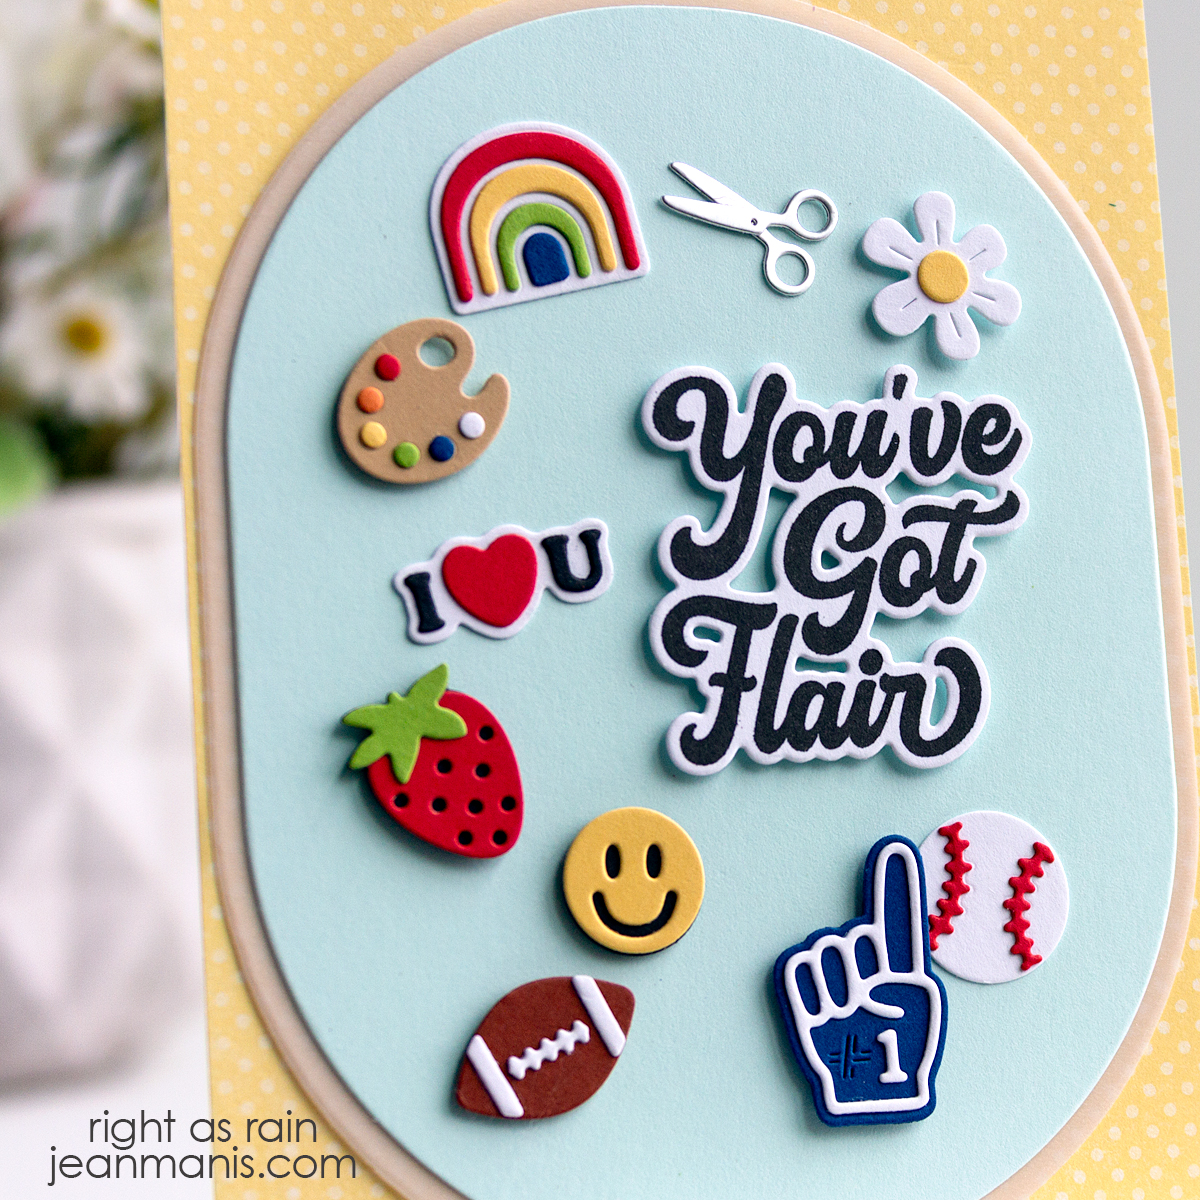
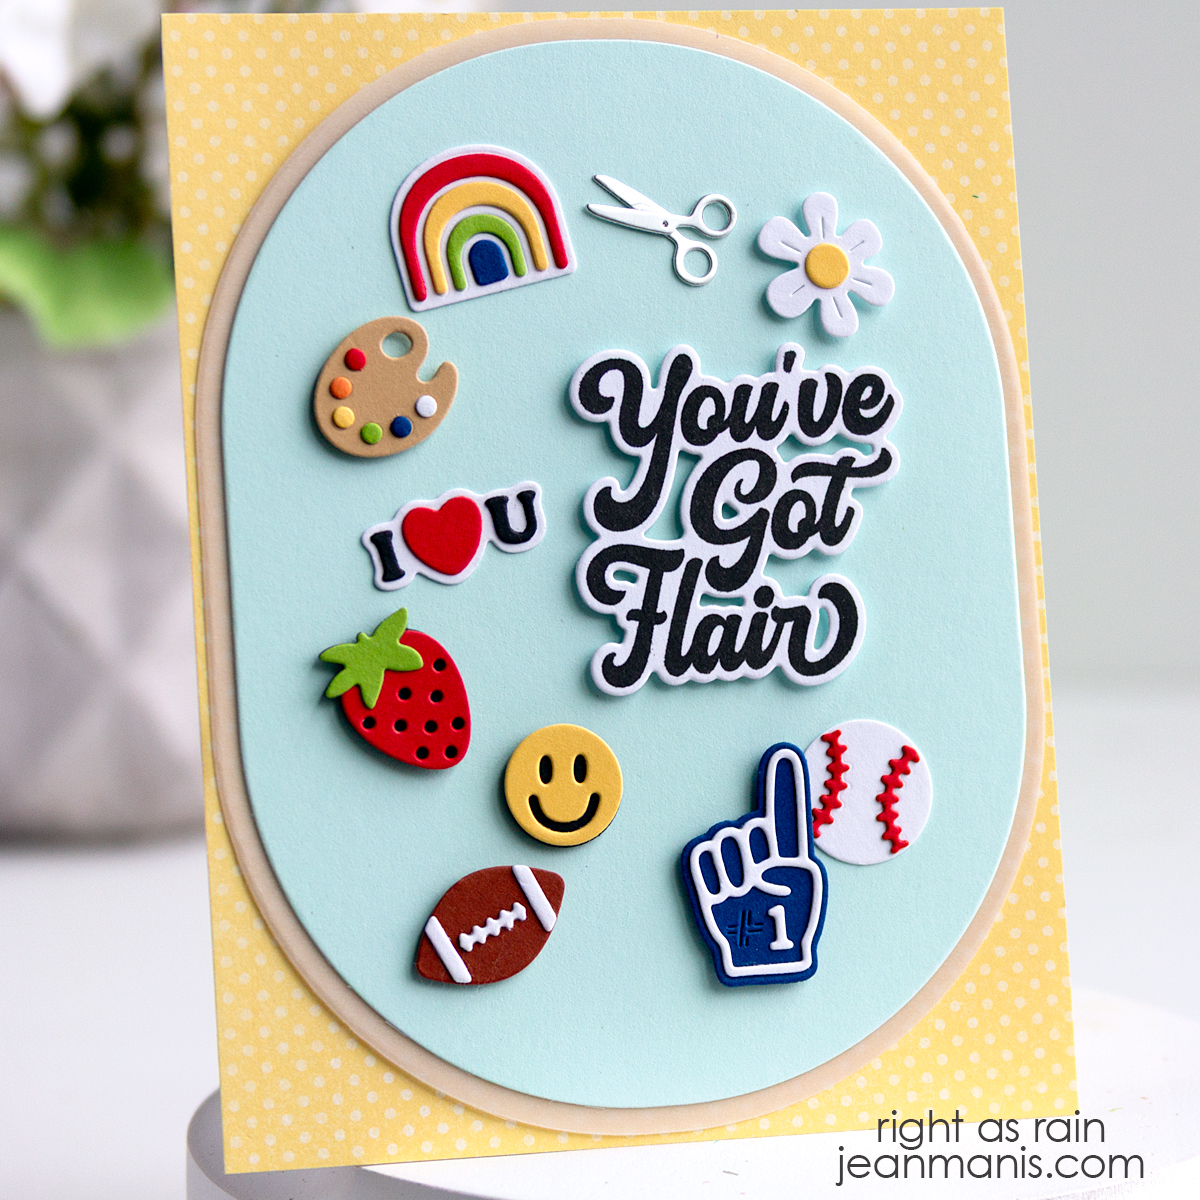
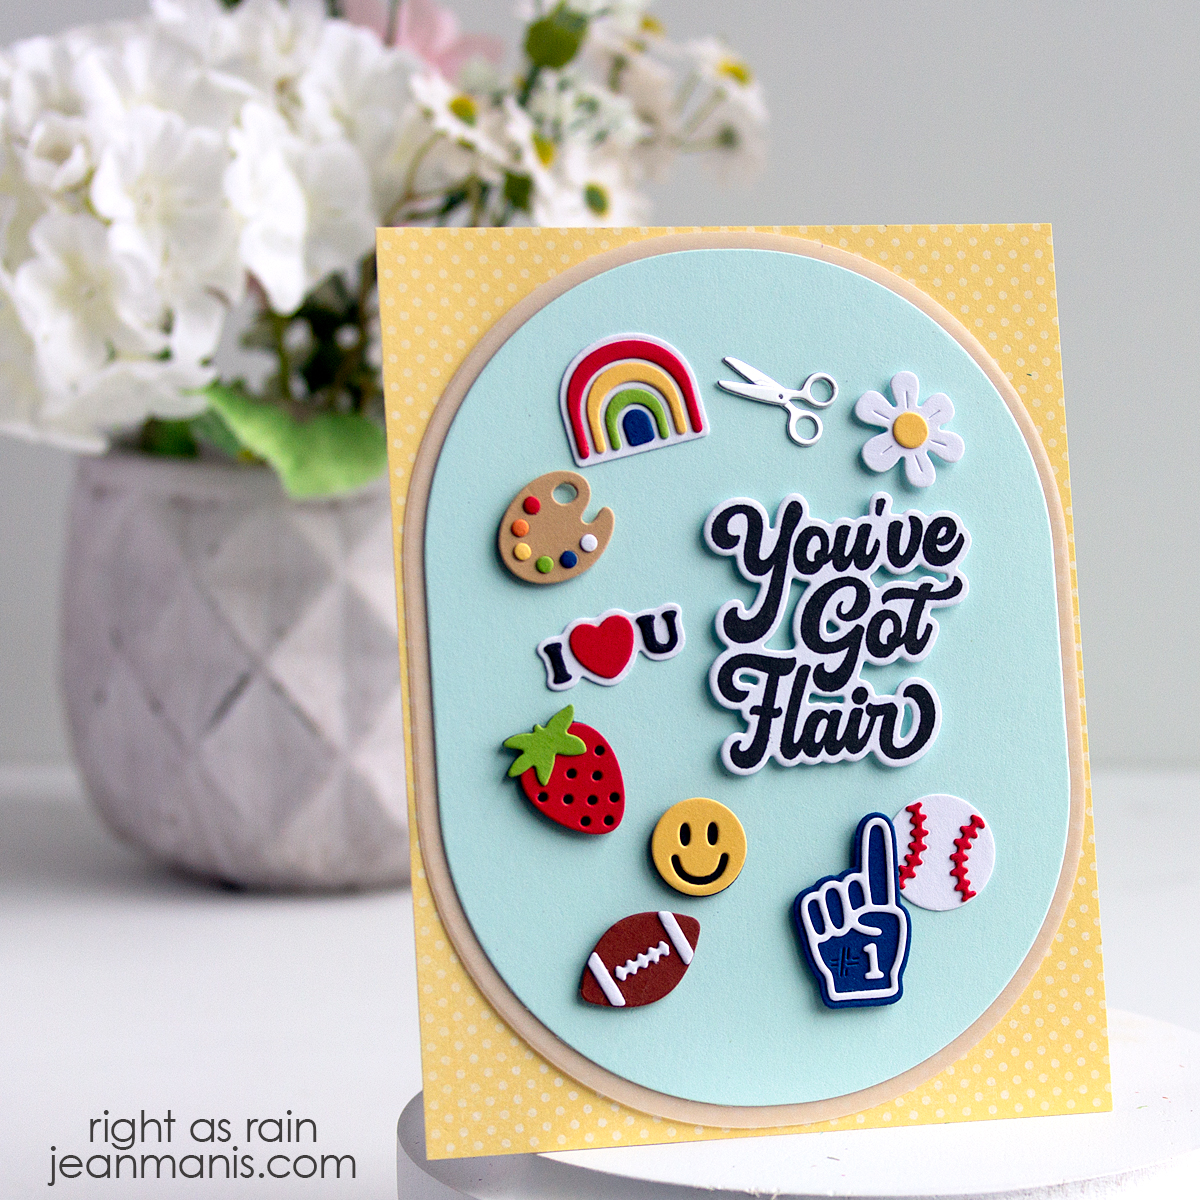
Spellbinders Timeless Painted Daisies

Hello! Today, I am sharing a flower-themed card created with Spellbinders products in the Through the Meadow Collection by Susan Tierney-Cockburn. I paired the realistic painted daisies with a floral-themed, dry-embossed background. The result is a refined, vintage-inspired design that feels both classic and enduring.

Spellbinders Through the Meadow Collection

    • Cut a 5″ square panel of soft blue cardstock and dry-emboss with the Wildly Beautiful folder. Add to card base.
    • Cut the Painted Daisy petals and leaves from Susan’s Garden Specialty Cardstock and color. I followed the video on the product page for coloring and shaping instructions, using Pan Pastels to color. Painted daisies come in a variety of colors —I recommend finding a visual reference to explore the many beautiful possibilities! I cut the flower centers from dark gray cardstock to match Power Outage Prills. Once assembled, glue the flowers and leaves to the card front.
    • Stamp the Message Strips sentiment on off-white cardstock with dark gray ink and cut with the coordinating die. Add to card front with foam adhesive.

Spellbinders Through the Meadow Collection

The Sweetheart Sale is available now at Spellbinders through February 16, 2025 at 11:59 MST.


Another Hero Arts Spring Hello

Hello! Today, I am sharing a CAS spring-themed card created with Hero Arts supplies. I shared a similar card here.

Hero Arts Spring Hello

  • I die-cut the watering can and flowers from white cardstock and colored them with Copic markers and colored pencils.
  • I stamped the sentiment, from a retired Hero Arts set and cut it with a small tag die. I tied the sentiment on to the can.
  • I added the assembled can with flowers to the patterned paper background with foam adhesive.
  • I drew a dotted border with a white pigment pen around the edge to add to the homespun feeling of the card.

Hero Arts Spring Hello

Supplies:

Hero Arts Spring “Hello”

Hello! Today, I am sharing a CAS spring-themed card created with Hero Arts supplies. Around here, we have decidedly spring days followed by ones, like today, that feel like winter!

Hero Arts Spring "Hello"

  • I die-cut the watering can and flowers from cardstock inked with Distress inks. I added additional ink to the cut pieces after cutting.
  • For the tulips, I pieced the blooms on to the stems.
  • I stamped the sentiment, from an old Hero Arts set, and cut it with a small tag die.
  • To create the background, I stamped an old Hero Arts background stamp with white paint. Once dry, I applied Distress inks in shades of yellow. The painted area resisted the ink.
  • I added the assembled can with flowers to the background with foam adhesive.

Hero Arts Spring "Hello"


Hero Arts Plant + Stand Die Set

Hello! Today I am sharing a CAS “hello” created with the Hero Arts Paper Layering Plant + Stand die set.

Hero Arts Plant + Stand Die Set

  • I colored Bristol with a variety of inks and cut it with the die set pieces. The stand was cut from a woodgrain cardstock.
  • I stamped the Sending Smiles sentiment on vellum.
  • I added the vellum to a faux watercolored paper background, which is revealed on the left-hand side. The vellum is adhered to the background under the leaves and pot.
  • I adhered the pot, stand, and leaves to the card front, using foam adhesive on some of the leaves for dimension.

Hero Arts Plant + Stand Die Set

Supplies:

CAS Christmas Ornament

Hello! Today I am sharing a CAS Christmas card on which I’ve combined several older Poppystamps dies.

CAS Christmas Ornament

  • I used the Poppystamps Viviro Ornament die set to cut the snowflake “string” for the ornament. I trimmed off the ornament part of the die-cut in order to use a different ornament.
  • I heat-embossed the Hero Arts sentiment on red cardstock and cut it with the Poppystamps Pinpoint Shaker Ornament die.
  • I adhered the two pieces together.
  • I dry-embossed the light-blue background with the Taylored Expressions Cable Knit folder.
  • When I added the dry-embossed panel to the patterned paper base, the transition was too harsh, so I added a white mat.

CAS Christmas Ornament

Supplies: