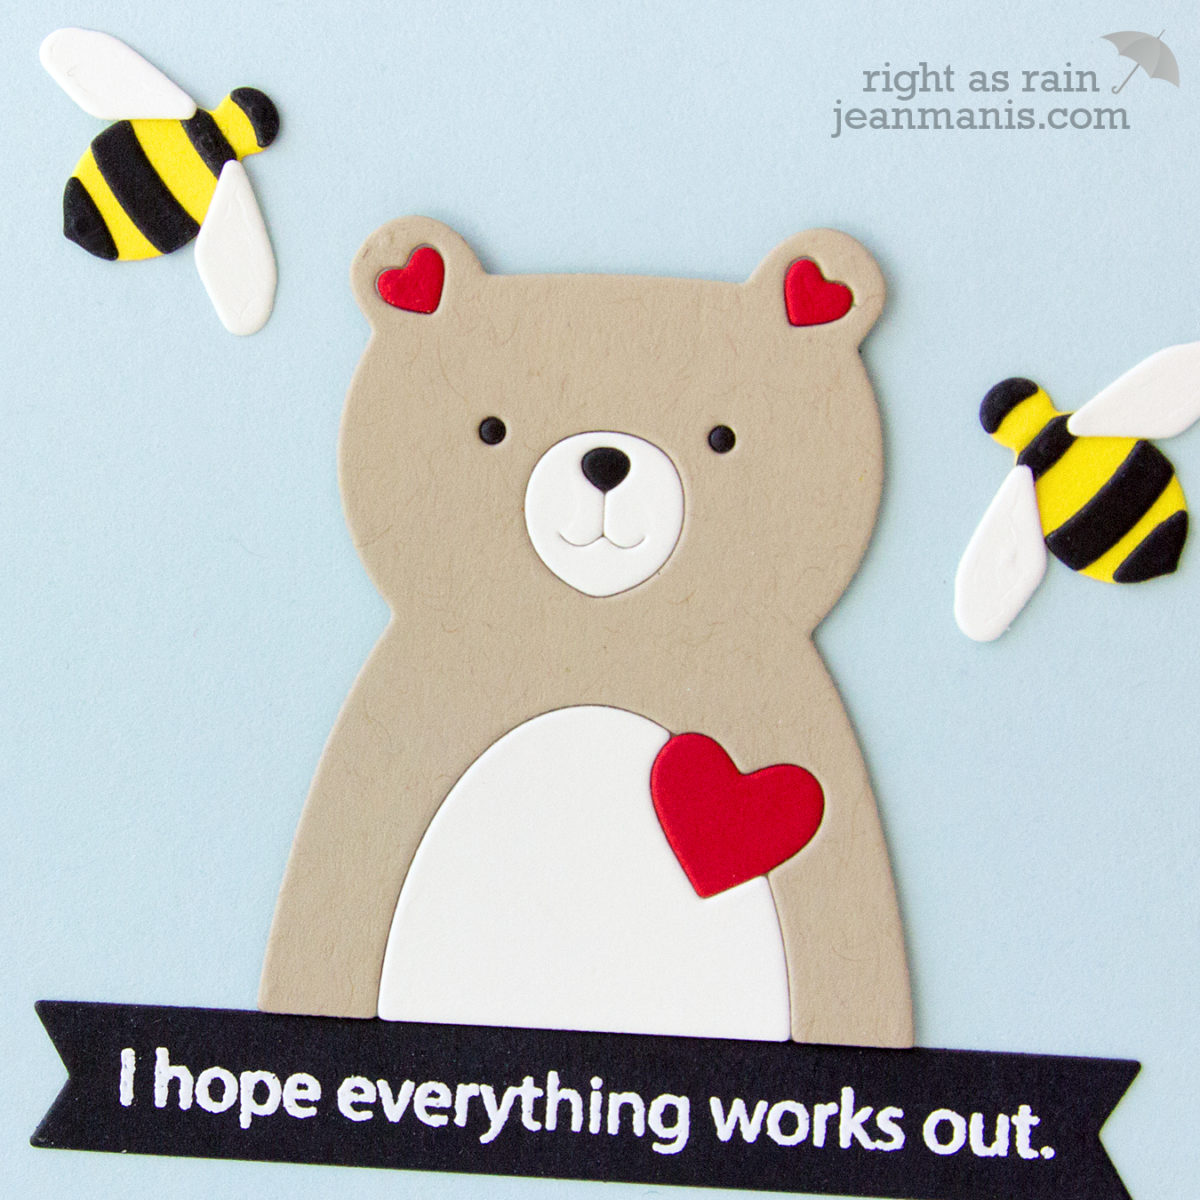
Hello! Today, I am sharing a CAS punny card, which I have had sitting out on my work table for a couple of days and just needed to assemble, featuring the Simon Says Stamp Picture Book Love Bear.
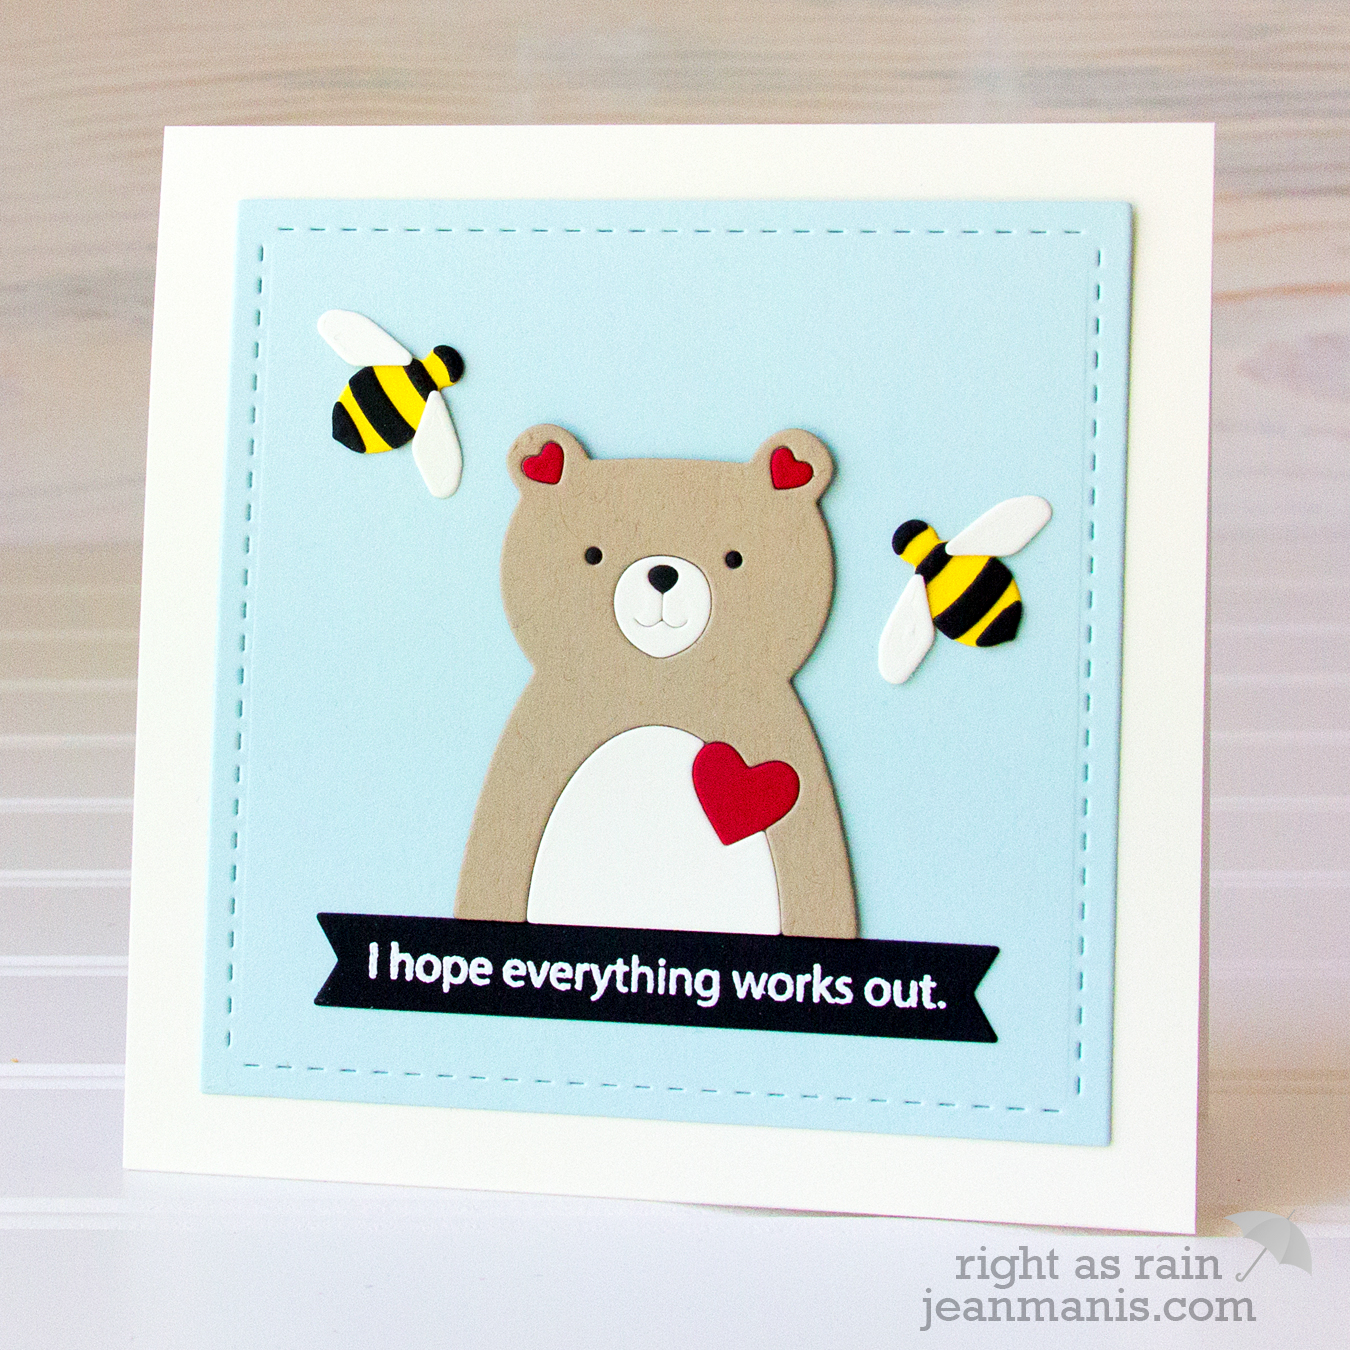
I paired the bear with die-cut bees, created with an older Memory Box die set, with an appropriate sentiment from the Messages for Everyday stamp set, which I heat-embossed on a strip of Black Licorice cardstock.

The background is cut from Sea Glass cardstock with a Lil’ Inker square die. It is a blue that works well with kraft cardstock, and I will be stocking up on this shade given how much I like to build scenes with blue skies.