I’ve had these penguins and snowbanks on my worktable for several months! We’ve had a particularly chilly couple of days, so I thought it was time to put this card together.
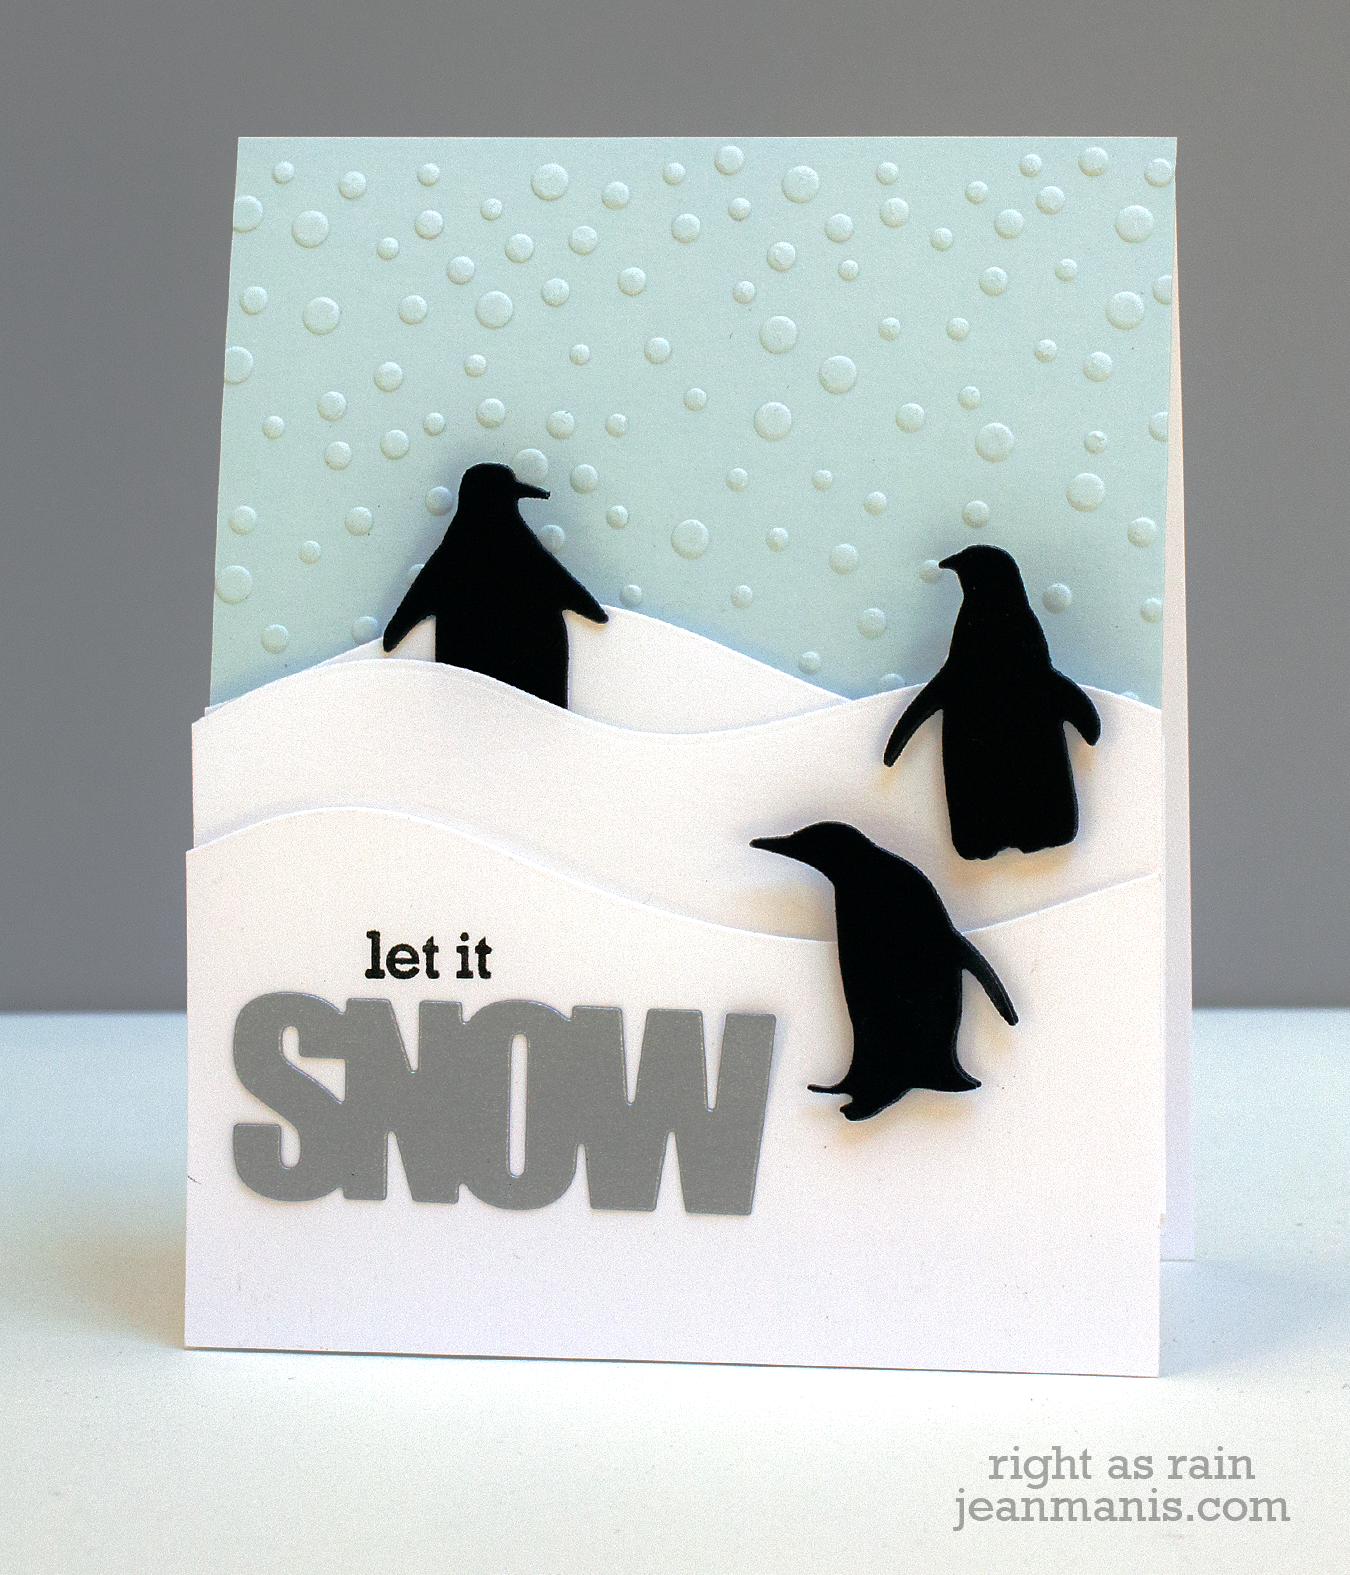
I had been playing around with different backgrounds, and the Taylored Expressions embossing folder gives just the right scale snowfall for the rest of the scene. I dry embossed the cardstock with my Big Shot extended multipurpose platform on Tab 1. This gave just a bit more depth to the embossing. I cut the penguins twice and adhered them together for extra depth. The front two penguins and front two snowbanks are attached with dimensional adhesive as well.
Supplies: Memory Box Playful Penguins; Papertrey Ink die cut and sentiment; Taylored Expressions Snowfall embossing folder; Taylored Expressions Build a Scene – Rolling Hills