Tim Holtz Cozy Winter Tags

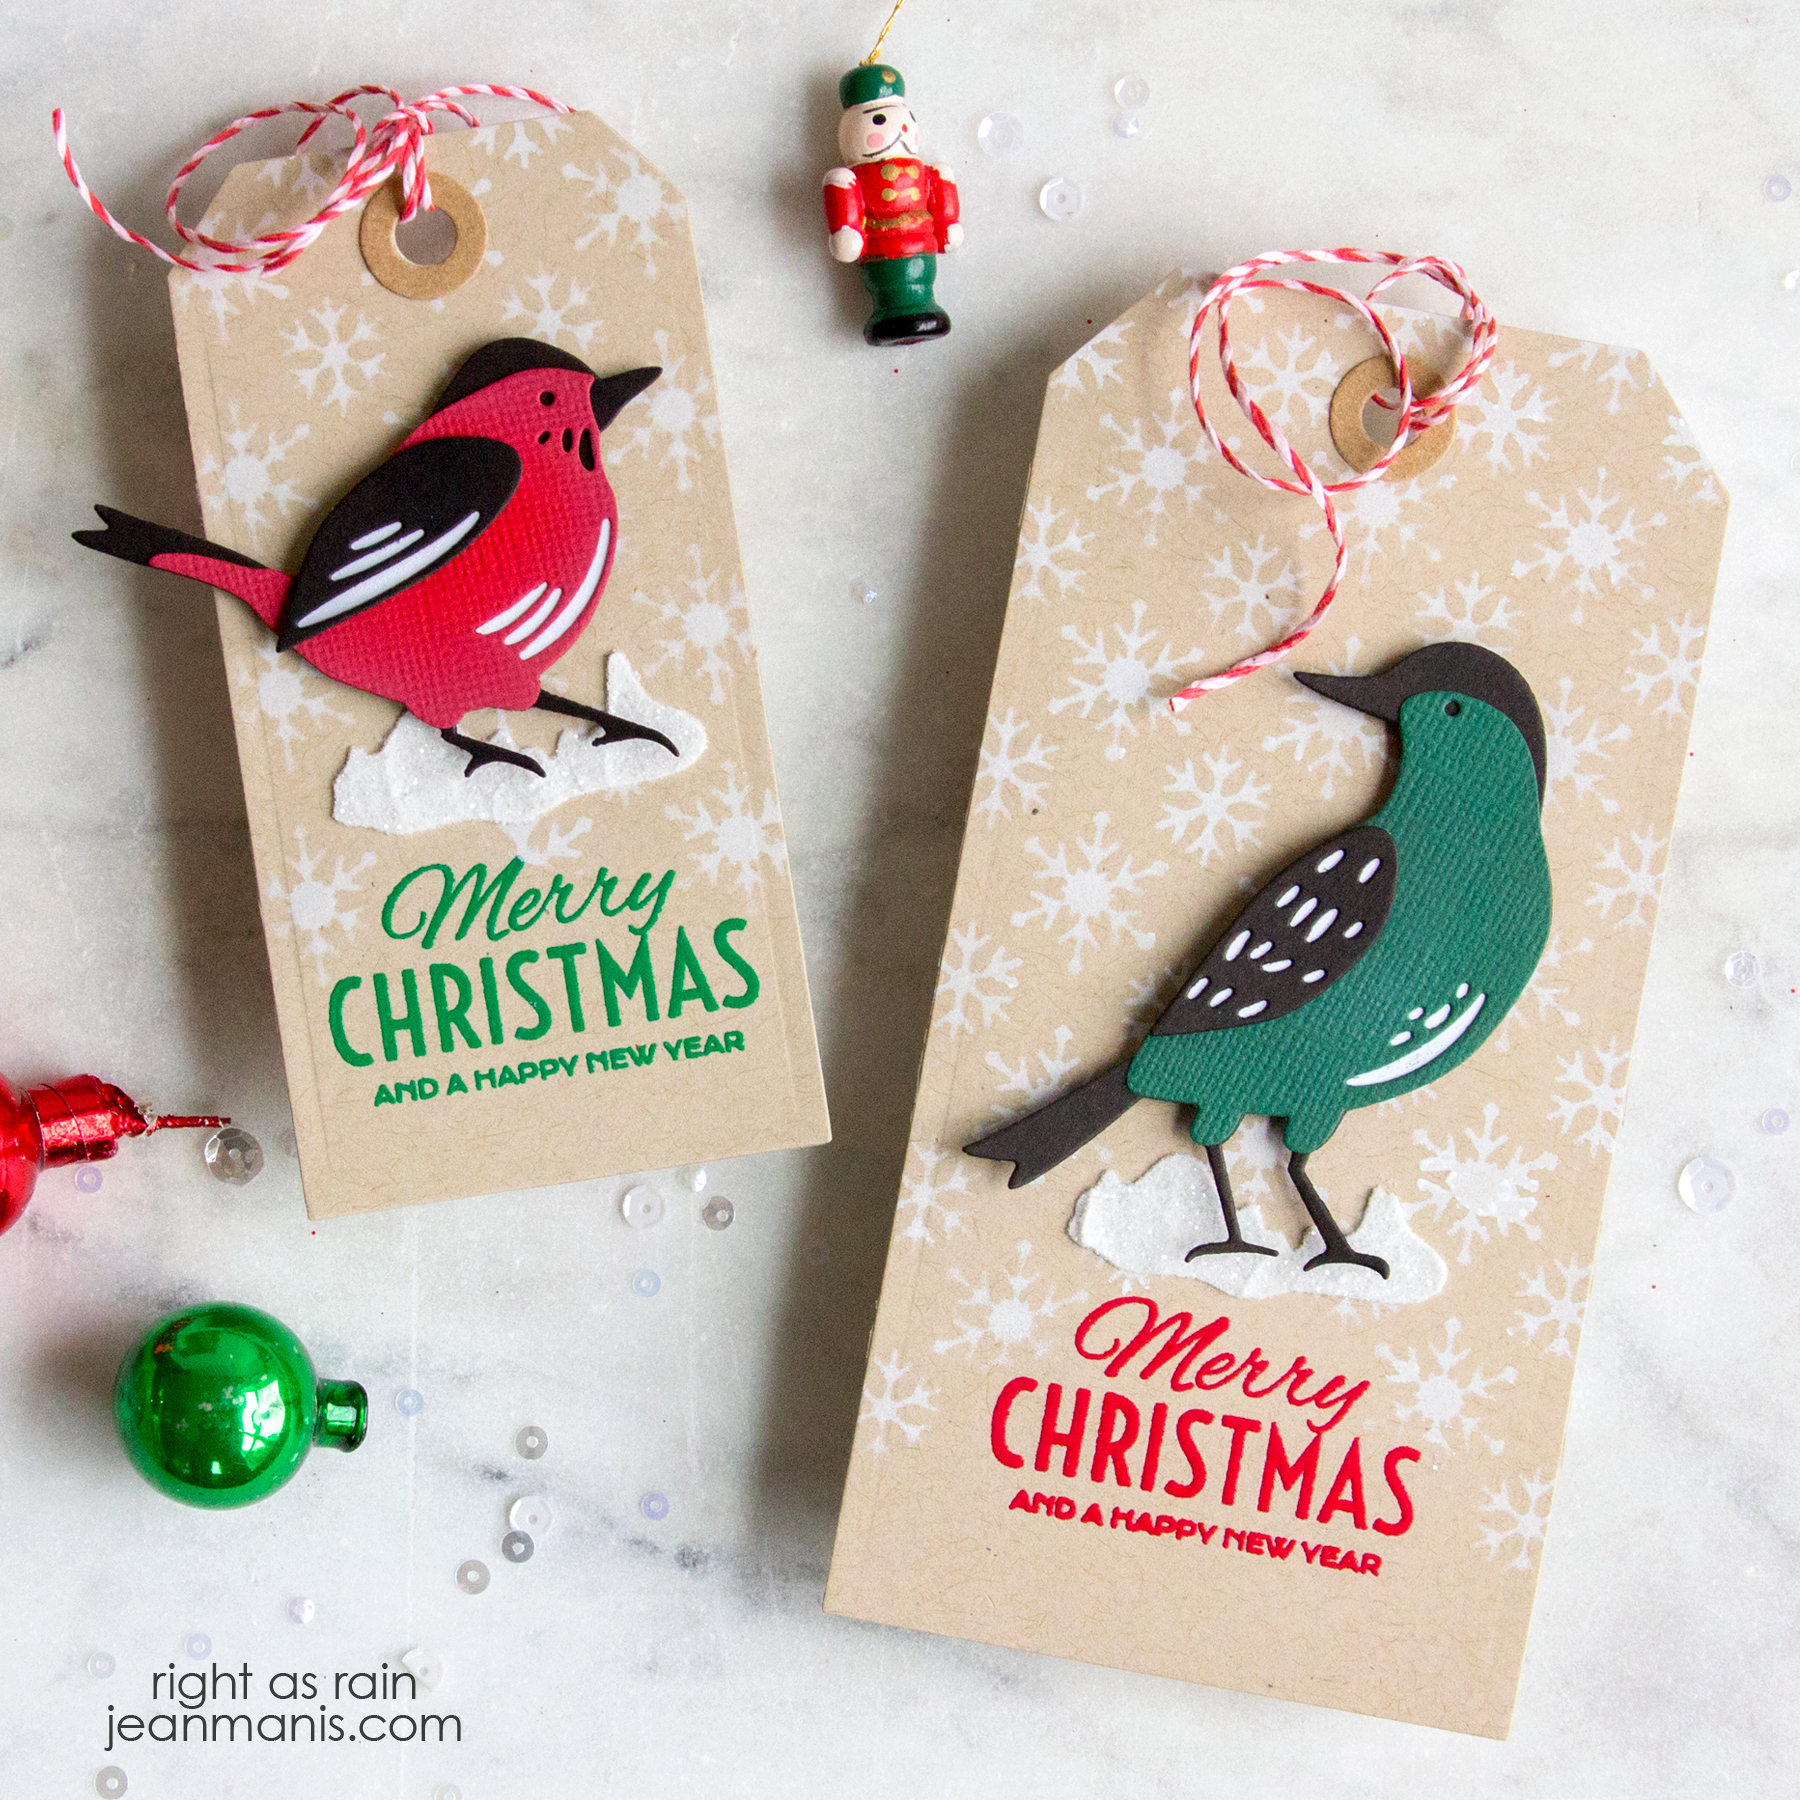
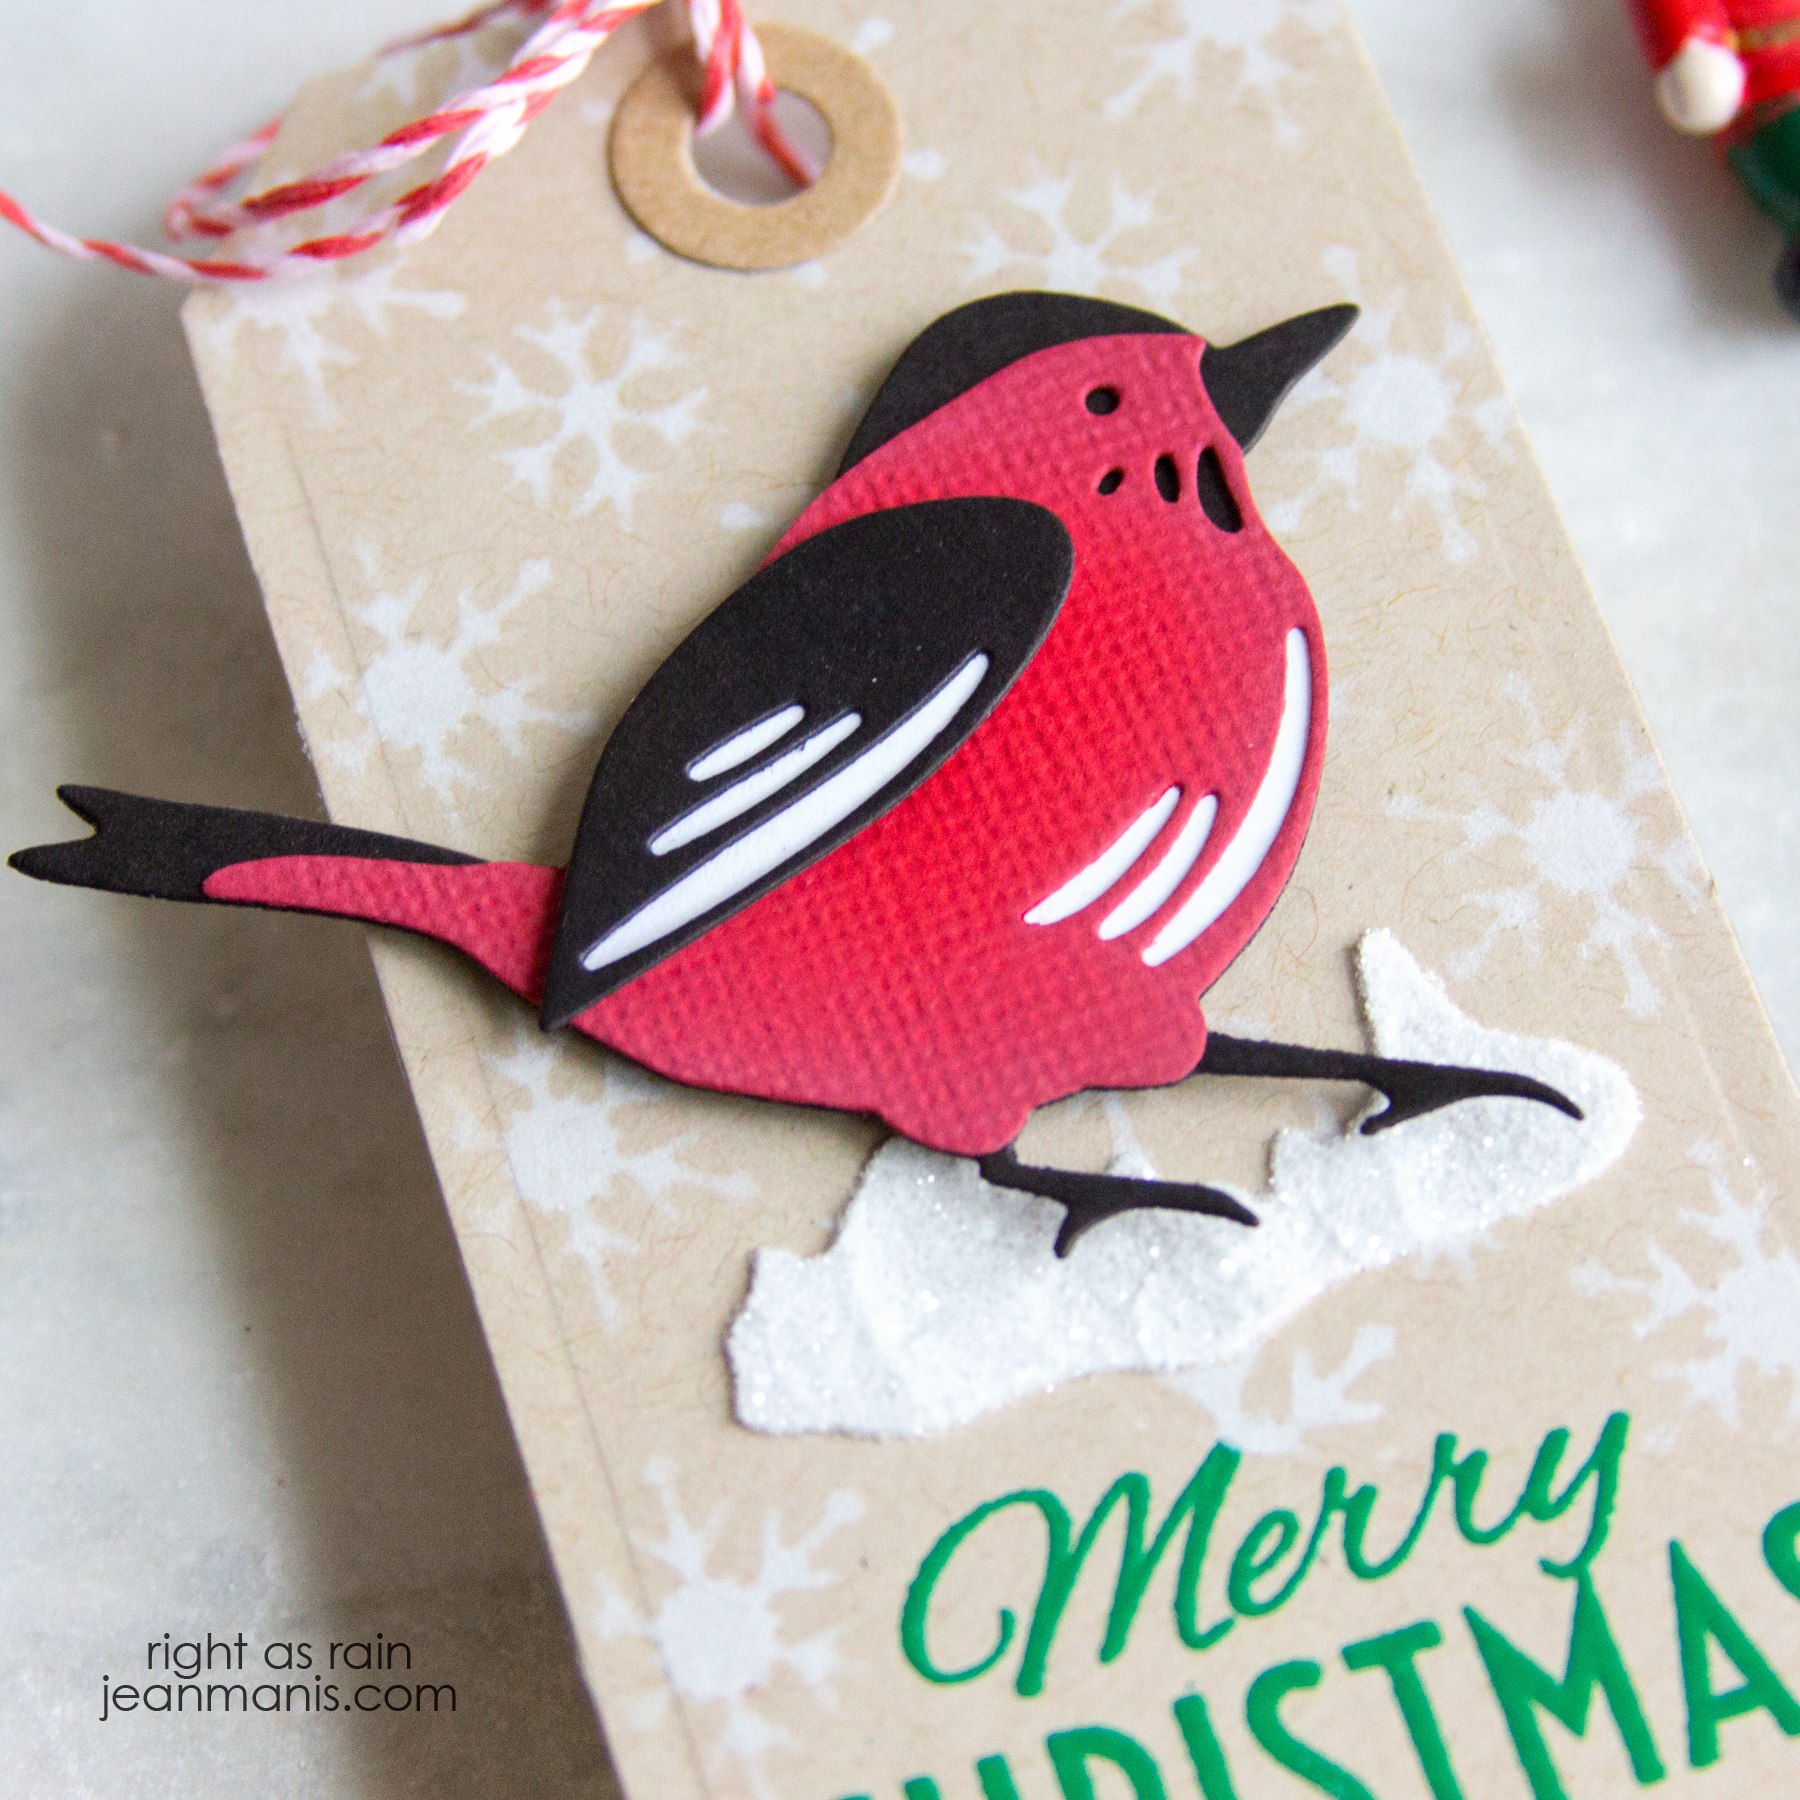
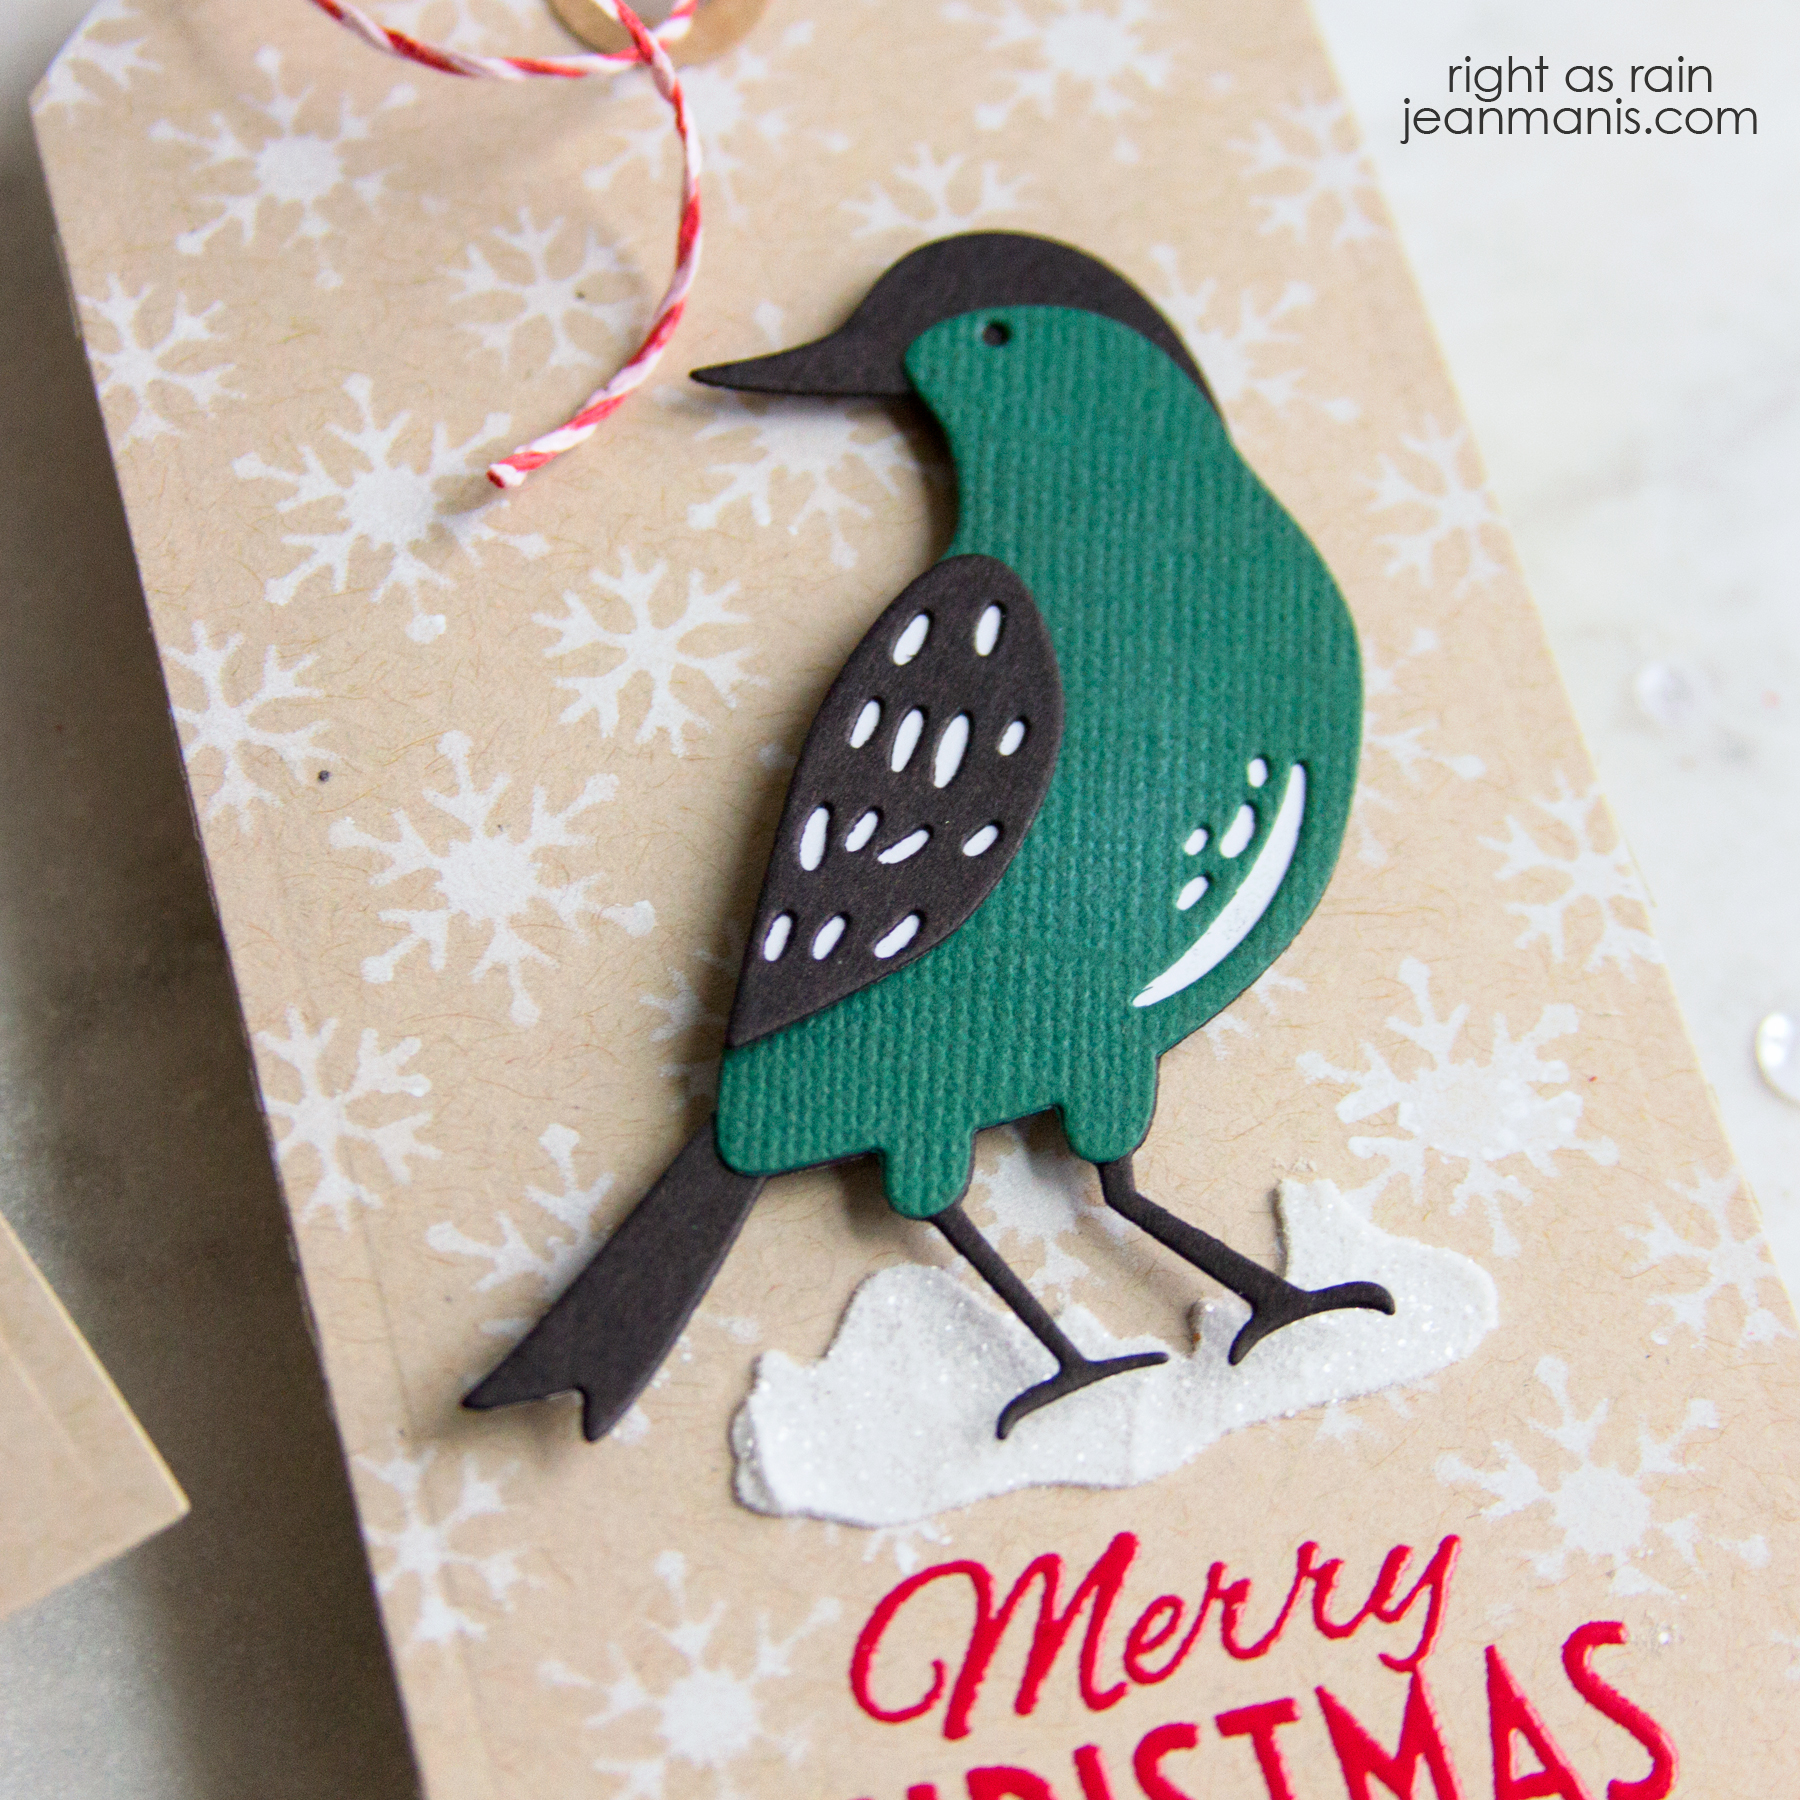
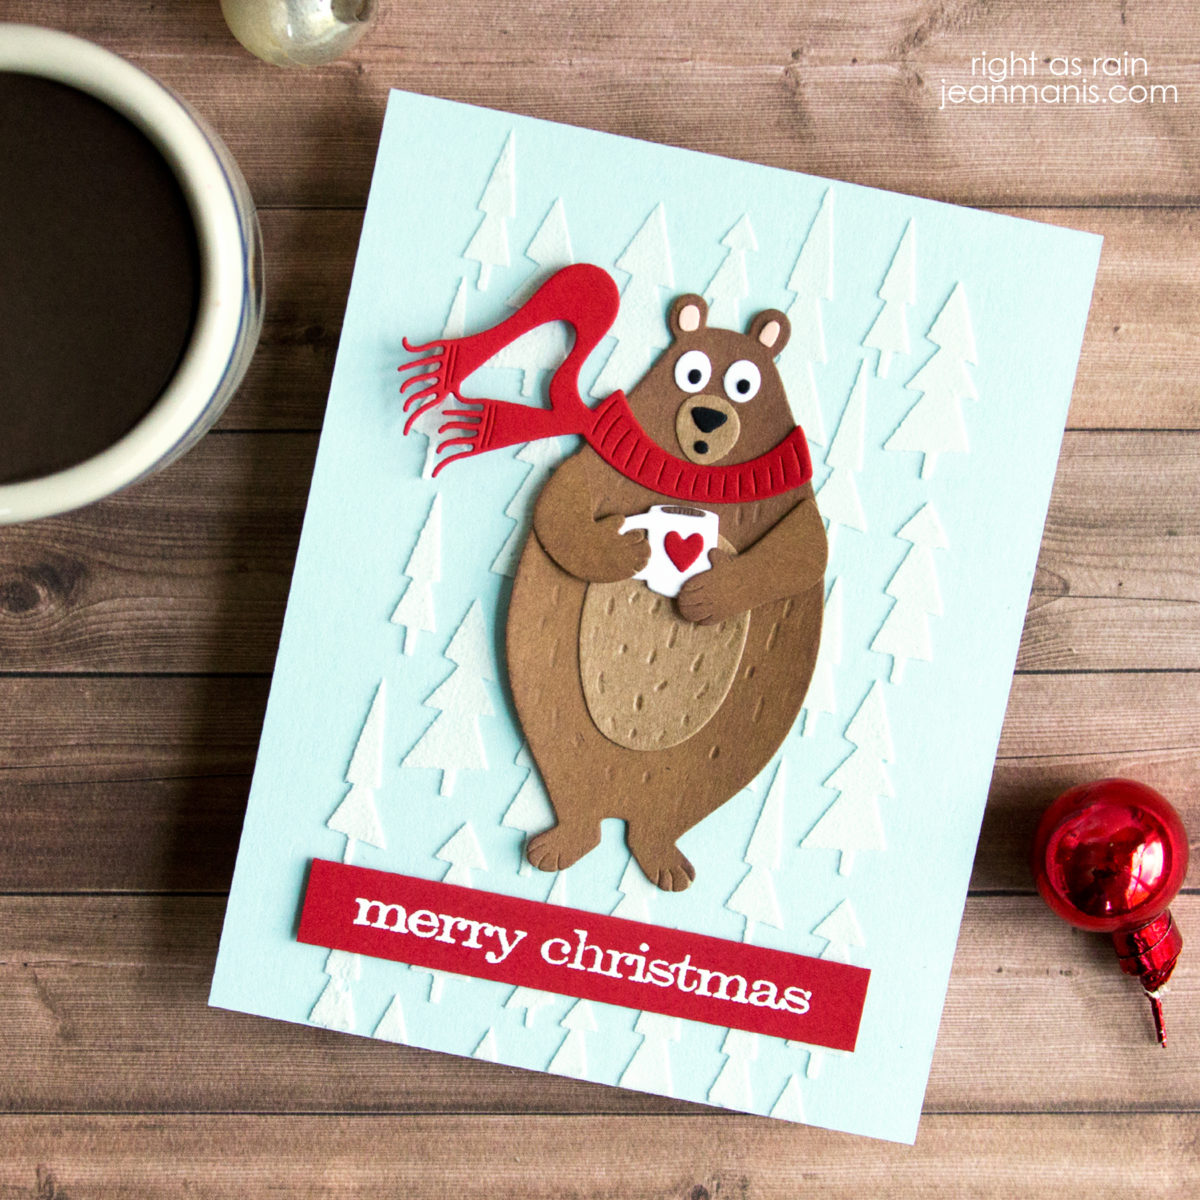
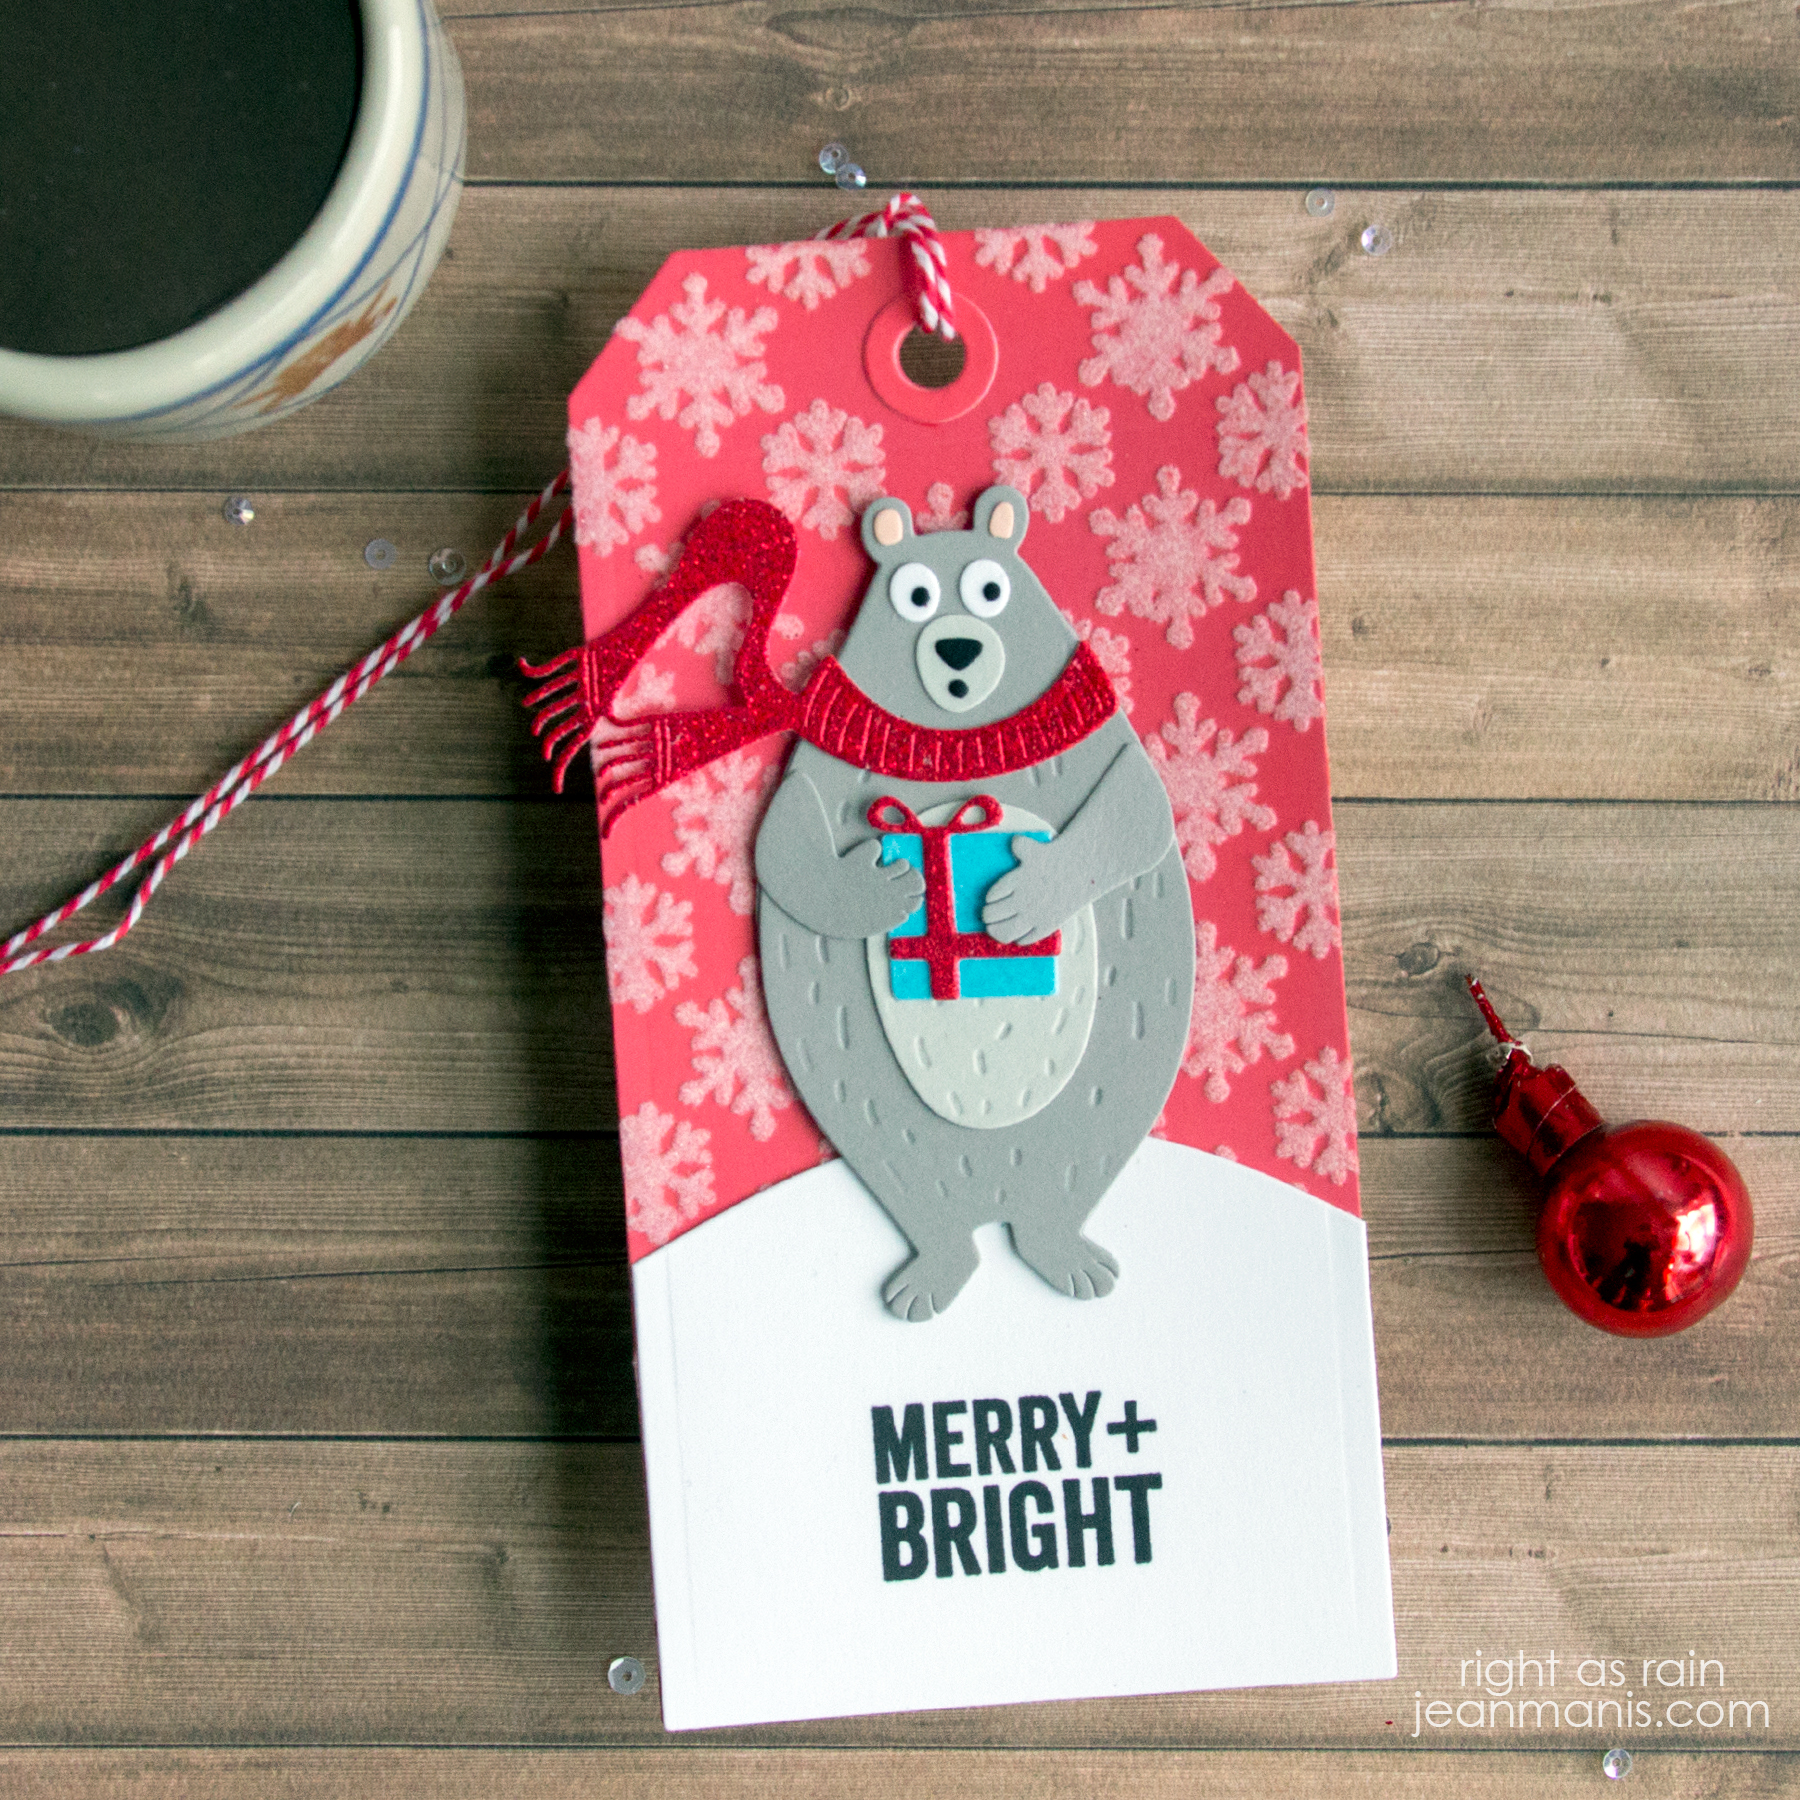
Hello! Today I am sharing two versions of a holiday tag featuring the Tim Holtz Cozy Winter bear. I previously shared a card featuring the bear here.

Tim Holtz Cozy Winter Tags

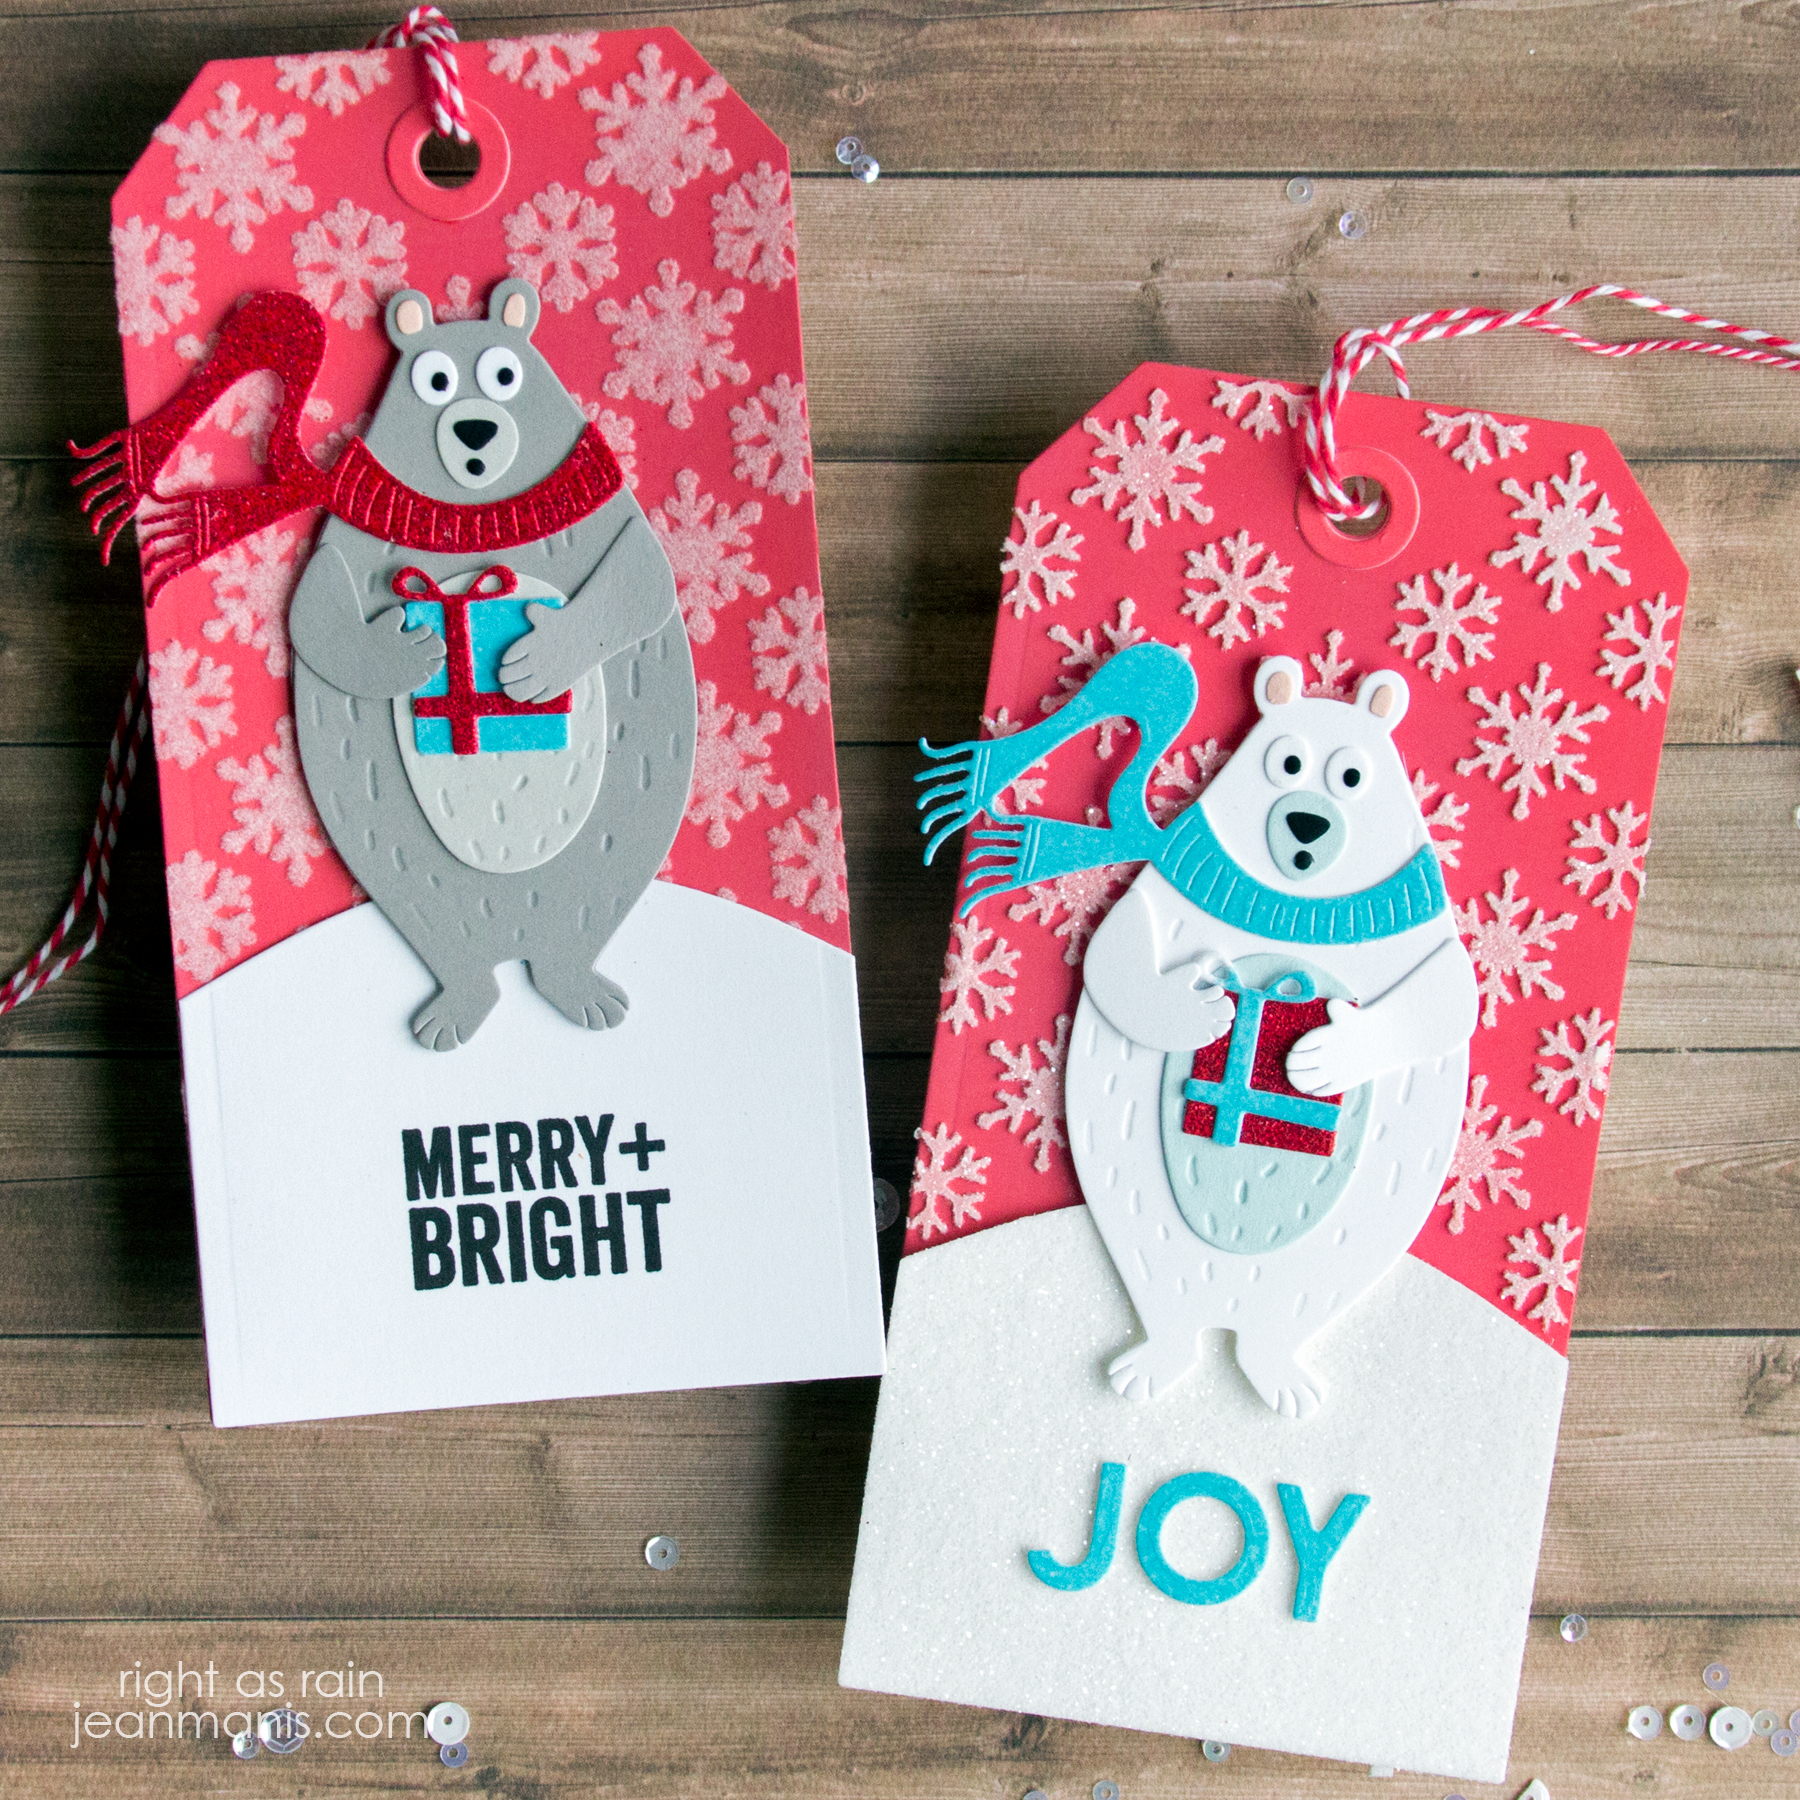
I used a die in the Tim Holtz/Sizzix Tag Collection set to create the tag base, cutting cardstock to which I had applied Distress Oxide ink.

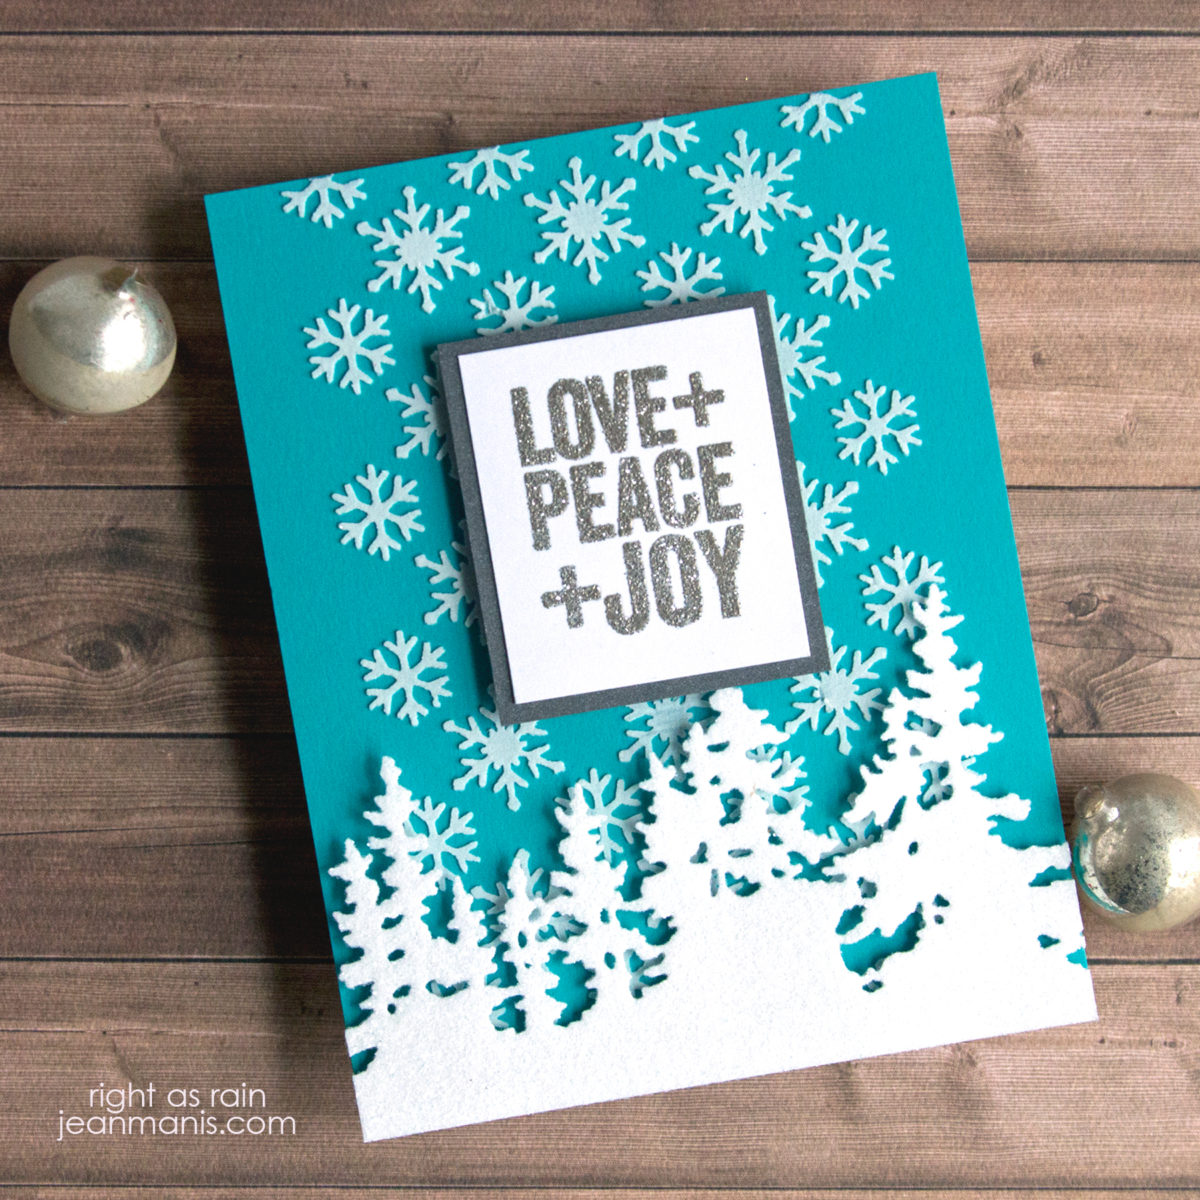
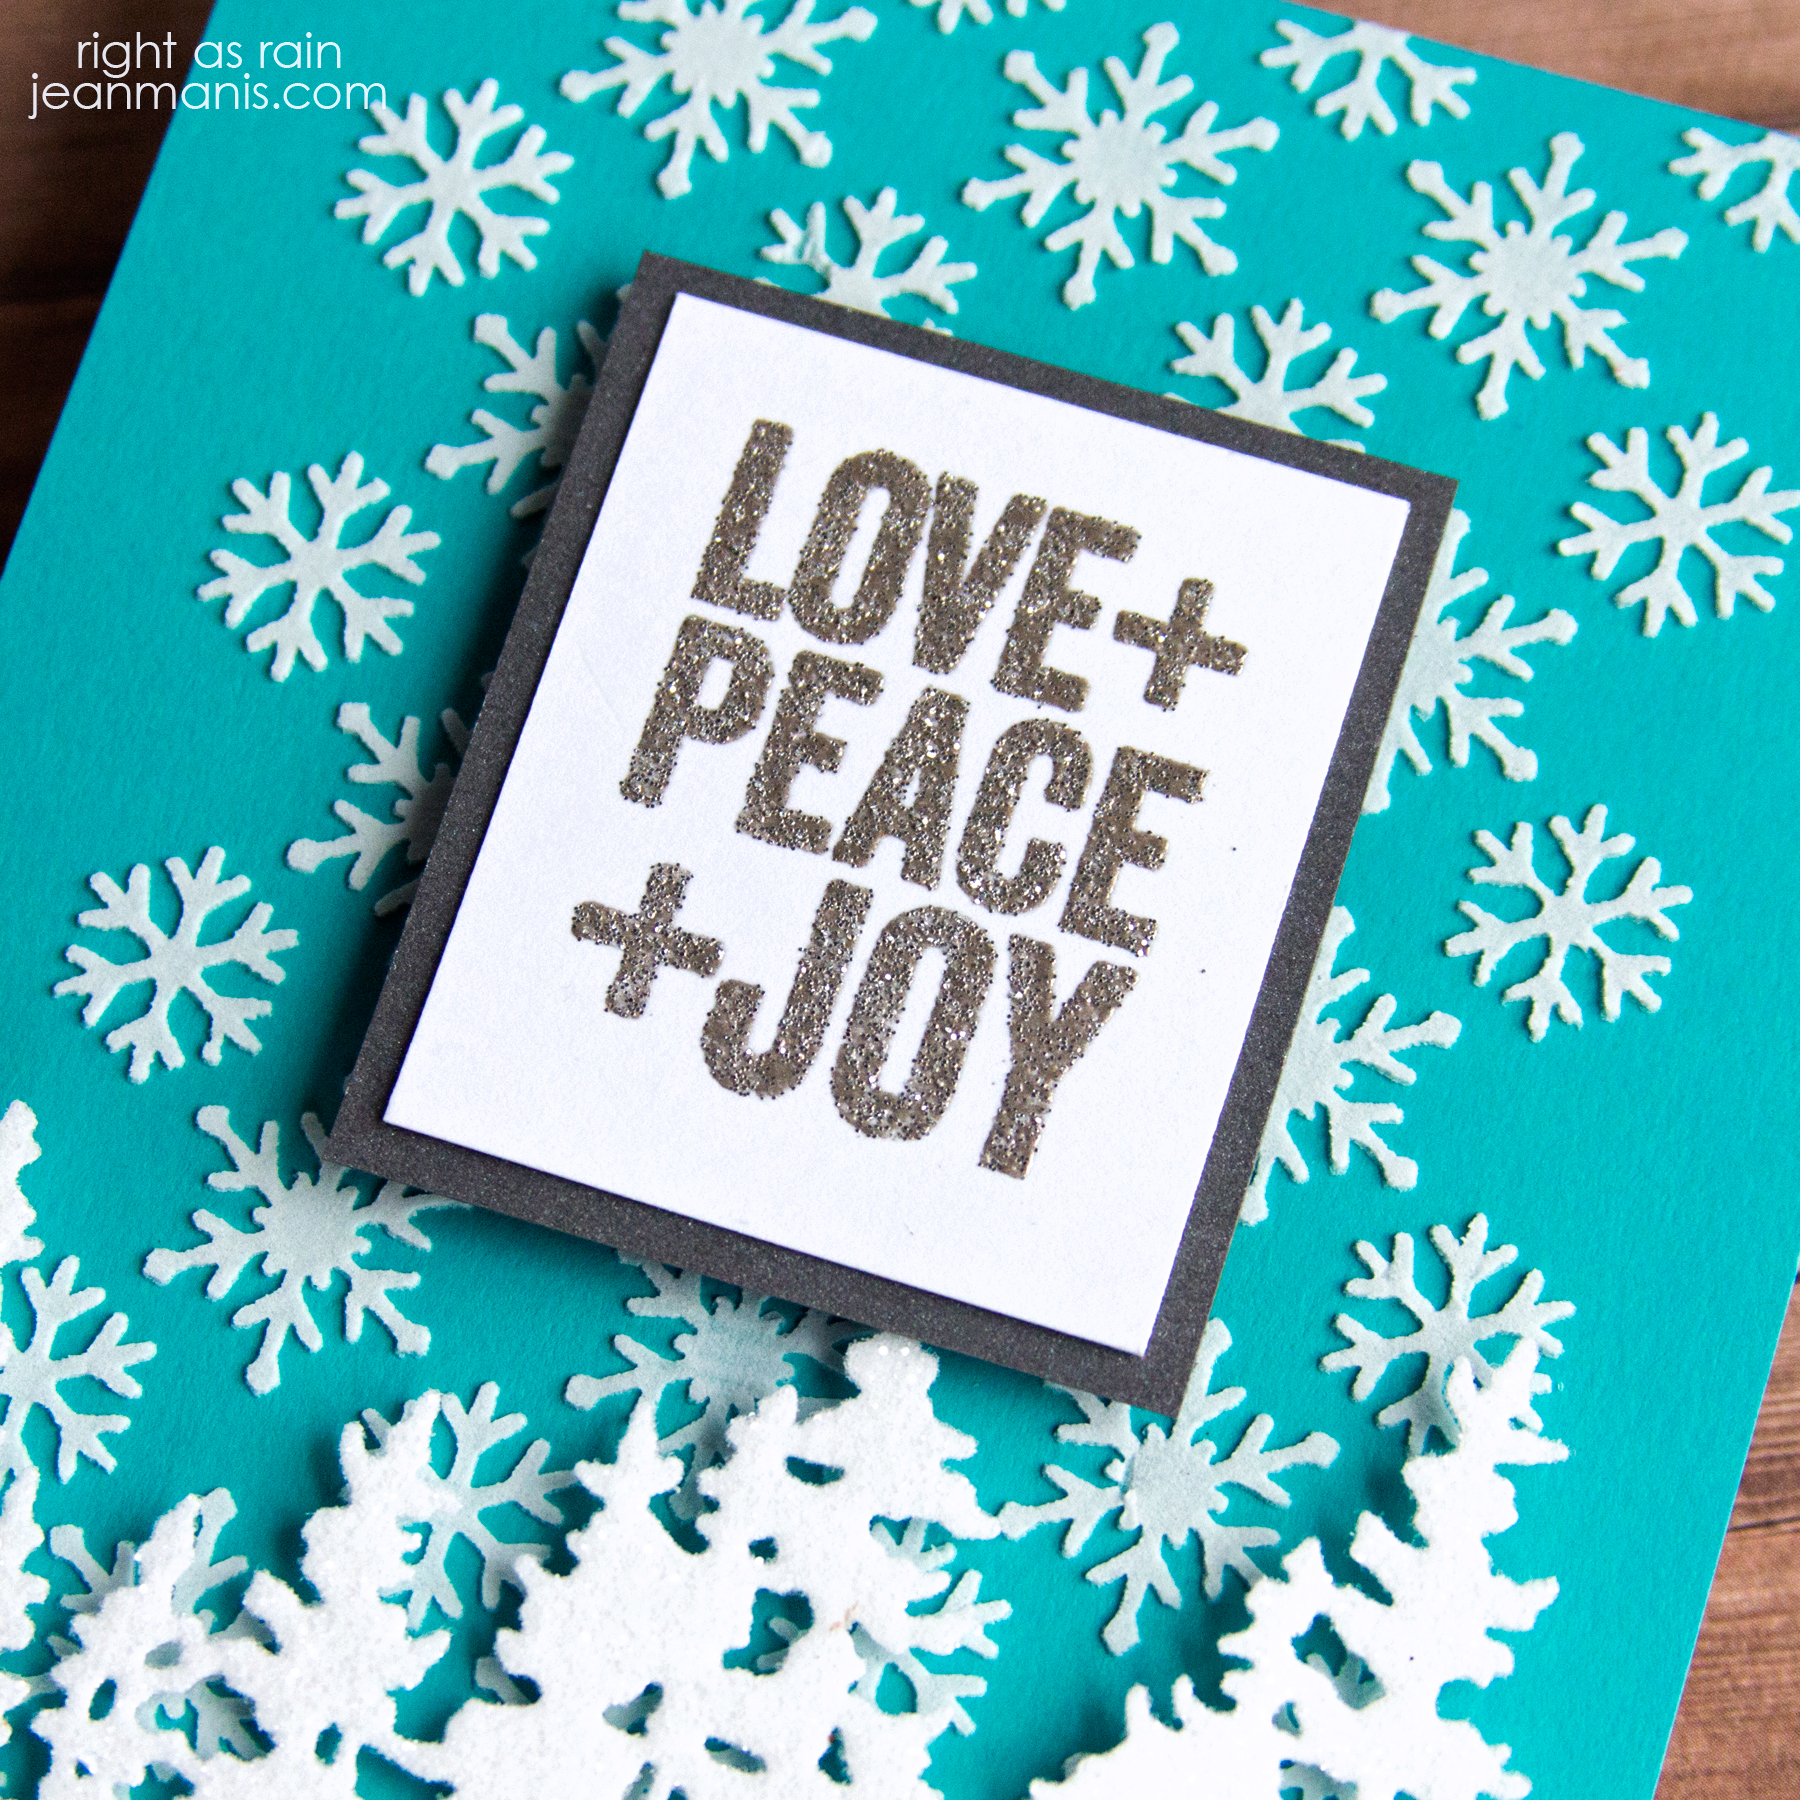
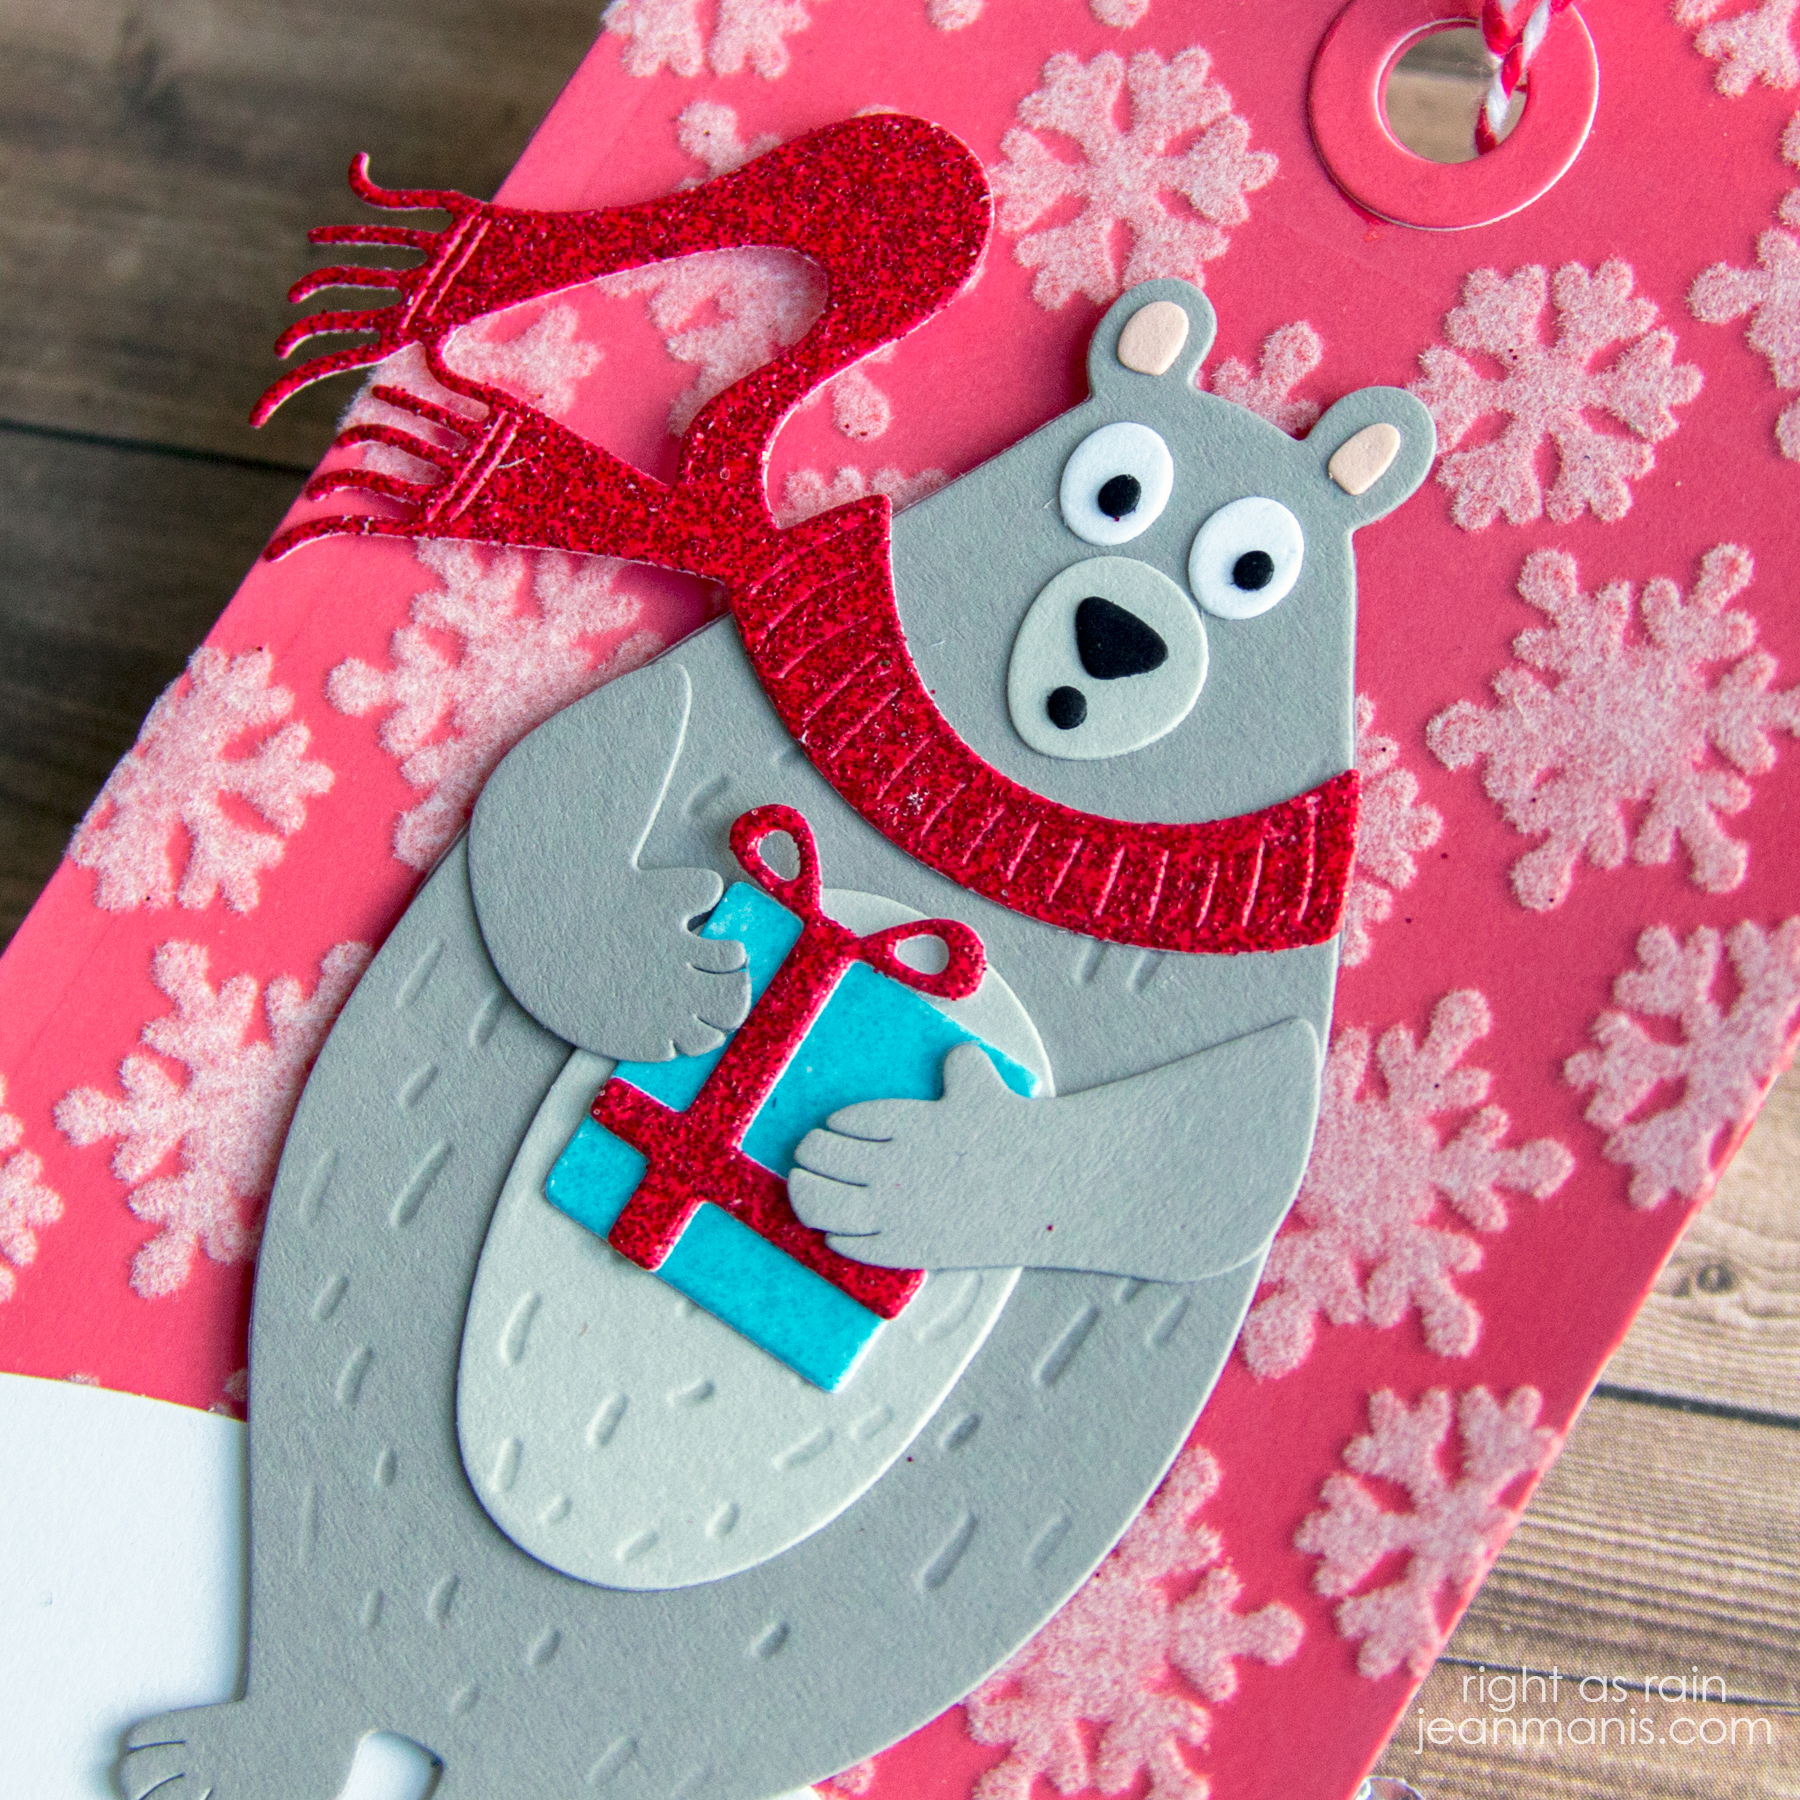
On both tags, I used the Flurries stencil, varying the method by which I created the snowflakes. For the tag on the left, I applied Transfer Gel through the stencil. Once dry, I ran the tag through my Minc with Flock Transfer (now called Deco Foil Plush Paper, White Latte).

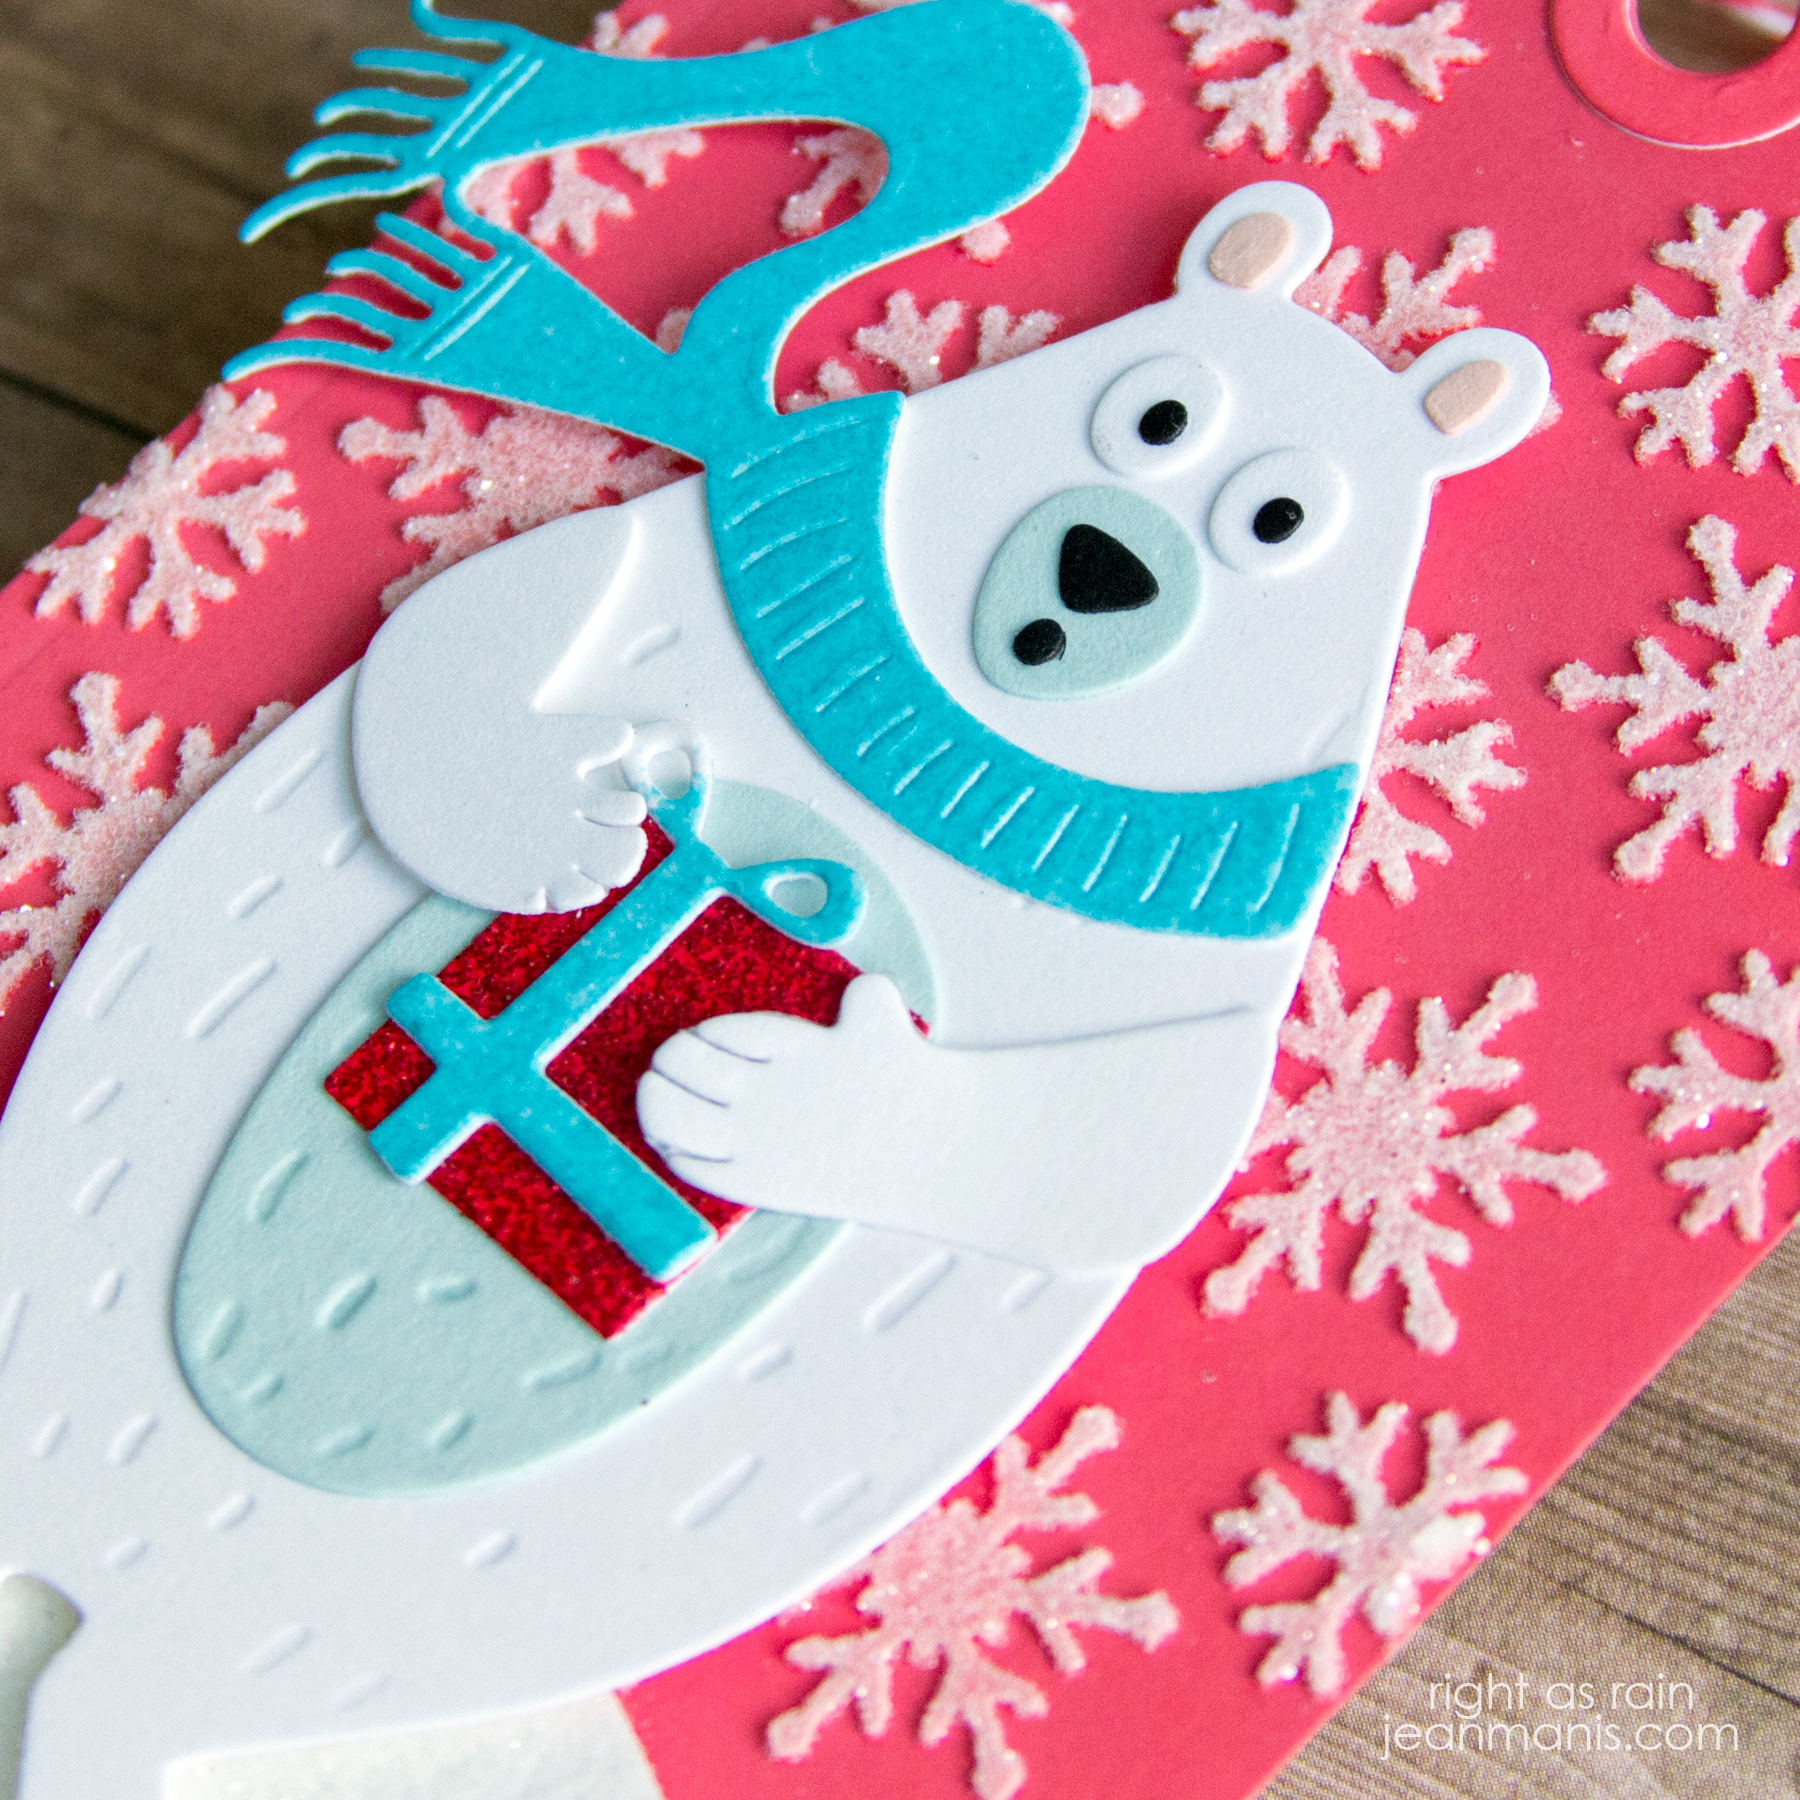
For the tag on the right, I applied white embossing paste through the stencil and sprinkled it with Clear Rock Candy glitter.

In addition to changing up the color of cardstocks I used to create the bears, I changed up the sentiment as well. For the first bear, I stamped the Bold Tidings Mini sentiment on to white cardstock and cut it with a Spellbinders Color Block Scenic Scape die.

Tim Holtz Cozy Winter Tags

On the other, I added Clear Rock Candy glitter to white cardstock (with double-sided adhesive), cut the cardstock with the Spellbinders Color Block Scenic Scape die, and added a sentiment cut with the Alphanumeric Bold set, from cardstock to which I had applied Broken China Glaze.

Tim Holtz Cozy Winter Tags

The Cozy Winter set includes a mug for the bear to hold. I swapped out the mug for a present, cut with the Christmas Minis set. I cut the present from cardstock to which I had applied Broken China Glaze and cardstock which I had heat-embossed with Red Tinsel embossing powder. I cut the scarf from these same two pieces.

Tim Holtz Cozy Winter Tags Tim Holtz Cozy Winter Tags

I really enjoy using the same design while varying the ways in which I create the elements.


Tim Holtz Bold Tidings Mini

Hello! Today, I am sharing a CAS Christmas card created with Tim Holtz supplies that combines my favorite techniques: stenciling, die-cutting, and heat-embossing.

Tim Holtz Bold Tidings Mini

  • I applied white embossing paste through the Flurries stencil on an A2 teal card base.
  • I heat-embossed the Bold Tidings Mini sentiment with Wow silver glitter powder on white cardstock. I trimmed the sentiment and backed it with a silver cardstock mat.
  • I die-cut the Tree Line from white cardstock to which I had applied double-sided sheet adhesive. I added Clear Rock Candy glitter to the exposed trees. I like using Clear Rock Candy glitter as it does not have an undertone (some premade glitter sheets are blueish, yellowish, or pinkish).
  • Once the background was dry, I added the trees and the sentiment panel with foam adhesive.

Tim Holtz Bold Tidings Mini


Tim Holtz Cozy Winter

Hello! I am sharing a CAS Christmas card created with Tim Holtz supplies. With the Cozy Winter bear, it was love at first sight!

Tim Holtz Cozy Winter

  • I added white embossing paste through the Tree Lot stencil on to SSS Sea Glass cardstock.
  • I die-cut the Cozy Winter bear from SU Kraft, white, light pink, red, and black cardstock and colored the arms and base with Vintage Photo ink. I glued the pieces together.
  • I heat-embossed the Simple Sayings sentiment on to red cardstock and cut it with a banner die.
  • I added the bear and sentiment to the Tree Lot background.

Tim Holtz Cozy Winter

This card combines my favorite cardmaking techniques of stenciling, die-cutting, and heat-embossing, as well as, a favorite color combination of red, light blue, and white.


A Cool Yule – Die-cut Penguin

Hello and Merry Christmas! This is my final Christmas card for the season. I have so many more ideas, but between shopping, baking, and so forth, I just don’t have the time to turn those ideas into cards.

For this last card, I am showcasing the recently released Cool Yule die set designed by Tim Holtz, using a design similar to this tag. I am combining some of my favorite cardmaking things: stamped graphic background, die-cutting, stenciling, and heat-embossing.

A Cool Yule - Die-cut Penguin

  • I stamped the Buffalo Plaid Background for the card background.
  • I die-cut the Cool Yule penguin and assembled it with glue. I cut a circle of Woodgrain Vellum (gifted to me by a friend) to which I attached the penguin.
  • I heat-embossed the sentiment and cut it with one of the tag dies in this set and trimmed the bottom a bit, so that the tag would fit better on the card base.
  • I placed another vellum circle (of the same size) on the tag before I applied embossing paste through the Snowed In stencil. The circle worked as a mask. I masked the sentiment area with washi.
  • I finished the tag off with Peppermint twine before attaching it to the card base.

A Cool Yule - Die-cut Penguin

Thanks so much for visiting!

Supplies: