Hello! Today, I’m sharing two mixed-media holiday cards featuring the Tim Holtz Tree Lot stencil that start with the same design but are finished in different ways. On both, the background begins with a monoprint. From there, I explored two approaches. One version combines inking with Sparkle paste, while the other layers paste with Distress Glazes for dimensional shine. It’s a fun reminder of how many directions a single stencil can take you.
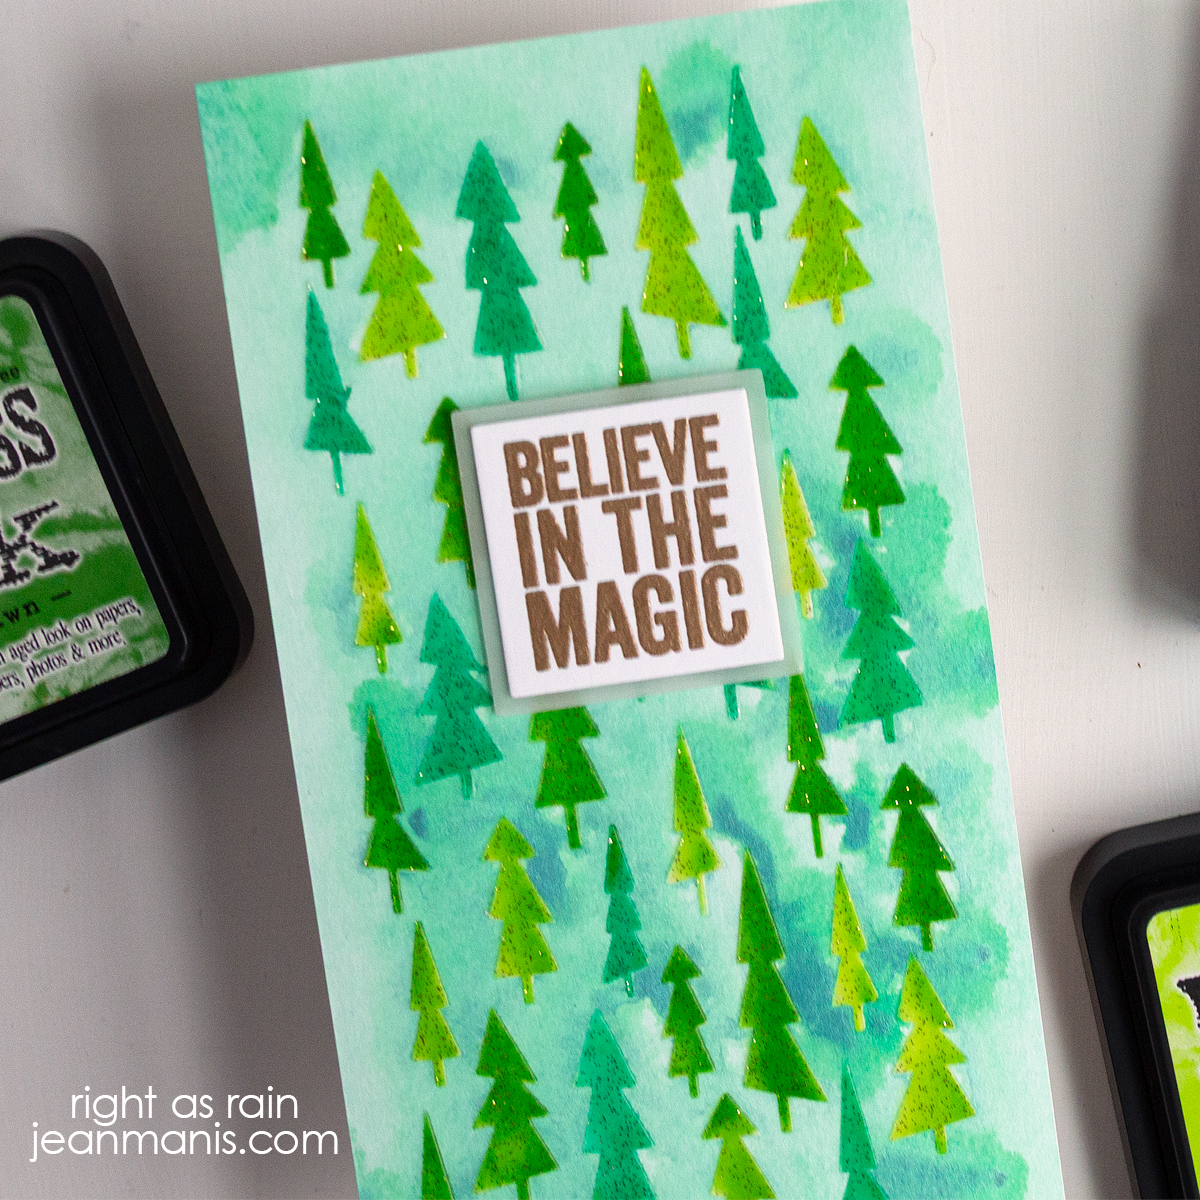
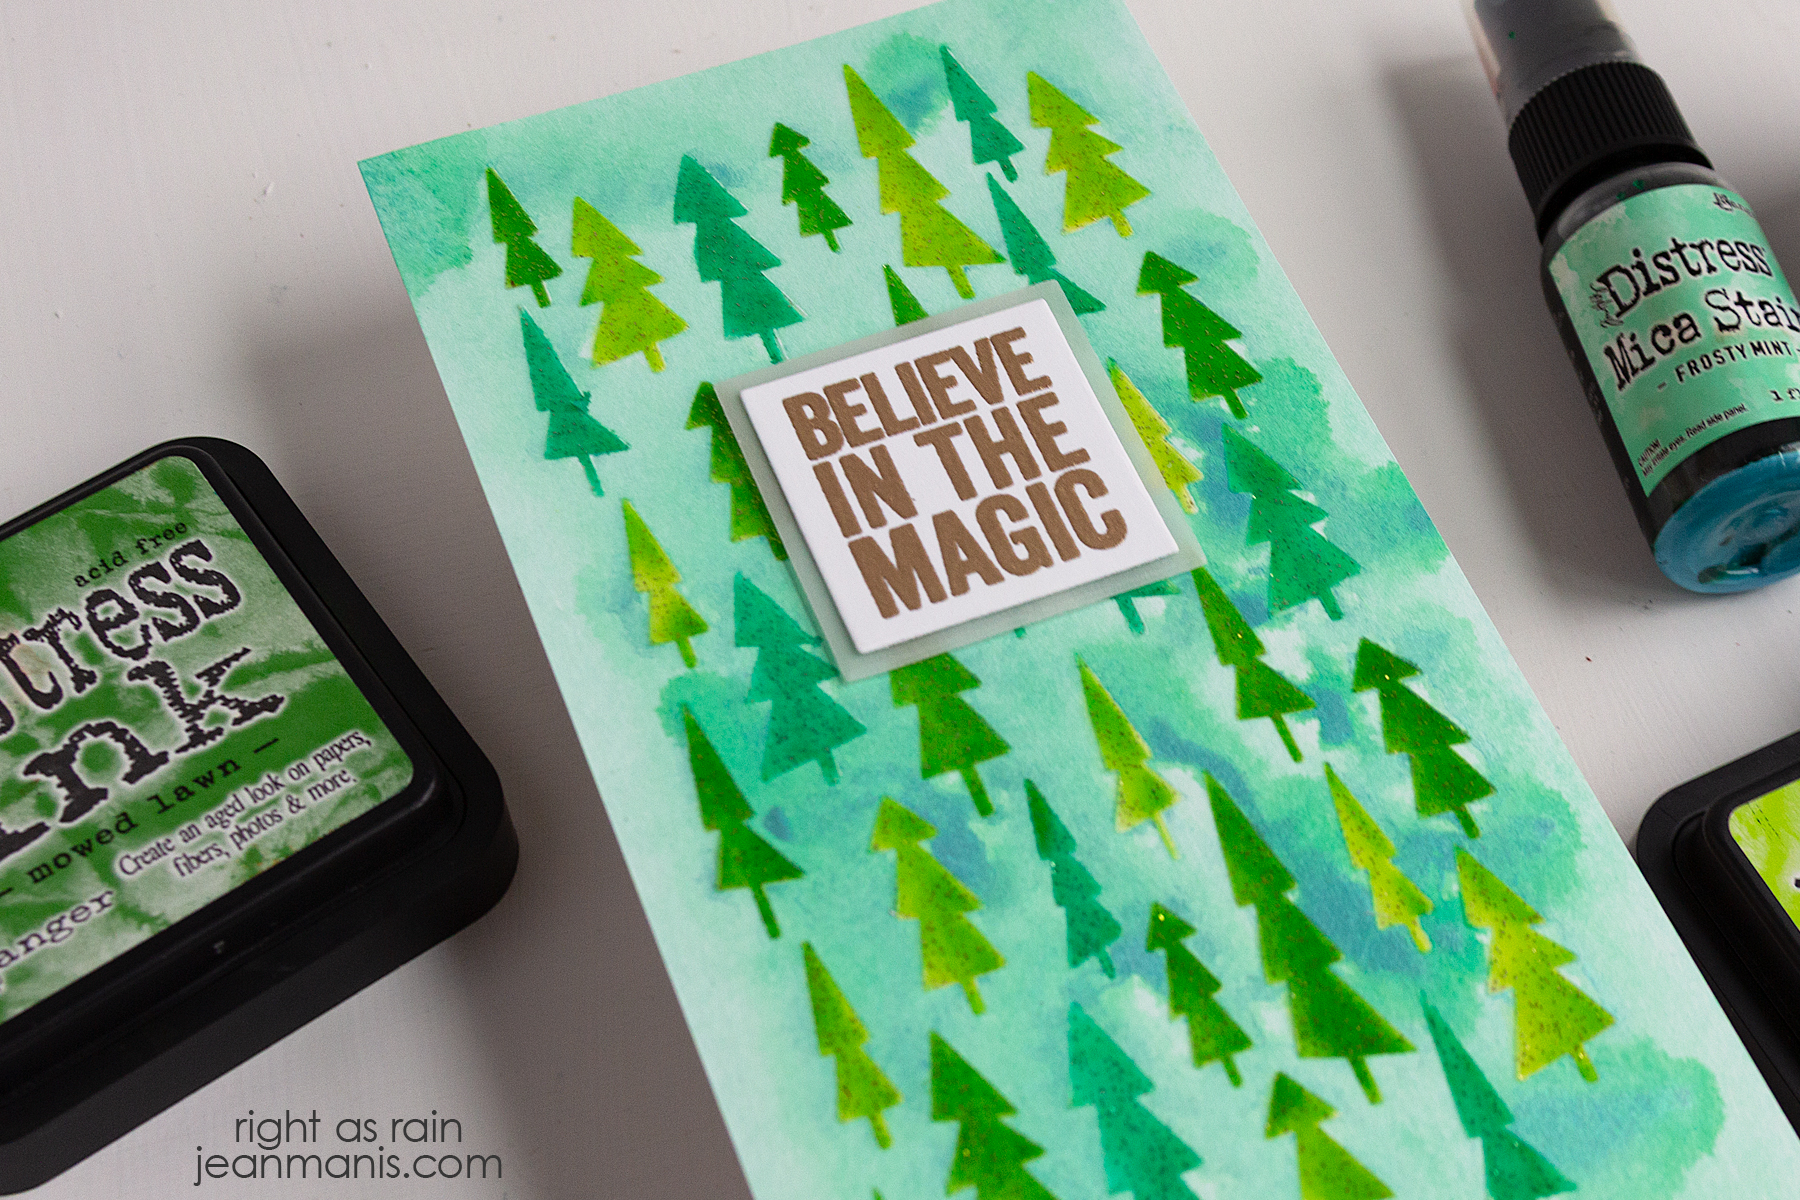
Both cards start with a monoprint of the Tree Lot stencil on watercolor paper with Frosty Mint Mica Stain. To note, Ranger’s Mica Stains are not part of the Distress Ink color line from Tim Holtz, so you won’t find them in the standard Distress collection colors.
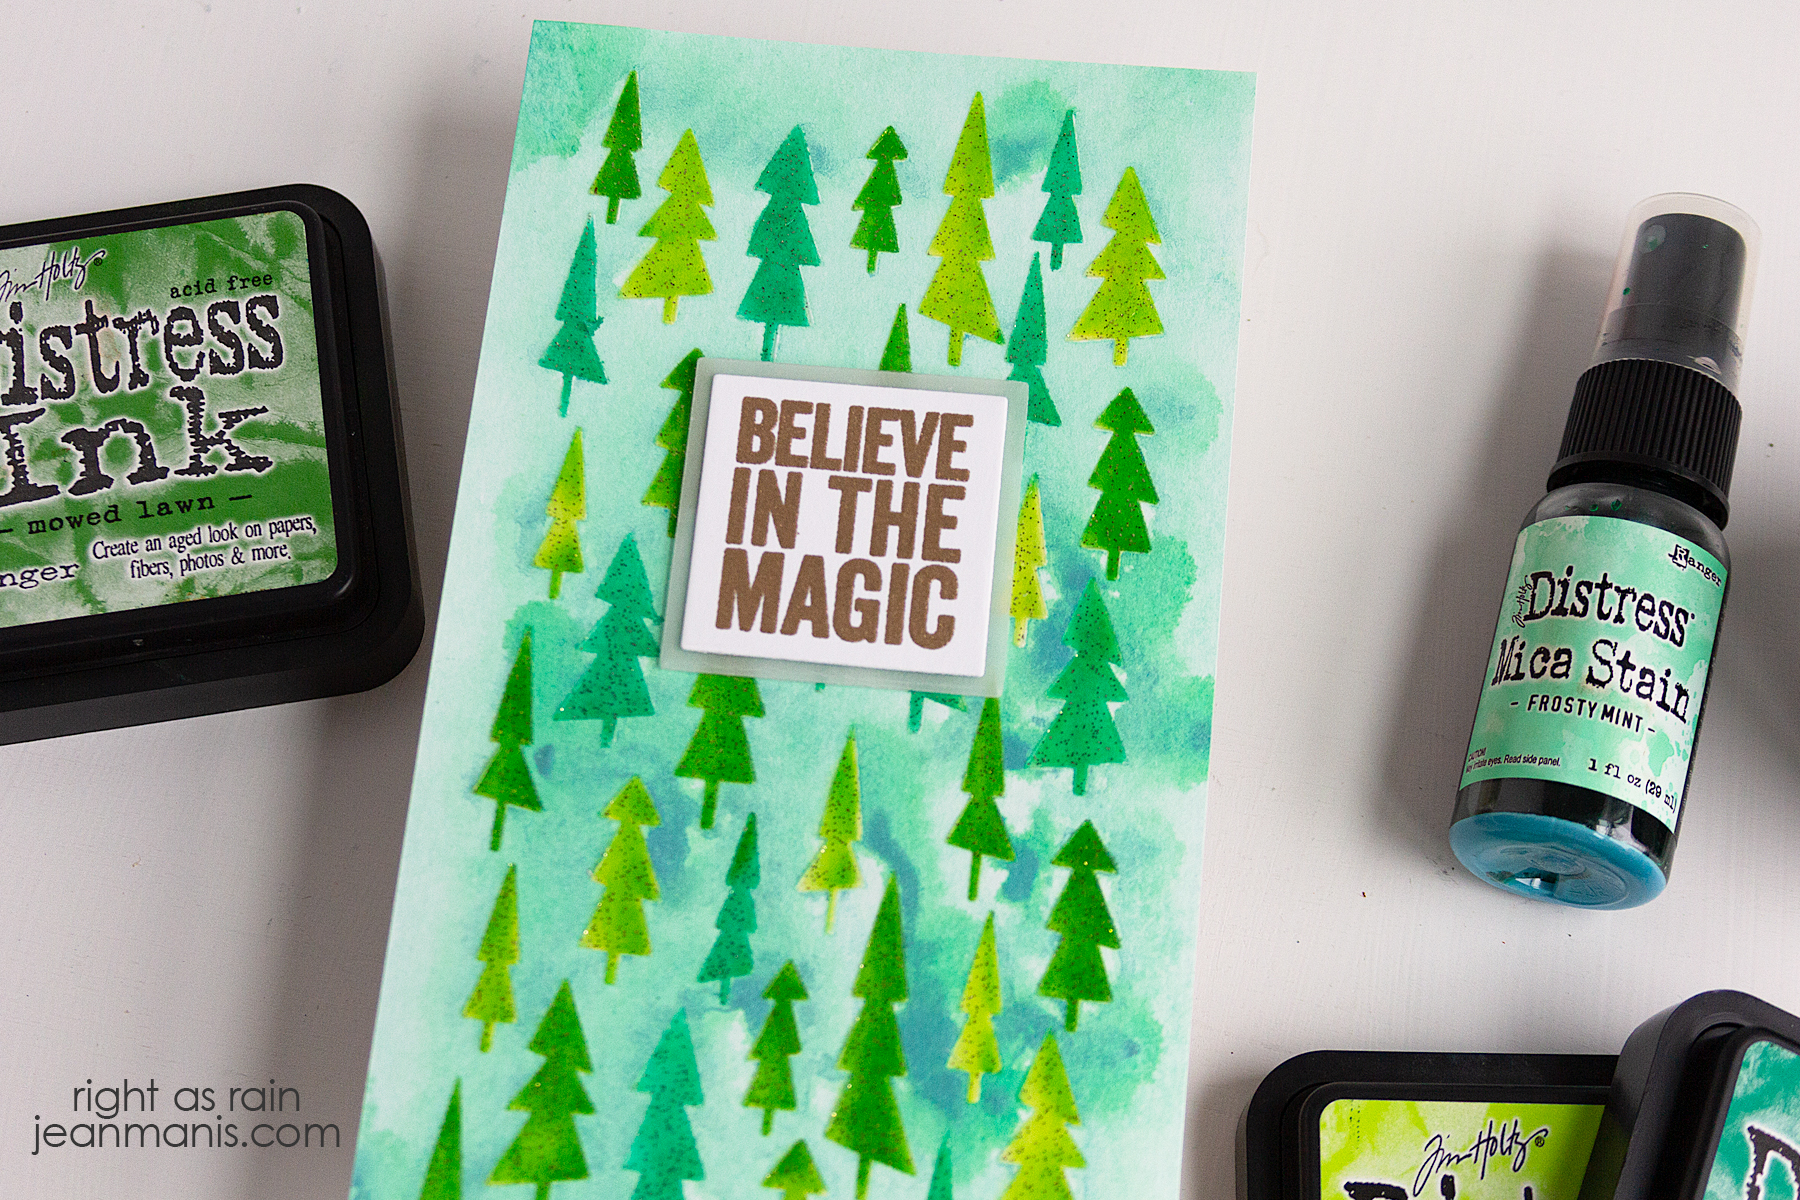
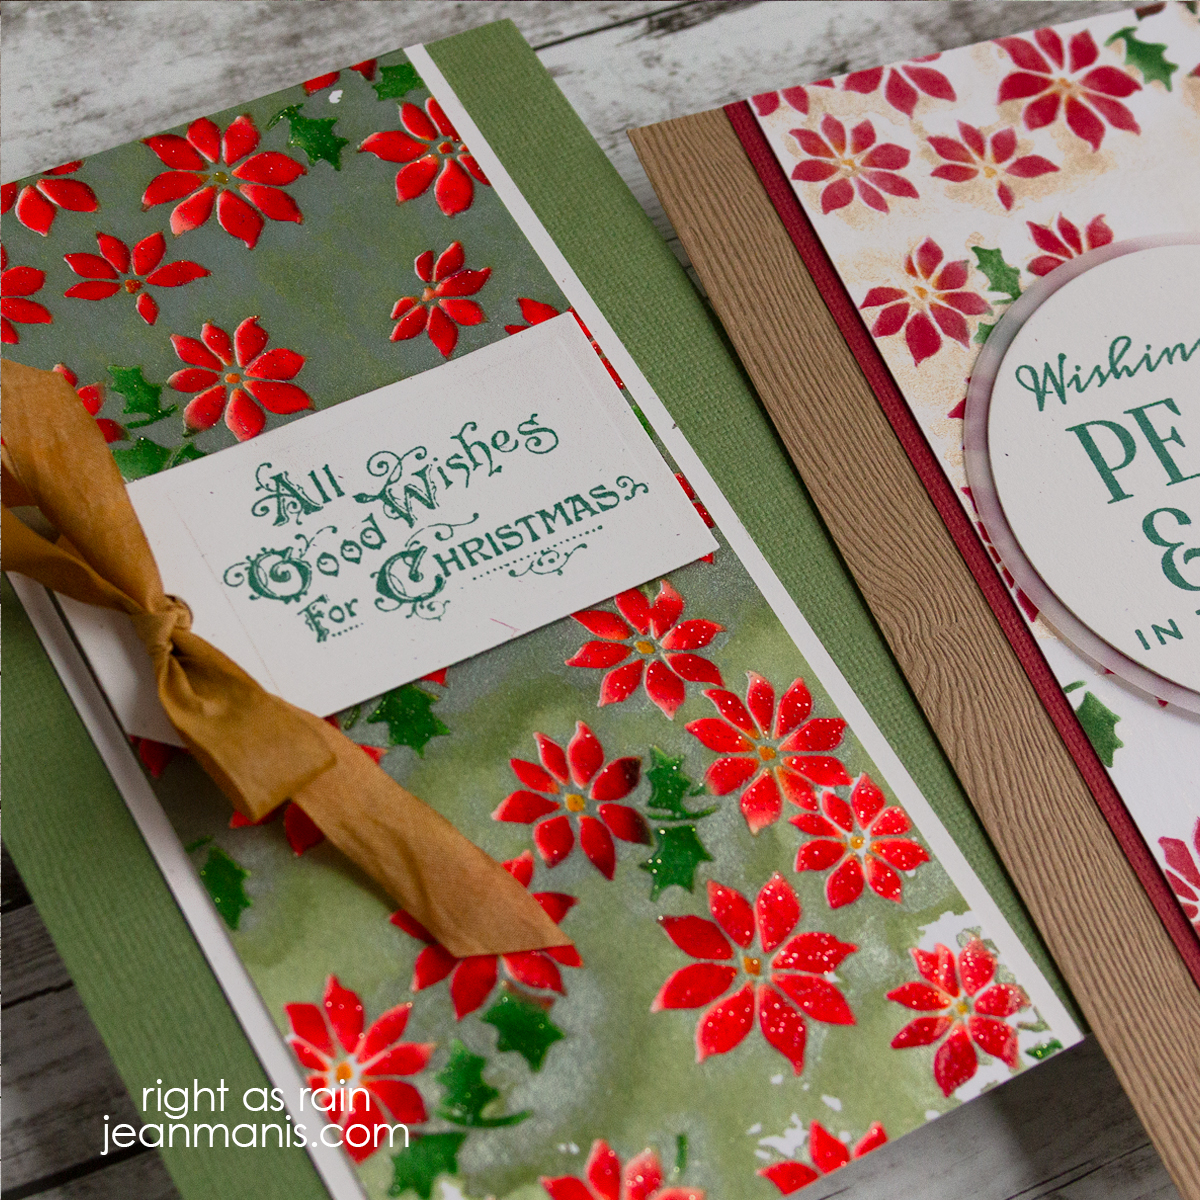
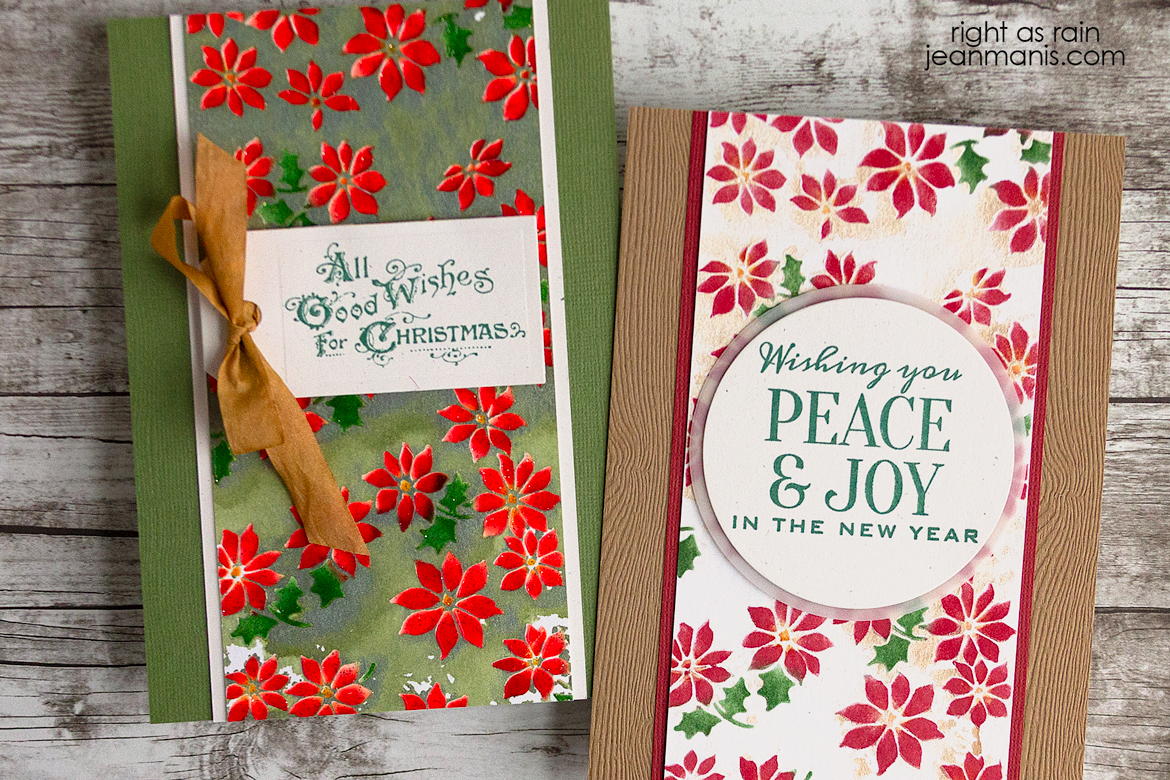
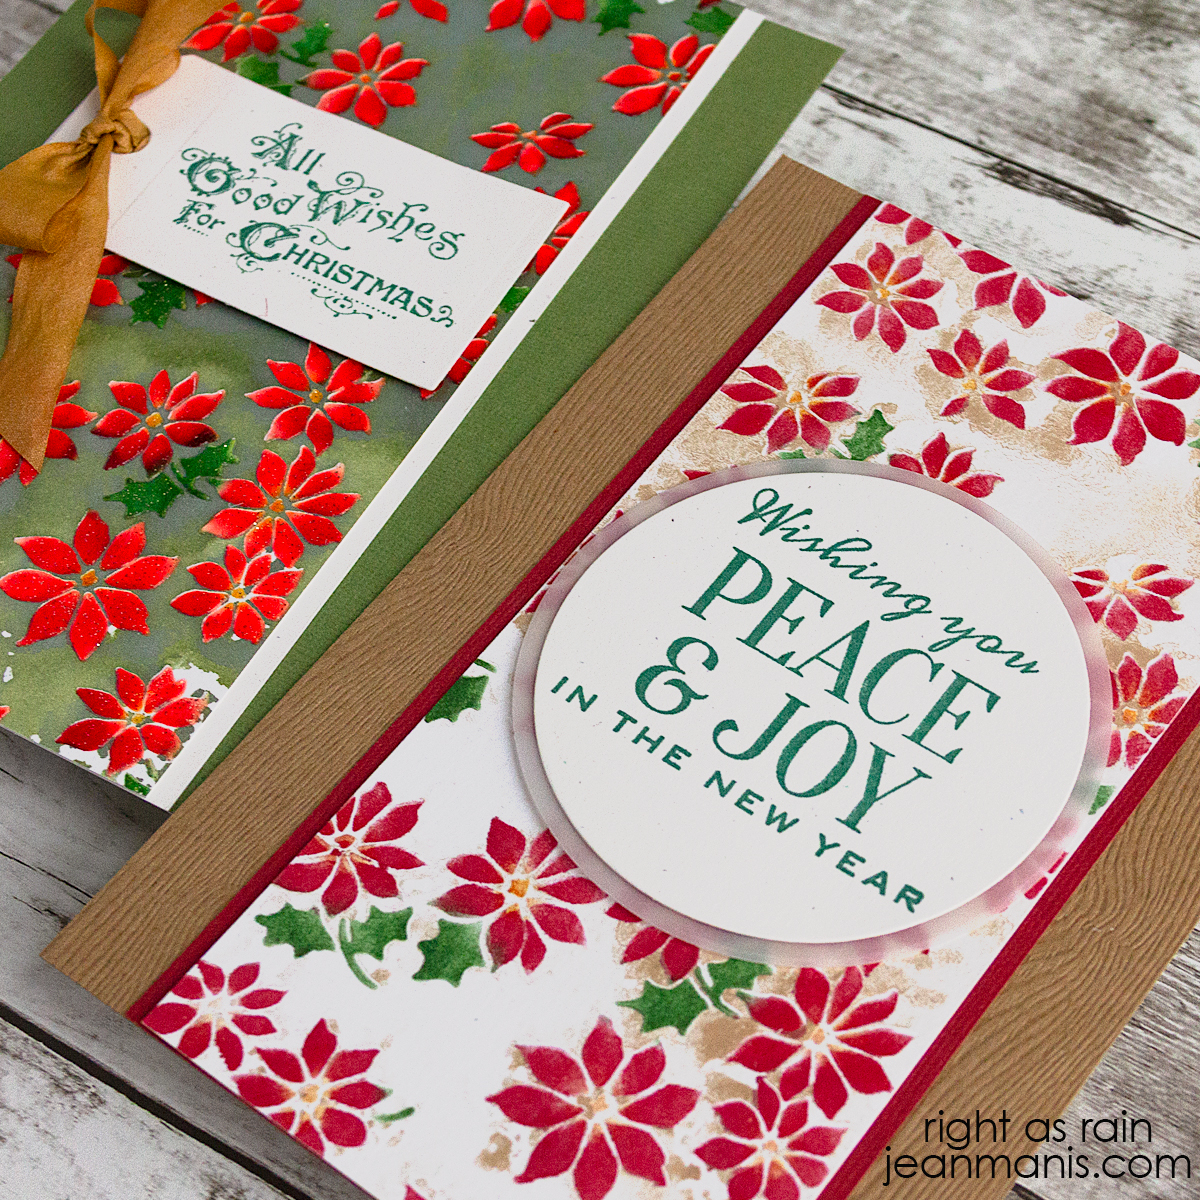
For the first card, once the monoprint is dry, stencil the trees with Twisted Citron, Lucky Clover, and Mowed Lawn inks. Clean the stencil. Add Sparkle paste through the stencil and set the panel aside to dry. Once dry, trim to 4″ x 7 1/2″, and add to a card base.
Heat-emboss the Bold Tidings Mini sentiment in Princess Gold on white cardstock and cut with a square die. Add a slightly larger vellum square. Add the assembly to the card base with foam adhesive.
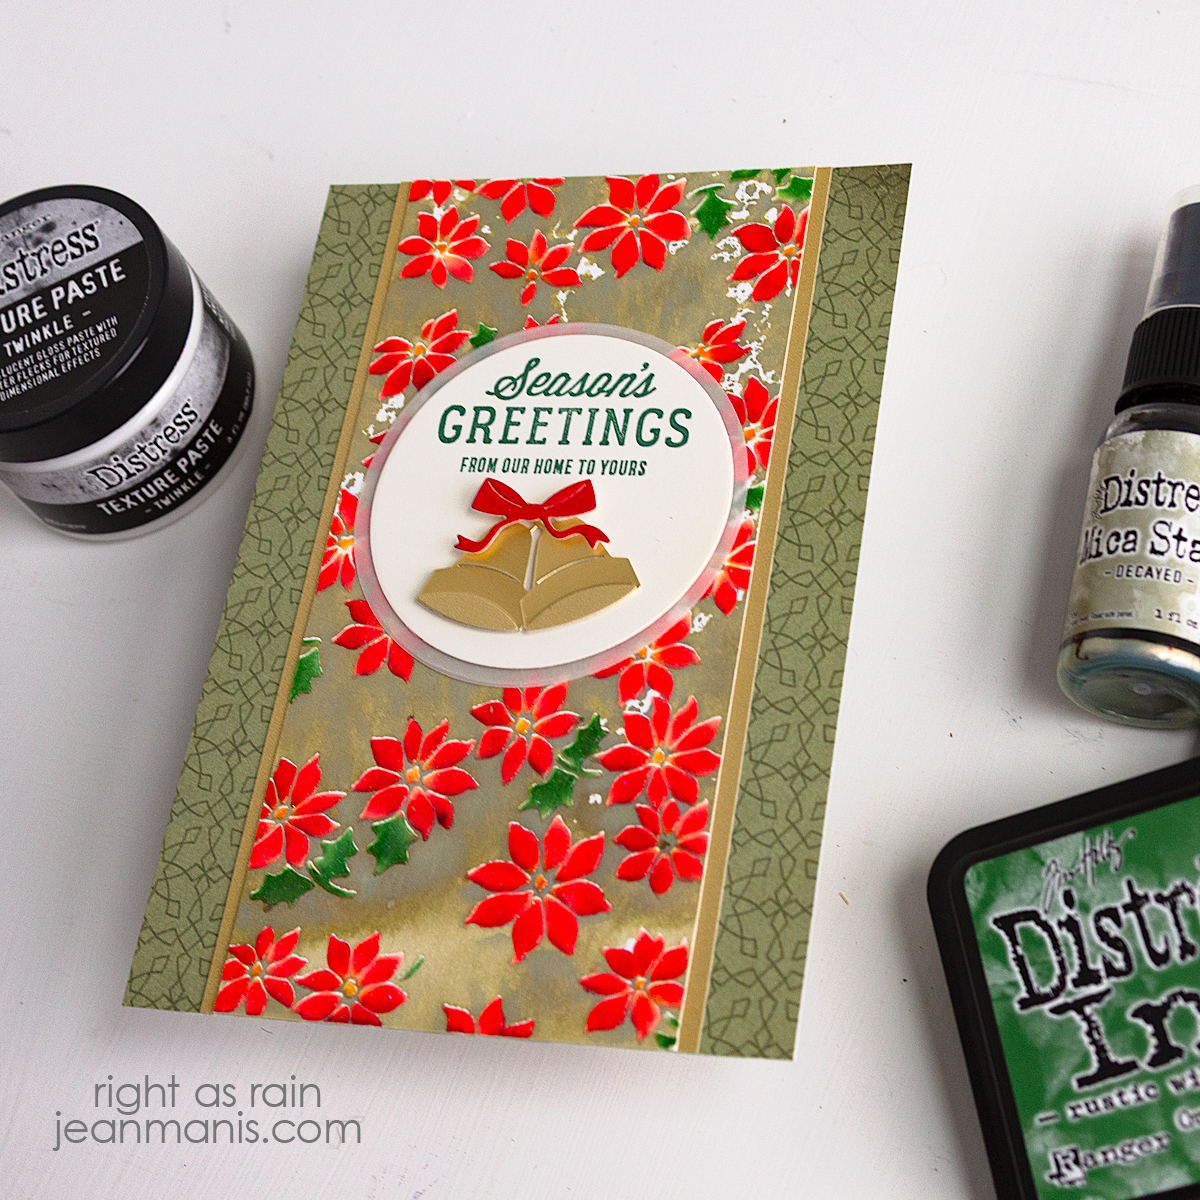
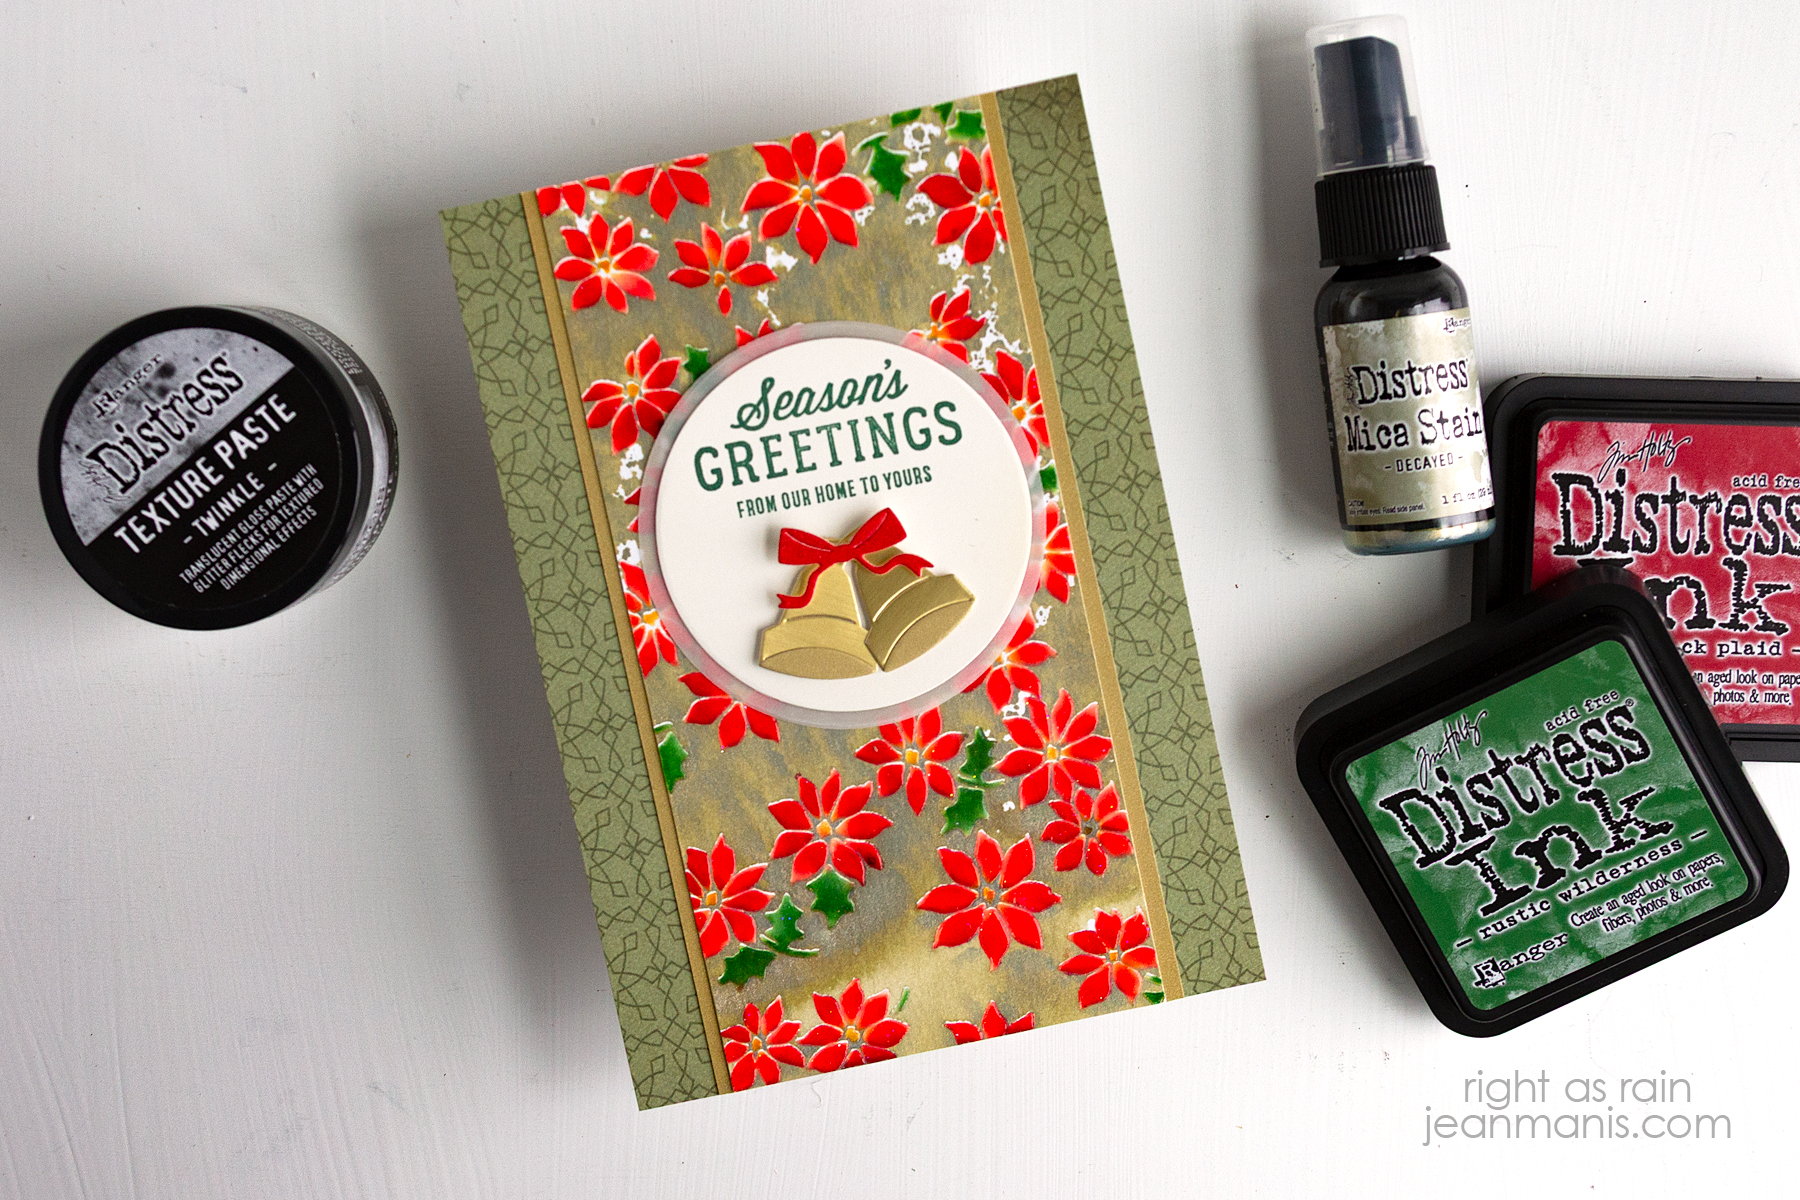
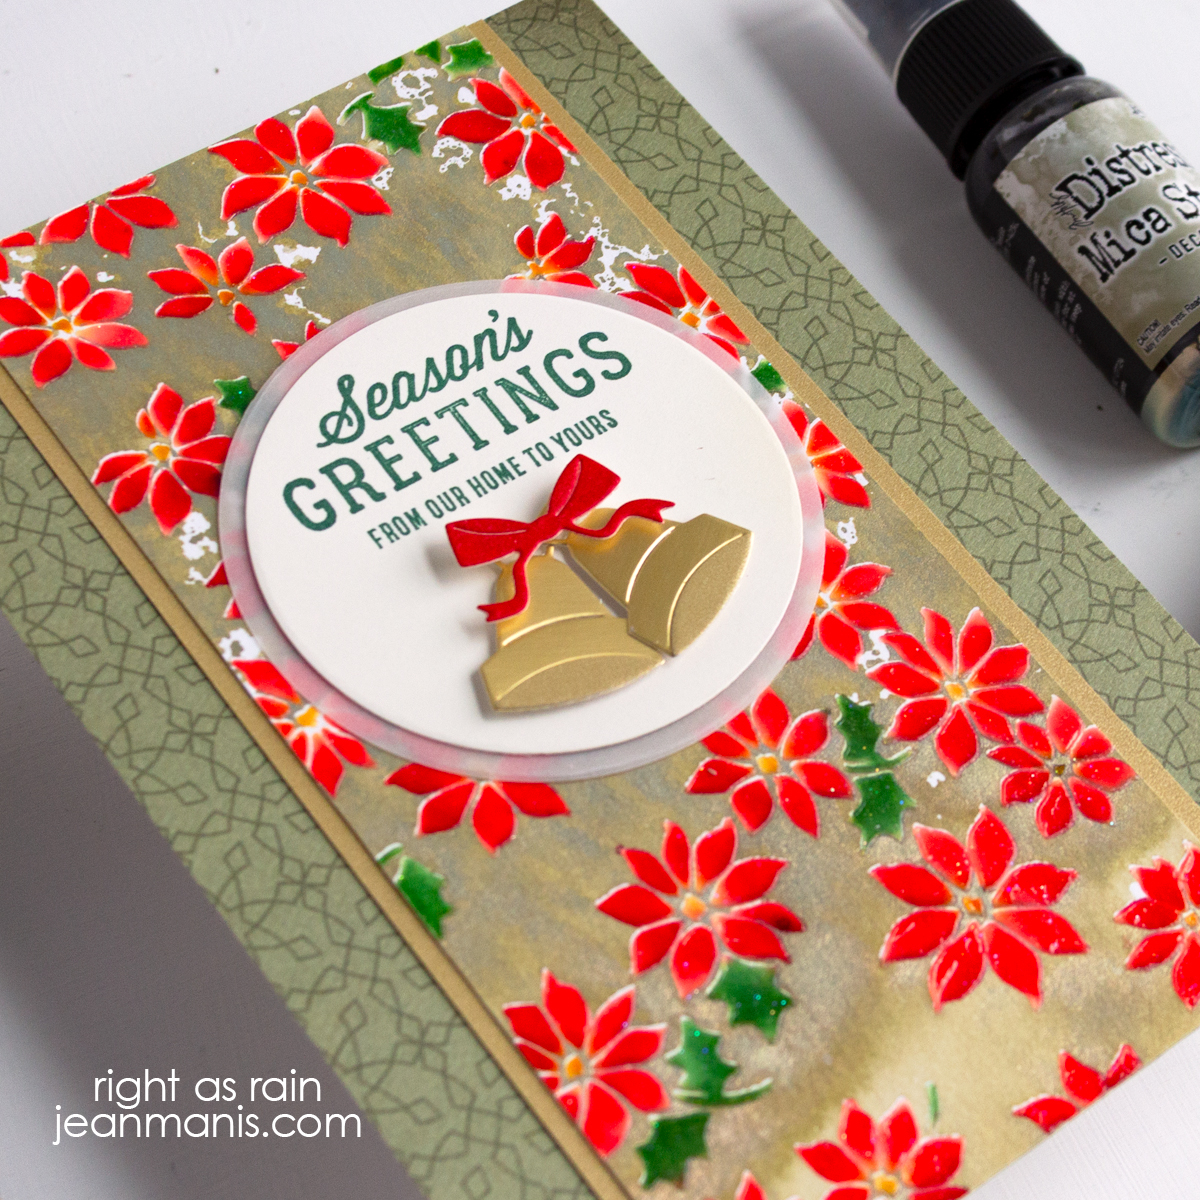
For the second card, once the monoprint is dry, add Sparkle paste through the Tree Lot stencil. Sprinkle on Distress Glazes in Twisted Citron, Cracked Pistachio, and Rustic Wilderness. (I started with the Rustic Wilderness; next time, I plan to start with the lightest glaze first.) Set panel aside to dry; when dry, heat-emboss the glazes. Once dry, trim to 4″ x 7 1/2″, and add to a card base. For more inspiration, you can see two cards using this technique and the same stencil HERE.
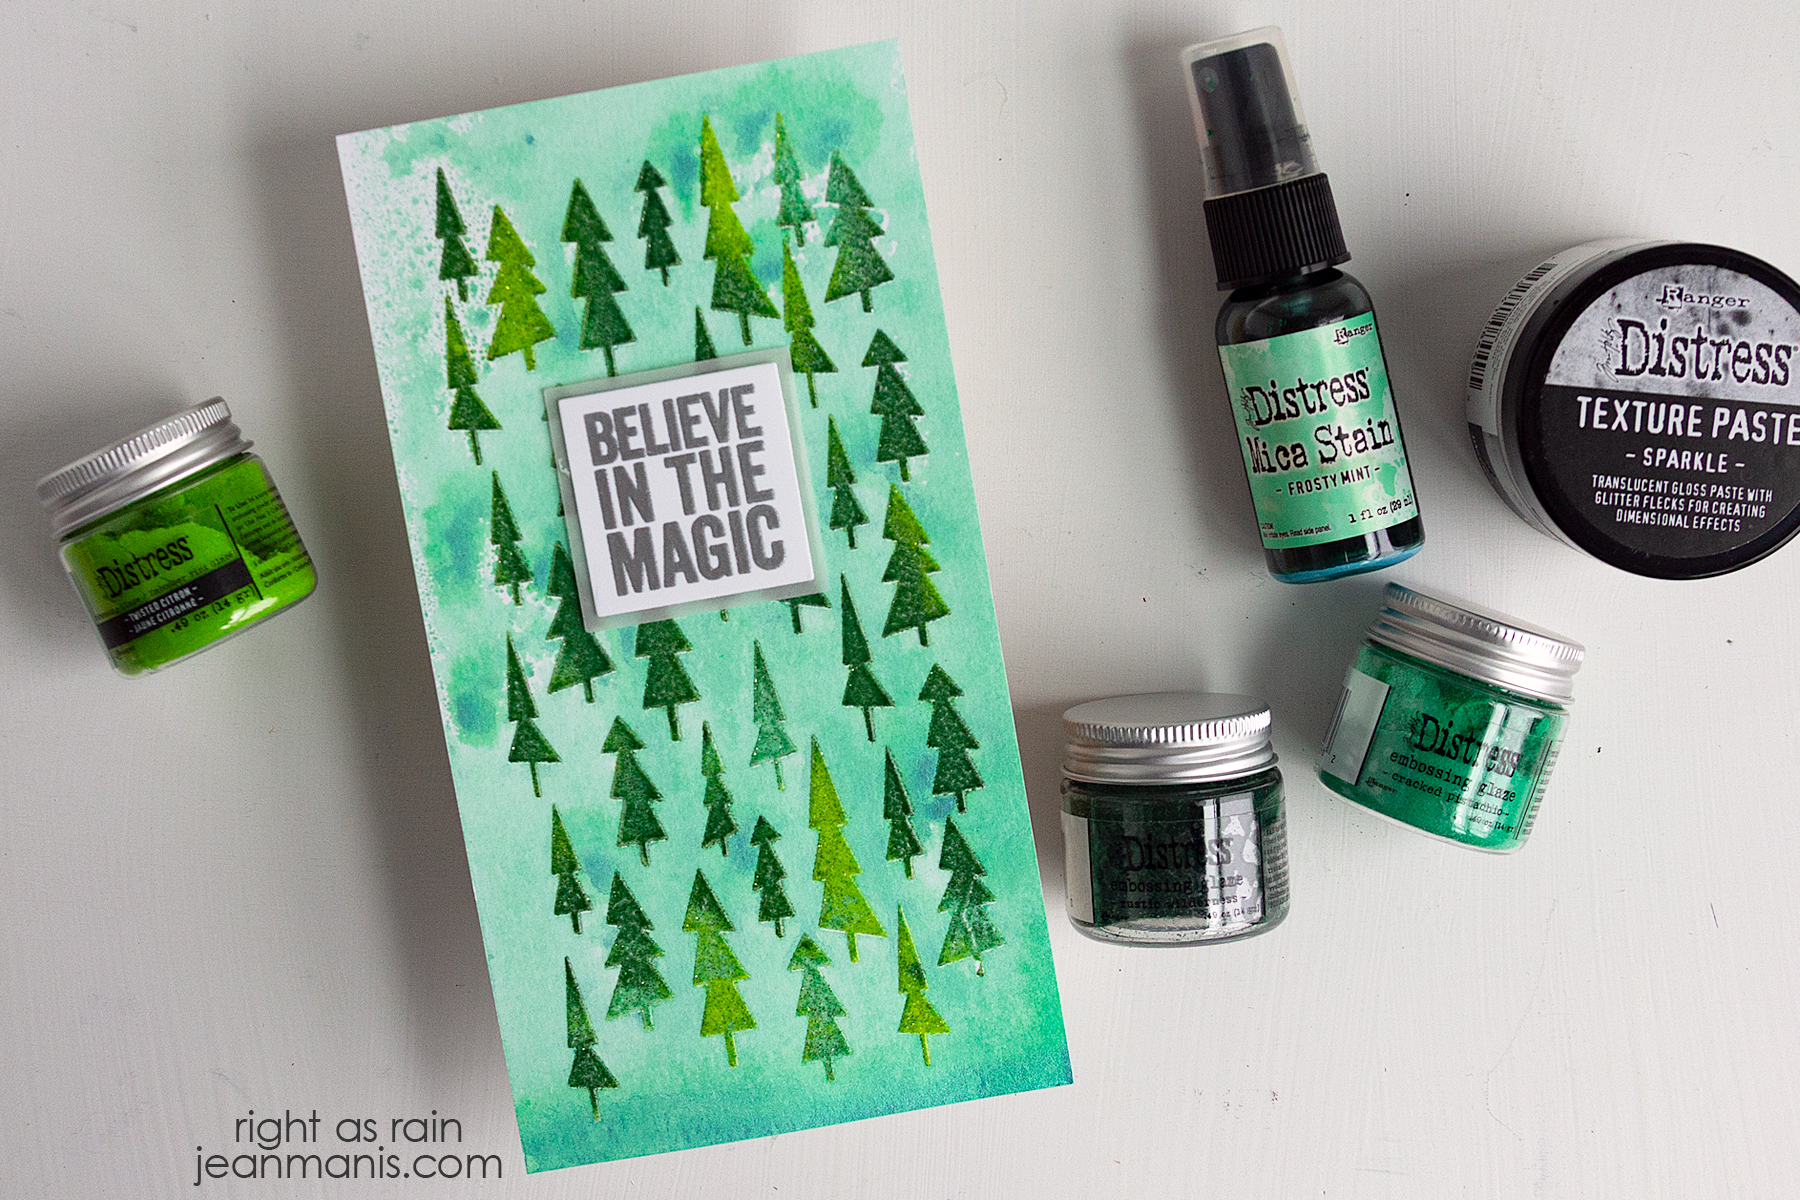
Heat-emboss the Bold Tidings Mini sentiment in Silver on white cardstock and cut with a square die. Add a slightly larger vellum square. Add the assembly to the card base with foam adhesive.