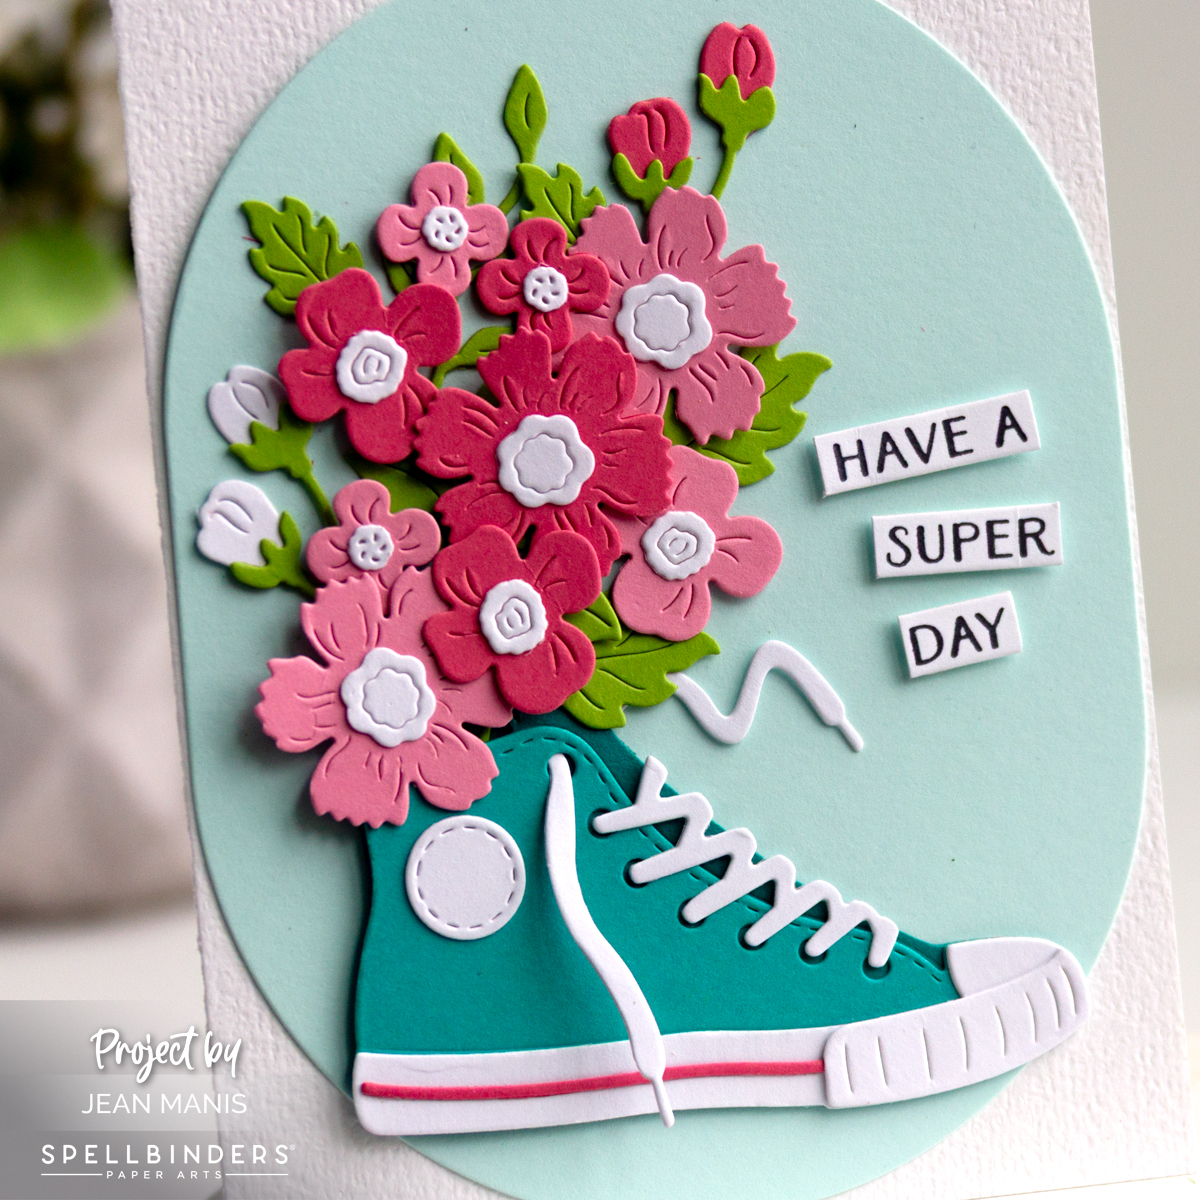
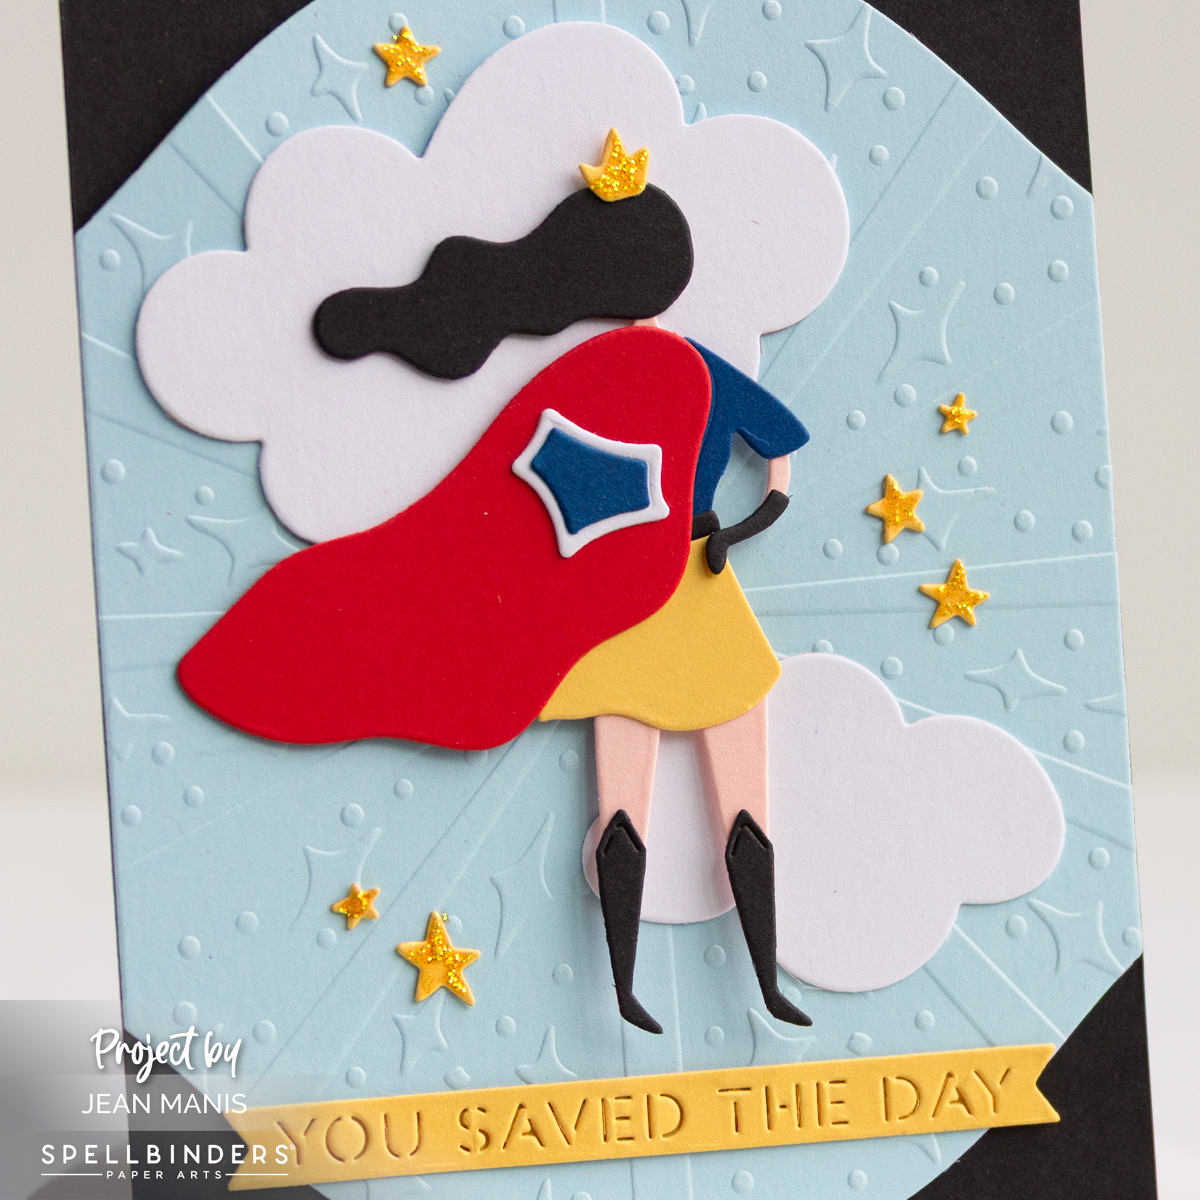
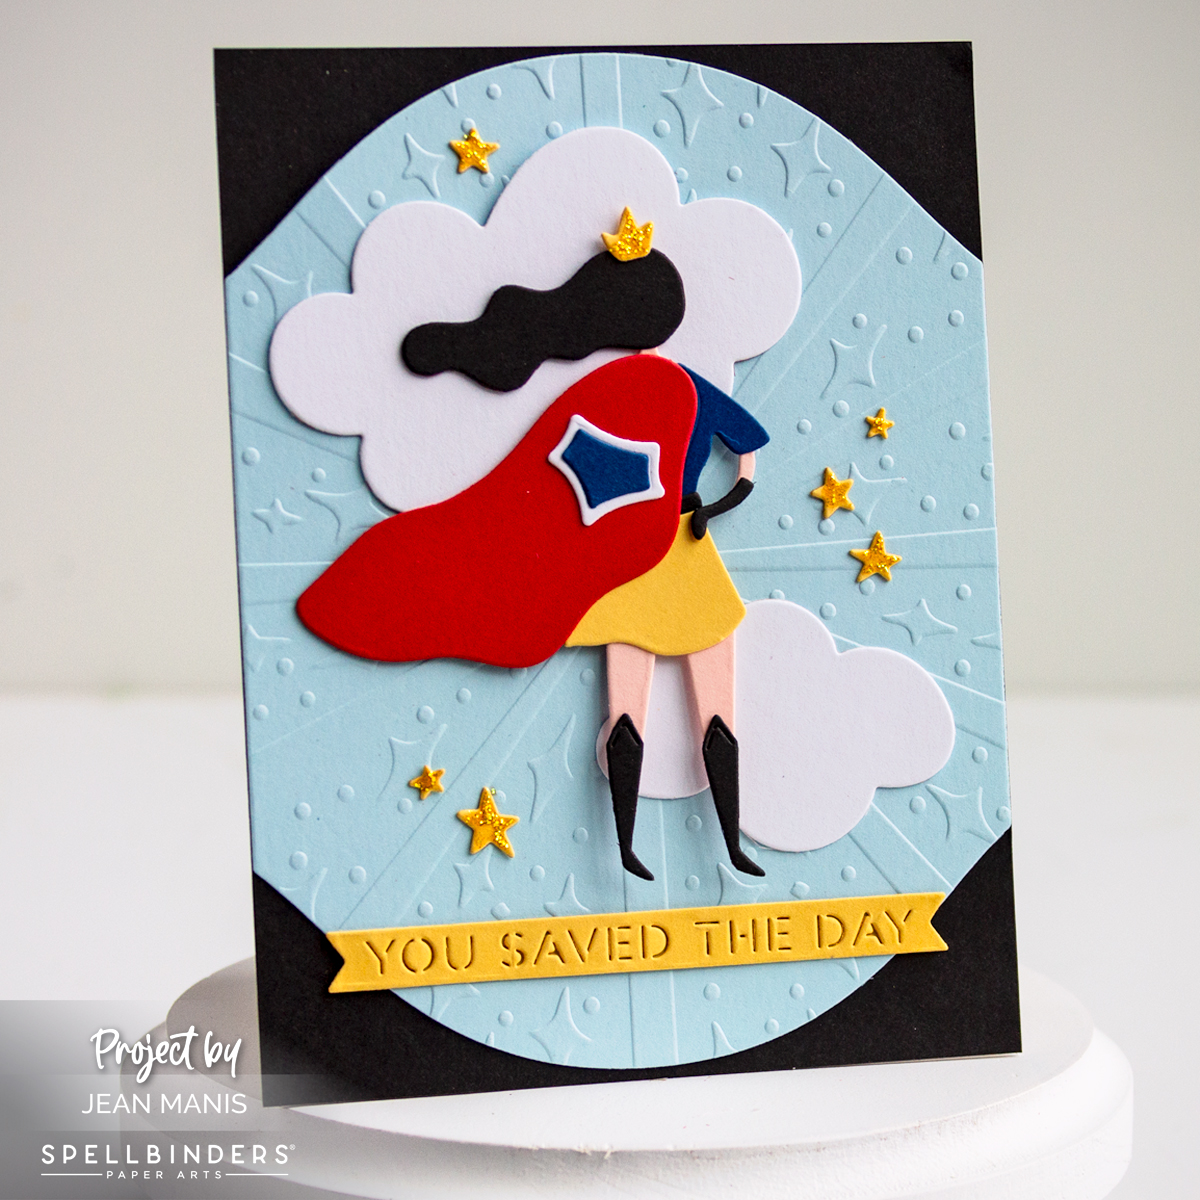
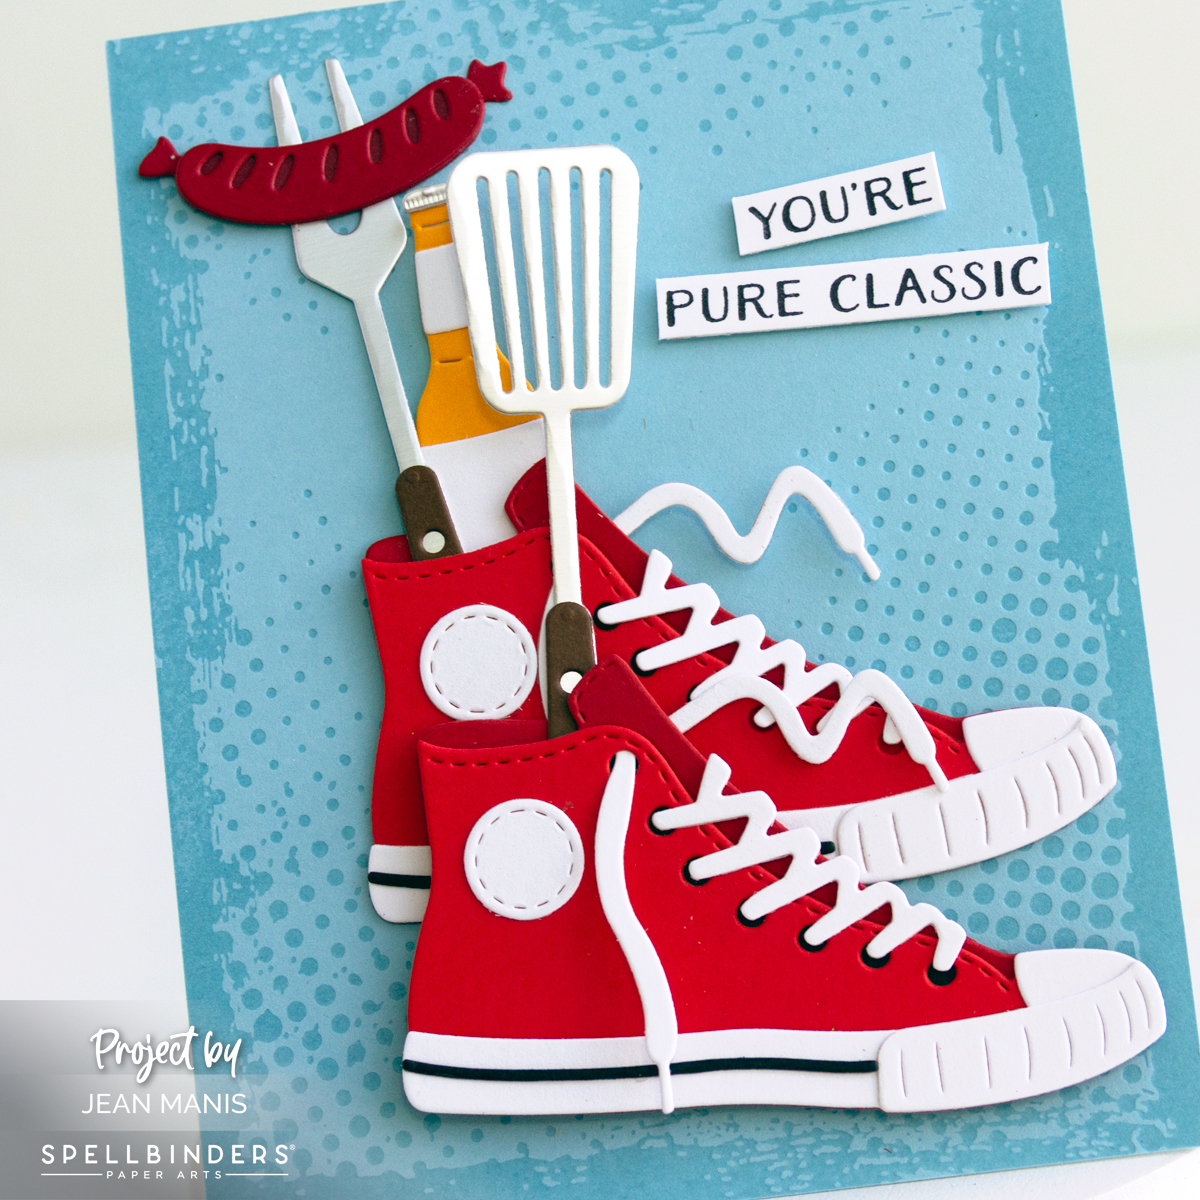
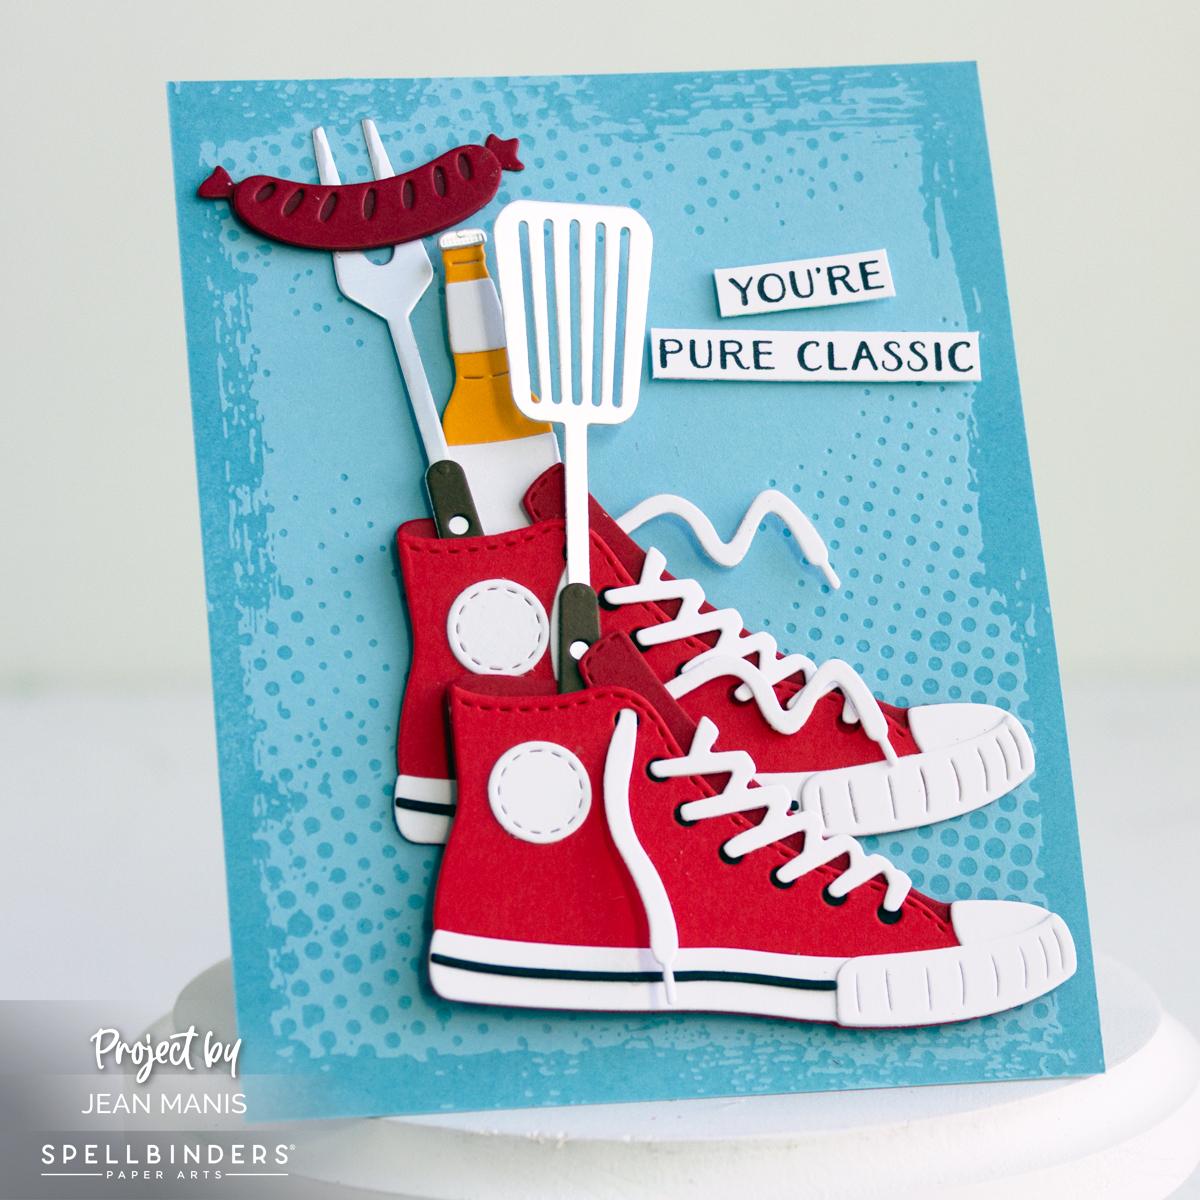
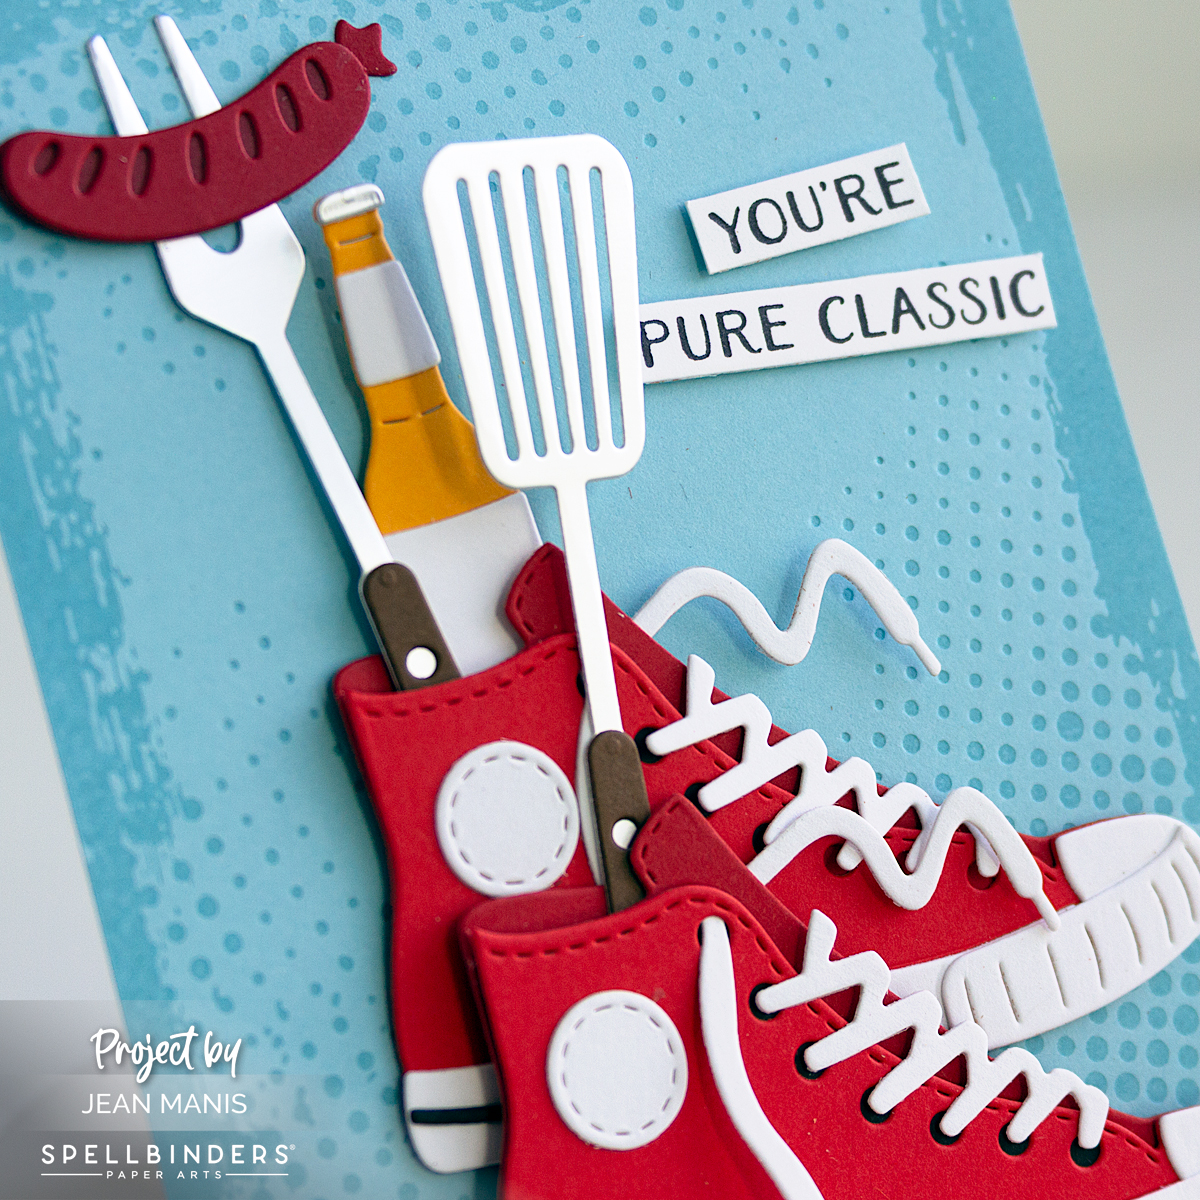
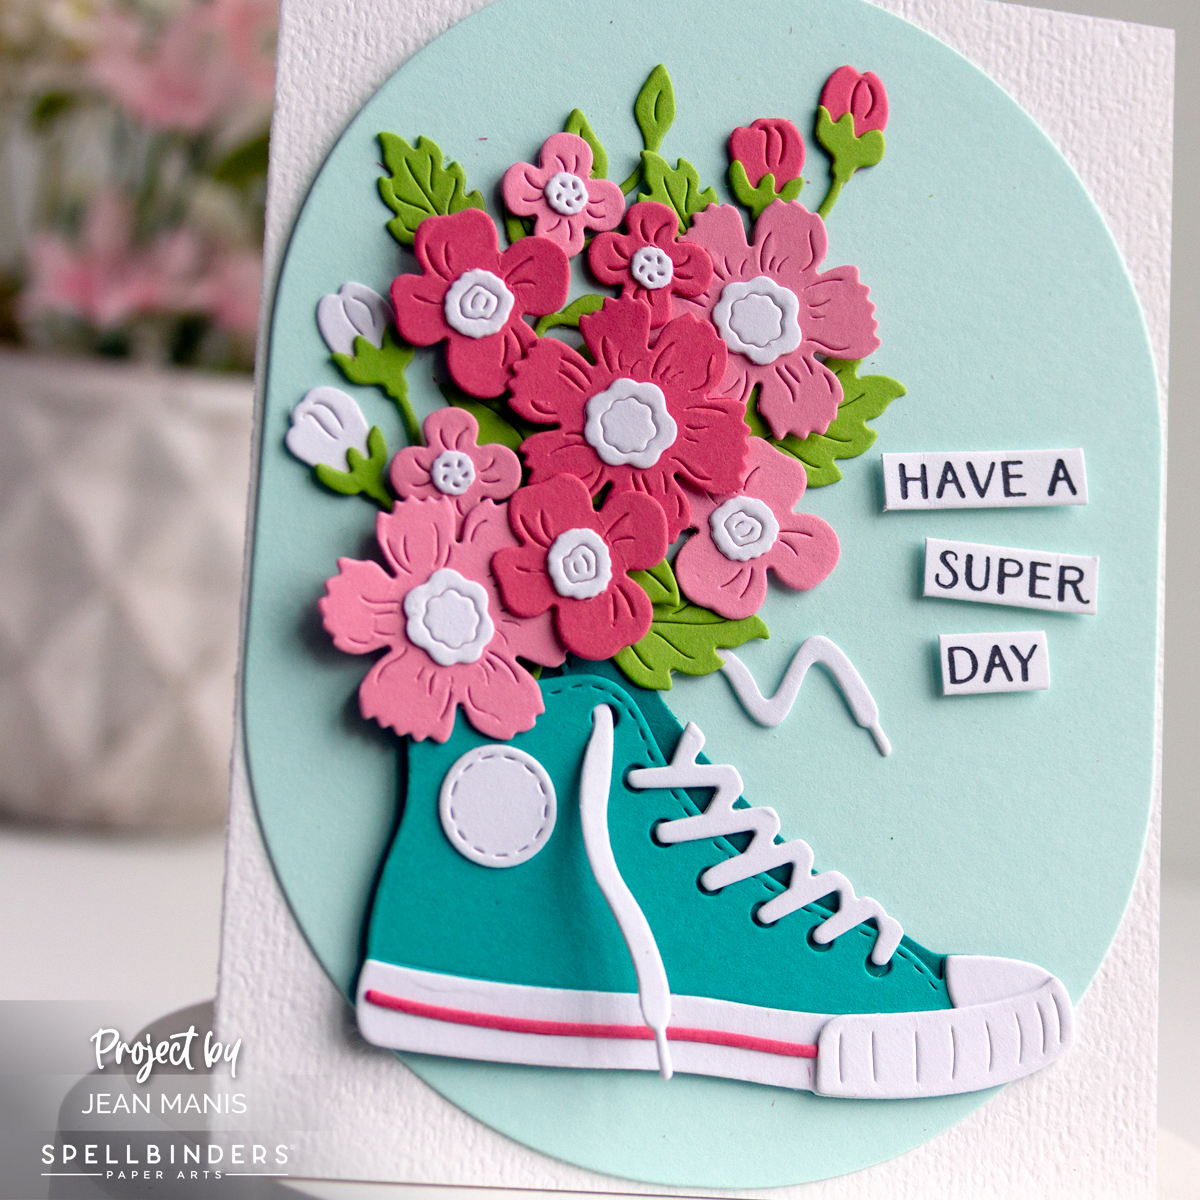
Hello! I’m excited to share that I have a guest post up on the Spellbinders blog featuring The Poet’s Garden Collection by Susan Tierney-Cockburn. I’m sharing three card designs created with this beautiful floral collection, along with all the details behind each project. I’d love for you to visit the blog post, take a look at the cards, and leave a comment.
Category: Spellbinders
Spellbinders | Sweet Valentine Mash-Up
Hello! This Valentine card came together as a true mashup, blending newer products with well-loved favorites from my stash. I used the Spellbinders January 2026 Large Die of the Month frame pairing it with the Simon Hurley Birthday Bear for a cheerful focal point. A winter-themed Simon Hurley die set and several older Valentine-themed die sets filled in the details. I talked about my fondness for product mashups in this post.

-
- Create an A2-size card base from Raven cardstock.
- Cut the frame with dies in the Large Die of the Month set from Blush cardstock. Use a die in the Parcel & Post Heart Decorations set to cut the letters from the frame and inlay with letters cut from Classic White cardstock. Back with patterned paper and add the assembly to the card base.
- Cut the panda with dies in the Birthday Bear set. I previously shared a birthday bear card created with this same set. Assemble. Use the North Pole Sentiments set to cut the hat and scarf. Add to the assembled panda.
- Cut a banner and heart with dies in the Love on the Rocks set and attach to stakes cut with a die in the Parcel & Post Heart Decorations set.
- Add the bear and accessories to the frame.

Spellbinders | January 2026 Crate Bonus
Hello! One of the special perks of purchasing all of the Spellbinders kit clubs is receiving the Crate bonus item, and this month’s offering is an especially good one. The bonus die set includes a beautifully designed frame with coordinating florals that comes together quickly and effortlessly. It creates a finished, polished look while leaving plenty of room for creativity in the center. For this card, I added the hummingbirds from the Large Die of the Month, which fit perfectly inside the frame. This is the kind of die set you’ll reach for again and again.

-
- With the Crate bonus item, cut the frame pieces. Dry-emboss the center piece with the Cloud Nine folder. Assemble and add to an A2-size card base.
- Use the Large Die set to cut the hummingbirds and center flower. Assemble and add to the card center.
- Press the Always and Forever sentiment, cut with the banner coordinating die, and add to the card with foam squares.
Simon Hurley Birthday Bear
When a birthday card is meant for a child, a playful focal point and clear design go a long way. For this card, I used the Birthday Bear die set created by Simon Hurley, part of the Spellbinders Sending Hugs Collection, letting a patterned paper background guide my color choices for the bear’s hat and gift. A Polaroid-style frame helps contain the scene. The versatility of this die set really shines, since it’s easy to swap colors to suit a girl or a boy, and you can choose to build either a sweet panda or a more traditional bear.

-
- Cover an A2-size card base with patterned paper.
- With the Birthday Bear die set, cut the bear, hat, sentiment, and present. Assemble as necessary.
- Cut the Frame and add the assembled bear to the inside of the frame, securing along the bottom. Add a patterned paper background to the back and add the assembly to the card base.
- Add the sentiment, sentiment banner, and hat.

Relaxing Card to Brighten Winter
Hello! Today, I am sharing a card created with the January Die of the Month for Spellbinders. The structure of the die did most of the work. The set cuts a graceful fan shape, and I dry-embossed the individual fan pieces to add subtle texture before layering them together. The floral elements sit on top of the fan. I chose a rich palette of deep, saturated colors from the ColorWheel cardstock that feel especially welcome this time of year. A simple sentiment is included at the bottom of the frame, keeping the emphasis on the design and texture of the card.

-
- Create an A-2 size card base from Violet cardstock.
- Use the Sunny Stems set to cut the fan pieces from Gold Treasured cardstock. Emboss the interior pieces of the fan with the Cloud Nine folder, the January 2026 embossing folder offering, and add to the fan frame. Add the assembly to the card base.
- Cut the Sunny Stems from a variety of cardstock colors and assemble. Add to the frame.
- Heat-emboss in gold the Fair Winds sentiment and cut with the coordinating die. Add to the card with foam squares.


