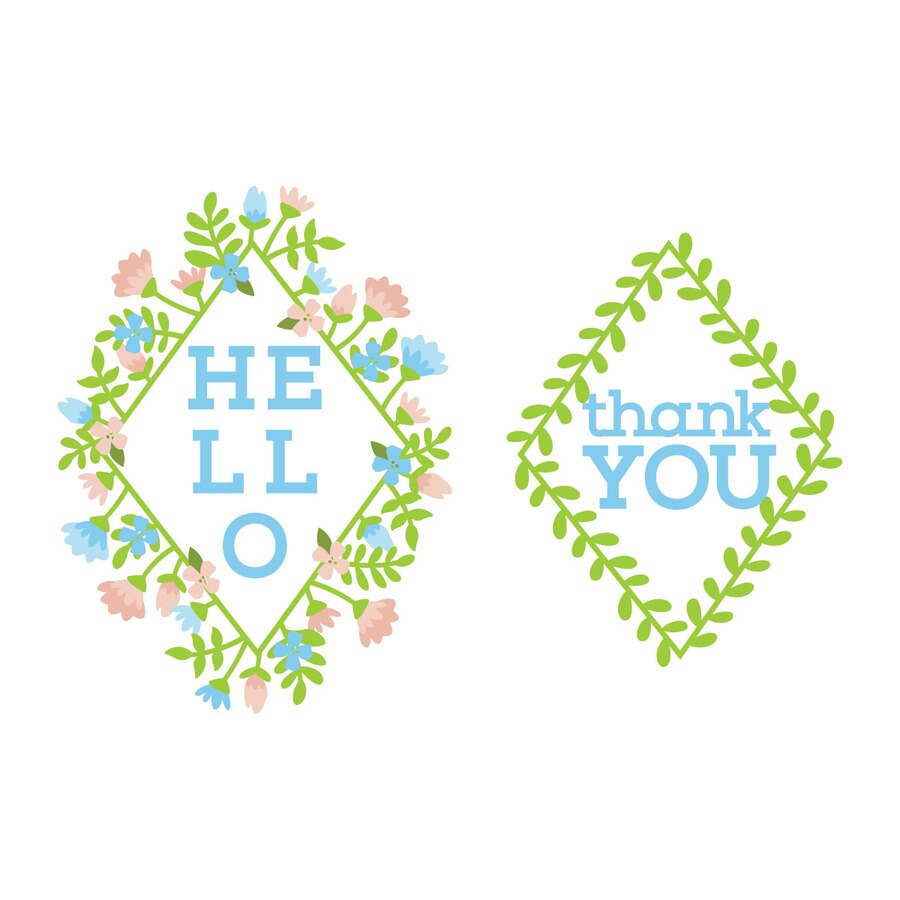
Hello! Today, I am sharing fall-themed cards created with this month’s Small Die of the Month kit at Spellbinders – “Hello & Thank You.” The kit is named for the word and letter dies included in the kit, which also includes frame and floral element dies.
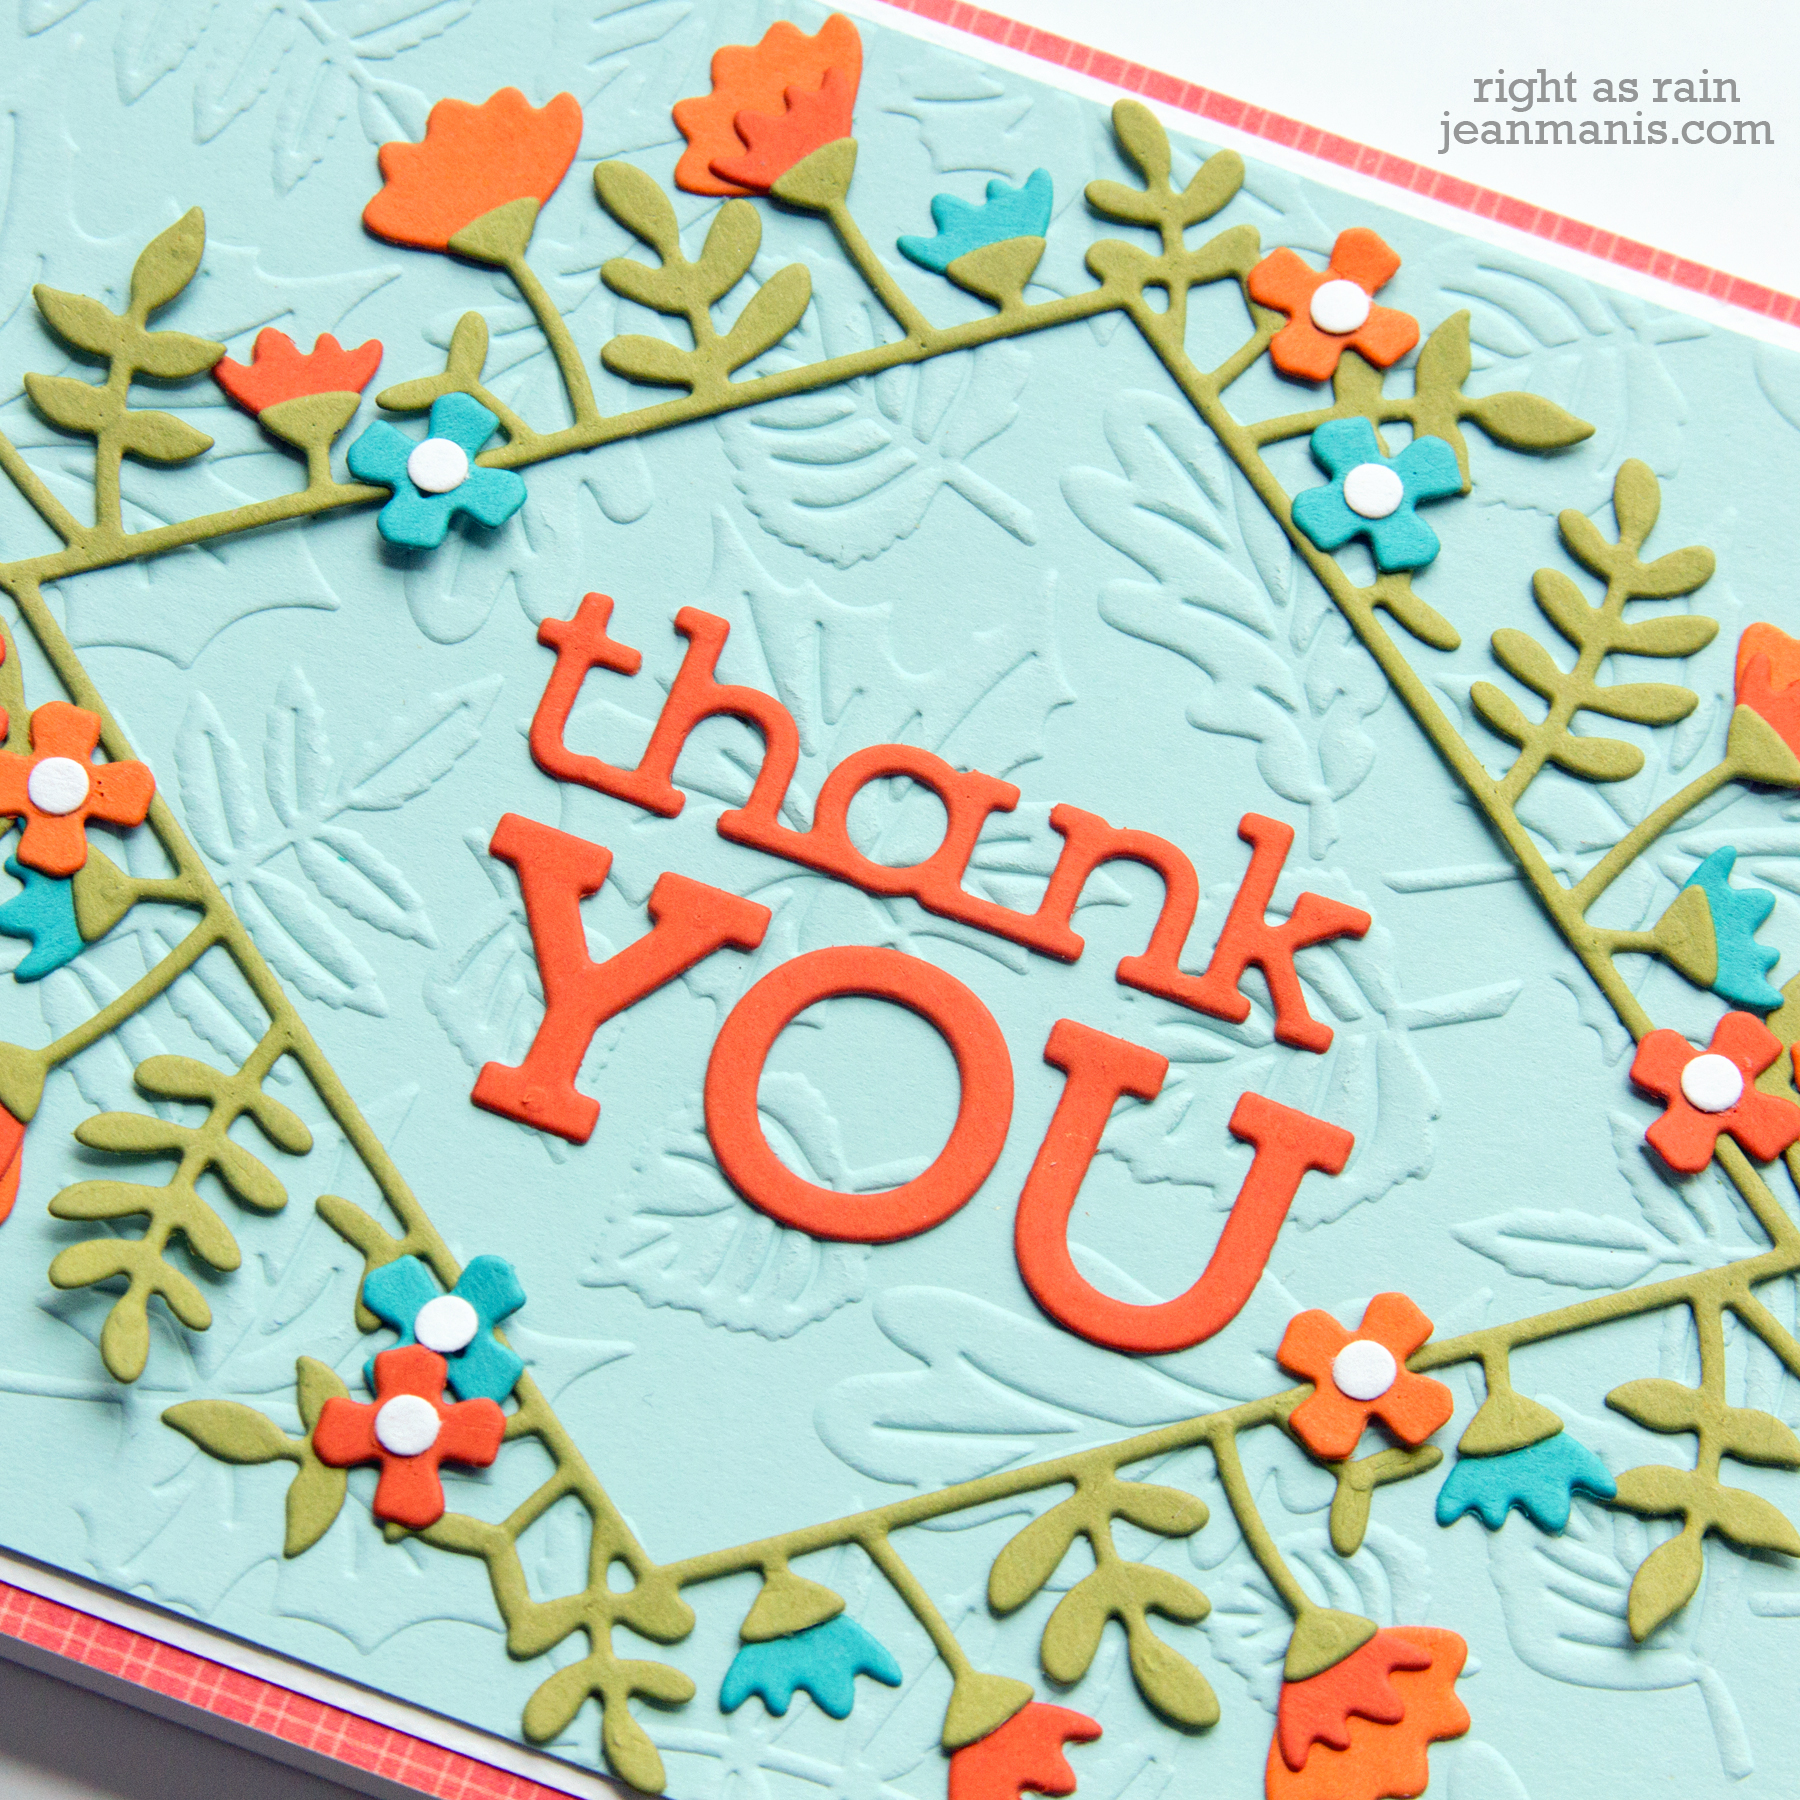
On my first card, I used the set’s more ornate frame piece with the “thank you” sentiment set against a dry-embossed background.
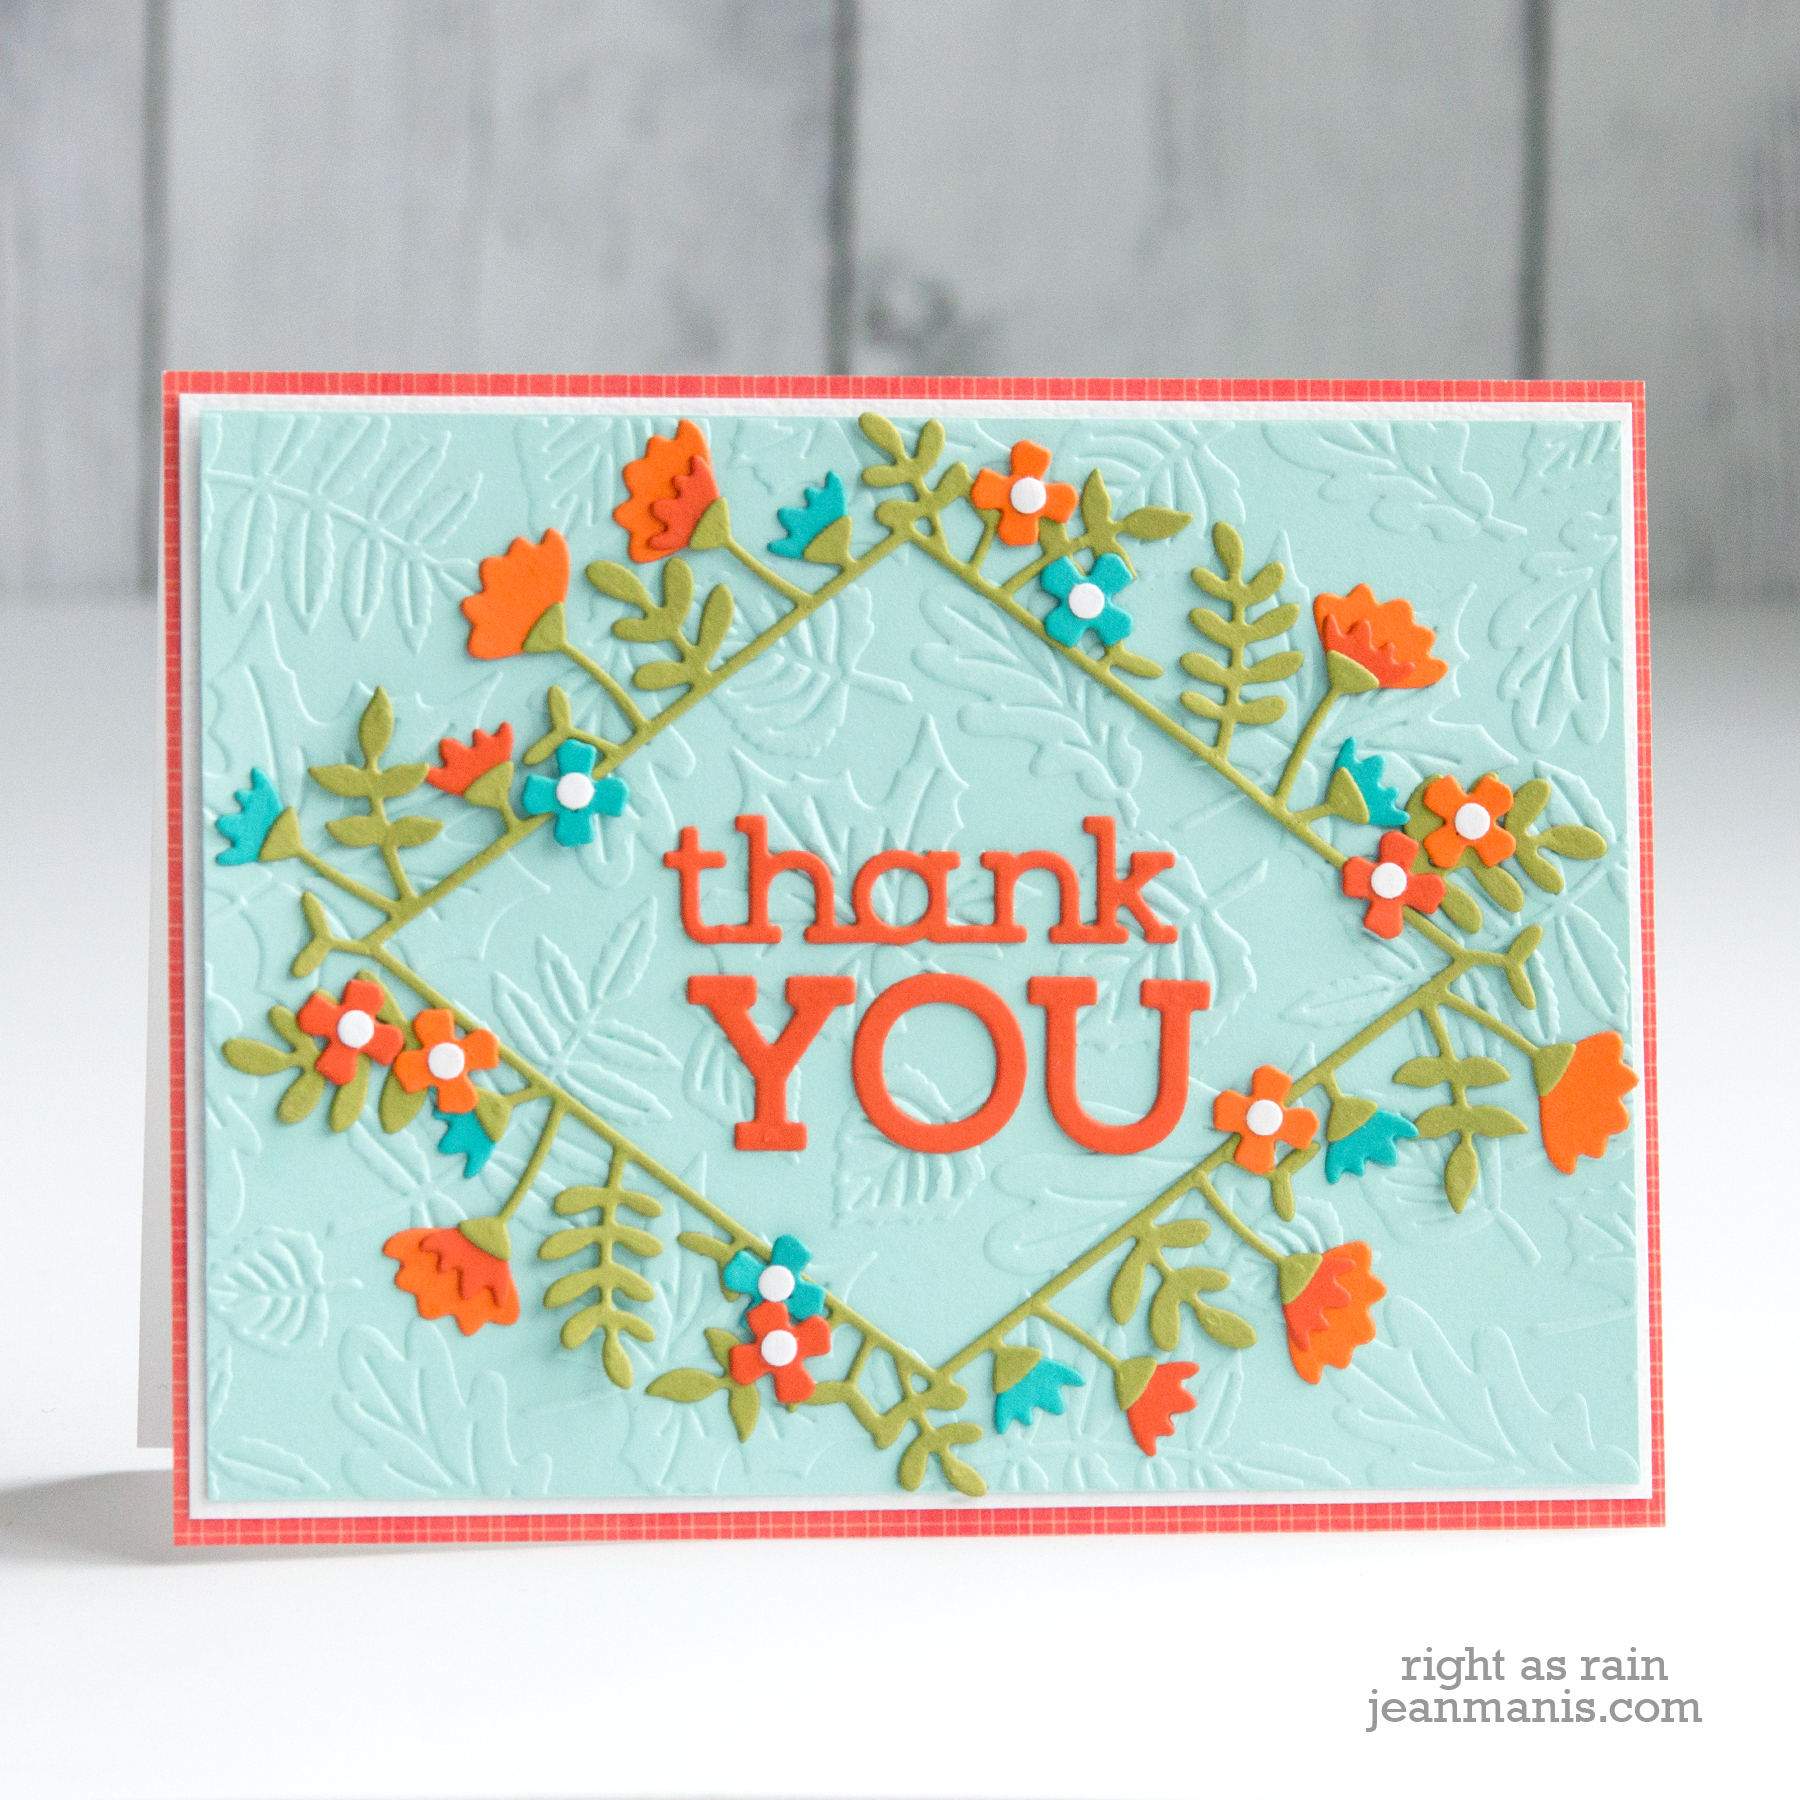
- I dry-embossed the soft-blue background with the Changing Seasons folder.
- I die-cut the frame piece (twice), the sentiment, and the flower pieces.
- I created the frame, adhered the floral pieces and added the assembly to the dry-embossed background.
- I adhered the sentiment in the center and small flowers around the frame, to which I added centers created with a hole punch.
- I added the panel to a white cardstock mat which I adhered to a patterned-paper card base.
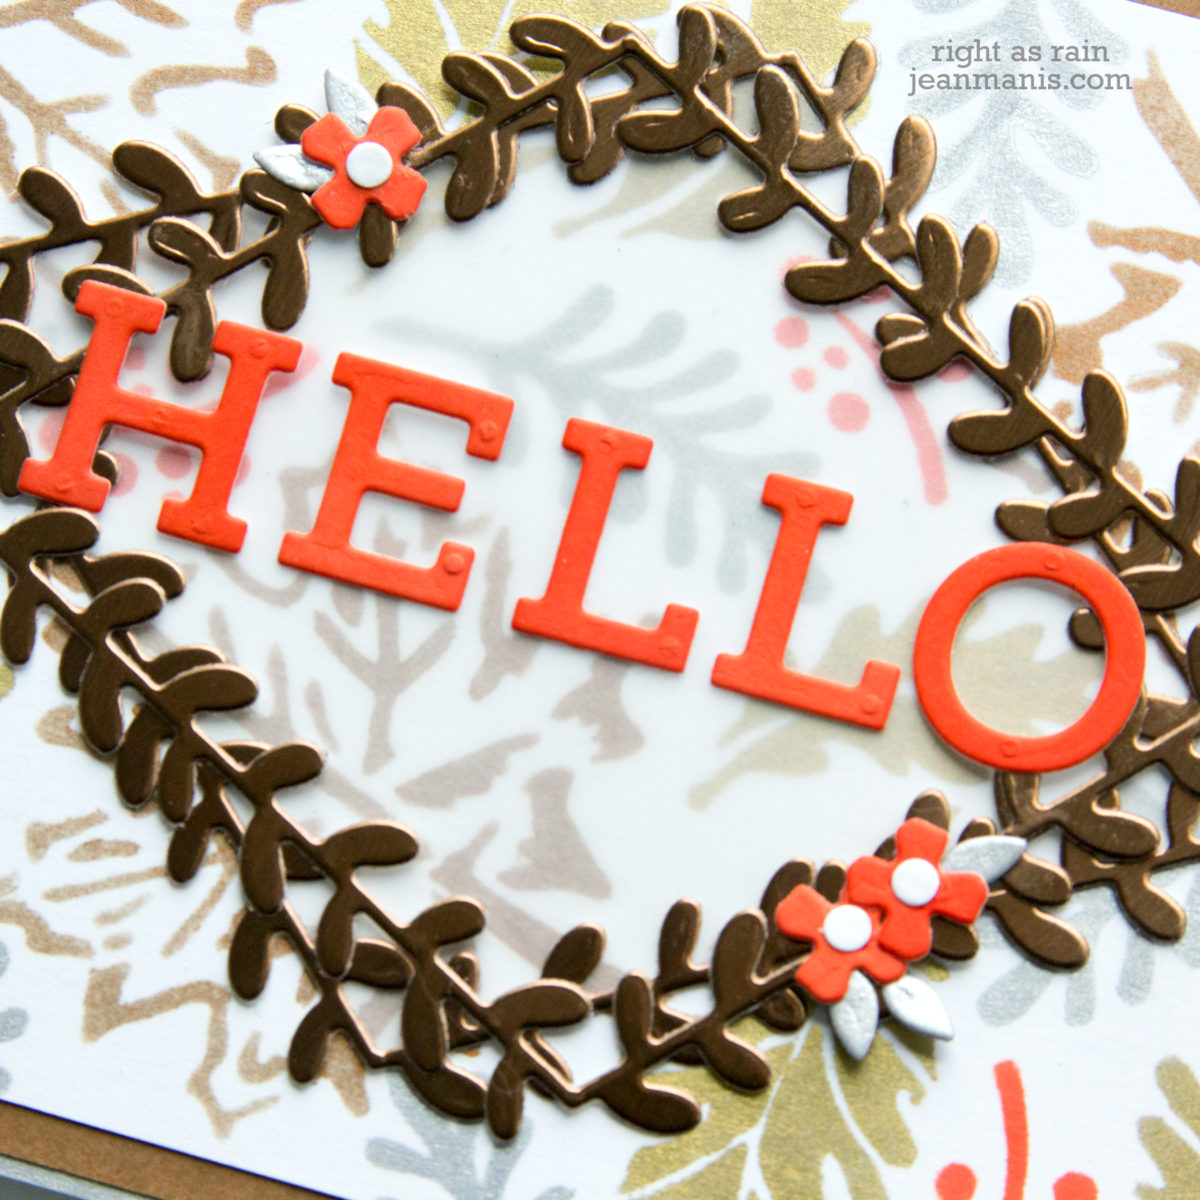
My second card uses the HELLO sentiment with the kit’s other frame set against a stenciled background.
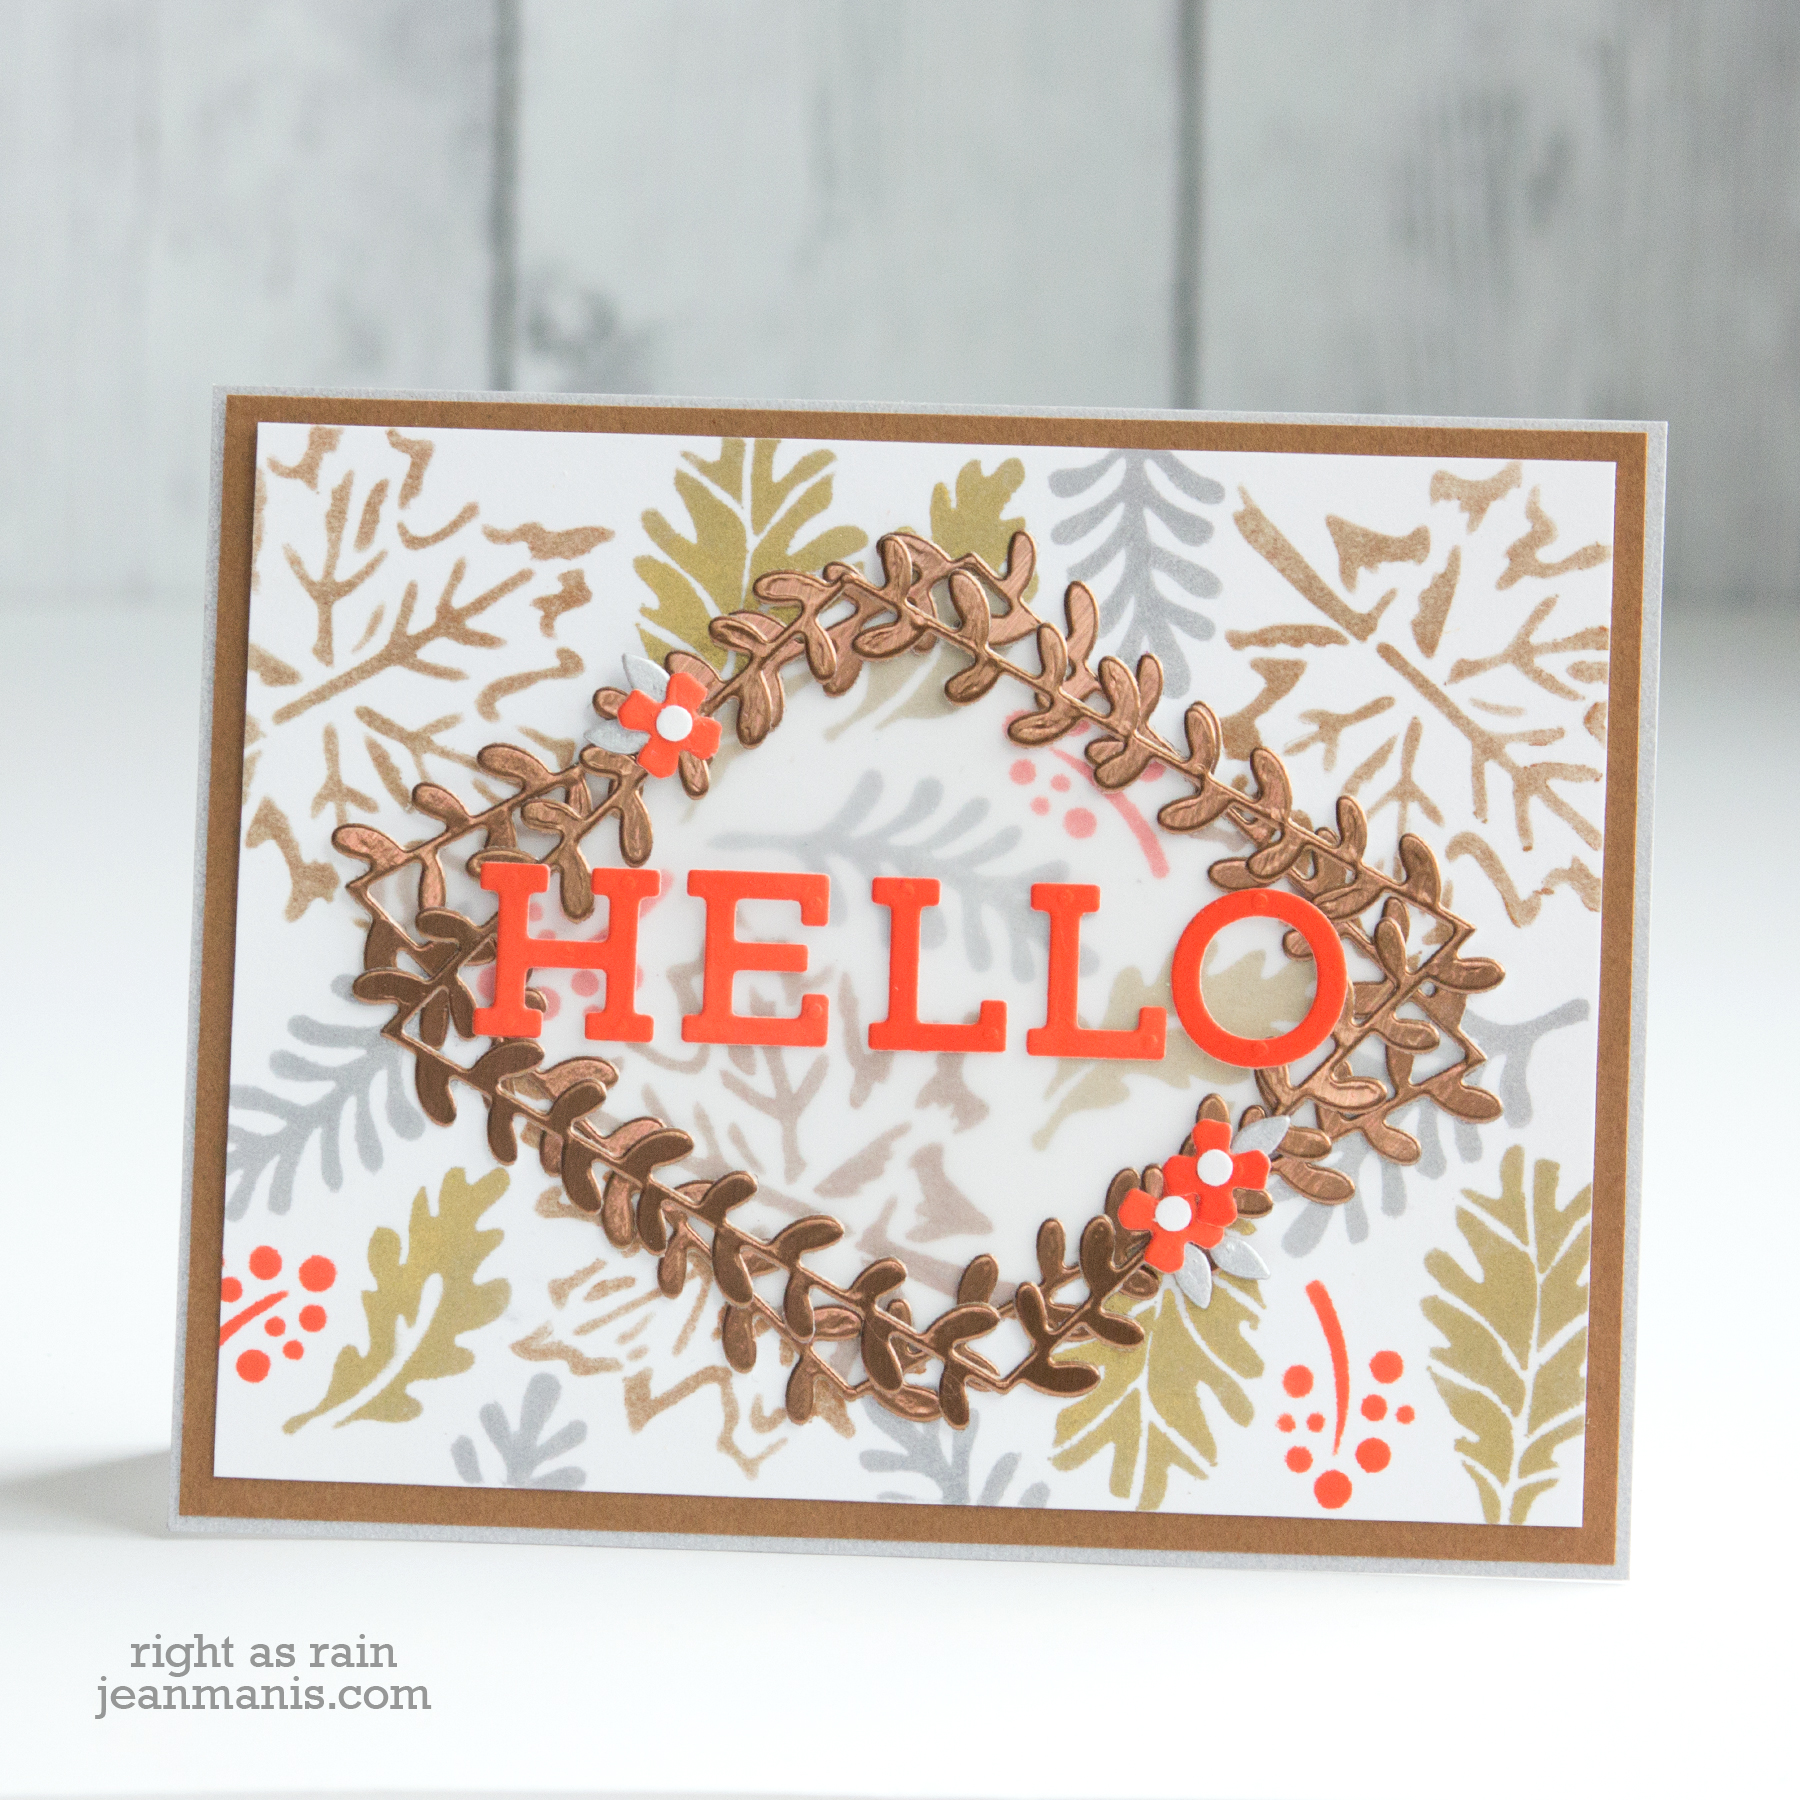
- To create the background, I stenciled the Four Layer Leaves Stencil with metallic inks and a deep orange ink.
- I die-cut the frame from copper foil. I cut four pieces to make two frames. I die-cut the sentiment from cardstock colored with the same orange ink used on the background. I die-cut flowers from the orange cardstock and leaves from matte silver cardstock .
- I traced a diamond shape on vellum and cut it with scissors.
- I glued two of the frame pieces together and glued the vellum diamond to the back. I glued the second assembled frame at a slight rotation.
- I glued the frame assembly to the stencil panel and glued the sentiment across the middle.
- I added the flowers and leaves.
- The assembled panel was added to a brown cardstock mat adhered to a matte silver card base.

Supplies: