Spellbinders Glimmer Foil – Skinny Stripe Background + Yana’s Tiny Sentiments

Hello! I am delighted to share two cards created with glimmer plates from the recently-released Yana’s Blooming Birthday Glimmer Collection at Spellbinders.

Spellbinders Glimmer Foil - Skinny Stripe Background + Yana's Tiny Sentiments

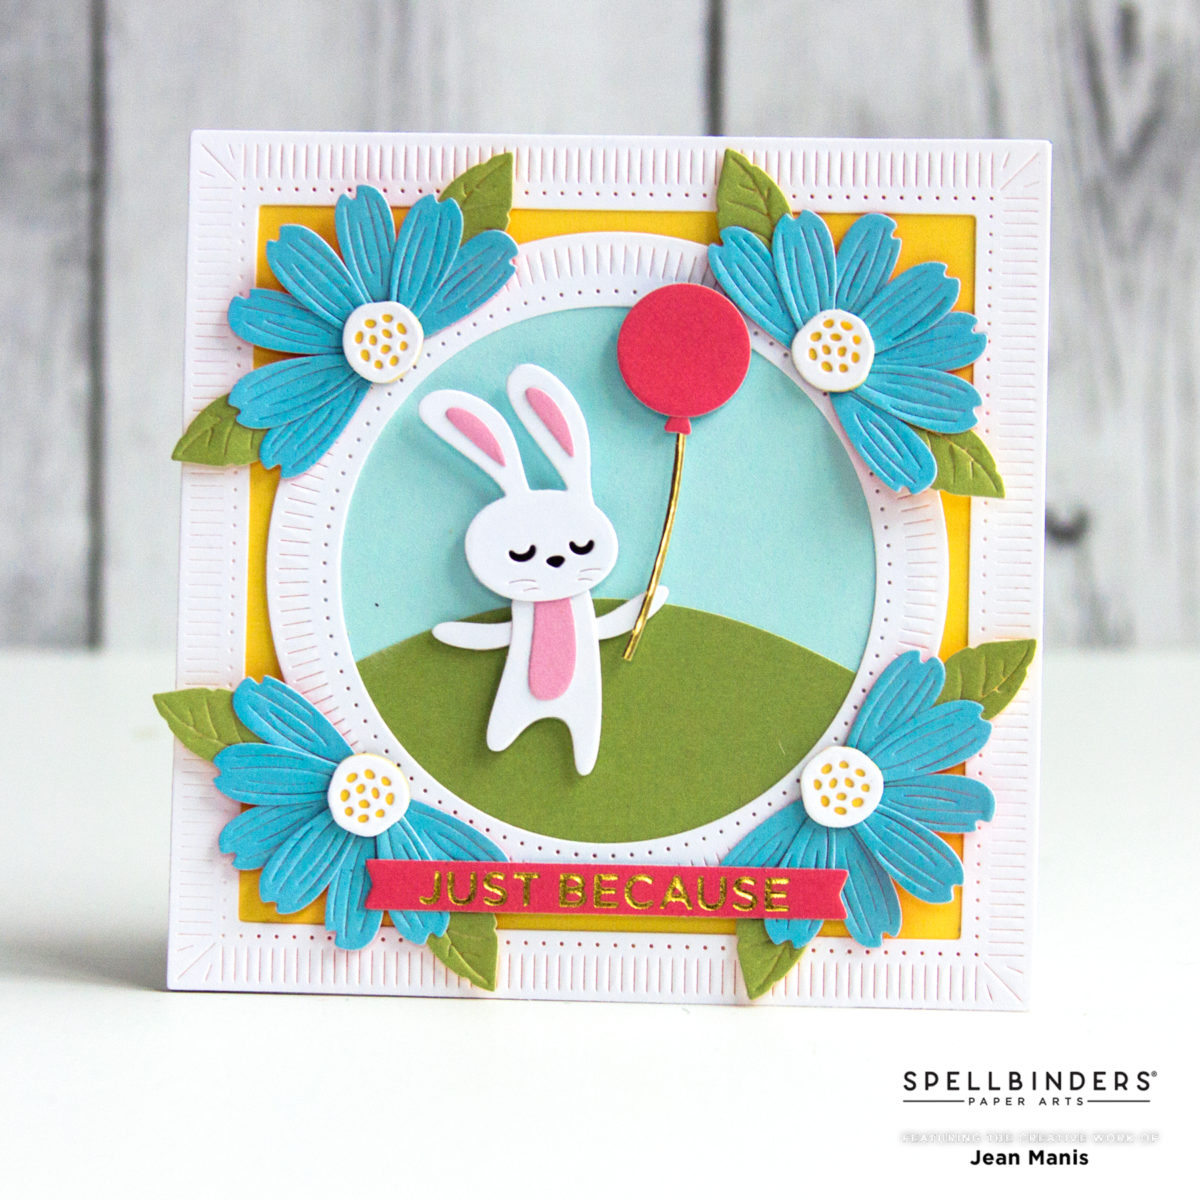
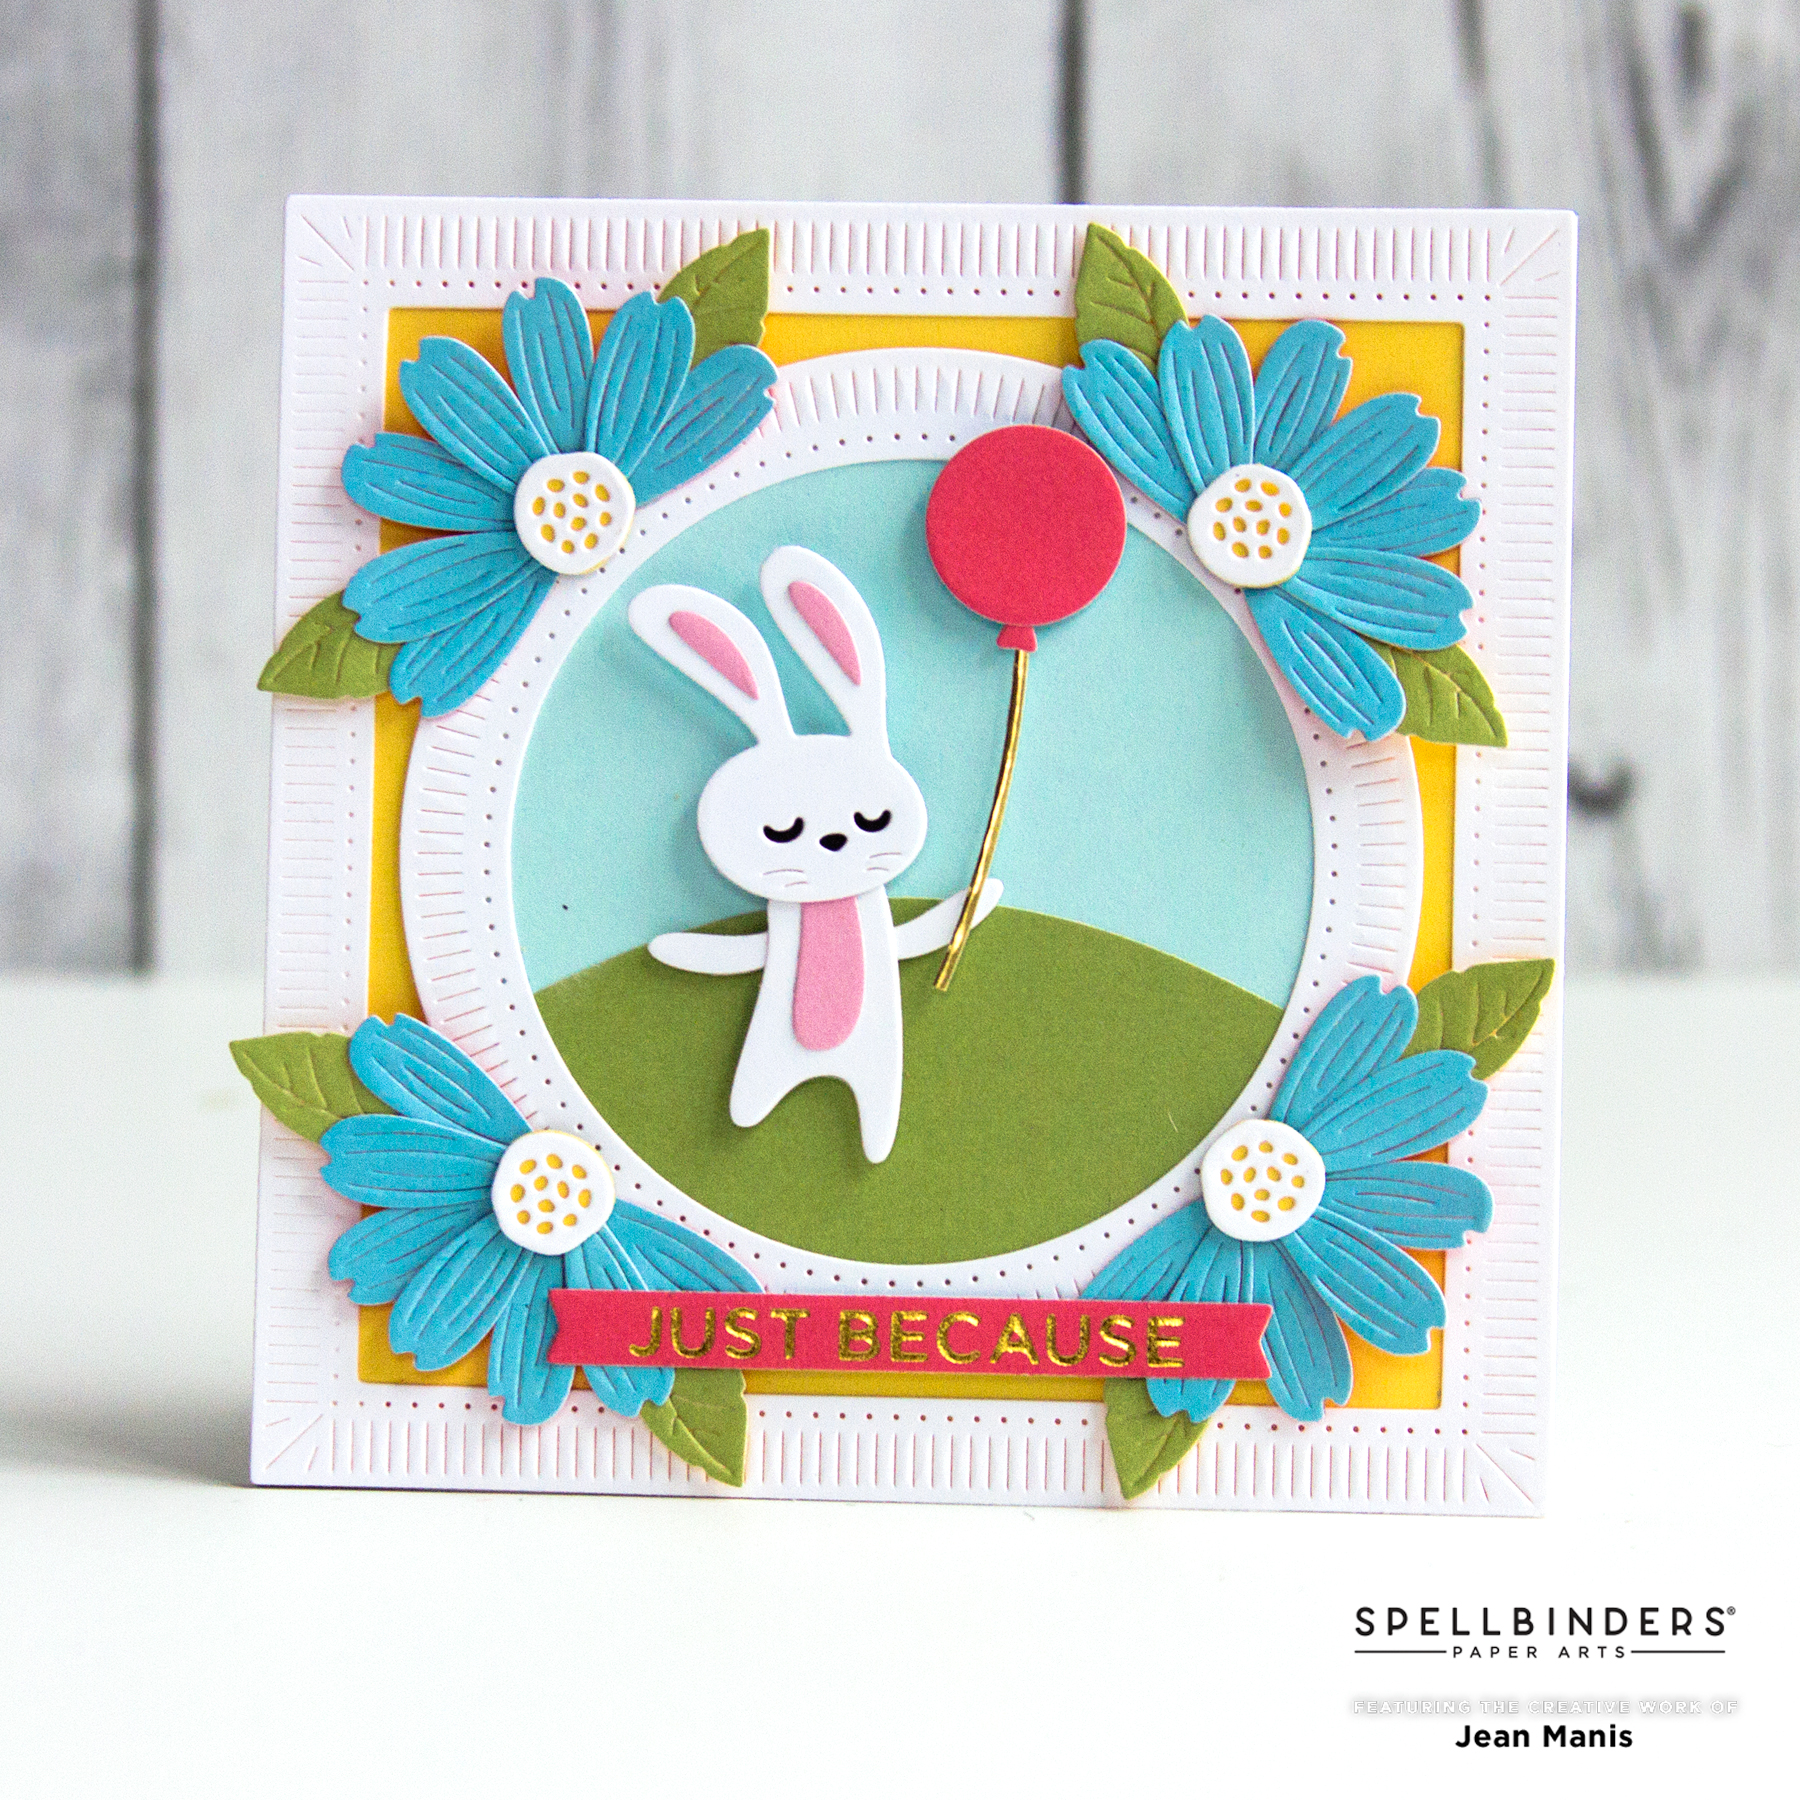
On the first card (shown above on the right), I paired a tone-on-tone Skinny Stripe Background with one of the Yana’s Tiny Sentiments, as well as dies from the March 2021 Large Die of the Month set, to create a spring-themed greeting. (I previously shared cards created with the kit in this post.)

Spellbinders Glimmer Foil - Skinny Stripe Background + Yana's Tiny Sentiments

  • I glimmer-foiled the Skinny Stripe Background with Moondust foil on light teal cardstock.
  • I glimmer-foiled the Yana’s Tiny Sentiments sentiment in Citrine on green cardstock and cut it with the grass die in the Large Die of the Month set and a square die.
  • I cut a square from vellum and added the grass to the front. I wanted to keep as much of the background visible as possible.
  • I added the bunny and flowers, cut with the Large Die of the Month set, to the scene.

Spellbinders Glimmer Foil - Skinny Stripe Background + Yana's Tiny Sentiments

On the second card, I glimmer-foiled the Skinny Stripe Background with Mini Rainbow Stripe foil on black cardstock.

Spellbinders Glimmer Foil - Skinny Stripe Background + Yana's Tiny Sentiments

  • I glimmer-foiled two of Yana’s Tiny Sentiments in Silver on colored cardstock and cut them with the sets coordinating die.
  • I cut cardstock in rainbow colors using the Yana’s Tiny Sentiments die and taped the strips together on the back (including the ones I had glimmer-foiled).
  • I used a heart die to cut out the rainbow strip panel, which I backed with a larger heart cut from vellum (again, not wanting to color up the background).
  • To embellish, I added hearts cut with a die in the Sunday Sunset Drive set from silver foil to the center.

Spellbinders Glimmer Foil - Skinny Stripe Background + Yana's Tiny Sentiments

Supplies:

Spellbinders March 2021 Clear Stamp Kit Club

Hello! Today I am sharing a special Easter-themed card created with this month’s Clear Stamp of the Month Club at Spellbinders – “Wonderful Spring.”

Spellbinders March 2021 Clear Stamp Kit Club

I combined one of the set’s bunny images with die-cut flowers and greenery.

Spellbinders March 2021 Clear Stamp Kit Club

  • With the Florets embossing folder, I dry-embossed soft blue cardstock for the card background.
  • I cut the greenery using several die sets from cardstock, colored with Distress Inks, and vellum.
  • I stamped the bunny on watercolor paper and colored him with Distress ink. Once dry, I fussy-cut the image.
  • I stamped the sentiment on yellow cardstock and cut with an Essential Ovals die.
  • I die-cut another oval from white cardstock and adhered it to the back of the yellow frame.
  • I added the frame assembly to the dry-embossed background. I adhered the bunny with foam adhesive and glued the florals and greenery around the oval.

Spellbinders March 2021 Clear Stamp Kit Club

Supplies:

Spellbinders March 2021 Large Die Kit Club

Hello Peeps! Happy March! I’m delighted to share two projects created with the Spellbinders March 2021 Large Die of the Month“Spring Together with Lever Pull.” With this 24-piece set, you can create a variety of interactive spring- and Easter-themed cards.

Spellbinders March 2021 Large Die Kit Club

Spellbinders March 2021 Large Die Kit Club

On both cards, my starting point was the background paper. Next, I die-cut and assembled the peeps from textured and smooth cardstock in colors that would stand out against the background colors.

The 4  1/4″ card use dies in the set to make two of the peeps interactive.

Spellbinders March 2021 Large Die Kit Club

After die-cutting and assembling the bunnies, and the mechanism for movement, I foiled a sentiment from the Mini Everyday Sentiments set in Silver on green cardstock and cut it with the grass die. I attached the grass at the bottom of the card, below the pull.

To embellish, I added a flower cut with dies in the  Large Die of the Month.

Spellbinders March 2021 Large Die Kit Club

The A2-size card uses dies in the set to make three peeps interactive.

Spellbinders March 2021 Large Die Kit Club
After cutting and assembling the bunny, lamp, and chick, and the mechanism for movement, I die-cut the sentiment from the  Large Die of the Month set (twice for dimension) and glued it to the grass layer. The bottom of the grass die does not cut, making it possible to make the grass as short or tall as desired.

I added clouds, included in the set, to the card base.

Spellbinders March 2021 Large Die Kit Club

Of course, you don’t have to use the set to make interactive cards and can instead simply use the critters, sentiments, clouds, and flower to create a spring- or Easter-themed card! Be sure to visit the product page to see more inspiration.

Supplies:

My Happy Place

Hello! Today I am sharing a CAS card featuring the Cottage Cutz Potting Shed die set with a retired MFT stamp set (“Beach Bunnies”) sentiment, which I masked (the sentiment says “You Are My Happy Place”).

My Happy Place
I die-cut the pieces for the shed, watering can, and flower pot and assembled them with glue. The die is one piece, which you run through multiple times cutting different colored cardstock. I tried a number of different shed siding/roof/door color combinations. I saw a garden shed online with a teal door (gray siding), but when I tried teal cardstock, it just didn’t look the same. I really like all of the details that the set provides.

I stamped the sentiment and added a horizon by brushing Distress Ink for the sky and the grass.

My Happy Place

We recently had snow in the PNW. It’s melted now and there are daffodils popping up!

Penny Black Daisy Hello

Hello! Today, I am sharing a CAS, spring-themed card showcasing two die sets from the Penny Black Daydream release.

Penny Black Daisy Hello

  • I die-cut the back panel with the 51-637 Bunch of Daisies die.
  • I backed the piece with white cardstock and inlaid the daisy stems and centers (having used the same die to cut those pieces).
  • I cut the sentiment with the 51-638 Thanks & Hello set.
  • I glued the letters to a white, textured cardstock band, using the negative for placement.
  • I cut a frame from pink, textured cardstock, adhered the sentiment band to the back of the frame, and adhered the assembly to the daisy panel.

Penny Black Daisy Hello