Winter Wishes – Die-cut Ornaments

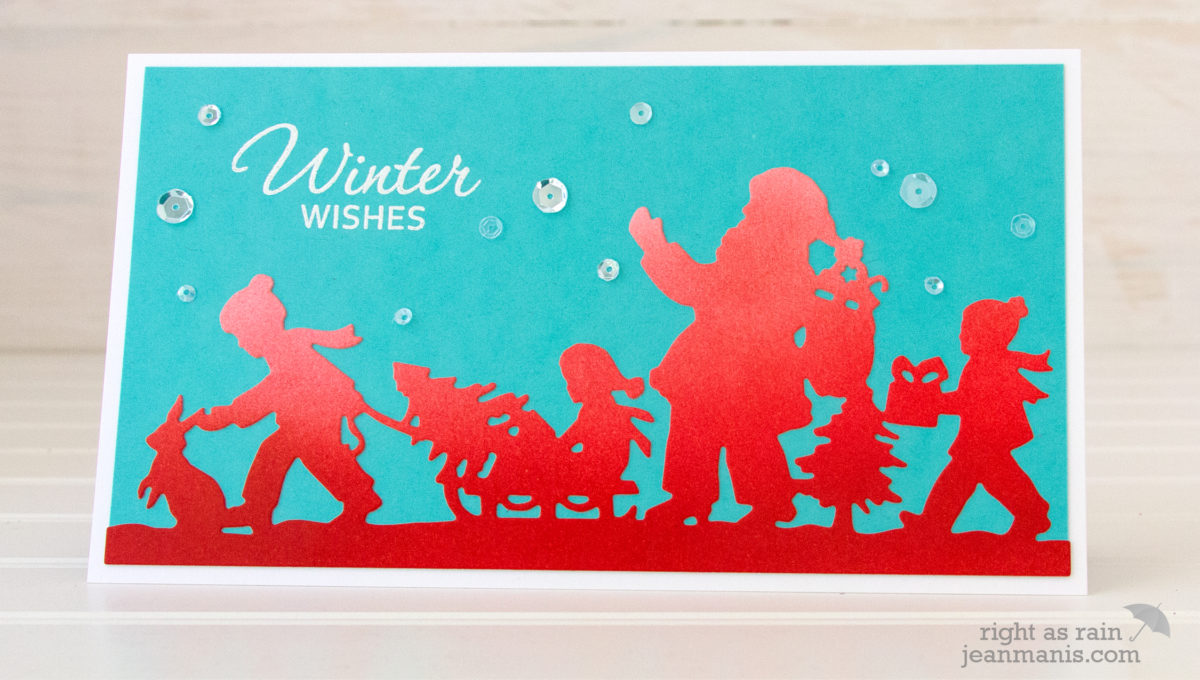
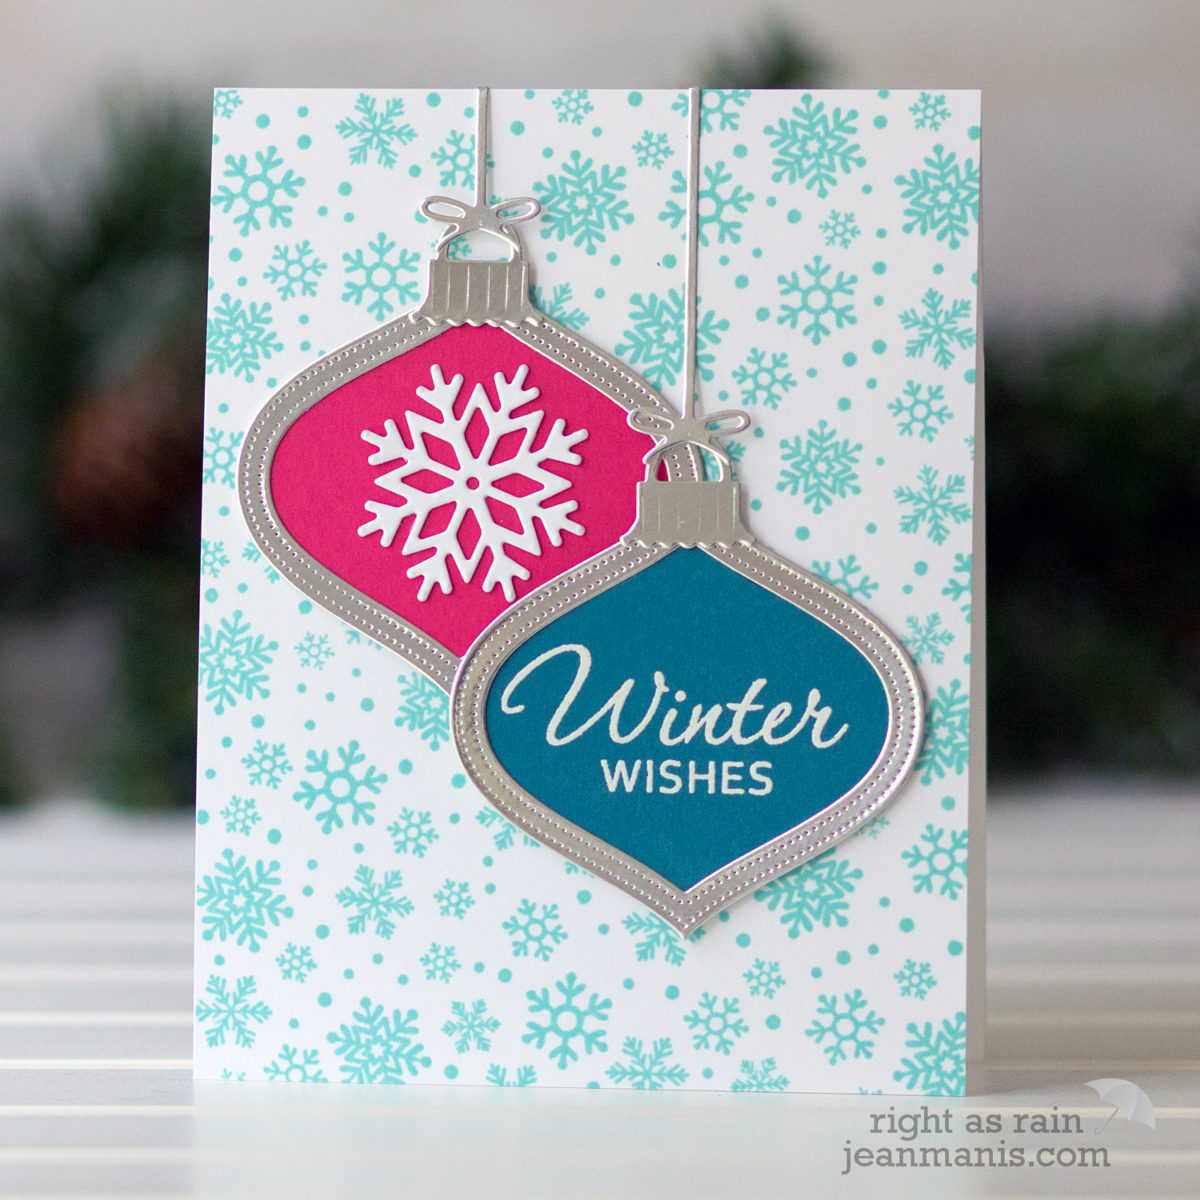
Hello! I like the ornament motif on holiday cards, and I have a collection of ornament dies. Today, I am sharing a card showcasing the newest addition to my collection – the Poppy Stamps Pinpoint Shaker Ornament. I liked it so much, I cut it twice!

Winter Wishes - Die-cut Ornaments
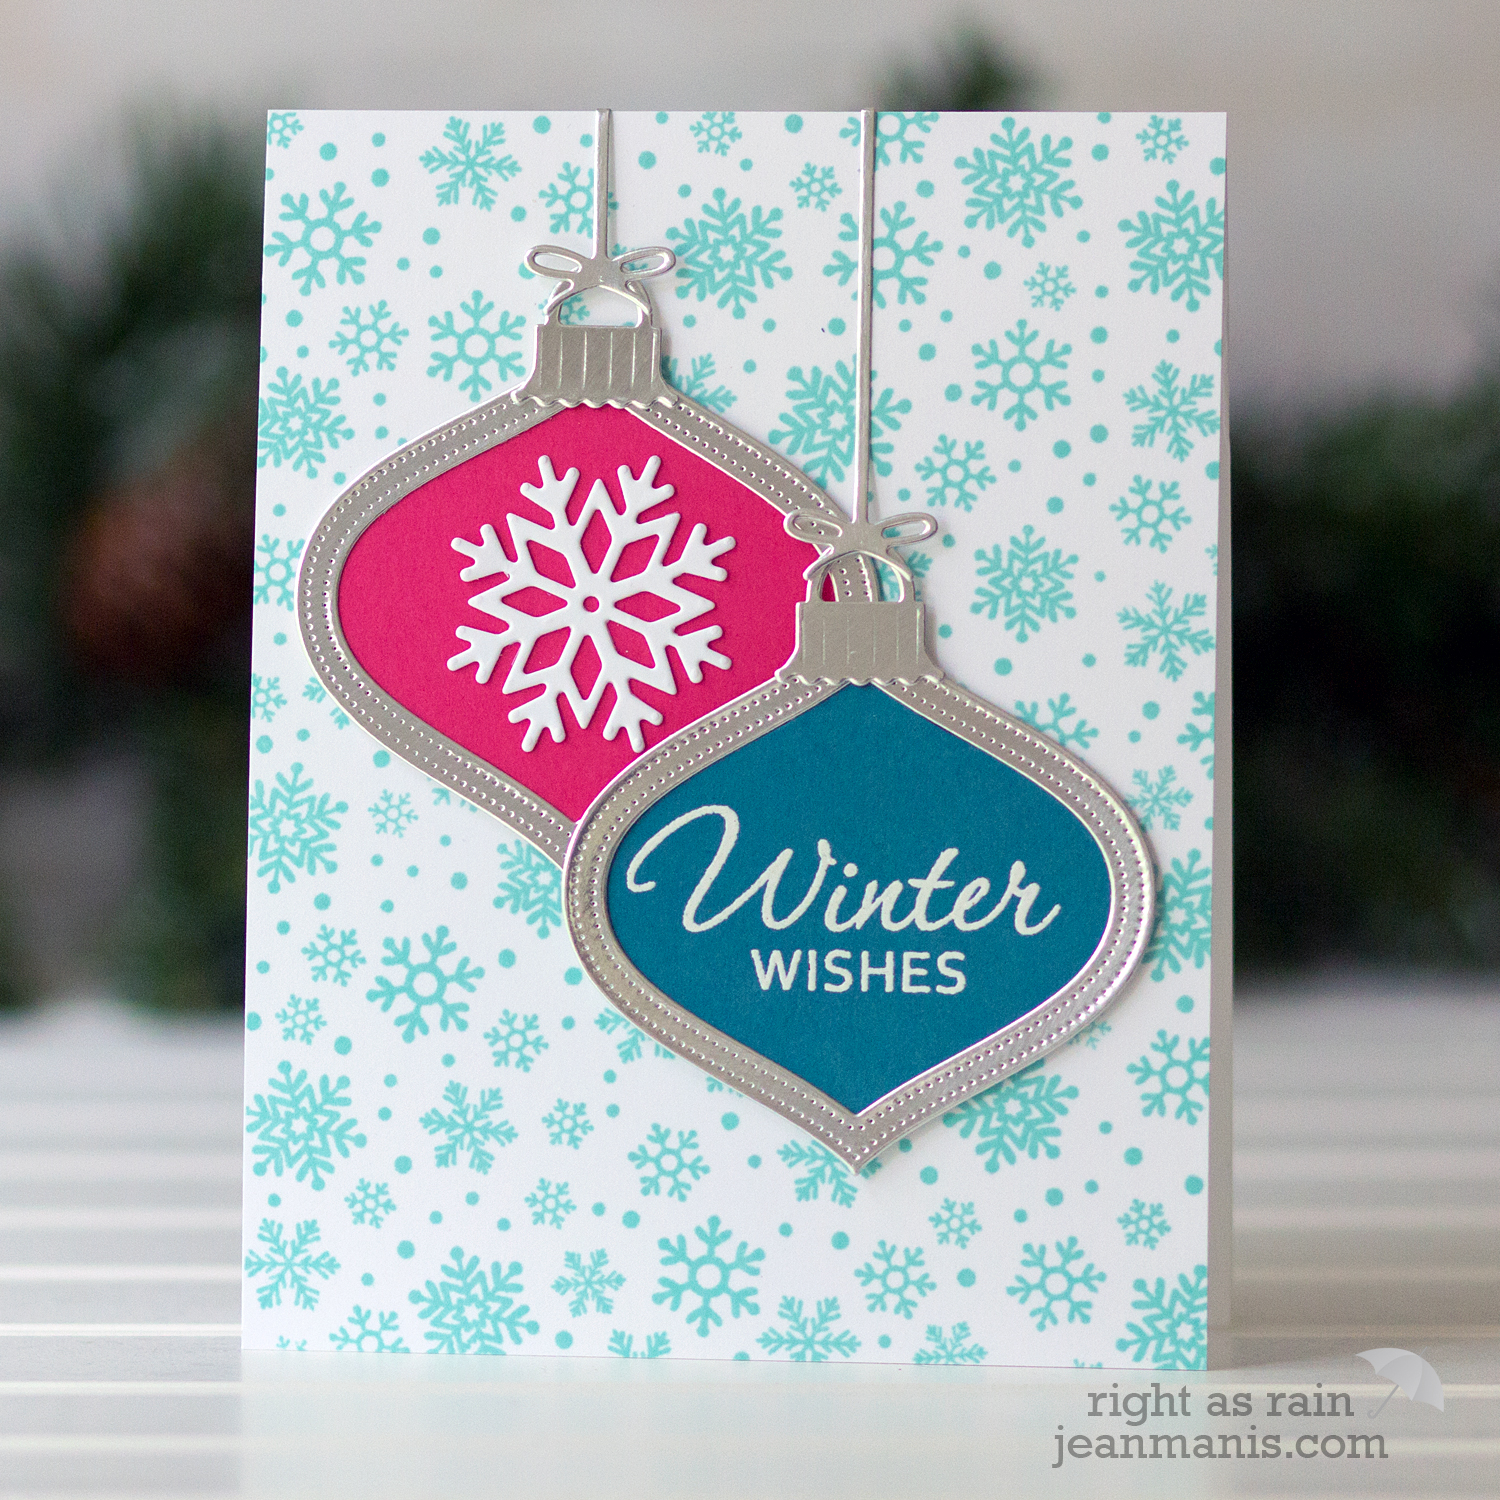
The Poppy Stamps Pinpoint Shaker Ornament die is designed to work with the Retro Ornaments die set. I don’t own that set but found that the Impression Obsession Vintage Ornament die set worked for my purposes. I white heat-embossed one of my favorite sentiments (from the now-retired Hero Arts Operation Write Home Winter Wishes set) on deep blue cardstock. I cut the other ornament from pink cardstock and added a Savvy Stamps snowflake.

Winter Wishes - Die-cut Ornaments

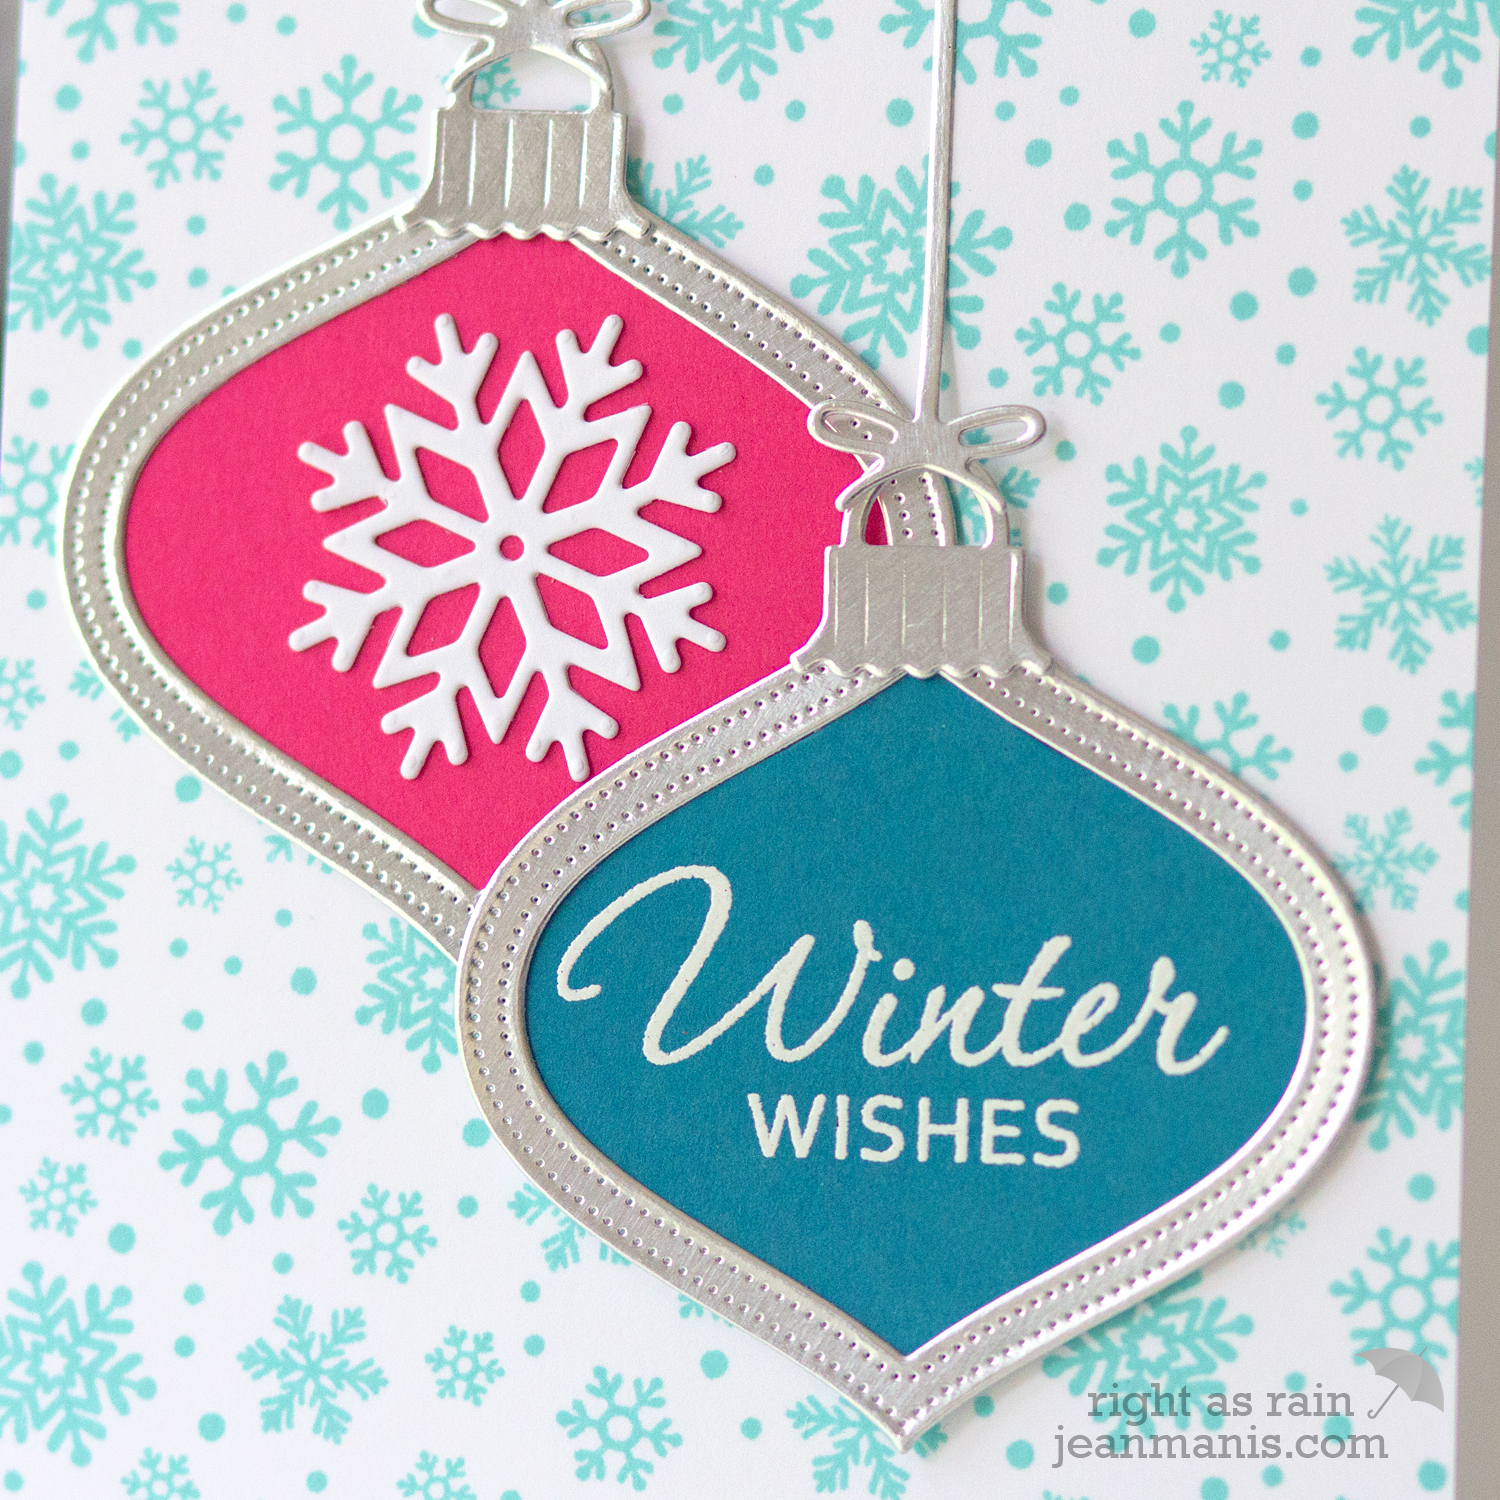
The ornament strings were cut with the Impression Obsession Vintage Ornament set. To create the background, I stamped the Taylored Expressions Snow Day Background stamp in Sea Glass ink on white cardstock.

Winter Wishes - Die-cut Ornaments
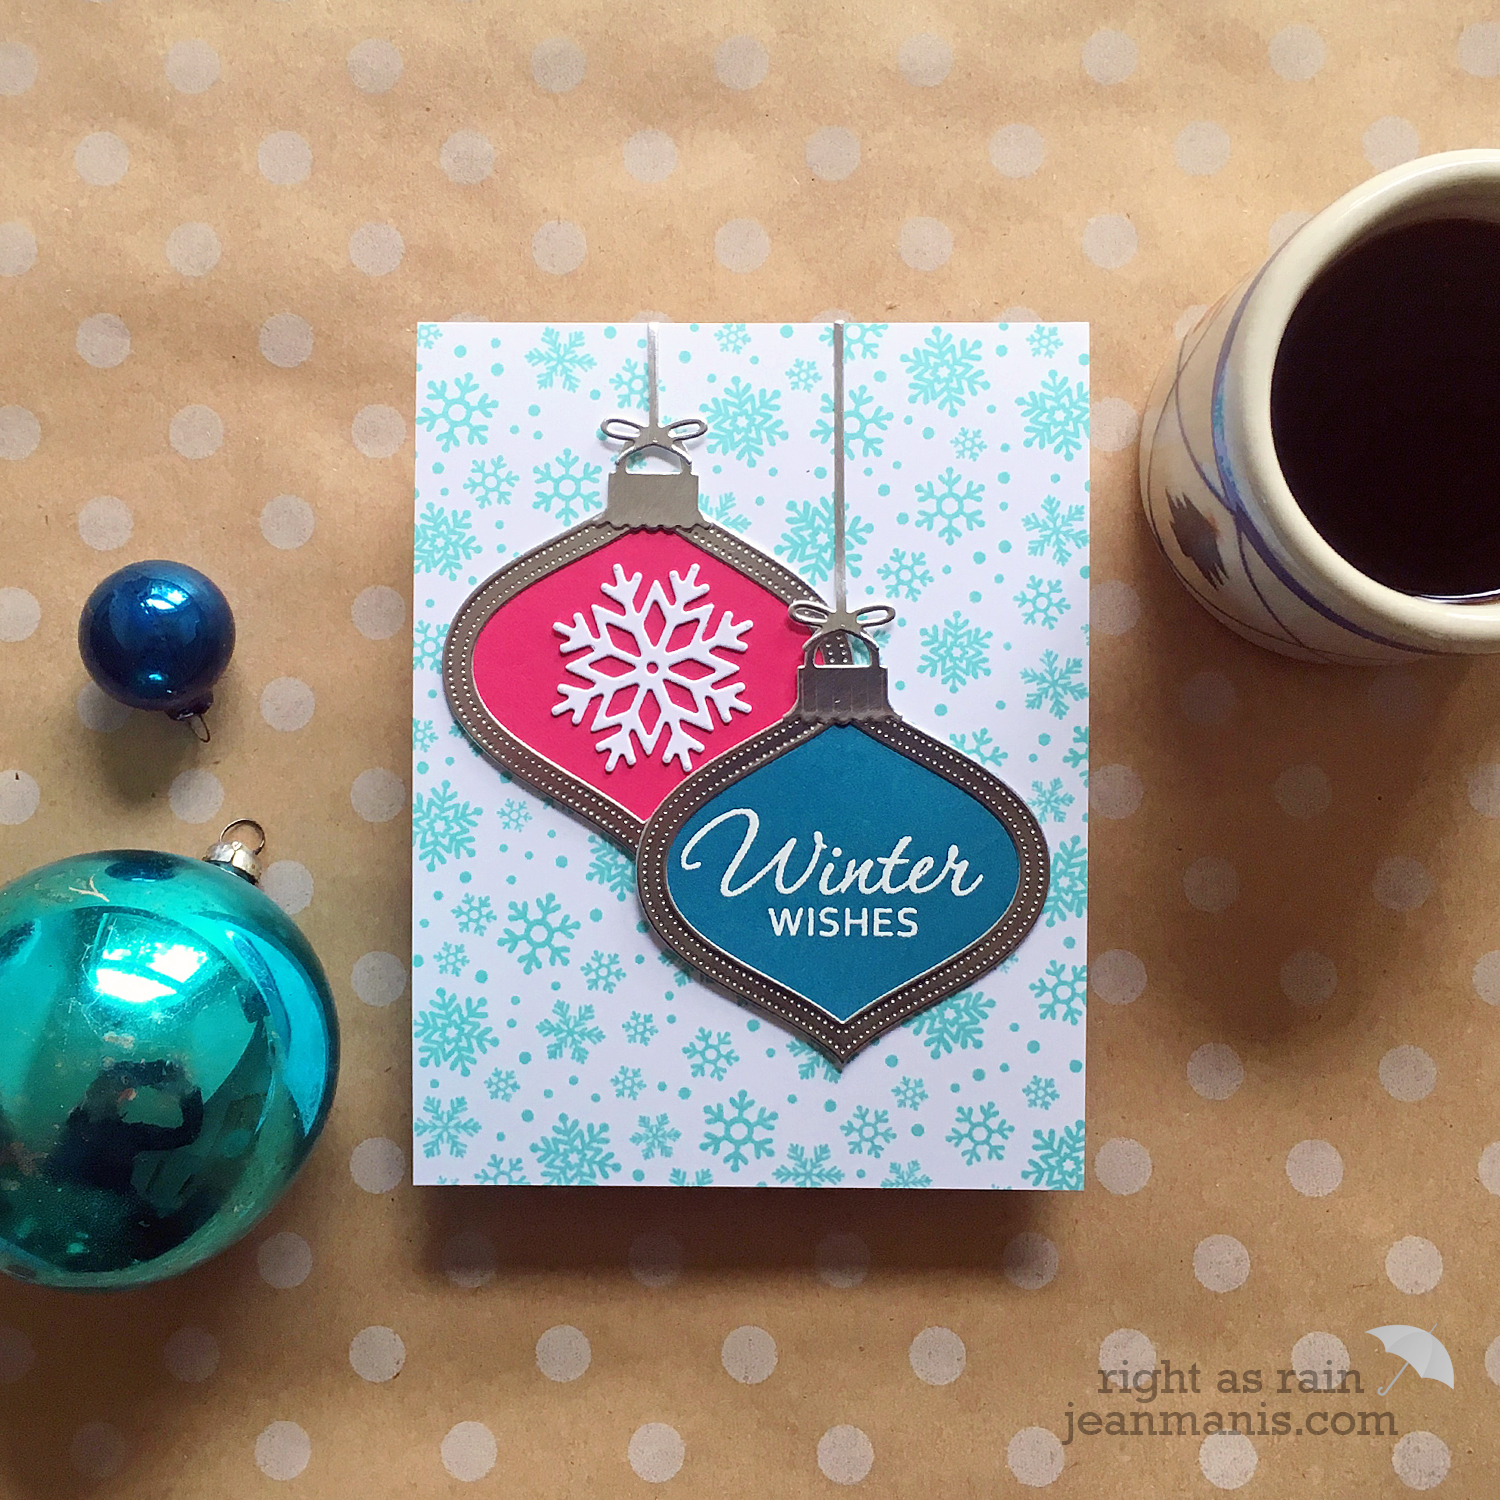
Supplies: Memory Box Pinpoint Shaker Ornament, Impression Obsession Vintage Ornament, Savvy Stamps Winter Snowflakes, Taylored Expressions Snow Day Background

Spellbinders – Amazing Paper Grace Die of the Month Kit

Spellbinders - Amazing Paper Grace Die of the Month Kit
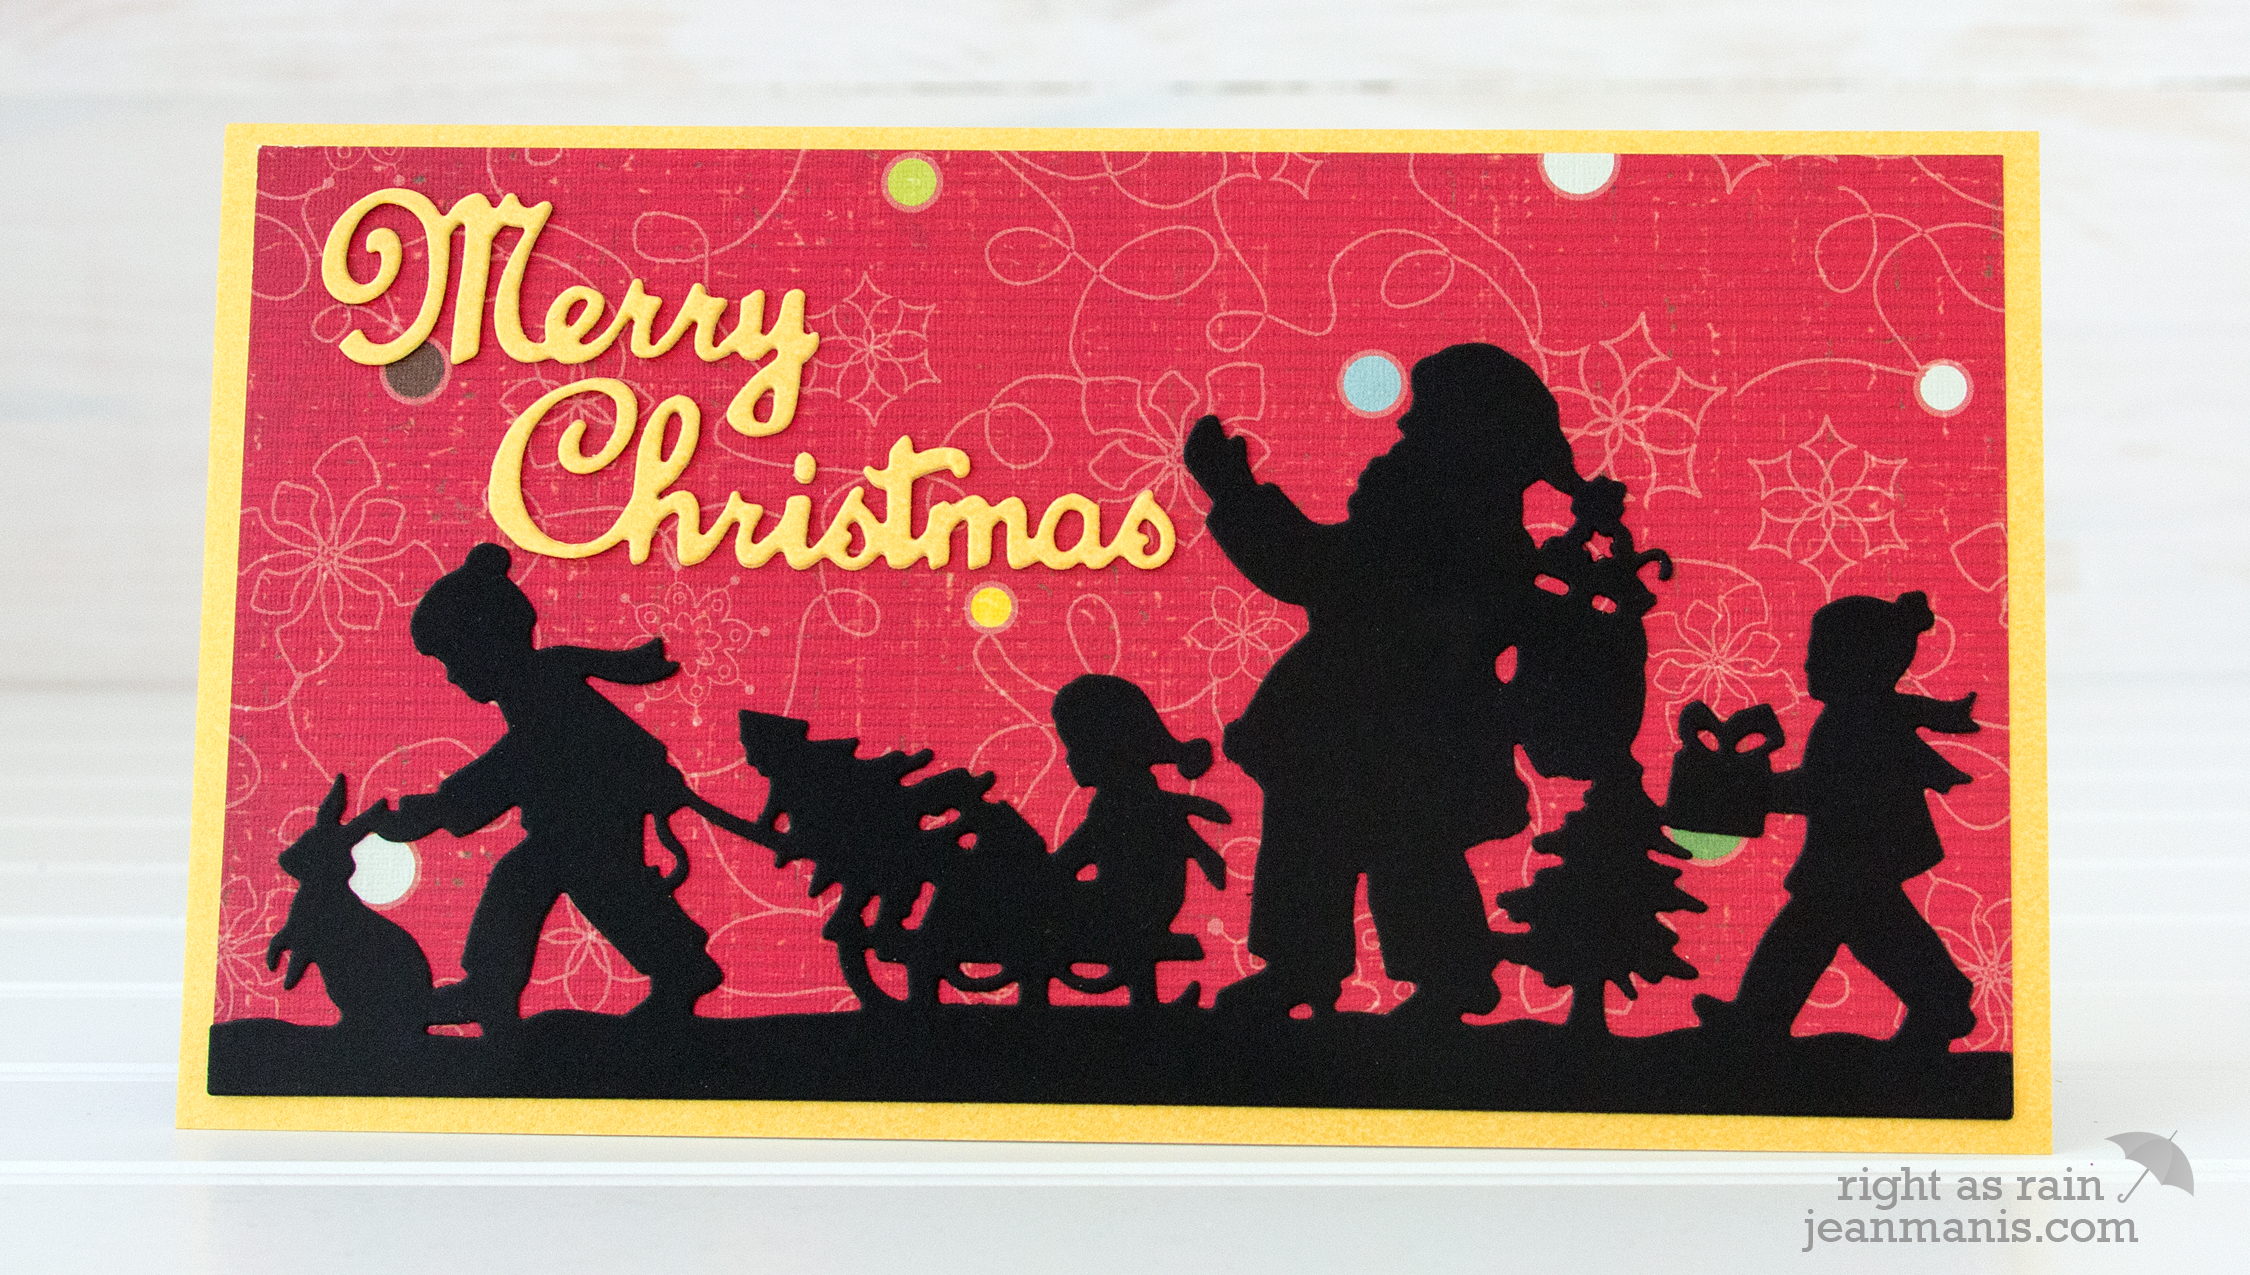
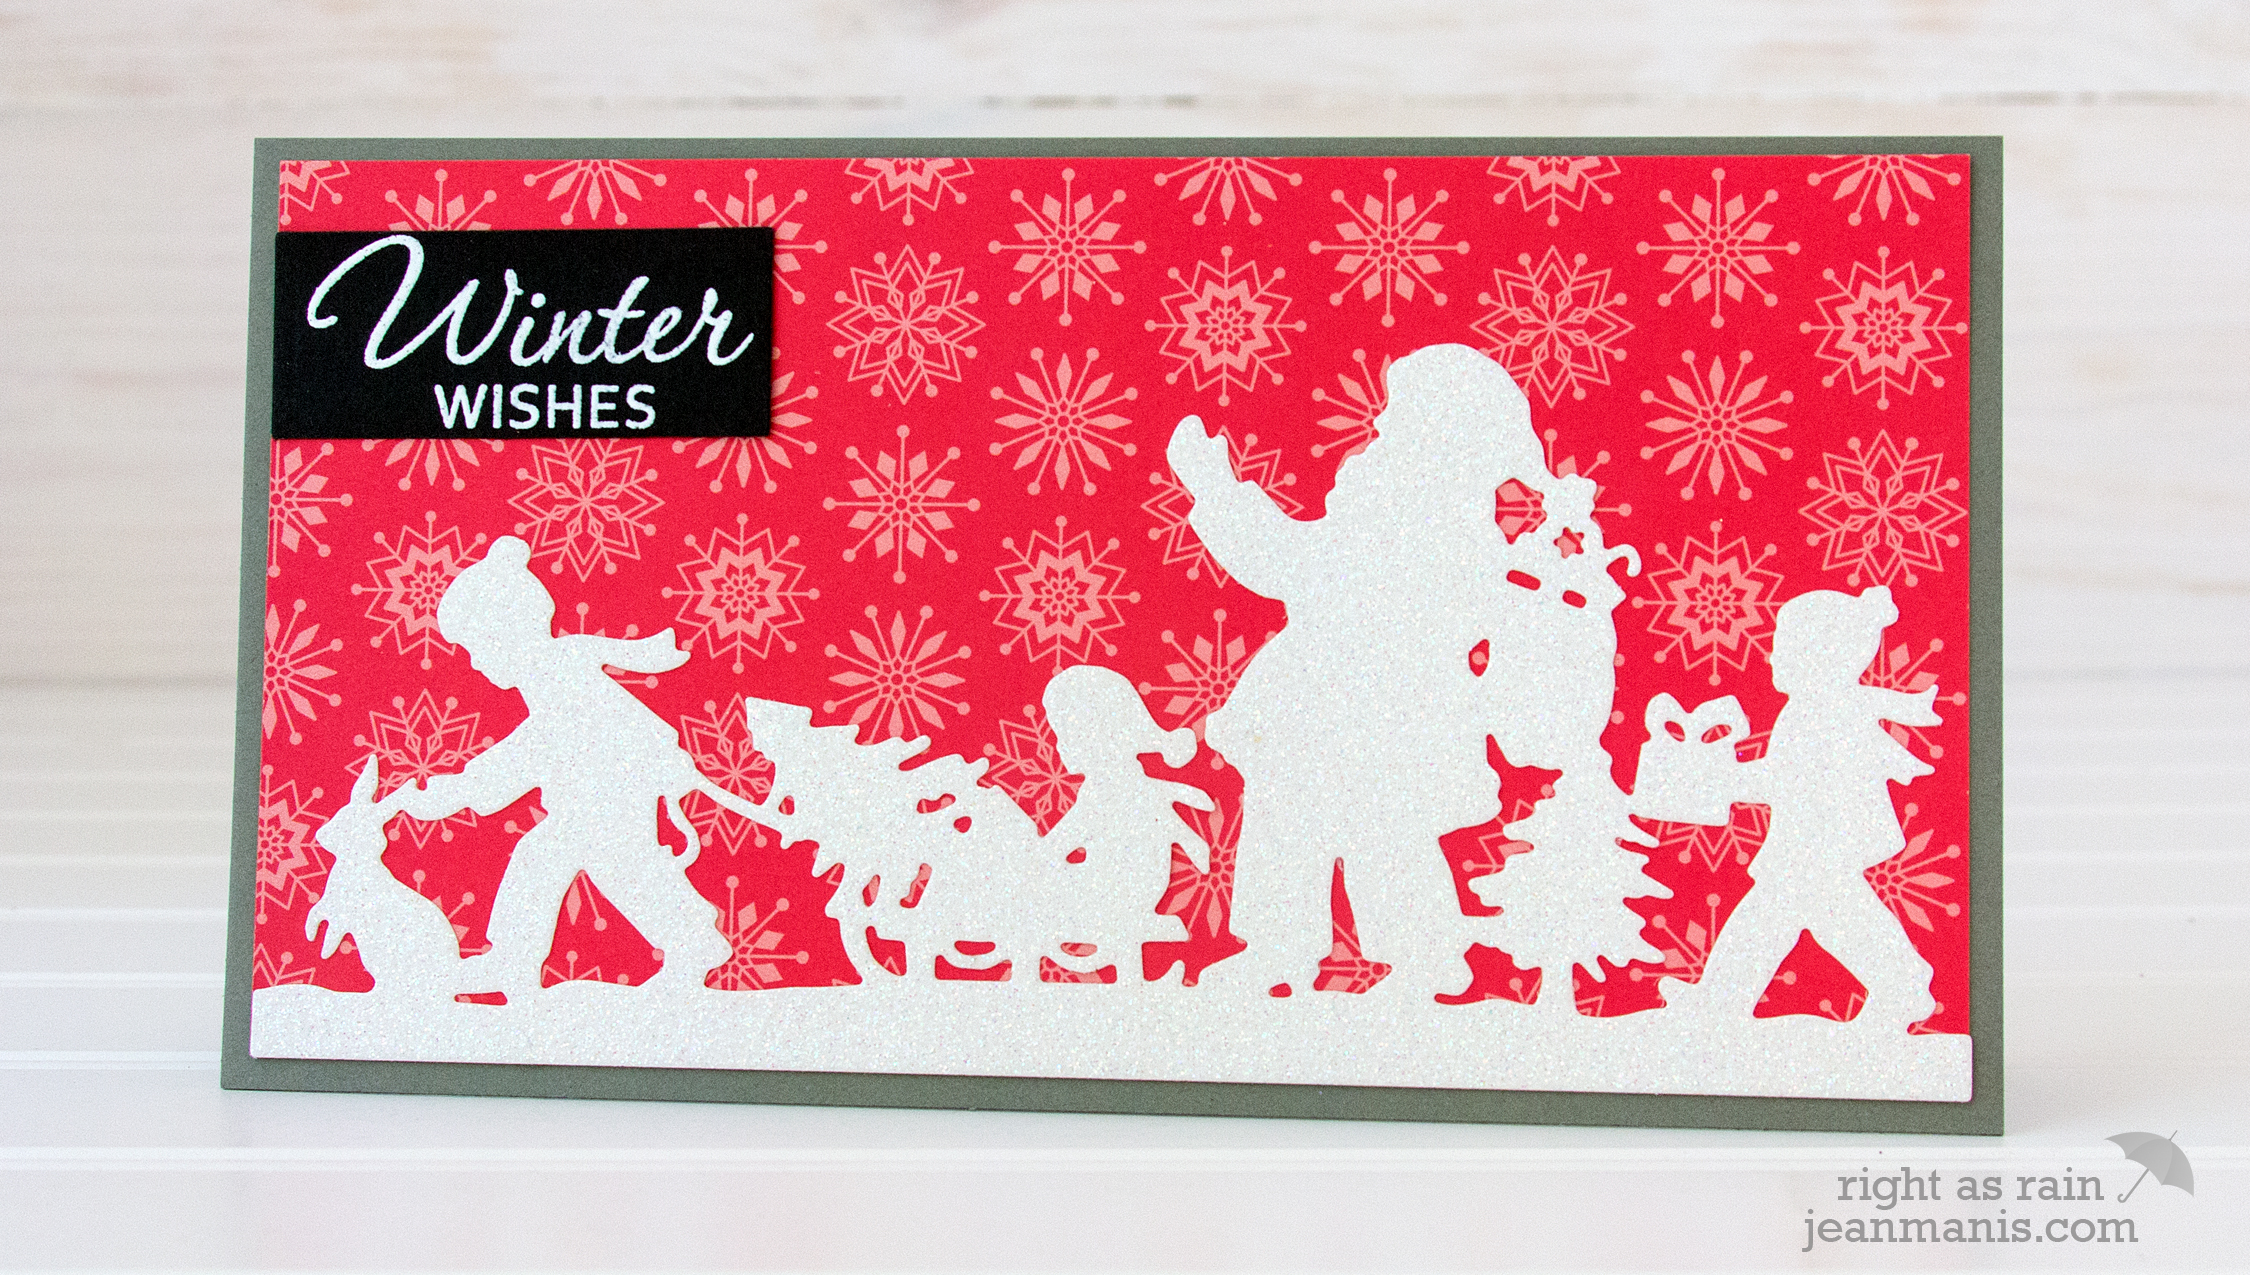
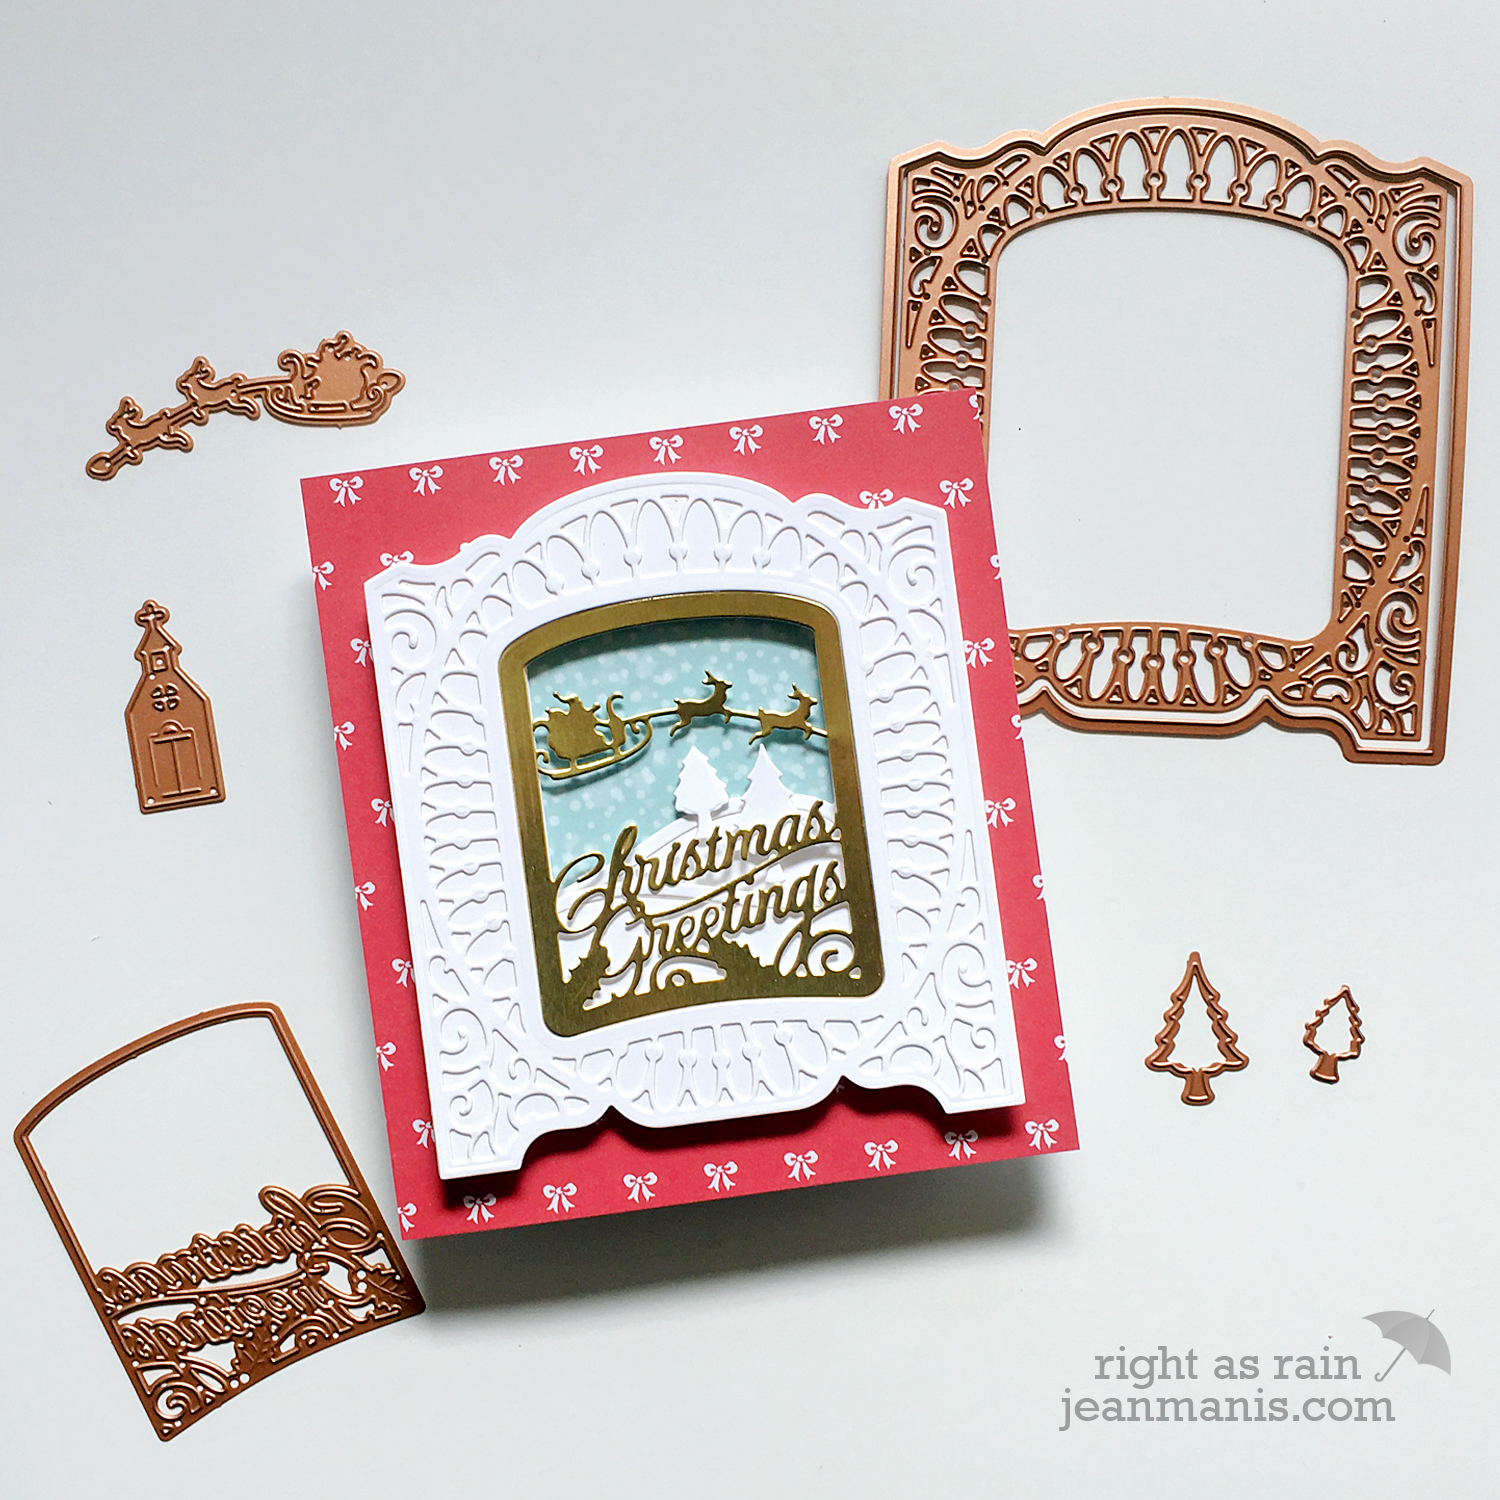
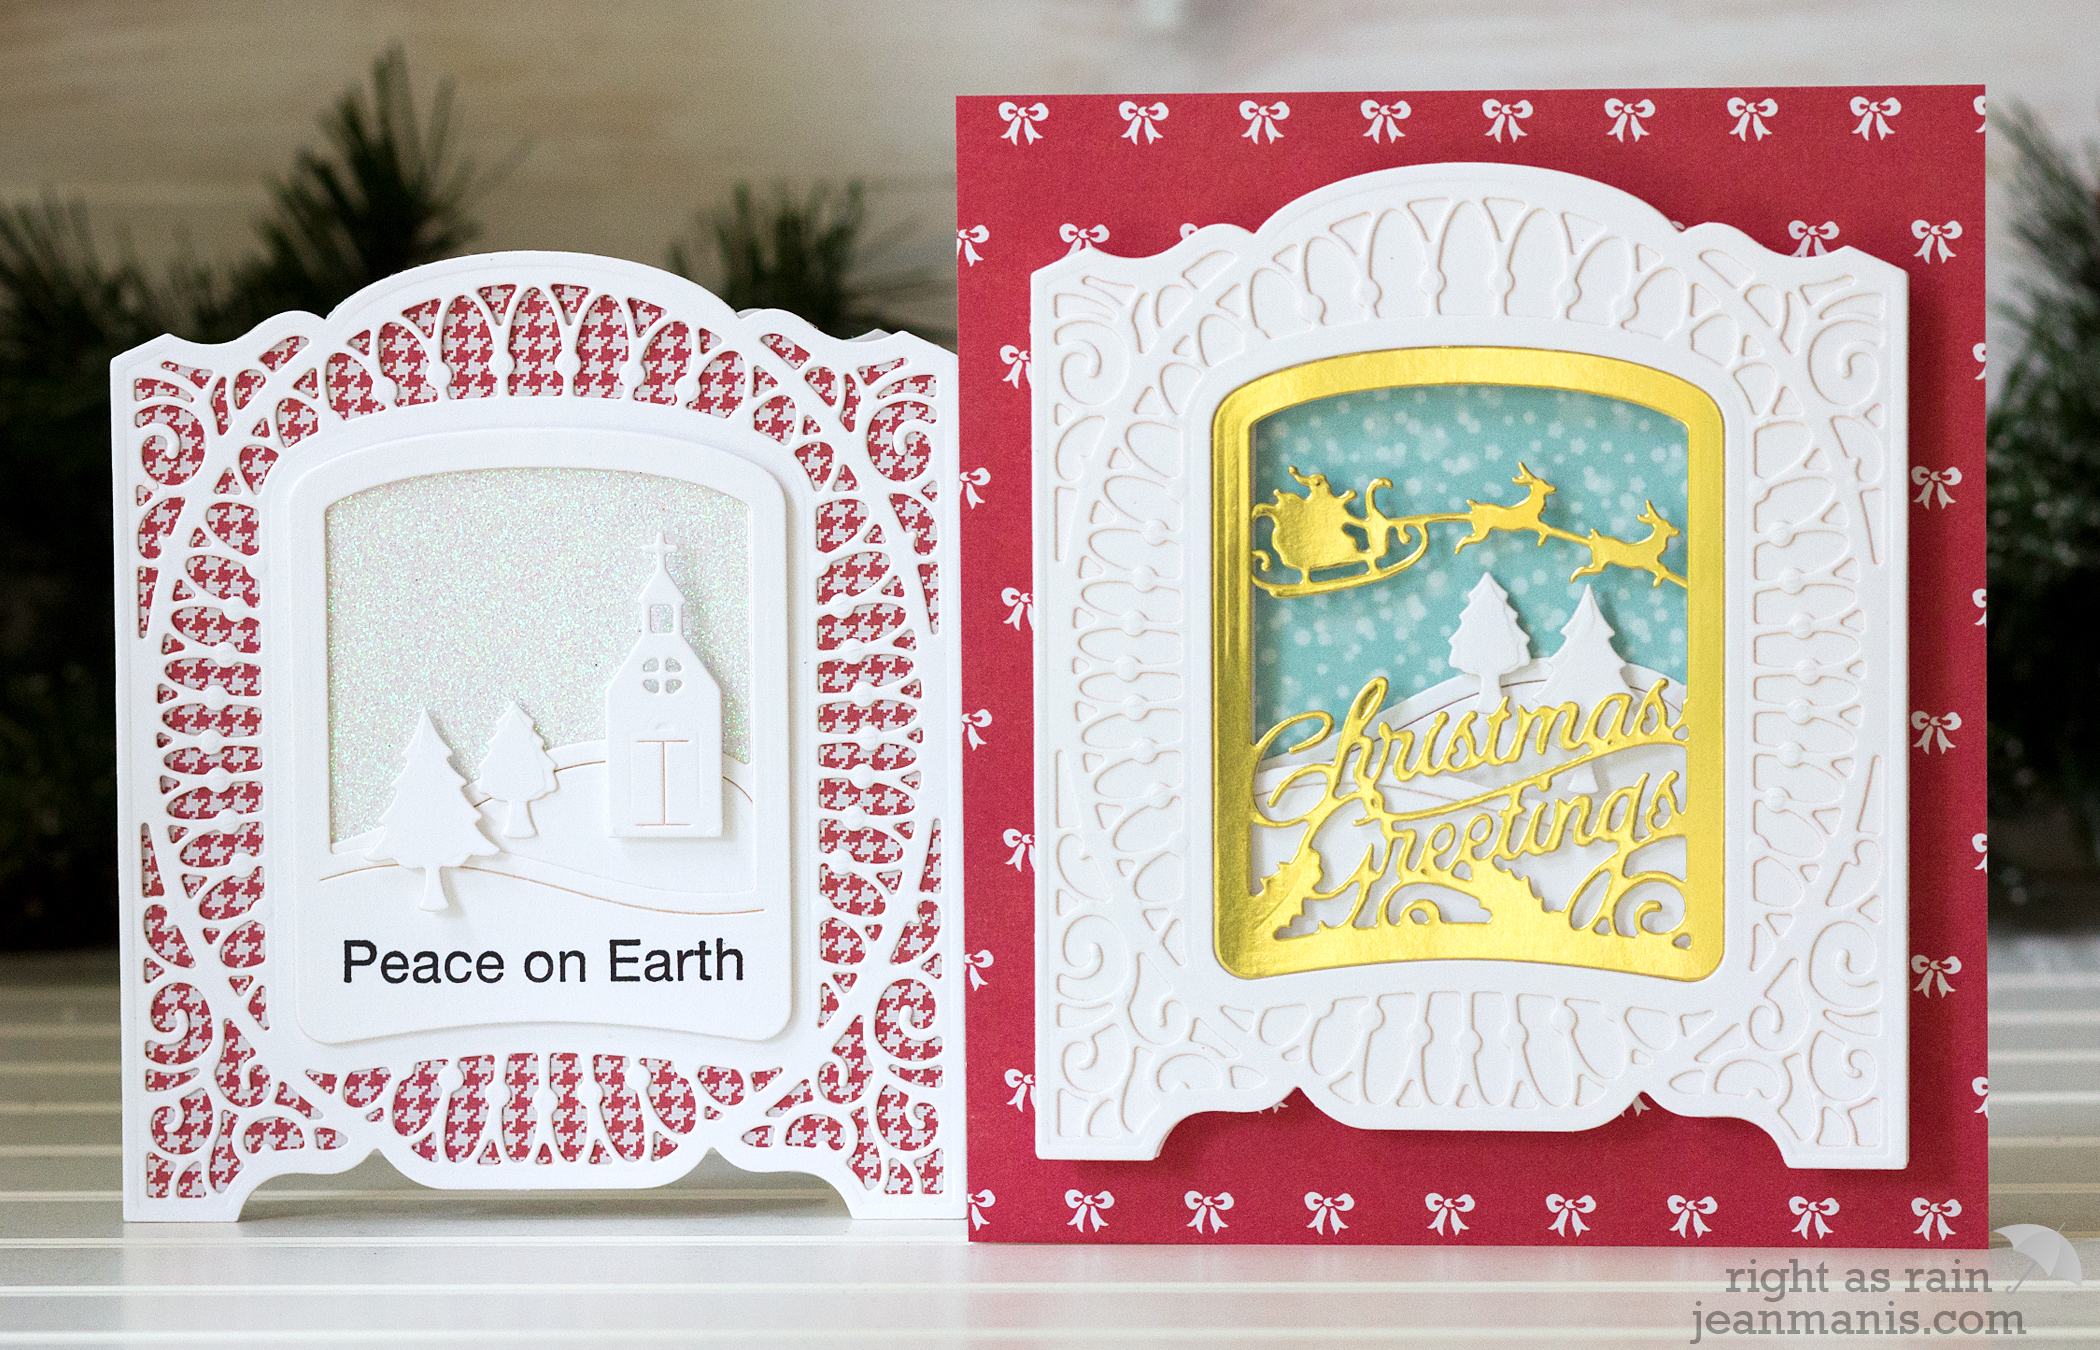
Hello! Today, I am delighted to share two projects created with this month’s Amazing Paper Grace kit from Spellbinders. The Christmas Village Vignette Frame Die Set is perfect for making holiday themed cards. It can be used to create stand-alone projects and coordinates with the previously-released Grand Cabinet 3D Card Etched Die Set. I was amazed at how easy it was to achieve elegant cards with just a few die cuts!

Let’s take a look at my first card.

Spellbinders - Amazing Paper Grace Die of the Month Kit

Spellbinders - Amazing Paper Grace Die of the Month Kit

On my first card, I used the large dies in the kit to create a frame for my holiday scene. I cut the sentiment panel from gold foil and attached Santa and his reindeer behind the panel. I taped the sentiment panel to the frame on the inside. I attached the die-cut snowbank panels and the patterned paper snow background to the back of the frame with dimensional adhesive. I attached the entire assembly to a back piece cut with the frame outline die.

Spellbinders - Amazing Paper Grace Die of the Month Kit

I attached the assembly to the patterned paper base, which measures 5 1/4″ x 6″.

Spellbinders - Amazing Paper Grace Die of the Month Kit

For my second card, I used the large frame piece to cut a shaped card base. I did not cut the shape on the left hand side where the fold is located. I used the same shape to cut patterned paper, with which I covered the base.

Spellbinders - Amazing Paper Grace Die of the Month Kit

Spellbinders - Amazing Paper Grace Die of the Month Kit
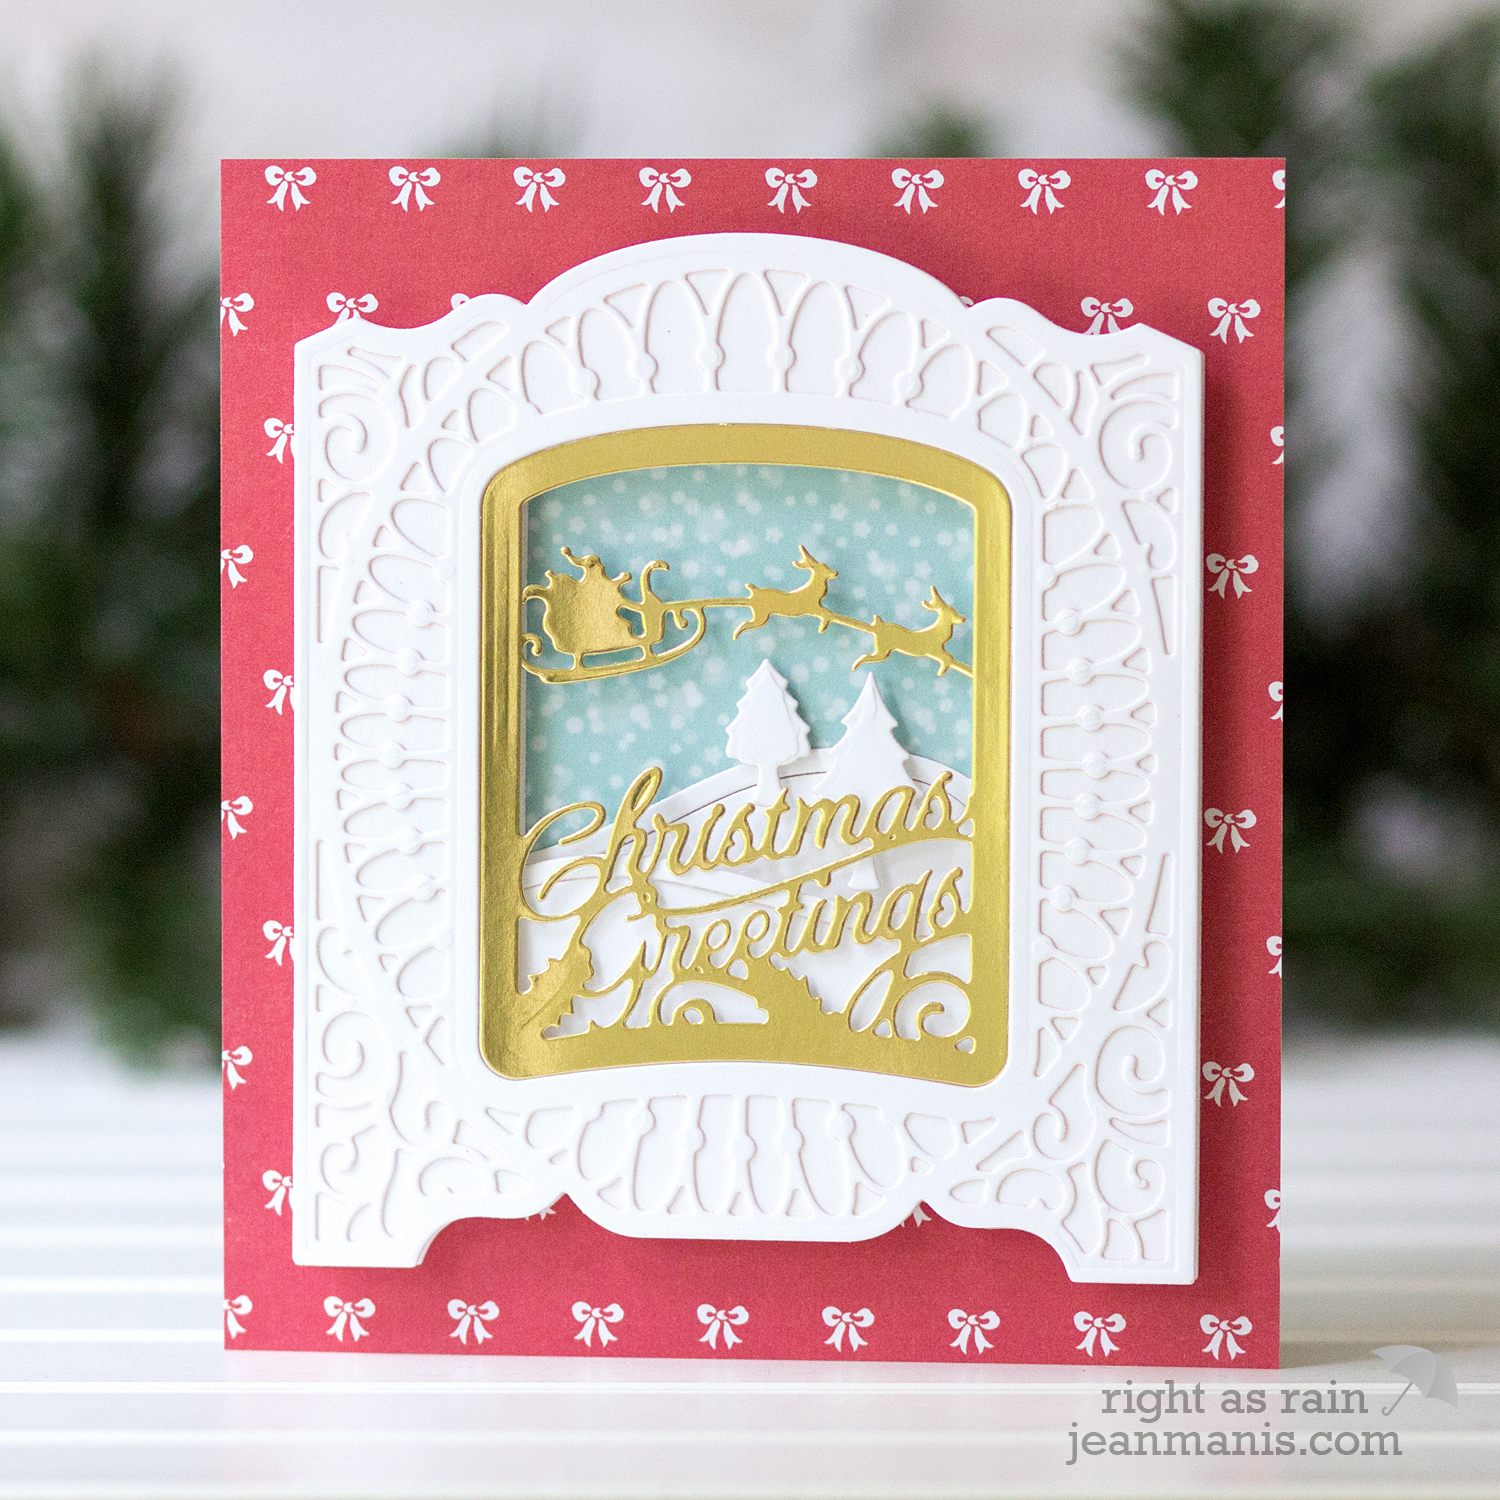
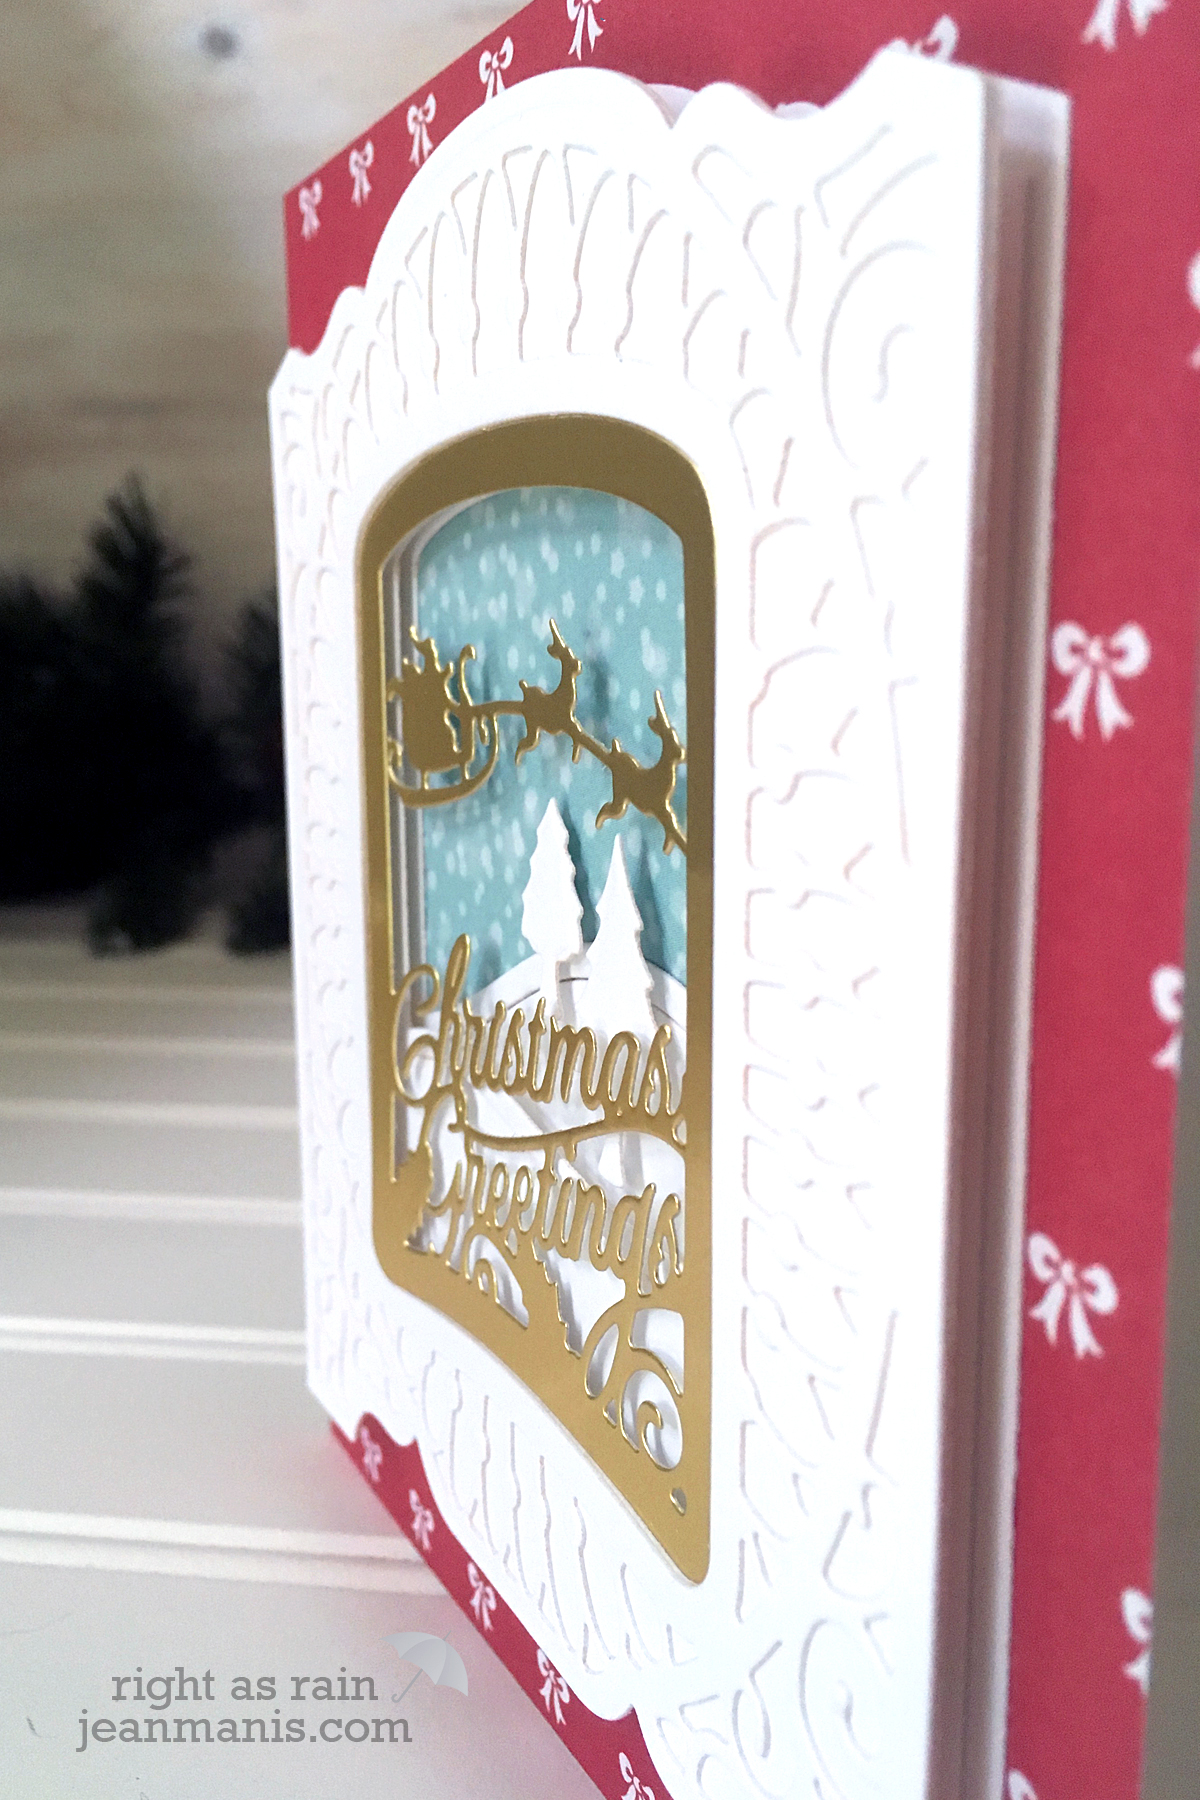
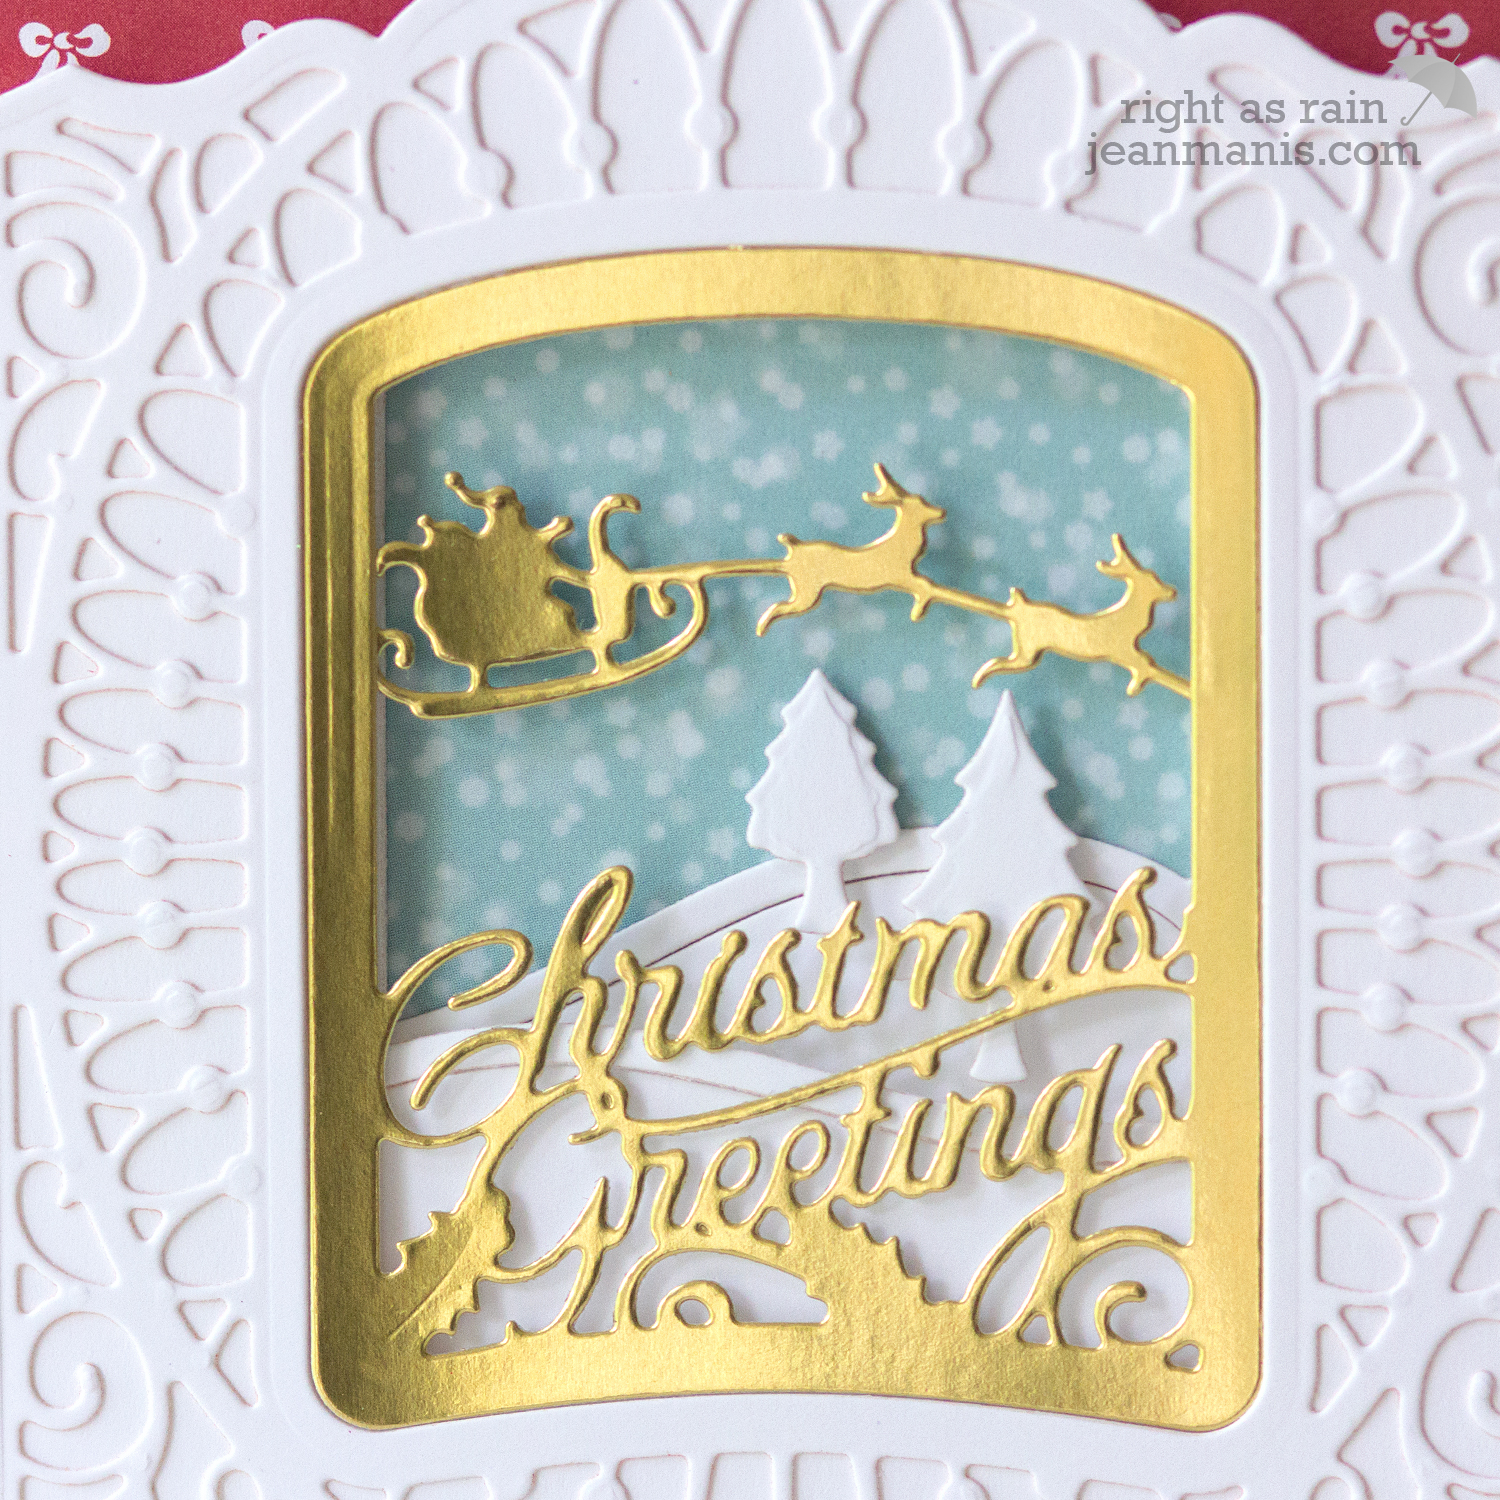
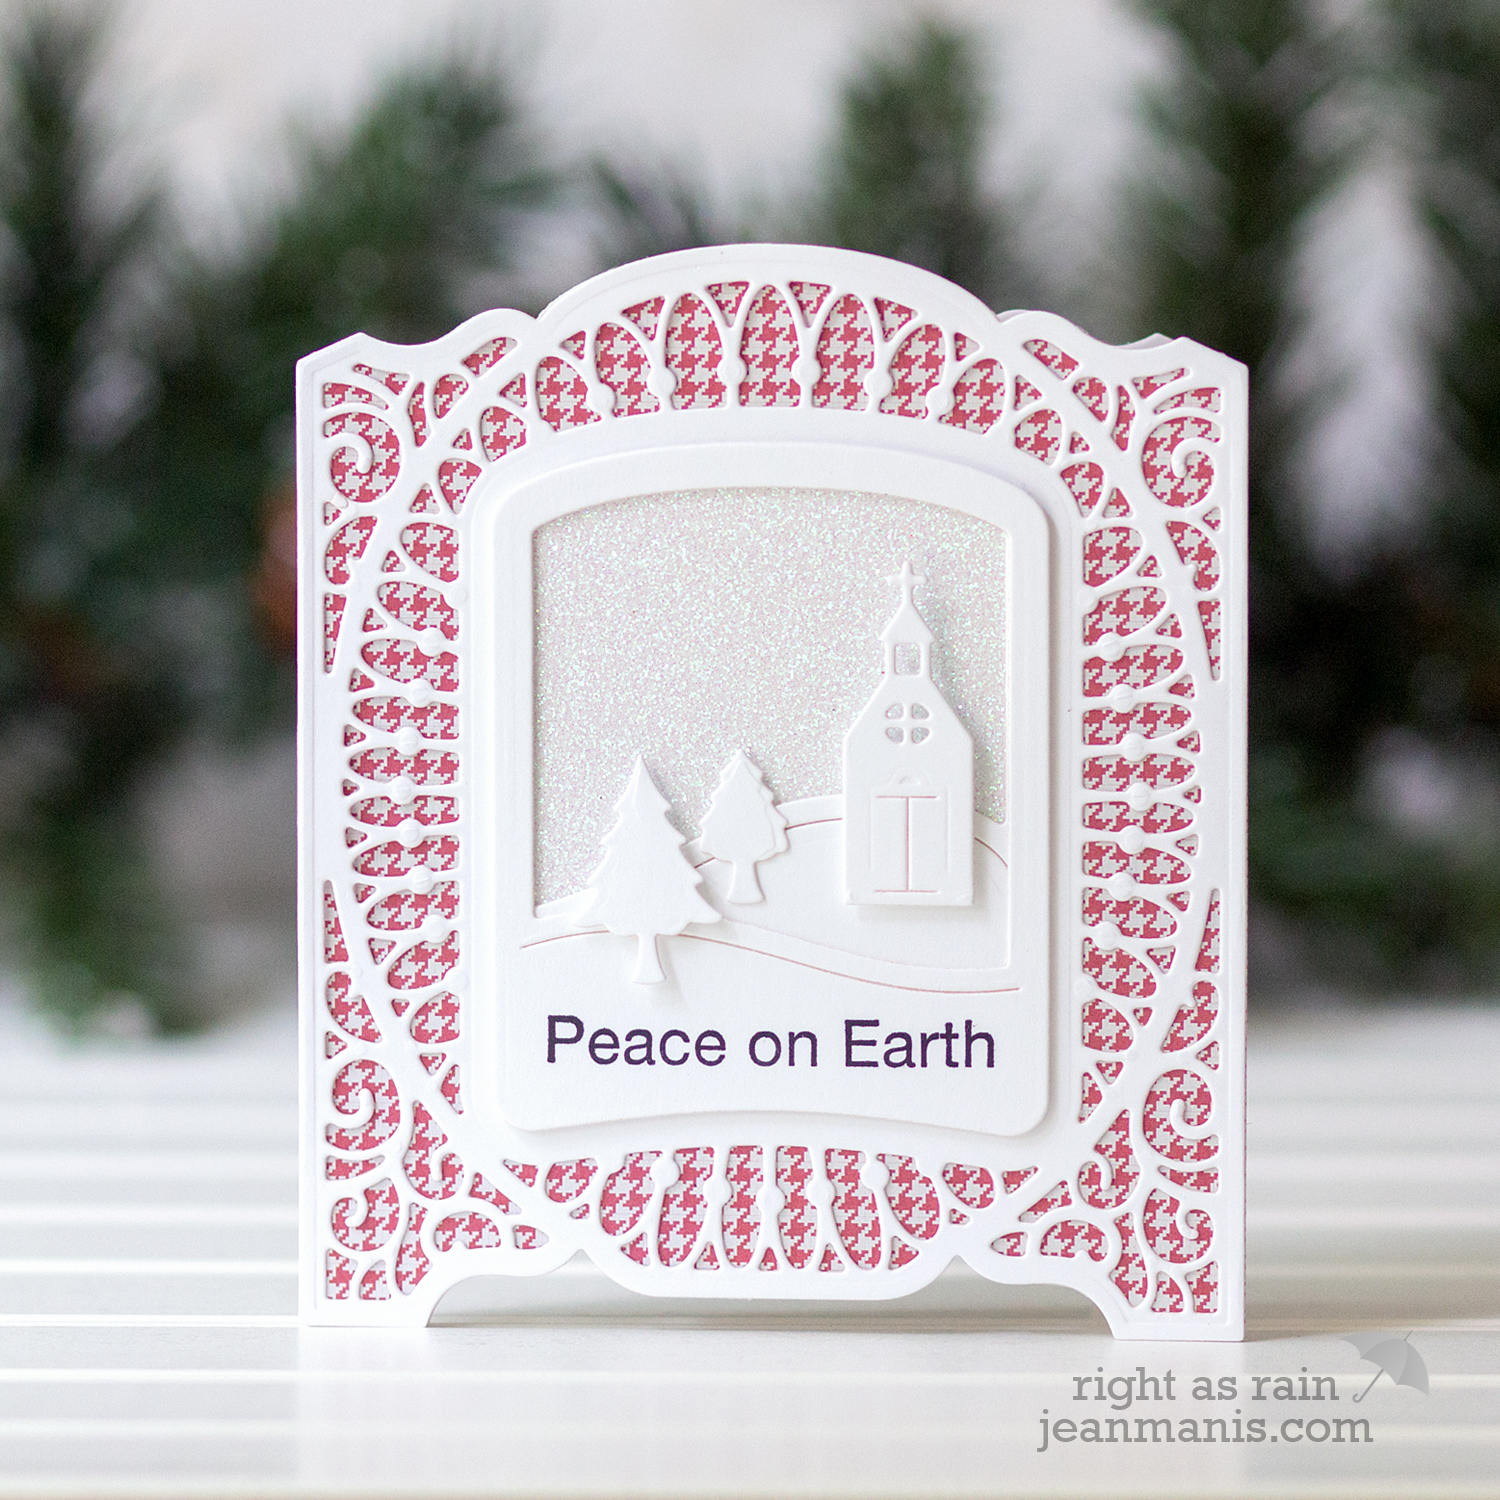
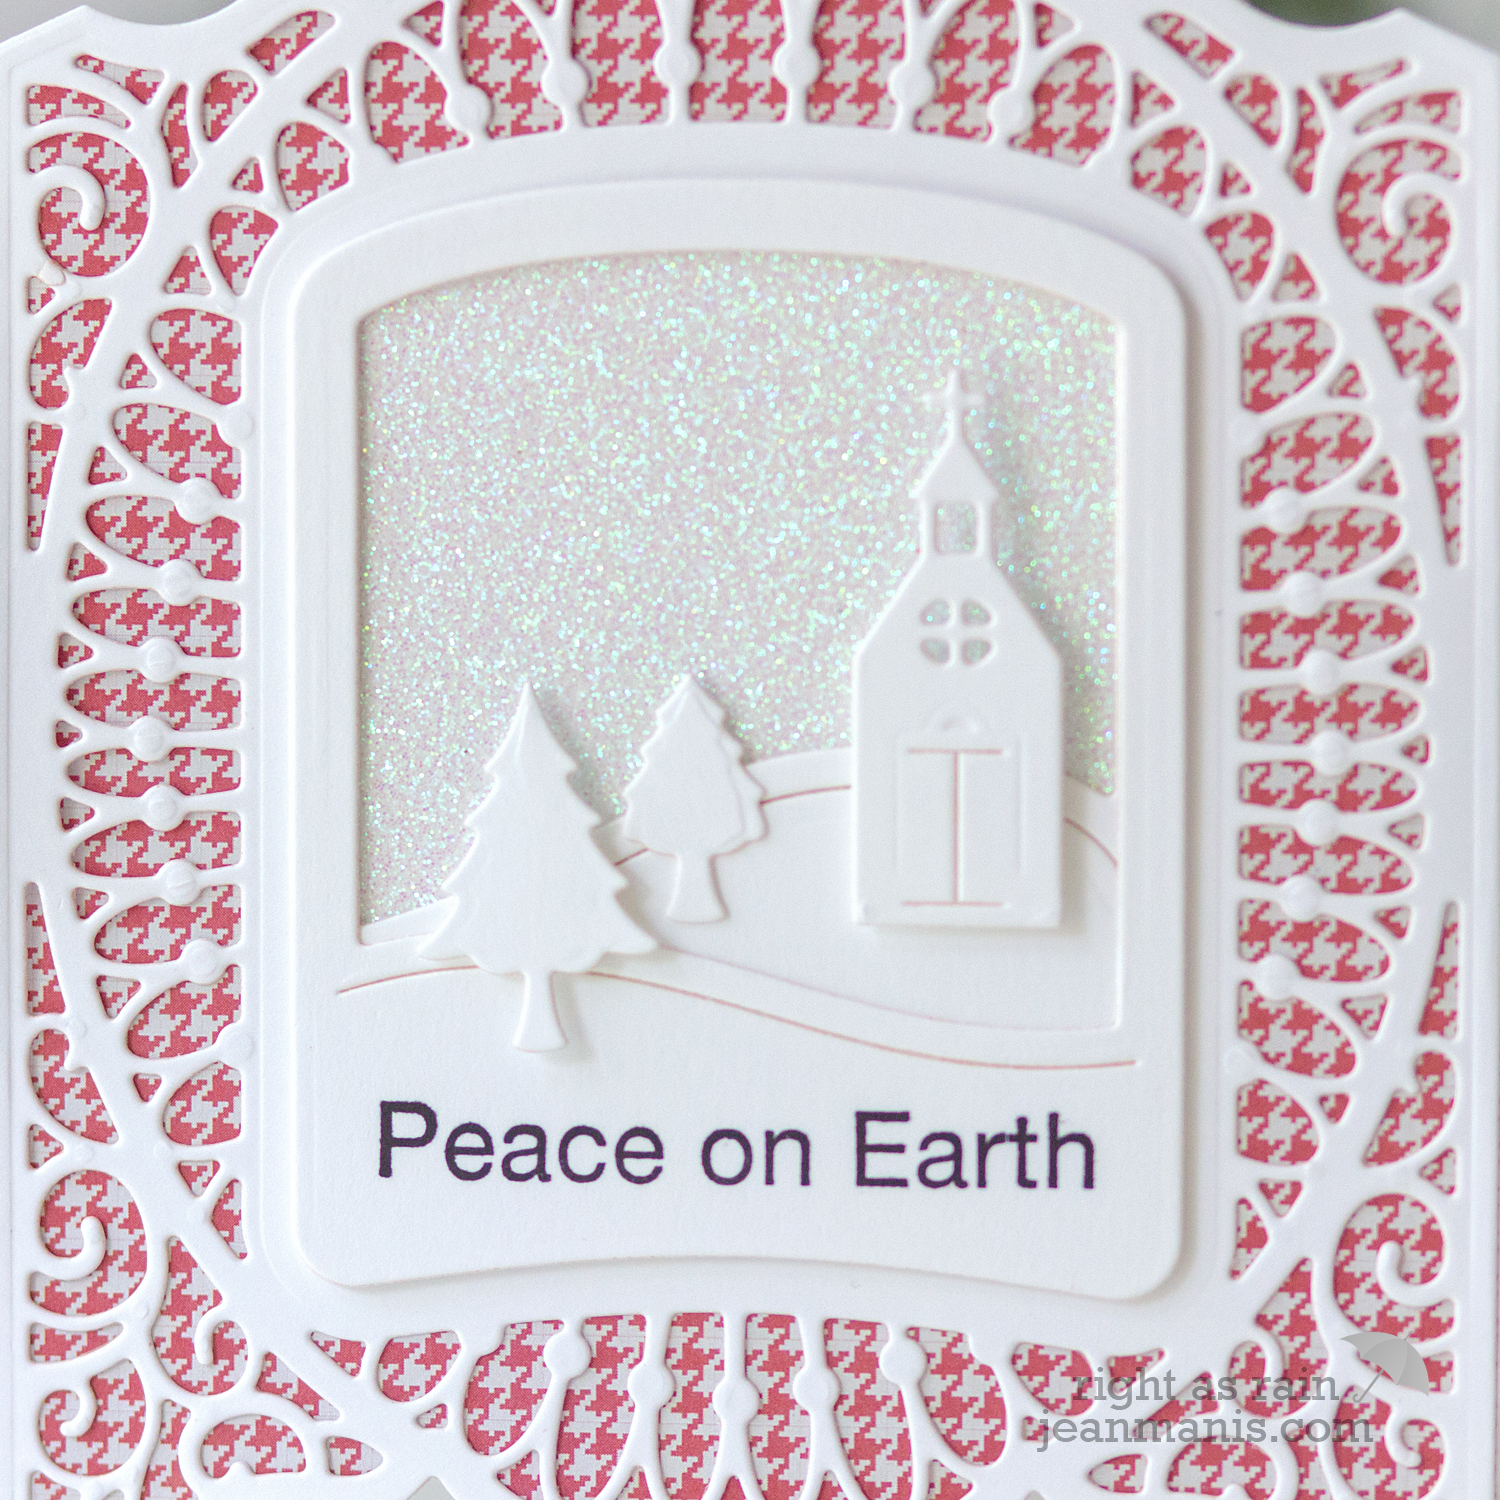
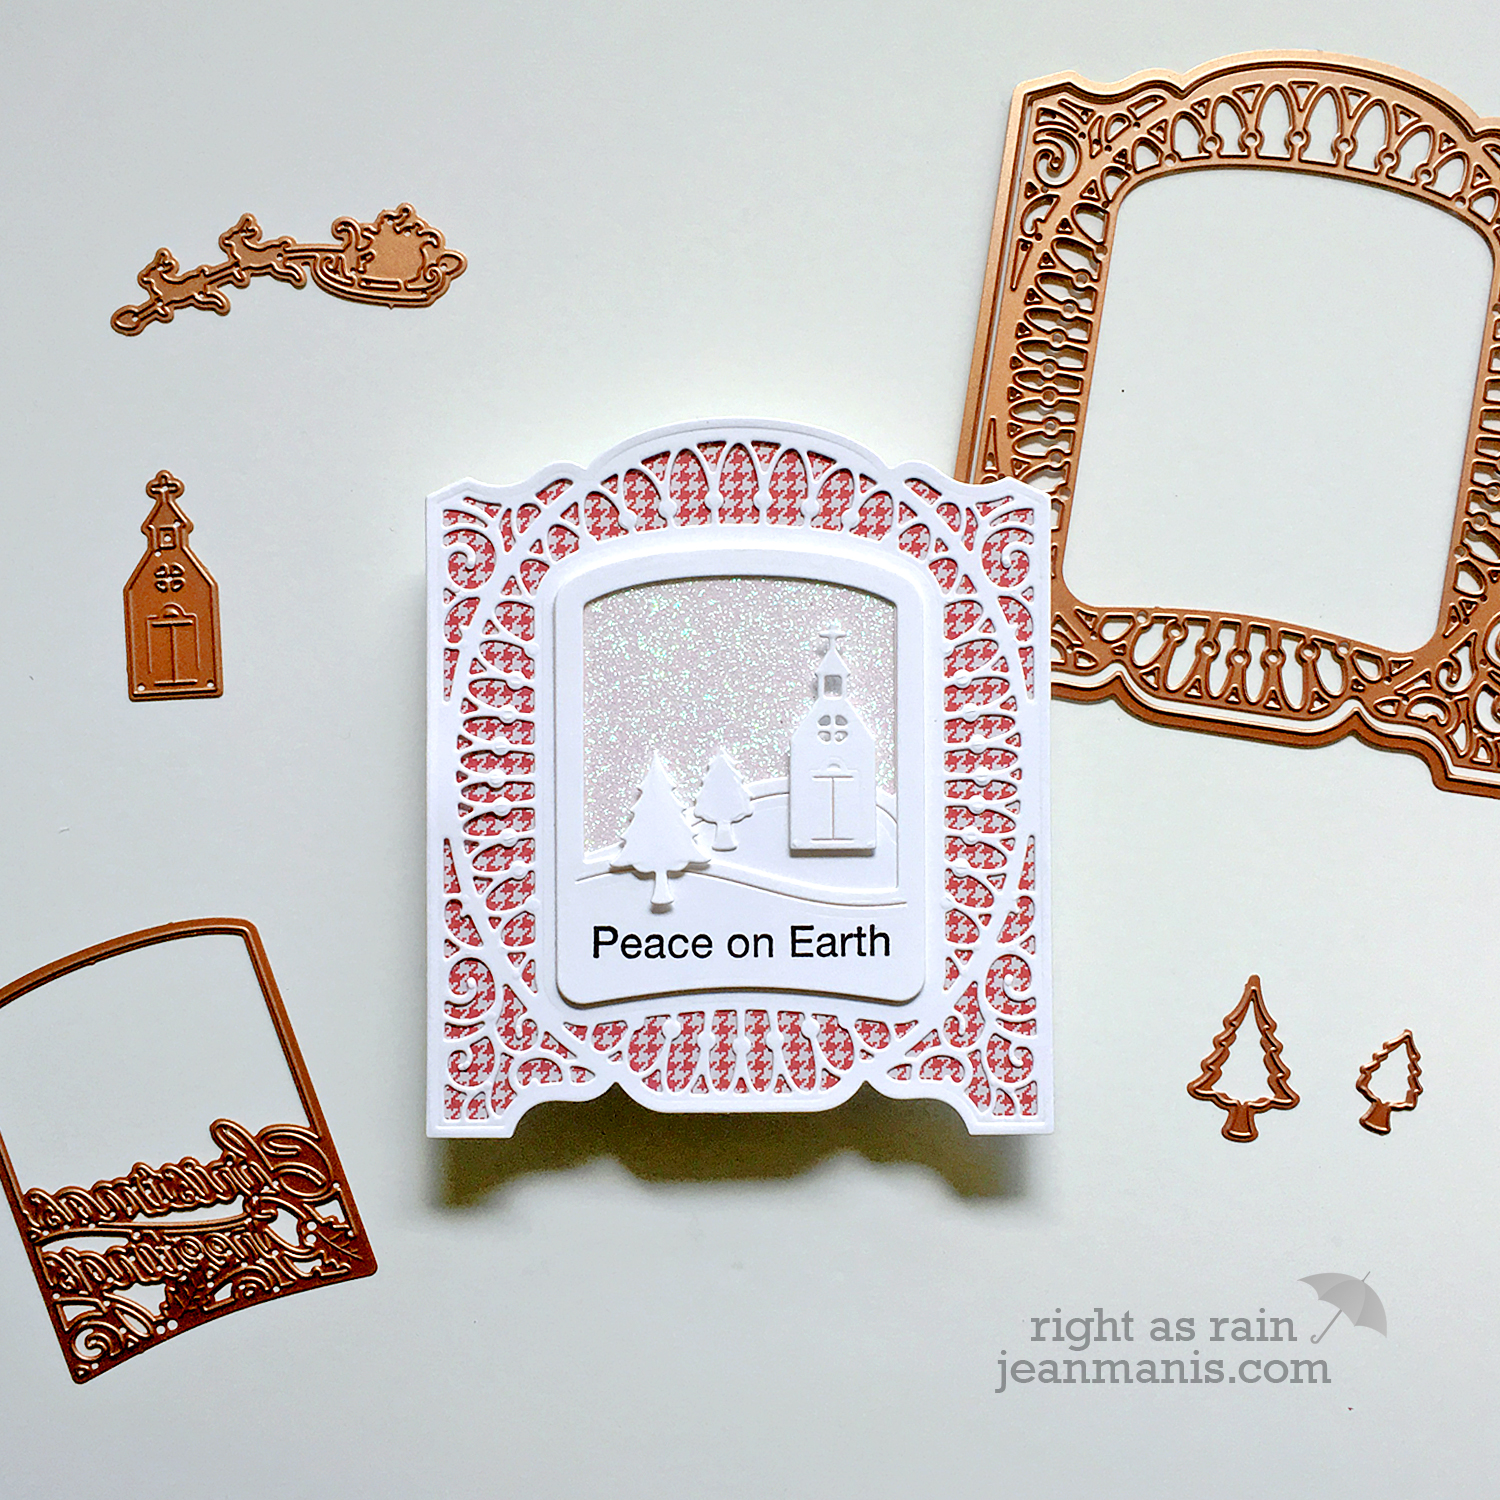
I used the large frame and detailed frame to cut the white cardstock background. I cut the two snowbank pieces and backed the assembly with glitter paper. I stamped the front snowbank piece with a sentiment from the Charming Tag Sentiments set. The church and trees were adhered to the scene.

Spellbinders - Amazing Paper Grace Die of the Month Kit

There are dozens of ways to use these dies to create stunning holiday cards! Head to the Spellbinders product page to see more examples created with this kit.

Supplies:

Simon Says Stamp – Picture Book Mash-Up

Hello! Today, I am sharing a CAS winter-themed card featuring a mash-up of two of the Picture Book dies from Simon Says Stamp – the Picture Book Bear and the Picture Book Snowman. I used the Bear die to create a Polar Bear whom I dressed with the scarf from the Snowman set!

Simon Says Stamp - Picture Book Mash-Up

Echo Park patterned paper in my stash was used for the scarf, the background in the picture frame, and for the card base.

Supplies:

Spellbinders – Santa Parade

Hello! Today, I am sharing three takes with the same die set from the Spellbinders A Sweet Christmas Collection by Sharyn Sowell. All three of the CAS holiday cards showcase the Santa Parade set which is part of this fabulous collection. The parade die measures a generous 7″ x 3″. With little effort, this set packs a big punch! I cut the parade out of black cardstock, glitter cardstock, and white cardstock, which I colored with Distress Inks. On all three cards, the bases are 7 ¼” x 4″; the rectangle backgrounds are 7″ x 3 ¾”.

For the card featuring the black cardstock parade silhouette, I used a sentiment from the same die set. I cut the sentiment twice from brushed gold cardstock for extra depth; I used the same gold cardstock for the base.

Spellbinders - Santa Parade

I heat-embossed a Hero Arts sentiment for the card on which I cut the parade from glitter cardstock. The gray cardstock base lends a cozy feel with the patterned paper.

Spellbinders - Santa Parade

On my final card, I used Distress Inks in Festive Berries, Barn Door, and Fired Brick to color white cardstock before cutting the cardstock with the parade die. I heat-embossed the Hero Arts sentiment on to the solid teal cardstock rectangle. To finish, I sprinkled on Taylored Expressions sequins.

Spellbinders - Santa Parade

Newton’s Nook Cup of Cocoa

Hello! Today, I am sharing a winter-themed card created with the Newton’s Nook Cup of Cocoa stamp set. I just could not resist this set and plan to use it again this upcoming fall and winter.

Newton's Nook Cup of Cocoa

I stamped several of the hot beverage options and colored the images with Copic markers and colored pencils.

For the background, I stamped the sentiment and applied Tumbled Glass and Hickory Smoke inks to the background with a Clarity Brush. The card base was dry-embossed with a Taylored Expressions embossing folder.