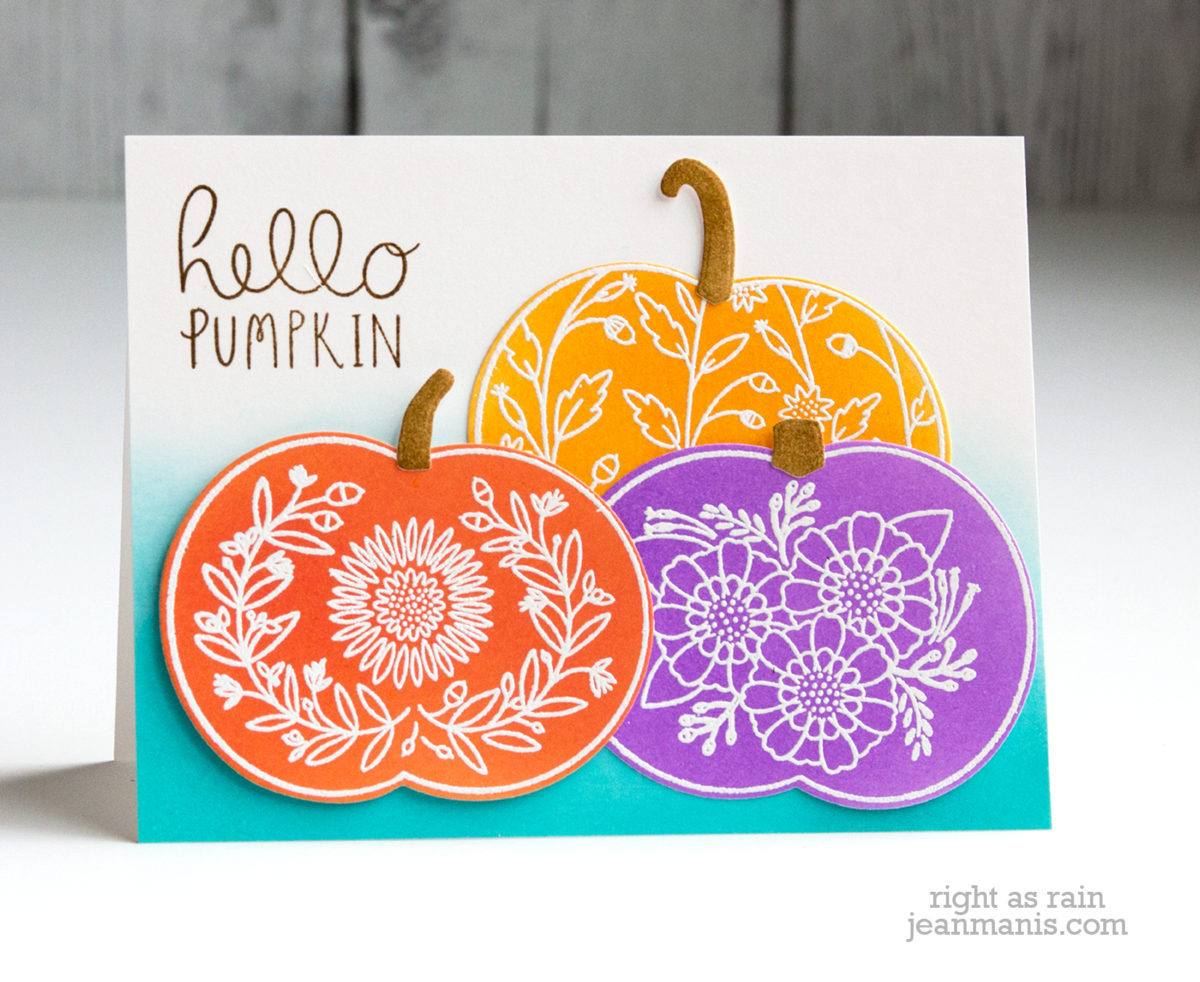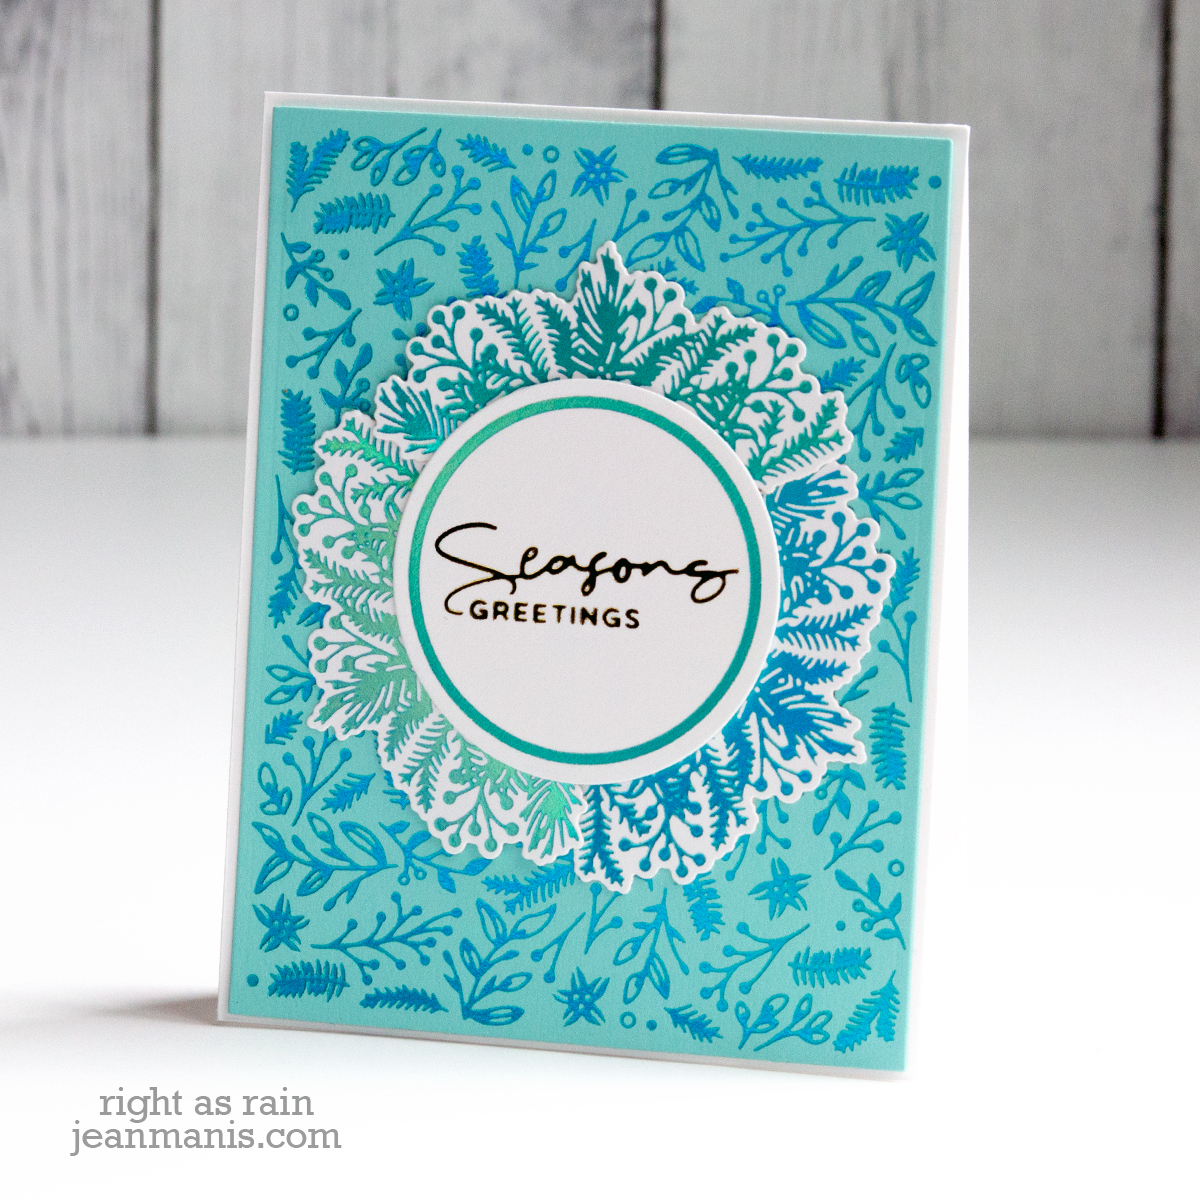
Hello! Today, I am delighted to be participating in a blog hop along with other paper crafters sharing projects created with the Spellbinders September 2020 Club Subscriptions. You should have reached me from the blog of Michelle Short. (The entire list of participants is included at the end of my post.) For the hop, I created CAS, Christmas-themed cards showcasing the September Small Die of the Month kit from Spellbinders – “Hello & Thank You.” (I shared two other cards created with the September Small Die of the Month kit in this post.)

To celebrate this release, Spellbinders is giving away a $50 gift certificate to 3 lucky blog readers, selected from the comments on the Spellbinders blog. Hop along for additional chances to win. The giveaway closes Sunday, September 27, 11:59 pm EDT. The winner will be announced in the blog hop post the following Tuesday. The winner is responsible for shipping cost, duties and taxes. Additionally, I will draw a winner to receive a $25 gift certificate from commenters on my blog. The deadline to comment is Saturday, September 26, 9:00 pm PDT. Please note: store credit (gift certificate) cannot be applied to Club Subscriptions. Store credit can be applied to shop past Club products, Club extras, and regular releases.
Join any Club and save 10% Off the first month. Must use Code NEWSEPT at time of subscription or savings will not be applied. Coupon code can only be applied to ONE CLUB per transaction. Offer is for individual consumer use only; not for distribution and excludes, tax, and shipping. Not valid on any previous web, phone or retail purchases. The code cannot be redeemed for cash or combined with any other offer; void where prohibited and limited to stock on hand. Offer only available 9/23/2020 to 9/30/2020 at 11:59 PST.
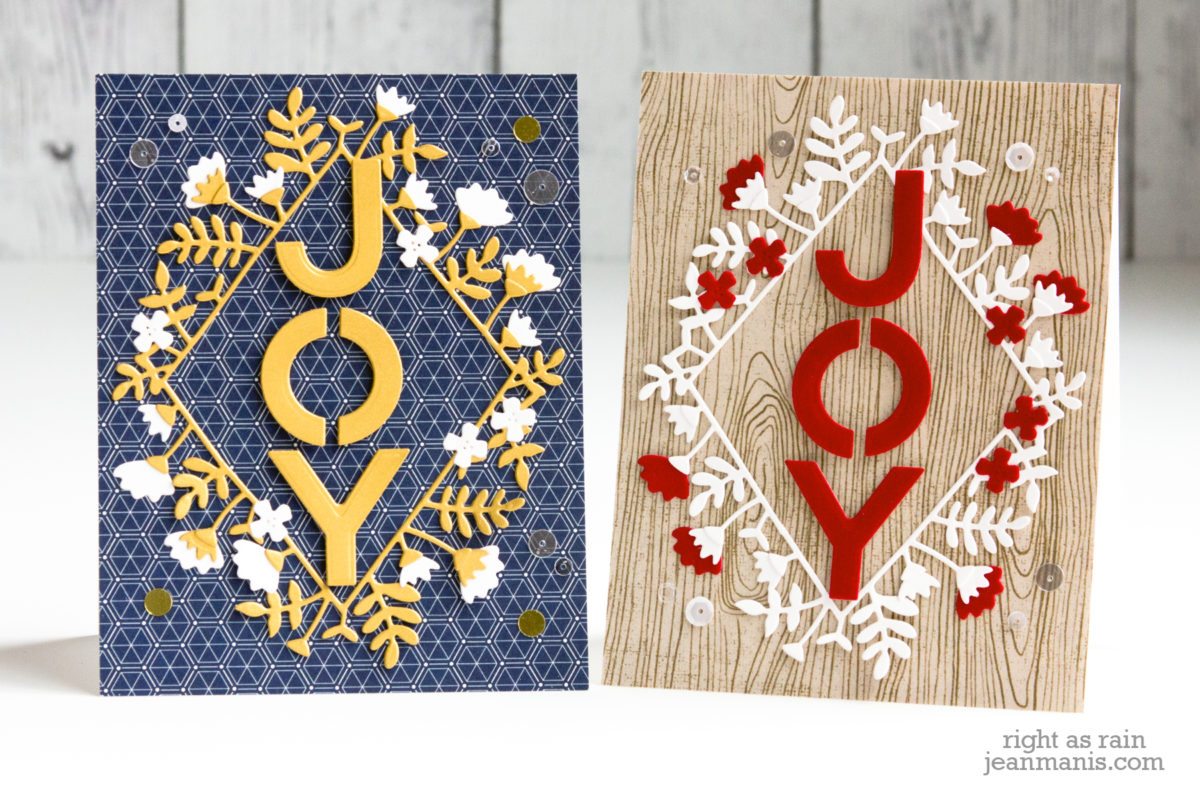
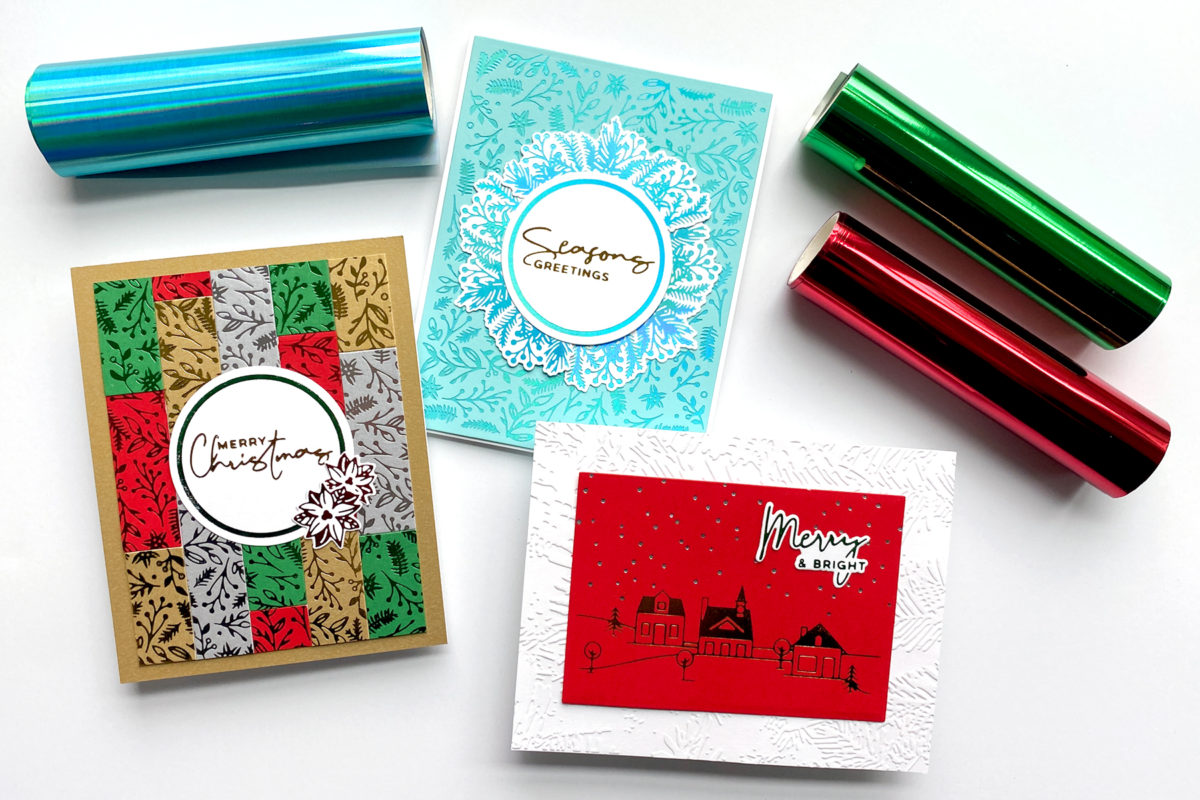
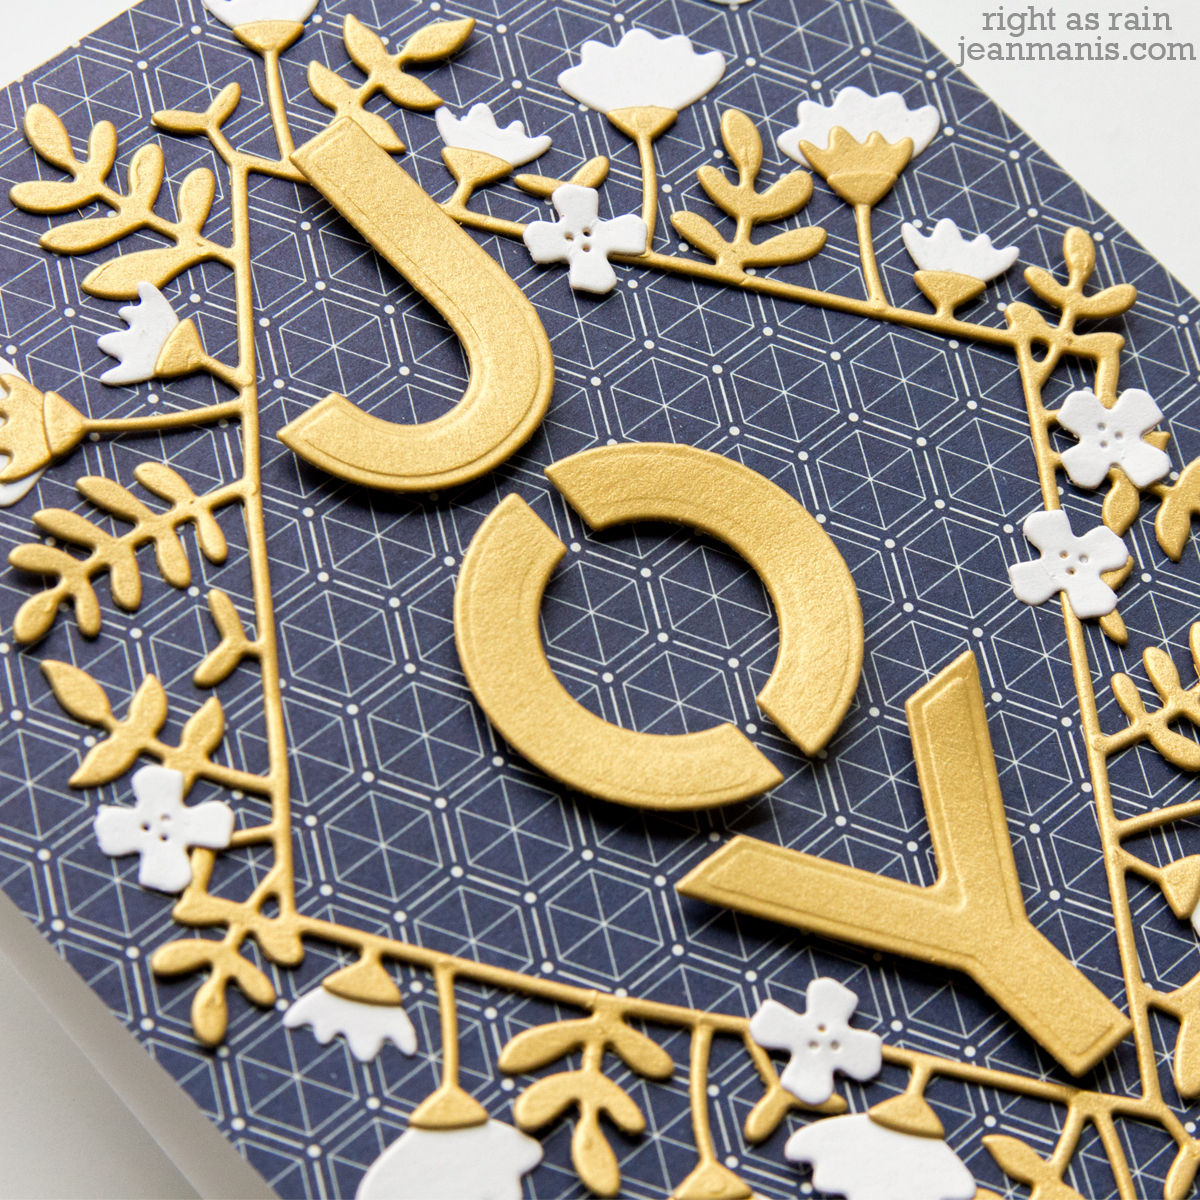
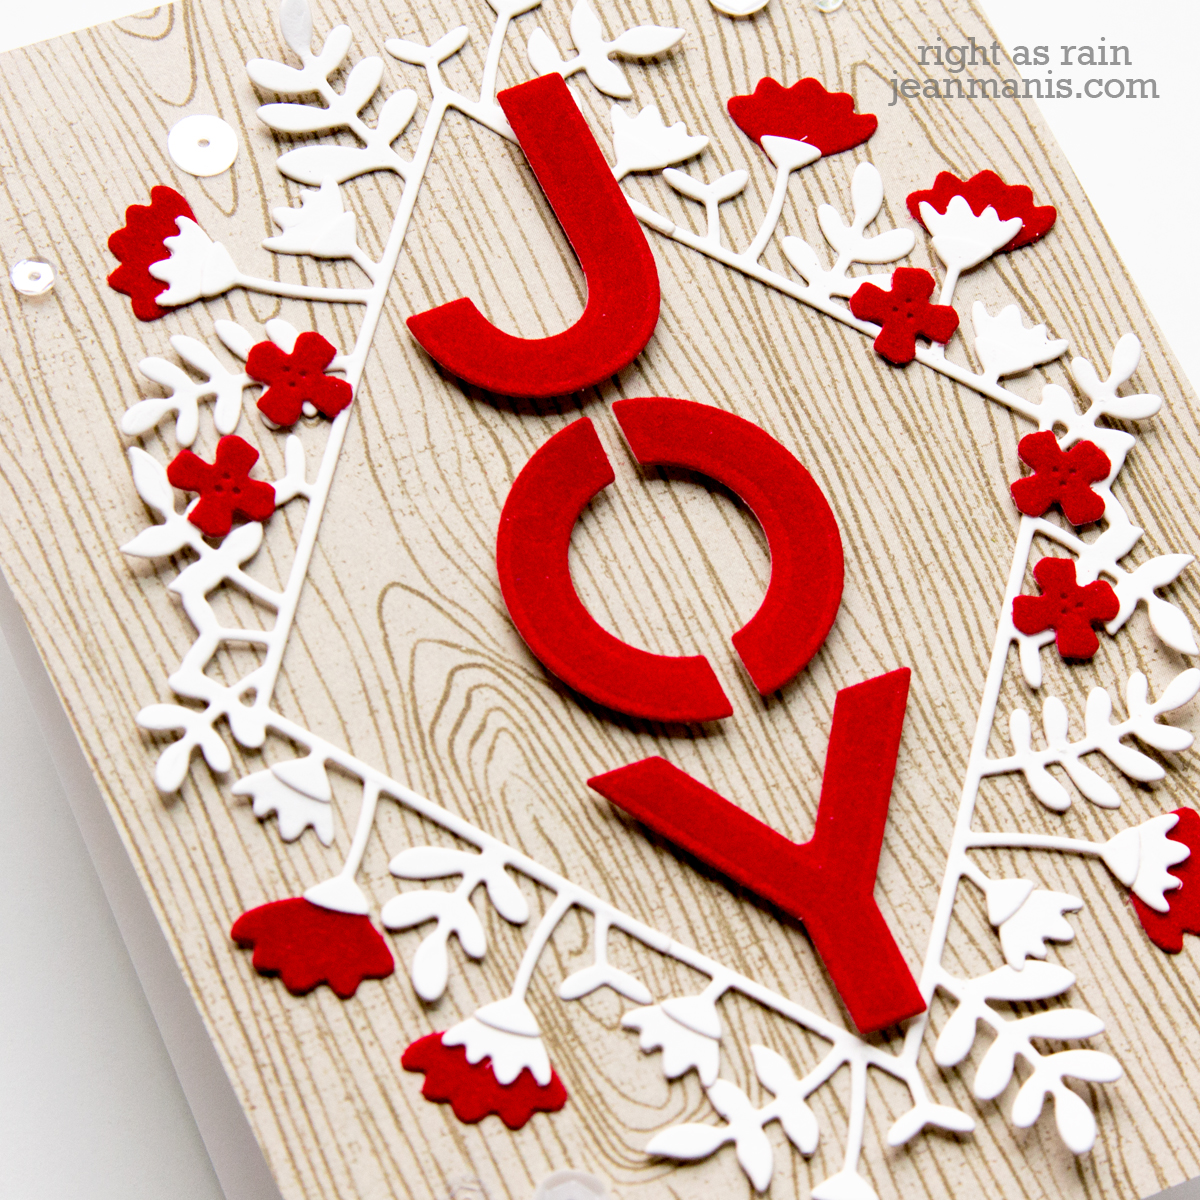
On both cards, I combined the Small Die of the Month kit’s floral frame and floral elements with a die-cut Joy sentiment on a patterned paper background.
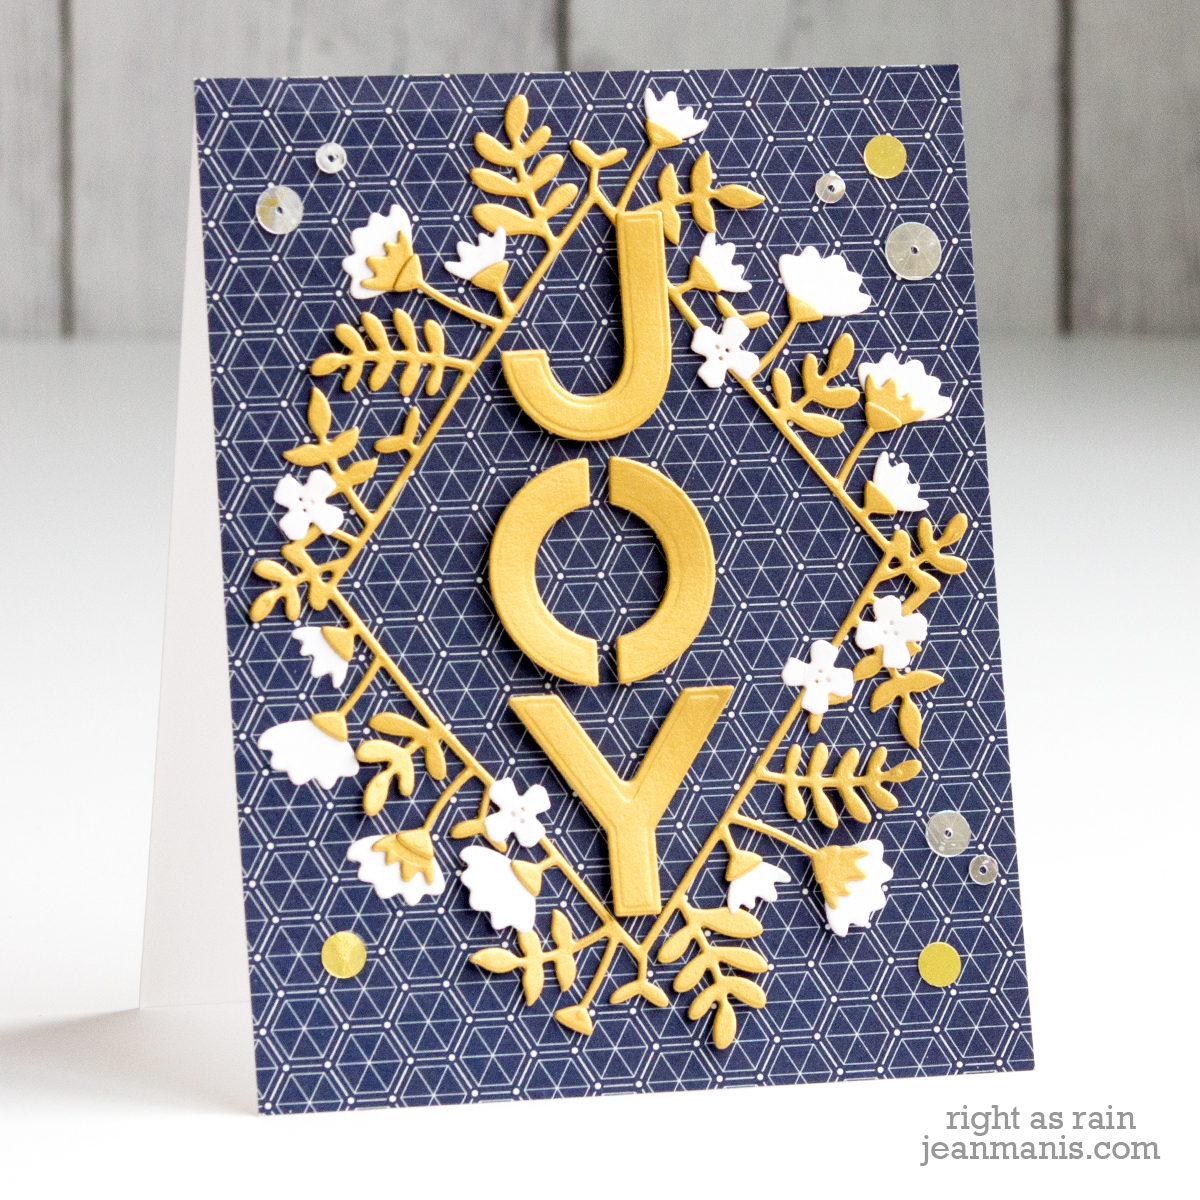
- On the first card, I cut the frame and letters from Brush Gold cardstock and added Whip Cream floral elements to the stems and around the frame.
- The letters were added with foam adhesive.
- I scattered a variety of sequins on to the card once everything was assembled.
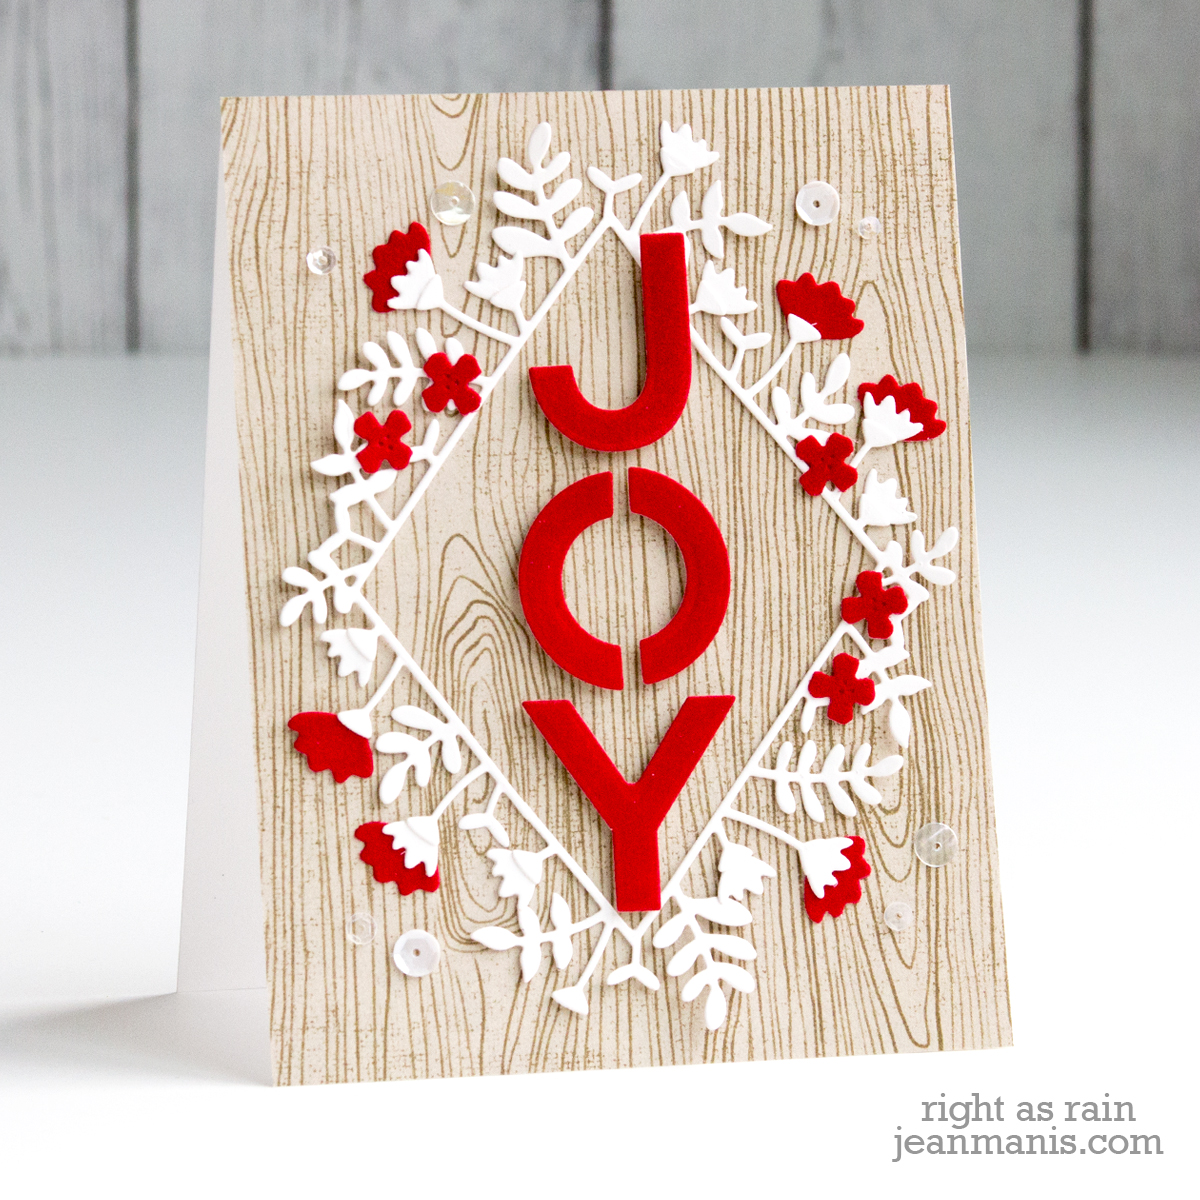
- On the second card, I cut the frame and letters from Whip Cream cardstock and added red velvet floral elements to the stems and around the frame.
- The letters were added with foam adhesive.
- I scattered sequins on to the card once everything was assembled.
Thank you for stopping by today!
Next on the list is the blog of Joy Baldwin. Scroll down for the entire list of participants.
Supply List:

Blog Hop Participants:
Spellbinders Blog
Nichol Spohr
Tina Smith
Sandi MacIver
Laurie Willison
Bibi Cameron
Michelle Short
Jean Manis
Joy Baldwin
Jennifer Snyder
Virginia Lu
Jill Hilliard
Kathy Clement
Ilina Crouse
Ivana Camdzic
Gemma Campbell
Hussena Calcuttawala
Jenny Colacicco