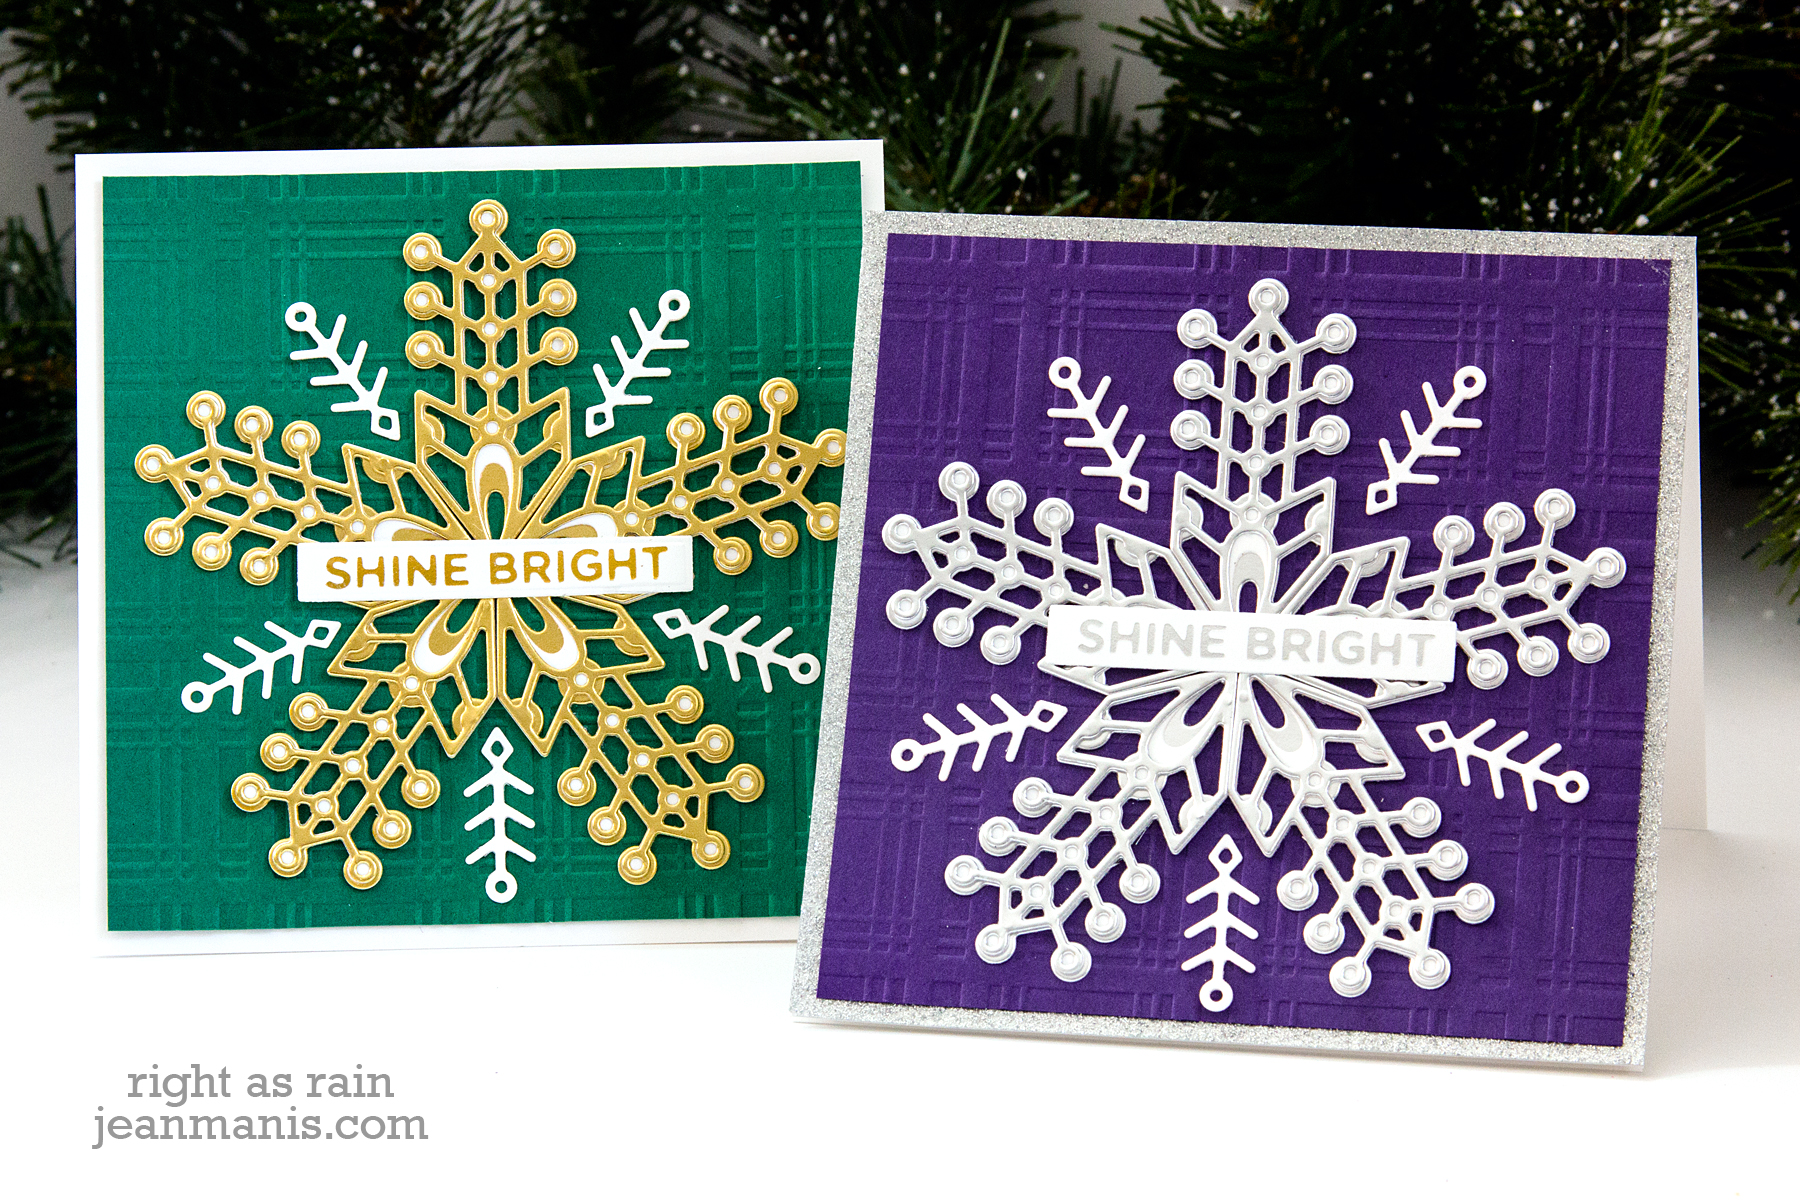
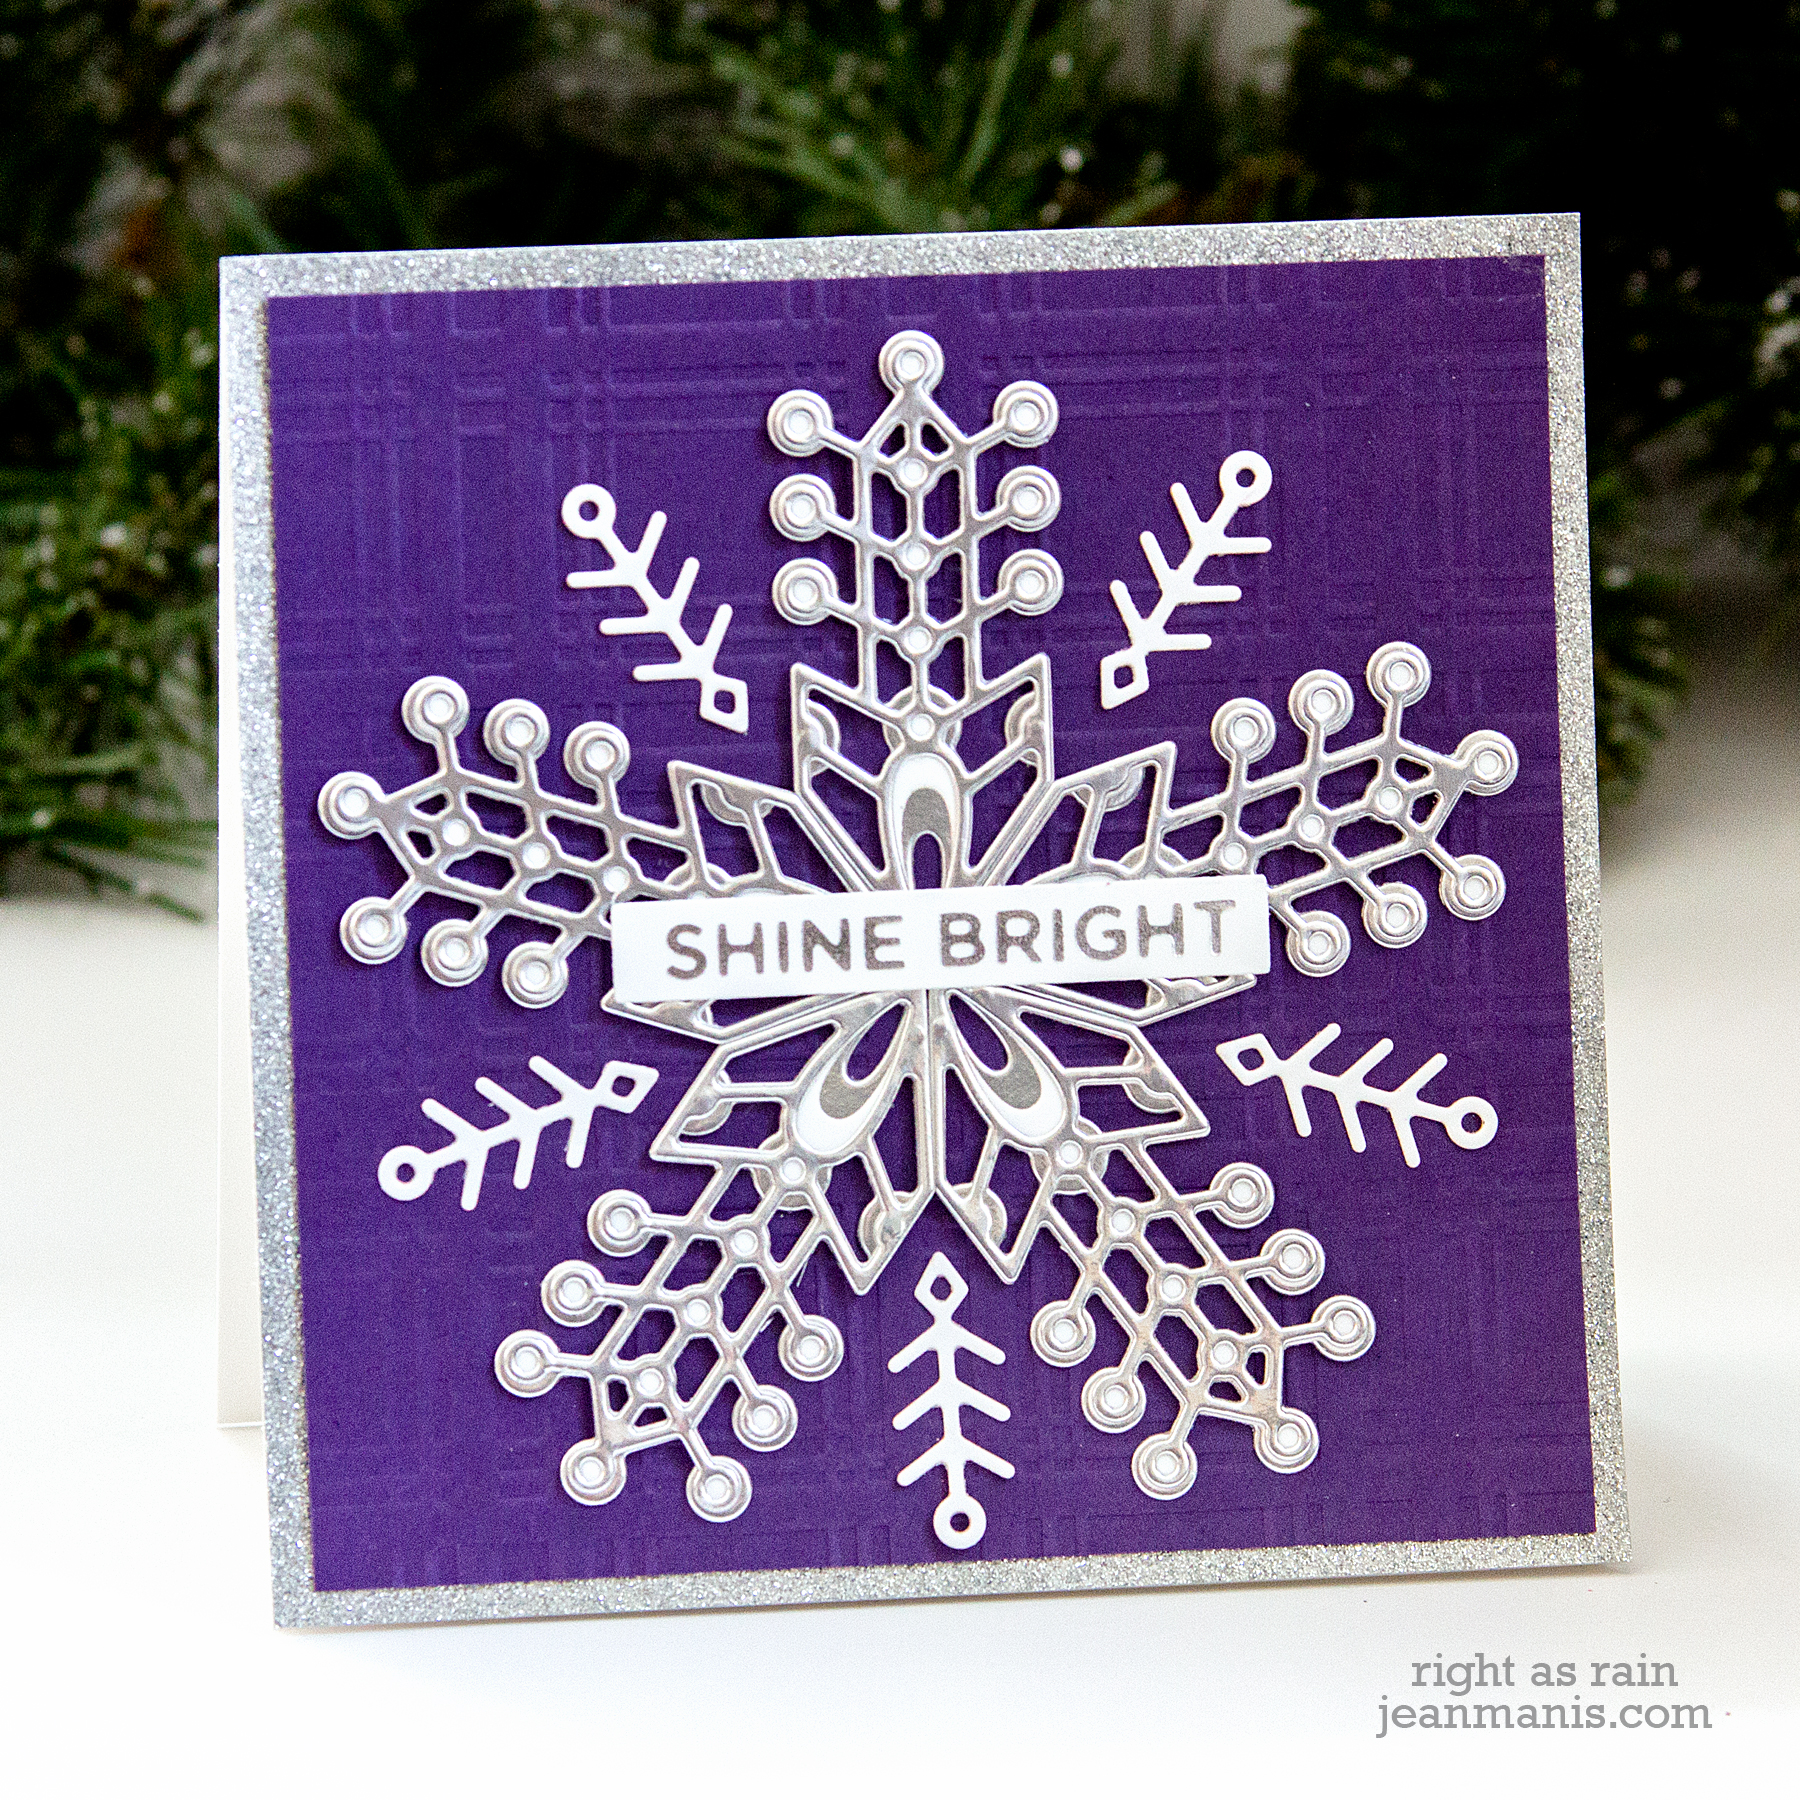
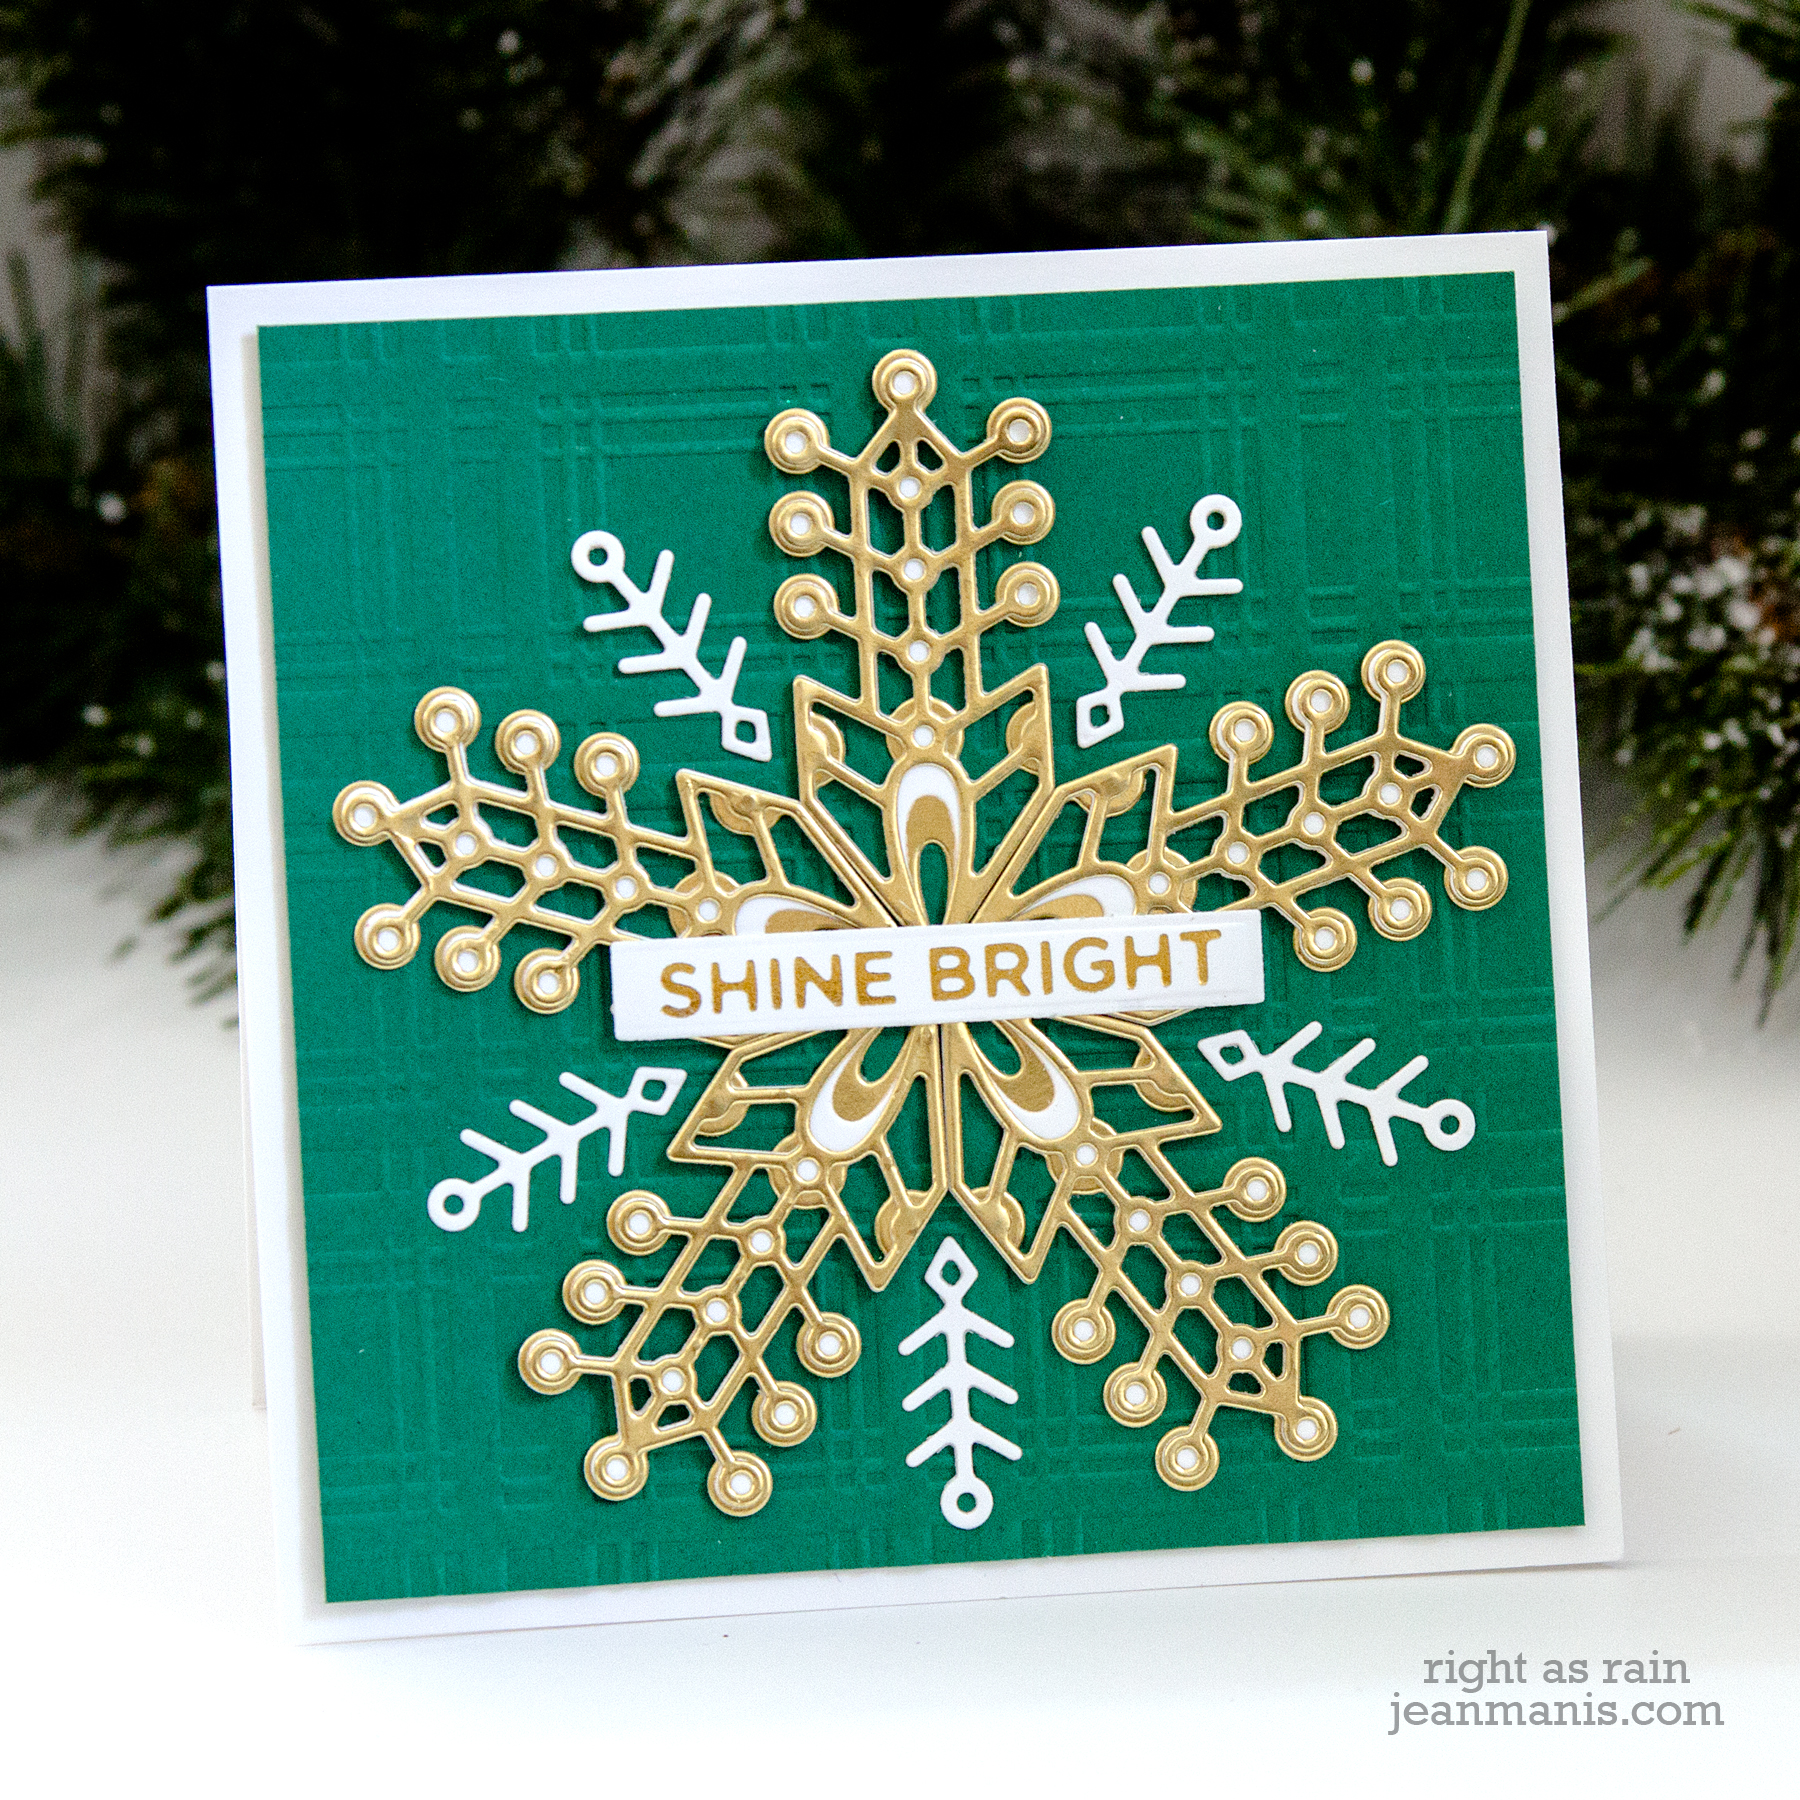
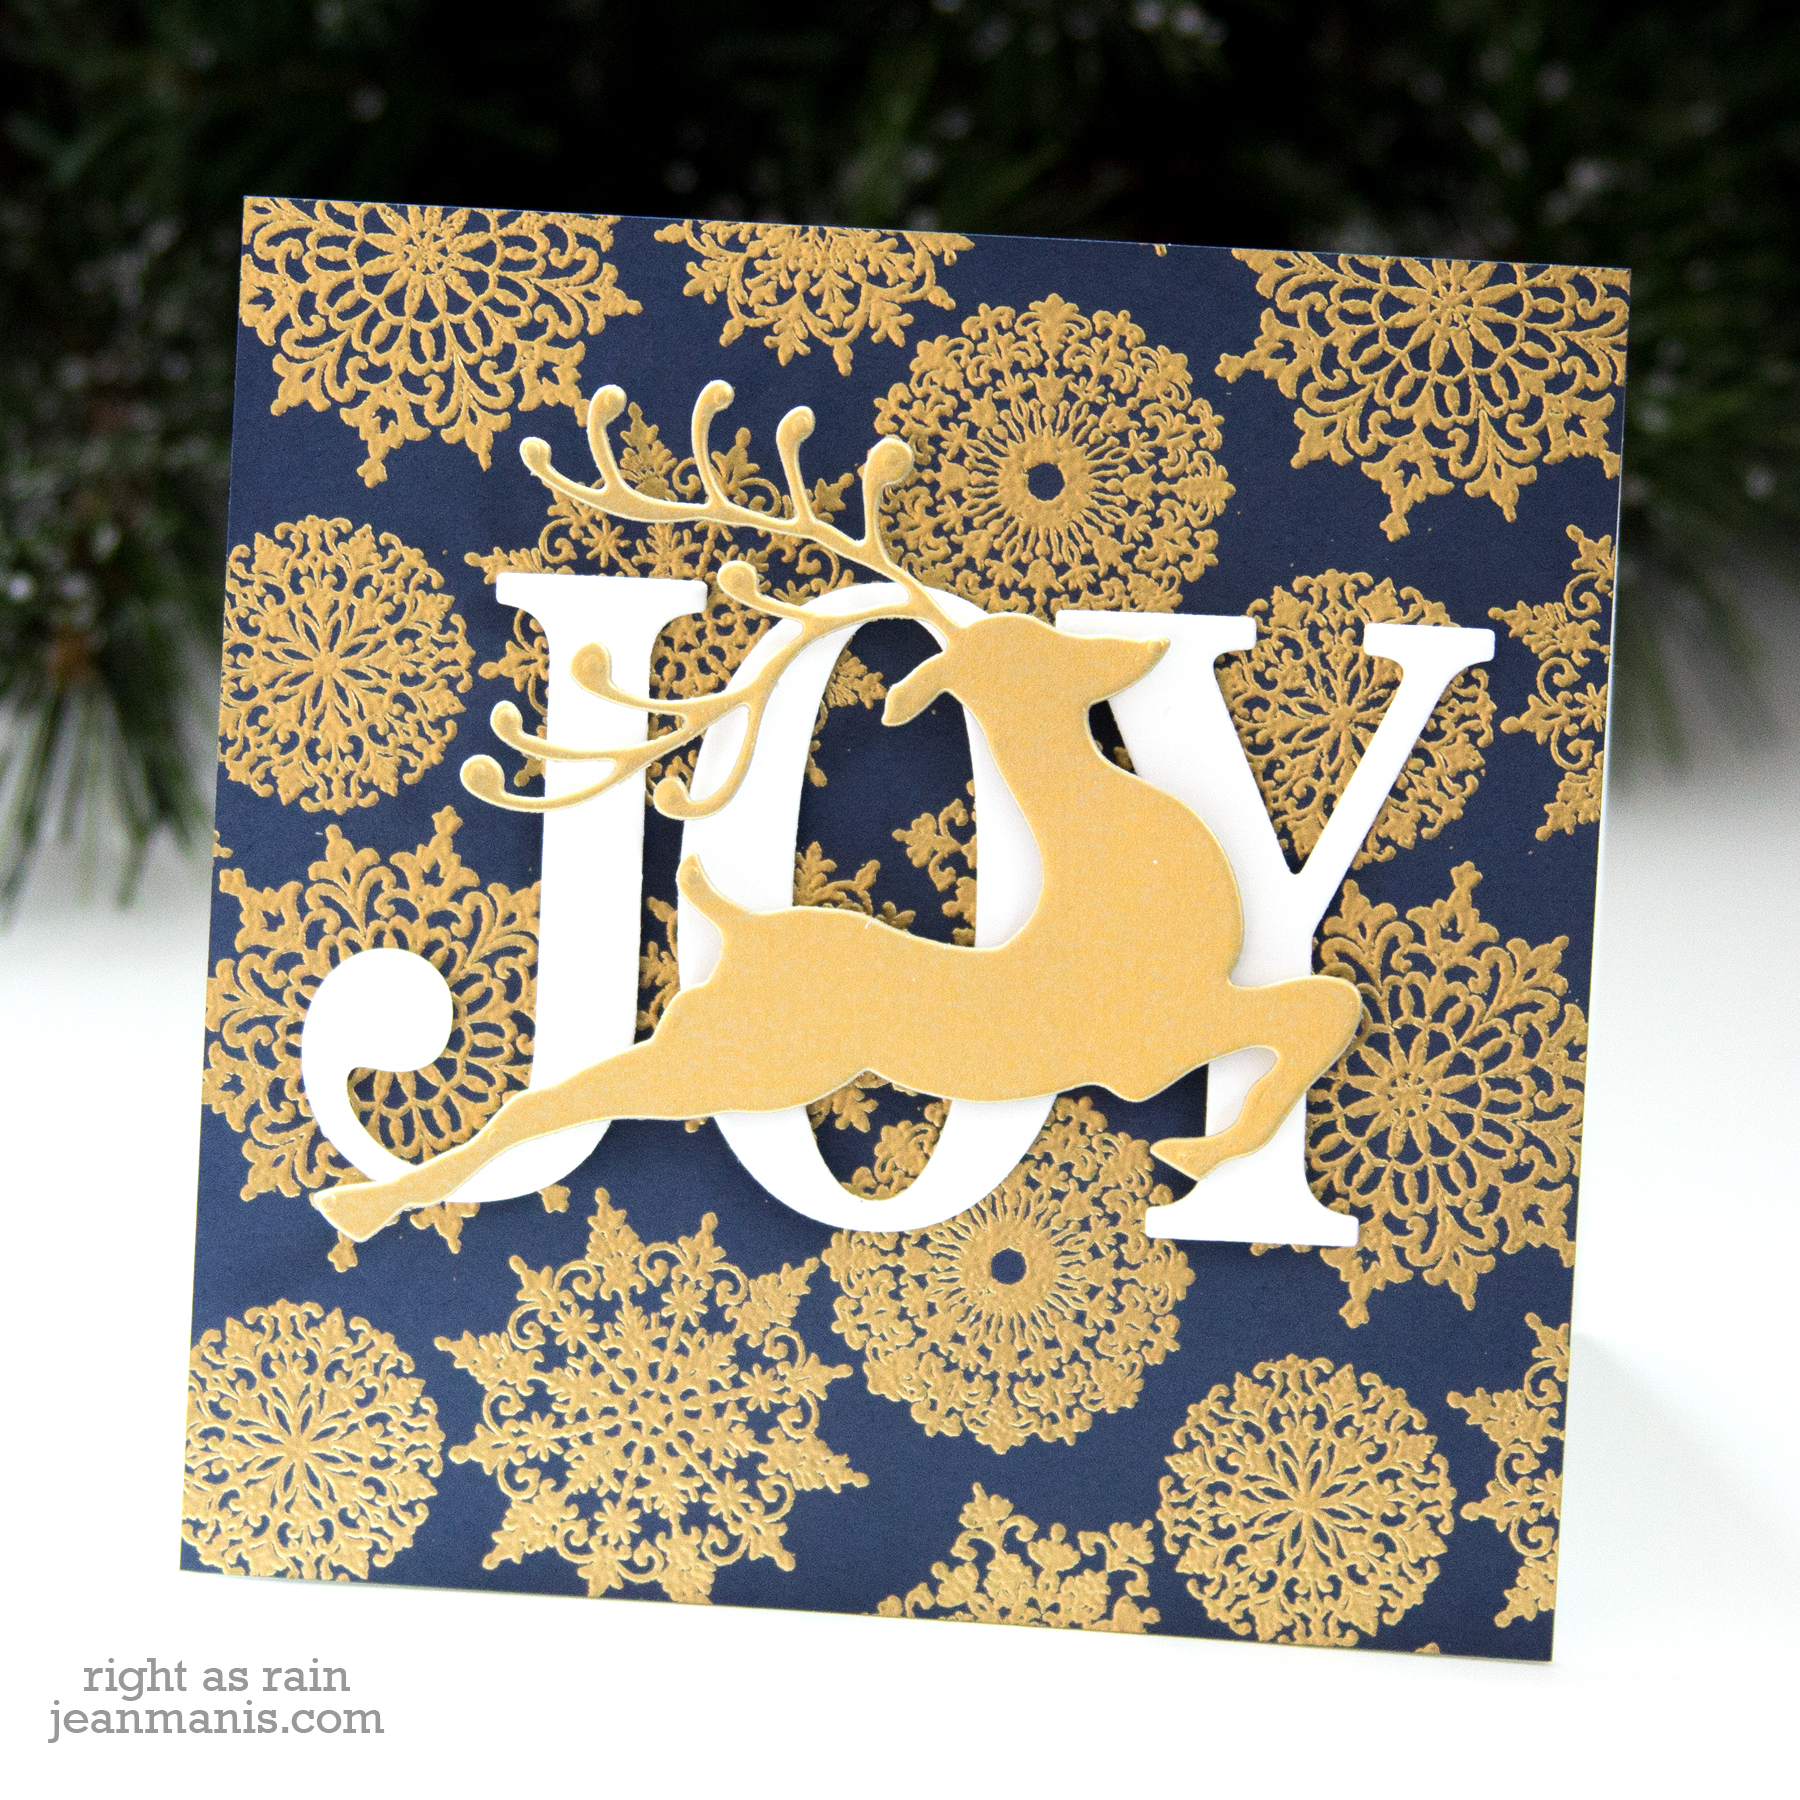
Hello! Today I am sharing two cards of the same design featuring Penny Black products from the First Snow release.
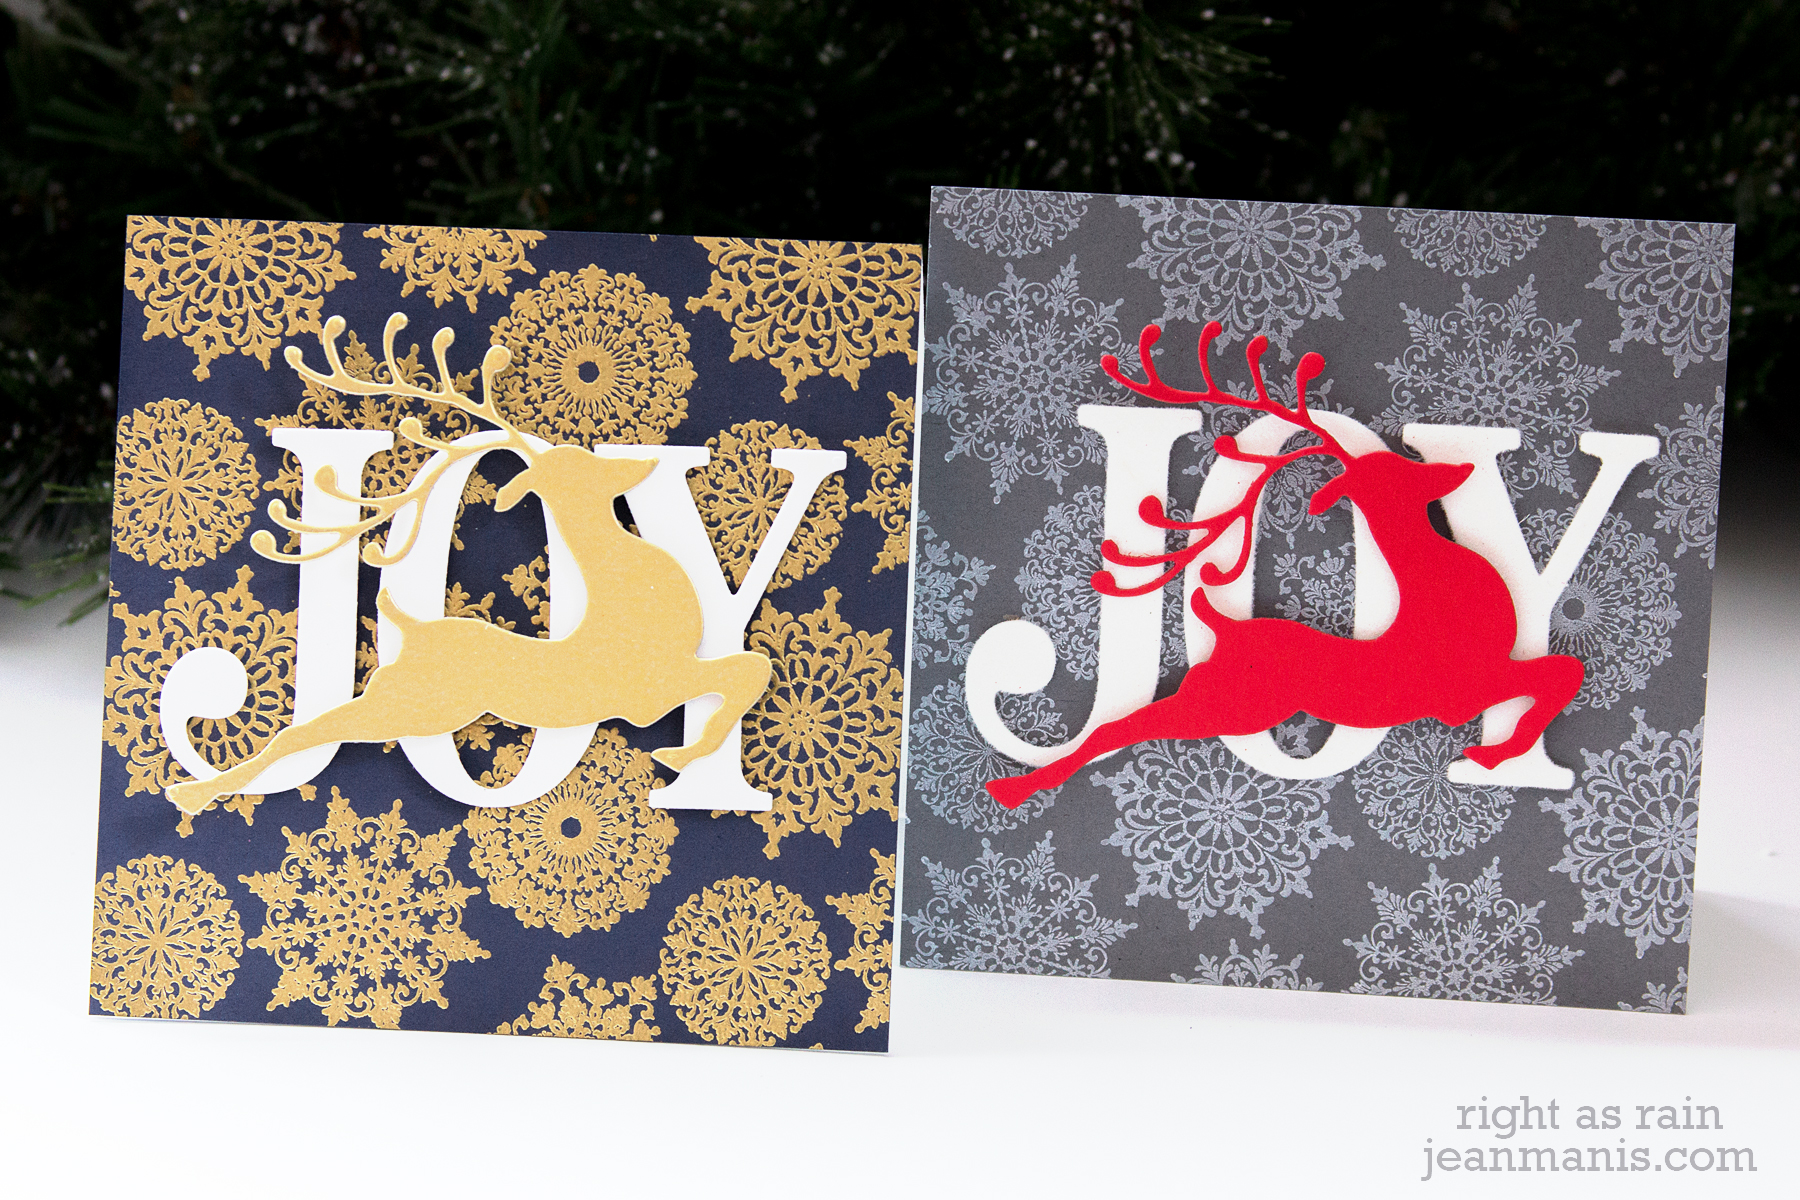
On both cards, I used the #51-572 Jumbo Joy die, the #51-557 Reindeer Leaps die, and the #40-706 Snowflake Pattern background stamp. However, I changed the colors and textures to show the versatility of the supplies.
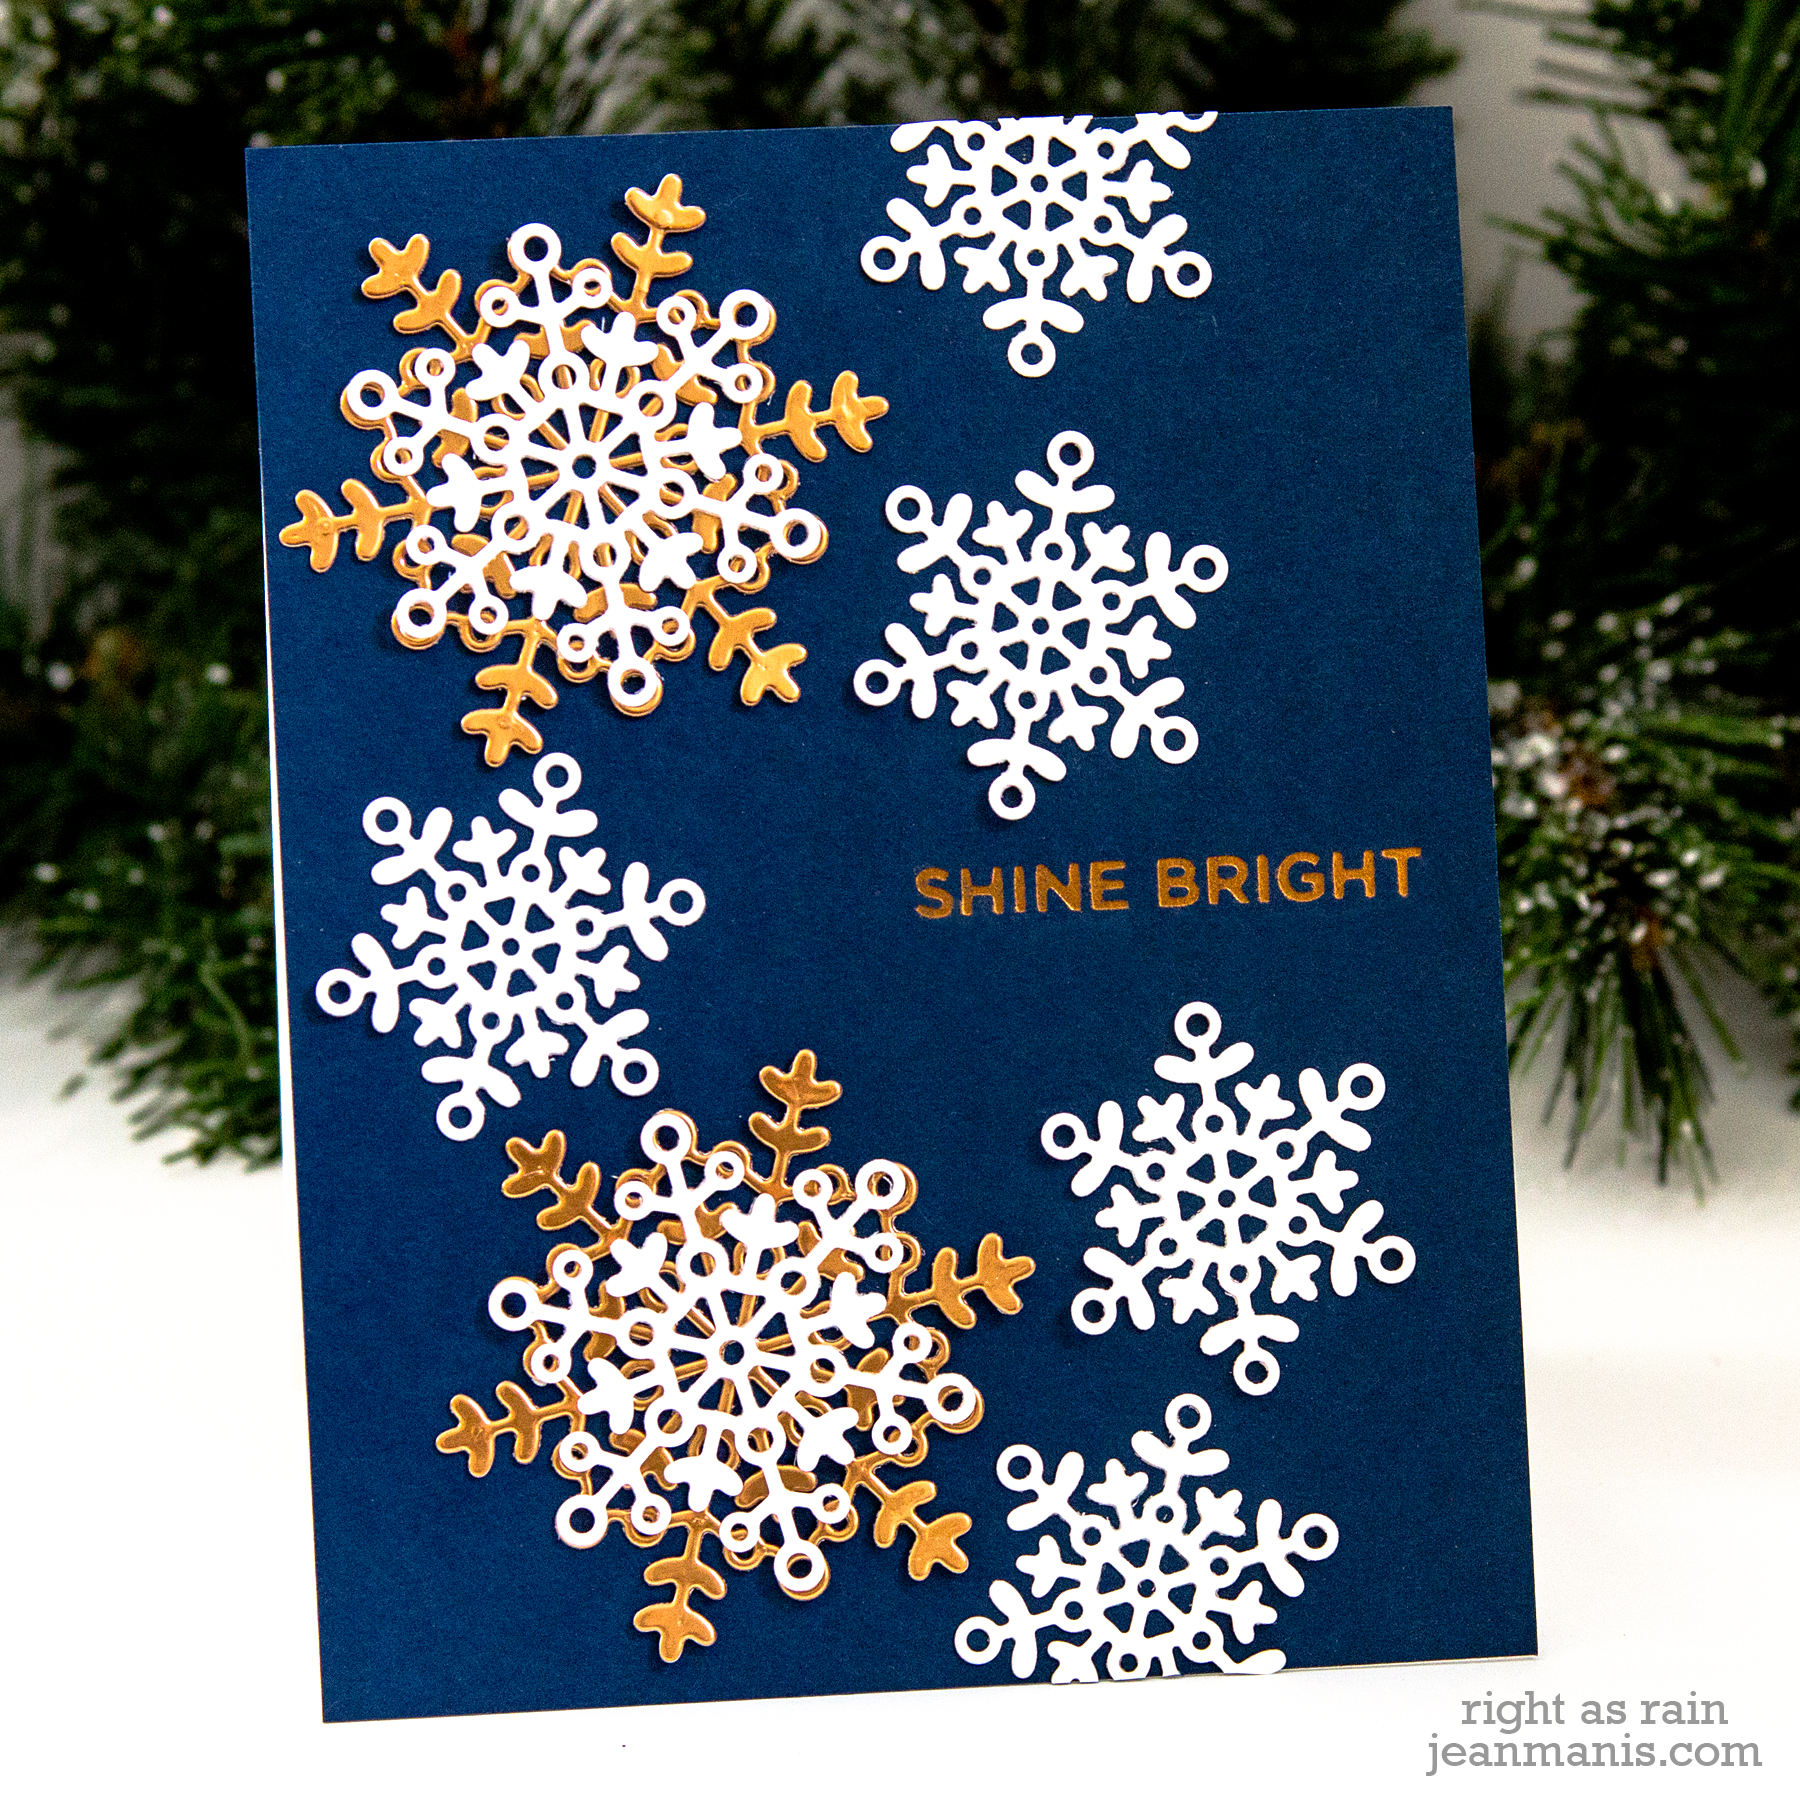
On the first, I heat-embossed the Snowflake Pattern stamp with gold embossing powder on navy cardstock. The reindeer is cut from brushed gold cardstock.
On the second card, I stamped the Snowflake Pattern stamp on gray cardstock with white ink. The JOY letters were flocked (using foam and the flock transfer sheets). This video shows how to die-cut the foam and apply the flock. I cut the reindeer from a bright red cardstock.
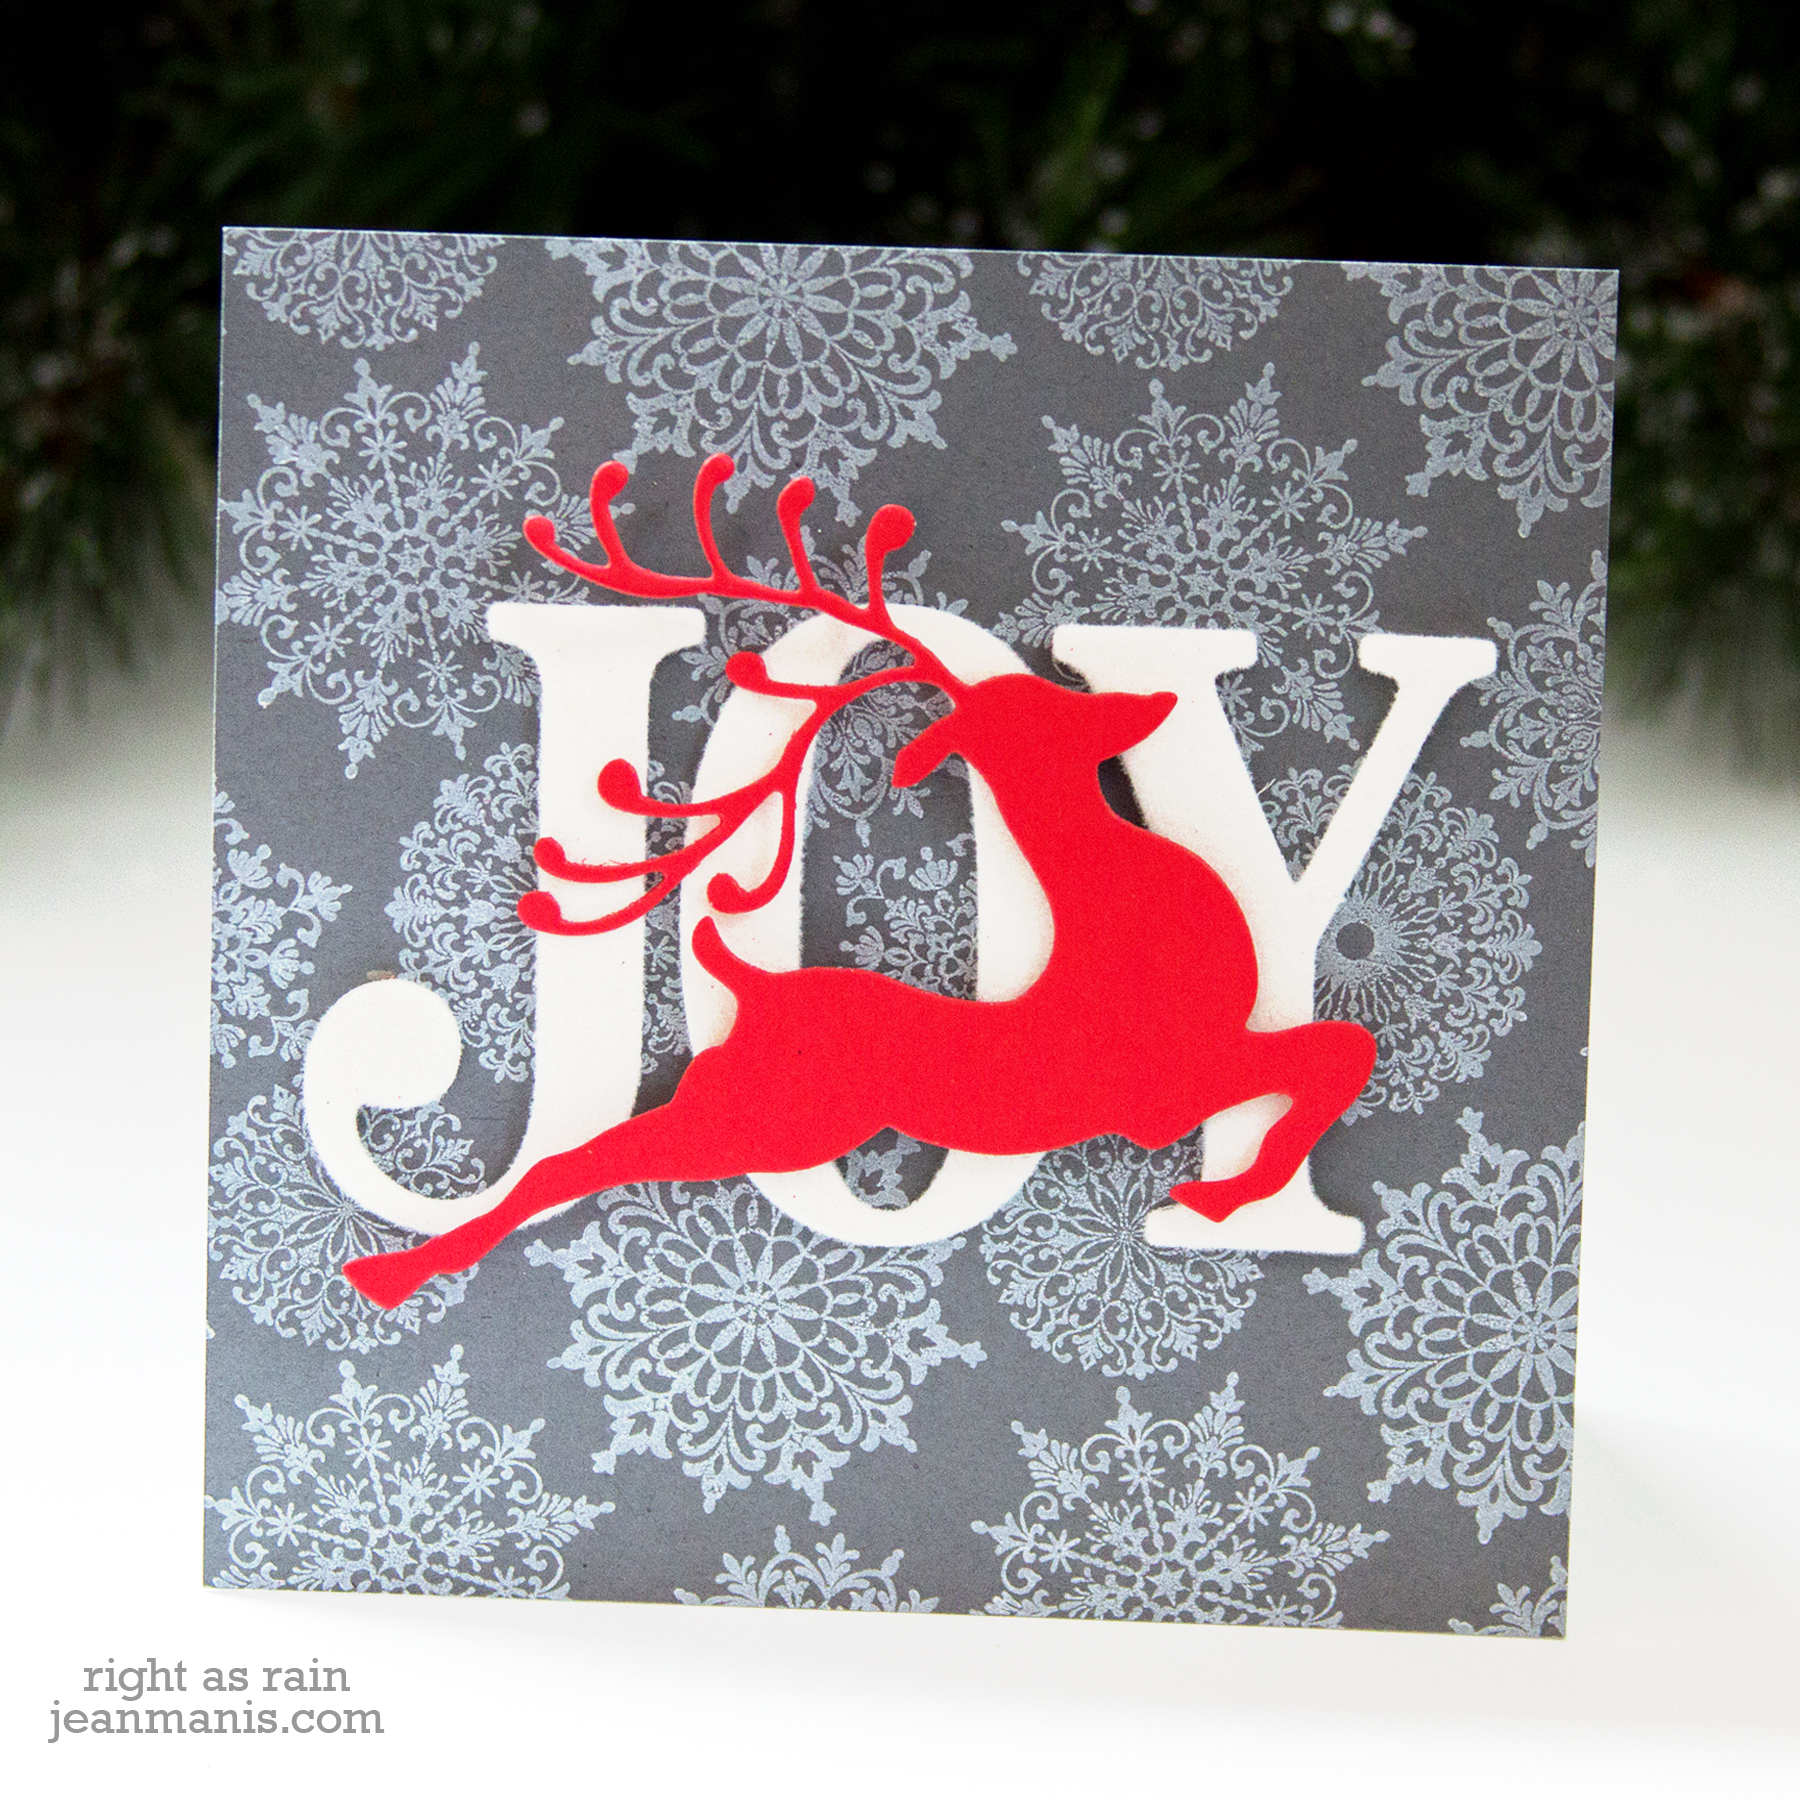
I really like to change the feel of a design with tweaks to the colors and textures.

Supplies: