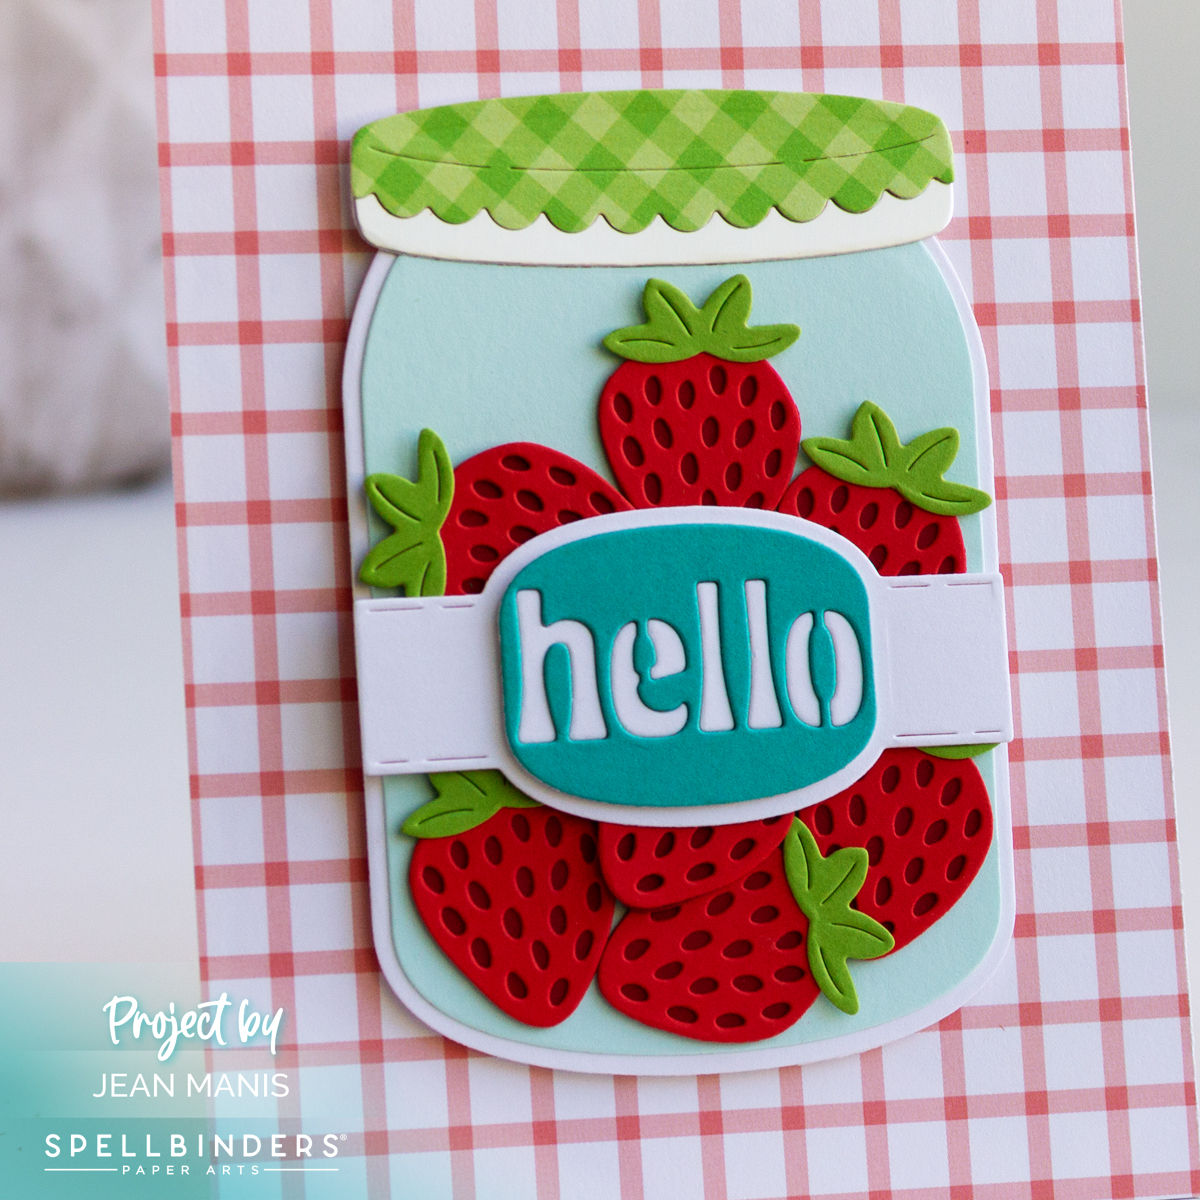
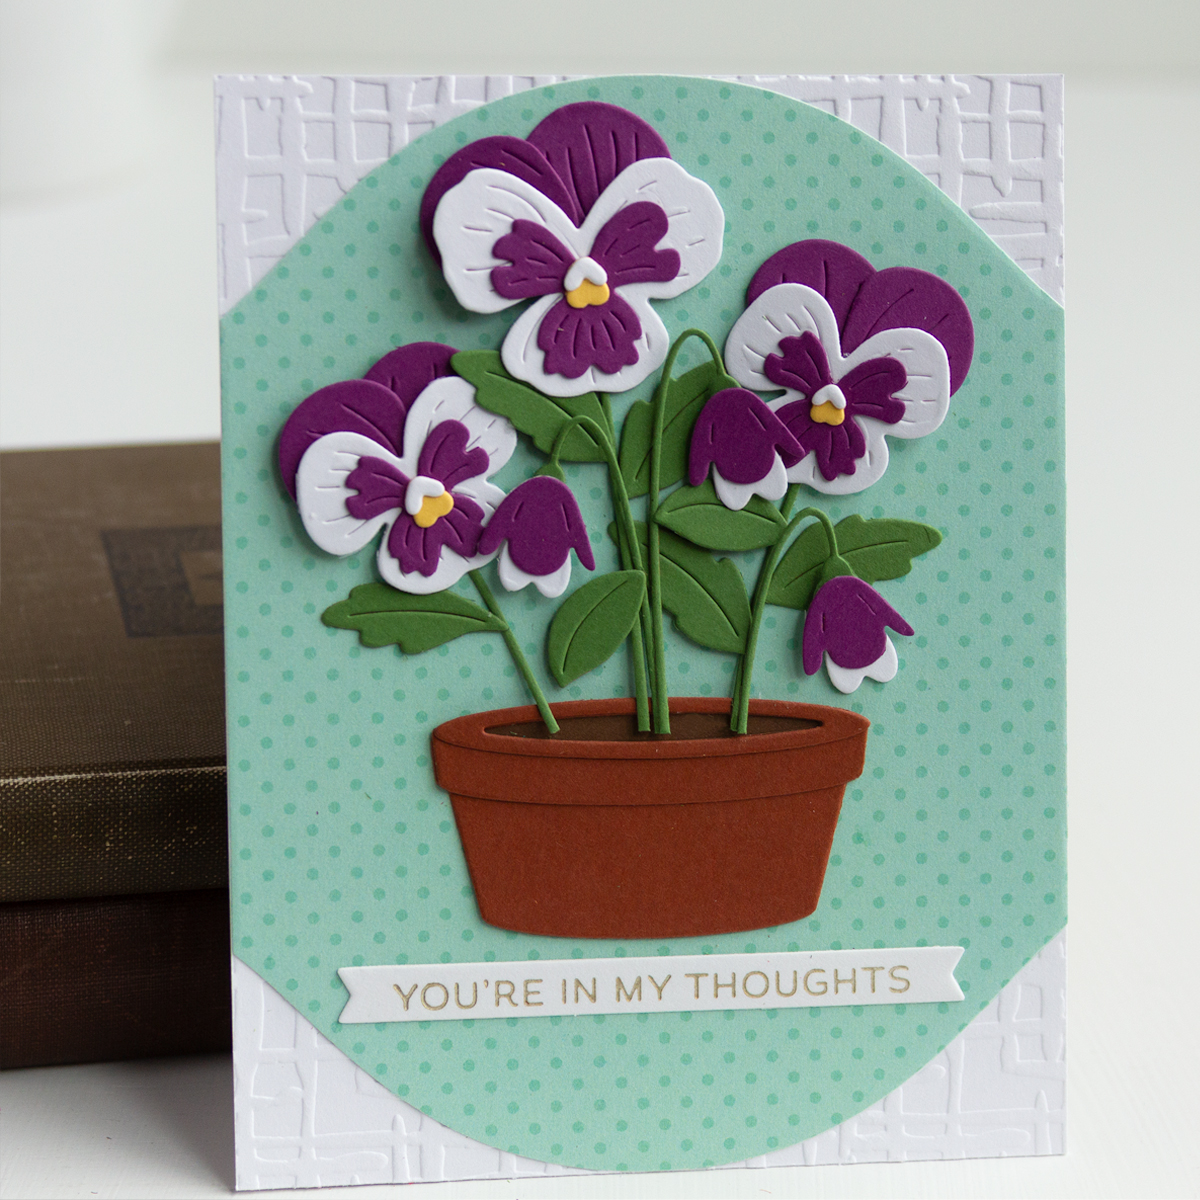
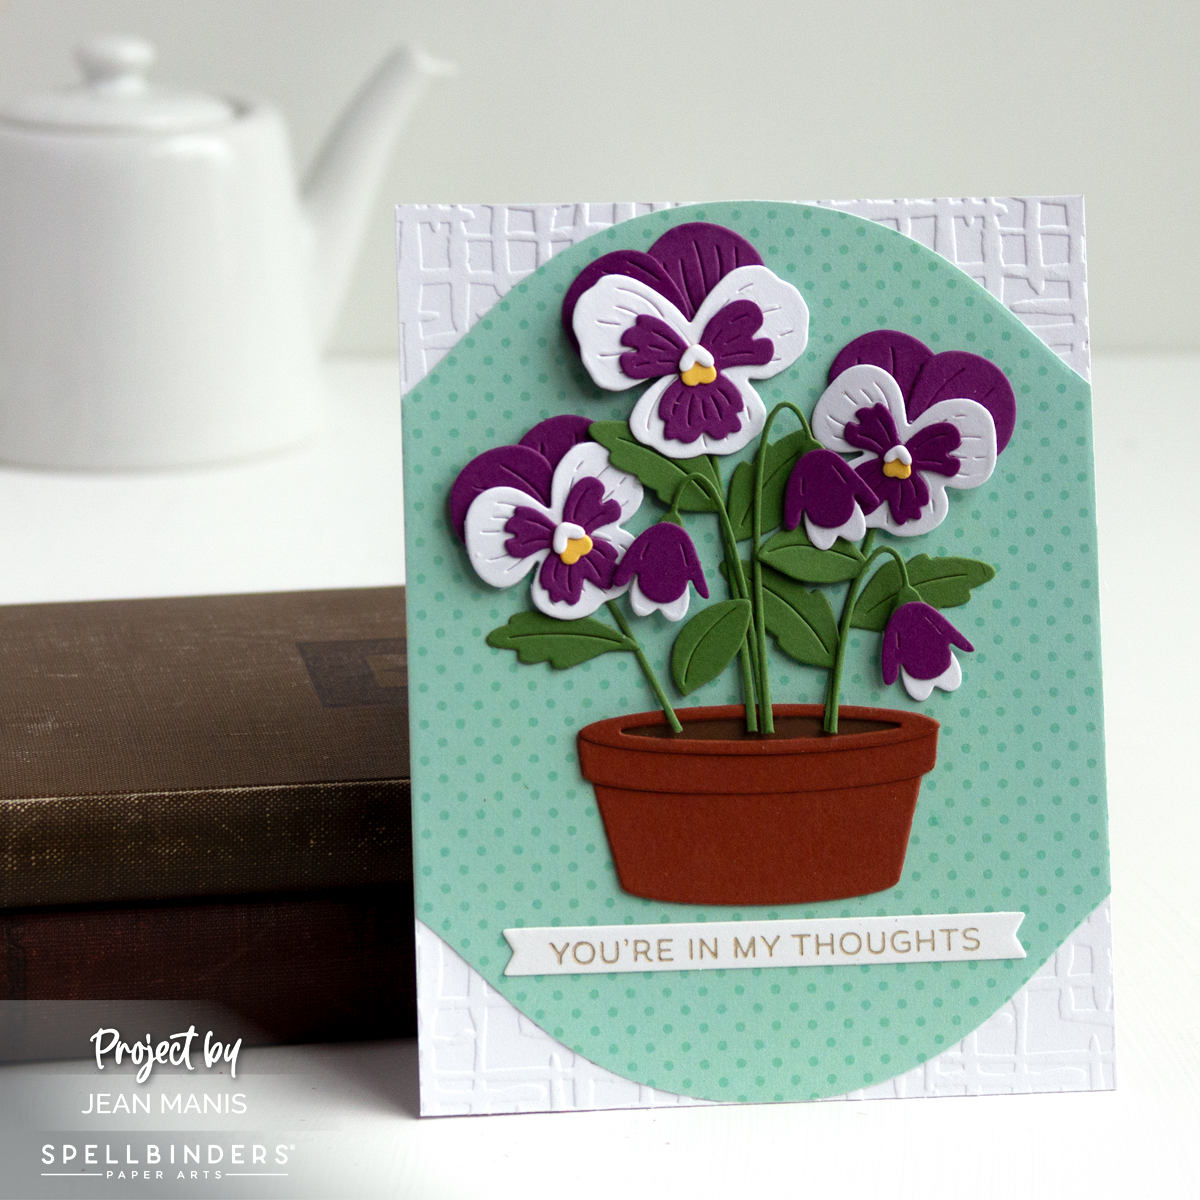
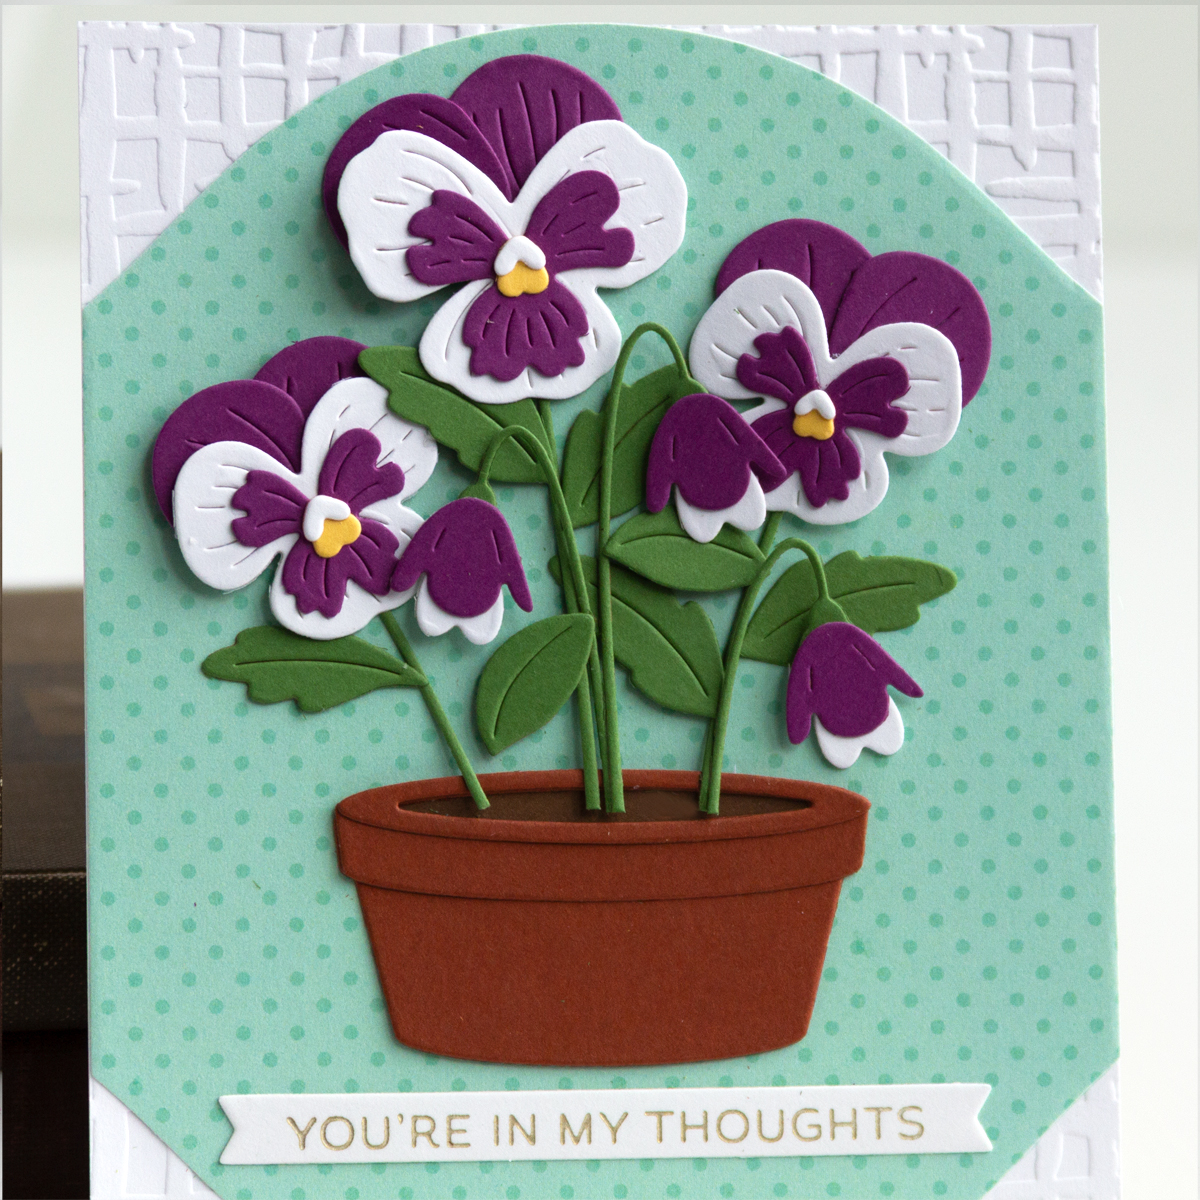
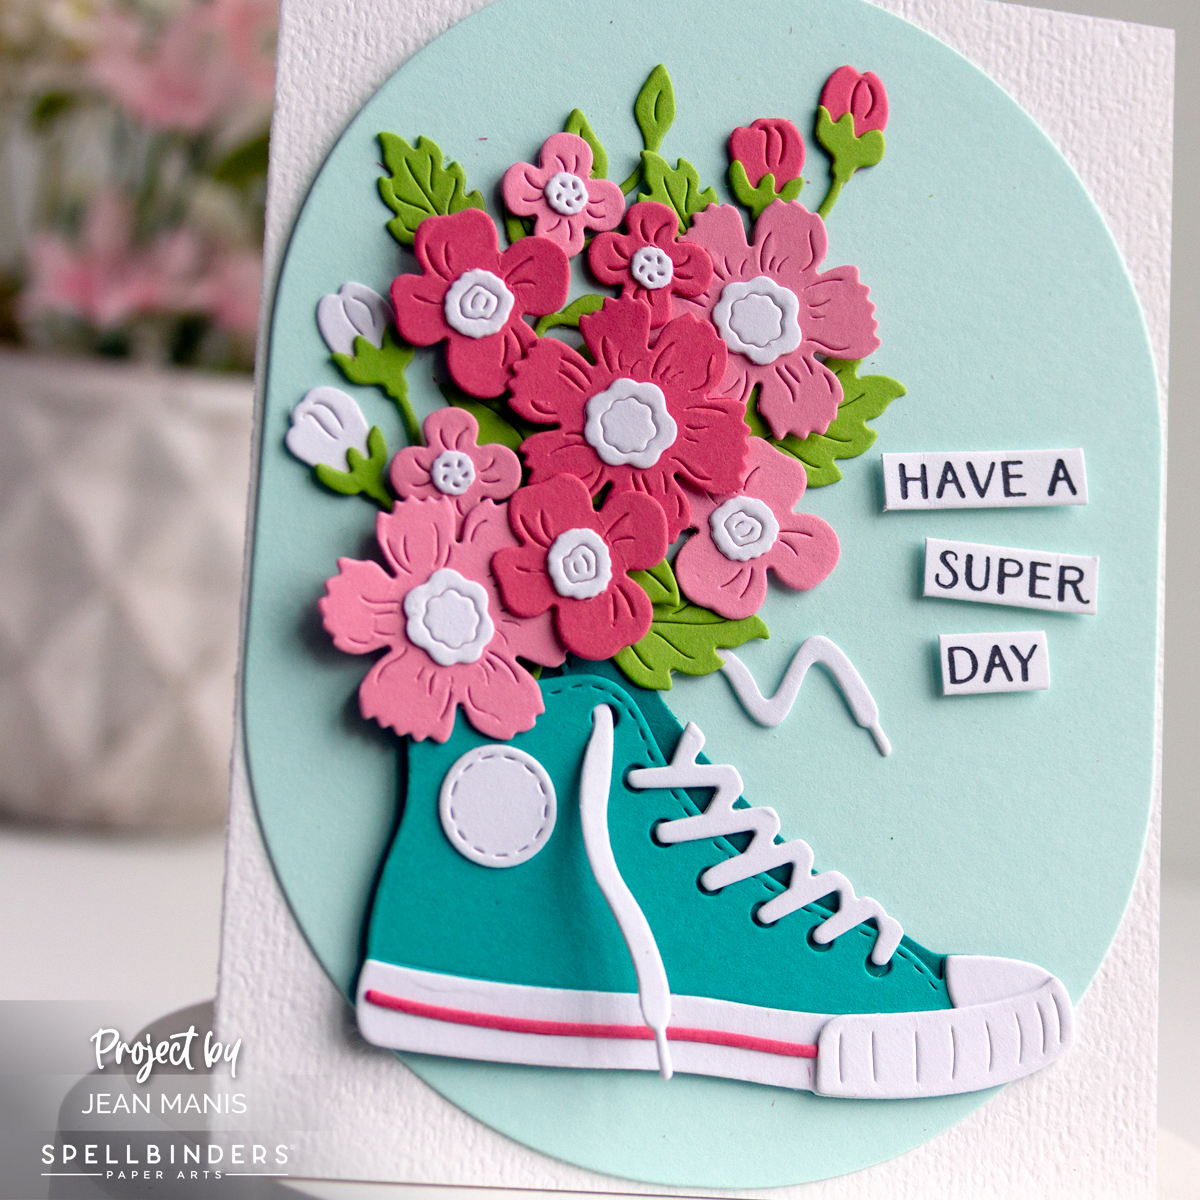
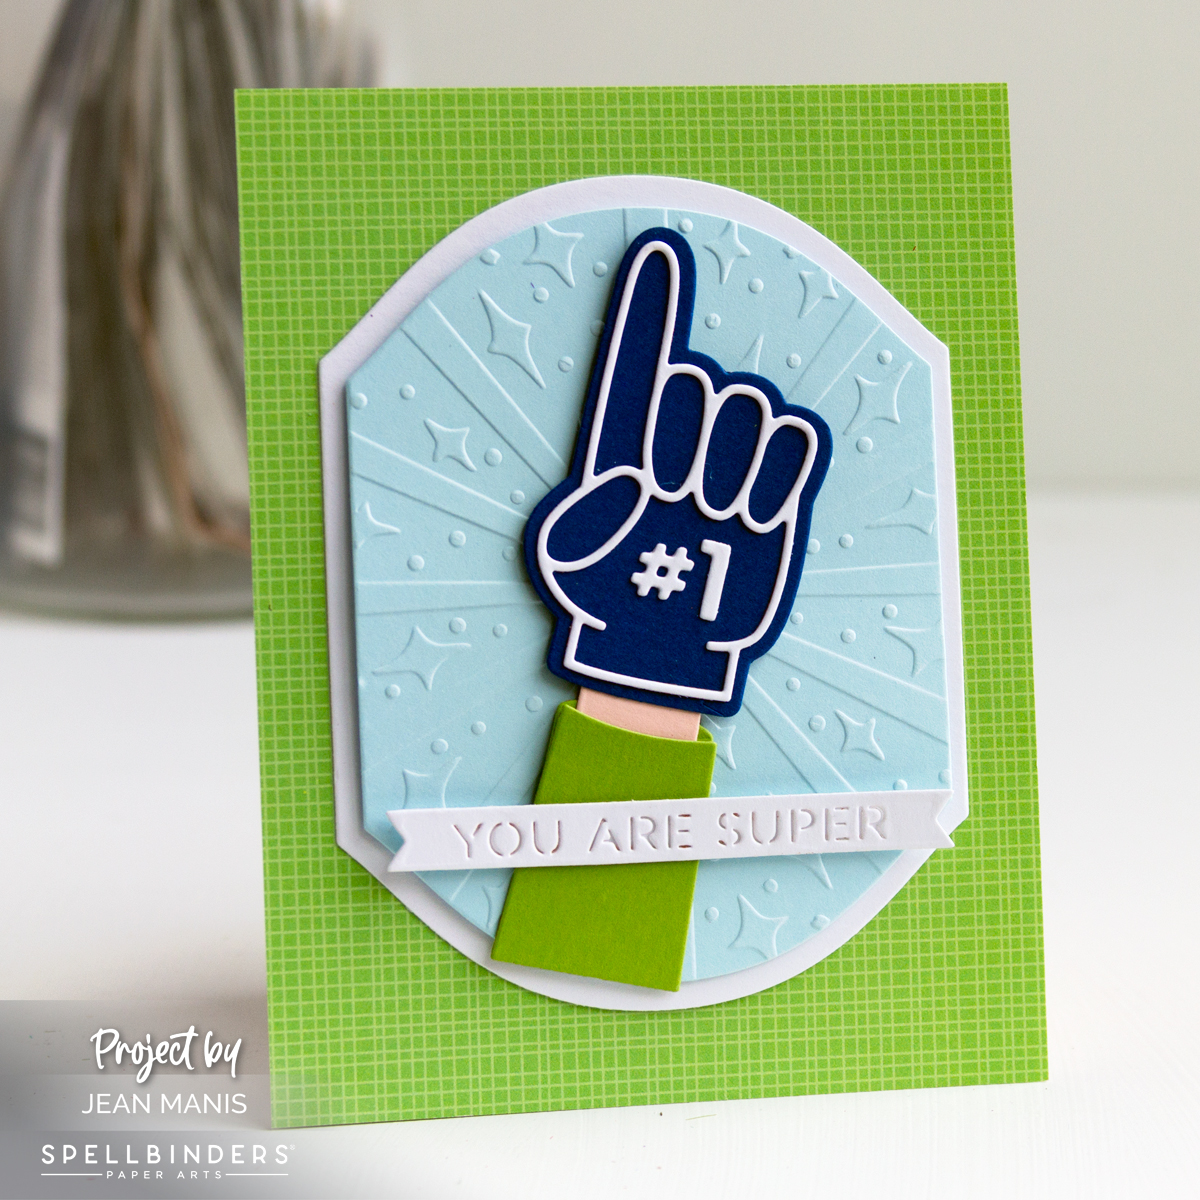
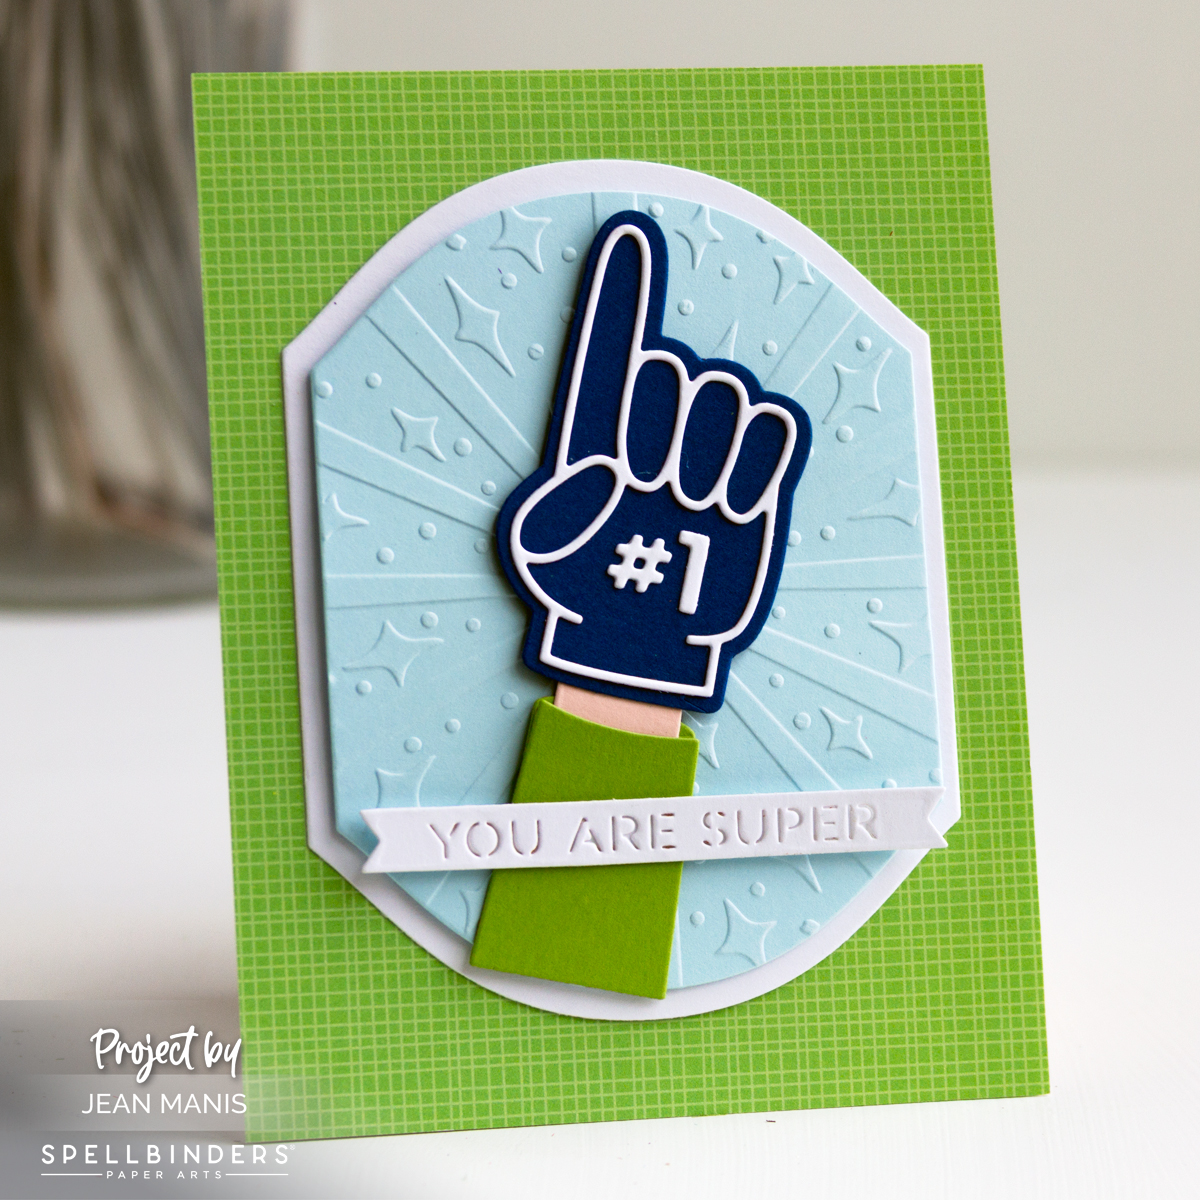
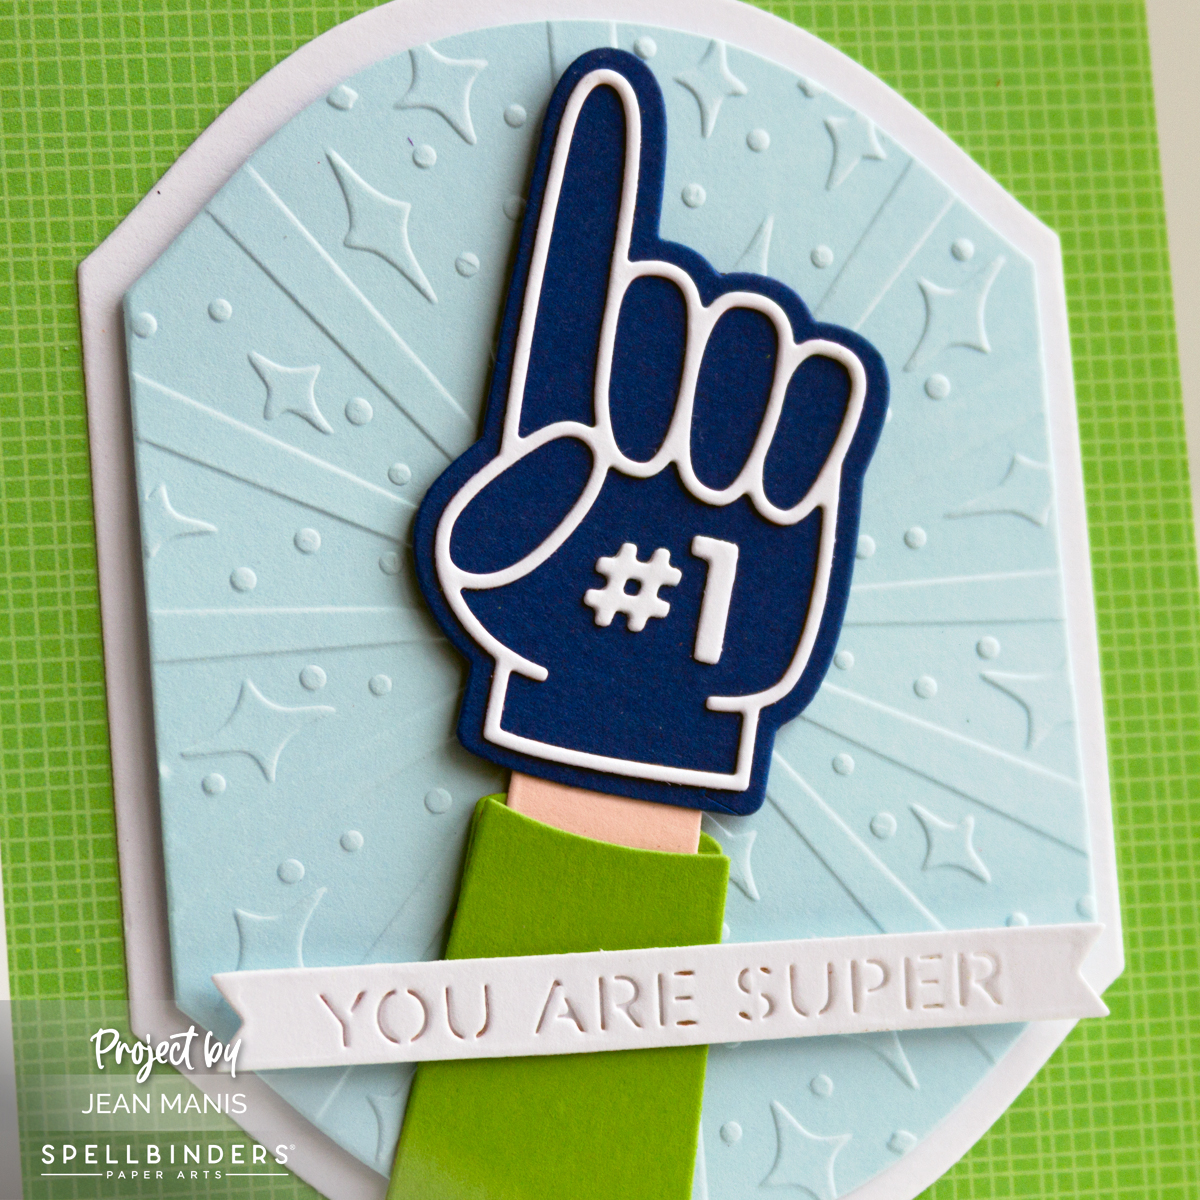
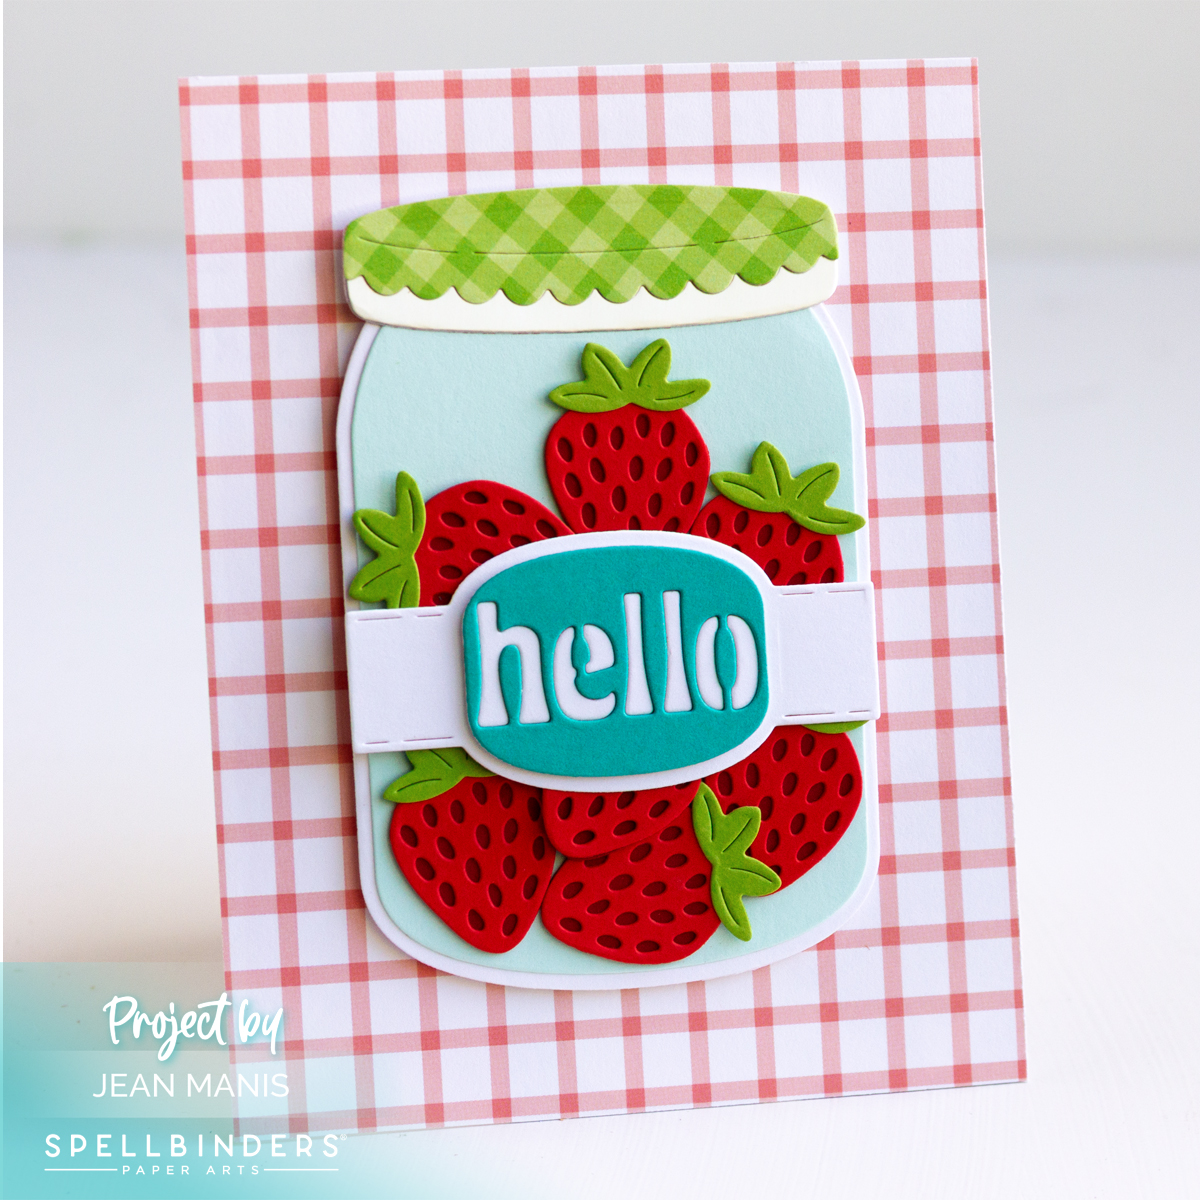
Say Hello with a Doggone Cute Design

Hello! Today, I’m sharing a playful handmade card featuring a die-cut dog sporting a baseball cap and a cheerful “Hello” sentiment—created with Spellbinders dies. This lighthearted design is perfect for sending a casual greeting, especially to a young child. I chose fun patterned paper to enhance the relaxed vibe, making the card feel friendly and fresh.

Say Hello with a Doggone Cute Design

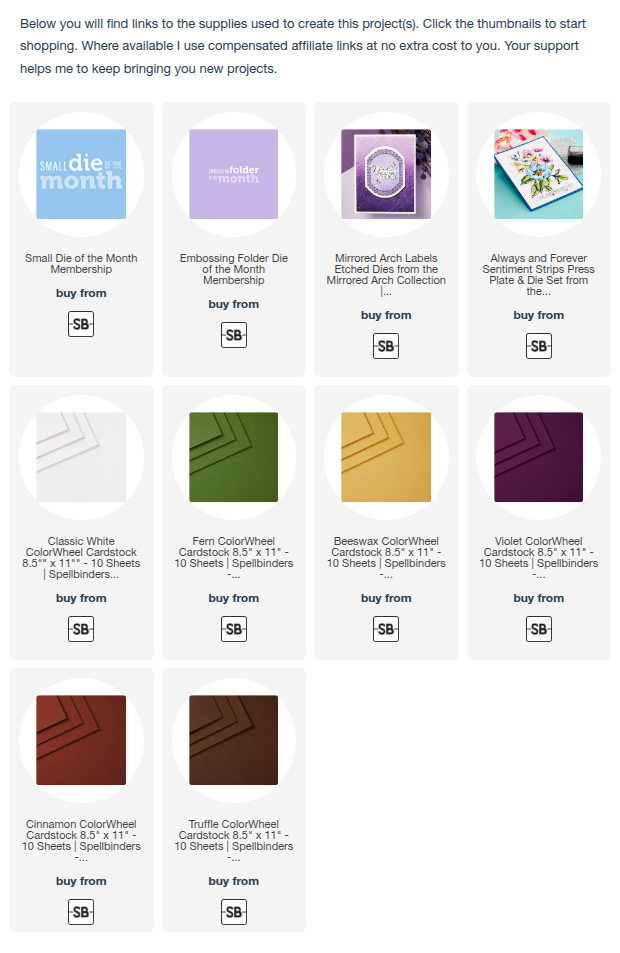
    • Cover an A2-size card base with patterned paper.
    • Use a die in the Essential Arches set to cut Cascade cardstock. Use the next smallest arch in the set to cut another piece of patterned paper. Attach the two and add to the card base.
    • Use dies in the Family & Friends Vignettes set (the March 2025 Large Die of the Month set) to cut the dog and hat. (I used other elements from the kit HERE.) Assemble.
    • Cut the sentiment with a die in the Fresh Picked Sentiments set (twice for extra depth).
    • Add dog and sentiment to the prepared card base.

Say Hello with a Doggone Cute Design


Special Delivery! A Snail Mail Card

Hello! Who says mail delivery has to be boring? My latest card brings a delightful twist to happy mail with a charming little snail on a mission! Using the Snail Mail Post die set—this month’s Small Die of the Month offering at Spellbinders—I crafted a whimsical scene featuring a determined snail, a colorful post box, and cheerful tulips. This snail is ready to spread joy, one letter at a time!

A Snail Mail Card

    • Add patterned paper to an A2-size card base.
    • Cut snail, post box, and tulips with dies in the Snail Mail Post set from a variety of cardstock colors. Assemble.
    • Stamp Message Strips sentiment on Classic White cardstock in black ink and cut with a coordinating die.
    • Cut patterned paper with the sloped line die in the Snail Mail Post set to create the ground. Attach to card base.
    • Add elements to the card with foam squares and dot adhesive.

A Snail Mail Card


Spellbinders Lock & Key Mailbox

Hello! Step back in time with the Spellbinders Lock & Key Mailbox die set—the April Large Die of the Month Club release! This detailed vintage post box captures the romance of handwritten letters and classic correspondence. With the sentiment built right in, it serves as both the focal point and a time-saving element, making assembly effortless. Whether you’re crafting for a special occasion or simply sending a heartfelt note, this design brings nostalgia and charm to every creation.

Spellbinders Lock & Key Mailbox

    • Cover an A2-card base with patterned paper.
    • Cut the mailbox, letter, and flowers with dies in the Lock & Key Mailbox set. Use the mailbox outline die to cut black foam. Assemble the mailbox, backing the assembly with the foam piece. Adhere to the card base.
    • Assemble the flower and envelope, slipping elements into the mailbox slot. Glue key to the card.

Spellbinders Lock & Key Mailbox

Spellbinders Club Rewind Sale


Adorable Crocodile Birthday Card

Hello! Why use just one die set when you can mix and match for even more creative fun? This charming birthday card features a crocodile carrying a bundle of balloons, brought to life with dies from two different Spellbinders kit clubs.

Adorable Crocodile Birthday Card

    • Create an A2-size card base from textured white cardstock.
    • Cut patterned paper with the largest die in the Essential Stylish Ovals set. Create the ground by cutting patterned paper with the same die and trimming. Add patterned pieces together and to the card case.
    • Cut crocodile, balloons, and clouds with dies in the Hooray! It’s Your Birthday and Birthday Bliss sets. Assemble.
    • Heat-emboss the Message Strips sentiment on black cardstock and cut with the coordinating die.
    • Add assembled elements to the card base with dot and foam adhesive.

The Hooray! It’s Your Birthday and Birthday Bliss, as well as other past kit clubs, are on sale through April 8, 2025!

Spellbinders Club Rewind Sale


Spellbinders | Step Into Spring

Hello! Today, I’m sharing a cheerful handmade card featuring a pair of rainboots brimming with vibrant spring blossoms. Created with a previous Spellbinders Small Die kit, this floral rainboot card is sure to brighten someone’s day! The Rainboot Bouquet and other past kit clubs are now on sale through April 8, 2025!

Spellbinders Rainboot Bouquet

      • Create an A2-size card base and cover with a panel of patterned paper.
      • Cut the Rainboot Bouquet pieces from a variety of cardstock colors and assemble.
      • Stamp the Message Strips sentiment in black ink and cut with a coordinating die in the set.
      • Add the assembled Rainboot Bouquet and sentiment to the card base using foam adhesive as needed.

Spellbinders Rainboot Bouquet

I previously used the Rainboot Bouquet die set HERE.

Spellbinders Club Rewind Sale