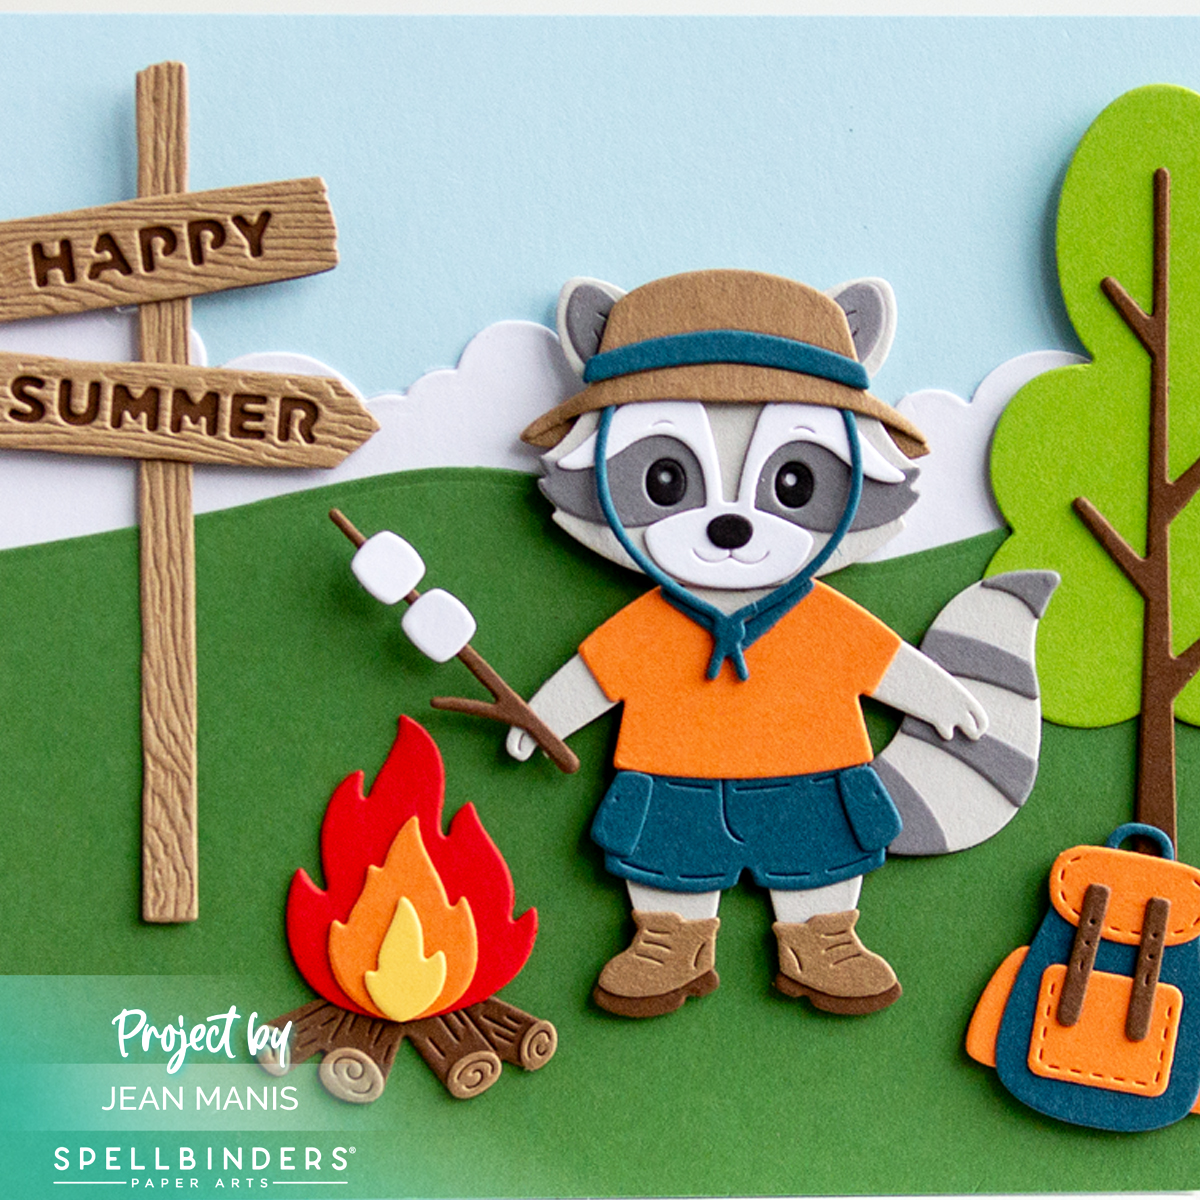
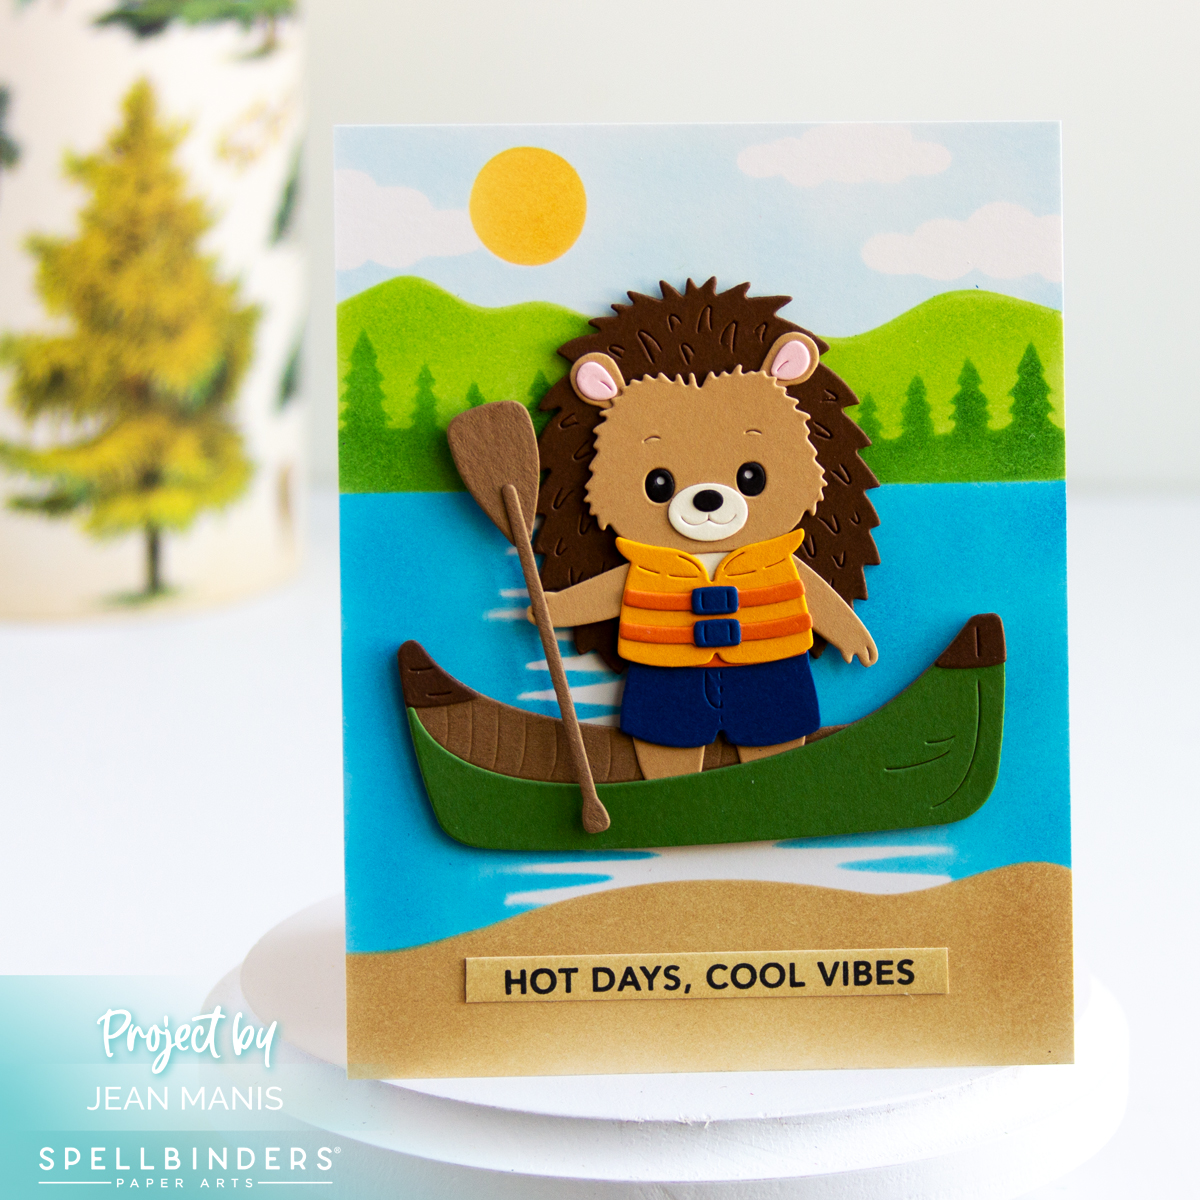
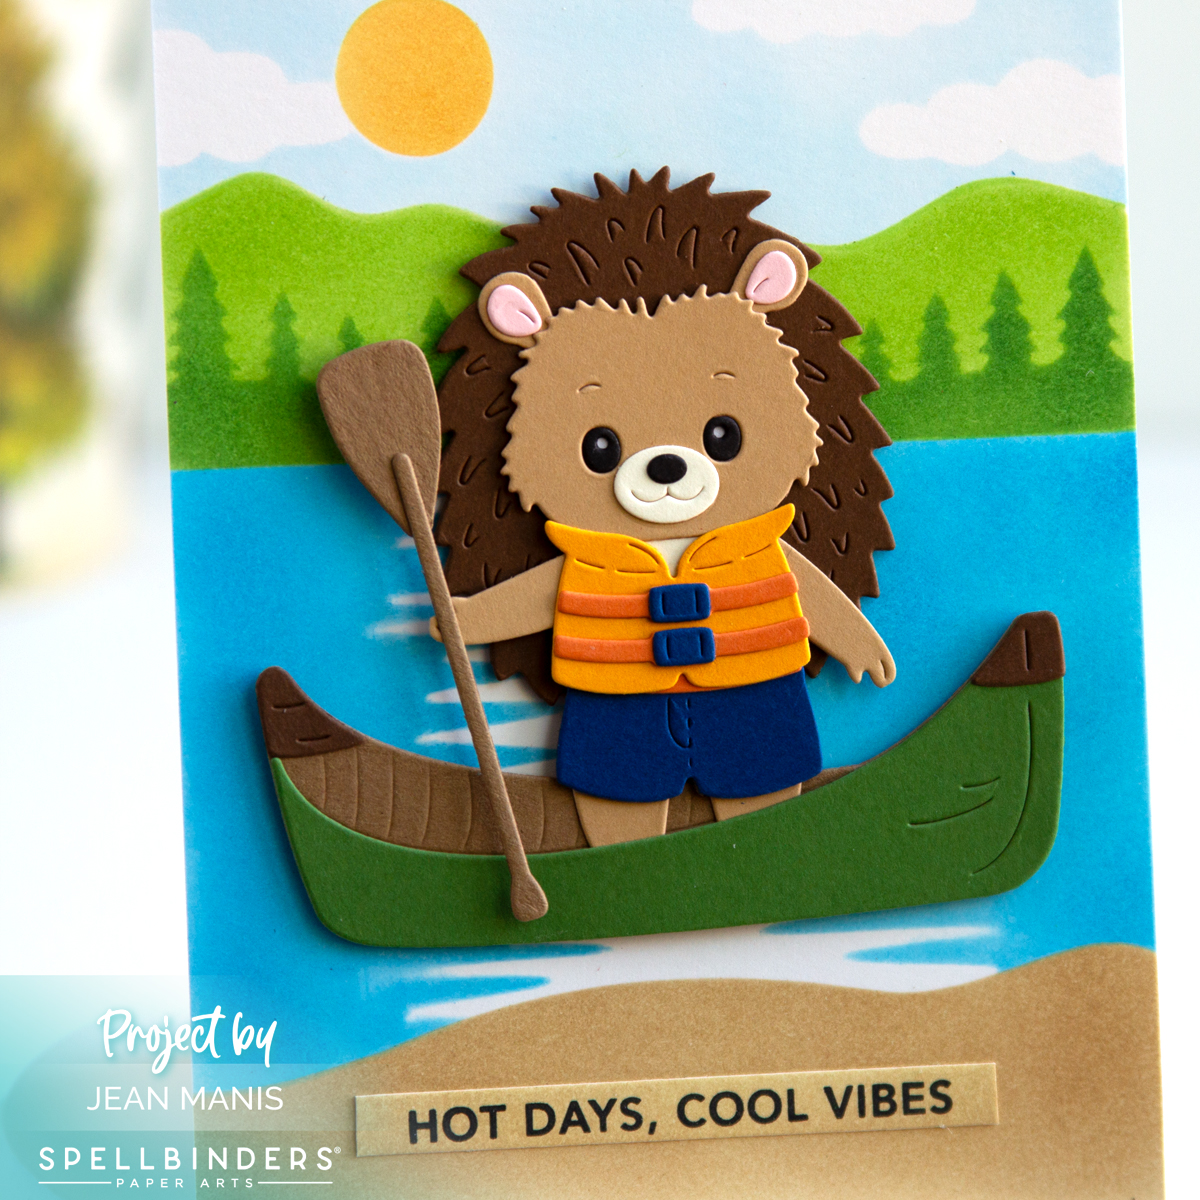
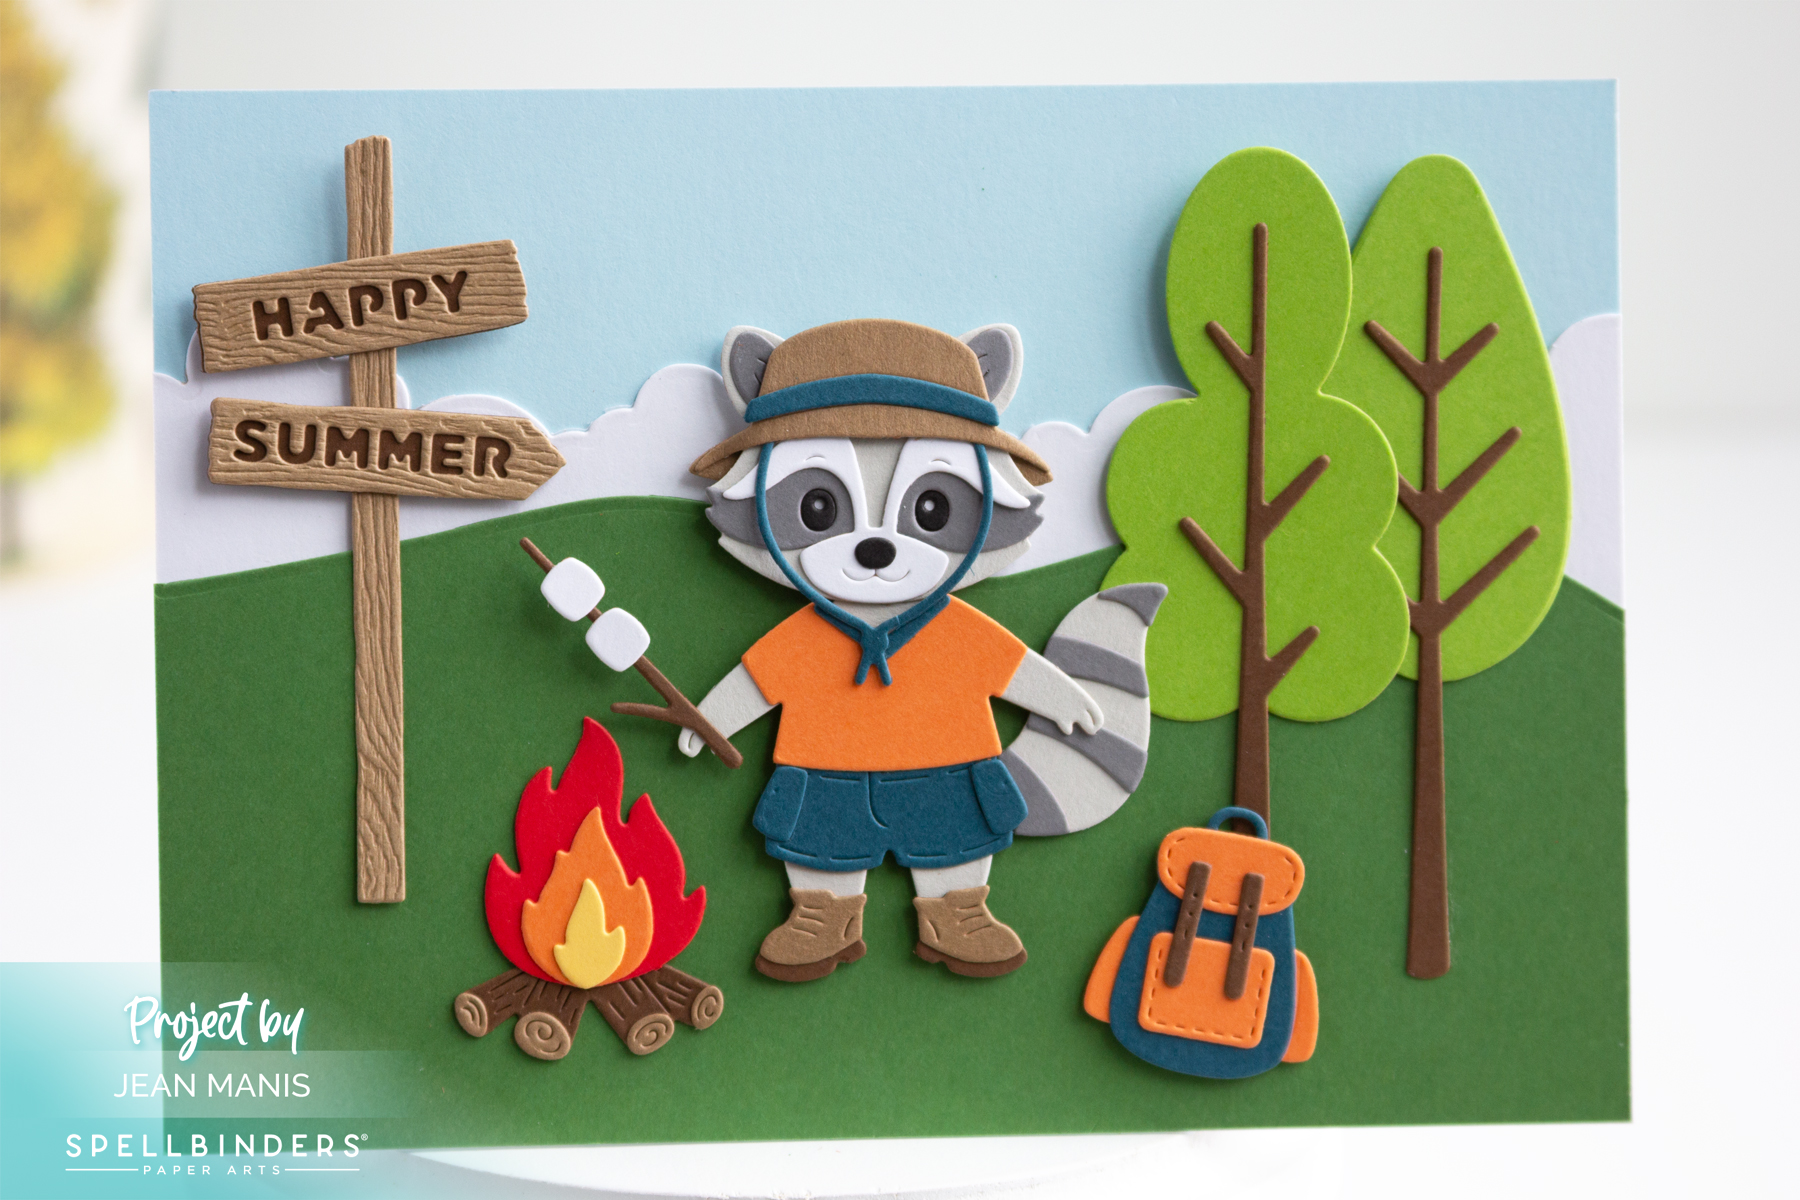
Spellbinders | Santa by the Mantel

Hello! There’s something especially heartwarming about Christmas scenes set inside the home. My latest card, created with several Spellbinders Simon Hurley die sets, captures Santa by the mantel, surrounded by stockings and holiday cheer. I loved bringing this cozy moment to life with die cuts that build a story—one that feels like it could come straight from a Christmas Eve illustration. I talk about the appeal of Santa in cardmaking HERE.

Spellbinders | Santa by the Mantel

    • Cover a 5″ x 7″ card base front with Hard Candy Christmas patterned paper. Add a strip along the bottom of Honey Bee Pinstripes and Polka Dots paper.
    • Cut Santa with the The Clauses set and assemble.
    • Create the mantel with the Mantel Village and Mantel Decorations die sets. Use a die in the North Pole Sentiments set to cut the sentiment into the mantel. Back with white cardstock.
    • Add assembled elements to prepared card base.

Spellbinders | Santa by the Mantel

I especially love that this card comes together entirely with die cuts—no stamping needed, and having the sentiment cut right into the mantel keeps the design clean and uncluttered.

Spellbinders | CAS Elegant Christmas Tree

Hello! I’m sharing a clean and simple Christmas card created with the Spellbinders Stamp of the Month – “To You & Yours.” The focal point is a Christmas tree–shaped sentiment, heat-embossed in gold and cut with the coordinating die. To elevate the design, I added the tree to a gold dry-embossed panel of holly leaves, framed it in white, and mounted it on a green card base. The touches of gold, combined with layered foam for dimension, give this minimalist design a luxurious holiday feel.

Spellbinders | CAS Elegant Christmas Tree

    • Create an A2-size card base from Fern cardstock.
    • Cut a gold cardstock panel and dry-emboss with the Holly & Foliage folder.
    • Add dry-embossed panel to a Classic White cardstock mat and add the assembly to the card base.
    • Heat-emboss in gold the Christmas tree sentiment, cut with the coordinating die, and add to the base with foam adhesive.

Spellbinders | CAS Elegant Christmas Tree


Spellbinders | Playful Pasta Cards

Hello! I’m sharing a set of four handmade cards created with the Buon Appetito Collection at Spellbinders celebrating all things pasta! Each card features one or two die-cut pasta shapes paired with a punny sentiment that’s sure to make anyone smile. From bowties to spaghetti, these designs are perfect for food lovers and cardmakers alike.

Buon Appetito Collection at Spellbinders

To begin, cover A2-size card bases with patterned paper.

Cut pasta and accessories with dies in the Pasta Friends set. Assemble as needed.

Buon Appetito Collection at Spellbinders

Stamp Stay Saucy sentiments onto cardstock and cut with a die in the Essential Stylish Ovals set.

Buon Appetito Collection at Spellbinders

Add sentiment panels to vellum ovals cut with the next largest die. Add assemblies to prepared card bases.

Buon Appetito Collection at Spellbinders

Add assembled pasta shape (or shapes) to cards with foam adhesive.


Spellbinders | Snow Day Friends

Hello! The Spellbinders October Small Die of the Month kit, Snow Day Friends, captures the playful joy of winter in the most delightful way. I used the kit to create a Christmas card showing two bundled-up children building a snowman, with a stamped sentiment from the coordinating Stamp Kit. The illustration style of the die set brings a nostalgic, storybook charm.

Spellbinders | Snow Day Friends

Dry-emboss a Breeze cardstock panel with the Sparkling Snow folder and add to an A2-size card base.

Cut the snowman, snowball, snowbank, and children with dies in the Small Die of the Month kit from a variety of cardstock colors. Assemble.

With the October Stamp & Die set, stamp the sentiment and cut with the coordinating die.

Add assembled elements to the card base with foam adhesive and glue.

Spellbinders | Snow Day Friends


Spellbinders | Window Wonderland

Hello! The Spellbinders October Large Die of the Month, Window Wonderland, is all about capturing nostalgic charm. The card reminds me of something out of “A Christmas Story” (which was set in 1940).

Spellbinders | Window Wonderland

    • Cover an A2-size card base with patterned paper.
    • Cut the bay window structure twice with the Window Wonderland set. Using the window die outlines, cut out the windows from the front panel. This enables the drapes and tree to go inside the windows.
    • Cut drapes and tree with the set and attach to the inside panel. Cut the detailed window frames and inlay to the frame created in the previous step. Adhere the two layers. Add additional details (trim, string of lights, snow on top of the window) using dies in the Window Wonderland set.
    • Using the Window Wonderland set, cut the child, sled, and gifts from cardstock and assemble. Use the same set to create the snowbank.
    • Use the sentiment die in the North Pole Sentiments set to cut “Merry Christmas” from the snowbank. Back with Pomegranate cardstock and add to the base of the card, providing enough room at the top to slide in the window assembly. Attach the child and sled with foam squares.

Spellbinders | Window Wonderland