Spellbinders | Potted Pansies Card

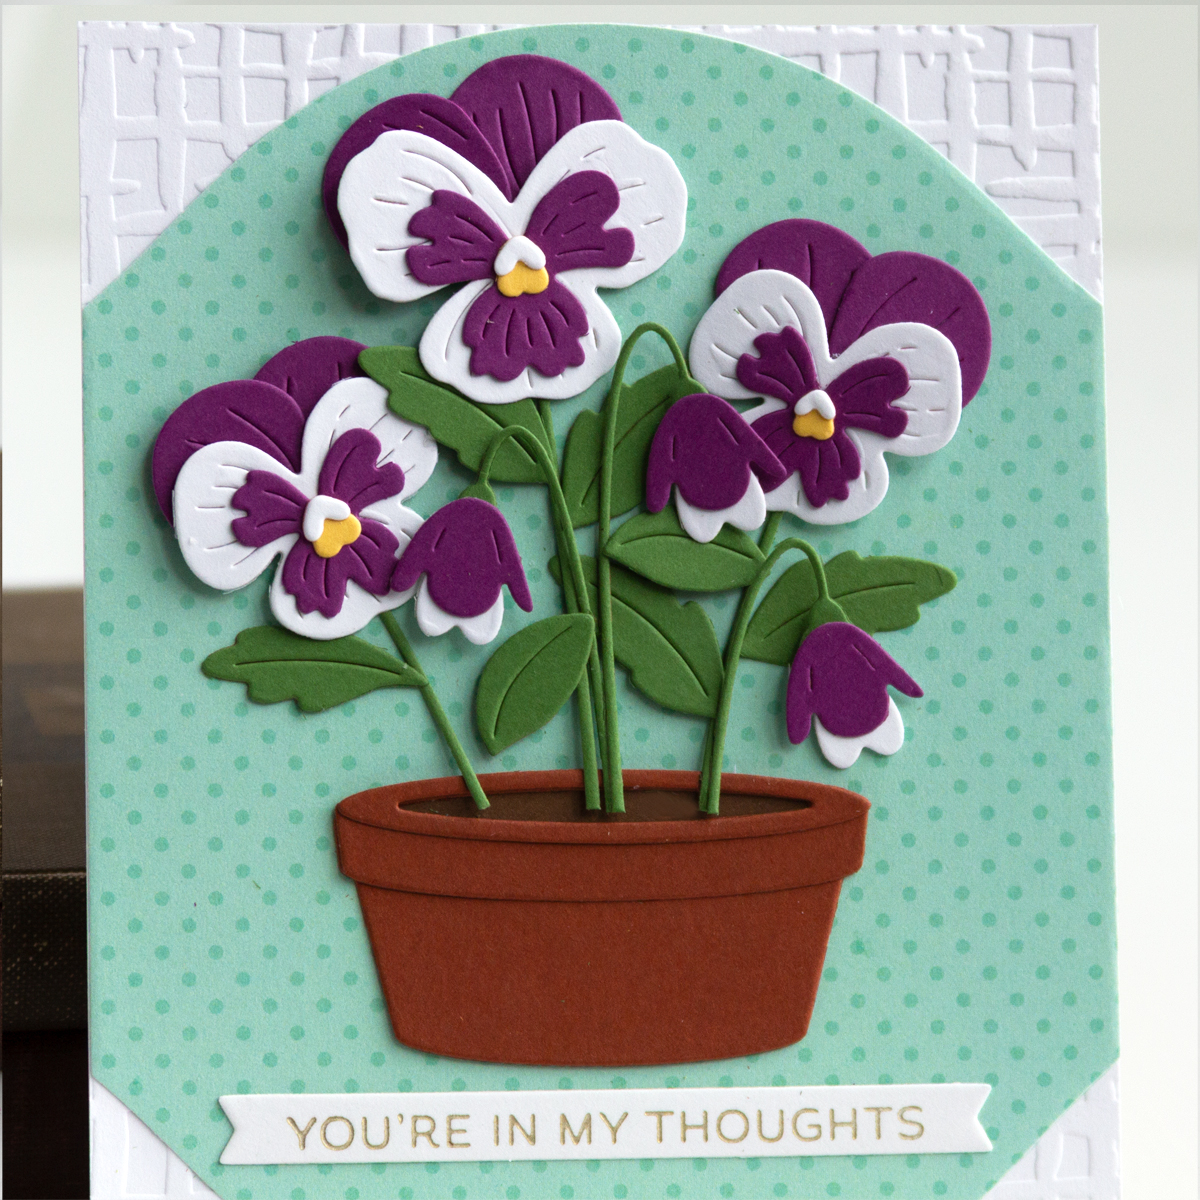
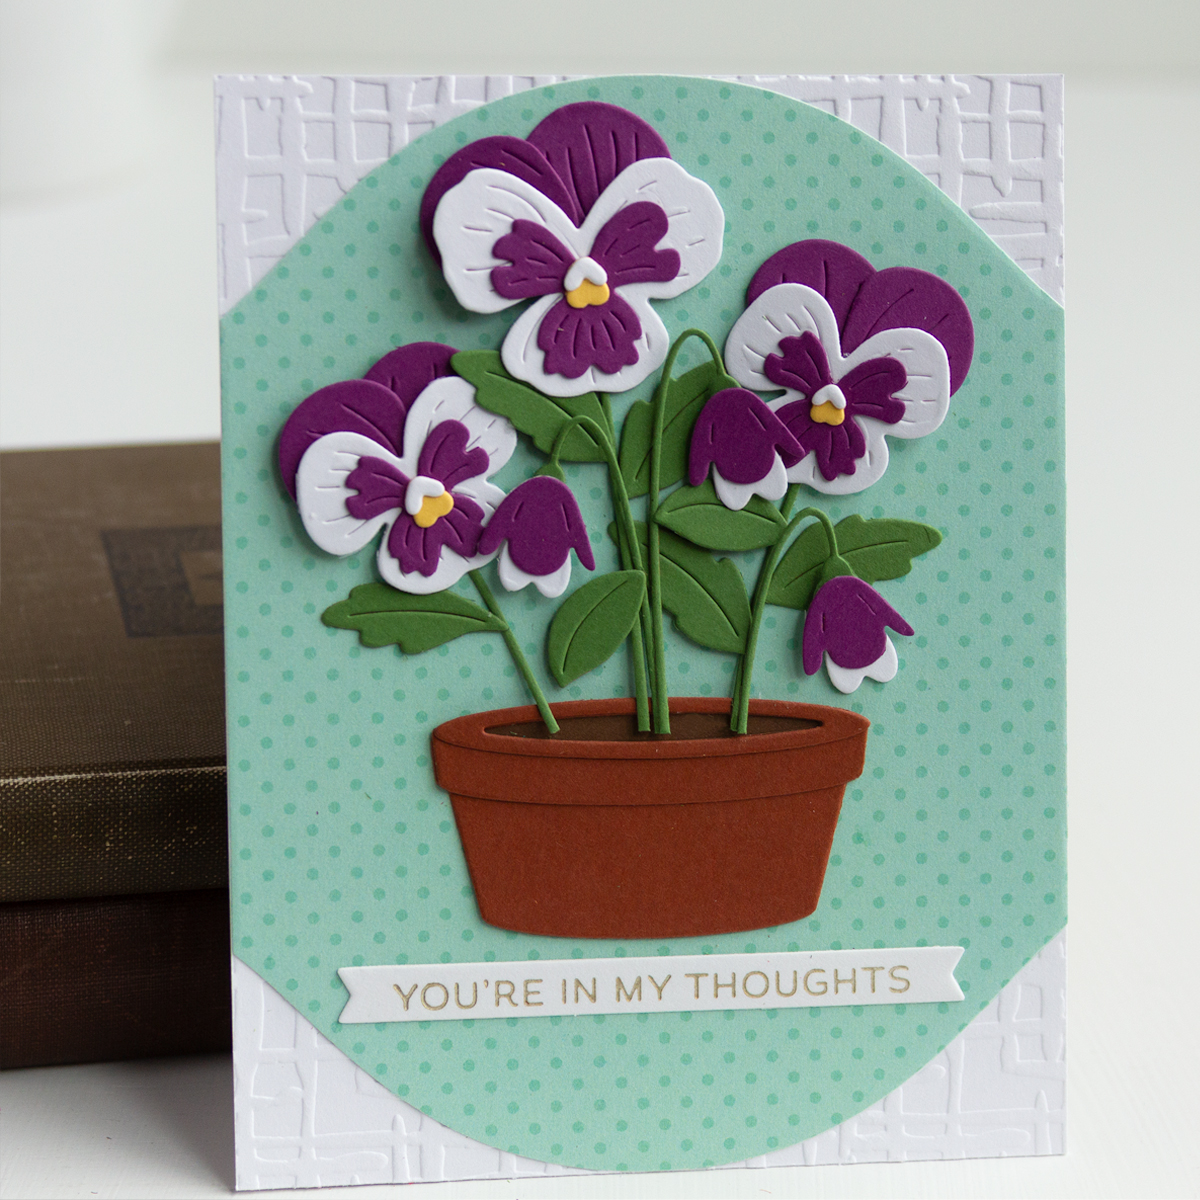
Hello! If you’re waiting on this month’s Spellbinders Die of the Month Kit, you’re in for something special. The pansies are beautifully designed, with bloom variations that make arranging them feel both easy and expressive.  paired the arrangement with a dry-embossed background for subtle texture and added a patterned paper mat. The sentiment, “You’re in My Thoughts,” makes this a card perfect for reaching out with a quiet moment of care and connection.

Spellbinders | Potted Pansies Card

    • Dry-emboss an A2-size panel of Classic White cardstock and add it to a card base.
    • Cut patterned paper with the largest die in the Mirrored Arch Labels set and add to the card base.
    • Cut the pansies, greenery, and pot from a variety of cardstock colors using dies in the Small Die set. Assemble as required.
    • Better Press the Always and Forever sentiment and cut with the coordinating die.
    • Add the elements to the card base with glue, dot adhesive, and foam adhesive.

Spellbinders | Potted Pansies Card


Elizabeth Craft | Little Mouse Tulip Drive

Hello! You may have noticed I’ve been creating quite a few scene cards lately with Elizabeth Craft Designs products, and this one might be my favorite for spring! Featuring the Little Mouse behind the wheel, I used the car from the Dogs Days release and scene-building dies to bring a road trip to the tulip fields to life. The “flower power” sentiment perfectly captures the playful, carefree vibe of this design, making it a fun way to celebrate the season.

Elizabeth Craft | Little Mouse Tulip Drive

    • To begin, create the background with the Garden Edges and Fence die set. I printed the sentiment and cut it with the cloud die in that set. Ink the pieces as needed, then add them to the card base. The card measures 5 1/4″ tall by 7″ wide.
    • Cut the Little Mouse, ink, and assemble. The full body is not needed.
    • Cut the Car, ink, and assemble. I previously used the Car die in this scene.
    • Add the assembled elements to the prepared background.

Elizabeth Craft | Little Mouse Tulip Drive


Spellbinders | Tulip Fields in Bloom

Hello! For this spring card, I used a Spellbinders BetterPress tulip plate with its coordinating stencils, part of the Yana’s Tulips Collection. The BetterPress background makes coloring the scene simple and the Distress Oxide inks through the stencils gives the scene the look of a painted landscape. A BetterPress sentiment ties everything together.

Spellbinders | Tulip Fields in Bloom

    • To begin, press the Windmills and Tulips scene on to white cardstock with black ink.
    • Color the scene with Distress Oxide inks using the coordinating stencils.
    • Trim panel and add to an A2-size card base.
    • Press the You are Everything sentiment, cut with its coordinating die. Add the sentiment to the scene.

pellbinders | Tulip Fields in Bloom


Elizabeth Craft | Spring Rain Mice Card

Hello! Today’s card features the charming Big Mouse and Little Mouse die sets from Elizabeth Craft Designs, ready for the spring rain. I intentionally kept the design streamlined by choosing patterned paper for the background rather than building a die-cut scene. I finished the design with a BetterPress sentiment that reads “Hello, Sweet Friend.”

Elizabeth Craft | Spring Rain Mice Card

    • Cover a 6-inch square card base with patterned paper.
    • Press the sentiment and cut with the coordinating die.
    • Cut the Little Mouse, Big Mouse, and Fall Accessories from Soft Finish Cardstock. Color with Distress Oxide inks (Tattered Rose, Black Soot, Spun Sugar, Blueprint Sketch, Candied Apple, Squeezed Lemonade, Hickory Smoke) and assemble.
    • Add the assembled mice and sentiment to the card base.

Elizabeth Craft | Spring Rain Mice Card


Spellbinders | Easter Birthday Card

Hello! A birthday during the Easter season calls for a mashup of spring and celebration. This card combines a variety of Spellbinders supplies including the recently released Bunny Buddies set. I know many of you enjoy seeing how versatile these sets can be. I’ve shared other mashups featuring Simon Hurley designs before, and once again this card shows how easily these pieces can stretch beyond a single holiday or occasion.

Spellbinders | Easter Birthday Card

    • To begin, cover an A2-size card base with patterned paper (Echo Park Party Animal).
    • Cut Cascade cardstock with the largest die in the Mirrored Arch Labels set and dry-emboss with the Floating Balloons folder. Add to the card base.
    • Cut the frame with the Memory Frames die and back with patterned paper (Carta Bella They Say It’s Your Birthday). Add to the card.
    • Cut the balloon with the smallest balloon die in the Color Block Balloons set. Assemble.
    • Cut the sentiment banner, package, and party hat with dies in the Birthday Bear set. Assemble.
    • Cut the bunny with the Bunny Buddies set. Assemble. I previously shared a card with the Bunny Buddies die set HERE.
    • Add assembled elements to the prepared card with foam and dot adhesive.

Spellbinders | Easter Birthday Card