Hello! Today I am sharing a Christmas card created for the Sketch Challenge at the 52 Christmas Card Throwdown.

I absolutely love participating in sketch challenges. The limited choice in terms of design pushes me to think innovatively. Instead of feeling restricted, I find that my imagination thrives! Additionally, challenges that don’t have specific manufacturer affiliations or brand restrictions make it possible for me to explore my vast collection of crafting supplies. I can reach into my stash of paper, stamps, and dies and mix-and-match!
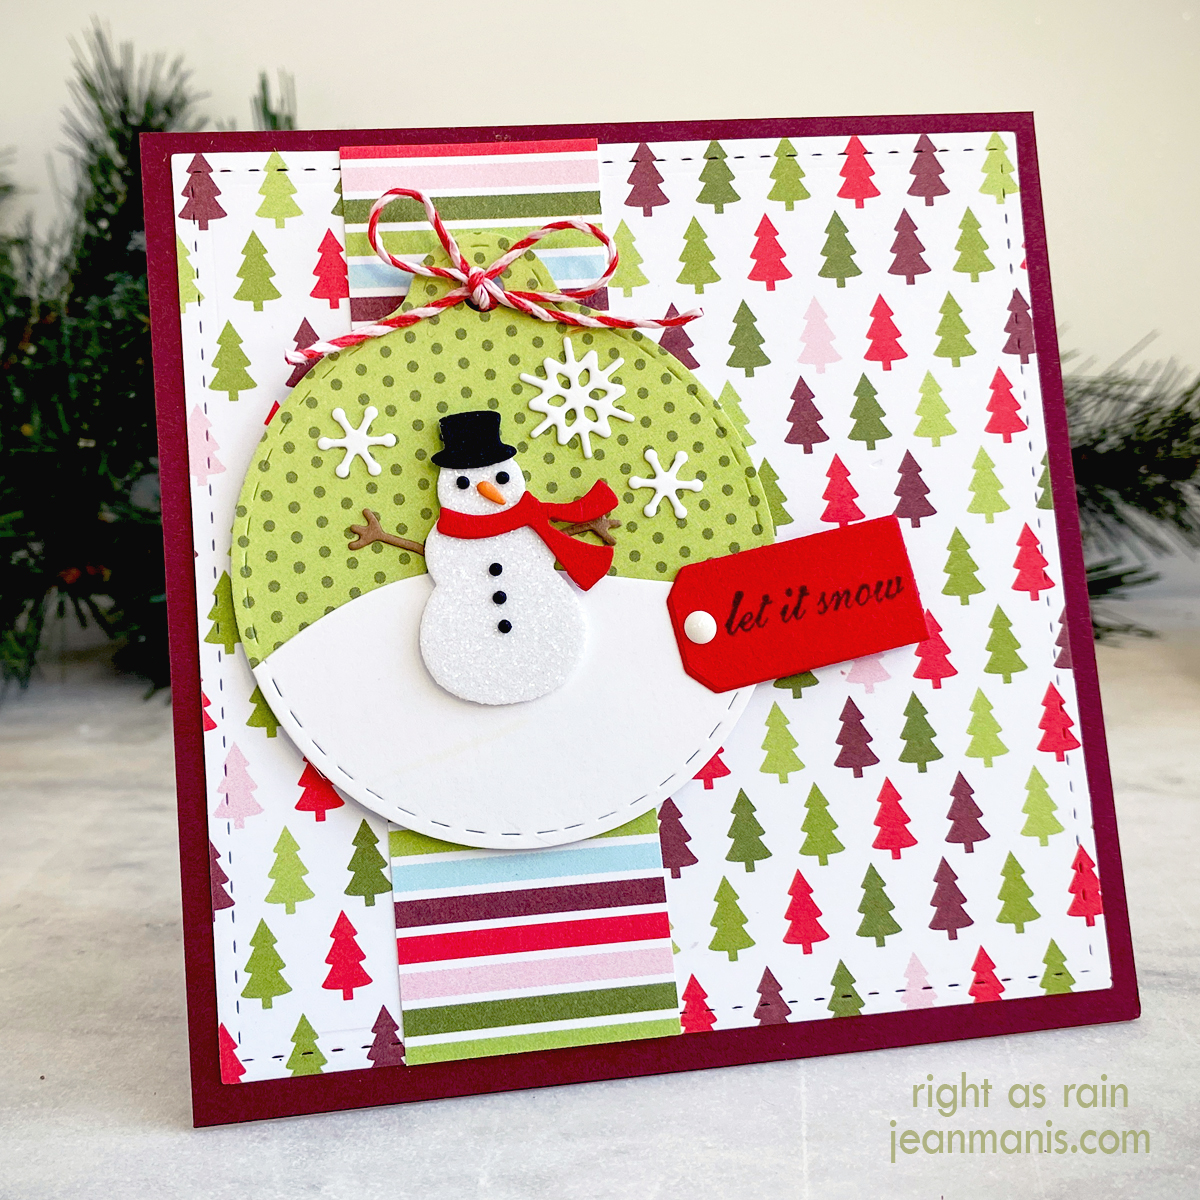
- I cut a 4 1/4″ square of the tree patterned paper with a now-retired Lil’ Inker stitched die and added it to a 4 1/2″ card base of TE Mulled Wine cardstock. (As I mentioned in this post, patterned paper offers a quick and convenient way to add character in cardmaking. I found a now-retired package of Taylored Expressions patterned paper with a variety of coordinating papers.)
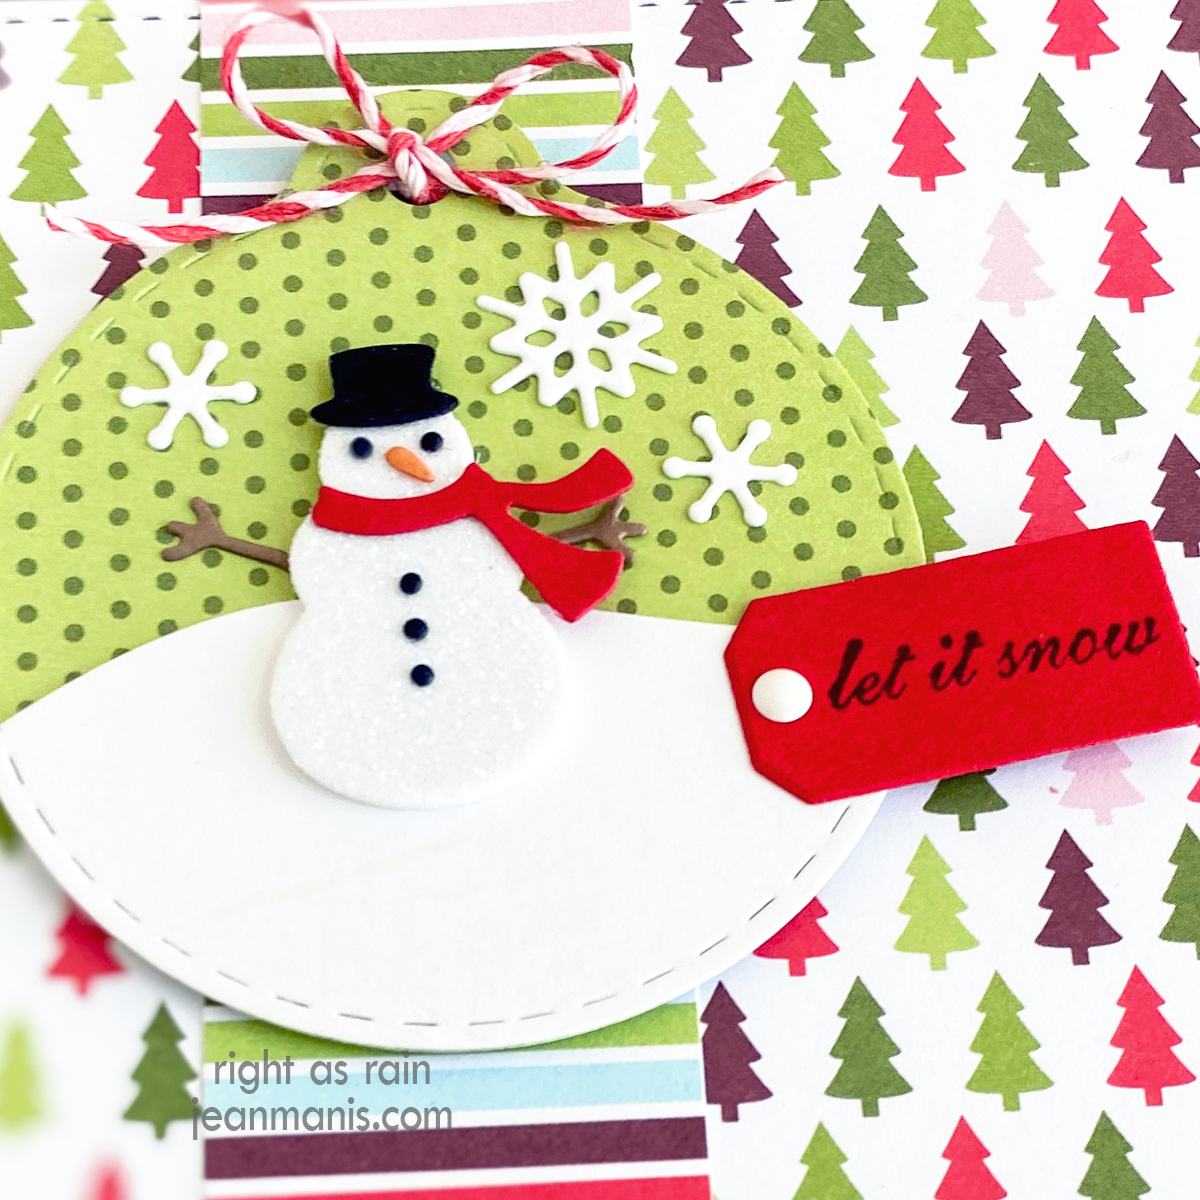
- With one of the Tag Stacklets 3 dies, I cut the ornament from patterned paper and Snowdrift cardstock. I used a die in the Build a Scene – Rolling Hills set to cut a snowbank from Snowdrift cardstock and added it to the ornament.
- I cut a strip of the striped paper 1 1/4″ x 4 1/4″ and added it to the background and the ornament to the strip.
- With the Taylored Expression Little Bits Snowman die set (now-retired), I cut the pieces and assembled the snowman. I used the Little Bits – Snowflake Confetti set to cut snowflakes from the Snowdrift cardstock. I adhered the snowman and snowflakes to the circle ornament and tied twine at the top.
- I used the Savvy “Let It Snow” rubber stamp, (bought over a decade ago at the Impress stamp store in Seattle), for the sentiment and cut it with a die in the TE Mini Tags set (the set is now retired, although there appear to be similar small tag dies on the Taylored Expressions site). I added the tag to the ornament with an enamel dot.
This challenge gave me the perfect excuse to revisit forgotten gems in my stash.