Welcome! If you are following along the blog hop you should have arrived at my blog from Ira’s.
I’m sharing two seasonal tags created with Poppystamps birdhouse and bird dies. I like having tags available that can be used for gift giving throughout the winter months. I also designed these tags with male recipients in mind – I’ve got two sons and a husband, so I’m always in need of gift-wrapping supplies that aren’t too girly.
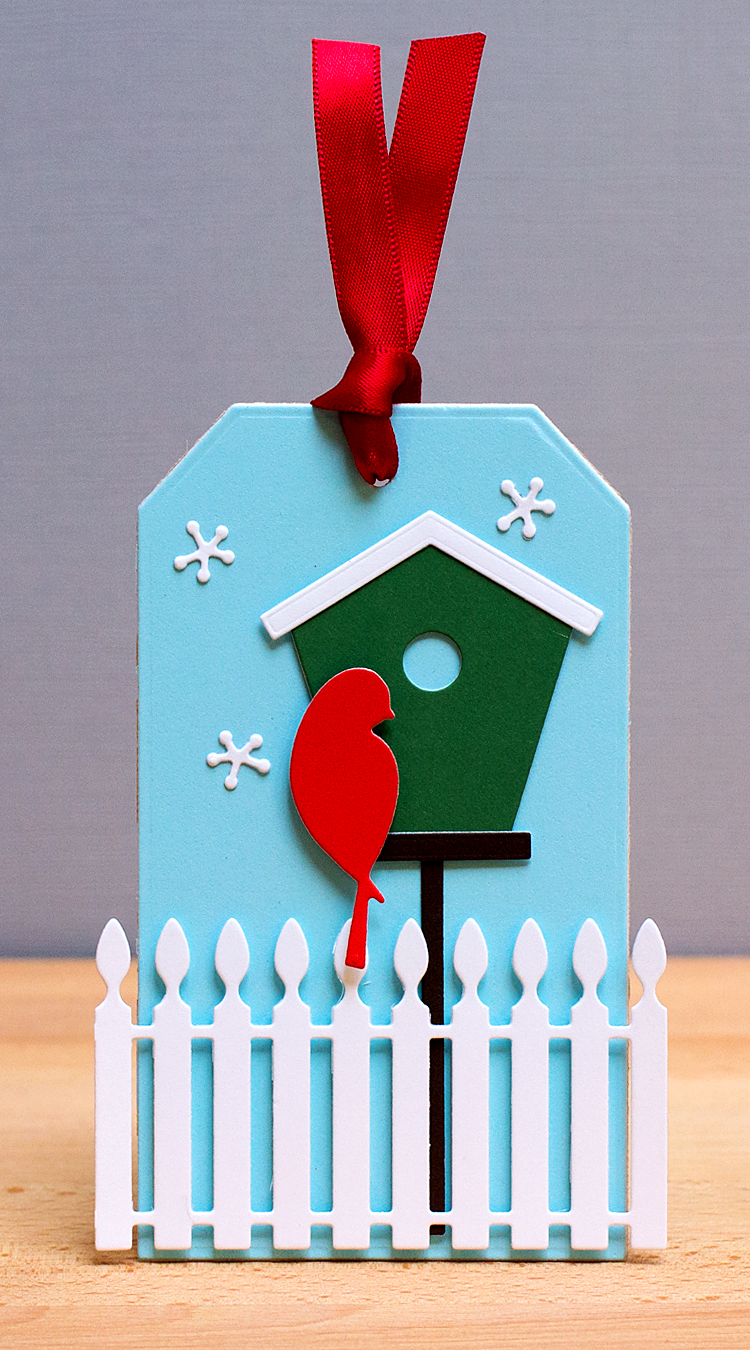
The first tag pairs the Carolina birdhouse with the Peaceful bird. I cut the birdhouse several times and then pieced it together as I wanted the roof to be white, as if snow had fallen on the top. The snowflakes are the center of the small poinsettia die set. I finished the tag with a stamped sentiment, ribbon and baker’s twine. The tag measures 3″ wide x 5″ tall.
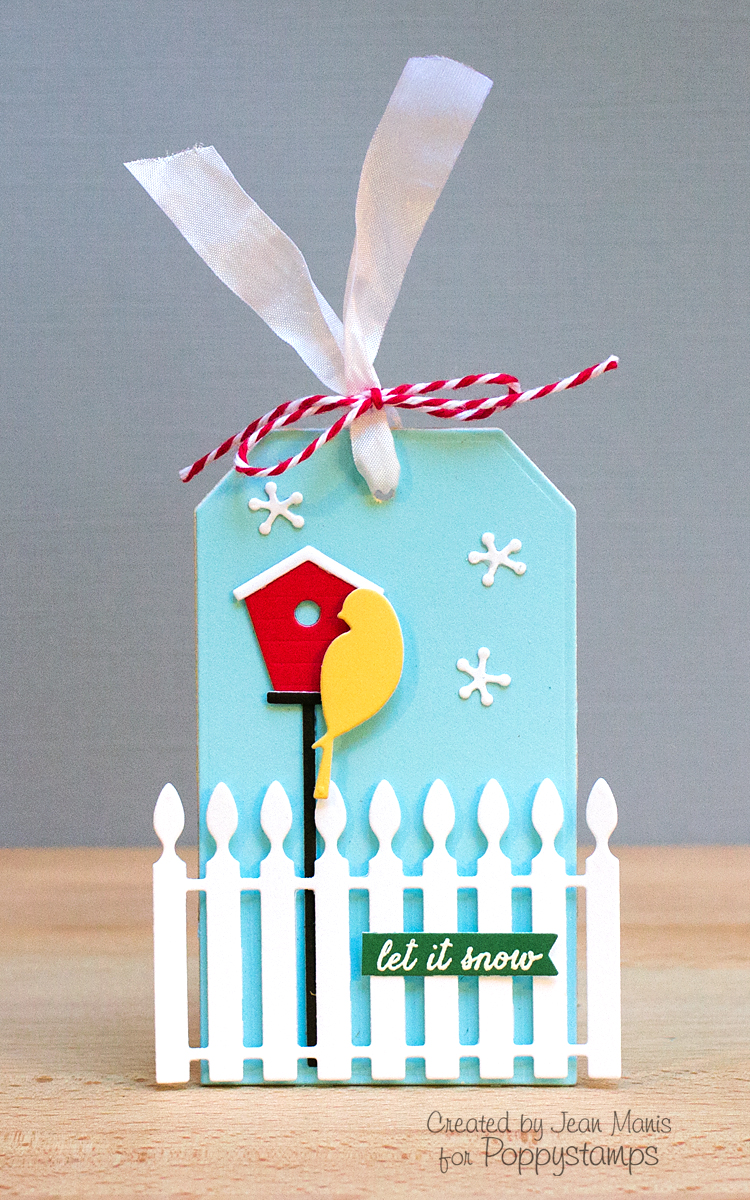
My second tag, which measures 2 1/2″ wide x 4″ tall, pairs the Evanston bird house with the Nestled bird, along with the “snowflakes.” Again, I finished the tag with a stamped sentiment, ribbon and baker’s twine.
Be sure to leave comments on all of the blogs – there’s hidden candy along the way. There will be three winners, who will each receive a prize. You have until December 8 to leave comments. Winners will be announced on December 9. You can get all of the details about the hop, including information about the prizes, on the Poppystamps Blog.
Head next to Jeanne’s blog. For your convenience here’s a list of all the designers with projects today:
Yvonne Dunlop
Chunyuan Wu
Diane Barney
Ira Huberts
Jean Manis
Jeanne Jachna
Kimberly Coleman
Lezlye Lauterbach
Mary McMillan
Michele Henderson
Patty Tanuz
Rudlis / Irena Kowalczyk
Sherry Eckblad
Sherry Hester
Supplies: