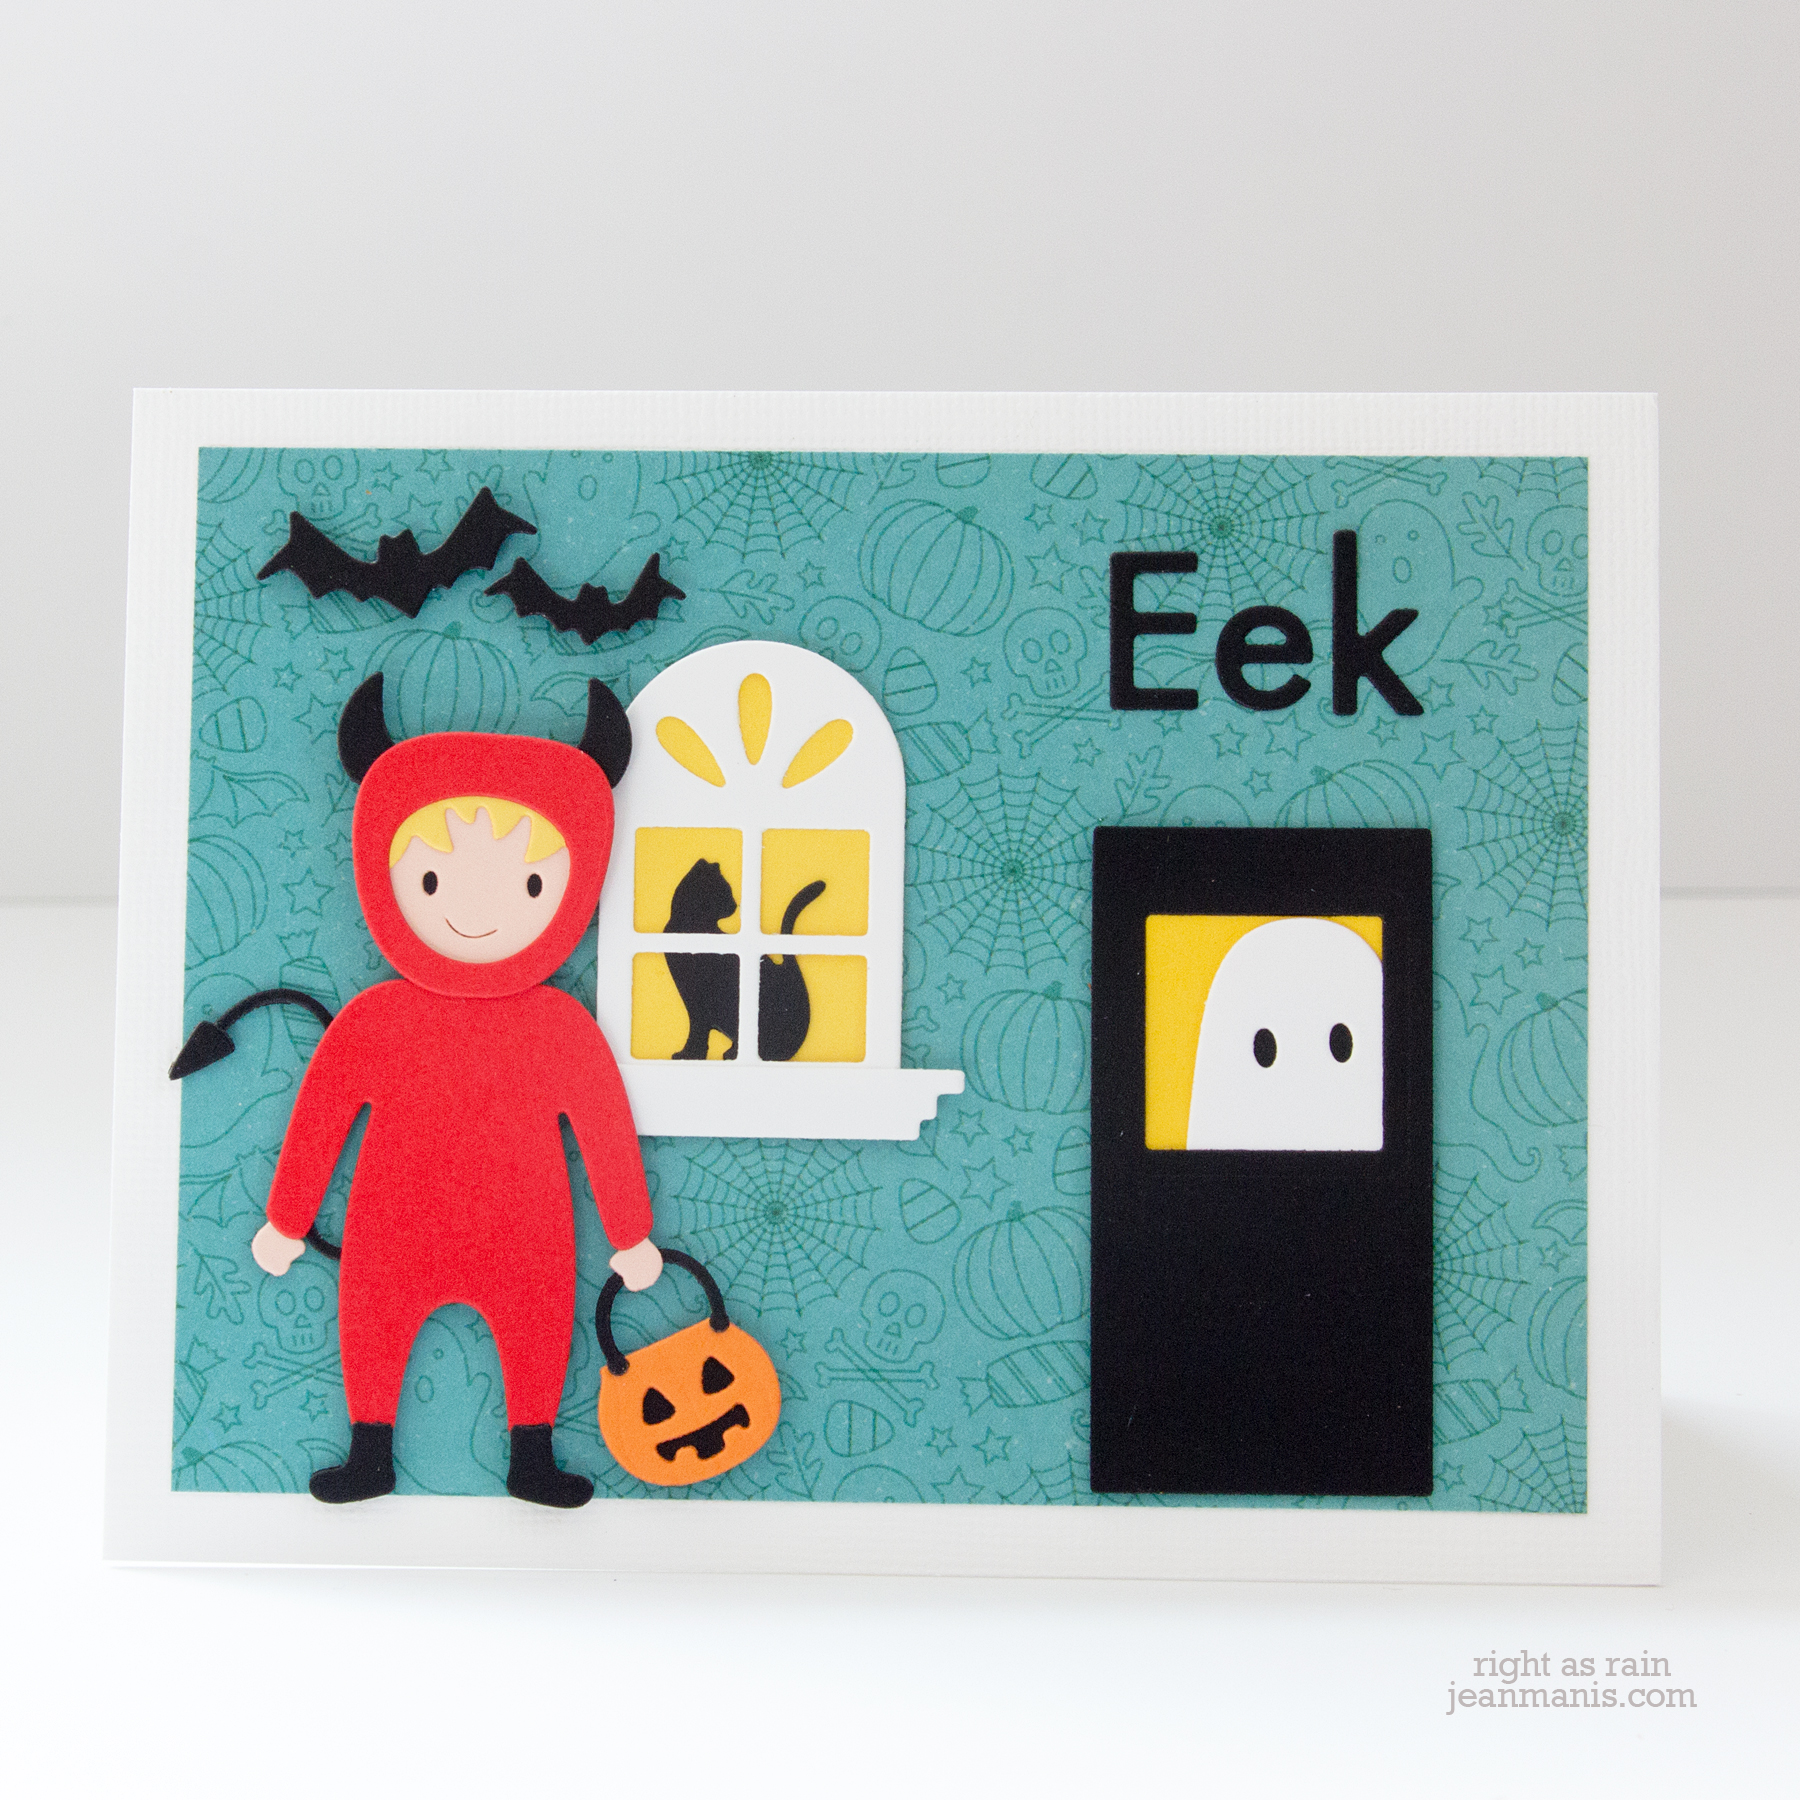
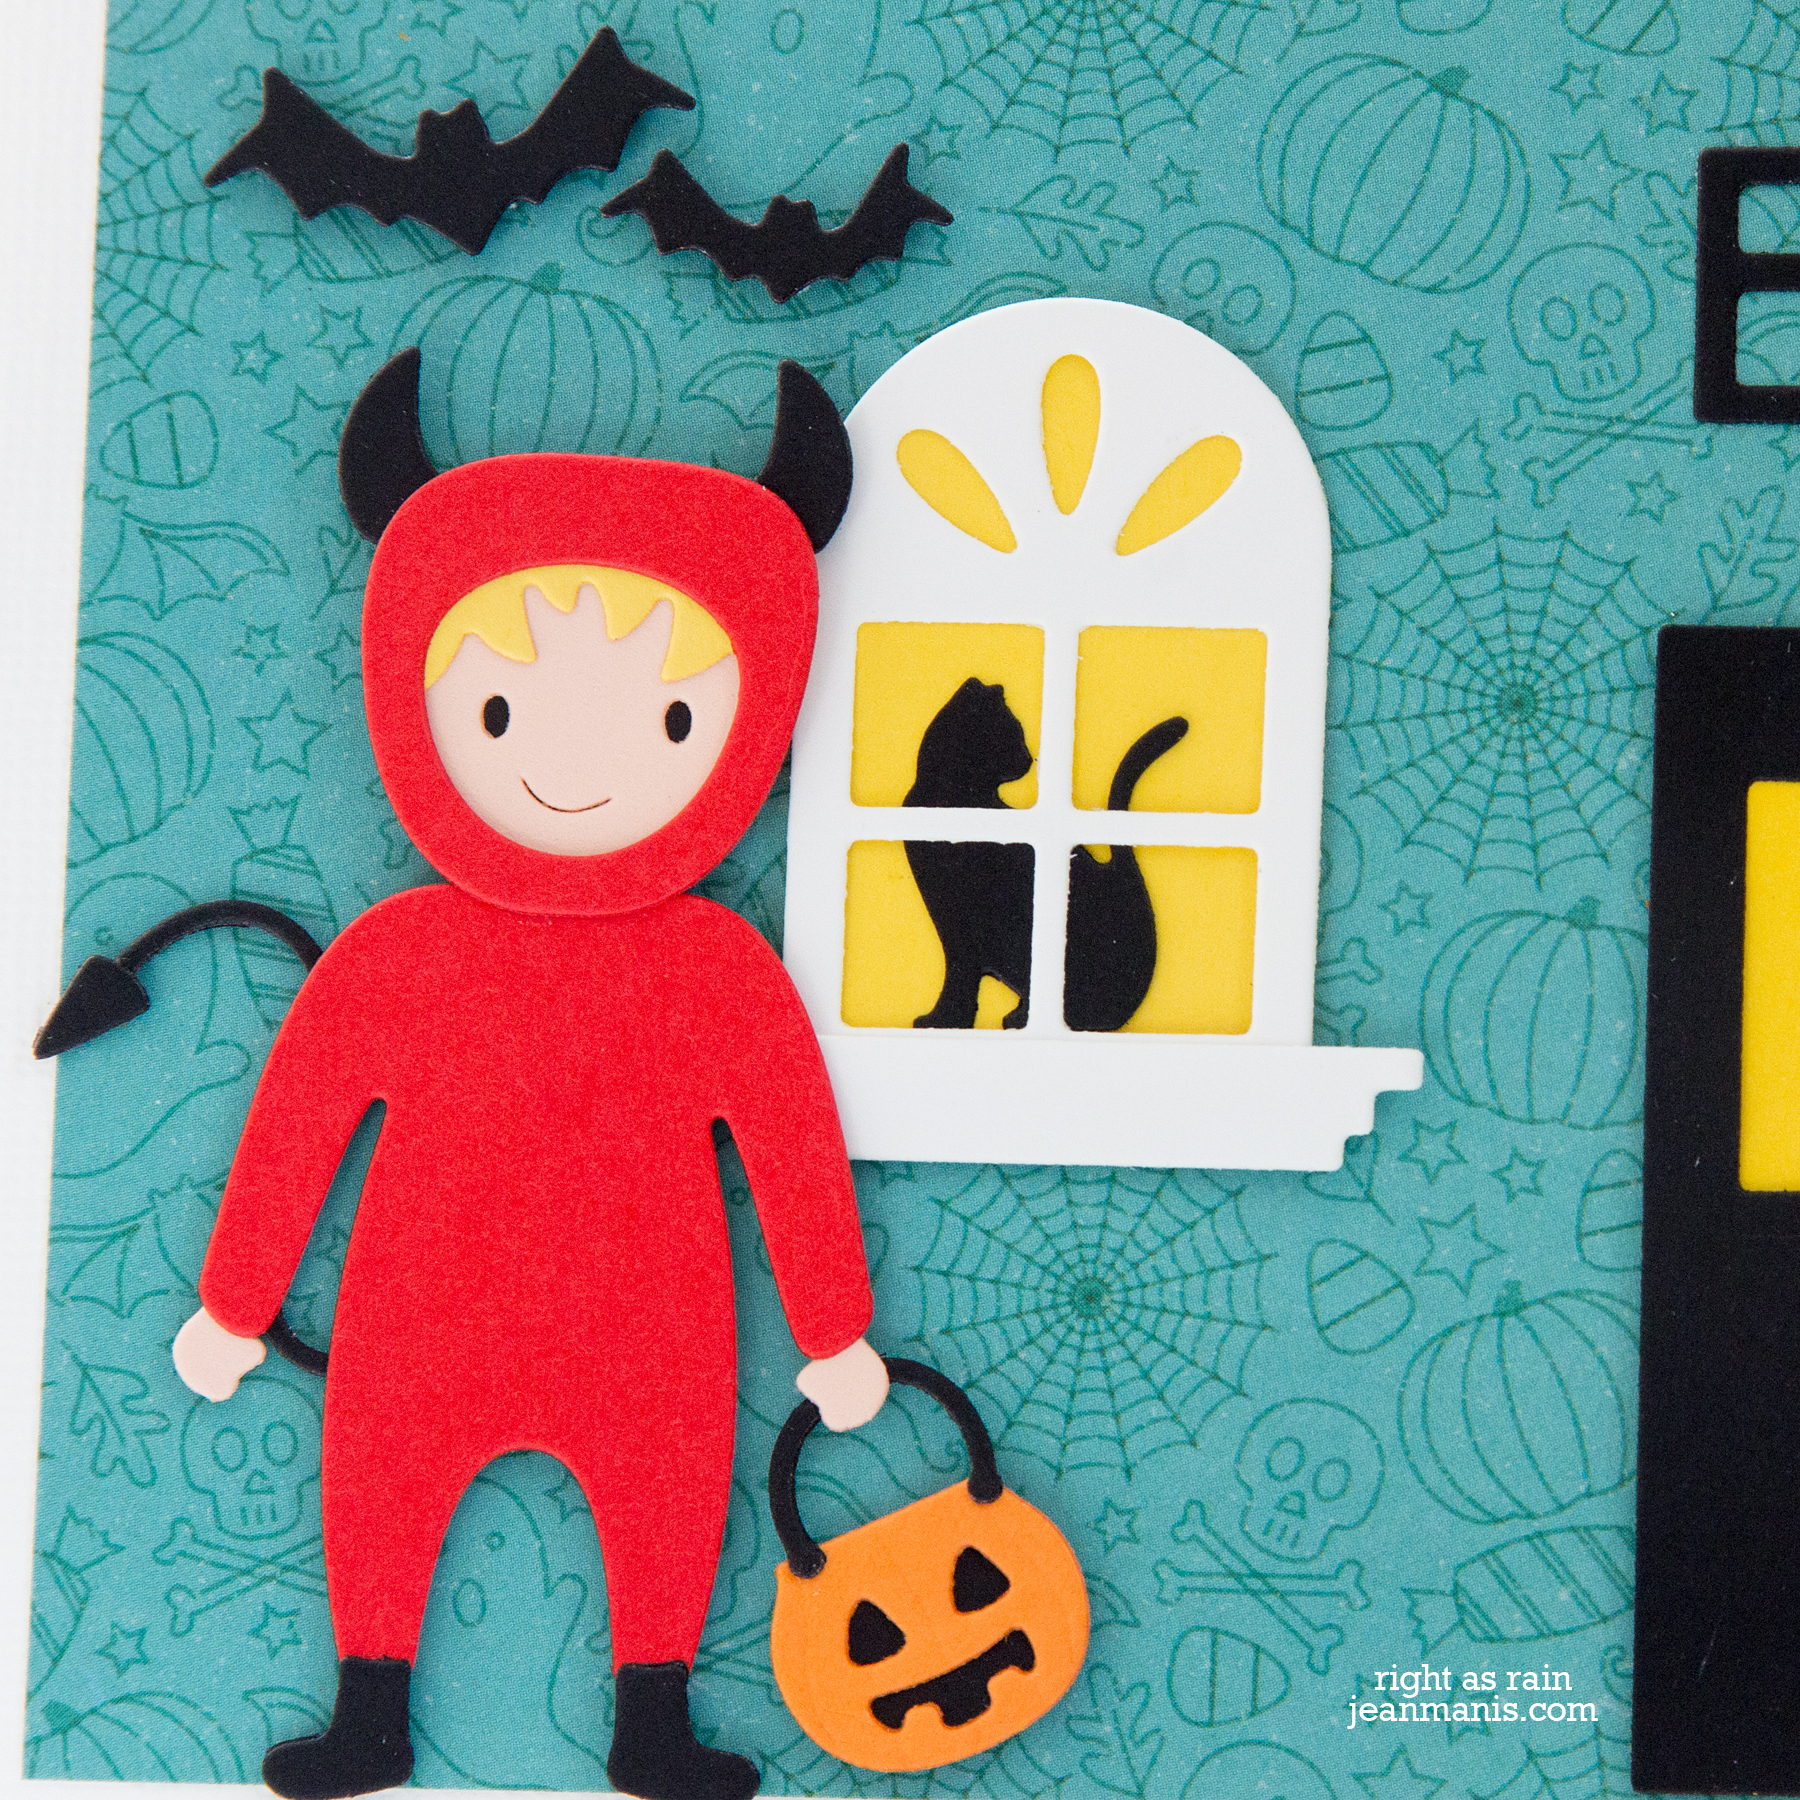
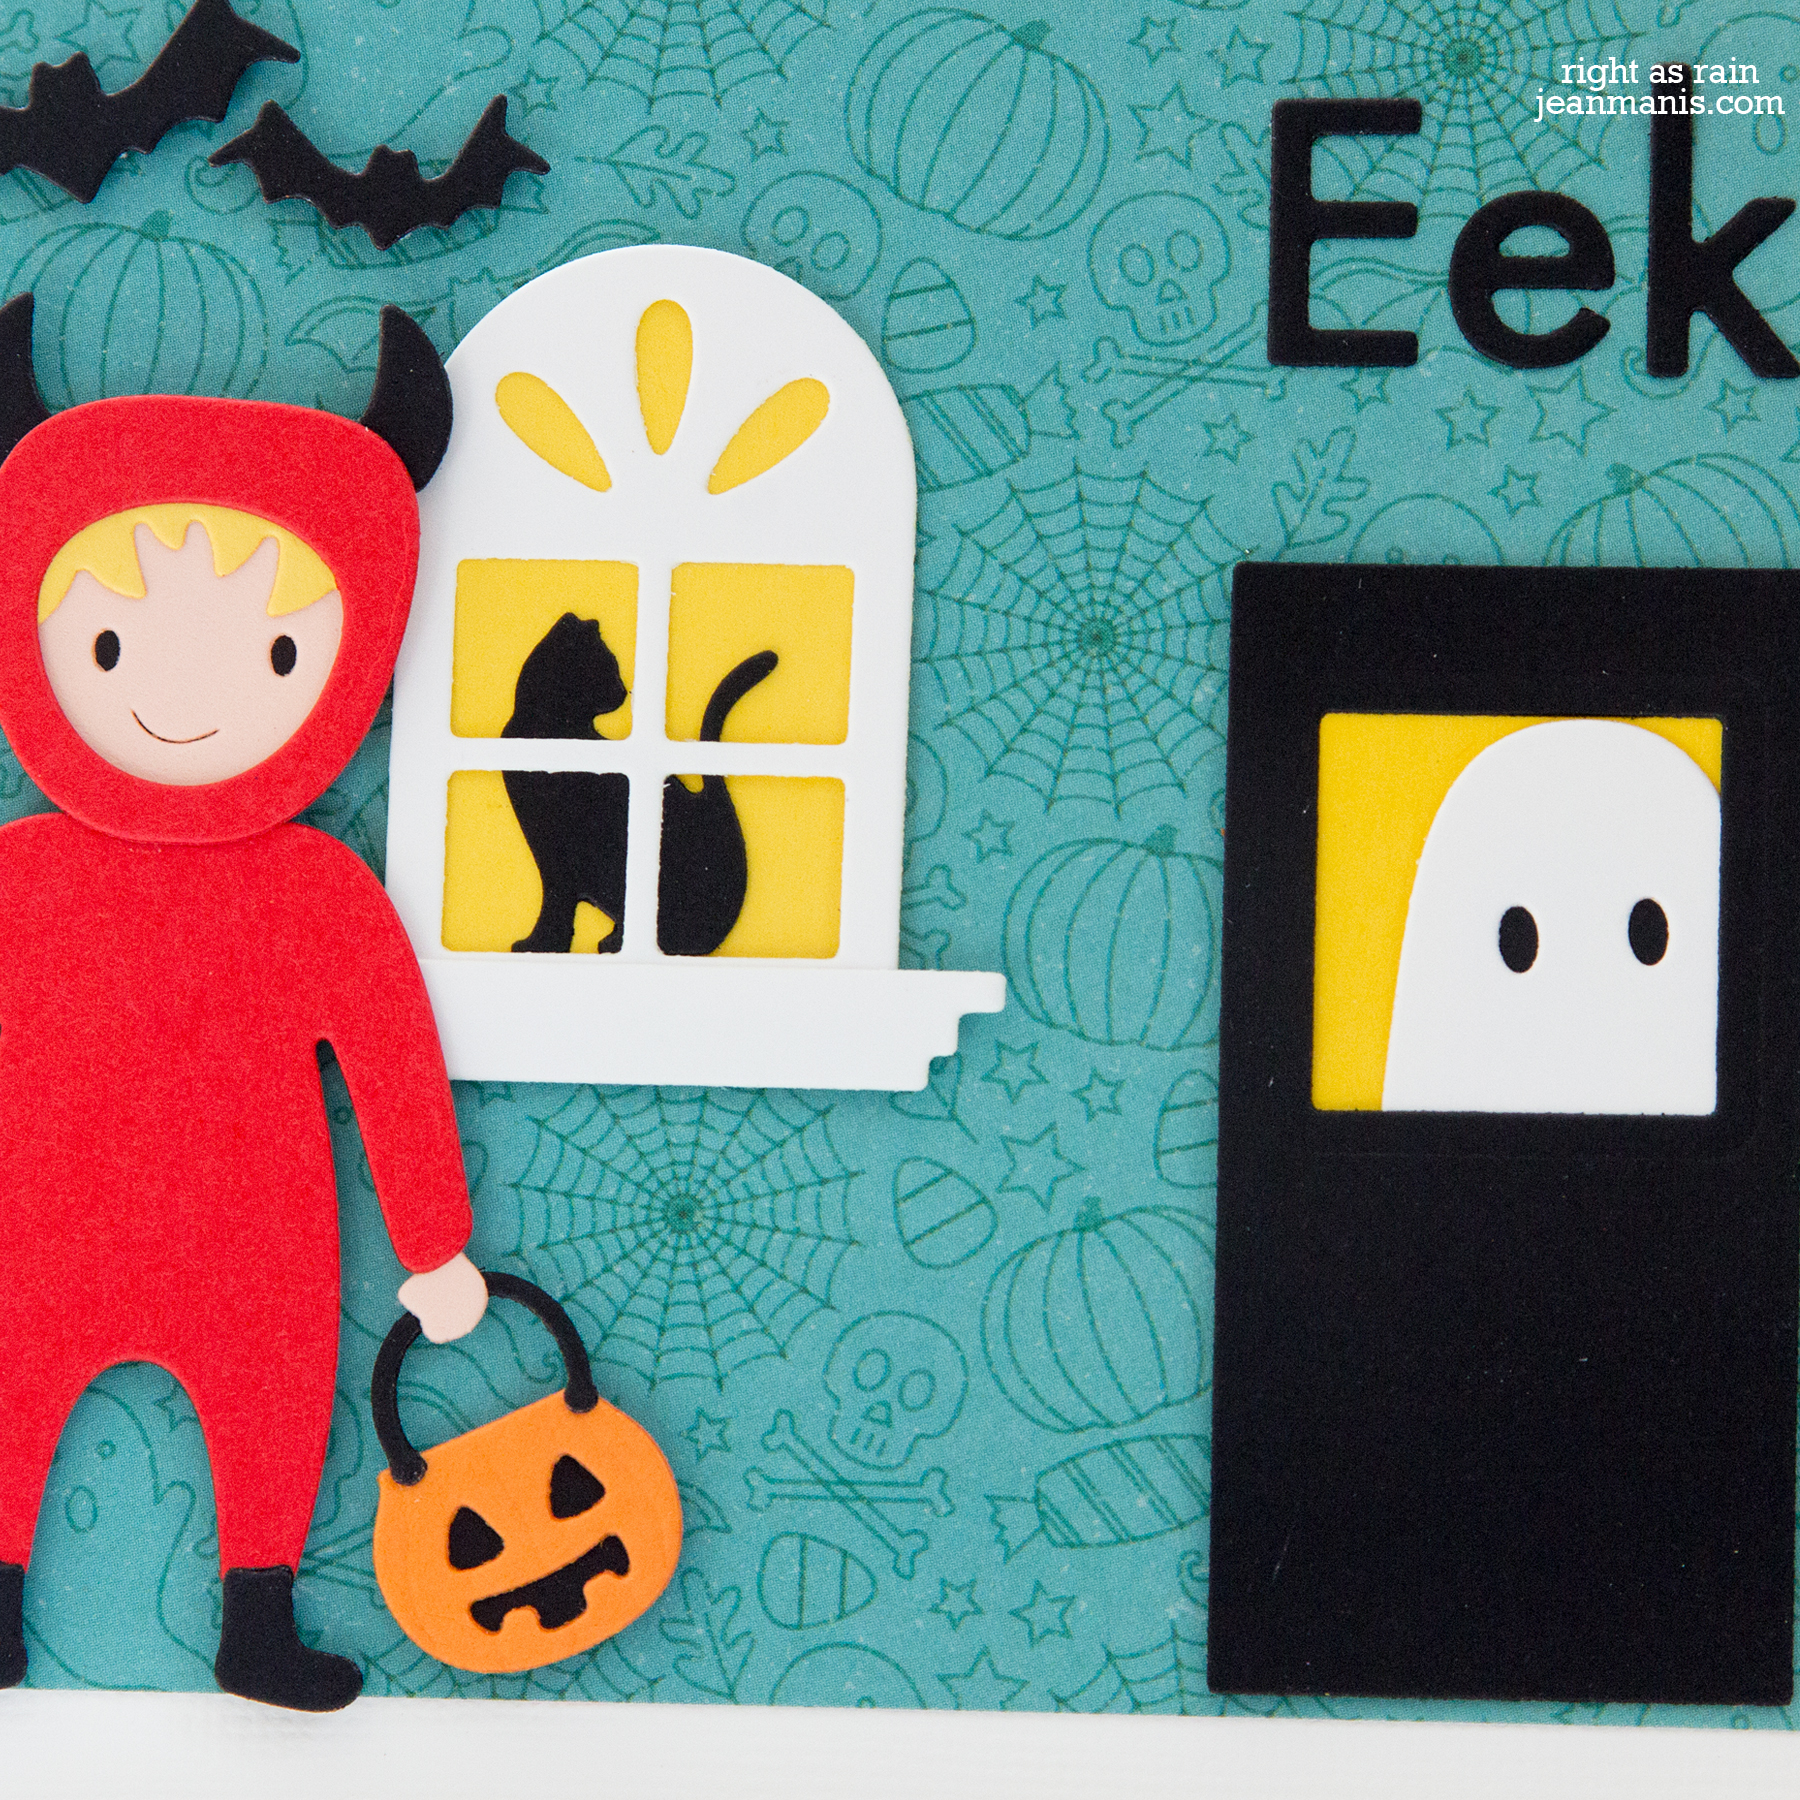
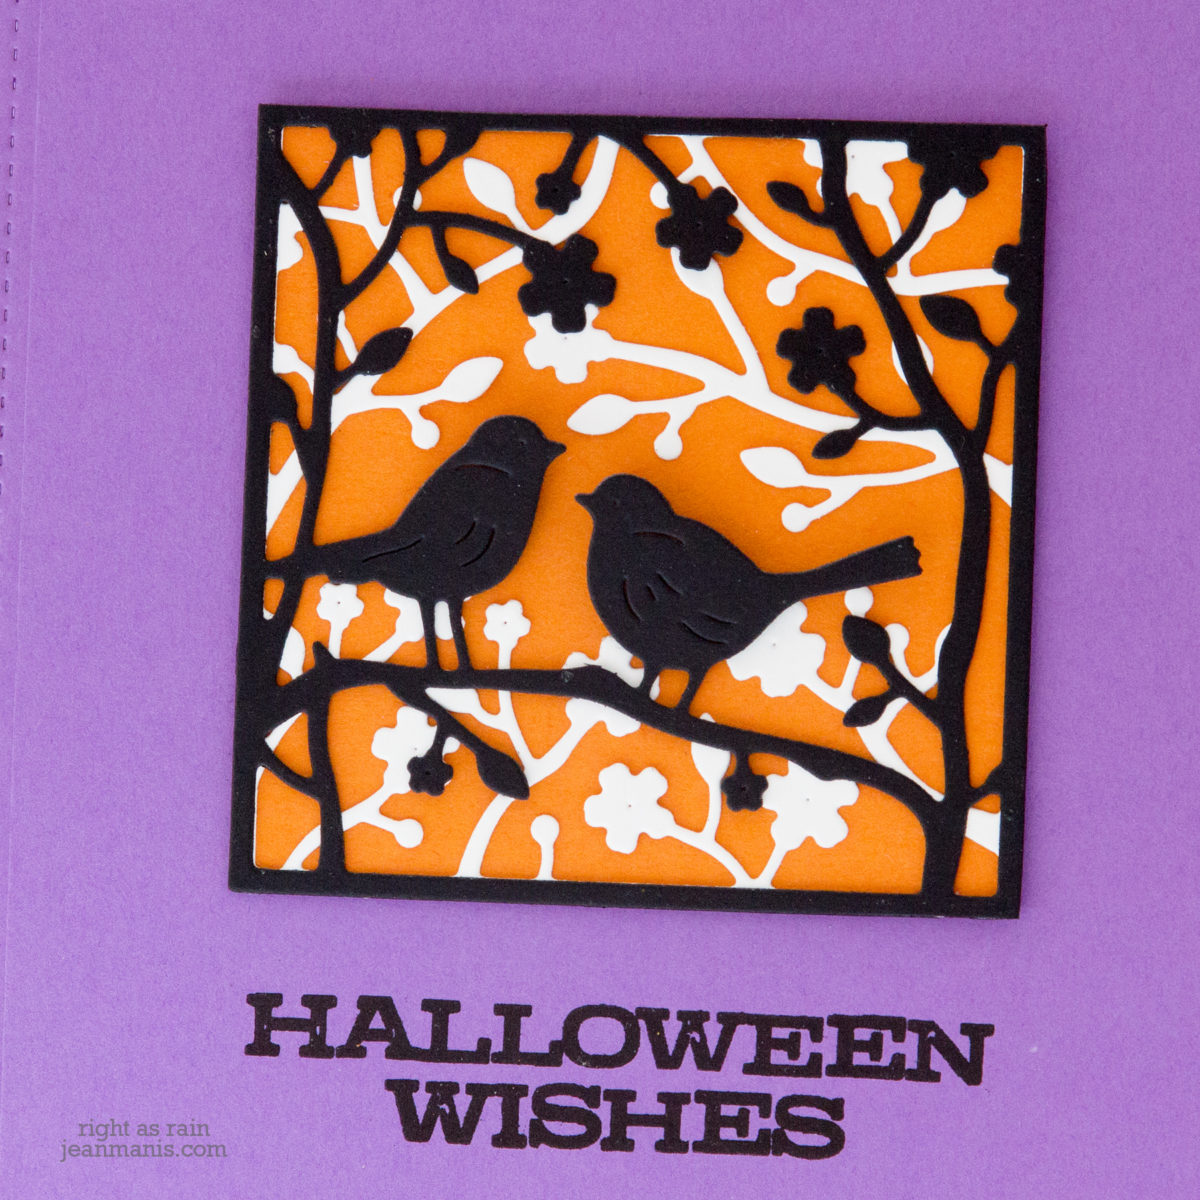
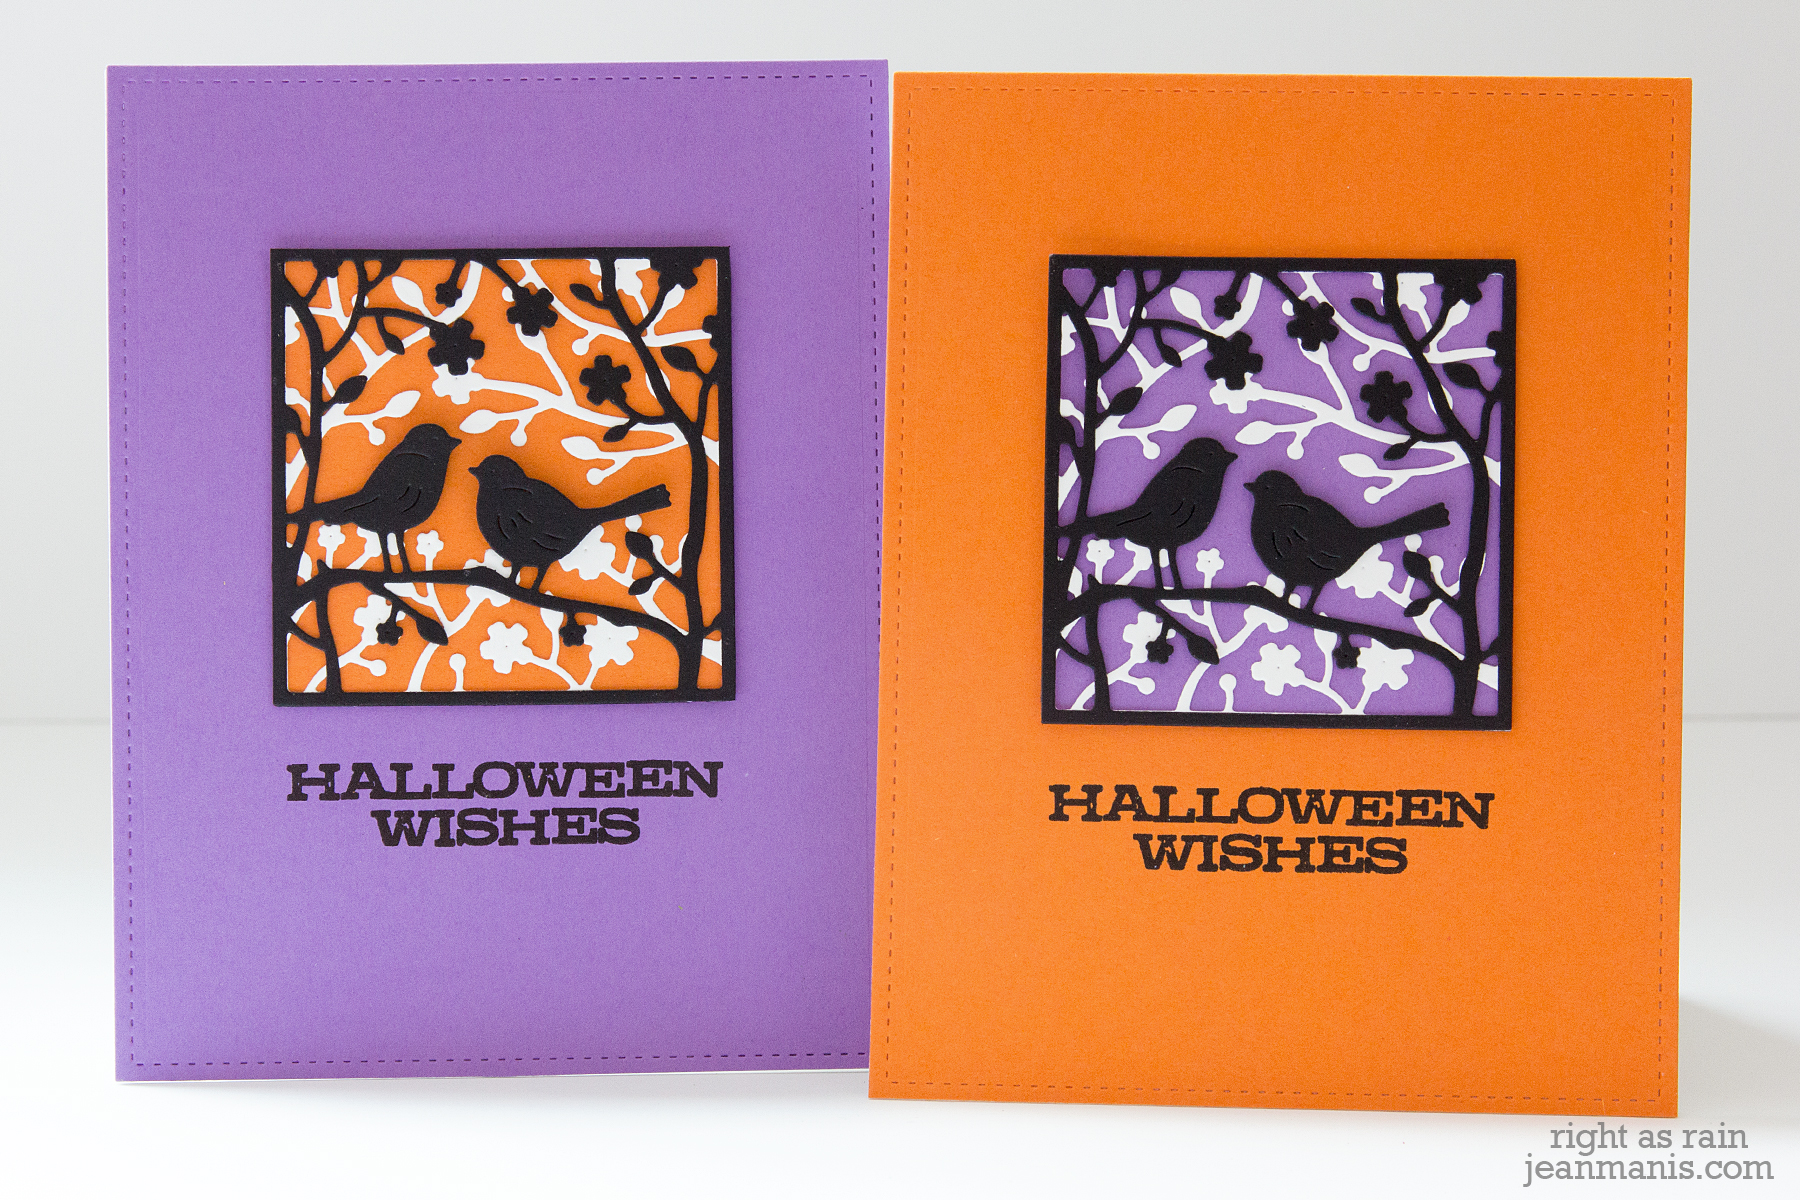
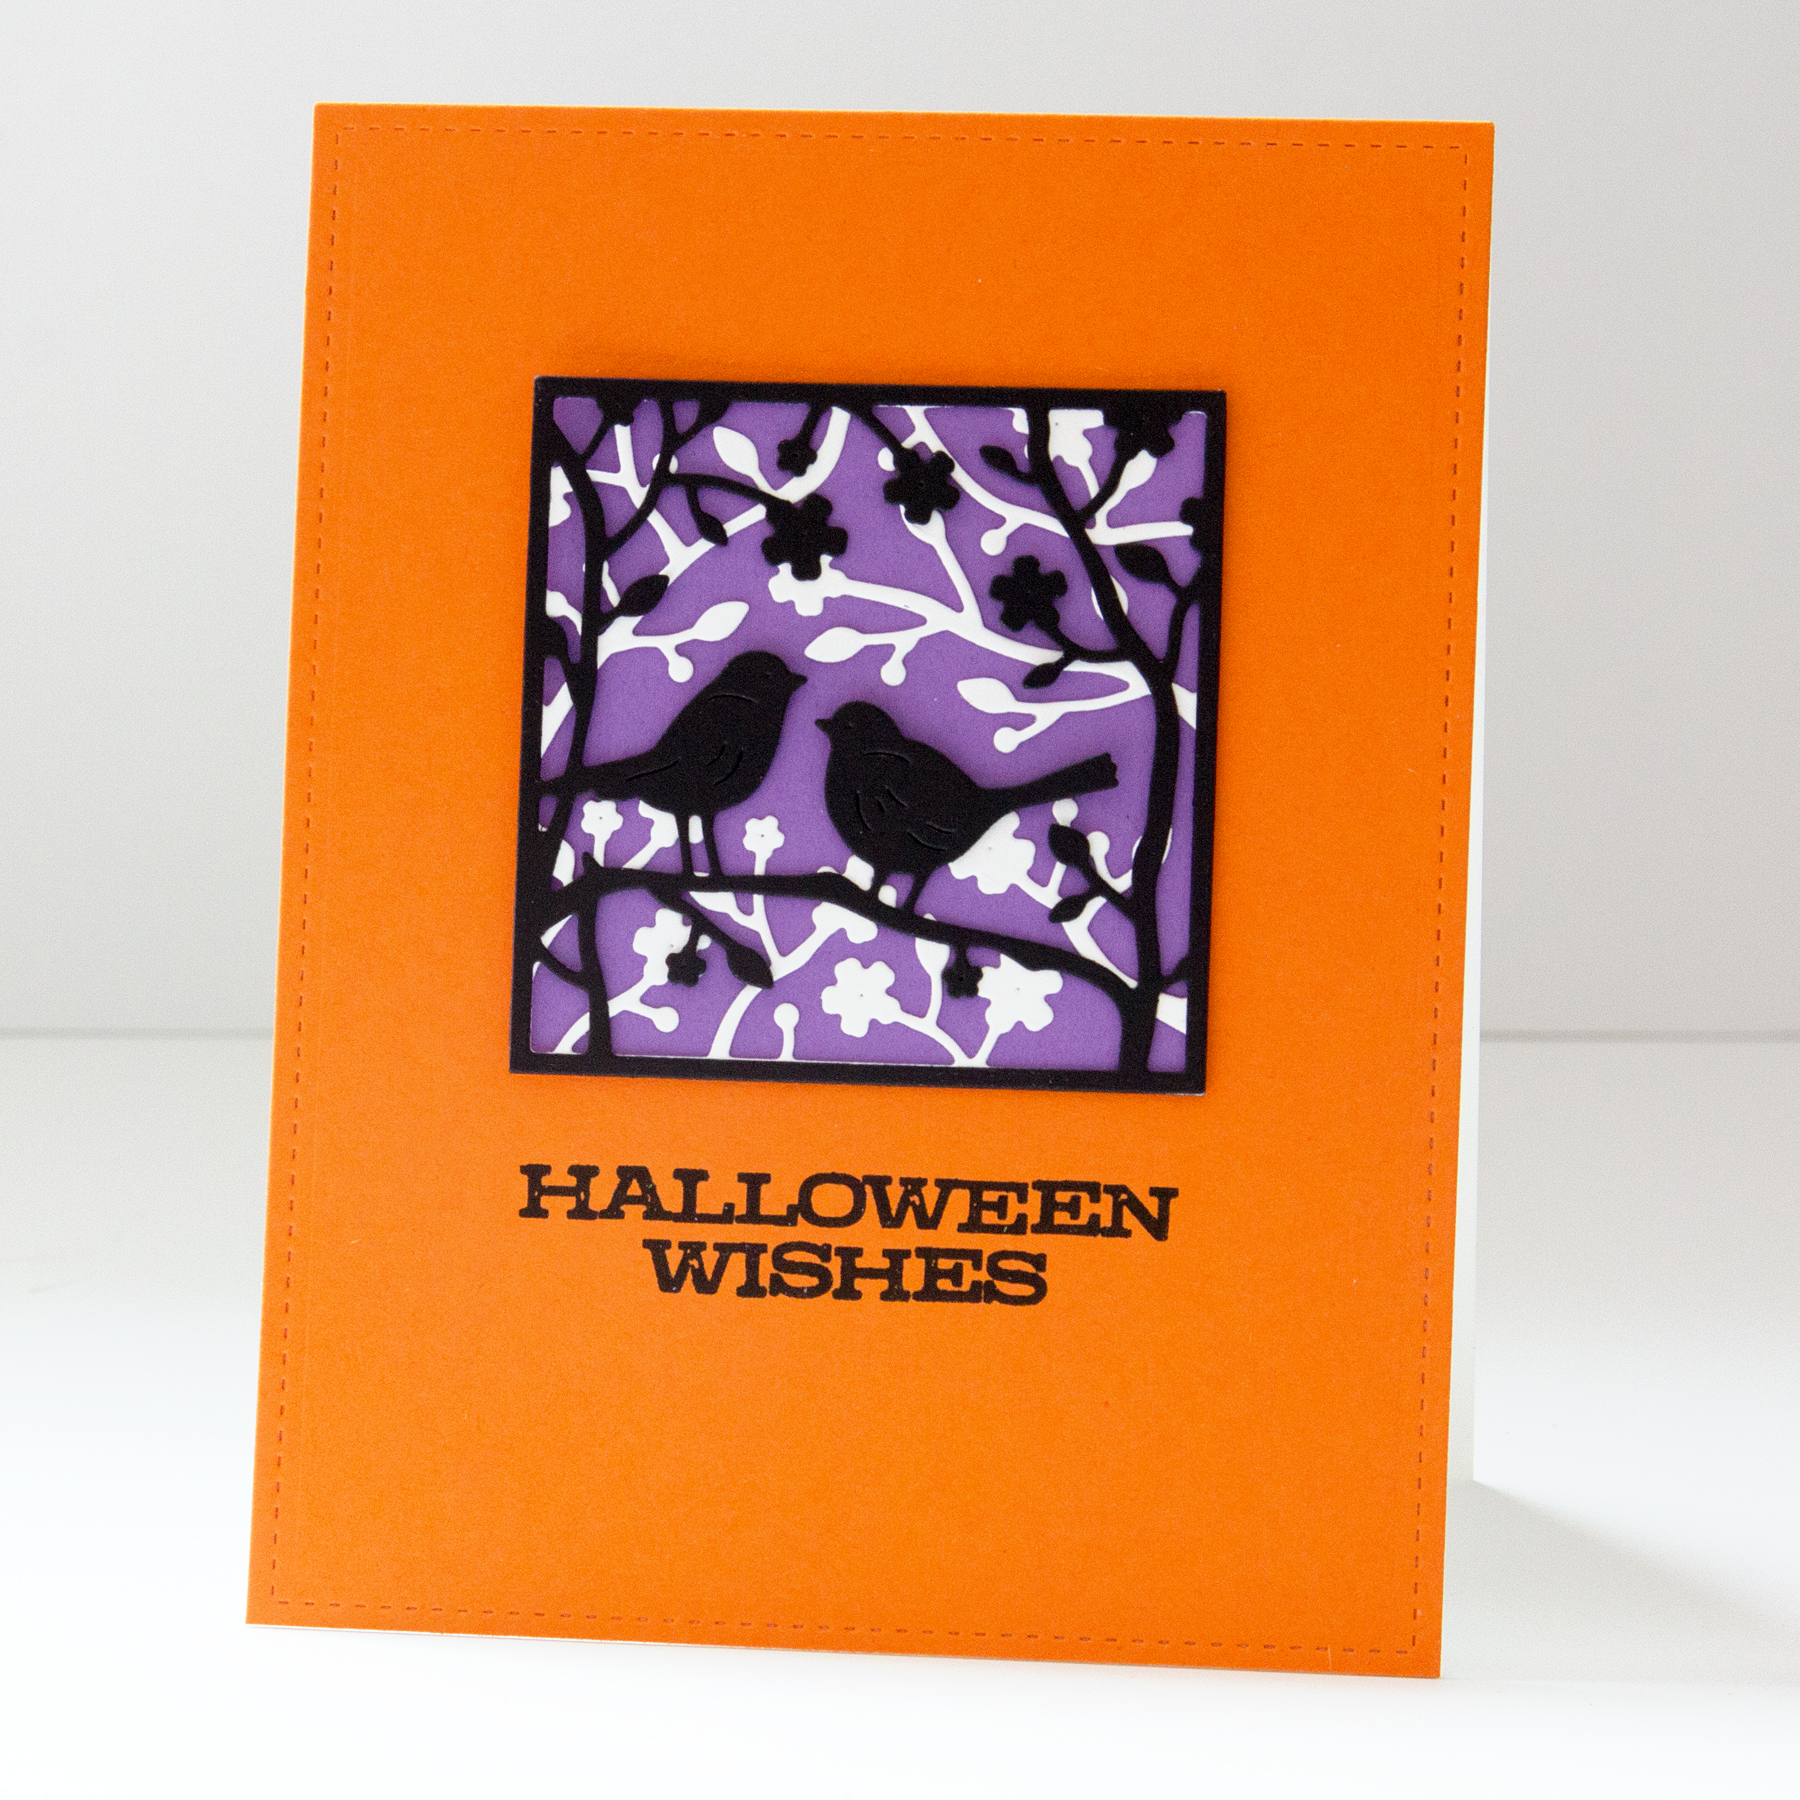
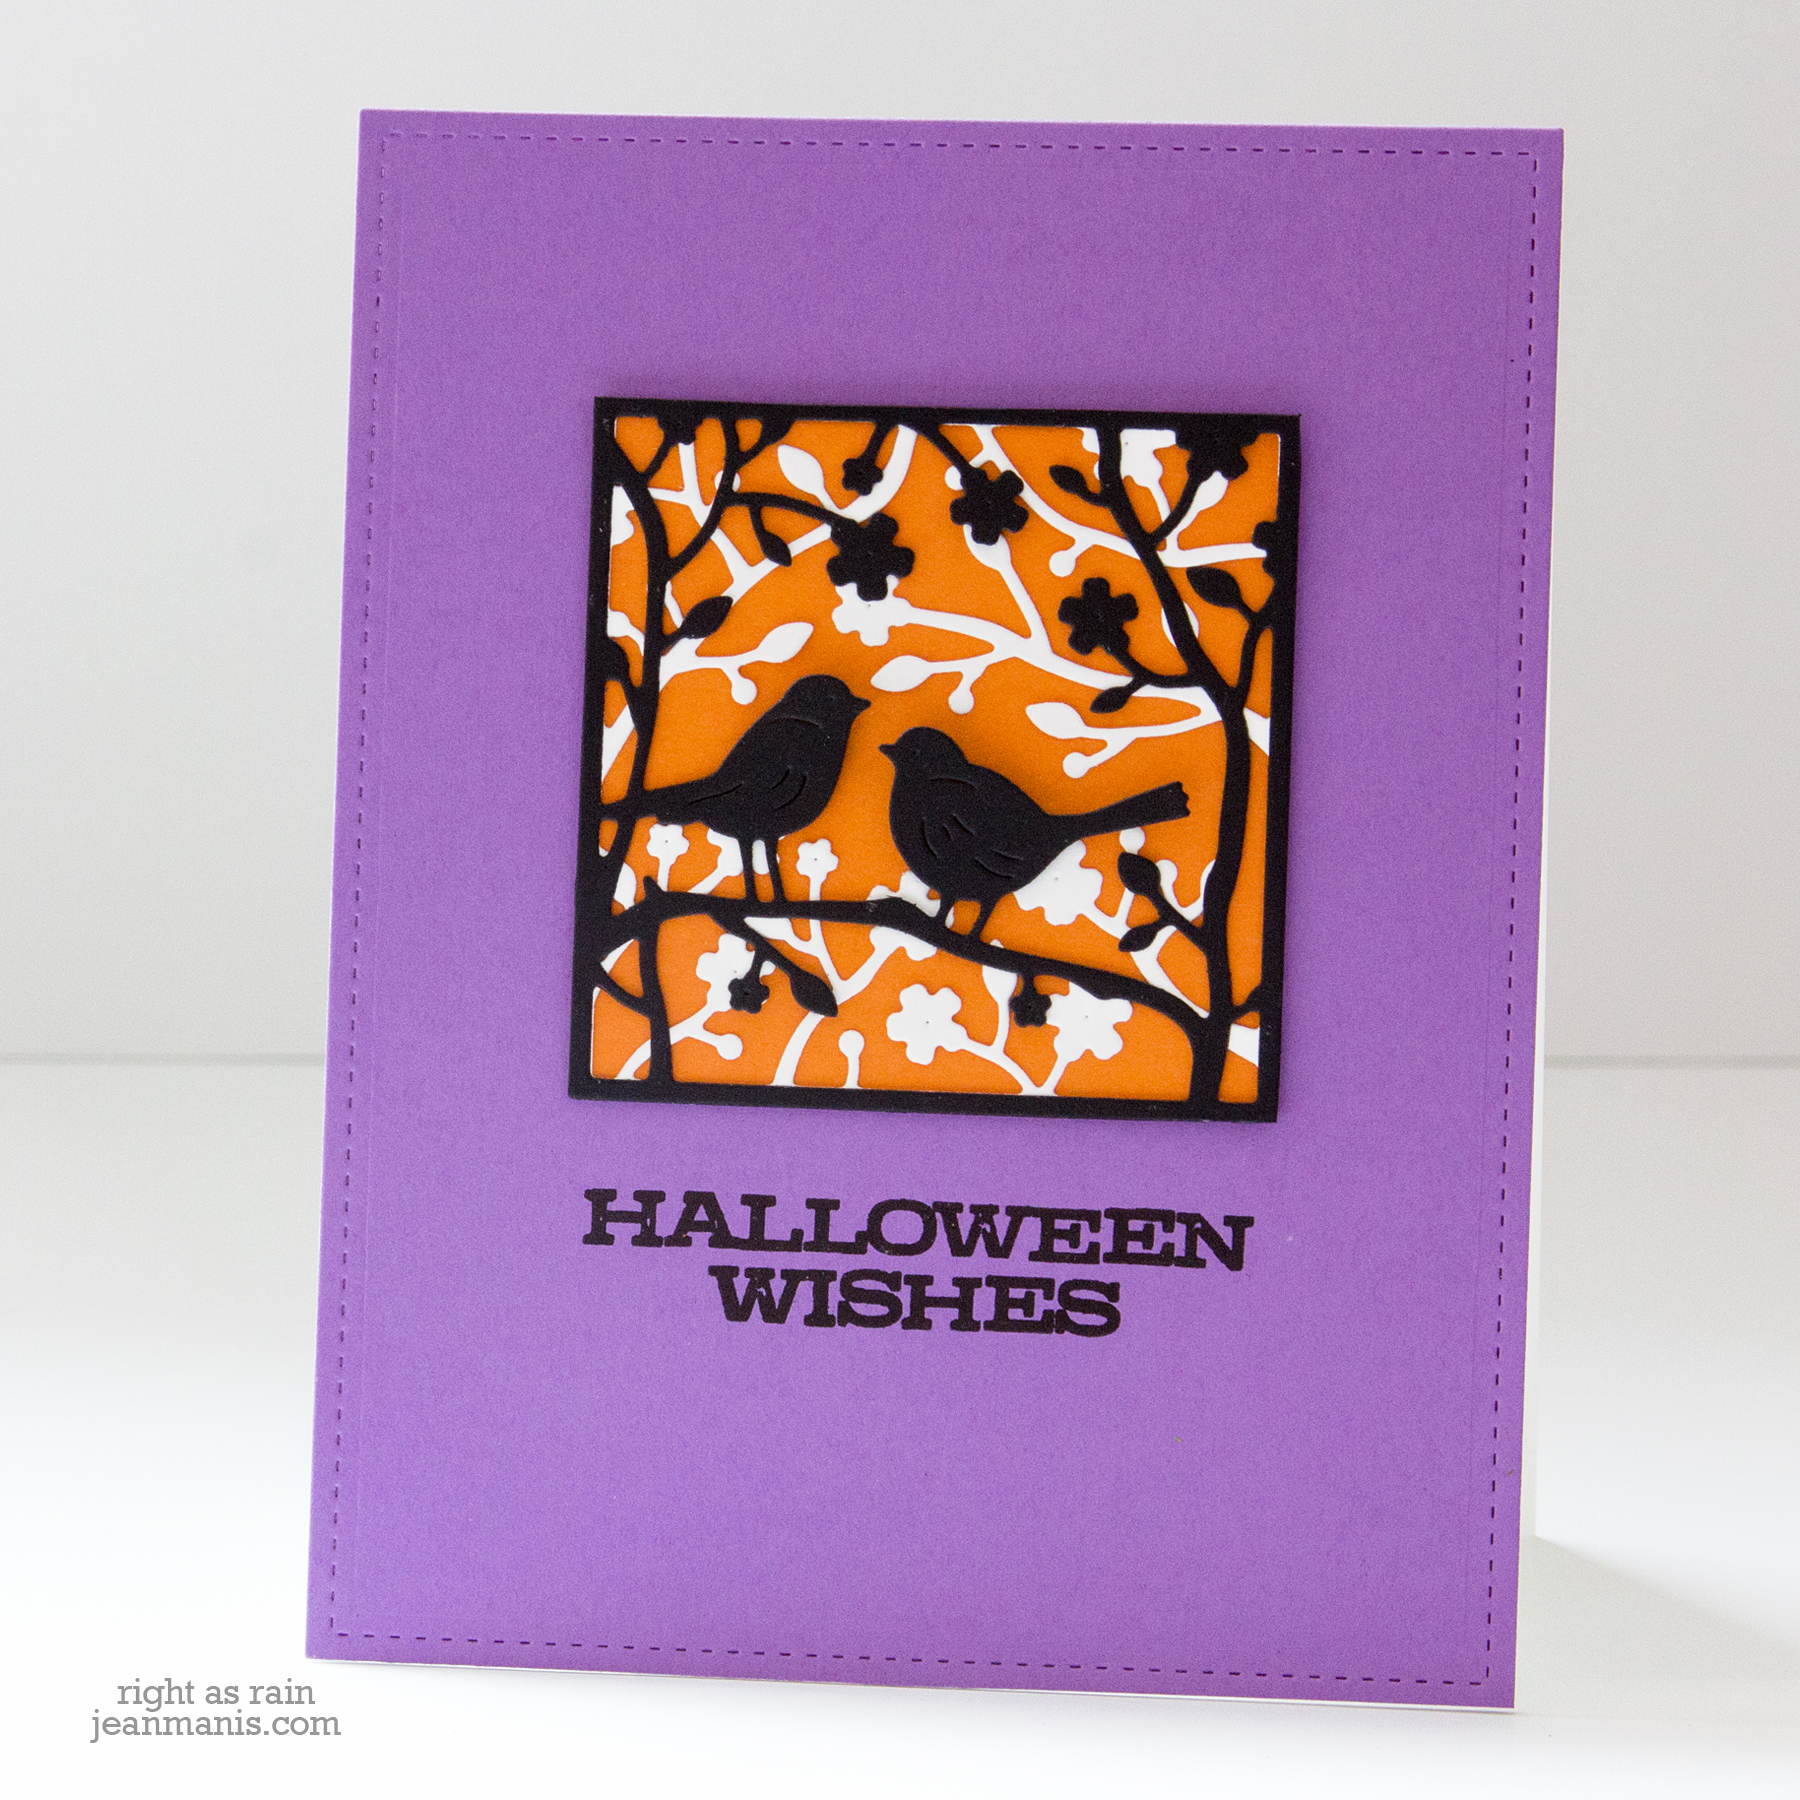
Hello! Today I am sharing a fall-themed card featuring the Birds of a Feather and Birdhouse die sets from My Favorite Things. I have previously created cards with this same design and same two die sets: a spring-themed Congratulations card and one for the Fourth-of-July.
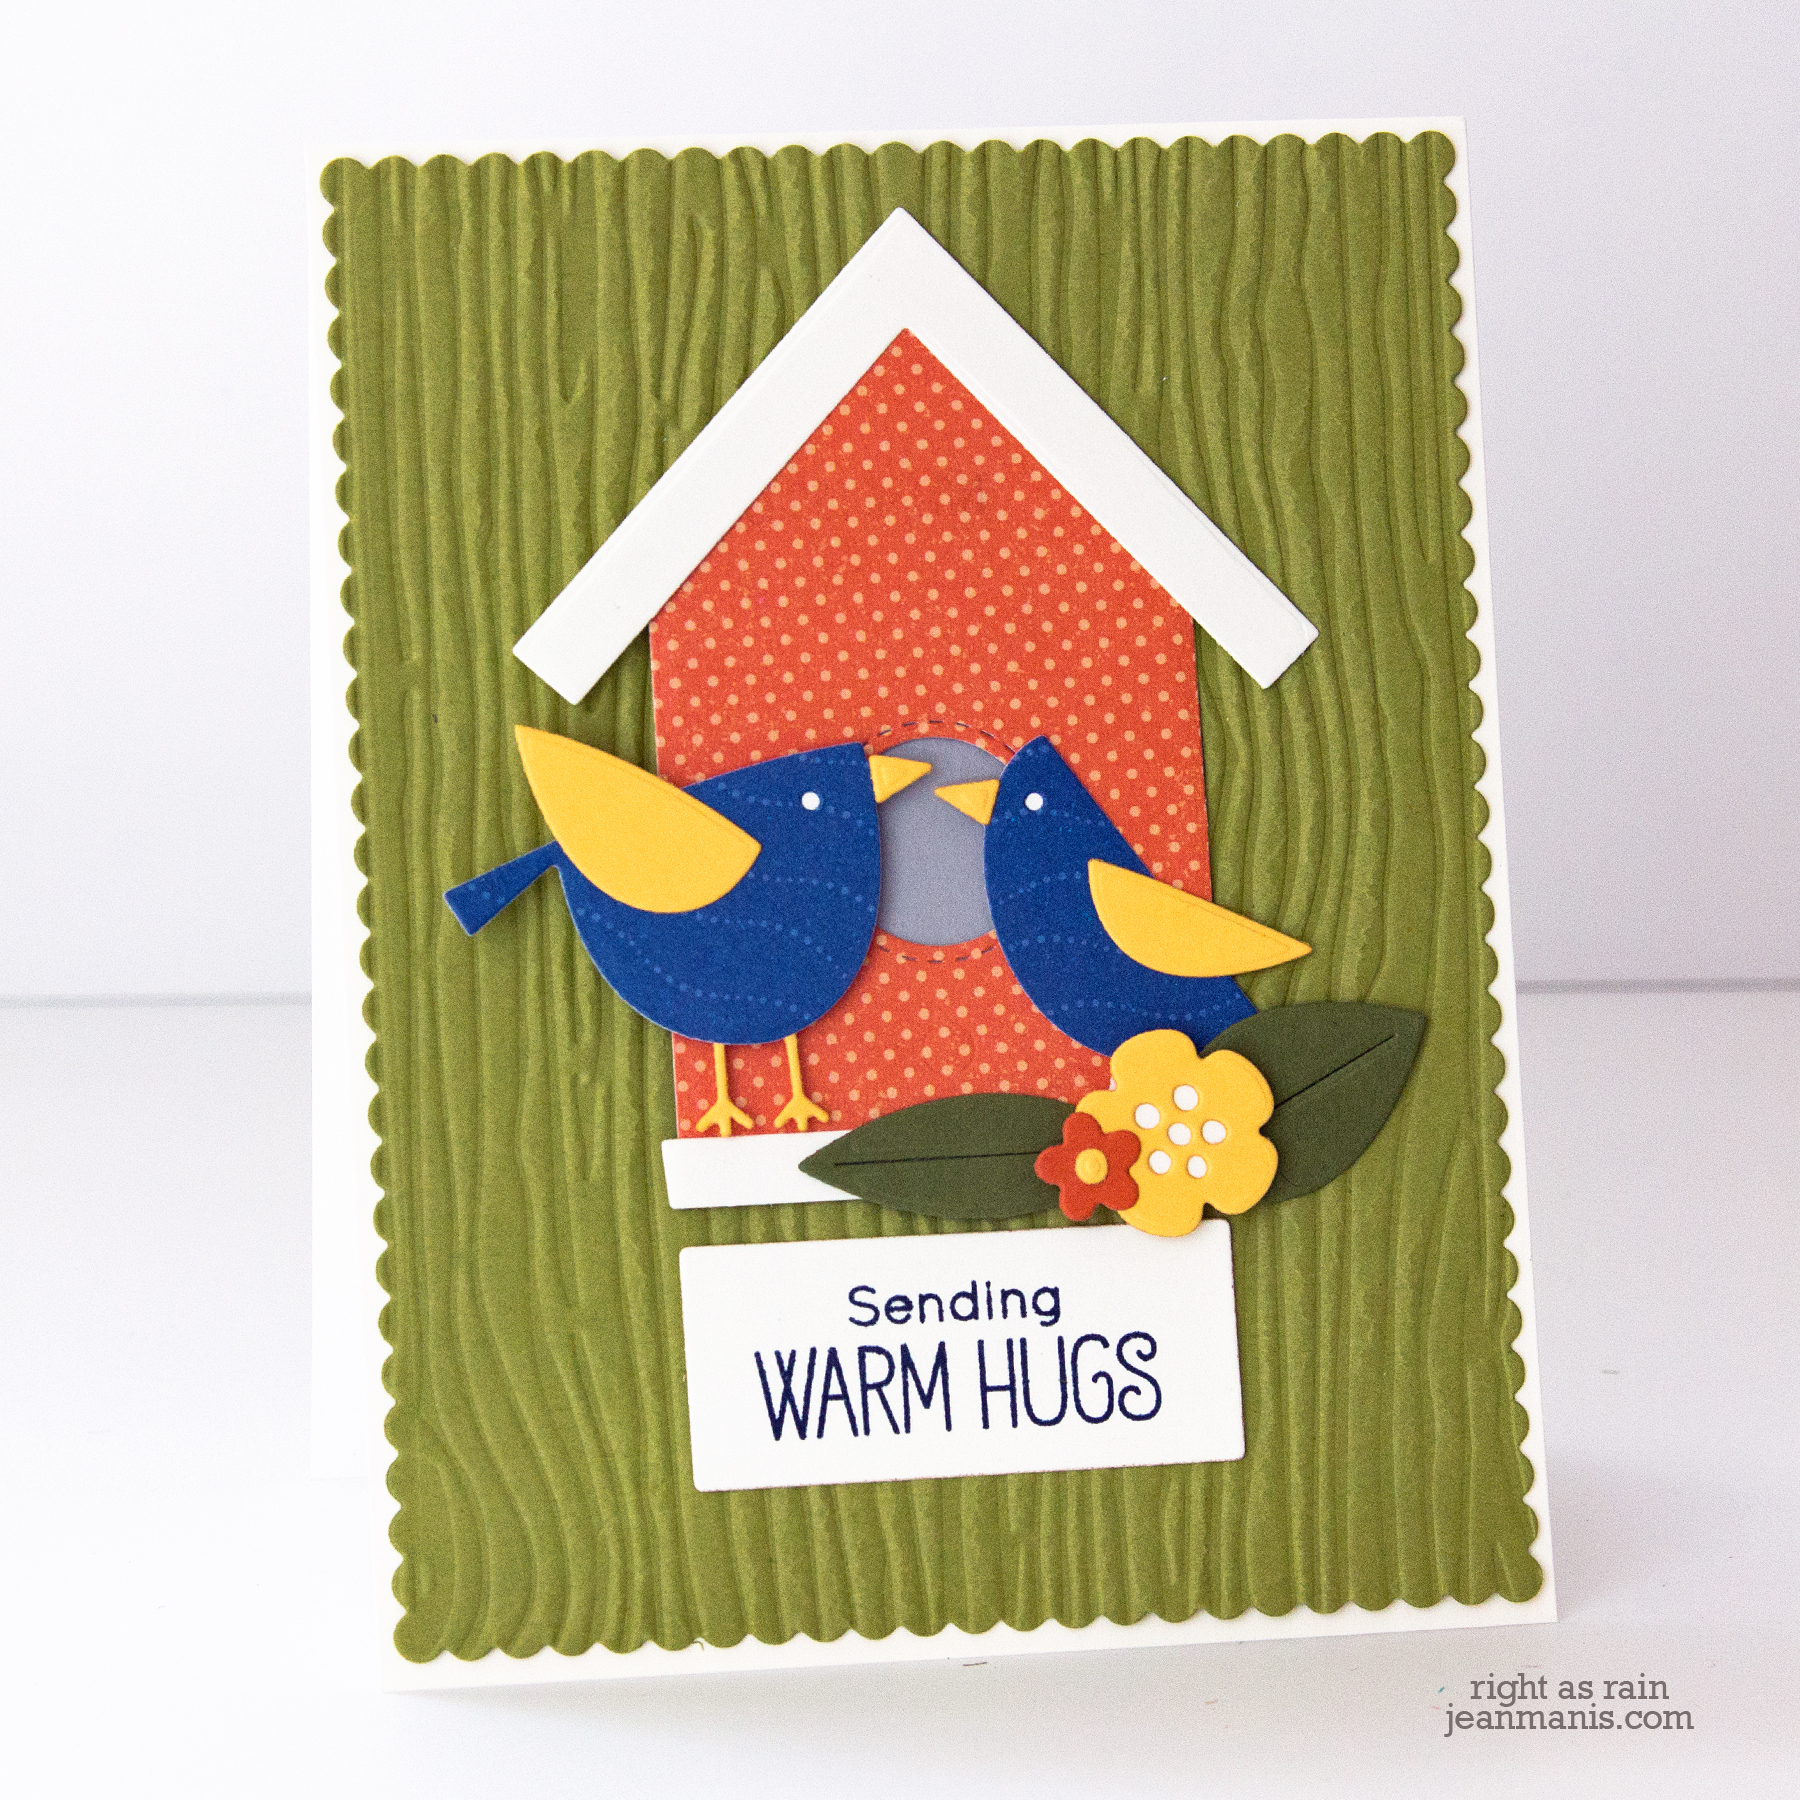
- I die-cut the birds, birdhouse, and floral pieces from solid cardstock and patterned paper in my stash.
- I assembled the pieces with Tonic Nuvo glue and added them to a panel cut from SU Old Olive with a now-retired MFT Blueprints set. I dry-embossed the panel with the Wood Grain folder.
- I stamped the sentiment from Sweater Weather in the Woods with Night of Navy ink on an off-white rectangular panel.
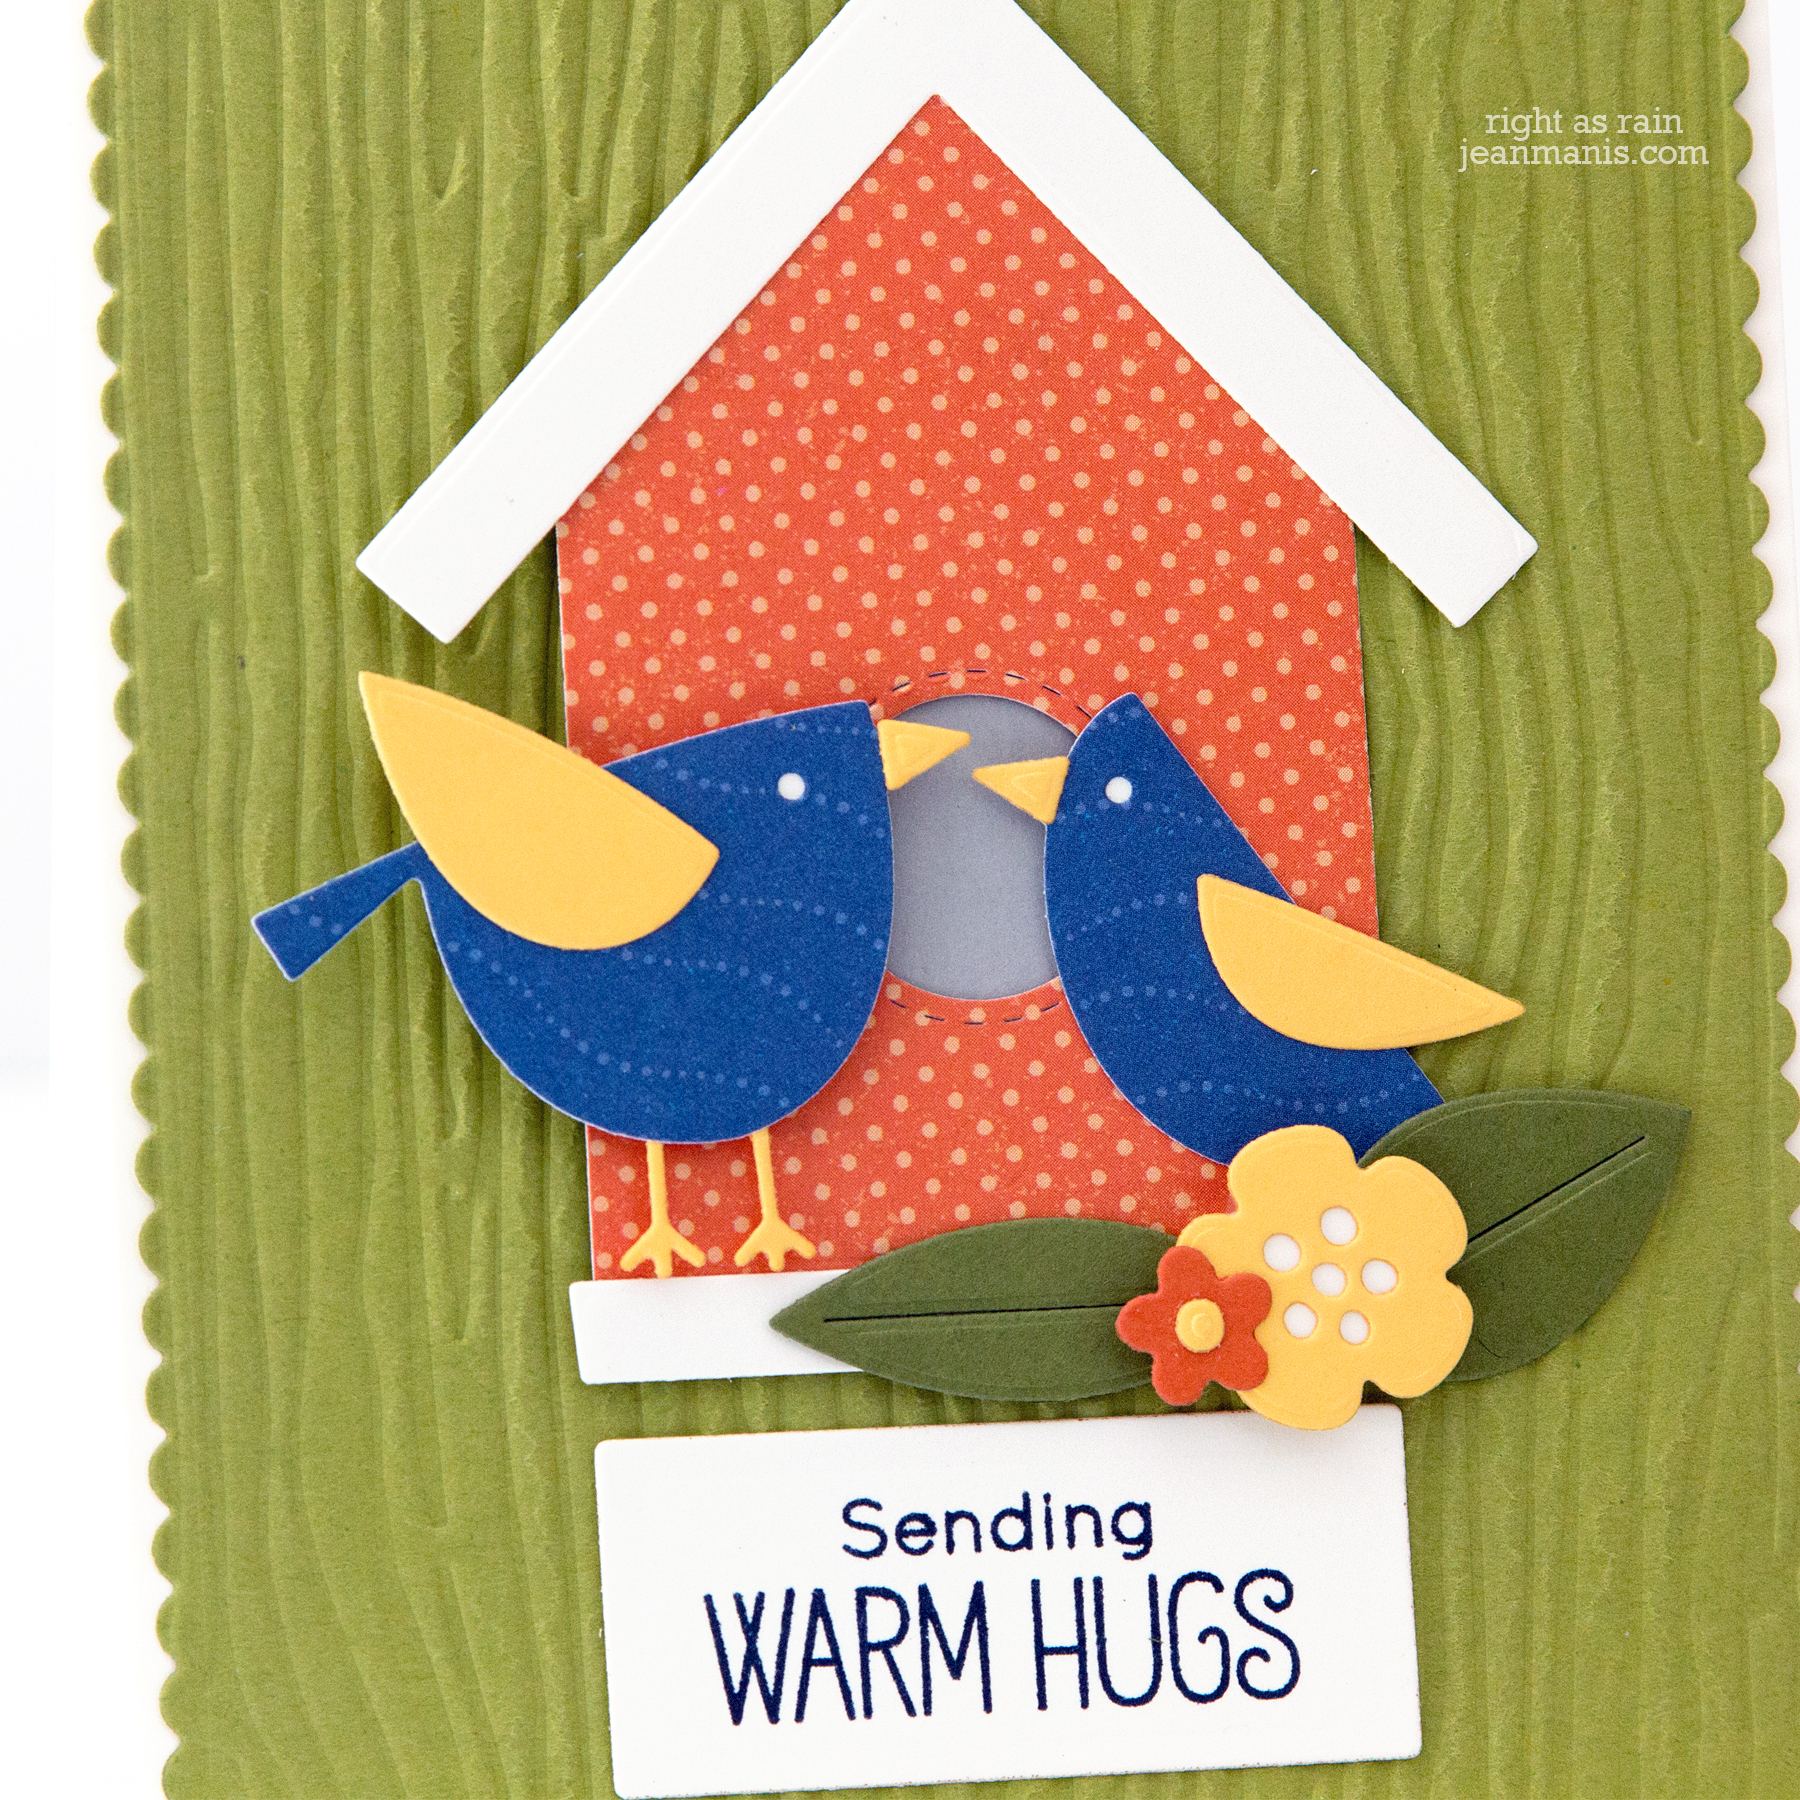
What I like about this card: the bird and birdhouse scene; the color combination of orange, olive green, navy, and gold; the dry-embossed, wood grain background.
Supplies: