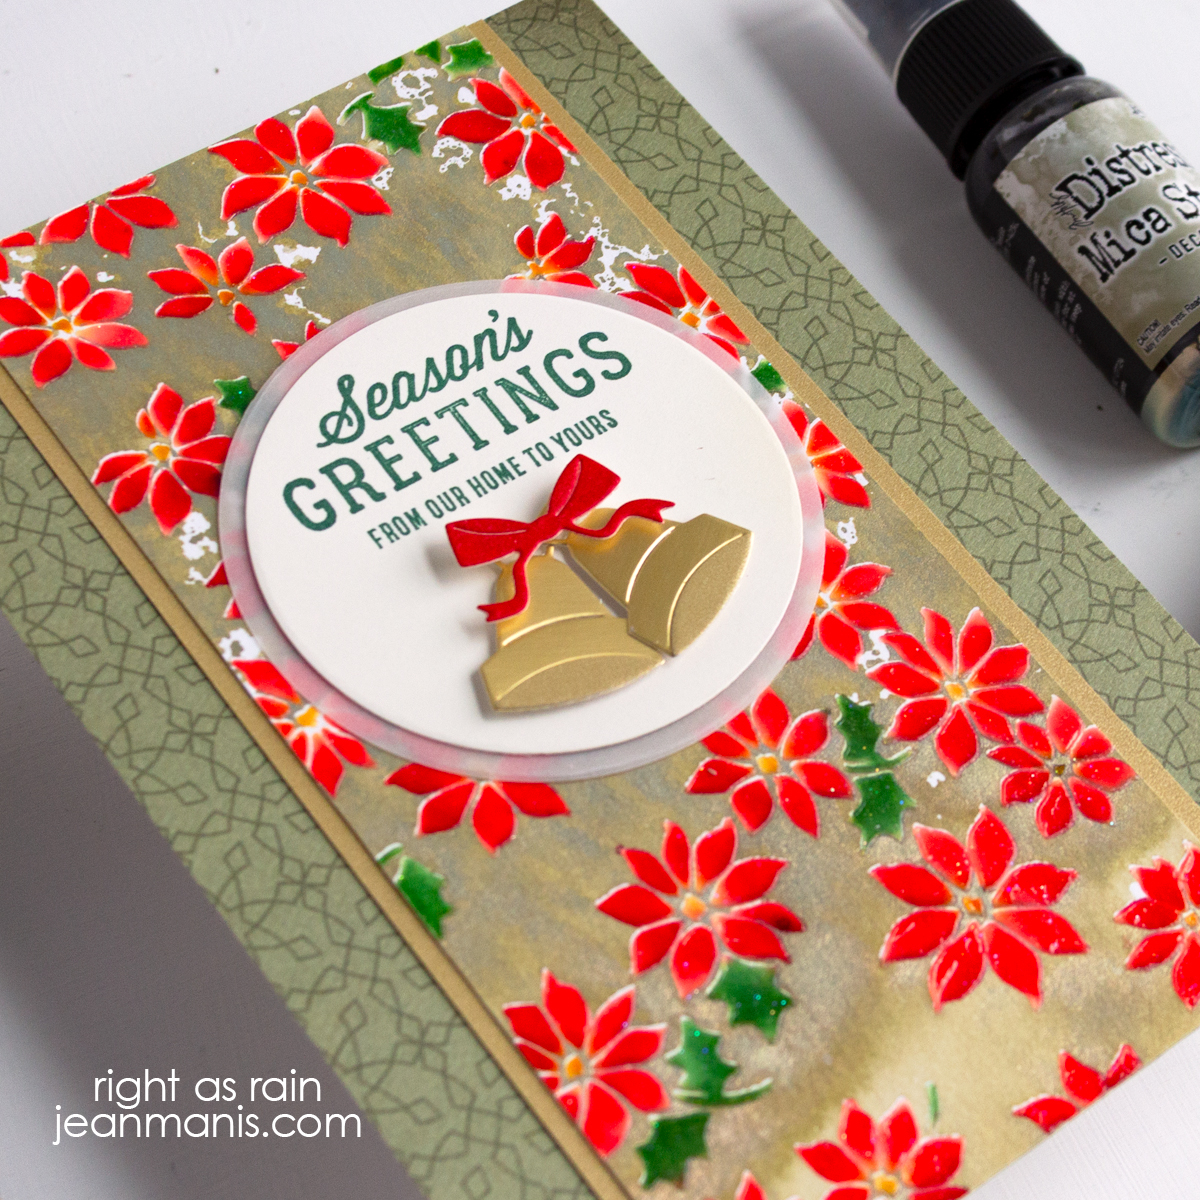
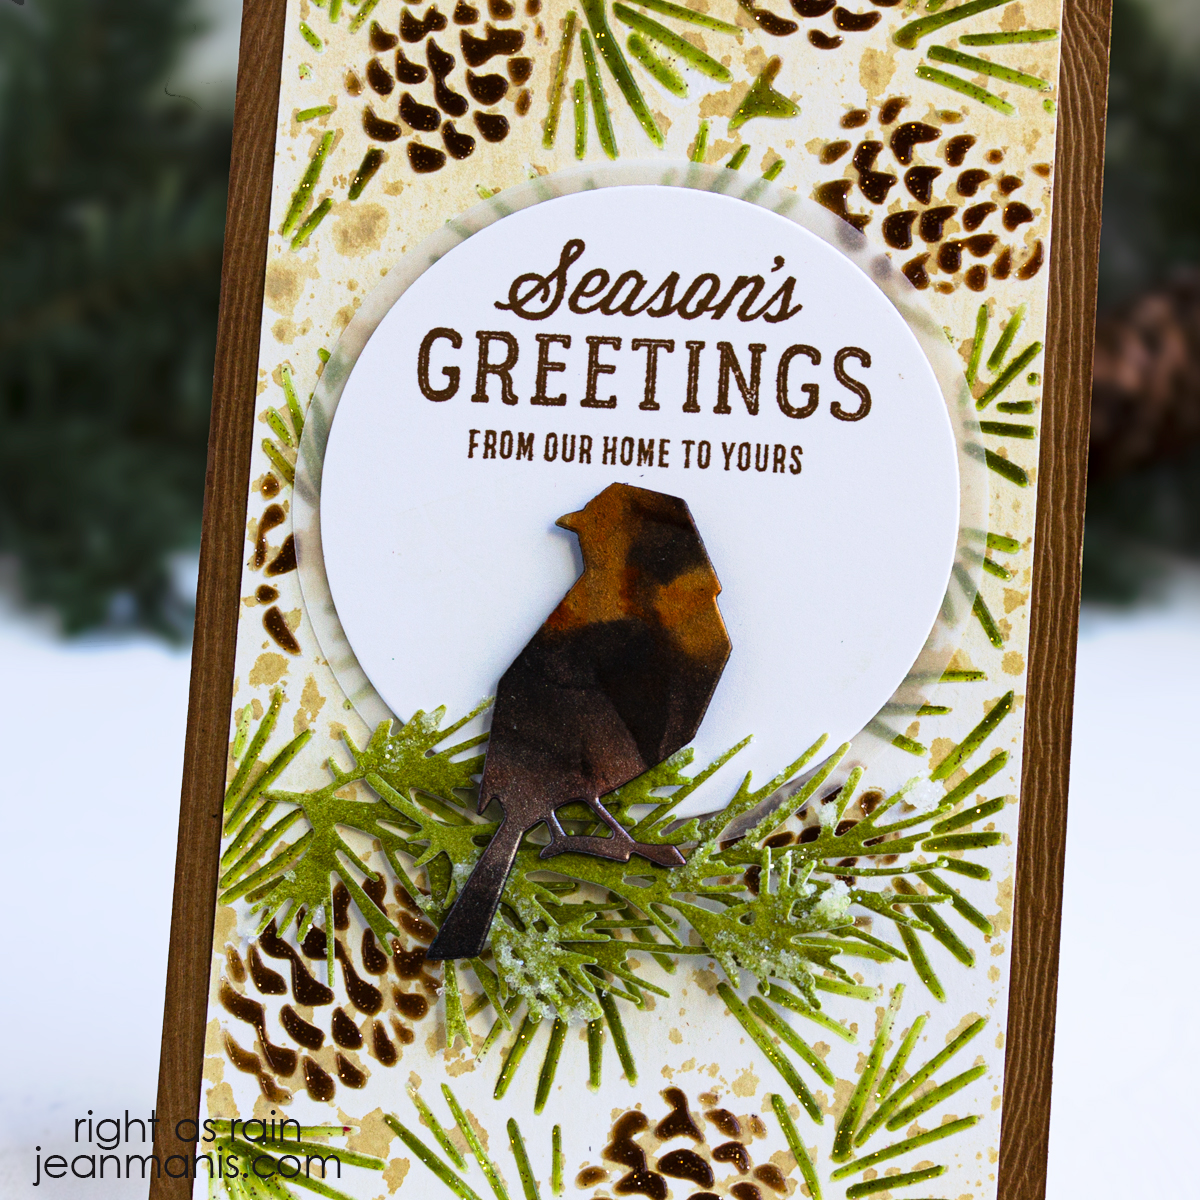
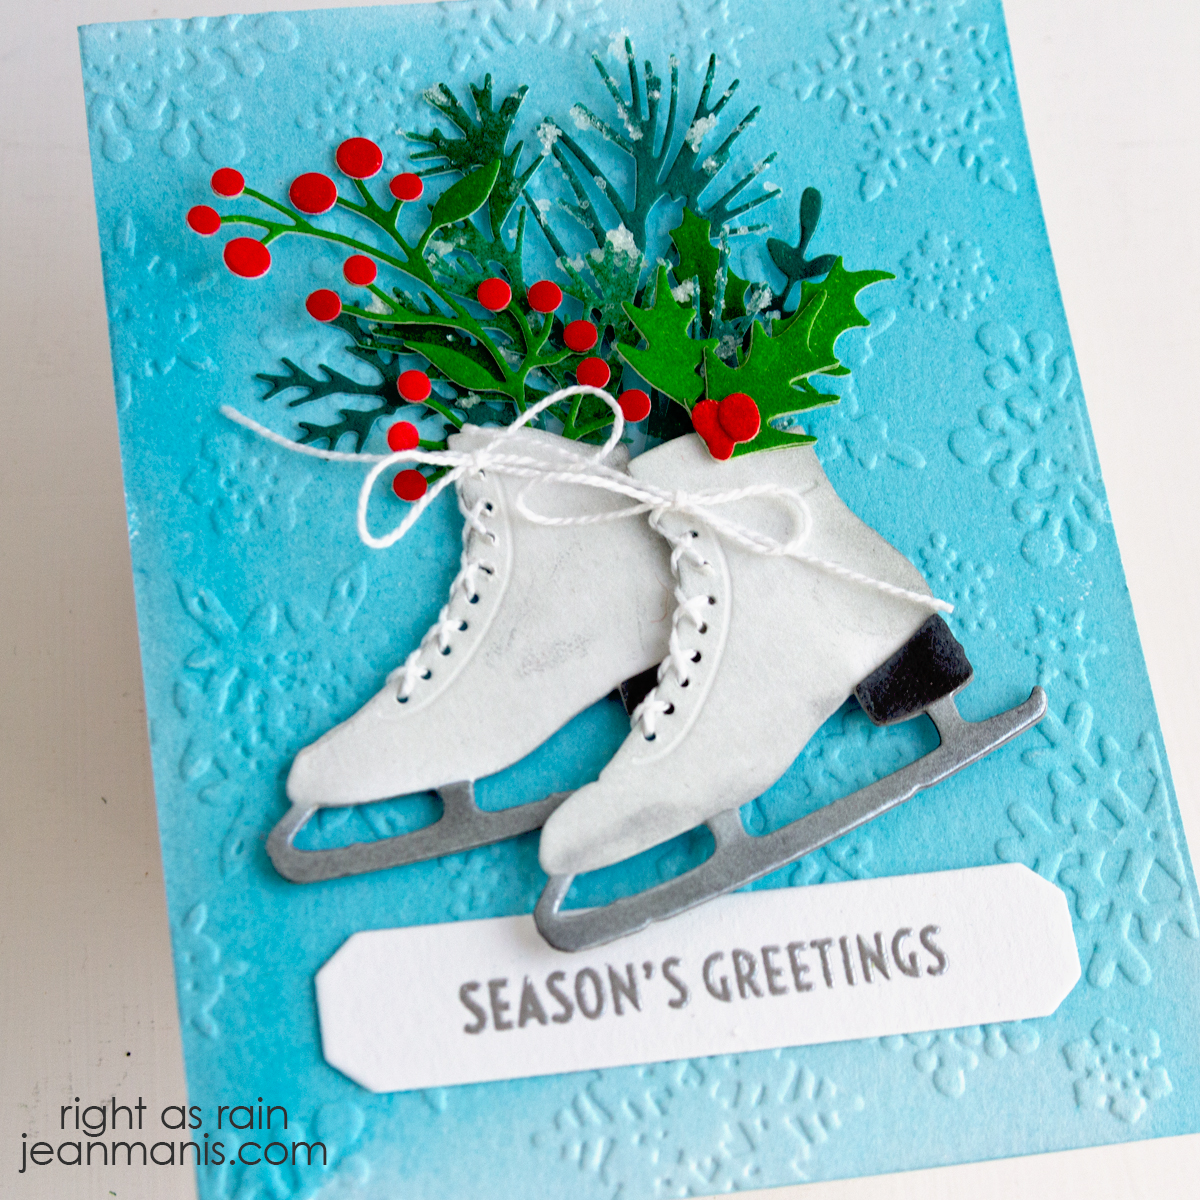
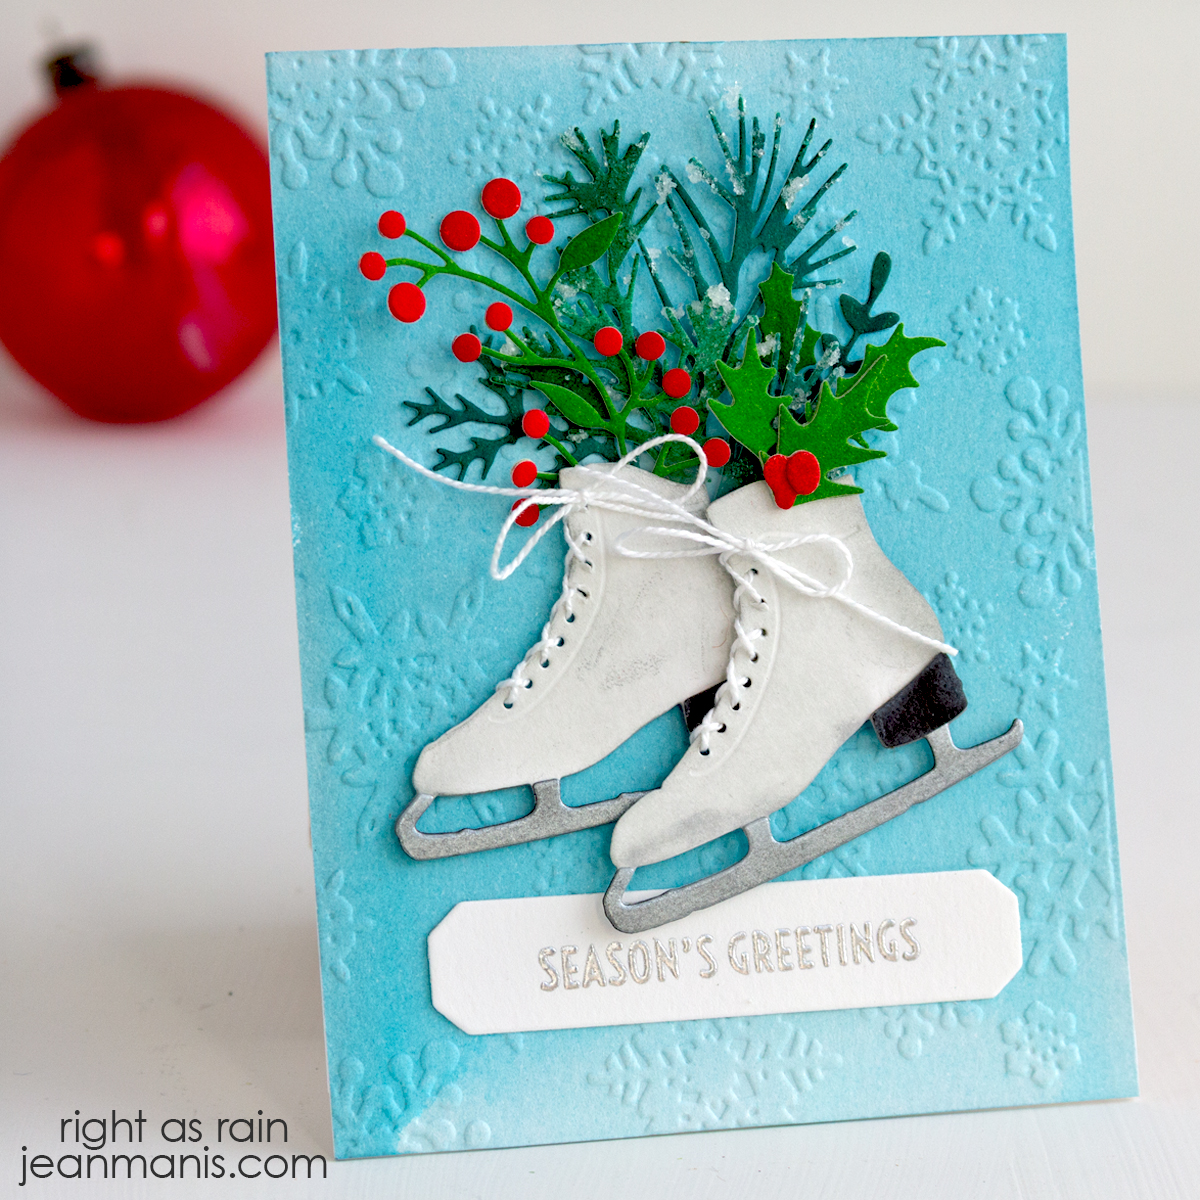
A Tim Holtz-Inspired Holiday Card

Hello! Mixed media isn’t my usual cardmaking style, but it’s always fun to step outside my comfort zone and experiment. For this Christmas card, I used a variety of Tim Holtz products including stenciling and alcohol inking. The variety of mediums adds character and depth to the design—each layer contributing its own texture and visual interest. It’s a festive project full of wintery sparkle and creative play.

A Tim Holtz-Inspired Holiday Card

    • To begin, create a card base 3 3/4″ x 6 7/8″ from woodgrain cardstock. Ink the sides of the cardstock with Gathered Twigs.
    • Next, create a monoprint on watercolor paper with the Pinecones stencil using Antique Linen Distress Spray and water. There are several of the Tim Holtz makers who regularly use this technique. Once dry, stencil in the pinecones and greenery. Apply the Sparkle paste through the panel and set aside to dry. Tim Holtz recently created a video discussing the many pastes available.; it proved to be an invaluable resource.
    • Once dry, you can add Antique Linen ink to the cardstock since the areas covered by the paste resist the ink. This can help fill in bare spots from the monoprint method.
    • Cut the bird from alcohol-inked black cardstock. I used the same formula as on this card.
    • Cut the greenery, from cardstock to which Distress ink has been applied, with dies in the Holiday Greens set. Add a snow effect by applying Snowfall Grit paste and Rock Candy glitter.
    • Stamp the Festive Overlay sentiment on to cardstock and cut with a circle die. Cut a vellum circle slightly larger. Adhere the two.
    • Trim the stenciled panel and add to the card base. Add sentiment circle, greenery, and bird.

A Tim Holtz-Inspired Holiday Card

It’s a bit more involved than my usual clean and simple cards, but worth every step for the texture and sparkle it brings to the finished design.

Watercolored Birdhouses with Newton’s Nook

Hello! Birdhouses make for a cheerful and inviting focal point in card designs. For this card, I used a Newton’s Nook stamp set and brought the stamped images to life with watercoloring. A scalloped die-cut background adds a playful touch, and I stamped the sentiment on a cloud for easy placement. Let’s take a closer look at how this colorful card came together!

Watercolored Birdhouses with Newton’s Nook

    • Create an A2-size card base from white cardstock.
    • Cut a scallop background from patterned paper. (I used a die in the Mama Elephant Basic Set.) Adhere to base.
    • Stamp Birdhouse Greetings birdhouses with VersaFine ink on Arches Cold Press watercolor paper; heat set.
    • Watercolor the images—I used Tombow markers and Derwent Inktense pencils. You can read more about watercoloring stamped images here. Once dry, I added depth and detail with colored pencils. I don’t often get the chance to experiment with different coloring mediums, but when I do, it’s always an enjoyable creative process!
    • Cut the images with the coordinating dies.
    • Stamp Birdhouse Greetings sentiment on to white cardstock and cut with a die in the On Cloud Nine set. Cut an additional cloud with a die in the same set.
    • Add birdhouses to card background with foam adhesive and the clouds with dot adhesive.

Watercolored Birdhouses with Newton’s Nook


Mixed Media Birthday Card | Newton’s Nook

Hello! Birthdays are all about fun, friends, and of course—presents! Today, I am sharing a card featuring an adorable Newton’s Nook stamped image featuring two playful cats, a happy pup, and a stack of brightly colored packages. To add to the celebration, I created a cheerful balloon-filled background with a stencil.

Mixed Media Birthday Card | Newton’s Nook

    • Ink Bristol cardstock with a light ink color – I used Tumbled Glass Oxide. Add balloons through the Bokeh Balloons stencil. I used darker inks at the top and lighter towards the bottom.
    • Stamp the Sky High Celebrations sentiment in black ink on the stenciled panel. Cut panel with A2-size Lawn Fawn Stitched Rectangle die and add to a card base.
    • Stamp Sky High Celebrations image with VersaFine ink on Cold Pressed Watercolor paper and heat set. Color with medium of choice. I used Zig and Tombow markers: Zig Dark Gray 95, Zig Orange 70, Zig Mustard 67, Zig Sand 601, Tombow Purple 665, Zig May Green 47, Zig Persian Blue 32, Zig Yellow 50, Tombow N15 Black, Tombow Burnt Sienna 947, Zig Medium Beige 76, Zig Geranium Red 29, and Tombow Dusty Rose 772.
    • Add additional color with Derwent Inktense pencils: Poppy Red, Neutral Gray, Yellow.
    • When dry, cut image with the coordinating die set.
    • Add image to card base with foam adhesive.

Mixed Media Birthday Card | Newton’s Nook

Note: The Sky High Celebrations stamp set and coordinating die set can be purchased directly from Newton’s Nook and Frantic Stamper.

I shared another birthday card HERE that showcases the other image on the Sky High Celebrations set.


Elizabeth Craft Designs | Winter Florals

Hello! Today, I am dipping my toes into the Elizabeth Craft Designs Paper Flowers collection. My slimline-sized card showcases two die sets from the collection – Floral Foliage 1 and Floral Greenery 1. The birdhouse in a barrel filled with plants creates a picturesque winter scene.

Elizabeth Craft Designs | Winter Florals

  • To begin, create a 4″ x 6 1/2″ card base and cover with patterned paper (I used Carta Bella Santa’s Workshop Collection Border Strips).
  • Cut Soft Finish cardstock with dies in the Floral Foliage 1 and Floral Greenery 1 sets. Color pieces with Distress Oxide inks and Pan Pastels. Assemble. Shape flowers with ball stylus tools. Add micro beads for the birds’ eyes.
  • Place assembled birdhouse into barrel and tape on back. Add the assembly to the card base. Add birds to birdhouse with foam adhesive. Add greenery to barrel and adhere with glue.
  • Stamp sentiment (Hero Arts All Occasion Messages stamp set) in black on white cardstock. Cut with small tag die (MFT Stamps). Add May Arts twine through hole. Add tag to card with foam adhesive.

Elizabeth Craft Designs | Winter Florals

Elizabeth Craft Designs | Winter Florals

Supplies: Hero Arts All Occasion Messages, MFT Stamps tag die, Finnabair black micro beads


Spellbinders | March 2023 Clubs Inspiration Blog Hop

Hello! I am delighted to be participating in a blog hop celebrating the Spellbinders March 2023 Club Subscriptions. You should have reached me from the blog of Daniel West. (The entire list of participants is included at the end of my post.) For the hop, I created a card showing a different way to use the March 2023 Large Die of the Month. As designed, the set creates a three-dimensional card, which I showed here.

Spellbinders | March 2023 Clubs Inspiration Blog Hop

Spellbinders is giving away a $25 gift certificate to three lucky blog readers – selected from the comments on the Spellbinders blog. Giveaway closes on Sunday, March 26, 11:59 pm MST. The winner will be announced in the blog hop post the following Wednesday. The winner is responsible for shipping cost, duties and taxes. Please note, store credit (gift certificate) cannot be applied to Club Subscriptions; store credit can be applied to shop past Club products, Club extras, and regular releases.

Create a spring-themed friendship card with the Large Die of the Month using watercolored paper for the die-cut elements.

Spellbinders | March 2023 Clubs Inspiration Blog Hop

  • Apply reinkers and watercolor marker ink to watercolor paper. Once dry, cut tree base, flowers, and leaves from the watercolor paper using dies in the Large Die of the Month set.
  • Adhere leaves and flowers to tree. Cut flower centers from Snowdrift cardstock and adhere. Trim tab from bottom of the tree (the tab is needed for the 3D application of the die set).
  • Using watercolor paper to which Mowed Lawn reinker has been applied, cut hill with die in the Color Block Scenic Scape set. For background, apply Tumbled Glass ink to Snowdrift cardstock. Trim and add to card base. Add hill to background and trim as needed.
  • Add tree to scene with foam adhesive. Cut bird from watercolored paper using dies in the Sweet Birds on a Branch set. Assemble and add to tree with foam adhesive.
  • Stamp sentiment with stamp in Seasonal Motif set. Cut with die in the A Cut Above the Rest Sentiments Stamp & Die Set. Add to card below the tree.

Thanks for visiting! Head next to the blog of Jennifer Kotas. Scroll for the full blog hop list.


Spellbinders Blog

Yana Smakula

Sandi MacIver

Annie Williams

Daniel West

Jean Manis <–You are here

Jennifer Kotas

Lydia Fiedler

Bibi Cameron

Heejung Hunsberger

Rebecca Keppel

Mindy Eggen

Inge Groot

Jumi Baek