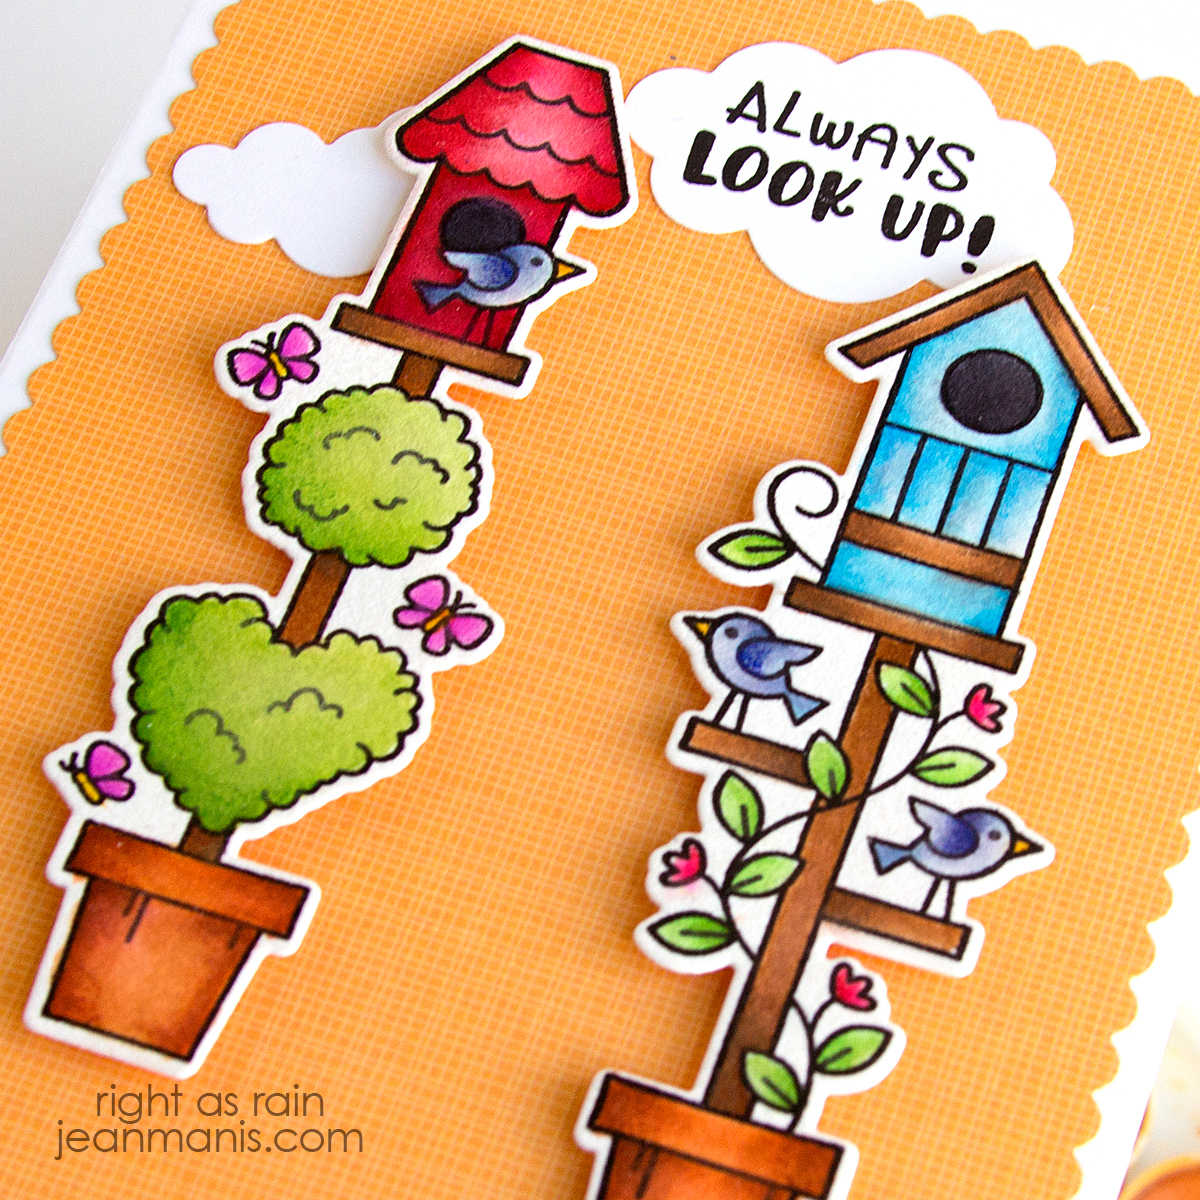
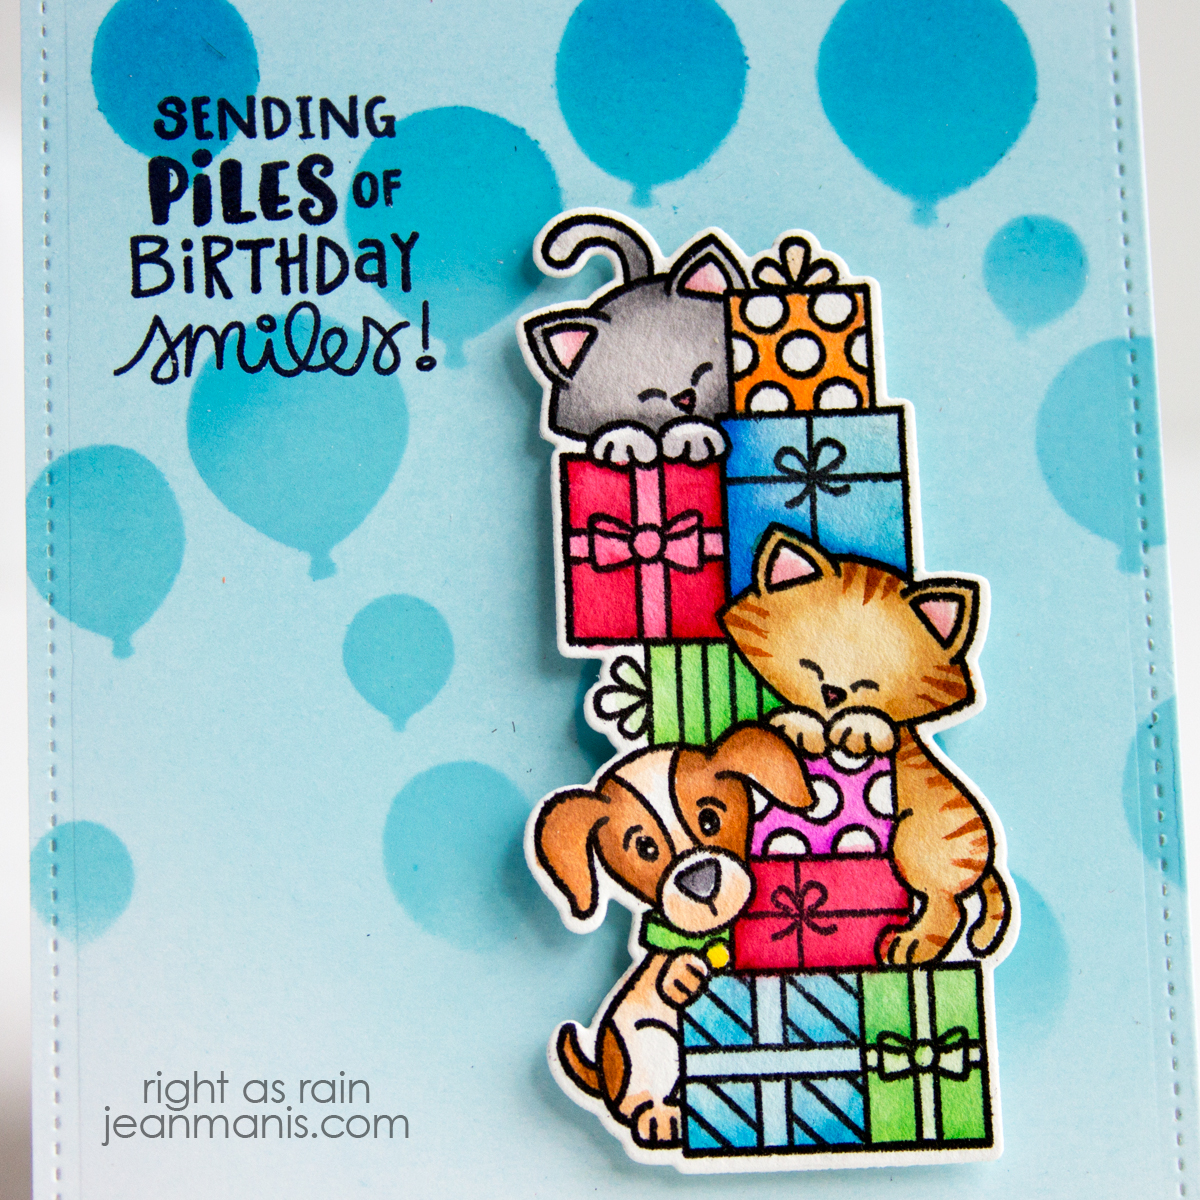
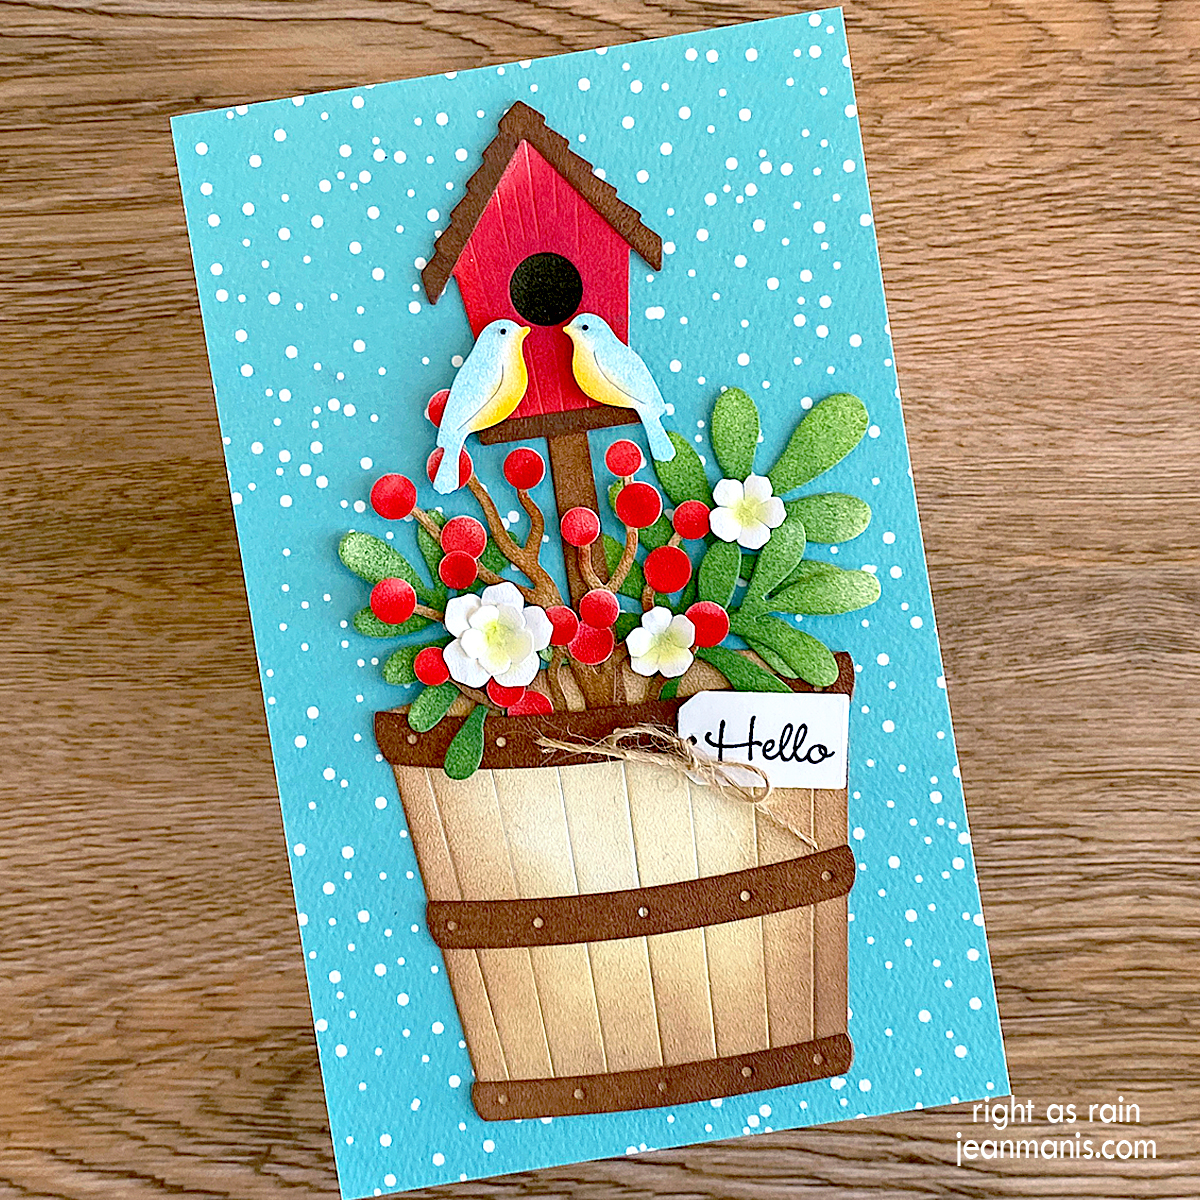
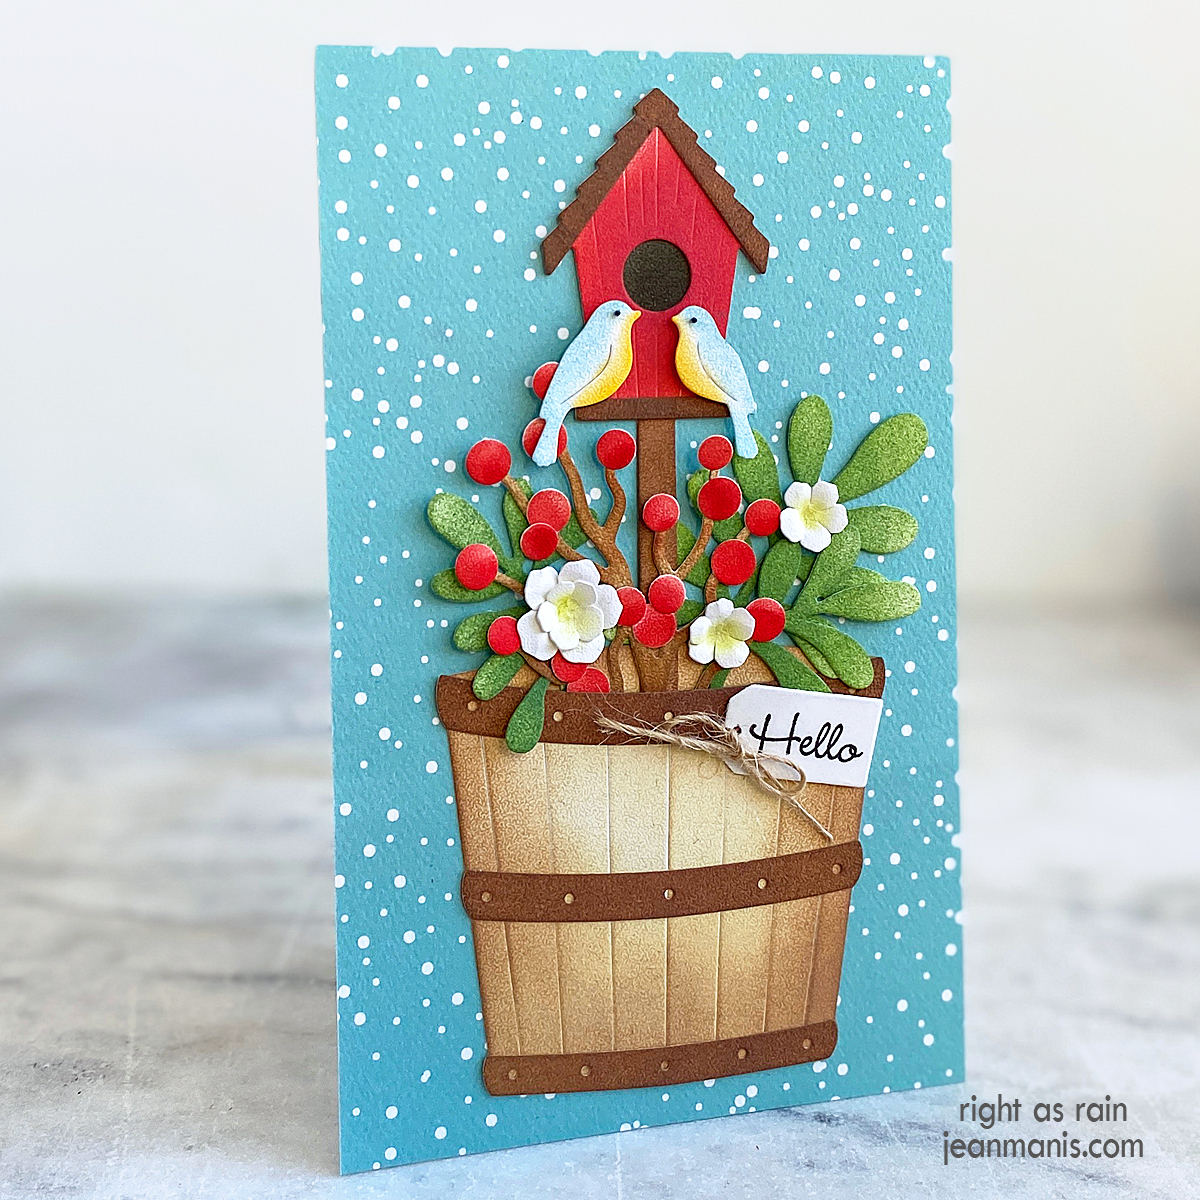
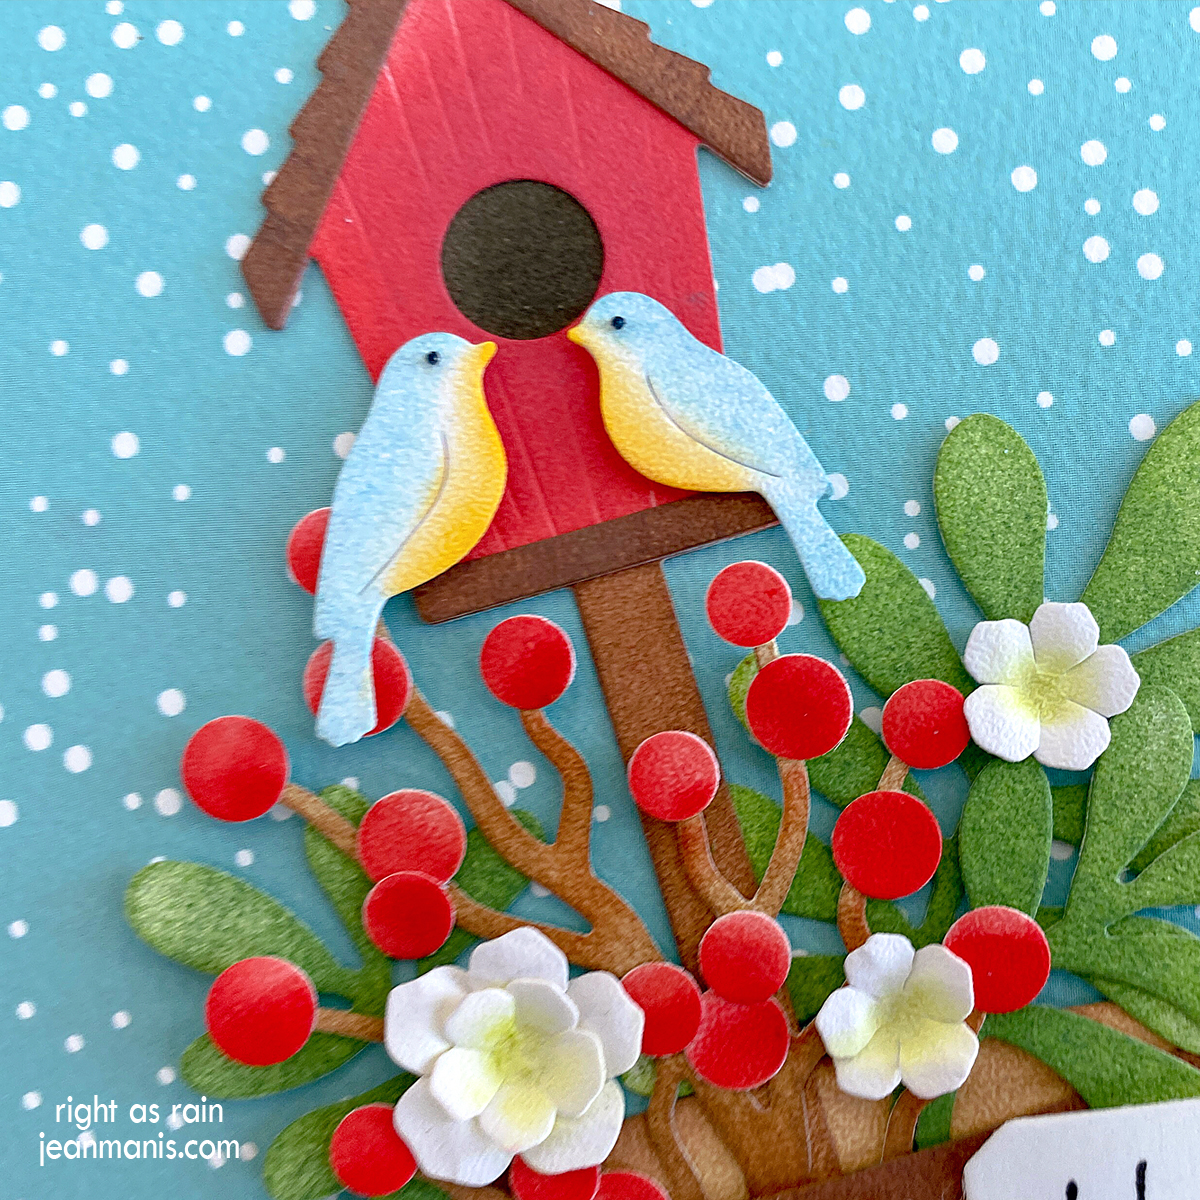
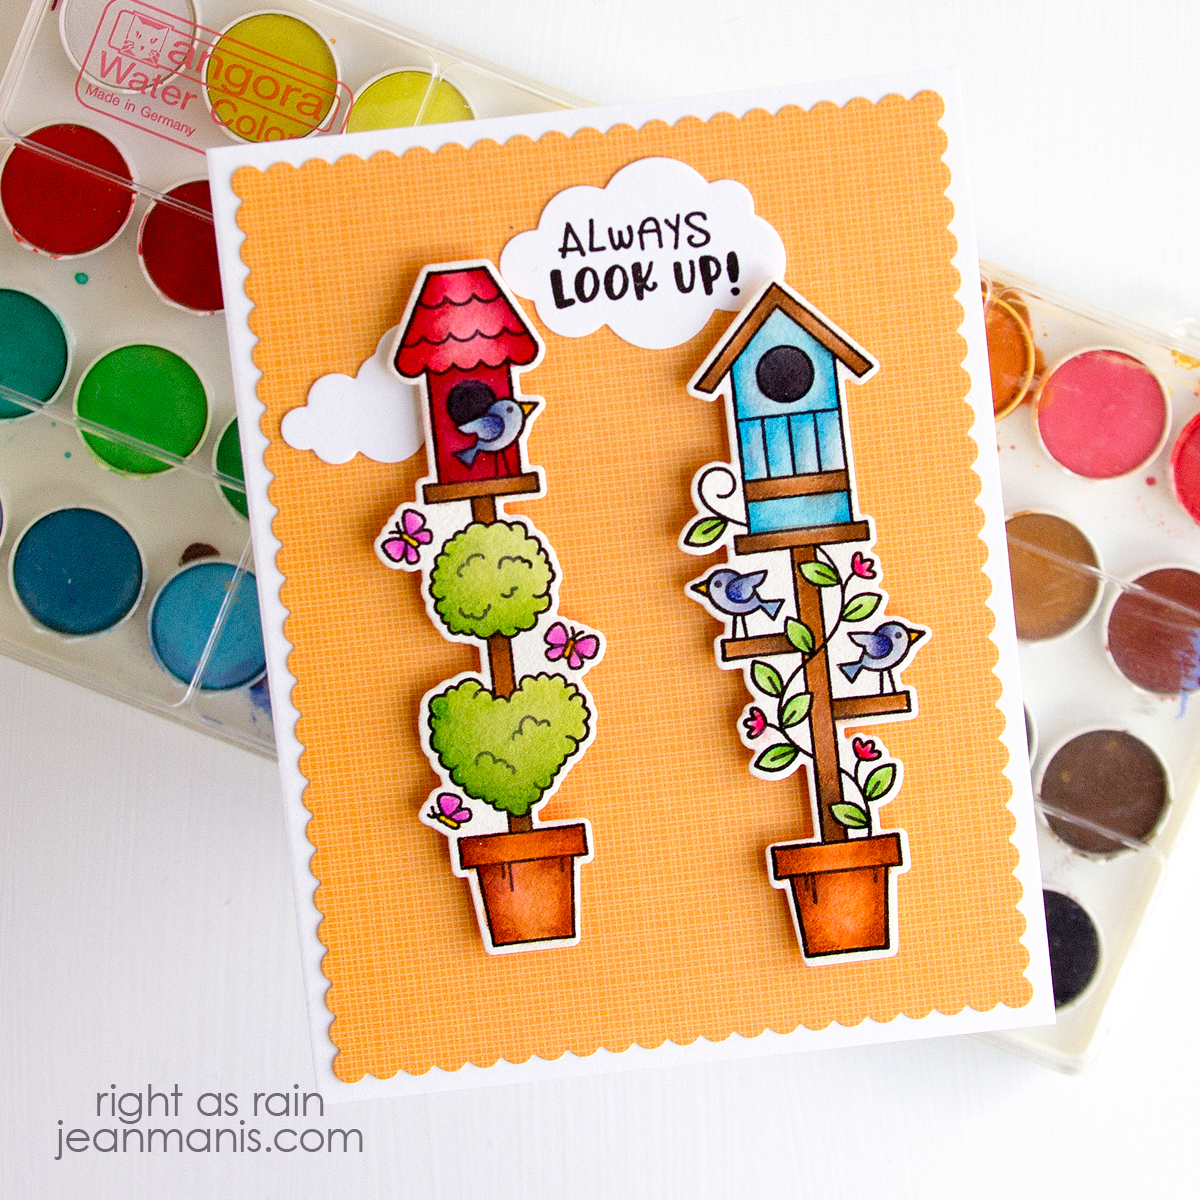
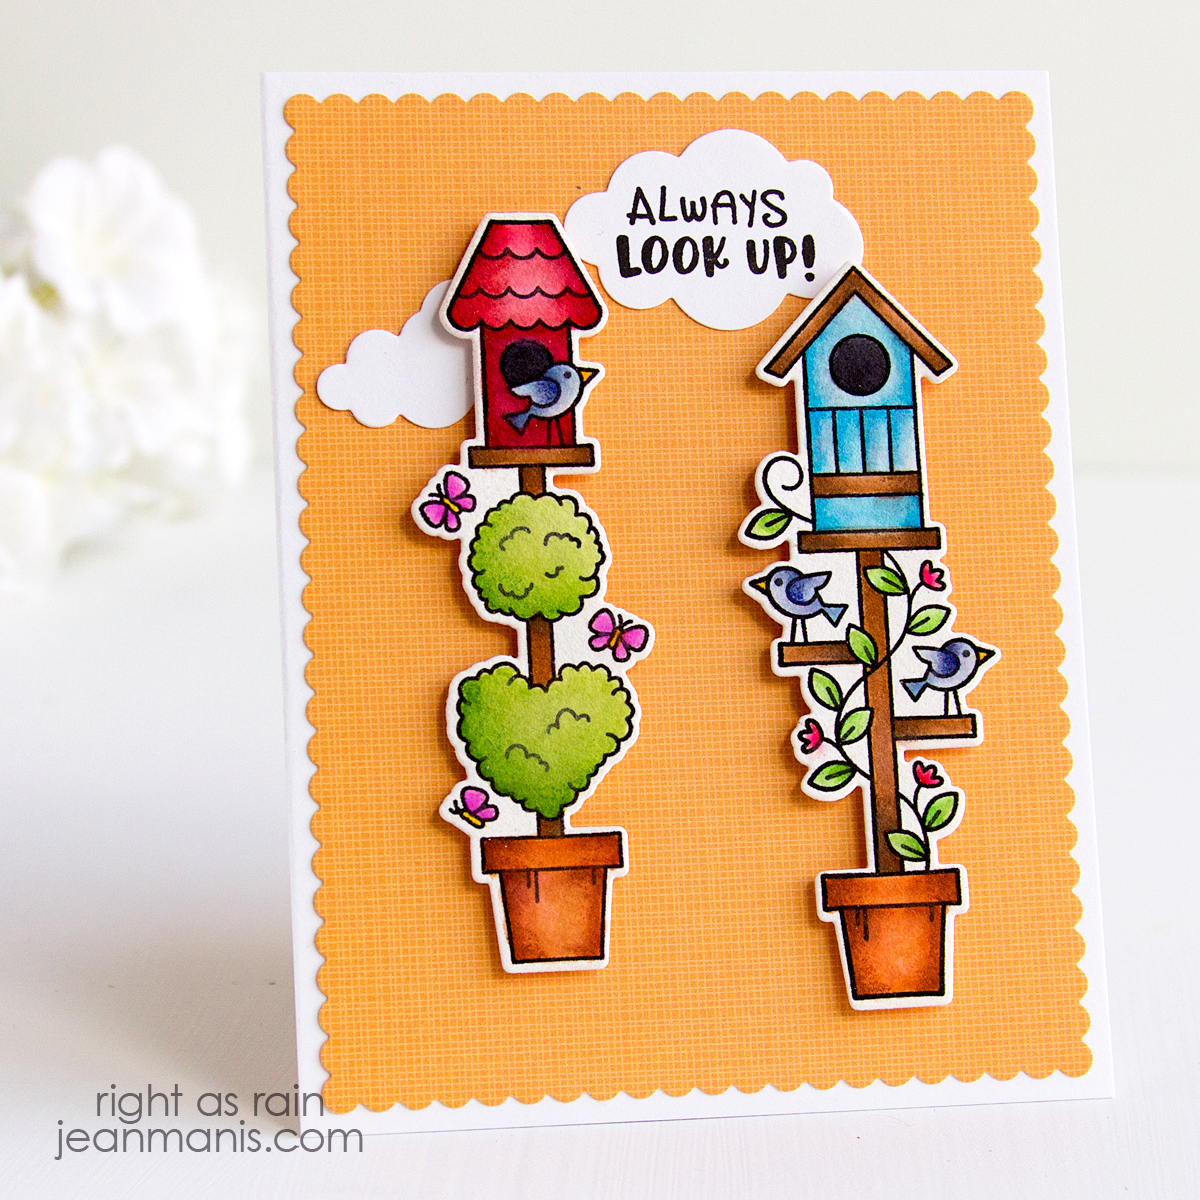
Tim Holtz | Mixed Media Holiday Card

Hello! Today, I am sharing a mixed-media holiday card created with a variety of Tim Holtz supplies.

Tim Holtz | Mixed Media Holiday Card

  • For the card background, I cut textured green cardstock from the Botanical pack and added it to an A2 card base.
  • I stamped the Tiny Text Christmas sentiment on light-green cardstock, also from the Botanical pack.
  • I added Snowfall Distress Grit Paste through the Pinecones stencil on to the sentiment panel (masking the sentiment area before the application). Once dry, I trimmed the panel, matted it with Brushed Gold cardstock, and added it to the card base.
  • To create the alcohol ink background paper for the bird, I read this blog post by Stacy Hutchinson and watched the video contained in this blog post by Tim Holtz. I used Gold Mixative, Mineral Pearls, and Sienna alcohol inks as that is what I had on hand.
  • Once the alcohol ink background was dry, I cut the bird with a die in the Silhouette Birds set.
  • I cut the bough from the darker shade of textured green cardstock using a die in the Mini Holiday Greens set. I added Snowfall Distress Grit Paste to the pine needles and sprinkled on Dry Glitter – Clear Rock Candy.
  • I added the bird and bough to the card and embellished with Gold Mix Gems.

Tim Holtz | Mixed Media Holiday Card


Tim Holtz | Tree Lot Stencil

Hello! Today I am sharing mixed-media, mini-slimline holiday cards, of the same design, showcasing the Tim Holtz Tree Lot stencil.

Tim Holtz | Tree Lot Stencil

To begin, I applied Translucent Distress Texture Paste through the Tree Lot stencil on cardstock – on white and kraft cardstock. While the paste was wet, I applied the Embossing Glazes in Twisted Citron, Rustic Wilderness, Broken China, and Cracked Pistachio. I set the panels aside to dry.

Once dry, I melted the glazes with my heat tool.

Tim Holtz | Tree Lot Stencil

I trimmed the panels to 3 1/2 x 6 inches, added the panels to card bases, and added sentiments cut with dies in the Alphanumeric Bold set. The letters on the kraft background were cut from White Glitter Foam. The Brushed Gold letters were adhered to letters cut from the glitter foam (to provide height).

Tim Holtz | Tree Lot Stencil


Tim Holtz | Die-cut Flowers

Hello! Today I am sharing a bouquet of die-cut flowers created with dies designed by Tim Holtz for Sizzix.

Tim Holtz | Die-cut Flowers

  • Cut pot, floral, and foliage pieces with dies in the Modern Floristry, Potted, and Brushstroke Flowers 2 sets from Strathmore Mixed Media paper.
  • Watercolor die-cut pieces with Vintage Photo, Rusty Hinge, Wild Honey, Mustard Seed, Candied Apple, Mowed Lawn, Rustic Wilderness, and Peeled Paint inks. Once dry, add additional ink as necessary.
  • Cut flower centers from black cardstock.
  • Assemble flowers.
  • Stamp Tiny Text sentiment in black on white cardstock. Add Tumbled Glass ink to background.
  • Adhere pot, flowers, and foliage to card using foam adhesive as necessary.

Tim Holtz | Die-cut Flowers


Spellbinders | Paint Your World Collection

Hello! I am delighted to share a slimline card featuring products from the just-released Paint Your World Collection at Spellbinders. I combined the Painted Blooms die set with the collection’s stamp set. I knew right away that I wanted to use paint on this project.

Spellbinders | Paint Your World Collection

  • Paint Bristol cardstock with acrylic paint in a variety of colors for the leaves, paint brush, and blooms.
  • While the painted cardstock dries, cut the brush bristles (several times) and handle tip from Snowdrift cardstock with the Painted Blooms die set. Apply VersaMark to the pieces and clear emboss them.
  • Cut the paint brush band from silver foil cardstock.
  • When the painted cardstock is dry, cut the leaves, blooms, and brush. Cut the brush again from thin balsa wood.
  • Glue the paint bristles and leaves to the balsa wood structure. Glue the foil band and handle tip to the painted brush. Glue the assembly to the balsa wood.
  • Stamp the Paint Your World sentiment in VersaFine Onyx Black ink on a slimline-size, light blue, cardstock base.
  • Adhere paint brush to card base. Glue flowers and centers together and add to card.

Spellbinders | Paint Your World Collection


Tim Holtz Cozy Winter Tags

Hello! Today I am sharing two versions of a holiday tag featuring the Tim Holtz Cozy Winter bear. I previously shared a card featuring the bear here.

Tim Holtz Cozy Winter Tags

I used a die in the Tim Holtz/Sizzix Tag Collection set to create the tag base, cutting cardstock to which I had applied Distress Oxide ink.

On both tags, I used the Flurries stencil, varying the method by which I created the snowflakes. For the tag on the left, I applied Transfer Gel through the stencil. Once dry, I ran the tag through my Minc with Flock Transfer (now called Deco Foil Plush Paper, White Latte).

For the tag on the right, I applied white embossing paste through the stencil and sprinkled it with Clear Rock Candy glitter.

In addition to changing up the color of cardstocks I used to create the bears, I changed up the sentiment as well. For the first bear, I stamped the Bold Tidings Mini sentiment on to white cardstock and cut it with a Spellbinders Color Block Scenic Scape die.

Tim Holtz Cozy Winter Tags

On the other, I added Clear Rock Candy glitter to white cardstock (with double-sided adhesive), cut the cardstock with the Spellbinders Color Block Scenic Scape die, and added a sentiment cut with the Alphanumeric Bold set, from cardstock to which I had applied Broken China Glaze.

Tim Holtz Cozy Winter Tags

The Cozy Winter set includes a mug for the bear to hold. I swapped out the mug for a present, cut with the Christmas Minis set. I cut the present from cardstock to which I had applied Broken China Glaze and cardstock which I had heat-embossed with Red Tinsel embossing powder. I cut the scarf from these same two pieces.

Tim Holtz Cozy Winter Tags Tim Holtz Cozy Winter Tags

I really enjoy using the same design while varying the ways in which I create the elements.