Be Merry

Today, I’m sharing a card created with one Kristina Werner’s designs from the Online Card Classes Holiday Workshop. There are still plenty of cards from class that I’d like to make!

Online Card Classes Holiday Workshop

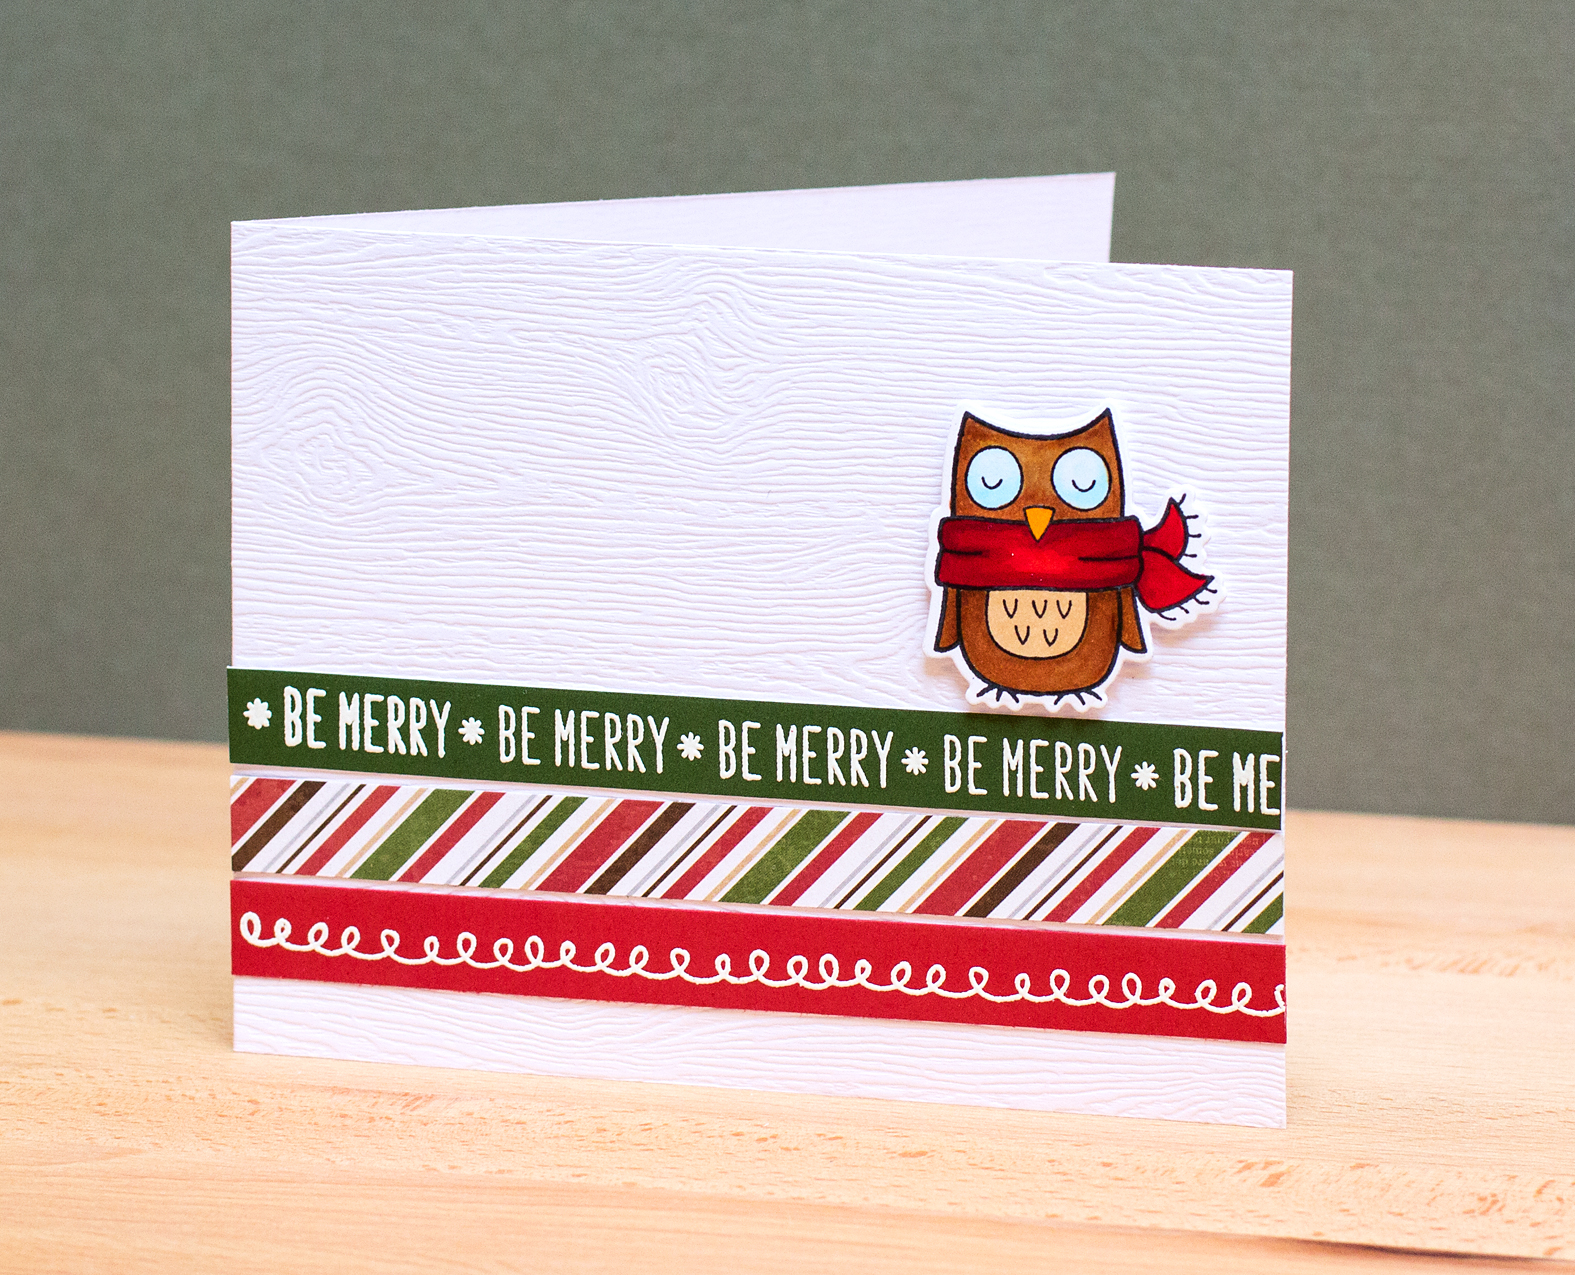
Kristina stamped lines with pigment ink on her card. I tried this idea, but wasn’t able to stamp lines that looked sharp, so I created strips from patterned paper instead. I heat embossed green and red cardstock with Lawn Fawn stamps. The patterned paper is from one of last year’s Echo Park collections. I stamped the owl with Memento black ink and colored him (her?) with Copics. Even though I didn’t mind fussy cutting stamped images too much, I really like the Lawn Cuts companion dies!

Supplies:

Holiday Card Camp Day 5

Today’s Online Card Classes Holiday Workshop lesson was all about feminine and masculine cards. I crafted the cards shown by Debby Hughes with a few modifications.

Holiday Card Camp Day 5

The card size is 3 1/2″ x 5″ with a panel of 3″ x 4 1/2″. I’ve never crafted a card this size before, but I must say I like it a lot. I cut a Crafter’s Workshop blank template with the Savvy branch die, through which I applied the embossing paste. I tried using cardstock, as Debby did, but ended up placing the branch too high on the card. I heat embossed the branch. Key to this idea is using an embossing buddy on the cardstock before applying the paste. I used one of my new favorite Hero Arts sentiment sets heat embossed in white. The Savvy snowflake die was heat embossed with silver several times.

Holiday Card Camp Day 5

I took a shortcut with the feminine card by dry embossing the background rather than using paste. I also have fewer snowflakes on mine than Debby had on hers. I can only do so much bling! With two sons, I actually have an easier time crafting masculine cards than feminine ones.

Today was a fabulous class loaded with inspiration to which I’ll turn in the coming weeks!

Supplies:

Holiday Card Camp Day 4

The focus of today’s Online Card Classes Holiday Workshop lesson is “stretching your stamps,” as in using them in less obvious or unusual ways. It’s a drizzly, cold November Monday here in the Pacific Northwest, so I’m a bit on auto-pilot. 🙂 I followed one of the cards shown by Shari Carroll almost to a “T.”

Holiday Card Camp Day 4

I loved the colors Shari chose for the tree line – and they make me happy! I heat set the stamped trees before I heat embossed the sentiment in silver across them. I tried stamping the sentiment without heat setting the trees, and the trees picked up quite a bit of the embossing powder, even though I used an “embossing buddy.” I used papers from October Afternoon’s “Midway” collection.

There were more terrific cards shown using the Lawn Fawn “Peace, Love, Joy” stamp set in today’s lesson that I plan to craft in the upcoming weeks.

Supplies:

Holiday Card Camp Day 3

The focus of today’s Online Card Classes Holiday Workshop lesson was Clean and Simple Holiday Cards. For my first card, I followed one shown by Shari Carroll.

Holiday Card Camp Day 3

Shari used a repeating sentiment from Lawn Fawn, which was adorable. I looked through my stash and found a sentiment from a Technique Tuesday set that would work, although it wasn’t repeating. Because of the sentiment’s length, I ended up making the card 4 1/2″ wide, to provide white space on the side and bottom. I added some “snowflakes” with embossing paste in the sky.

Holiday Card Camp Day 3

For the second card, I made some modifications to an idea shown by Cristina Kowalczyk. I masked off a triangular area and colored in select parts of the Tim Holtz Dot Fade stencil with Copics to form a Christmas Tree. I wasn’t thrilled with the way the tree sides looked, they were raggedy, so I cut it out with the larger tree die cut from the Sizzix “Holiday Cheer” set. I silver heat embossed a sentiment from the Hero Arts “Naughty or Nice” set – really like the fonts in this set!

Holiday Card Camp Day 2

Today I’m sharing a card based on the one shown by Debby Hughes in the Online Card Classes Holiday Workshop. The focus of today’s lesson is die cuts.

Holiday Card Camp Day 2

I made a few substitutions using what I had. For the snowy background, I used a Heidi Swapp stencil to apply the embossing paste. I didn’t like the look of my hand-cut snow slopes, and don’t have the die that Debby used, so I used the MFT dies. (These dies are used time and again for my winter projects!) I heat embossed the Hero Arts sentiment with silver embossing powder.

Light is scarce here at this time of year, so I better get started on another card!

Supplies: