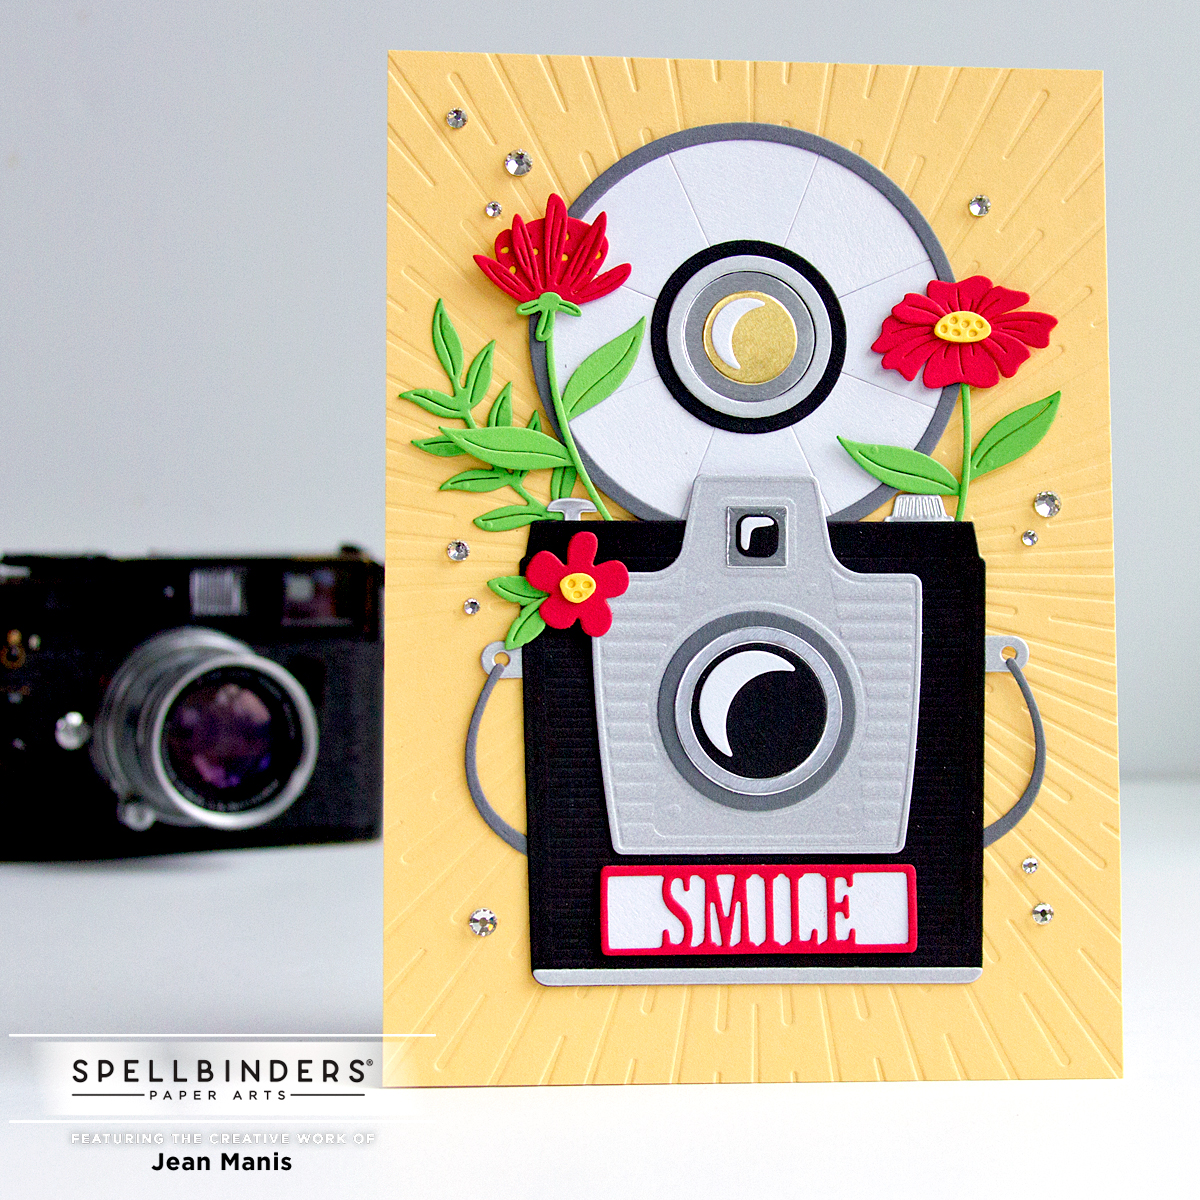
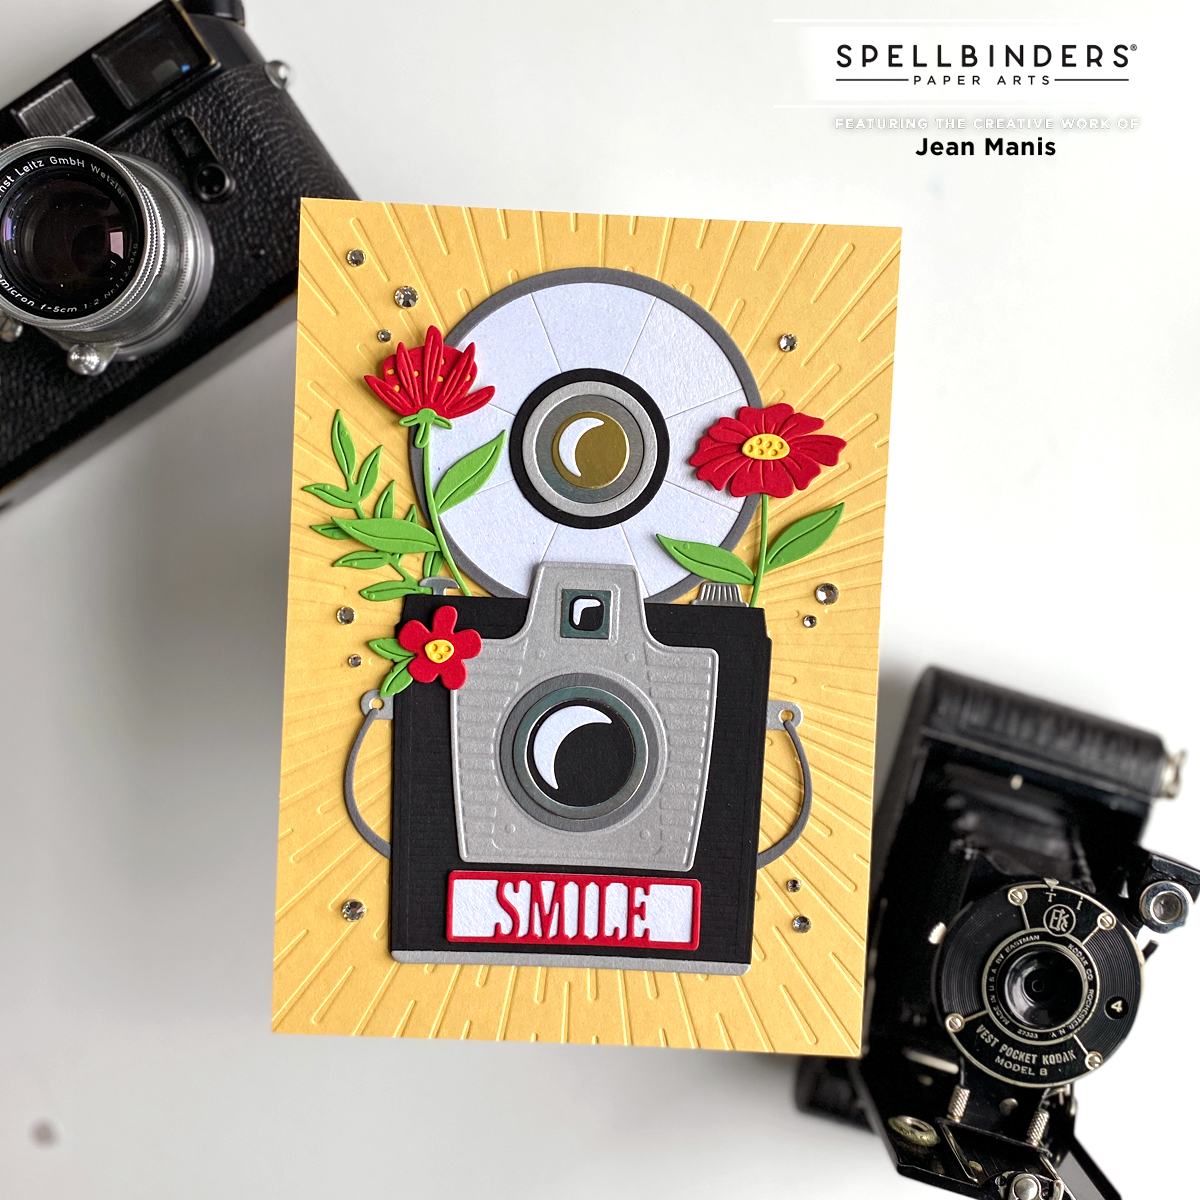
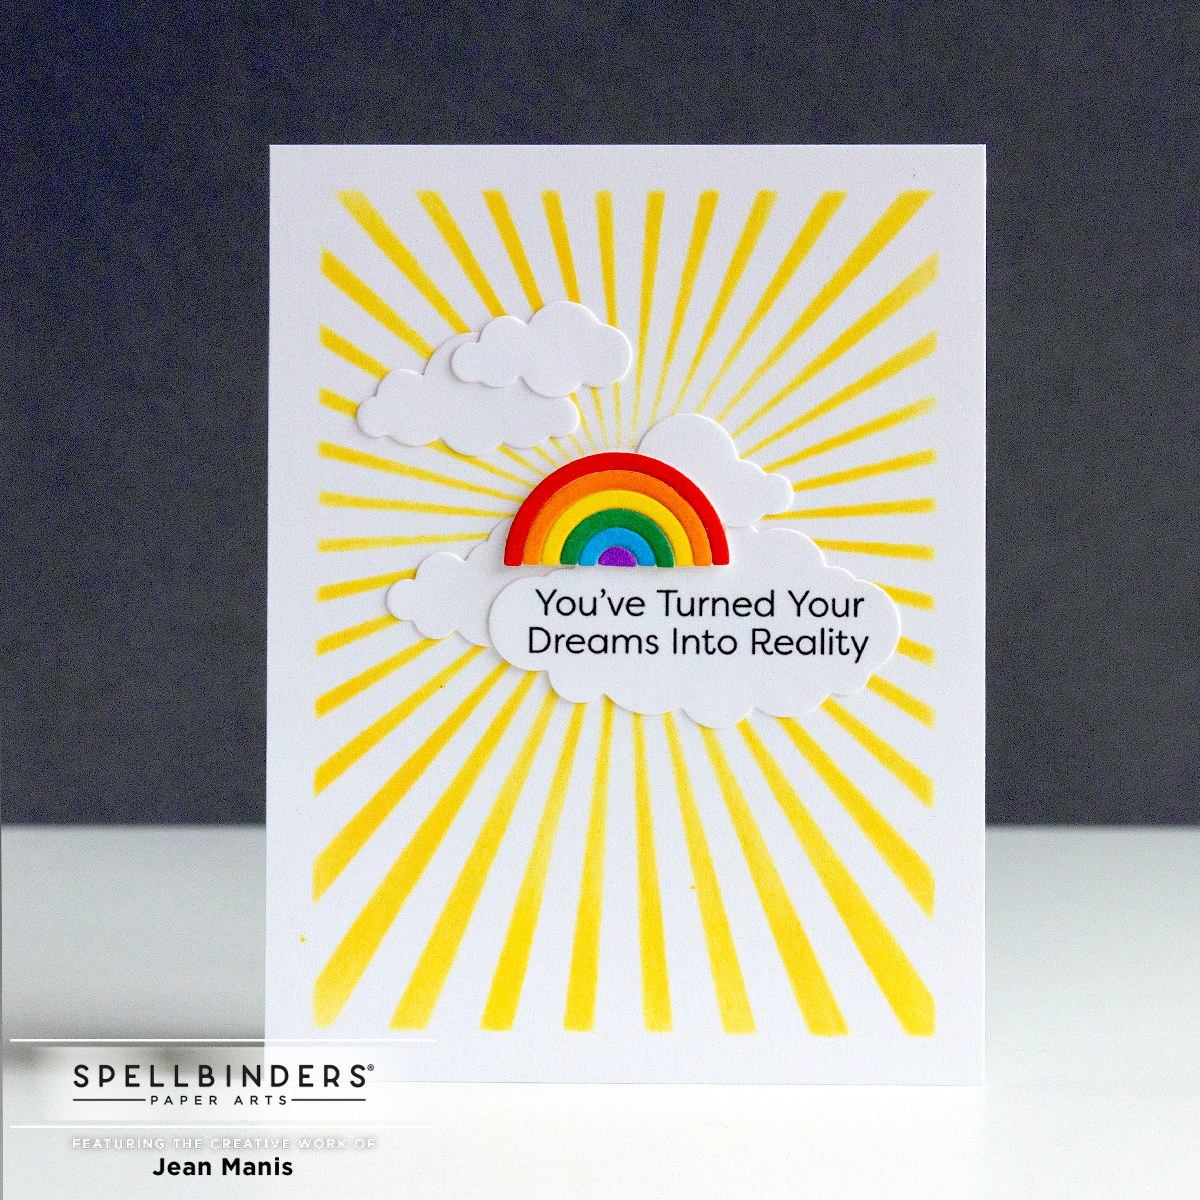
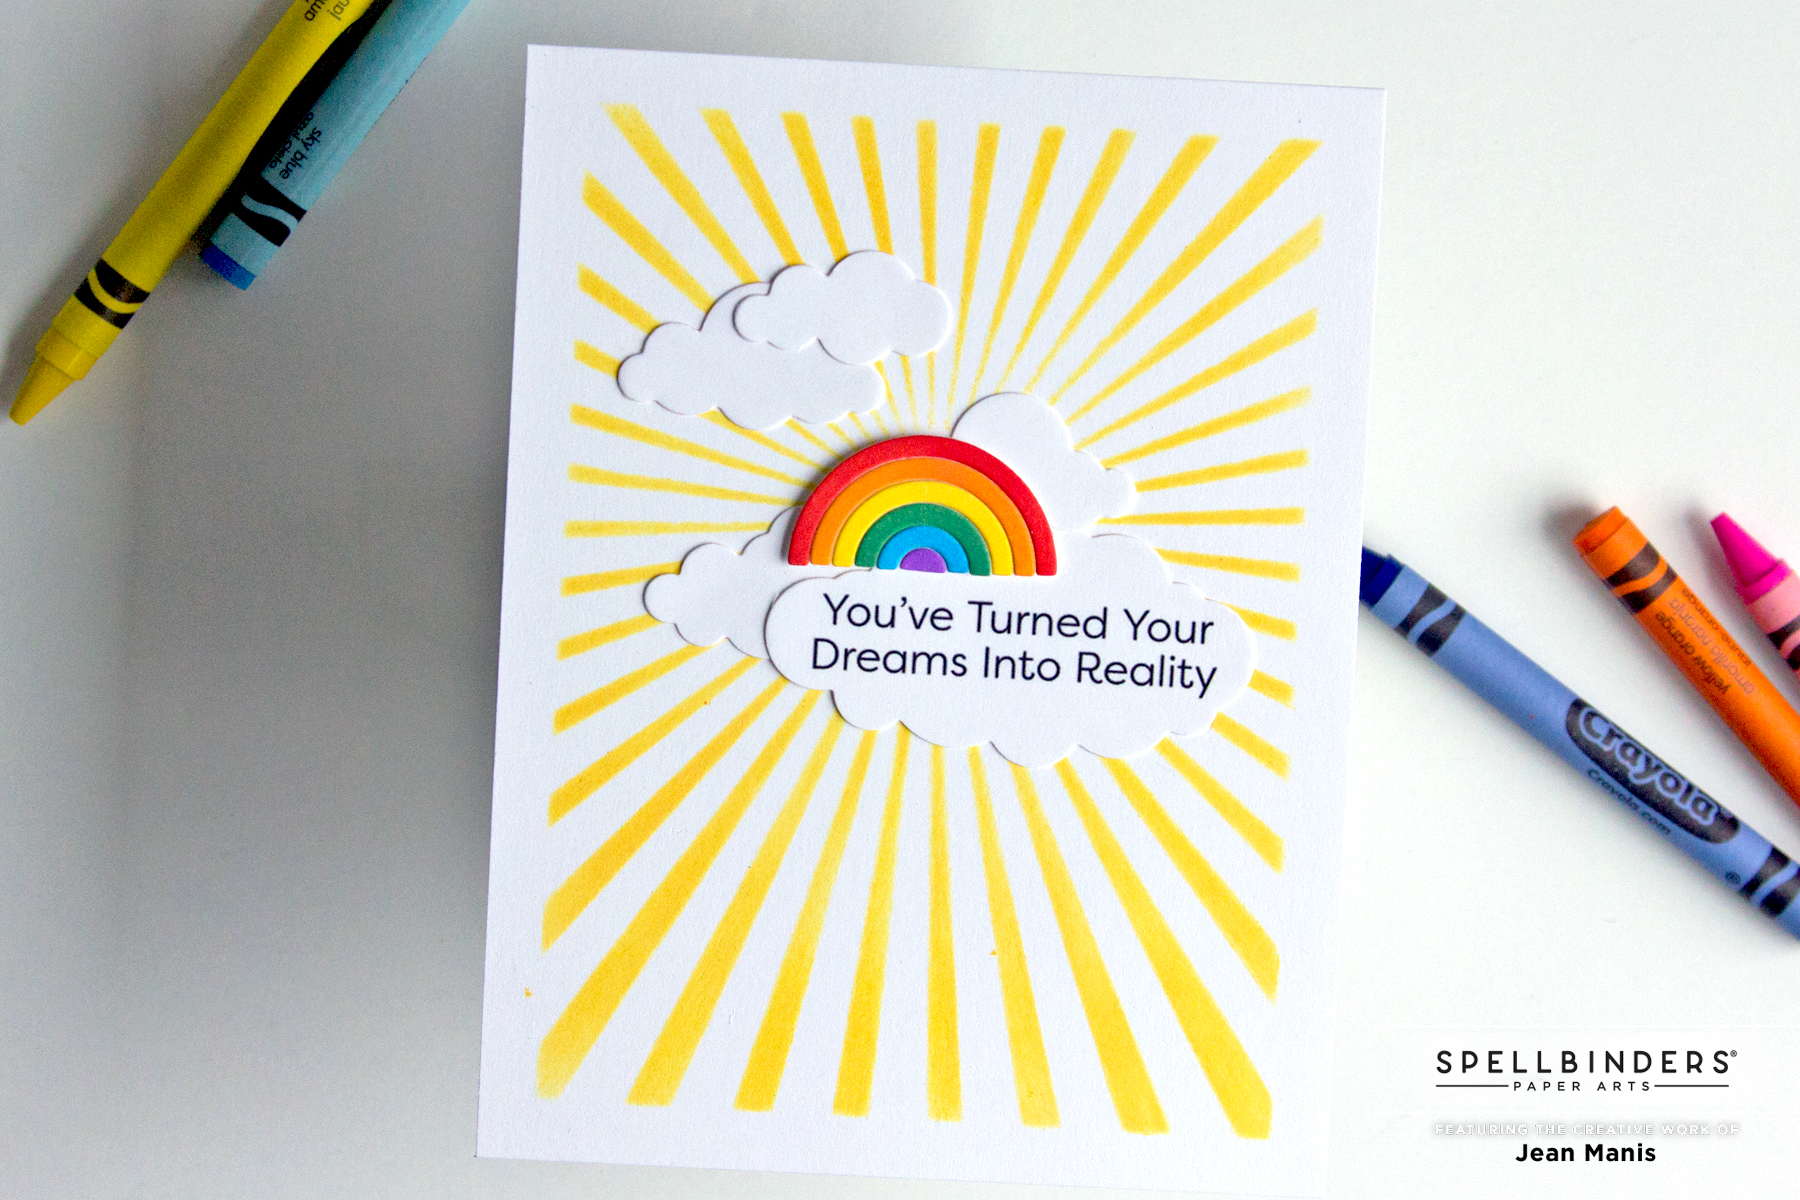
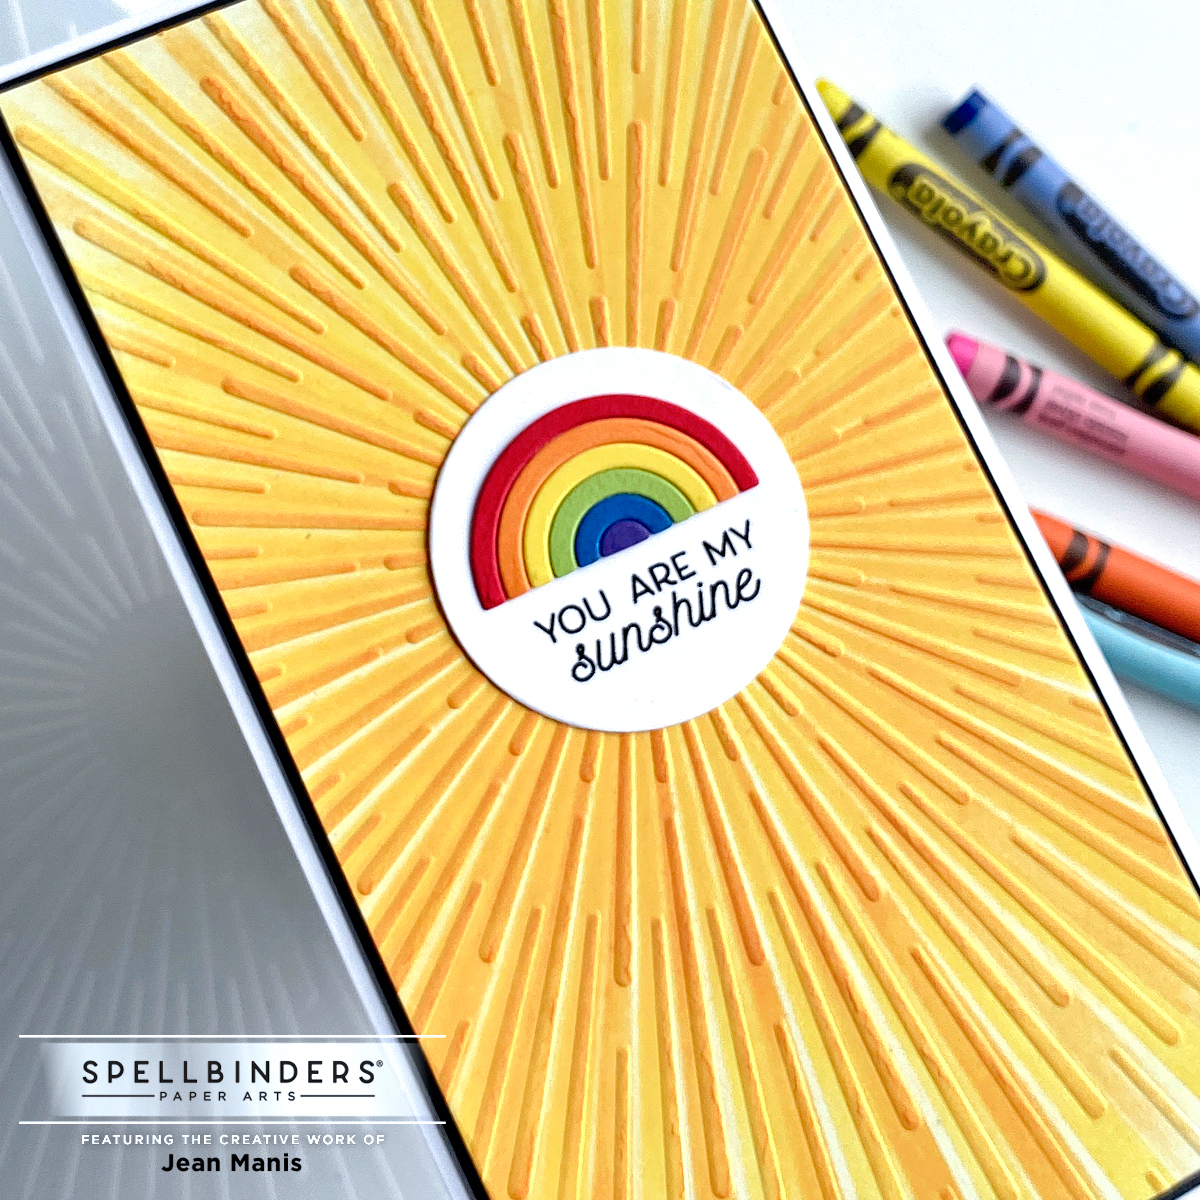
Hello! I’m sharing a CAS, mini-slimline card created with the Spellbinders April 2022 Embossing Folder Kit Club “Radiant Burst.”
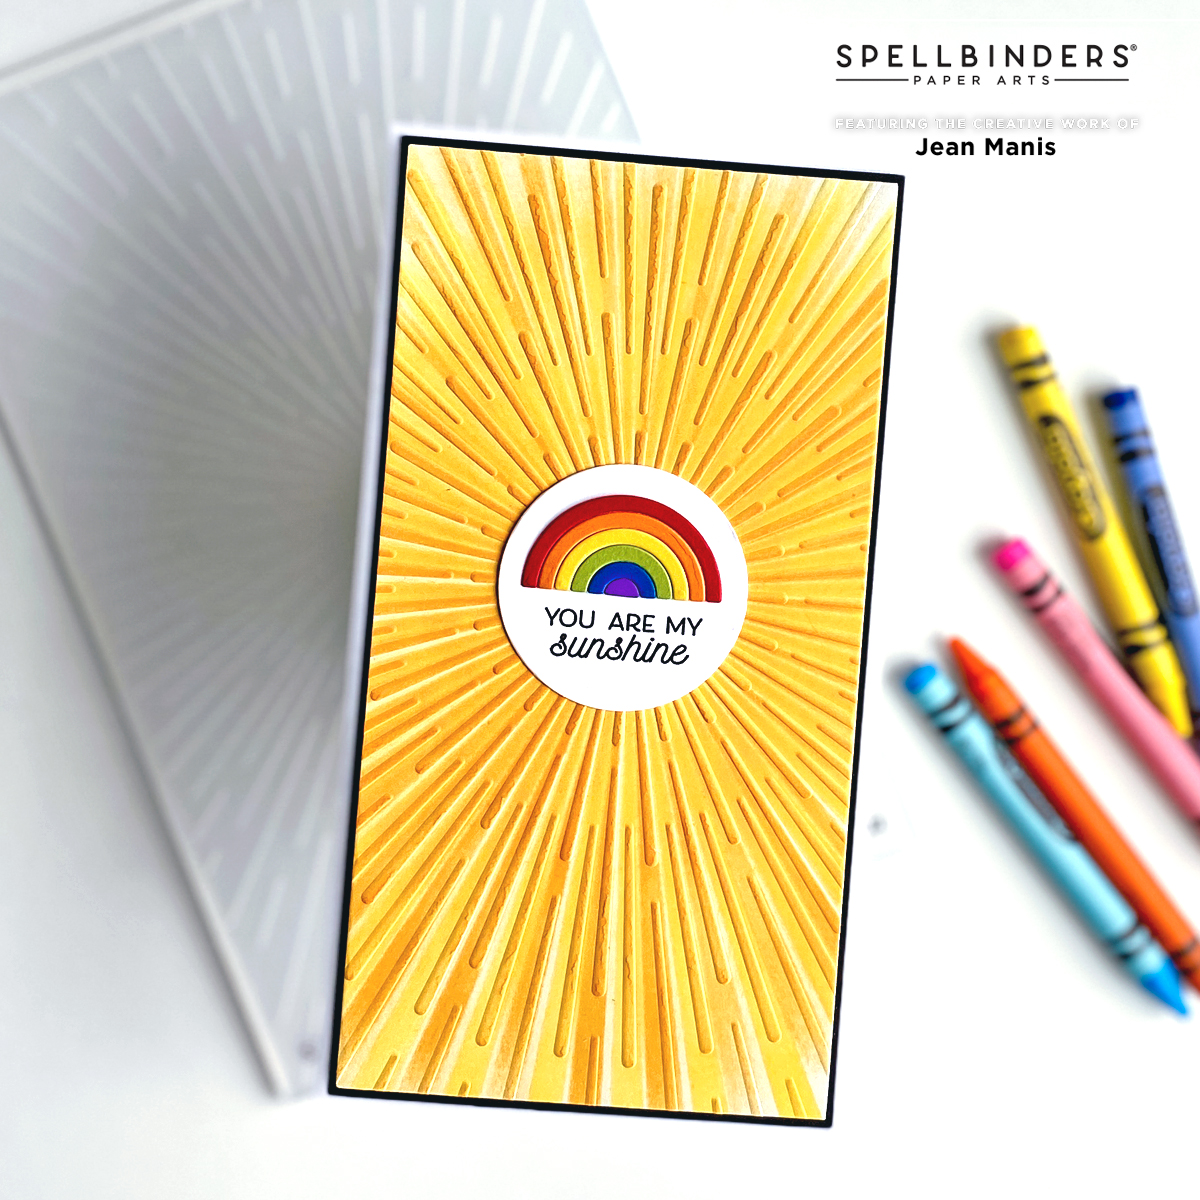
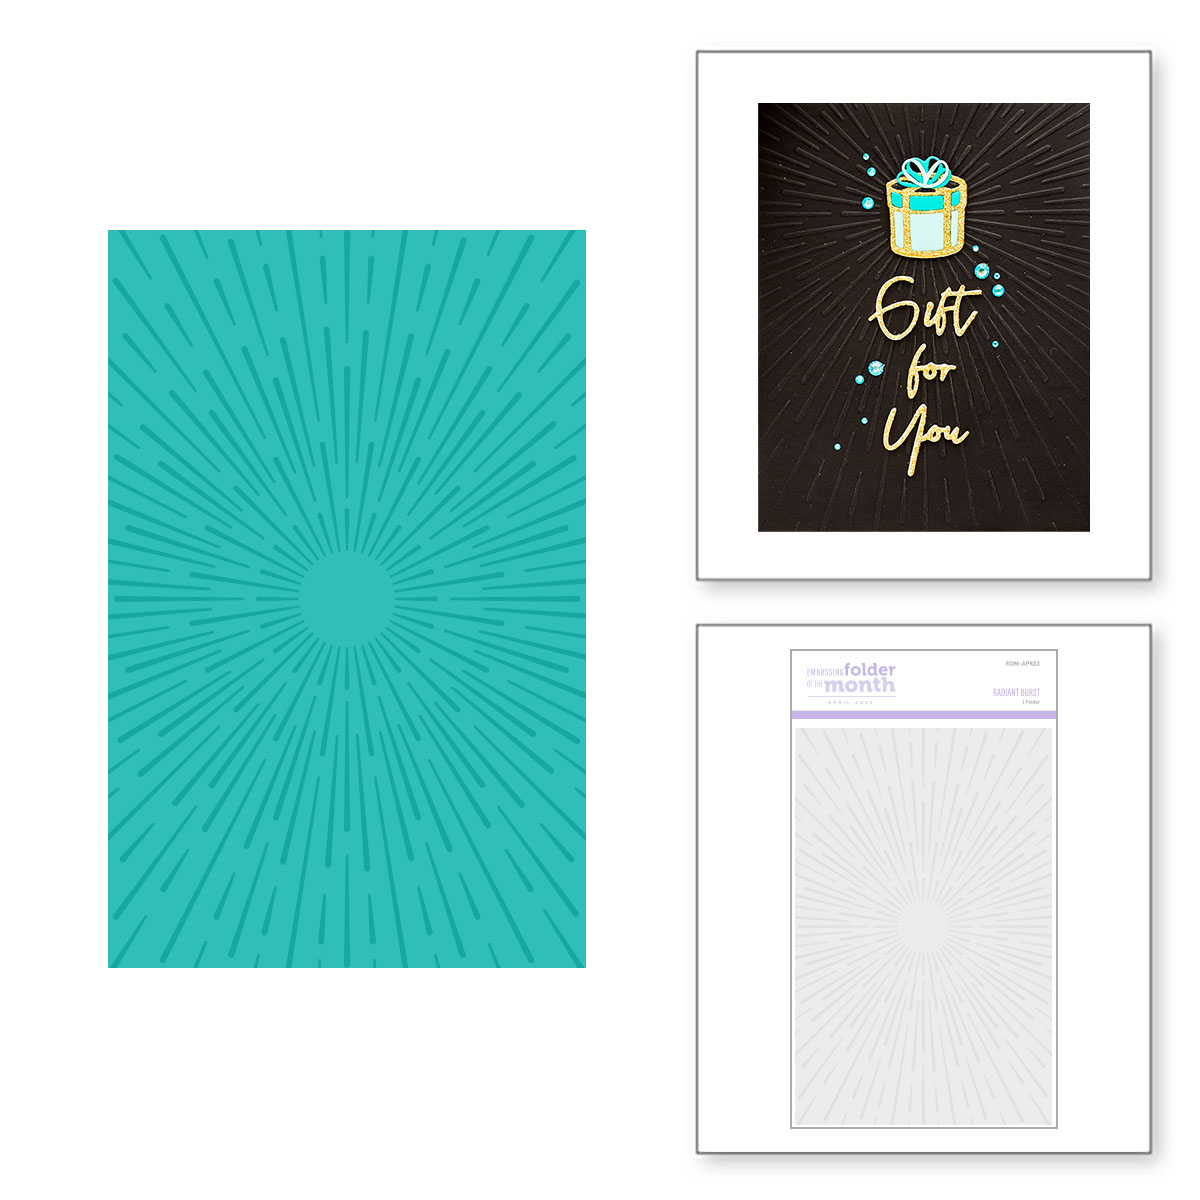
- Stencil ink through Sun Burst stencil on to Snowdrift cardstock. Rotate stencil and add a different ink. Repeat until panel is filled the desired amount. Cut panel with largest die in the Mini Slimline A set.
- Dry-emboss panel with the Embossing Folder Kit Club folder.
- Mat panel with Onyx cardstock and add to card base.
- Stamp Circle of Sunshine sentiment on to Snowdrift cardstock. Cut with circle die.
- Cut rainbow from colored cardstock with a die in the Colorblock Circles & Stripes set. Assemble and add to card.
The embossing folder, measuring 5.5 x 8.5 inches, can be used to make cards in a variety of sizes including slimline, mini-slimline, 5 x 7, and A2.