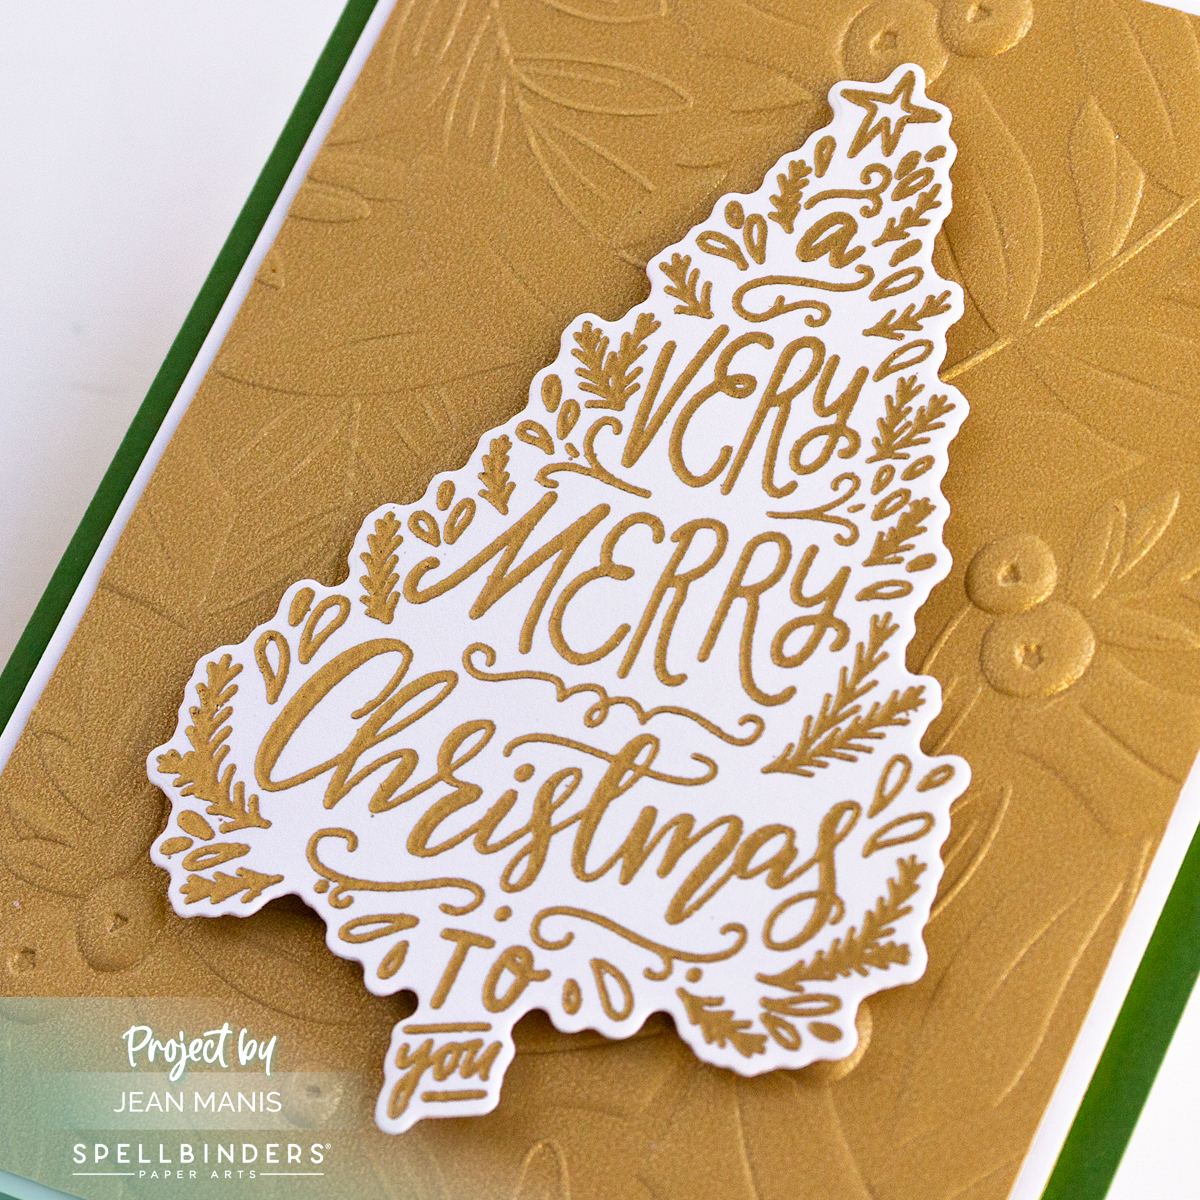
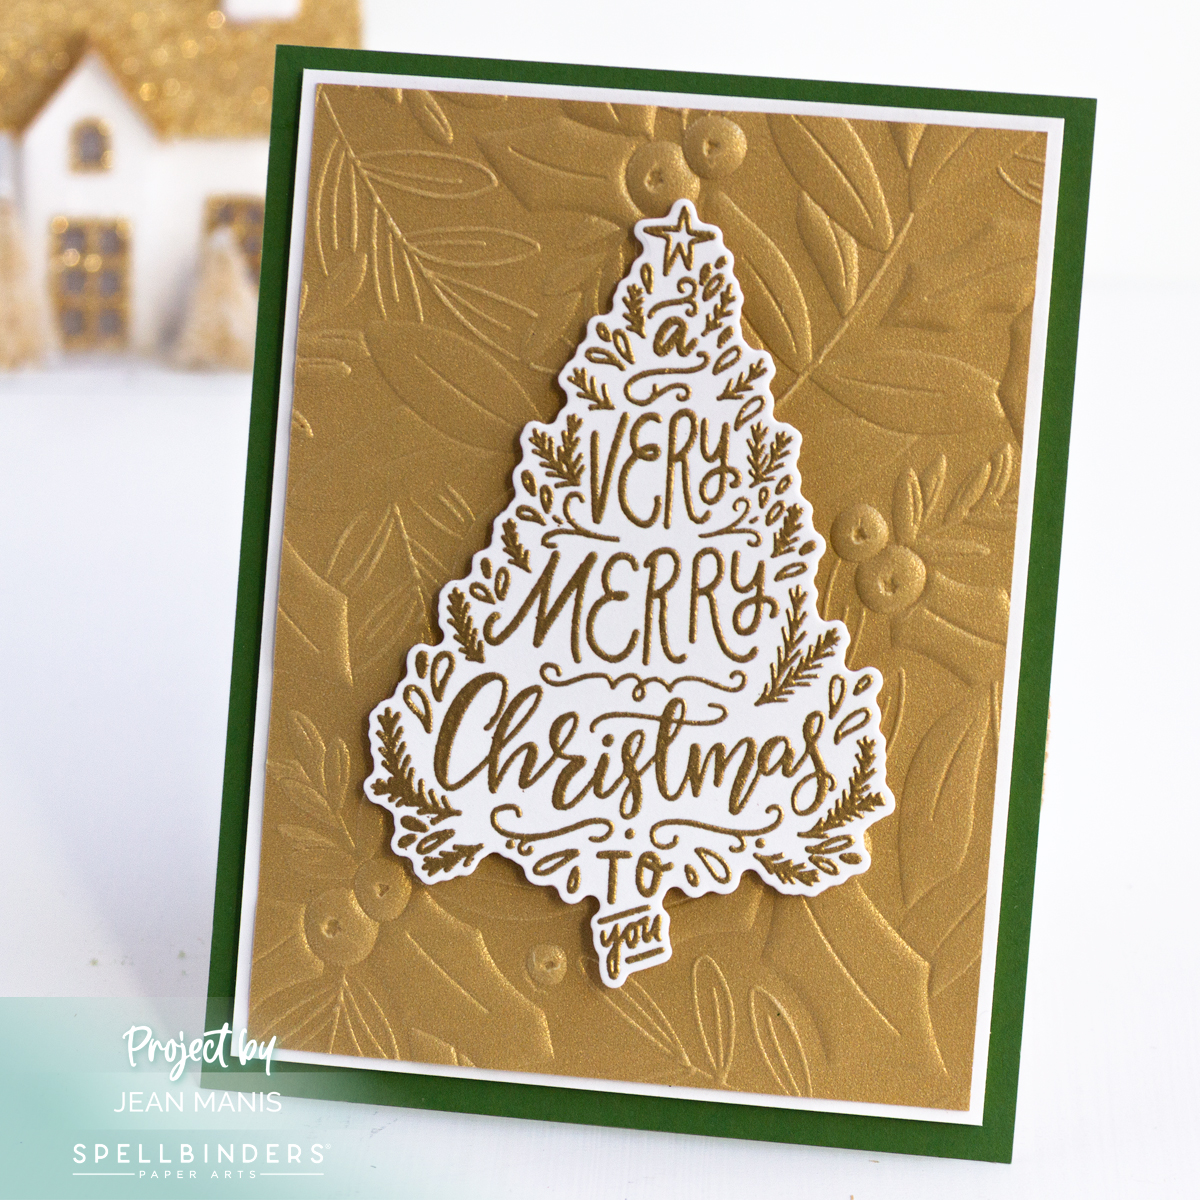
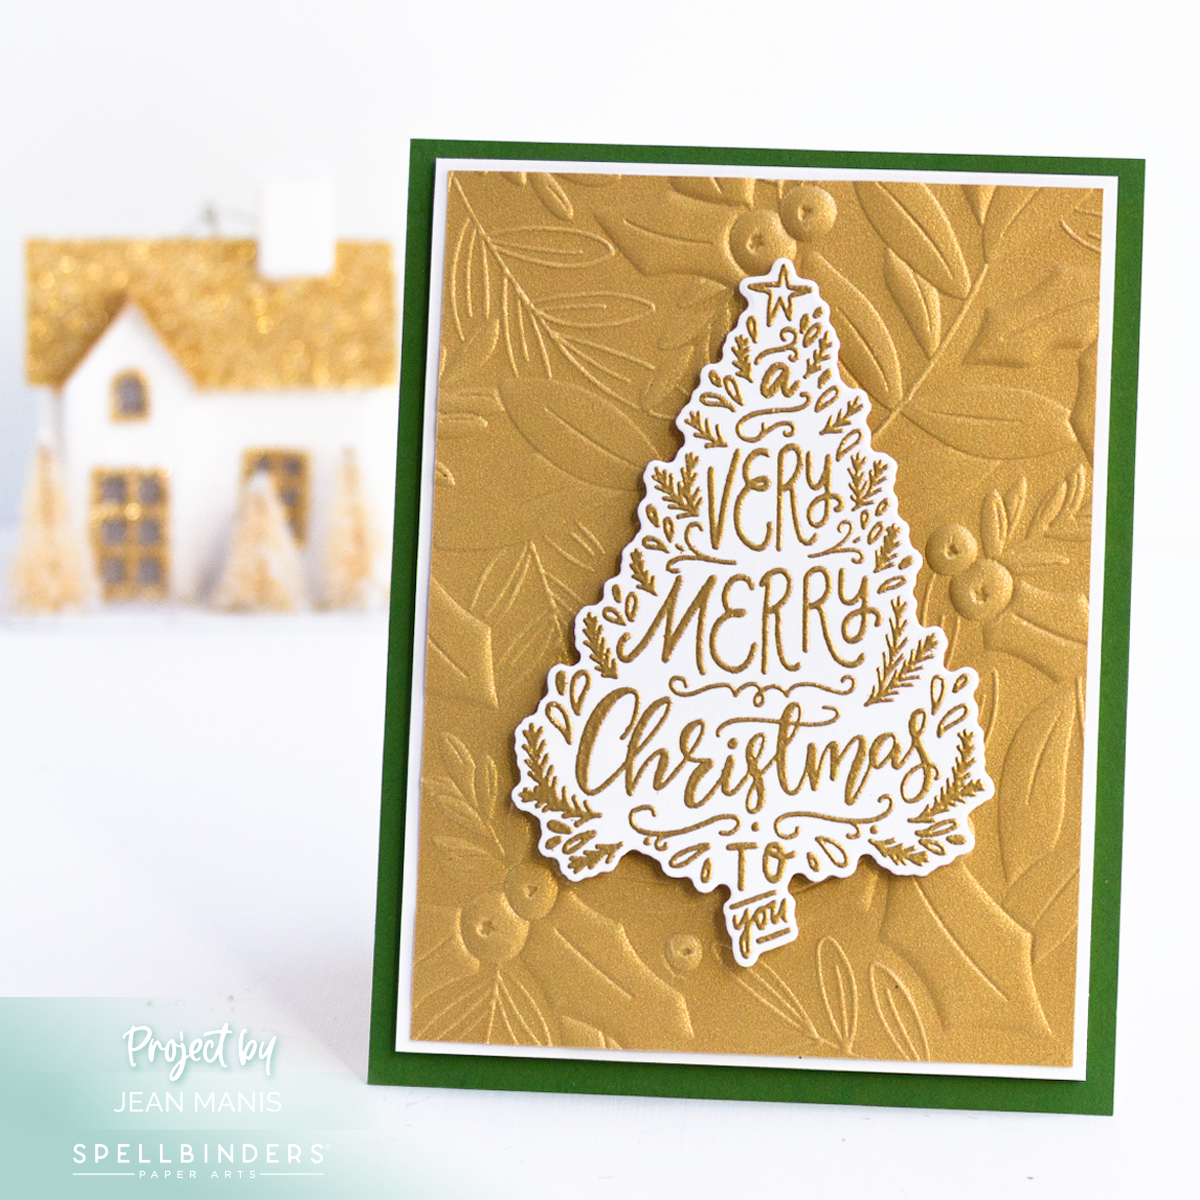
Newton’s Nook | Cat and Sparklers Card

I couldn’t resist making another card with the Newton’s 4th of July stamp set from Newton’s Nook! This time, the star of the show is a cheerful cat holding sparklers in both paws—ready to celebrate in style. I watercolored the image pairing it with patterned papers to reinforce the theme. See my first card with this stamp set HERE.

Newton's Nook | Cat and Sparklers Card

    • Cover an A2-size card base with patterned paper.
    • Stamp the 4th of July stamp image on to watercolor paper. Color with medium of choice. Once dry, cut with coordinating die set. I used Gansai Tambi watercolors.
    • Stamp the sentiment onto patterned paper and cut with an oval die. Cut another oval from a coordinating patterned paper and adhere sentiment piece. Add assembly to a scalloped oval mat cut from white cardstock. Add the assembly to the prepared base and adhere the watercolored image with foam adhesive.

As I mentioned in this post on card backgrounds, patterned paper offers a quick and convenient way to add character. I used papers from three different pads in my stash on this card.

Newton's Nook | Cat and Sparklers Card


Hero Arts | Retro Cassette Hello Card

Hello! I’m taking it back to the days of mixtapes and boomboxes with this retro-inspired thank you card! I used the July 2025 Mix Tape – Hero Studio Die set from Hero Arts to create a die-cut cassette tape, with the tape spelling a playful “hello.” I paired the cassette with patterned paper to complete the vintage theme—perfect for music lovers, ’70s and ’80s fans, or anyone who appreciates a throwback vibe in their paper crafts.

Hero Arts | Retro Cassette Hello Card

    • Cut patterned paper panel and adhere to a brushed silver cardstock base.
    • With the Mix Tape die set, cut cassette and sentiment pieces from a variety of cardstock colors. Assemble. I doubled up the sentiment to create a drop shadow.
    • Add assembly to card base with foam adhesive.

This design is easy to customize—change up the cassette or label colors to match your theme or leave off the tape-written sentiment and add a different message elsewhere on the card.

Hero Arts | Retro Cassette Hello Card


Hero Arts | Boho Birthday Balloons

Hello! I’m sharing a handmade birthday card that’s all about color and celebration—without being overly sweet. This design features die-cut balloons in a warm, boho-inspired color palette paired with a stamped background and a bold birthday sentiment. It’s the kind of card that feels festive yet grown-up, perfect for an adult birthday. I used a mix of Hero Arts products to bring this look together.

Hero Arts | Boho Birthday Balloons

    • Stamp the Ocean Waves background on to Classic White cardstock with gold ink. Trim and add to an A2-size card base.
    • With the Balloon Bunch dies, cut the balloon base and bow from gold cardstock. Cut balloons from desired cardstock colors. Adhere the balloons to the balloon base.
    • Heat-emboss the sentiment and cut with the coordinating die.
    • Add the balloon assembly to the prepared base with foam squares. Attach the bow and sentiment.

Hero Arts | Boho Birthday Balloons

This card comes together quickly with just a few basic die cuts and a stamped background—simple, but impactful. Swap out the boho tones for bright primaries or soft pastels, and you’ll have an entirely different look to suit any recipient or season.


Newton’s Nook | Celebrate the Fourth

Hello! I’m celebrating the 4th of July with a playful handmade card featuring a cat and dog riding in a wagon decked out in red, white, and blue! The adorable image, from Newton’s Nook, is perfect for patriotic crafting. I typically reach for watercolor markers, but this time I opted for my Kuretake Gansai Tambi pans for a fresh take. I decided I wanted to torture myself explore a different watercolor medium that I haven’t used in several years.

Newton's Nook | Celebrate the Fourth

    • Cover an A2-size card base with patterned paper.
    • Stamp the 4th of July stamp image on to watercolor cardstock. Color with medium of choice. Cut with coordinating die set.
    • Stamp the sentiment onto cardstock and cut with a rectangular die. Add the watercolored image with foam adhesive.
    • Add embellishments to the panel (I used Taylored Expressions white epoxy stars from my stash) and add to card base.


Retro Kitchen Collection: Second Helping

Hello! I’m back with another handmade card featuring those irresistible vintage Pyrex dishes—this time in a landscape format! I used the same Hero Arts products from my previous project to craft two charming kitchen shelves, each stamped with part of the sentiment: “You’re not old, you’re retro” and “No one measure up to you.” The dishes are stacked in a mix of blue, red, and sunny yellow, but you can easily customize the palette for any season or holiday.

Hero Arts | Retro Kitchen Collection

    • Create an A2-size Alabaster card base. Adhere a 4″ x 5 1/4″ panel of patterned paper to the base.
    • Stamp the On the Shelf sentiments in blue ink on to Alabaster cardstock and cut with the shelf die in the coordinating die set.
    • Cut the dishes with the Classic Casserole set from desired cardstock colors. I chose to back the dishes with Alabaster cardstock, rather than white, for a more vintage. Assemble. Cut two spoons with the same die set.
    • Add the stacks of dishes to the shelves and attach to the prepared card base. Add the die-cut spoons.

Hero Arts | Retro Kitchen Collection