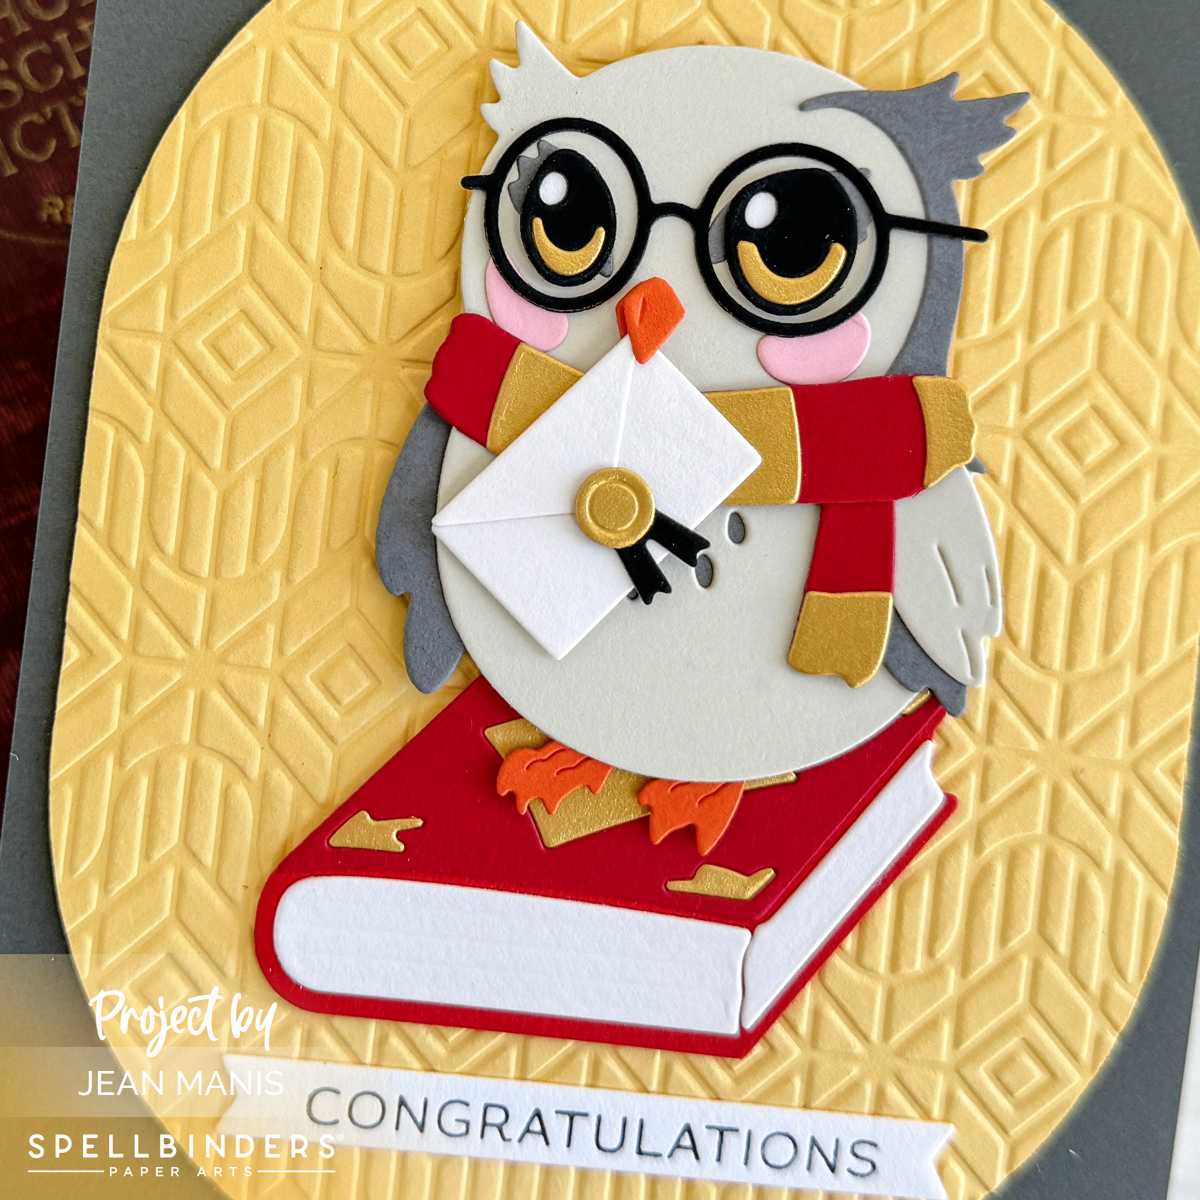
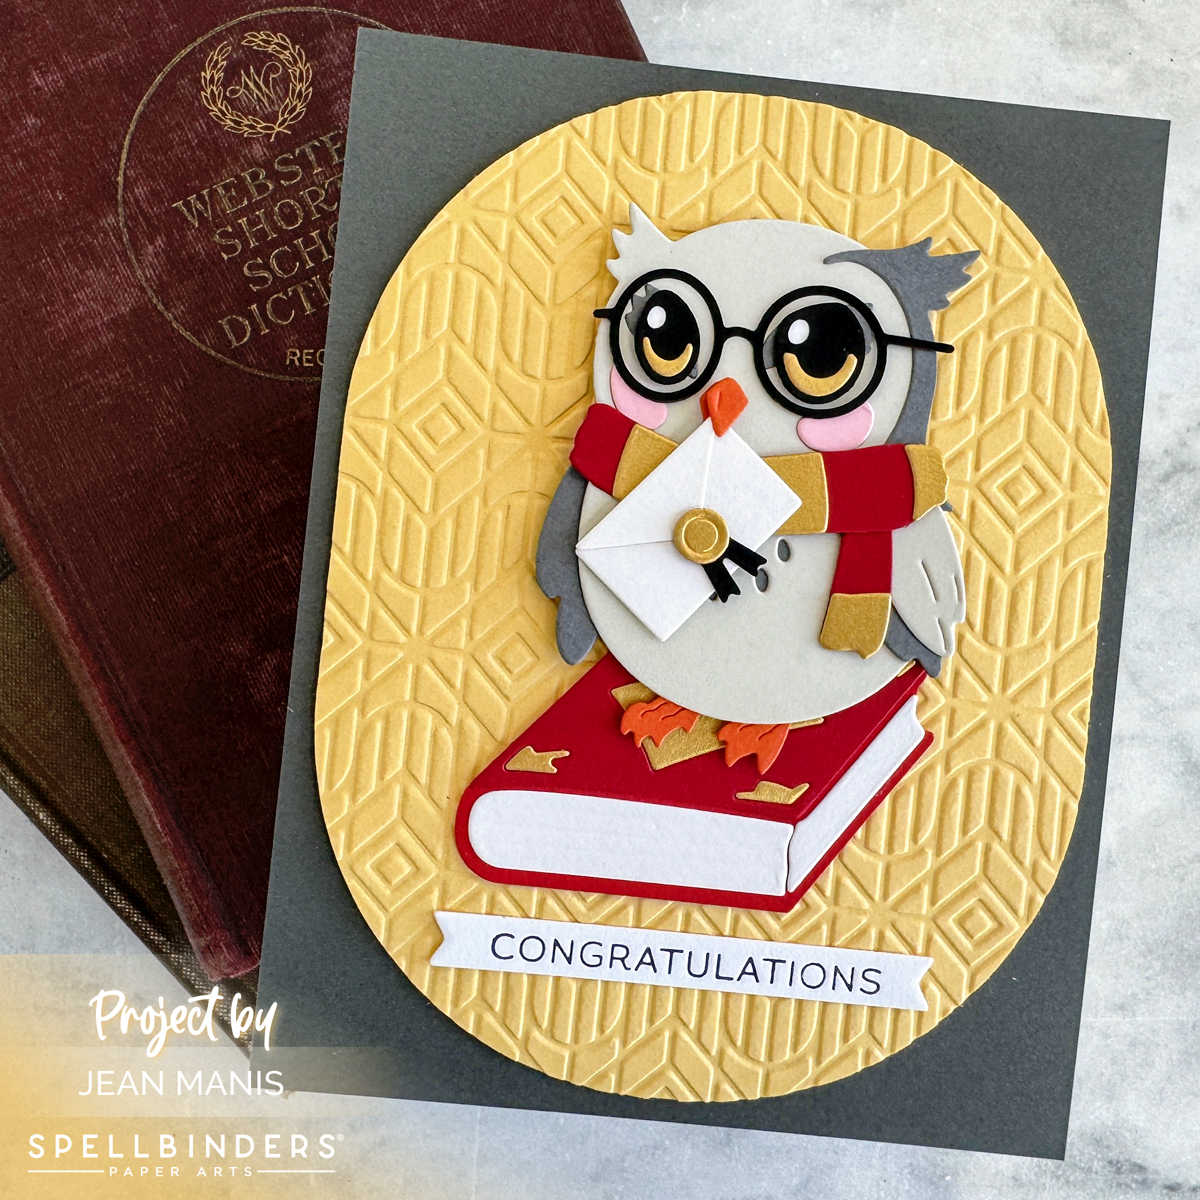
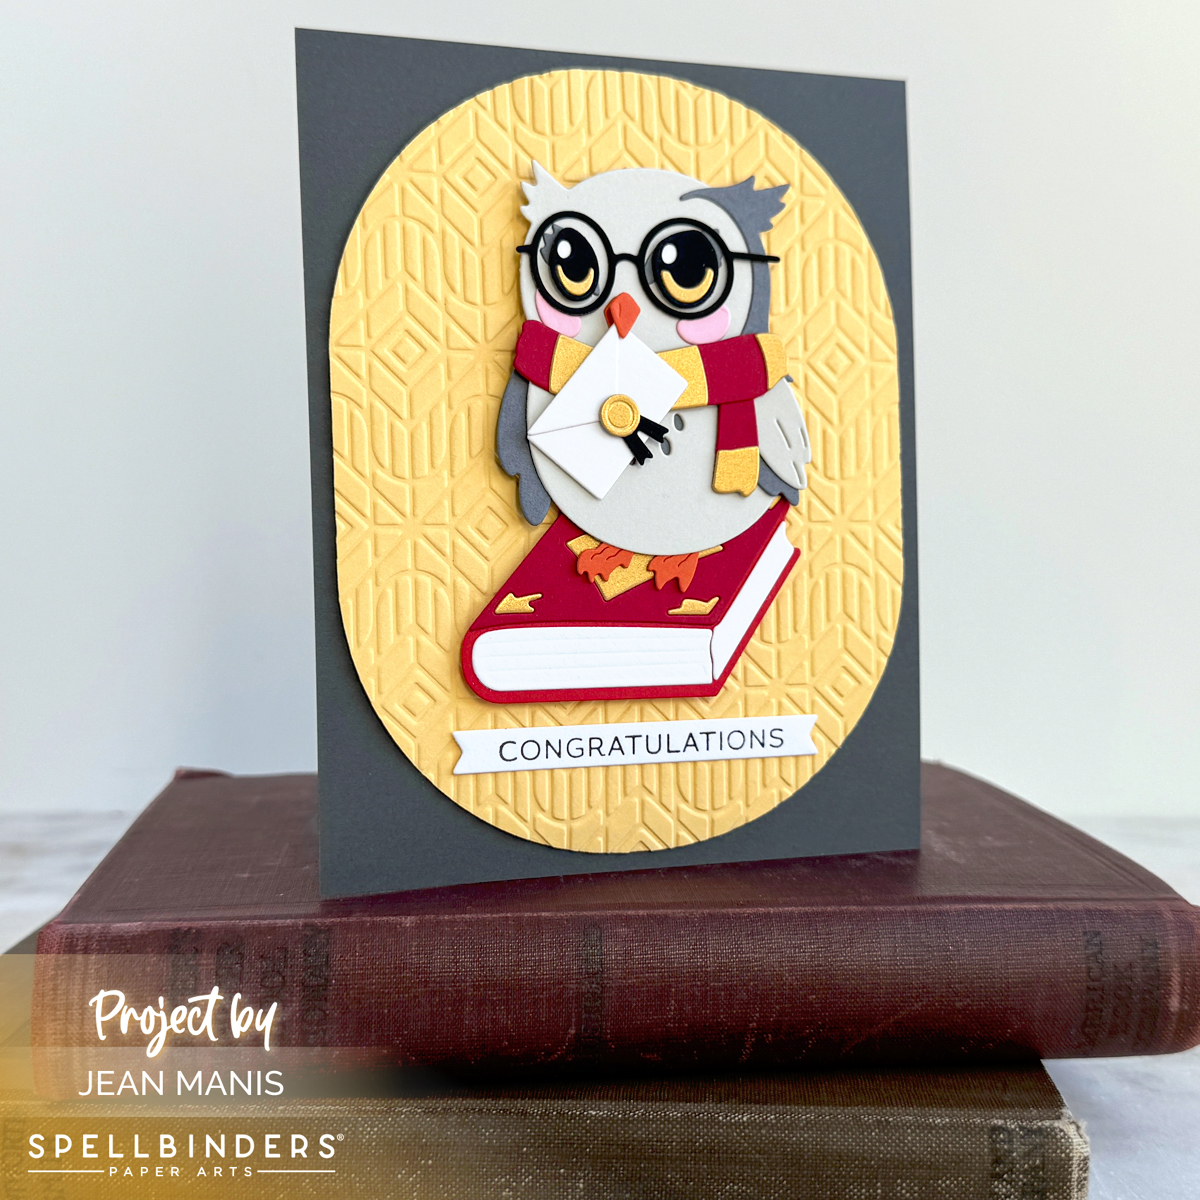
Art Impressions | Tool Box Matchbook

Hello! Today I am sharing a project created with Art Impressions supplies. I have been familiar with the company for years, but I have never before crafted with their products; I re-discovered them while doing my recent deep dive into watercoloring. Their blog, Facebook page, and YouTube channel are full of inspiration, and their customer service is fantastic!

Art Impressions | Tool Box Matchbook

The Matchbook series has many different options. You can see an intro video here. The Tool Shed, with which I created, was released this year. I like the small size – it allows me to practice watercoloring with markers, learn the colors of the markers, and finish a watercoloring project in a relatively short amount of time. I am looking forward to crafting more of these projects. The series offers sets for Halloween, Christmas, birthdays, cat lovers, gardeners, …

Art Impressions | Tool Box Matchbook

  • Stamp Tool Shed images in VersaFine ink on Arches Cold Press watercolor paper.
  • Watercolor the images with color medium of choice. I used a combination of Tombow and Zig markers.
  • Once dry, cut the images with the dies included with the Tool Shed set. Stamp sentiment on white cardstock and cut with coordinating die.
  • Cut matchbook from patterned paper with the MB Template. Add Tool Shed elements.


Spellbinders | April 2023 Quick & Easy Card Kit

Hello! I am sharing four cards created with the Spellbinders April 2023 Quick & Easy Card Kit of the Month.

Spellbinders | April 2023 Quick & Easy Card Kit

The Happy Skies Ahead” kit includes 6×6 patterned paper, die cut shapes, sticker sentiments, embellishments, card bases, sequins, and more!

Spellbinders | April 2023 Quick & Easy Card Kit

Tips for how to create cards with the kit:

Cut patterned paper with largest Essential Rectangles die and add to a card base, included in the kit.

Spellbinders | April 2023 Quick & Easy Card Kit

Add elements to card using foam adhesive to create depth.

Mix chipboard and die cut shapes for variety.

Spellbinders | April 2023 Quick & Easy Card Kit

Quiet patterned paper with vellum, as well as ground the focal image, by adding a circle cut from vellum with a die in the Everlasting Circles set.

Spellbinders | April 2023 Quick & Easy Card Kit

Use existing supplies such as the Sun Burst stencil to create a background.

Spellbinders | April 2023 Quick & Easy Card Kit


Spellbinders | April 2023 Large Die of the Month

Hello and happy April! Today, I am sharing a “Hello” card created with the Spellbinders April 2023 Large Die of the Month “Punch and Pierce Frame and Sentiments” set. Check out more inspiration on this set here.

Spellbinders | April 2023 Large Die of the Month

Spellbinders | April 2023 Large Die of the Month


Penny Black | Watering Can and Blooms

Hello! Today I am sharing a spring-themed card created with Penny Black supplies, new and old. As I mentioned in this post, featuring a card of the same design, I have been watching the video series created by Jill Foster for Penny Black, which has been incredibly instructive.

Penny Black | Watering Can and Blooms

  • Using the two largest Stitched Frames dies, cut frame from white cardstock. (This set cuts on the inside and creates a cut pattern on the outside. By using the two dies together, I get a frame with the cut pattern on the frame.)
  • Ink white cardstock panel with Tumbled Glass and Mowed Lawn. Stamp Flower Teddy sentiment with VersaFine Onyx ink. Trim panel and adhere frame to top. Add assembly to yellow card base.
  • Cut Watering Can elements and tulips from Arches Cold Press watercolor paper. Color with watercoloring medium and colors of choice (some of the markers that I used to color the watering can and tulip blooms are listed below). I used the May Green Pitt Artist Pen to color the greenery and stems. Trim tulips as needed and add to inside of the watering can.
  • Add assembly to card with foam adhesive.

<img class="aligncenter size-full wp-image-22404" src="https://jeanmanis.com/wp-content/uploads/2023/03/JeanManis-PennyBlack-WateringCanandTulips-3.jpg" alt="" width="1200" height="1200" />


Spellbinders | Stampendous Sweet Song

Hello! Today I am sharing two spring-themed cards featuring the Stampendous Sweet Song stamp set, part of the Stampendous Spring Collection at Spellbinders. The instructions for the two cards are essentially the same, with the key difference being the color of the cardstock background.

Looking for the March 2023 Clubs Inspiration Blog Hop? Head here.

Spellbinders | Stampendous Sweet Song

  • Stamp Sweet Song floral corners multiple times on Peach Sorbet cardstock (new cardstock color that will be available next month) with similar ink color for a tone-on-tone background. (I rotated the stamp to create a more random pattern.) For the second card, repeat process with Sage cardstock. Trim panels as necessary and add to card bases.
  • Stamp Sweet Song small and medium birds in VersaFine Onyx ink on Arches Cold Press paper; heat set and watercolor with medium of choice. (I listed below the watercolor markers I used.) Once dry, add white acrylic ink to eyes and fussy-cut.
  • Ink Snowdrift cardstock with Tumbled Glass ink. Stamp panel with Sweet Song lines (in Morning Mist ink), sentiment and bird (in Onyx). Trim and add to floral background. Add fussy-cut bird. Repeat for second card.

Spellbinders | Stampendous Sweet Song