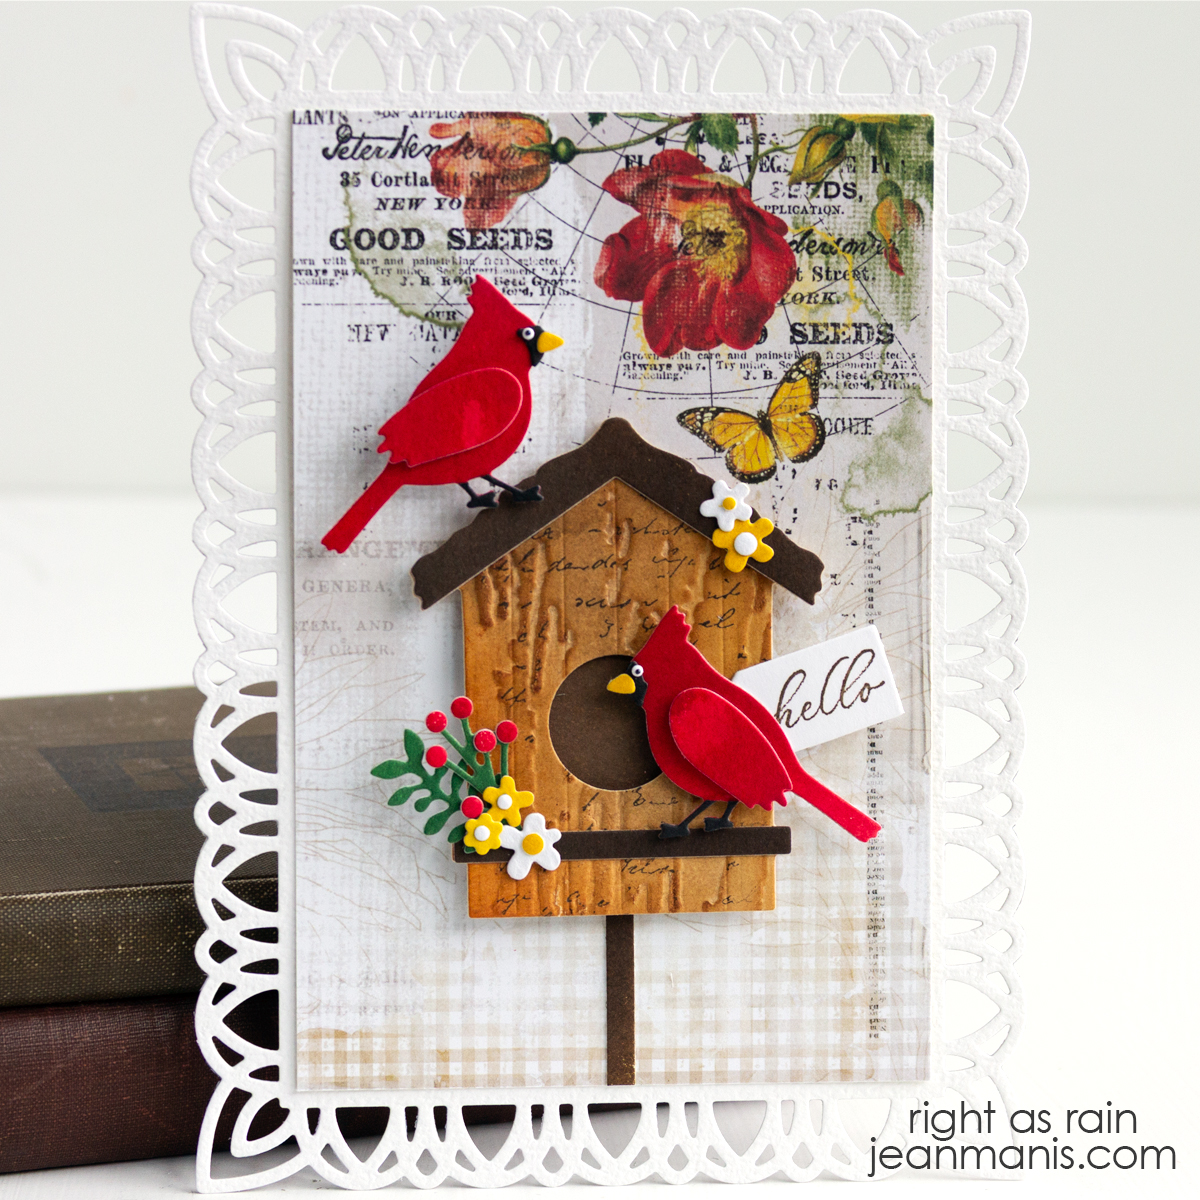
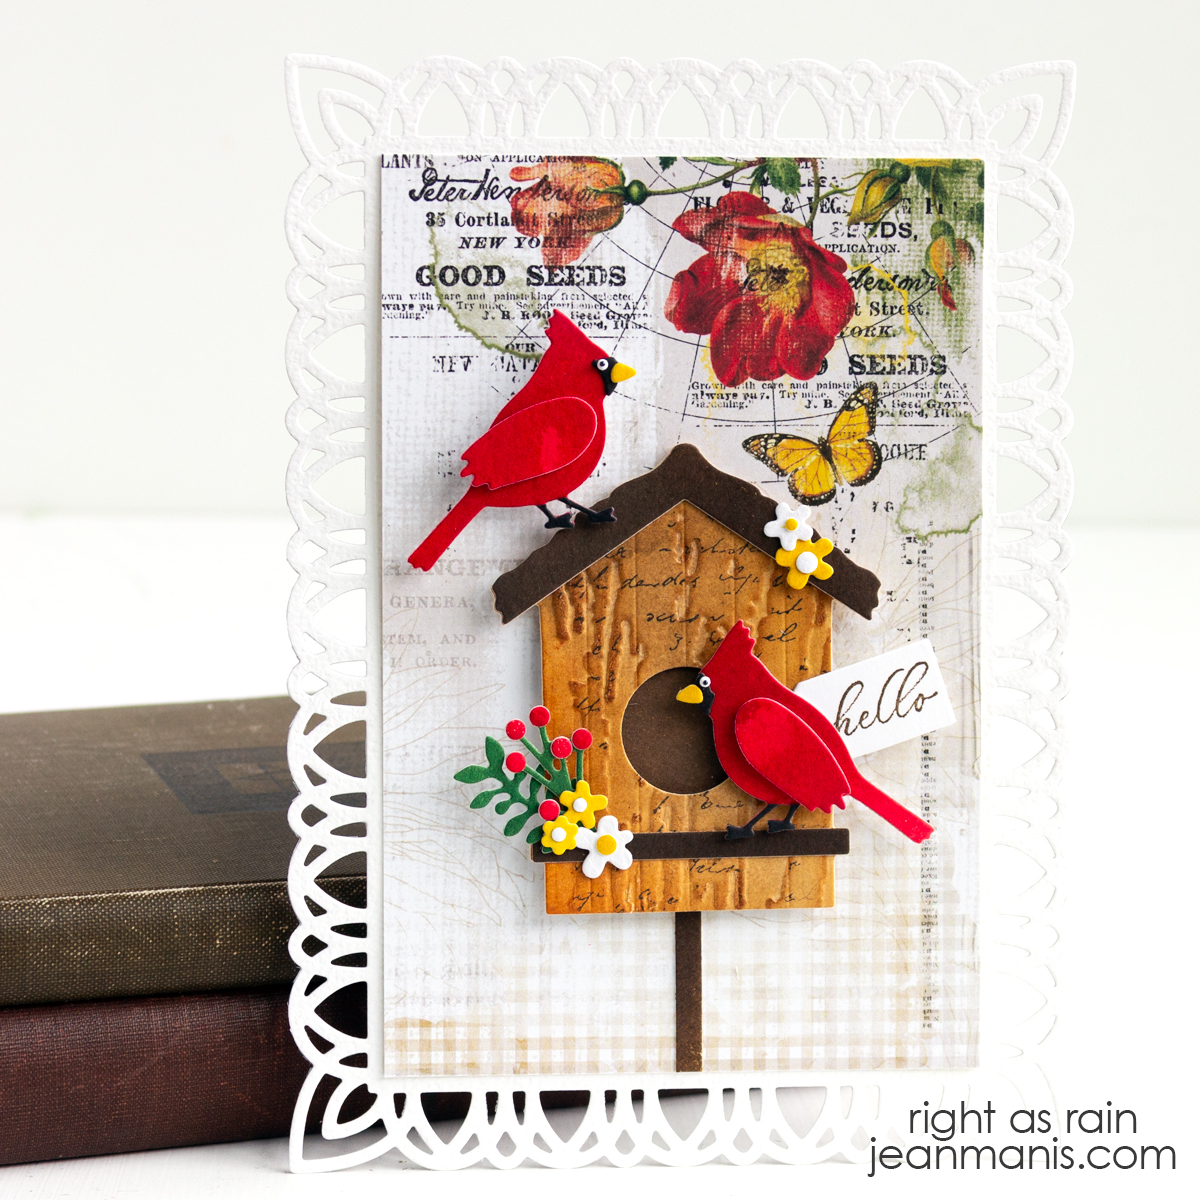
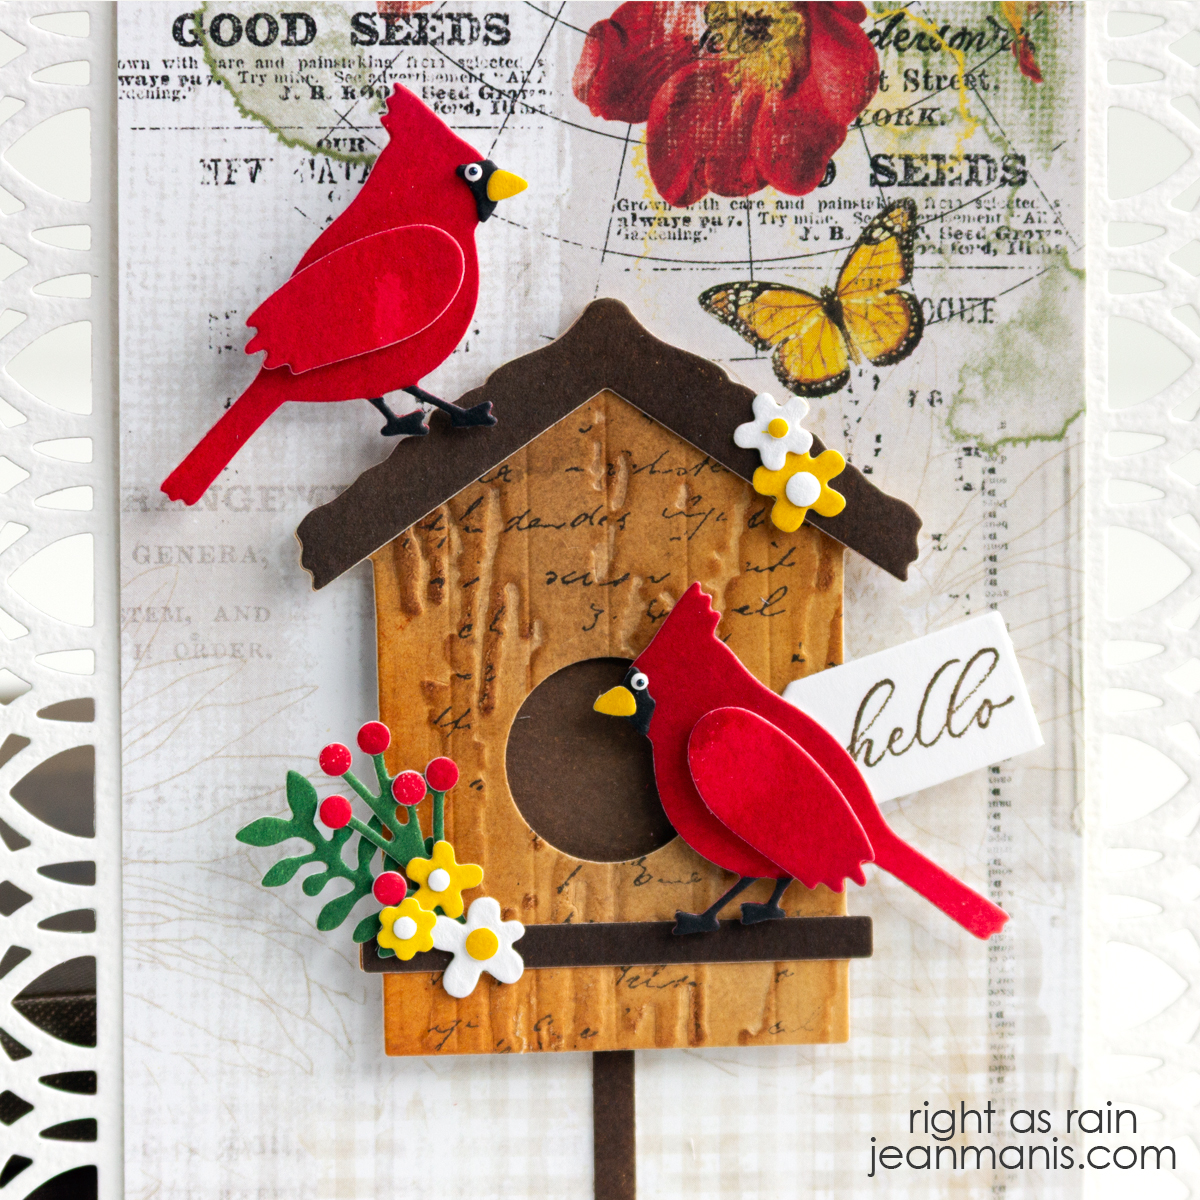
Handmade Cards for Encouragement

Sending an encouragement card is a heartfelt gesture that can uplift spirits during challenging times, whether it’s simply to let someone know you’re thinking of them, support their recovery from illness, offer solace after the end of a relationship, brighten their day unexpectedly, or provide upbeat affirmation. In this roundup of encouragement cards, join me in exploring a collection of cards that offer support for those who need it most.

Throughout this post, I’ll be using cards from my blog archive as examples. Click on the card image to be taken to the original post. Even if the specific products used on the cards may no longer be available, the focus is on how the theme is represented on the card.

Rainbows are recognized as a symbol of hope. Incorporating a rainbow on a card serves as a visual reminder to the recipient that brighter days are ahead, offering comfort and encouragement during challenging times.

Handmade Cards for Encouragement

Handmade Cards for Encouragement

Harnessing the strength of the sentiment “You are worth it,” these cards showcase the versatility of the sentiment paired with a variety of focal items.

Handmade Cards for Encouragement

Handmade Cards for Encouragement

Handmade Cards for Encouragement

Capturing the essence of renewal and optimism, this card reminds us that like the changing seasons, hope blooms eternal.

Handmade Cards for Encouragement

Featuring a steadfast seaworthy boat, this card captures the sentiment “We’ll weather the storm together.”

Handmade Cards for Encouragement

Adorned with a cuddly bear, this card delivers a heartfelt message – “Sending bear hugs.” Perfect for reaching out to a child, it offers comfort and reassurance, wrapping them in affectionate gestures from afar.

Handmade Cards for Encouragement

A wrapped bouquet of flowers paired with the sentiment, “I’m here for you” serves as a reminder of support and companionship, offering solace and strength to those facing challenges.

Handmade Cards for Encouragement

I hope this roundup of encouragement cards has inspired you to continue spreading kindness and positivity.

Sunny Studio Stamps | Valentine Truckload

Hello! Today, I am sharing a Valentine’s Day card featuring the delightful Sunny Studio Stamps Truckloads of Love stamp set with coordinating dies. You can see a similar fall-themed card that I created with the set HERE.

Sunny Studio Stamps | Valentine Truckload

    • To begin, dry-emboss an A2-size panel of Dahlia cardstock with the Burlap embossing folder. Add to card base. You can read more about dry-embossed card backgrounds HERE.
    • Stamp Truckloads of Love pickup, hearts (twice), and two of the critters with Versafine on Arches Cold Press watercolor paper and heat set. Color the images with watercoloring mediums of choice (I used Tombow markers). Once dry, cut the images with the dies in the coordinating set. (Check out my “Resources for Watercoloring Stamped Images” HERE.)
    • Cut scallop mat from white cardstock with the Mini Mat and Tag 3 set.
    • Stamp sentiment on white cardstock and add Distress Oxide Inks to sky and road (using vellum to mask while applying the inks). I created the sentiment on my computer.
    • Trim inked sentiment panel to fit inside the Mini Mat and Tag 3 scallop mat. Add inked panel to mat.
    • Adhere truck, hearts, and critters. Add assembly to card base.

Sunny Studio Stamps | Valentine Truckload

Looking for more inspiration? You can see a roundup of Valentine’s Day cards that I created with a variety of products HERE.


Art Impressions Hedgehog Birthday

Hello! Today I am sharing a birthday card featuring the Art Impressions Hedgehogs stamp set. I recently shared a round-up of birthday cards HERE and mentioned that following Christmas cards, birthday cards are the type I send most frequently.

Art Impressions Hedgehog Birthday

    • Cover an A2-size card base with Bazzill Canvas Texture cardstock.
    • Cut a 4 x 5 1/4-inch bright green cardstock panel (I used Stampin’ Up Granny Apple Green) and dry-emboss with the Floating Balloons 3D folder. Add panel to prepared base.
    • Stamp Hedgehogs image with VersaFine ink on Arches Cold Press watercolor paper; heat set. Color the image with watercoloring mediums of choice (I used Tombow markers). Set aside to dry. (You can read more about watercoloring stamped images HERE.)
    • Once dry, cut the hedgehog image with die in the Hexagon Double Stitched set.
    • Stamp Hedgehogs image on Masking sheet and fussy-cut.
    • Cover watercolored hedgehog image. Using a vellum sheet, add Hickory Smoke ink for the ground and Tumbled Glass ink for the sky.
    • Add hexagon panel to card front.
    • Stamp Hedgehogs sentiment in black ink on white cardstock and cut with a 1 1/2″ circle die. Add to card front with foam adhesive.

Art Impressions Hedgehog Birthday


Spellbinders | Rain Boot Bouquet

Hello! Today, I am sharing a friendship card, featuring a charming pair of rain boots and an array of exquisite floral elements, created with the Spellbinders February 2024 Small Die of the Month Club Kit – “Rain Boot Bouquet.”

Spellbinders | Rain Boot Bouquet

Spellbinders | Rain Boot Bouquet

    • To begin, dry-emboss an A2-size panel of Waterfall cardstock with the Tiny Dots folder. Attach to card base.
    • With the Small Die of the Month Club Kit set, cut boots, foliage, and greenery. Assemble.
    • Use the BetterPress System to create the sentiment in Black ink on Snowdrift cardstock with the Always and Forever Sentiment set. Use the coordinating die to cut.
    • Add sentiment to the card from with dot adhesive.
    • Add boots to the card front with foam adhesive.
    • Fill boots with greenery and floral pieces.


Spellbinders | Floral Bunny Basket

Hello! Dive into the Easter spirit with the Spellbinders February 2024 Large Die of the Month Club Kit – “Floral Bunny Basket.” The card, created with the 18-piece set that includes dies to create a basket, a bunny, carrots, greenery and foliage for a beautiful Easter basket, effortlessly came together.

Spellbinders | Floral Bunny Basket

Spellbinders | Floral Bunny Basket

    • To begin, dry-emboss a 5″ x 7″ panel of Sea Glass cardstock with the Tiny Dots folder. Attach to card base.
    • Cut bunny, basket, carrots, foliage, and greenery with the dies in the Large Die of the Month Club Kit set from a variety of cardstock colors. Assemble.
    • Use the BetterPress System to create the sentiment in Clay ink on Snowdrift cardstock with the Always and Forever Sentiment set. Use the coordinating die to cut.
    • Use dot adhesive to add the sentiment to the card front.
    • Add the assembled basket with the bunny to the card front with foam adhesive.
    • Add carrots, foliage, and greenery to the basket; adhere with glue, dot adhesive, and foam adhesive, as required.

Spellbinders | Floral Bunny Basket

FEB 2024 Sale