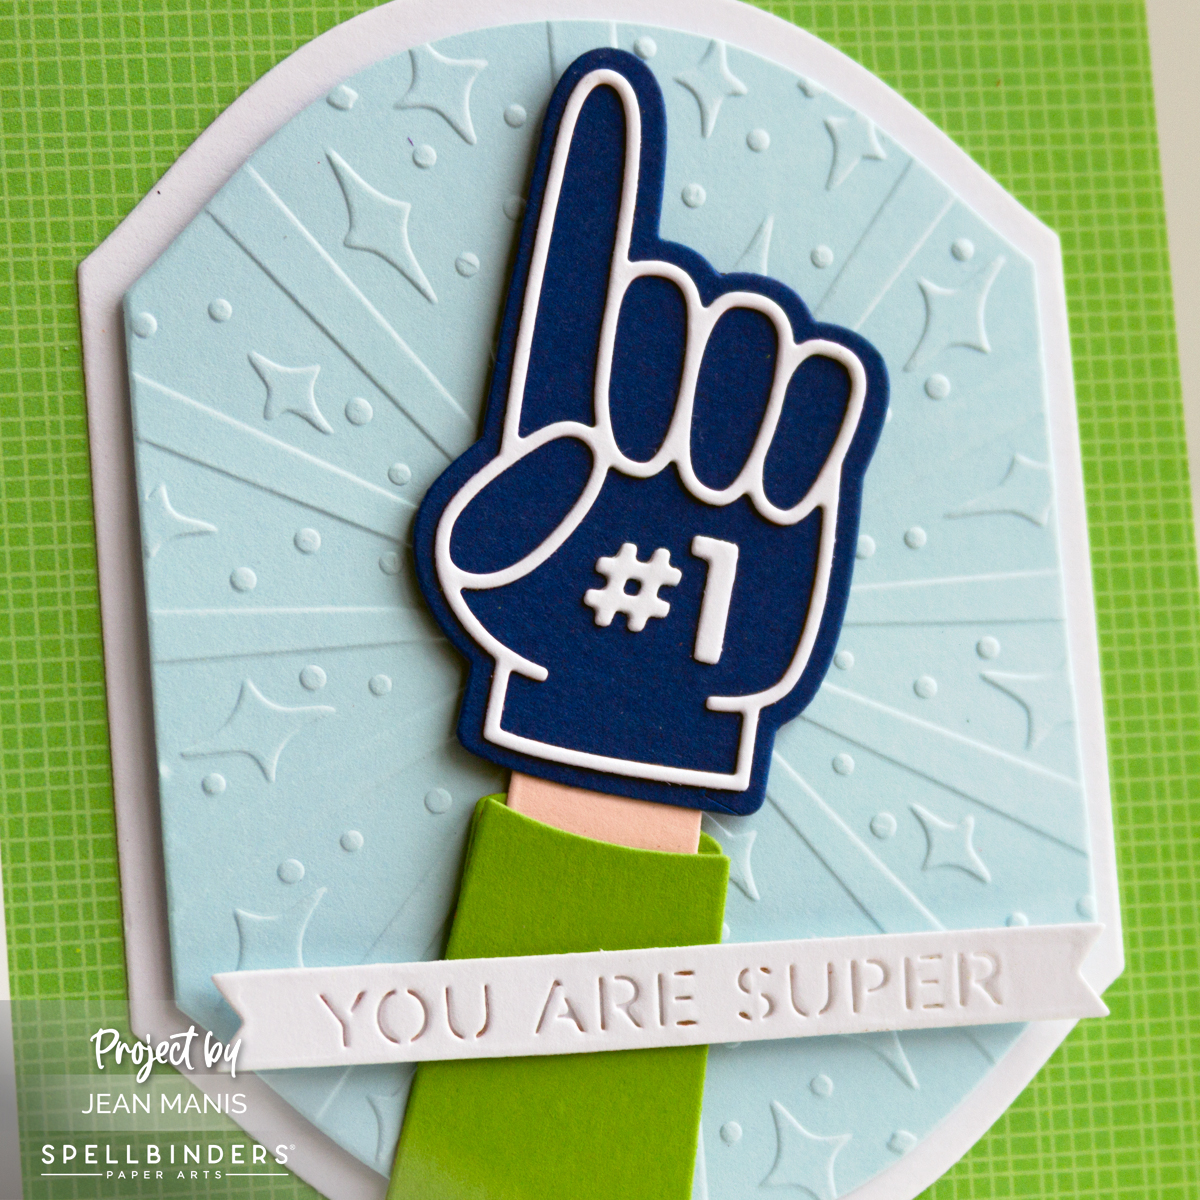
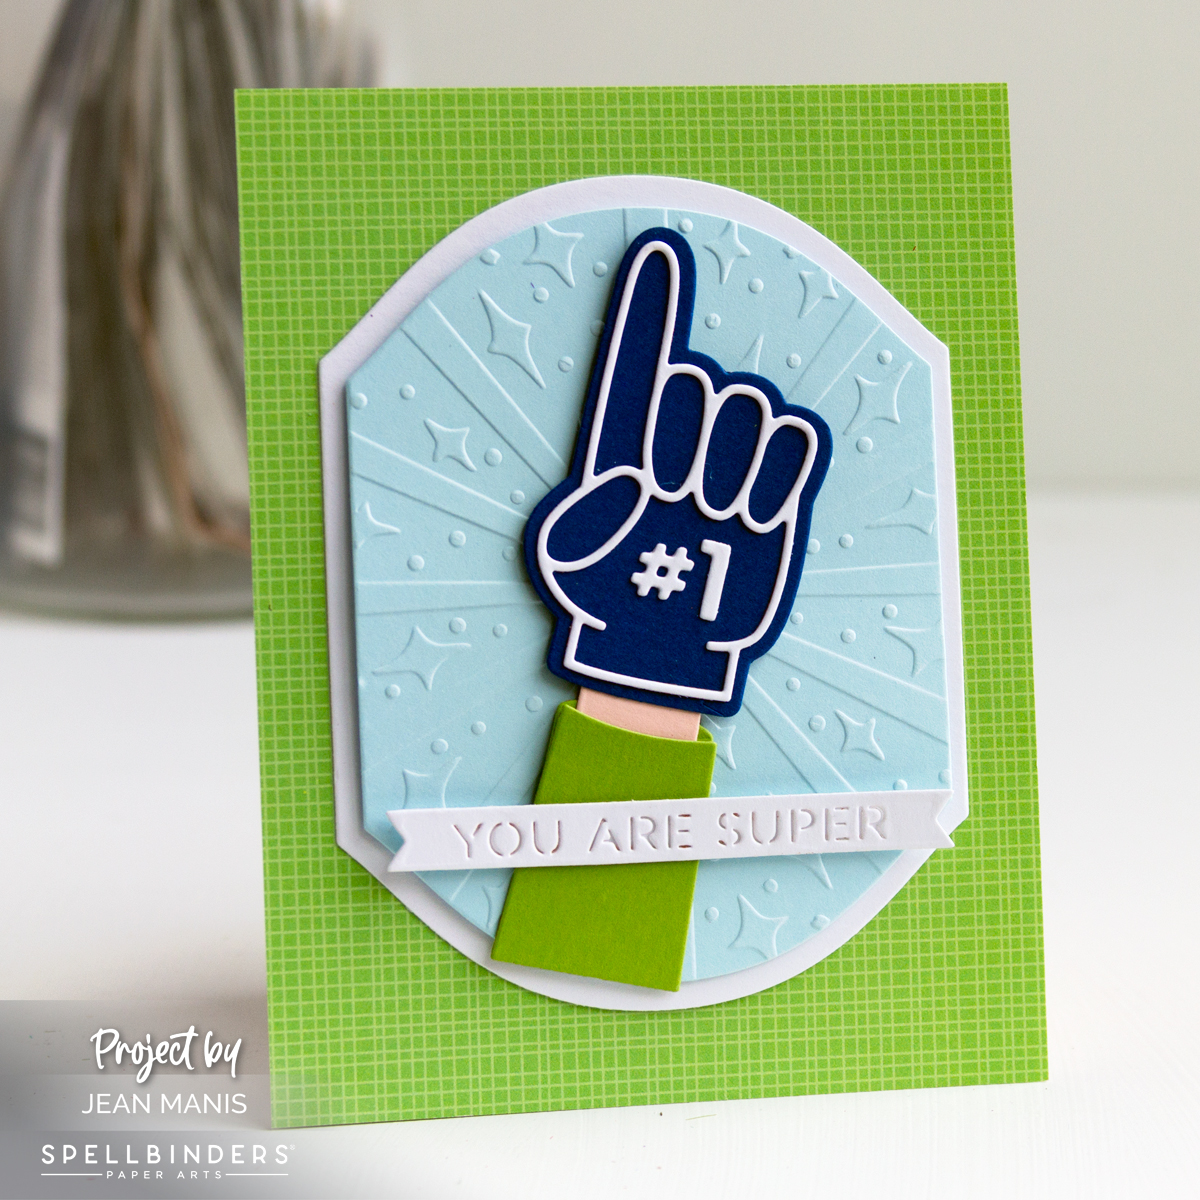
Hero Arts | Candy Cane Magic

Hello! I’m back with another holiday card featuring the new Candy Cane Collection from Hero Arts. This time, I used Distress Oxide to ink the solid candy cane shapes, then added snowfall paste through the striped stencil and sprinkled on dry glitter for extra holiday sparkle. It’s a fun and festive way to bring texture to a clean and simple card design. You can see my first designs with these products HERE.

Hero Arts | Candy Cane Magic

    • Apply Distress Oxide inks through one of the stencils in the Toss Up set on to white cardstock.
    • Add Snowfall Grit paste through another stencil in the set and sprinkle with Dry Glitter. Set the panel aside to dry.
    • Once dry, add to a Tutu cardstock panel and add the assembly to a brushed silver card base. I created a custom size base to accommodate the design.
    • Stamp the Candy Cane Swag sentiment with silver ink on white cardstock. Cut with the coordinating die and add to the card base with foam adhesive.

Available from July 28 to July 31st, 2025, at 11:59 MST, save on Clearance Products at Hero Arts!

Hero Arts Sale


Hero Arts | Candy Cane Collection

Hello! I’m sharing two holiday cards created with the new Candy Cane Collection from Hero Arts. This festive collection includes stamp sets with coordinating dies, a stand-alone sentiment die set, and a versatile layering stencil. I used two different approaches with the stencil set—one uses white embossing paste on red cardstock for a bold, dimensional look, and the other layers white and red ink to build a classic candy cane pattern. Both cards feature the cheerful sentiment “Holiday Vibes and Peppermint Skies,” bringing a fresh twist to holiday cardmaking.

Hero Arts | Candy Cane Collection

    • Apply embossing paste through one of the stencils in the Toss Up set on to a Pomegranate cardstock panel. Add to a white card base.
    • Stamp the Candy Cane Swag sentiment with black ink on white cardstock and heat-emboss with clear powder. Cut with the coordinating die and add to the card base with foam adhesive.

Hero Arts | Candy Cane Collection

    • Ink a Fawn cardstock panel with white ink using one of the Toss Up layering stencils. Once dry, add red ink through another stencil in the set. Add the stenciled panel to the base.
    • Stamp the Candy Cane Swag sentiment with Versamark ink on Wild Berry cardstock and heat emboss with white powder. Cut with the coordinating die and add to the card base with foam adhesive.

A bold sentiment over a stenciled background is a reminder that simple choices can lead to striking results!


Statement Carnation in a Vase

Hello! Sometimes a single bloom says it all. For this card, I created a dimensional carnation using a Susan Tierney-Cockburn die set and placed it in a vase to let the flower take center stage. Because the carnation has such a strong visual presence, I kept the overall design clean, adding just a touch of patterned paper in the background and a BetterPress sentiment to complete the look.

Statement Carnation in a Vase

    • Create an A2-size card base and cover with Echo Park – My Favorite Summer patterned paper.
    • Cut the Carnation pieces from Susan’s Garden Specialty Cardstock and Fern (leaves) cardstock. Follow the video in the product link to form the carnation.
    • Use dies in the Ceramic Vases set to cut the vase.
    • Press the You are Everything Sentiments plate in black ink. Cut with the coordinating die set.
    • Add assembled carnation, vase, and sentiment to the card with foam adhesive. Glue leaves behind the bloom.

Statement Carnation in a Vase


Hello Card with Stenciled Rainbow Birdhouses

Hello! Sometimes, a simple design with a pop of color is all you need to make a cheerful card! Today, I’m sharing a quick and easy hello card featuring a row of stenciled birdhouses inked in a vibrant rainbow of colors. To keep things simple, I used a stamped and die-cut “Hello” sentiment—an effortless way to add dimension to an otherwise single-layer card.

Hello Card with Stenciled Rainbow Birdhouses

    • Add Mowed Lawn ink to the base of a white cardstock panel to create the grass. I used vellum to mask the sky and create the straight line.
    • Mask the grass and ink the birdhouse posts with the Newton’s Nook Birdhouse Line Stencil. The stencil includes three rows with etching to aid with alignment.
    • Move the stencil and ink the birdhouses. Move the stencil again to ink the birds and birdhouse openings.
    • Trim stencil panel and add to a black cardstock base.
    • Stamp the I’ve Got You Covered sentiment and cut with the coordinating die. Add to card with foam adhesive.

Hello Card with Stenciled Rainbow Birdhouses


Simon Hurley | Deck the Halls

Hello! Today, I’m sharing a festive card created with Simon Hurley’s layering stencil – Mod Christmas Trees. This design features three inked Christmas trees adorned with gold decorations, adding depth and shimmer. The “Deck the Halls” sentiment ties the design together, complementing the trio of decorated trees.

Simon Hurley | Deck the Halls

    • Create an A-2 size card base from Pomegranate cardstock.
    • Stencil the first layer of trees with Later Gator green ink.
    • Next, add Rustic Wilderness ink to all three trees with the half tree portion of the Mod Christmas Trees stencil.
    • Stencil gold pigment ink (I used Color Box) through the stencil for the tree trunks.
    • Next add the three gold pastes (left to right) – Slippery When Wet Astro Paste, Slippery when Wet Lunar Paste, and Golden Hour Solar Paste. Once dry, trim the panel and mat with gold cardstock. Add assembly to card base.

Simon Hurley | Deck the Halls

This Clean and Simple card design shines with its simplicity, but achieving that effortless look takes attention to detail and a steady hand.