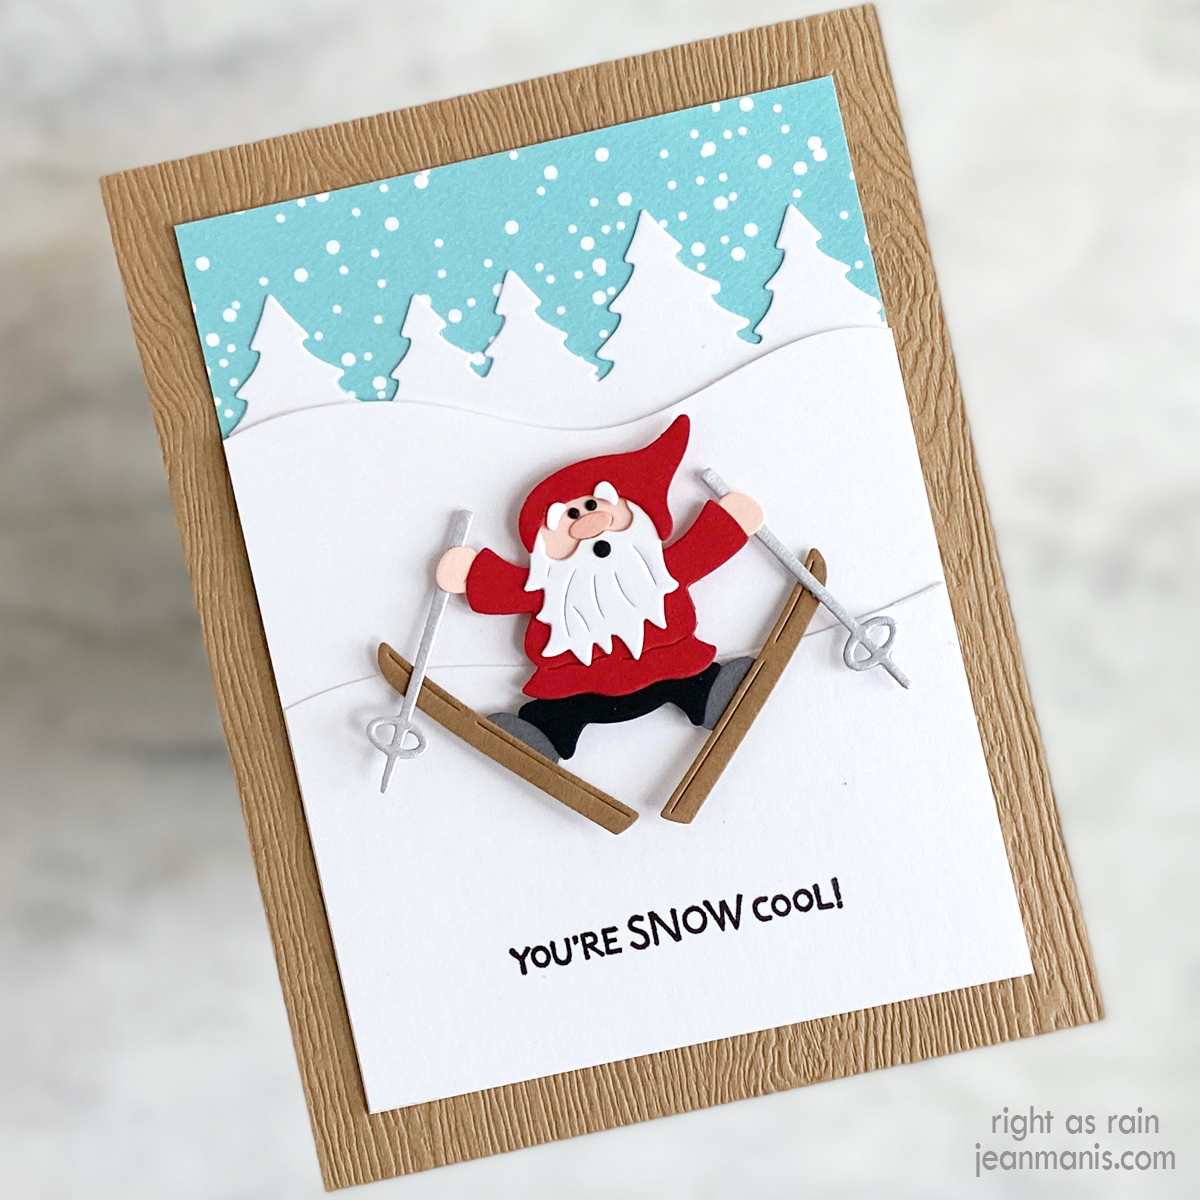
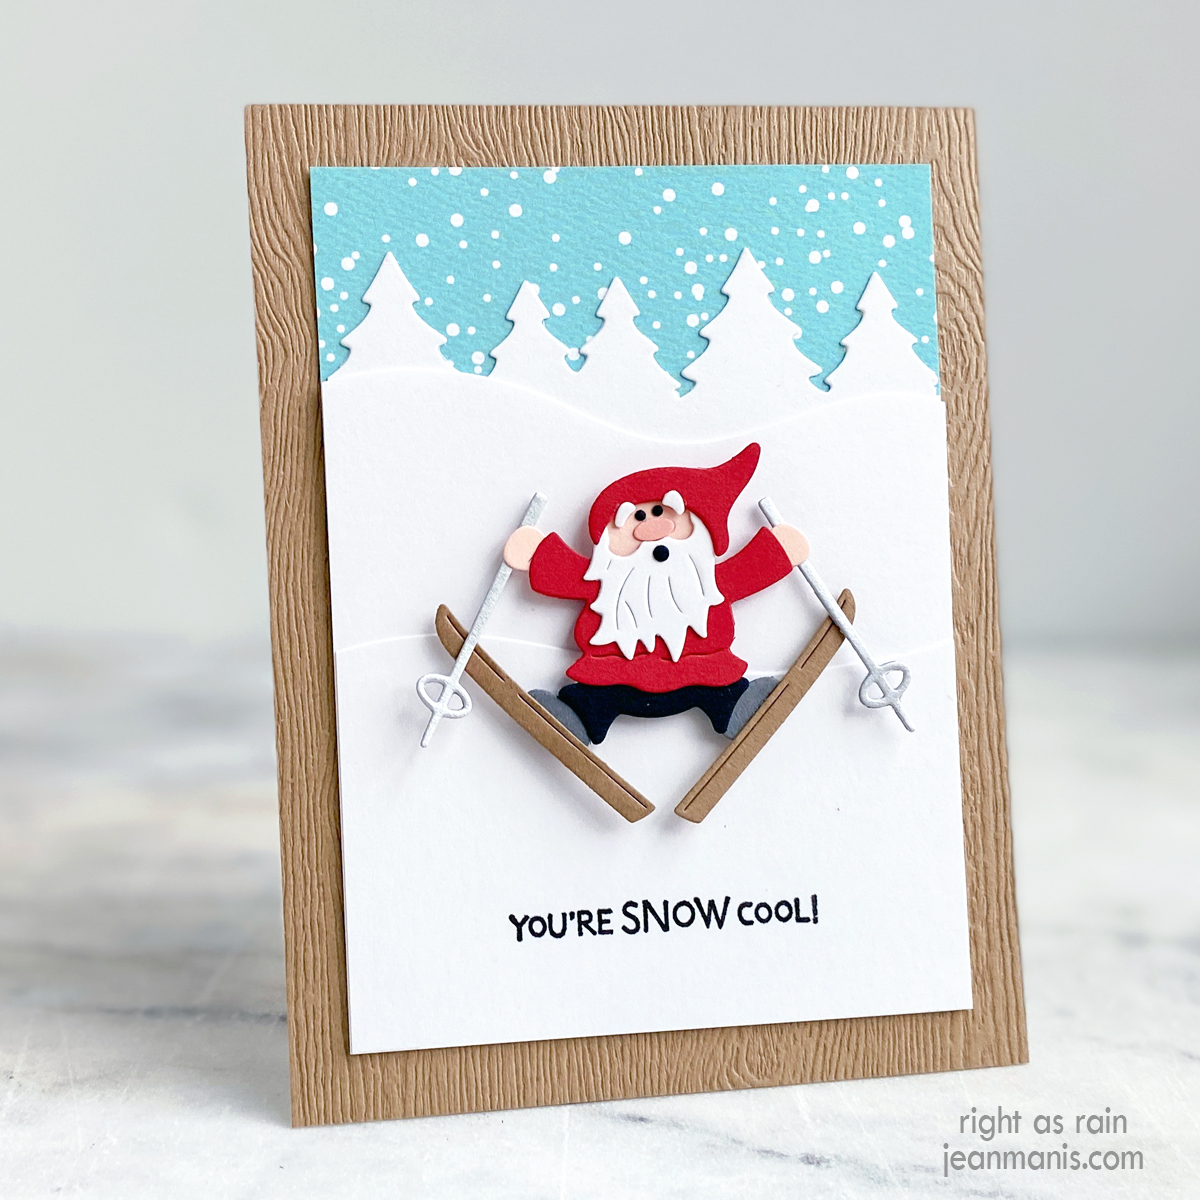
Hello! As you may have read, I am focusing on winter-themed cards to extend the season of the cute stamps and dies that are holiday-related. A skiing gnome adds a whimsical and charming touch to a card suitable for a variety of occasions including a winter birthday or friendship card. There is something endearing about a gnome navigating the slopes (or is he?)!
I have had the CottageCutz Skiing Gnomes die set for quite some time and it was gathering dust. As such, I am entering the card in the NBUS Challenge #57 (Never-Before-Used-Schtuff). The die set is still available directly from Scrapping Cottage or from Frantic Stamper.
-
- To begin, I created an A2-size card base from Light Brown Woodgrain cardstock.
- Next, I cut the gnome from a variety of cardstock colors and assembled him. There is no die in the set for the eyes or the mouth. I created the eyes using a die in the Impression Obsession Santa Mug die set and the mouth using a die in an older Taylored Expressions Little Bits set.
- I used one of the Impression Obsession Tree Line dies to create the back of the landscape.
- I stamped the sentiment in VersaFine ink using a stamp in the Stampin’ Up Snowbody Better set (the set is from several years ago, and I have never used it before) on to Snowdrift cardstock. I cut the top of the stamped panel measuring 3 1/2″ wide with a die in the MFT Snow Drifts die set (now retired). I cut another snowdrift panel with the other die in the same set.
- I assembled the three landscape layers – tree line, snowdrift, and snowdrift with sentiment – and added the assembly (measuring 3 1/2″ wide by 4 3/4″ tall) to patterned paper. That assembly was added to the card base. Finally, I added the gnome with foam adhesive.