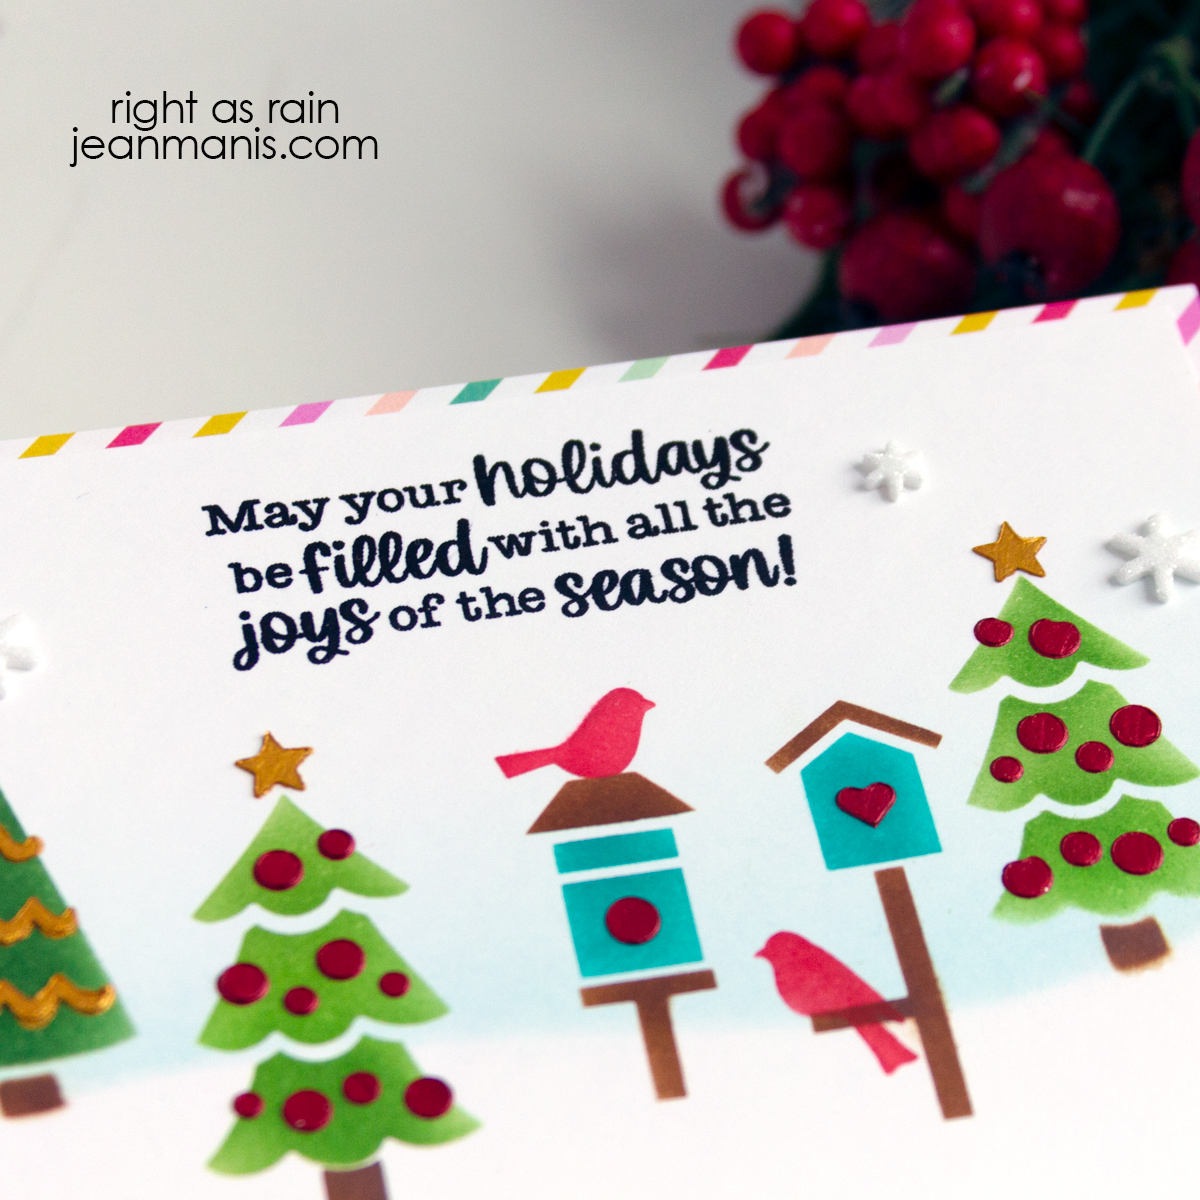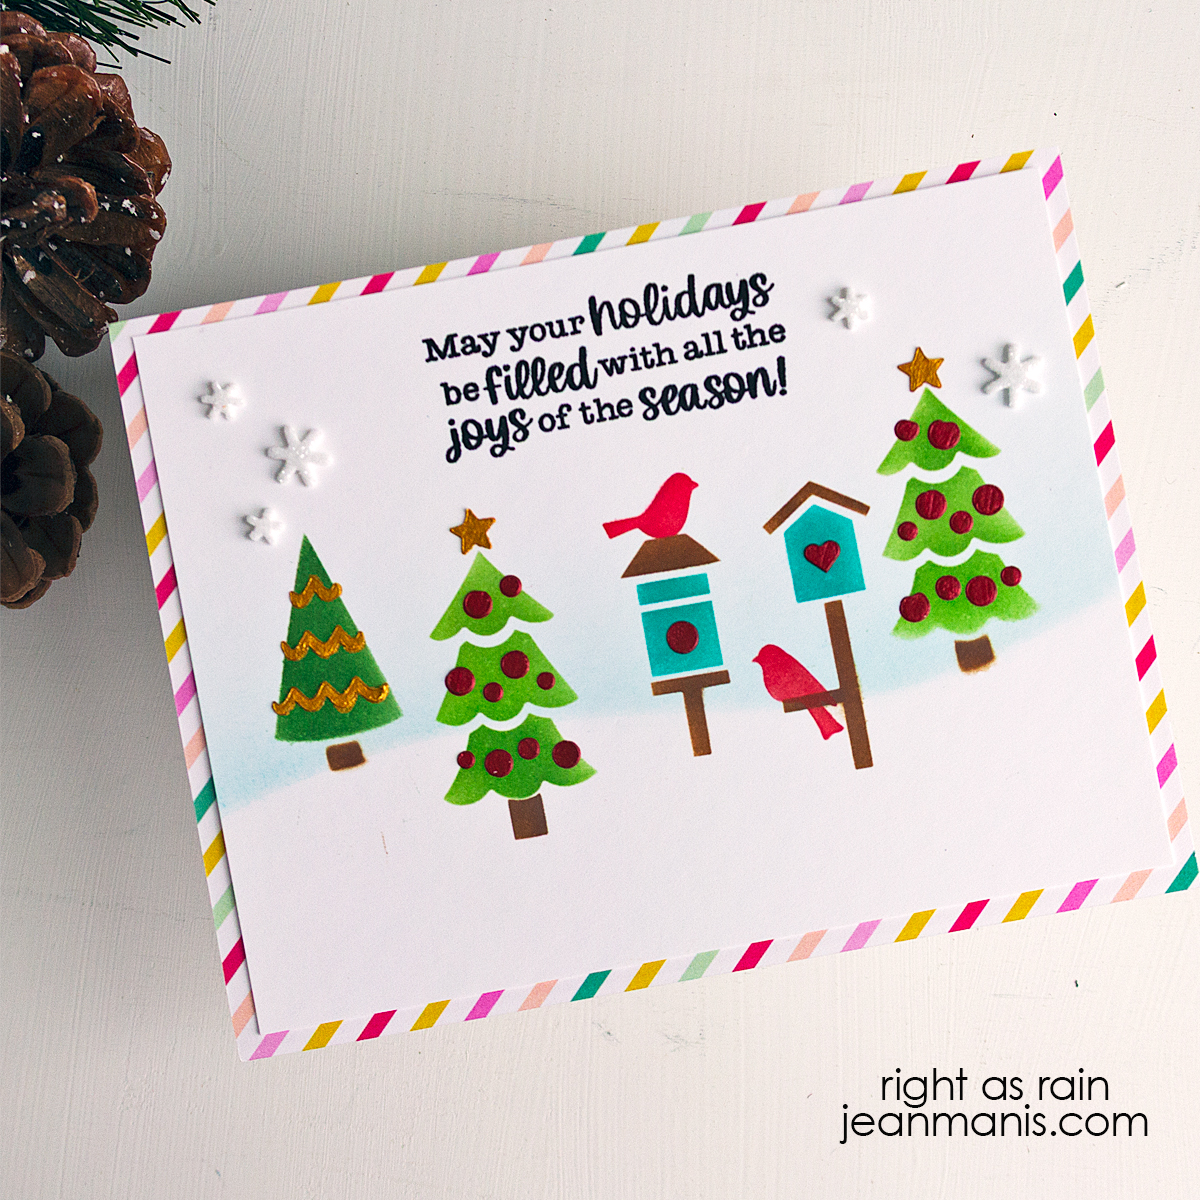
Hello! For those of us who love crafting, there’s a joy in building a layered scene with stencils. On this Christmas card, I combined two Newton’s Nook stencils to craft a playful forest view. Mixing and matching stencils opens up so creative possibilities, allowing you to experiment with color and composition. It’s also a fun way to challenge yourself to try more complicated scene-building on your holiday cards.
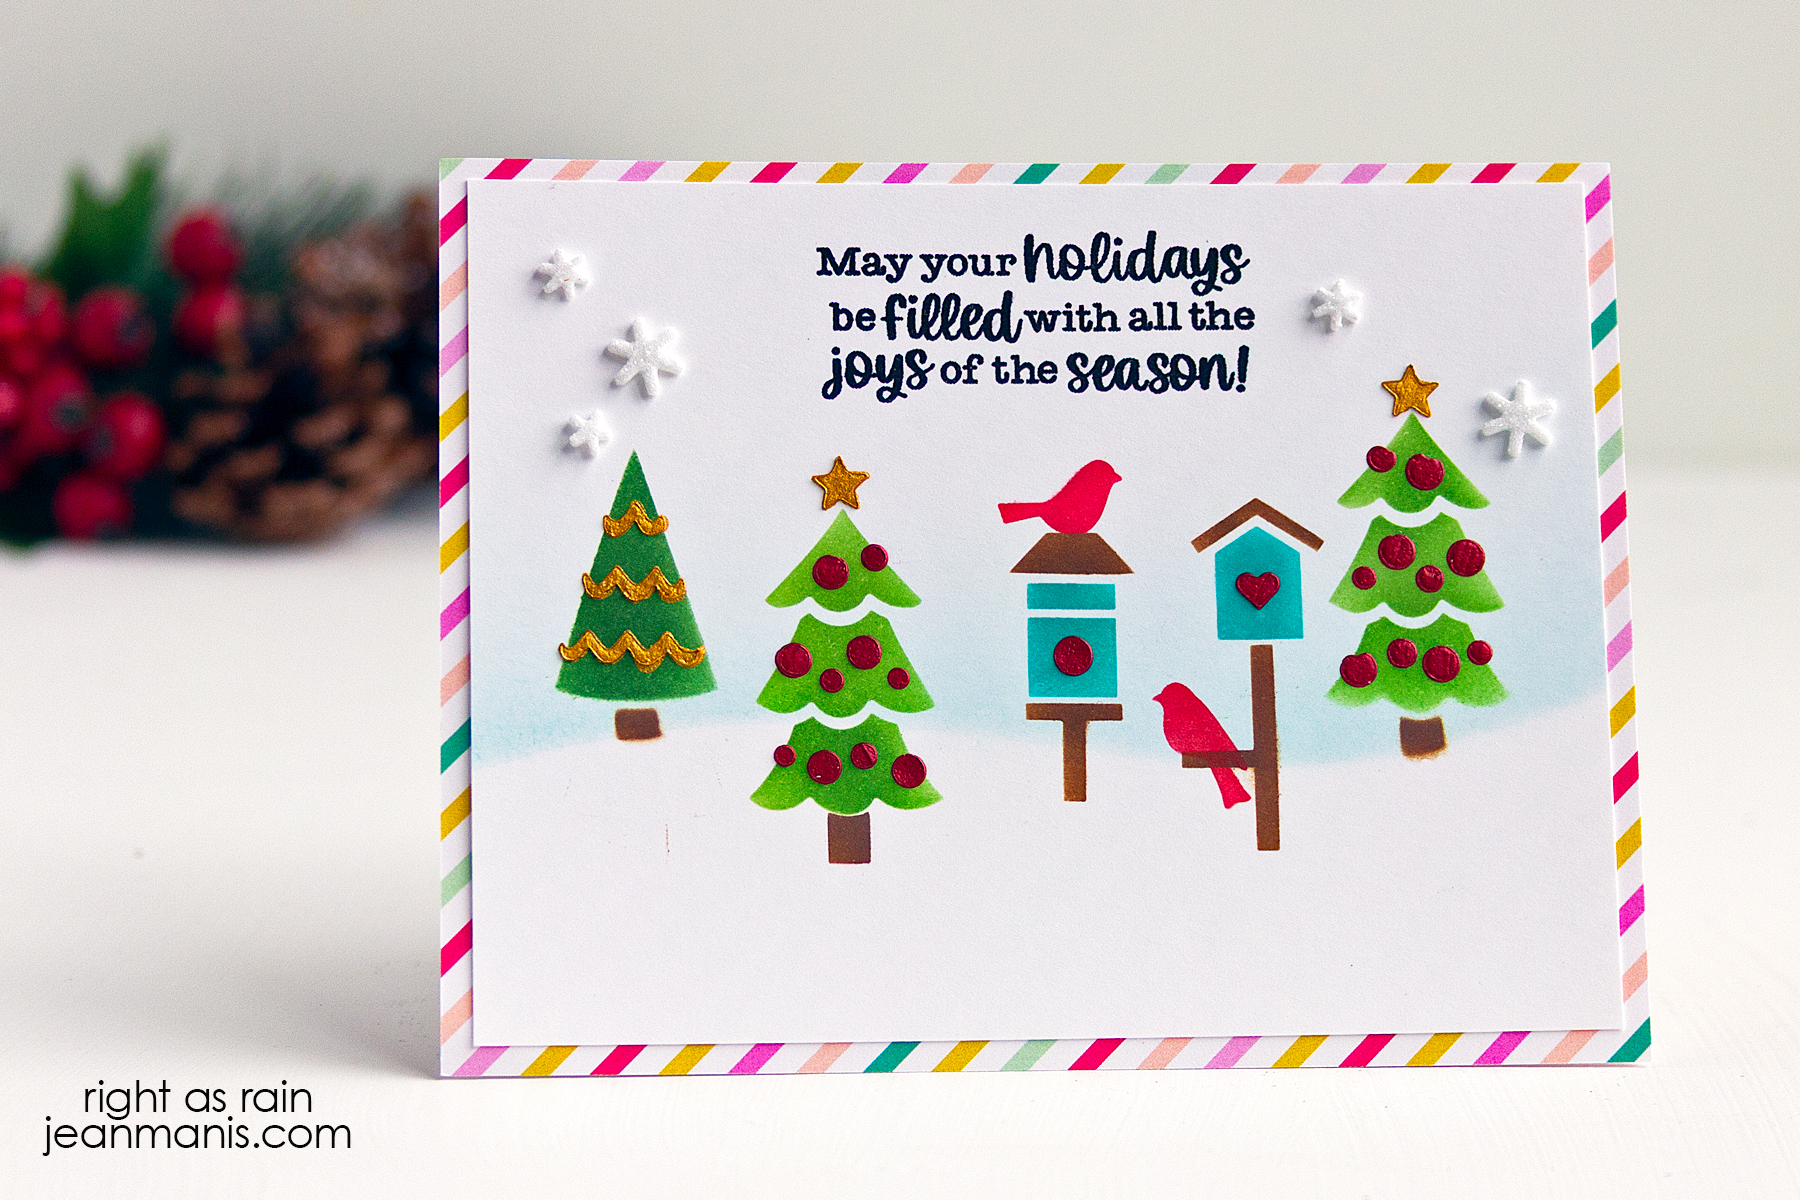
- Begin with a draft scene, stenciling in black on scrap paper to determine the placement of the trees and bird feeders.
- Once the scene is determined, stamp the Holiday Haul sentiment on to white cardstock.
- Next, cut the hillside with a die in the Nature Borders set from vellum and stencil the sky above the snowbank with Tumbled Glass ink.
- Stencil the Birdhouse Line birdhouses and Christmas Tree Line trees in steps, adding the layers of embossing paste last.
- Adhere patterned paper to an A2-size card base. Trim the stenciled panel and add to the base.
- Finish the scene with snowflakes cut from glitter foam using dies in the Lawn Fawn Mini Snowflakes and Sizzix Festive Things sets.