Impression Obsession | Frosty Fun

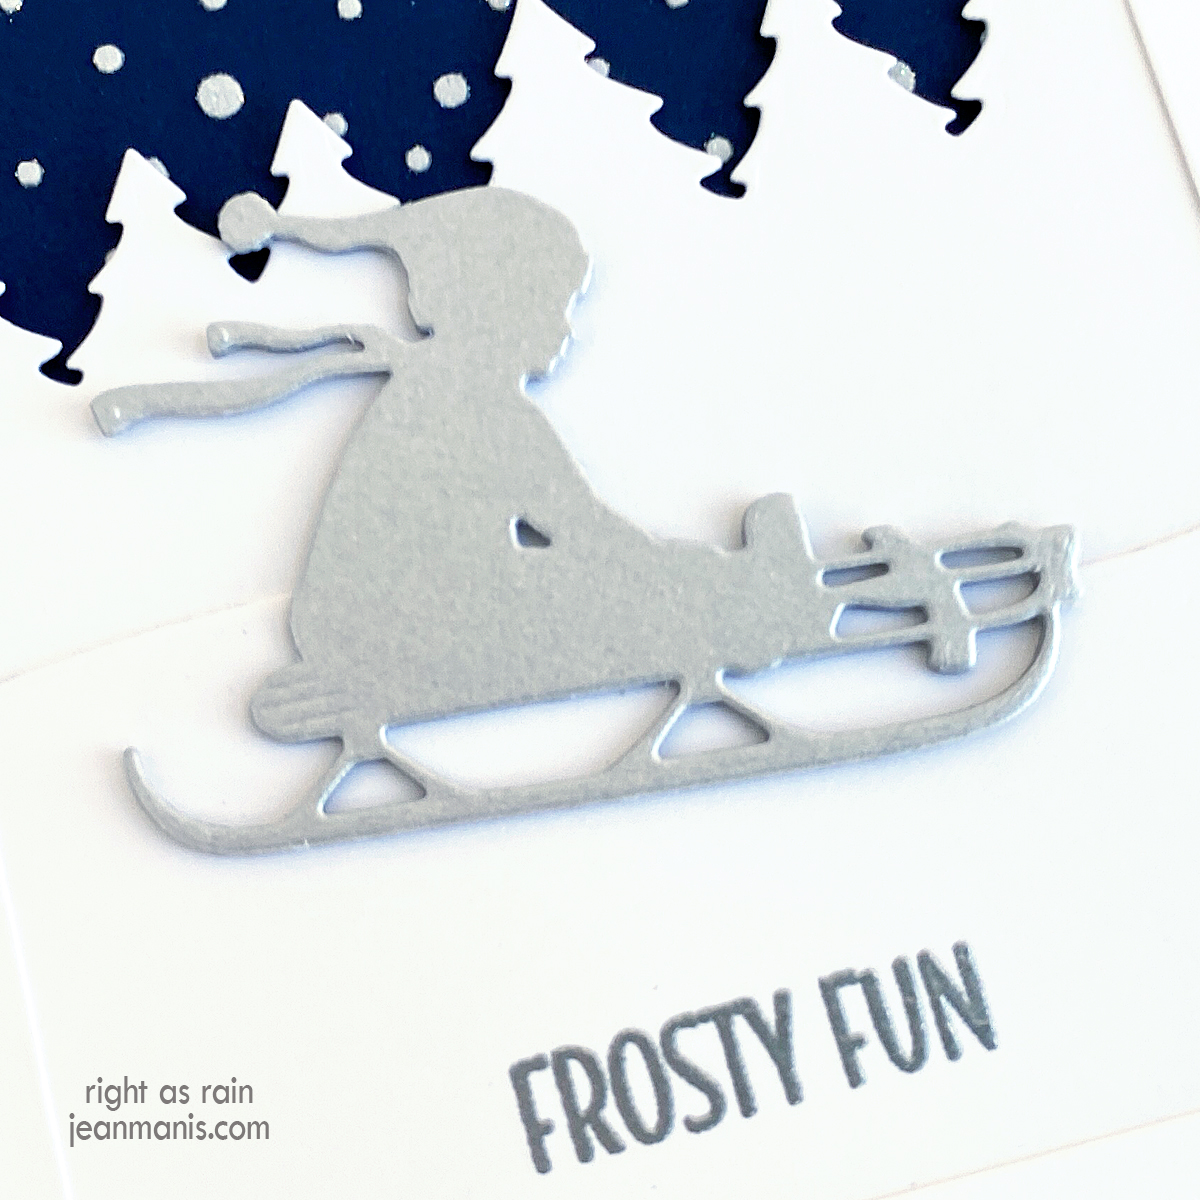
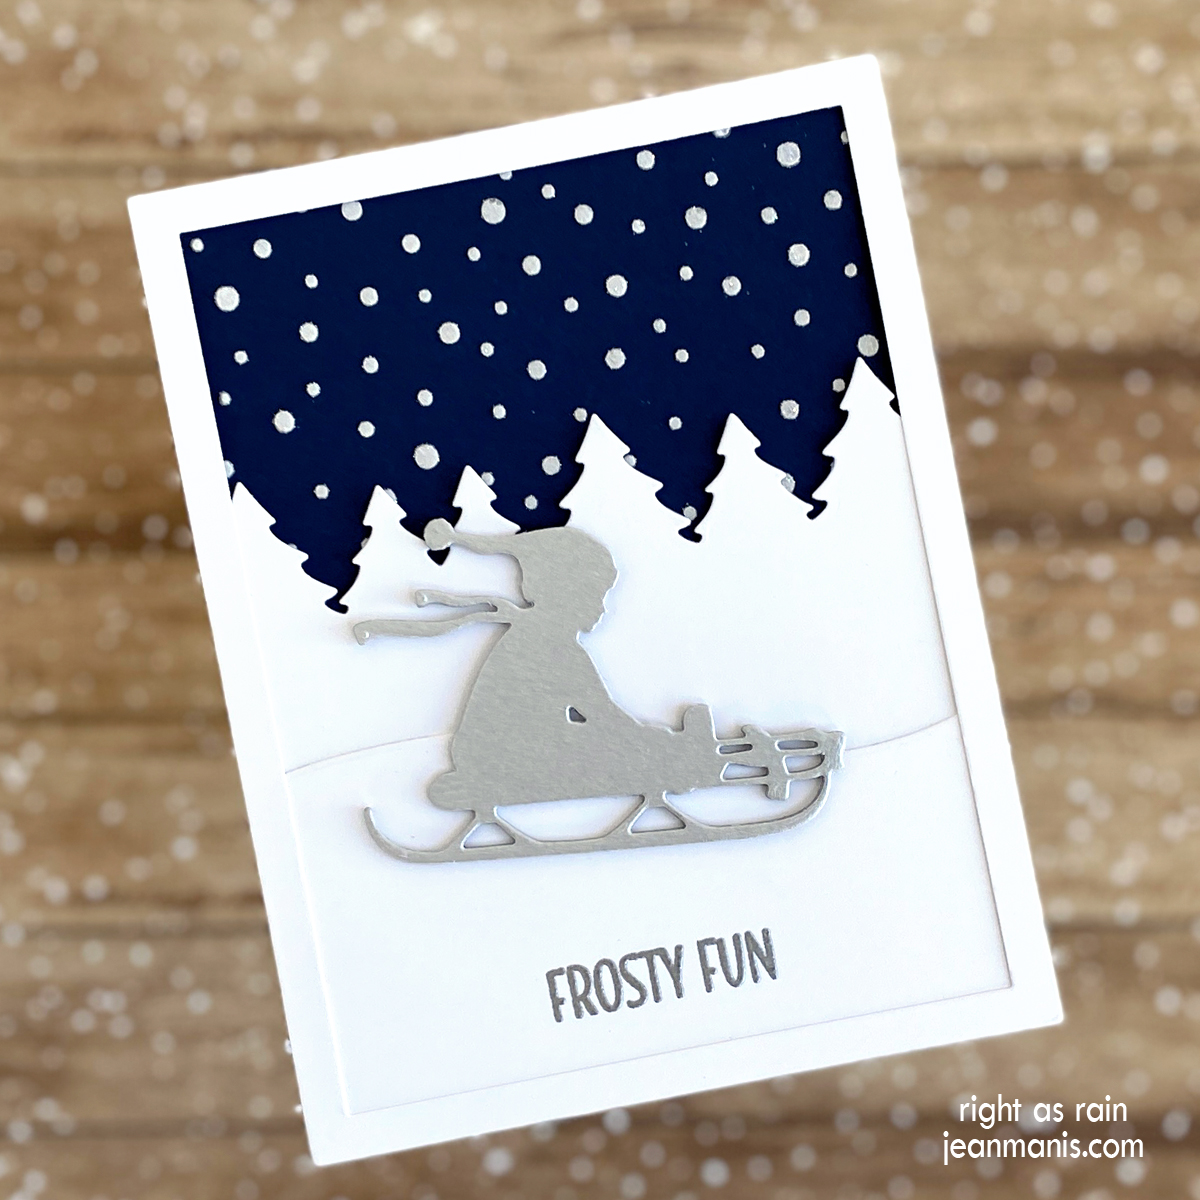
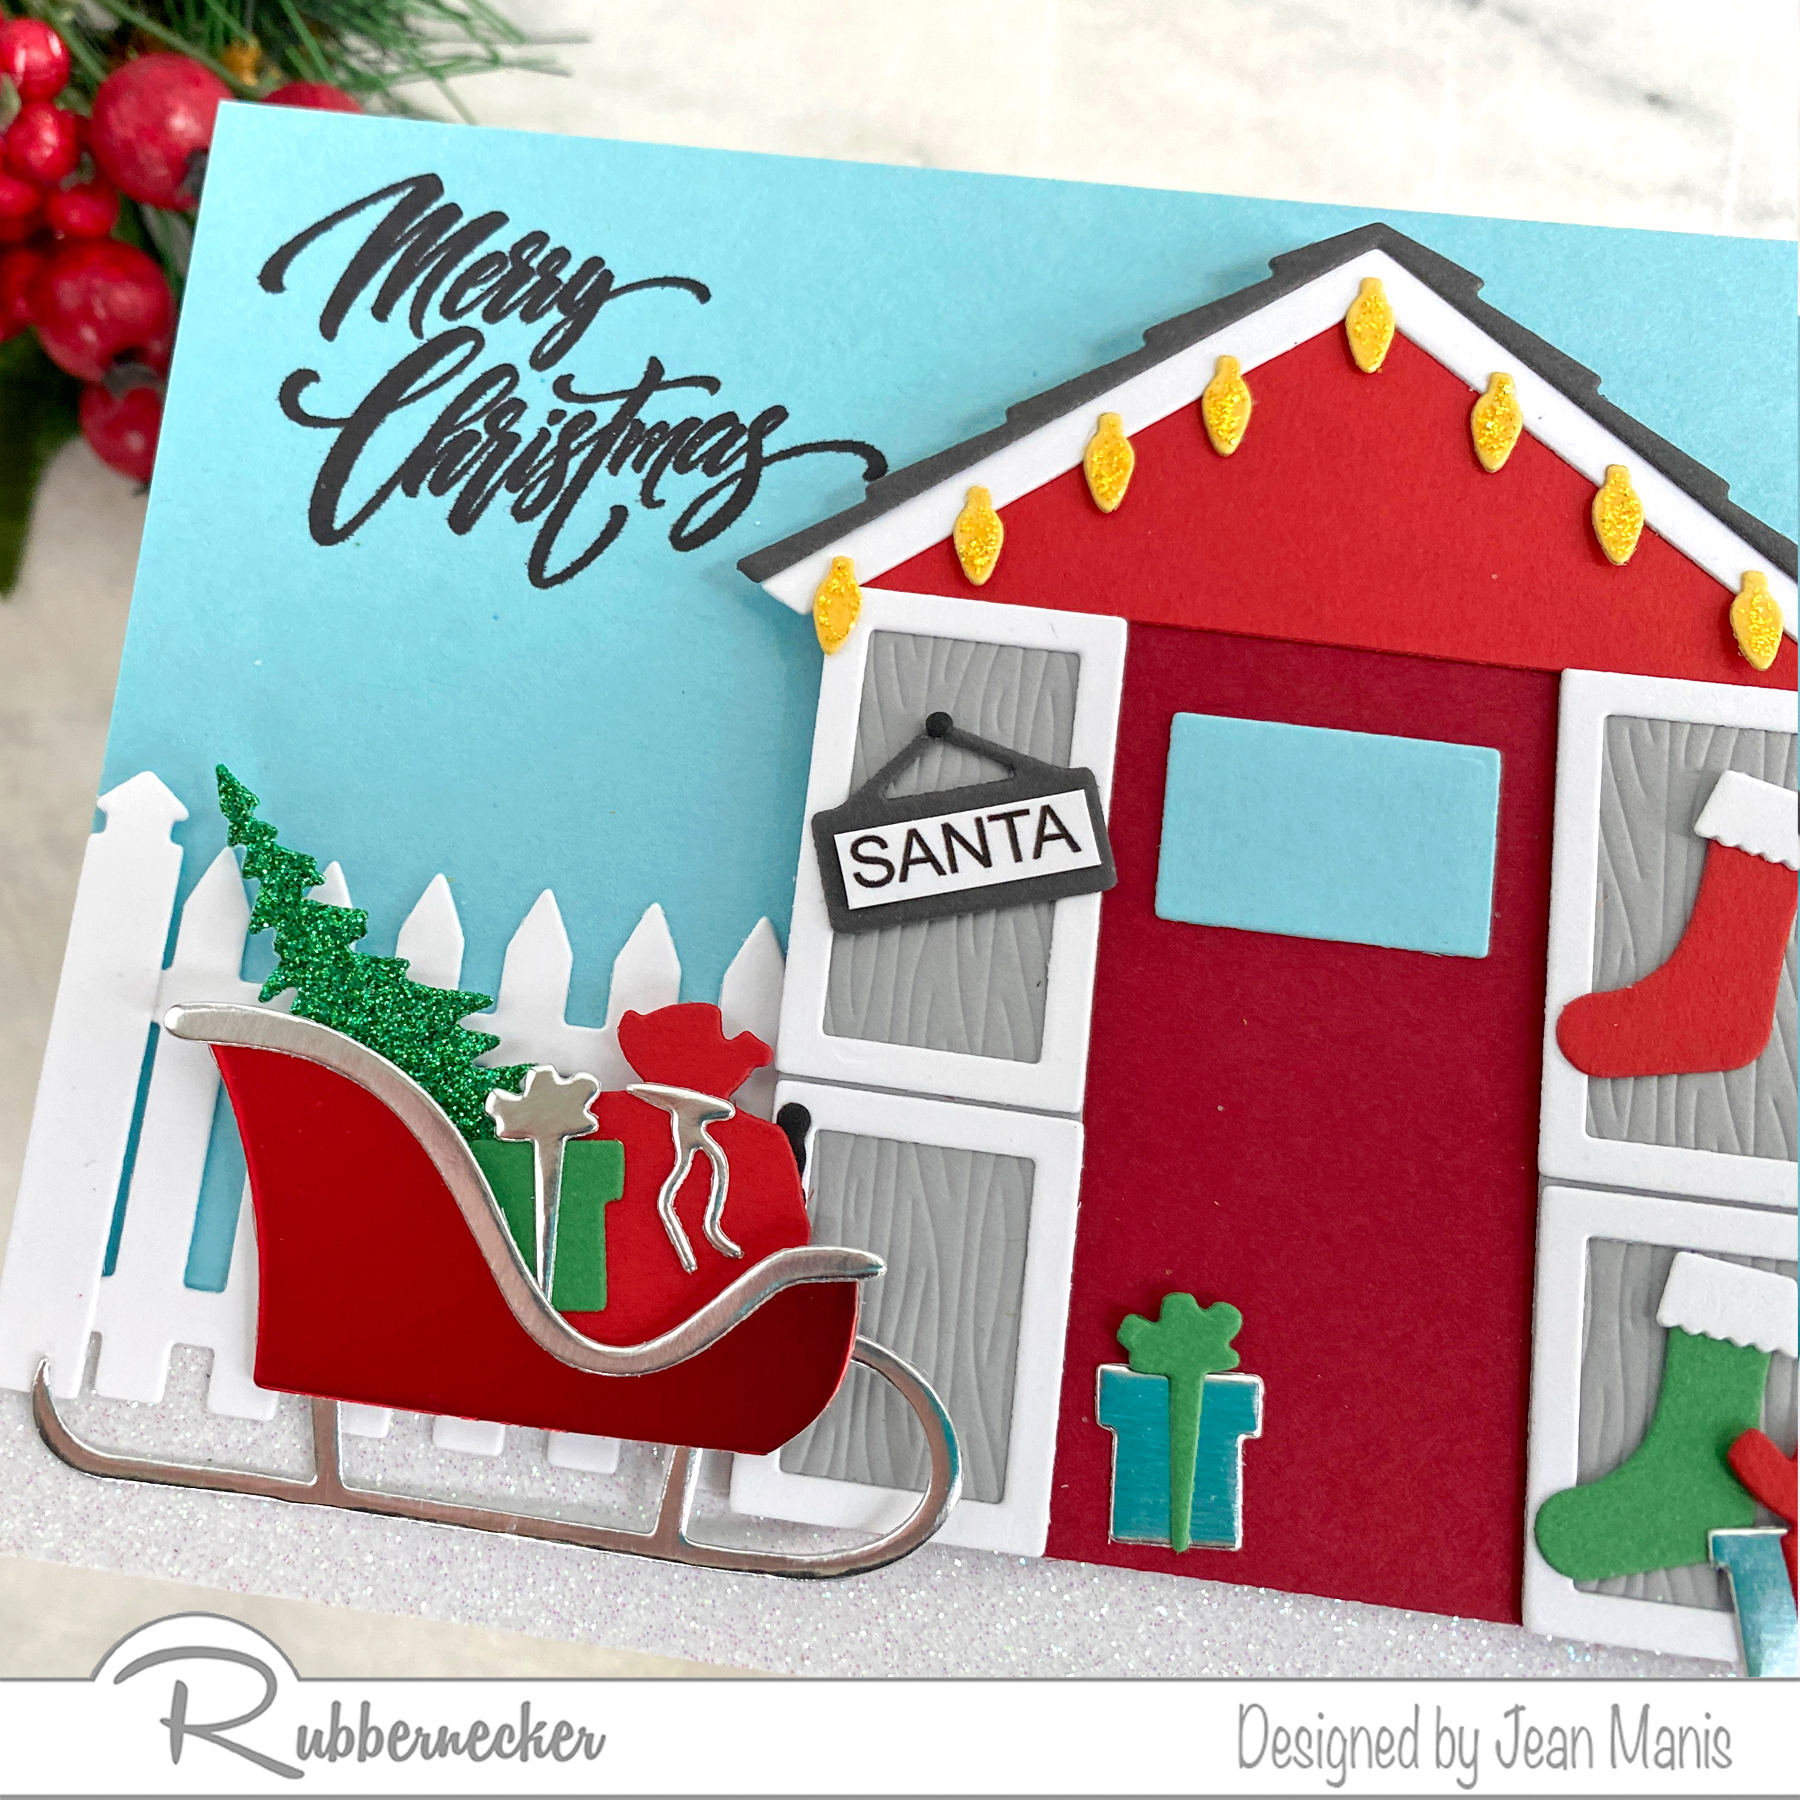
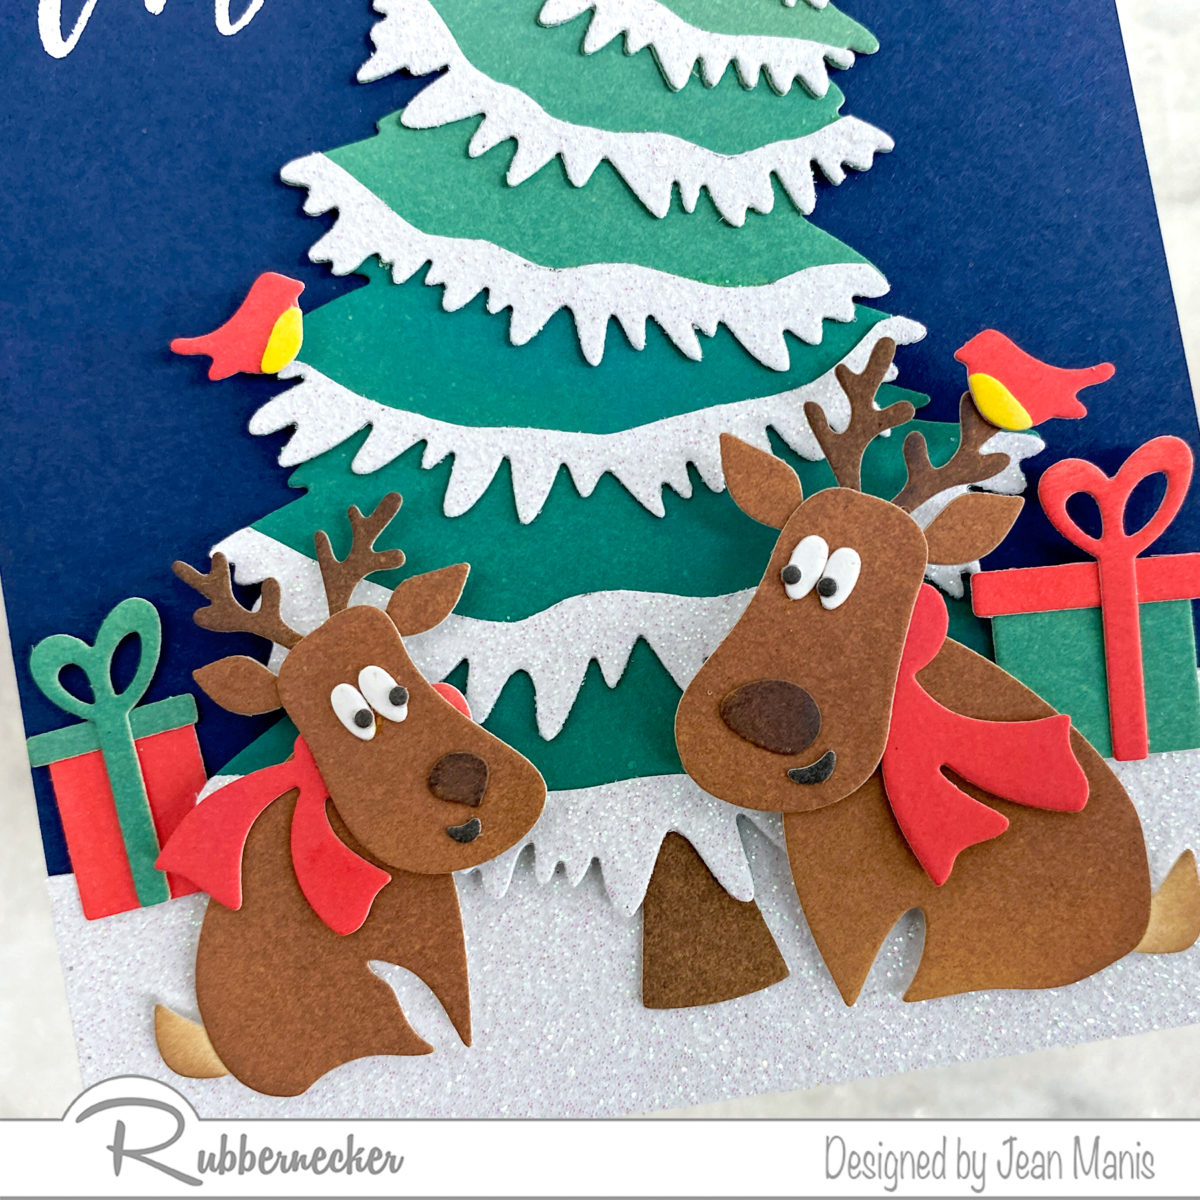
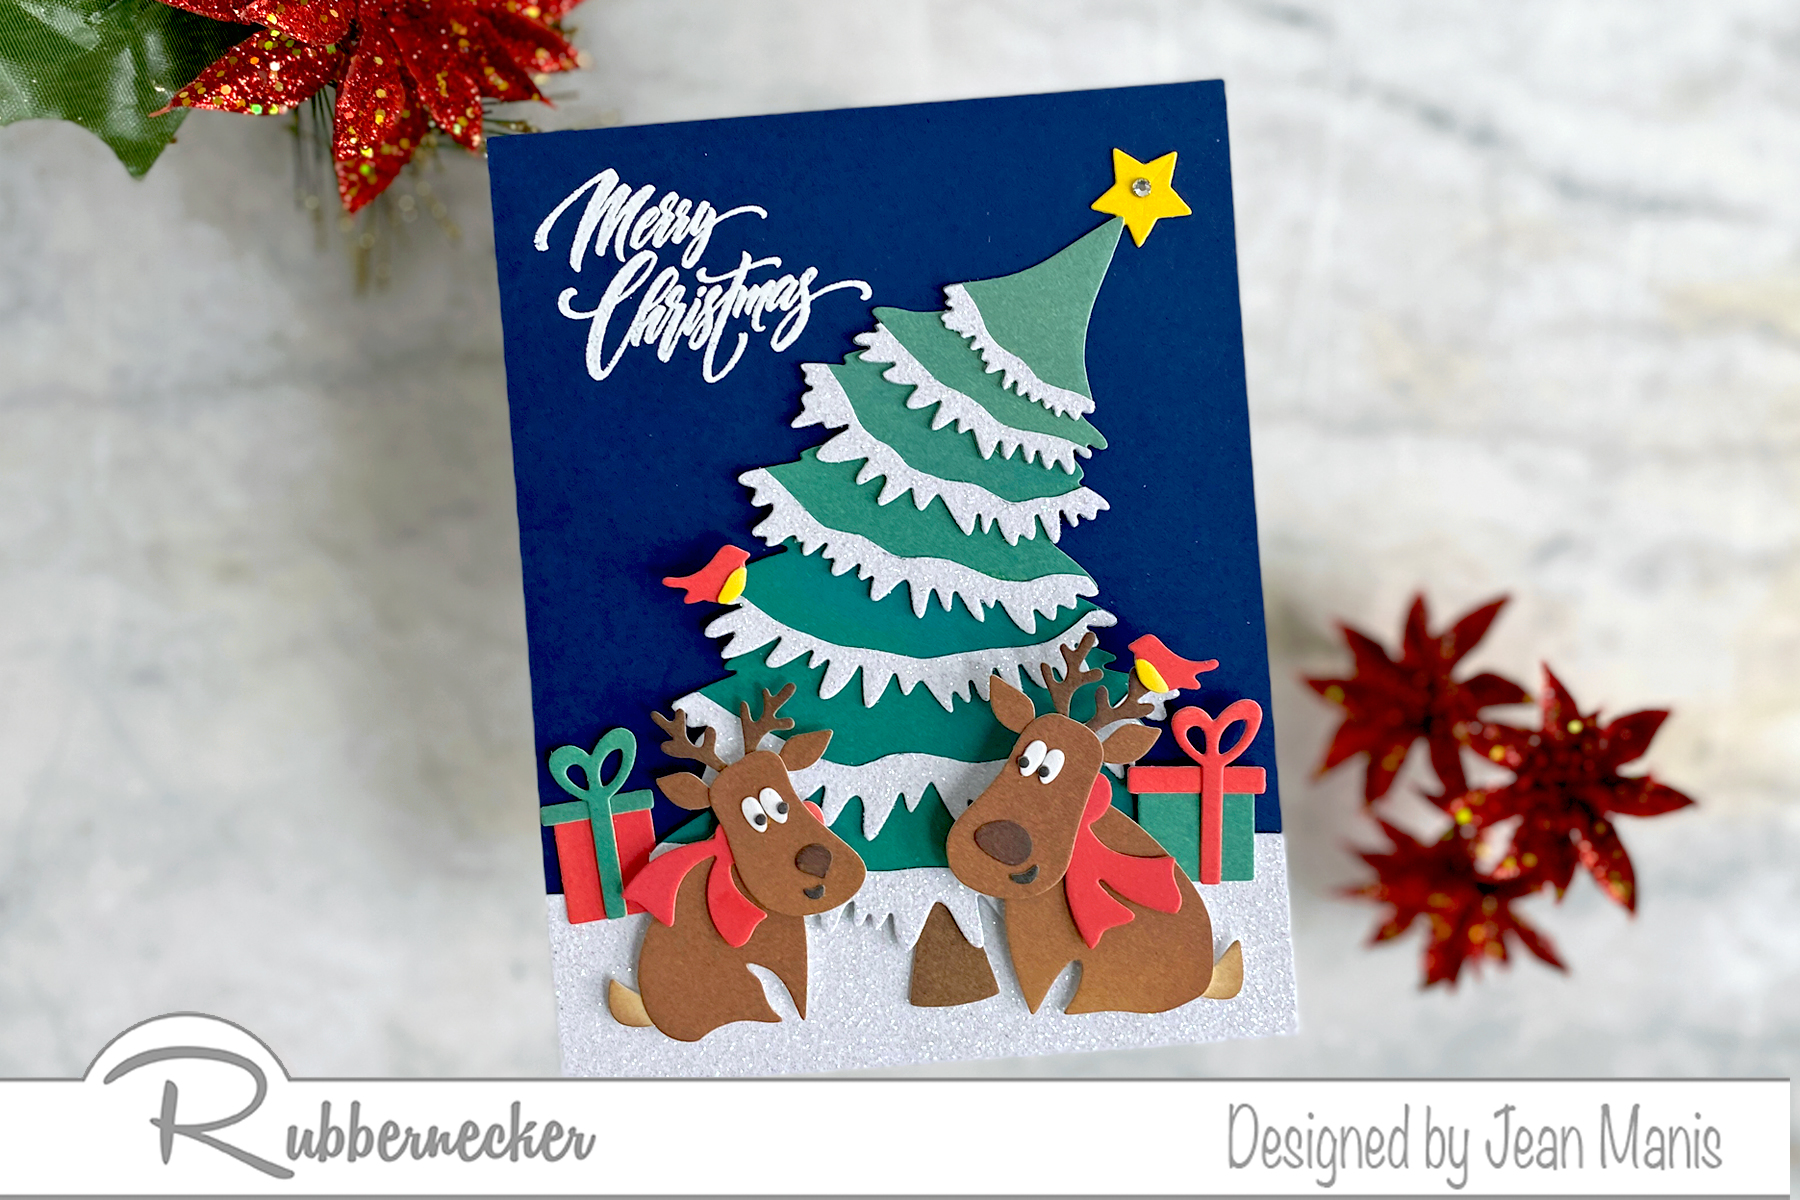
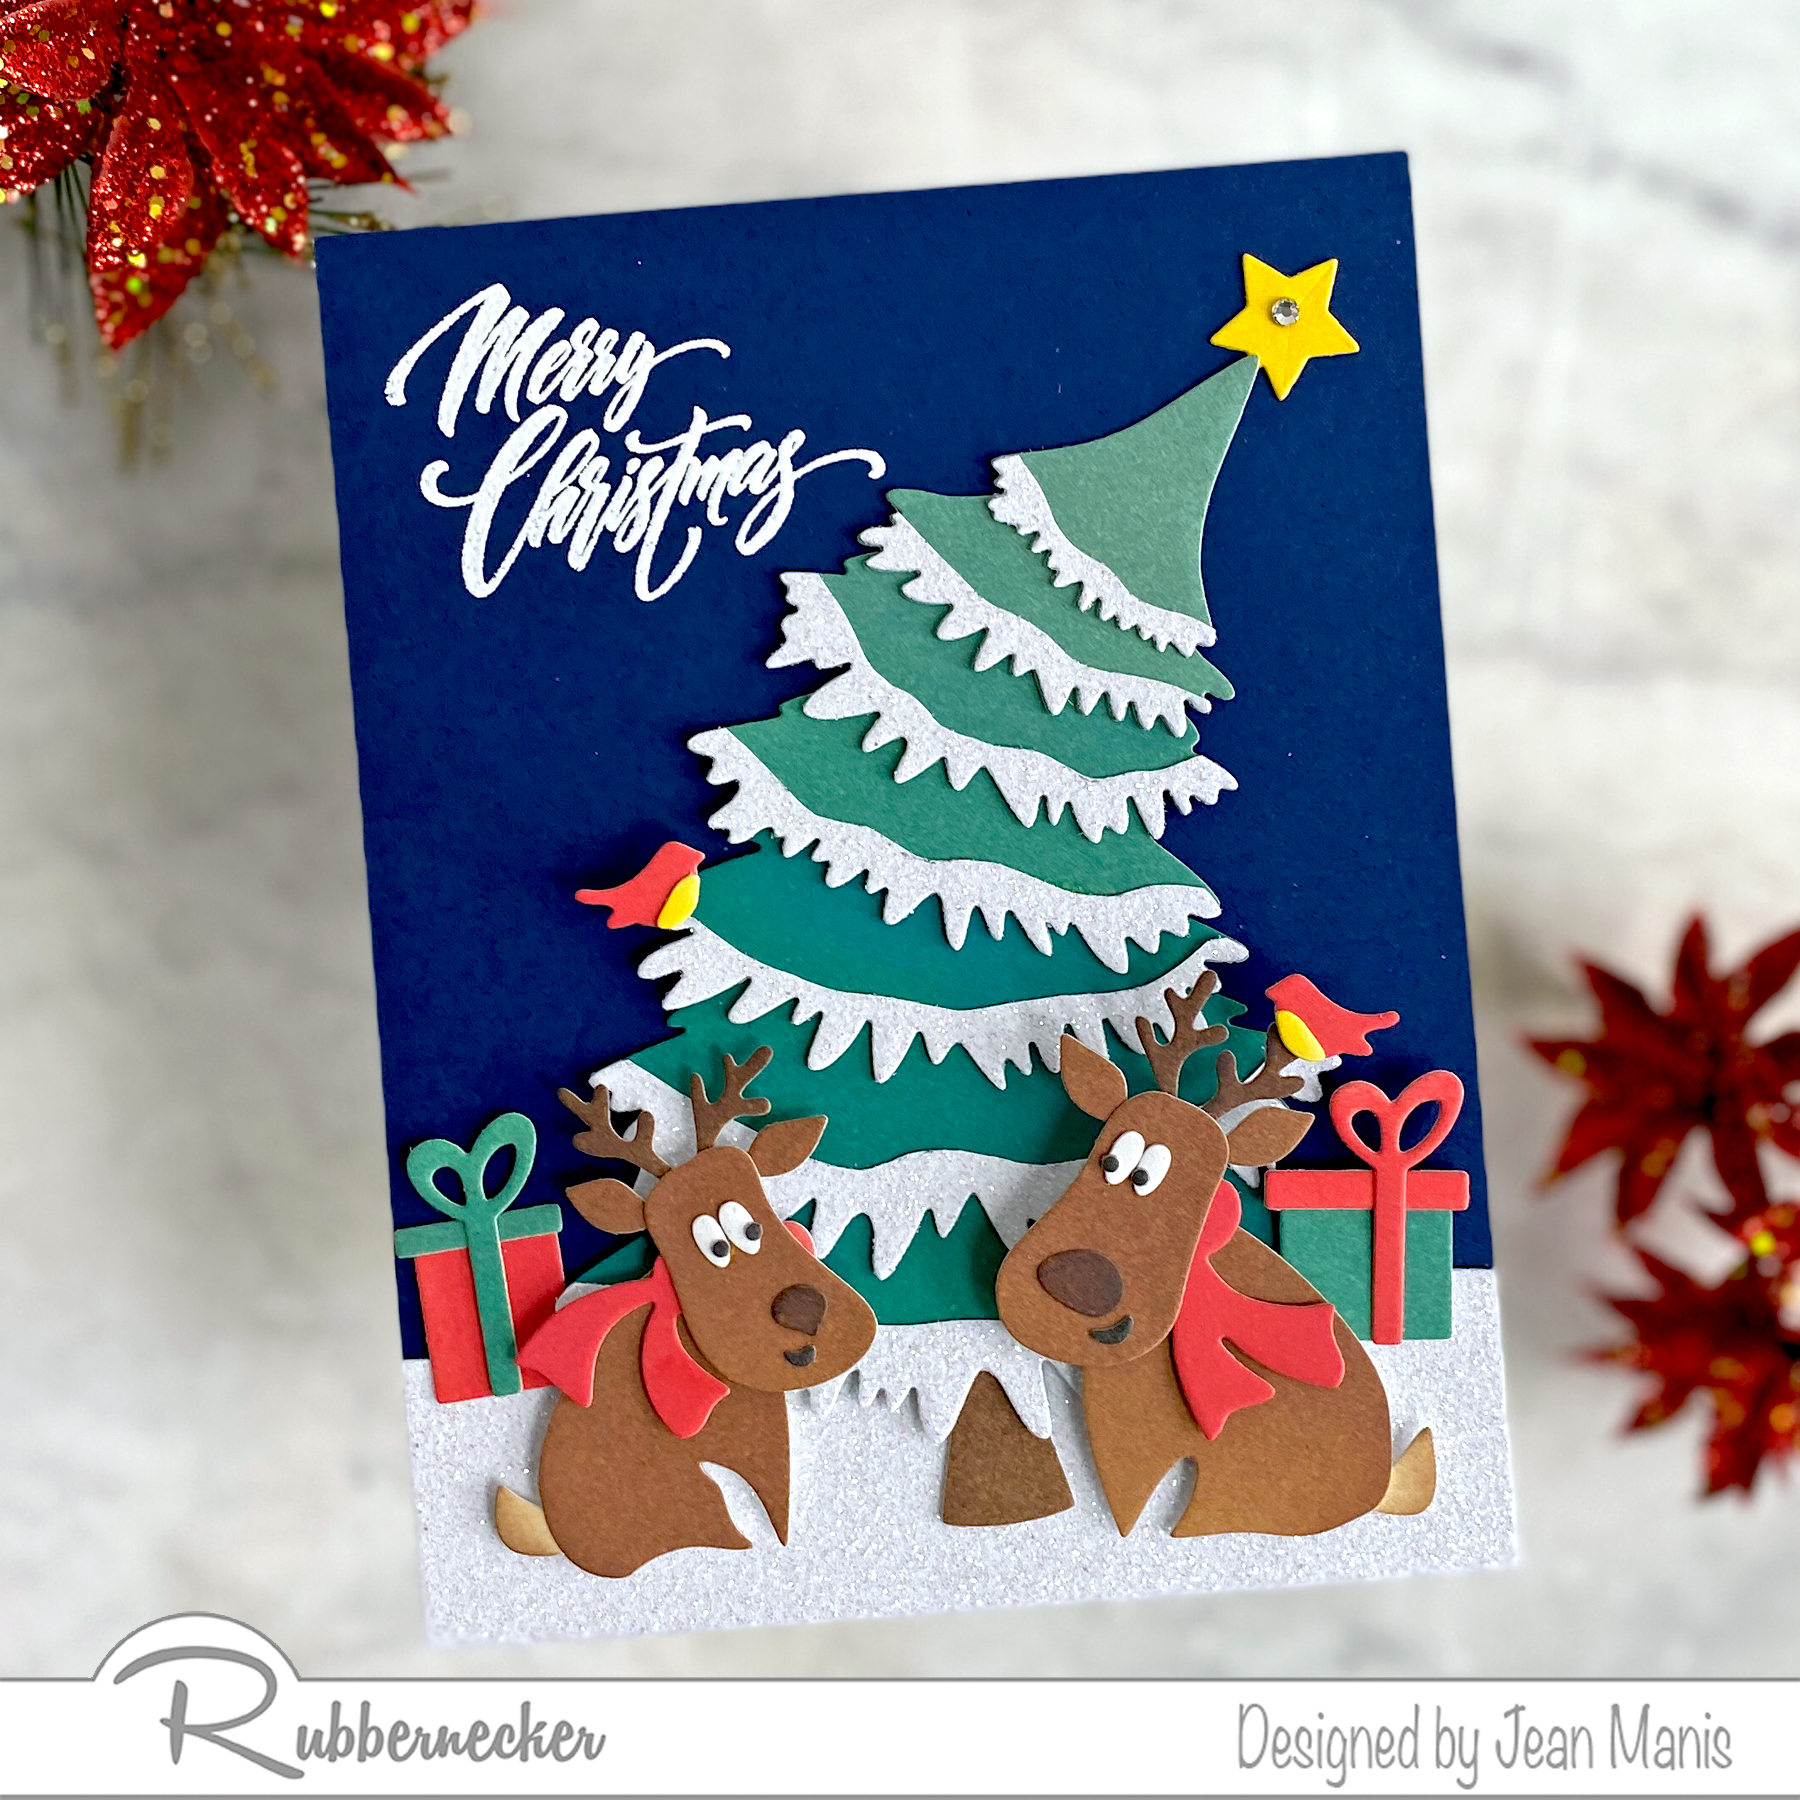
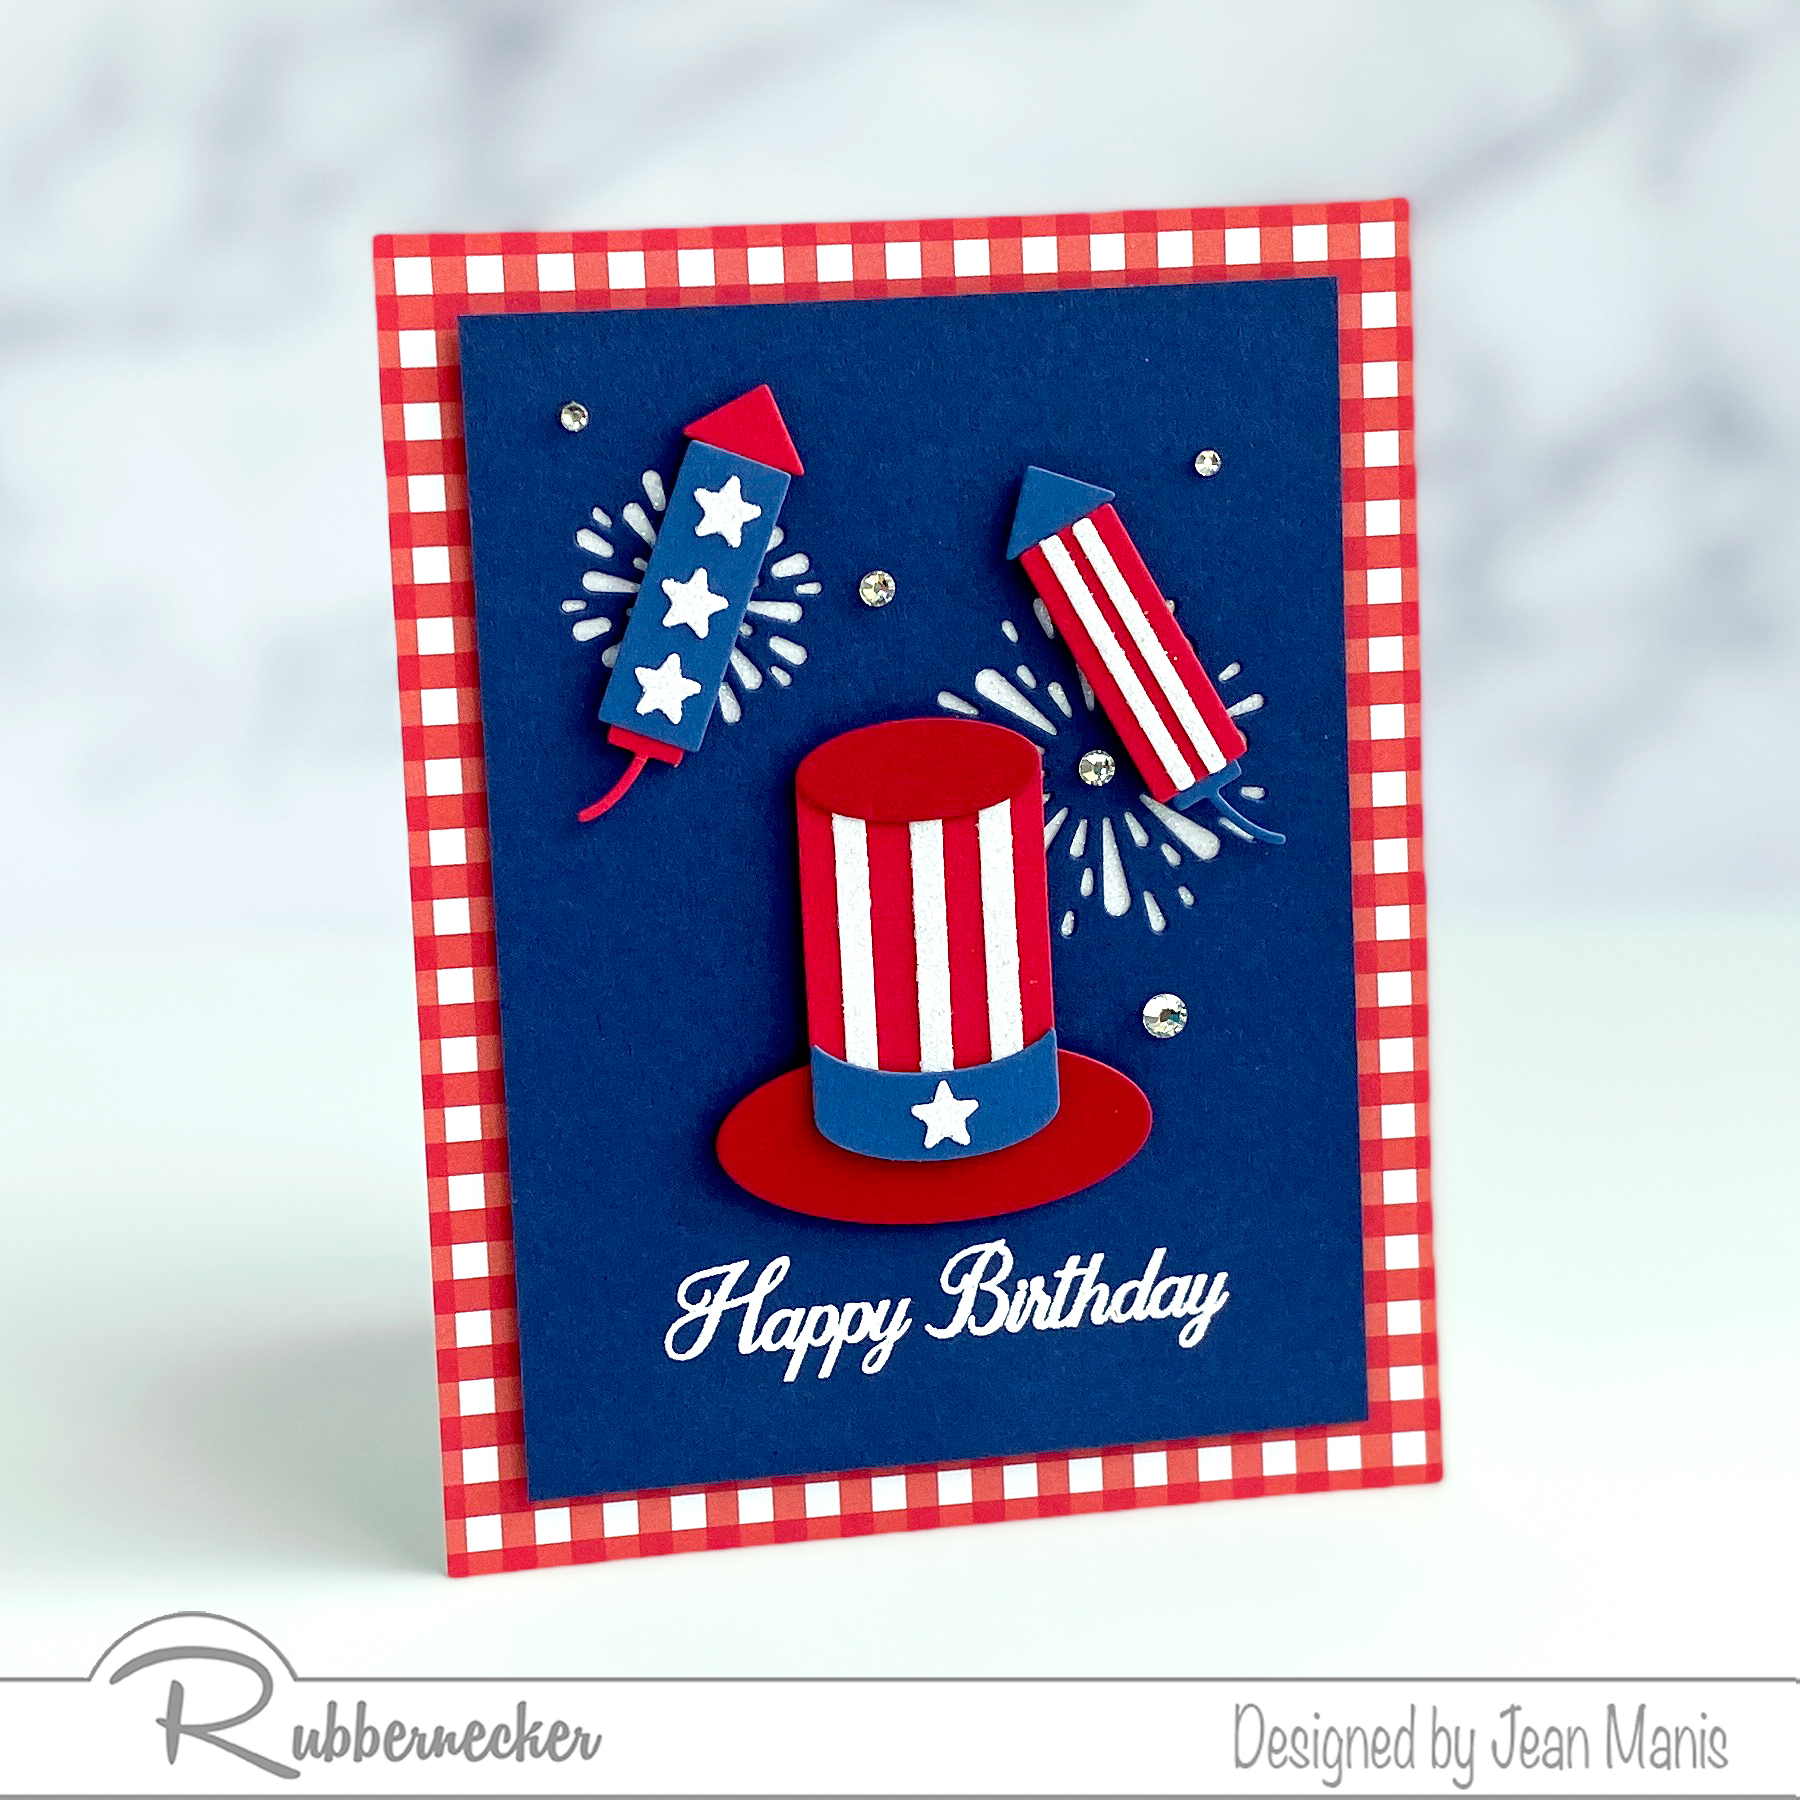
Hello! Experience the magic of winter beyond the holidays! As I mentioned HERE, I am looking to extend the use of my winter-themed supplies beyond the holidays. Today, I am sharing a CAS, winter-themed card perfect for a birthday, a thank you, or to brighten someone’s day. The card features a die cut of a boy sledding in the mountains, set against a stenciled sky that can transport anyone into a winter wonderland of joy and exhilaration.

Impression Obsession | Frosty Fun

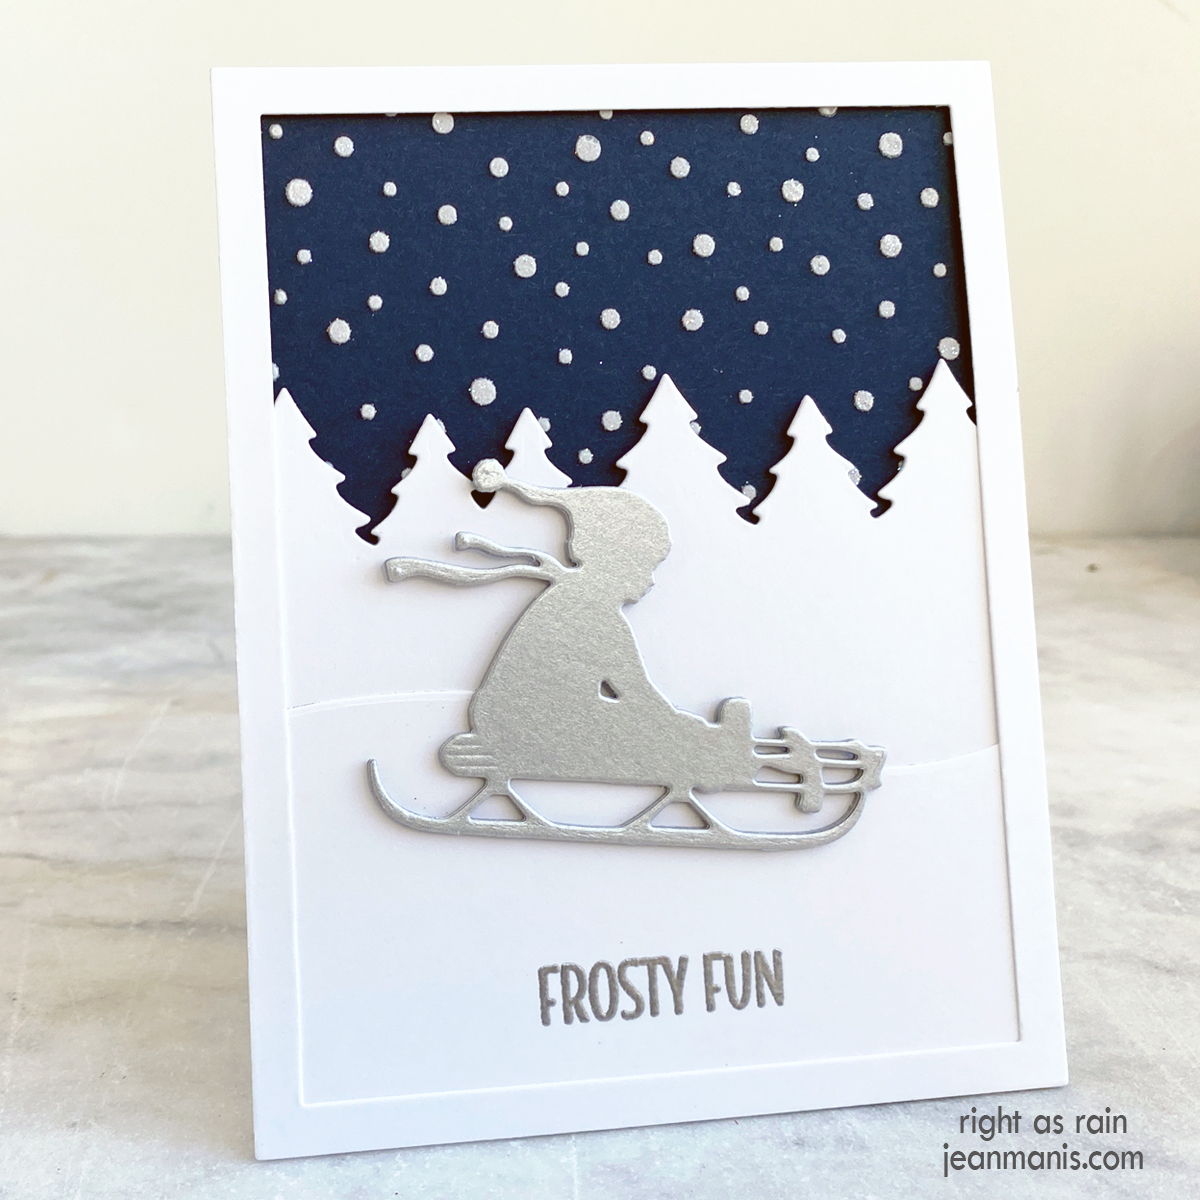
  • Apply white embossing paste through the Lawn Fawn Snow Flurries Stencil on to an A2-sized panel of Taylored Expressions Blue Corn cardstock. Sprinkle on Spellbinders Sparkle Dust Glitter and set aside to dry. Once dry, add to card base.
  • Cut trees from Spellbinders Snowdrift cardstock with one of the dies in the Impression Obsession Tree Line set. The die cuts along the top but not at the bottom. Trim as necessary and add to card base.
  • Stamp and heat-emboss in silver a sentiment from the Rubbernecker Snowmen with Presents set. Cut a snowbank on the heat-embossed panel with a curved die (now-retired MFT Stamps Snow Drifts set). Trim at the bottom and add to card base.
  • Cut the Impression Obsession Sled from Spellbinders Brushed Silver cardstock several times and adhere together for extra depth. I used a Sizzix Release Sheet to help with the cut as the end of the sled was not easily releasing. Attach sled to card front.
  • Cut a frame with the largest die in the MFT Stamps A2 Rectangle Frames set from Spellbinders Snowdrift cardstock and add to the card.

Impression Obsession | Frosty Fun

Impression Obsession | Frosty Fun


Rubbernecker | Die-cut Santa’s Workshop

Hello! Today, I am sharing a Christmas scene depicting Santa’s Workshop created with Rubbernecker stamp and die sets.

Rubbernecker | Die-cut Santa's Workshop

  • With black ink, stamp the sentiment in the Christmas Phrases Large/Small set on a light-blue cardstock panel. Trim to A2-size and add to card base.
  • Cut Picket Fence, including the post, from white cardstock twice.
  • For snow, cut 5-inch wide by 3/4-inch tall strip of glitter cardstock
  • Add fence and snow to stamped background.
  • Cut Shed and Shed Add On Spring pieces from white, black, and colored cardstock; assemble.
  • Cut Santa’s Sleigh from red and silver foil cardstock; assemble.
  • Cut tree with Evergreen Tree die set from green glitter cardstock.
  • Cut presents and Santa’s bag with dies in the Santa with Presents set from silver foil, red, and green cardstock; assemble.
  • Embellish Santa’s workshop (the shed) with lights cut with the Tiny Ornaments, stockings cut with the Fire Place set, and a customized sign created with dies in the Dog House set.
  • Add glitter glue to lights.
  • Add focal elements to card with dot and foam adhesive.

Rubbernecker | Die-cut Santa's Workshop


Rubbernecker | Whimsical Die-cut Christmas Scene

Hello! Today, I am sharing a whimsical, Christmas scene created with Rubbernecker stamp and die sets. Rubbernecker has been sharing Christmas inspiration all month; head to their blog for more inspiration.

Rubbernecker | Whimsical Die-cut Christmas Scene

Here’s how you can make this card:

  • Stamp and heat-emboss the Christmas Phrases Large/Small sentiment, (this stamp set is filled with wonderful sentiments), on a dark blue A2-size cardstock panel. Cut glitter cardstock with die in the Slimline Hills set and add to bottom for snow.
  • Cut Slimline Christmas Tree layers from ink-colored cardstock. Cut snow from glitter cardstock with the tree layer dies and fussy-cut along the top. Adhere snow to tree layers. Assemble tree, titling the layers towards the right. Add star to top and add assembled tree to scene.
  • Cut deer and birds from ink-colored cardstock with Reindeer and Bird’s die set. Assemble and add to scene.
  • To embellish, cut packages from ink-colored cardstock with the Santa Mini set.

Rubbernecker | Whimsical Die-cut Christmas Scene

Rubbernecker | Whimsical Die-cut Christmas Scene


Rubbernecker | 4th of July Birthday Card

Hello! Today, I am sharing a 4th of July-themed birthday card created with Rubbernecker supplies.

Rubbernecker | 4th of July Birthday Card

  • Cover A2-size card base with patterned paper.
  • Stamp and heat-emboss in white the 4th of July Fireworks sentiment on navy cardstock. To create a horizontal sentiment, mask “Birthday” when stamping “Happy” and mask “Happy” when stamping “Birthday.” Trim panel to 3 5/8 x 4 7/8 inches. Add to card front.
  • Cut hat and fireworks with USA/Uncle Sam die set from red, dark red, blue, and white glitter cardstock; assemble.
  • Use hat and fireworks to determine placement of fireworks. Cut navy panel with dies in the Star Bursts/Fireworks set. Back with white glitter cardstock. Add navy panel to card base.
  • Add hat and fireworks to panel with foam adhesive. Embellish with gems.

Rubbernecker | 4th of July Birthday Card

Rubbernecker | Summer Road Trip Scene

Hello! Today I am sharing a die-cut scene depicting a road trip in the American Southwest created with Rubbernecker supplies.

Rubbernecker | Summer Road Trip Scene

Create background
  • Apply alcohol inks to Yupo paper. Cut the Double Buttes and Single Butte with dies in the Southwest Hills set.
  • Cut hill from tan cardstock with die in the Southwest Hills set. Add ink to edge for definition.
Create focal elements
  • Cut Beach Van from white, dark teal, gray, black, and silver foil cardstock. Assemble using instructions provided on Beach Van product page.
Assembly & Finishing Touches
  • Stamp Mini Simple Sayings “Relax” sentiment in black on white cardstock. Cut with largest Clouds die. Cut additional clouds.
  • With Cactus die, cut cacti from cardstock colored with green ink.
  • With Sun Moon die, cut sun from cardstock colored with yellow ink.
  • Cut small flowers with Tiny Flower Buds die from cardstock colored with yellow ink; adhere to cactus plants.
  • Add cacti and sun to scene with dot adhesive. Add Beach Van and clouds with foam adhesive.

Rubbernecker | Summer Road Trip Scene