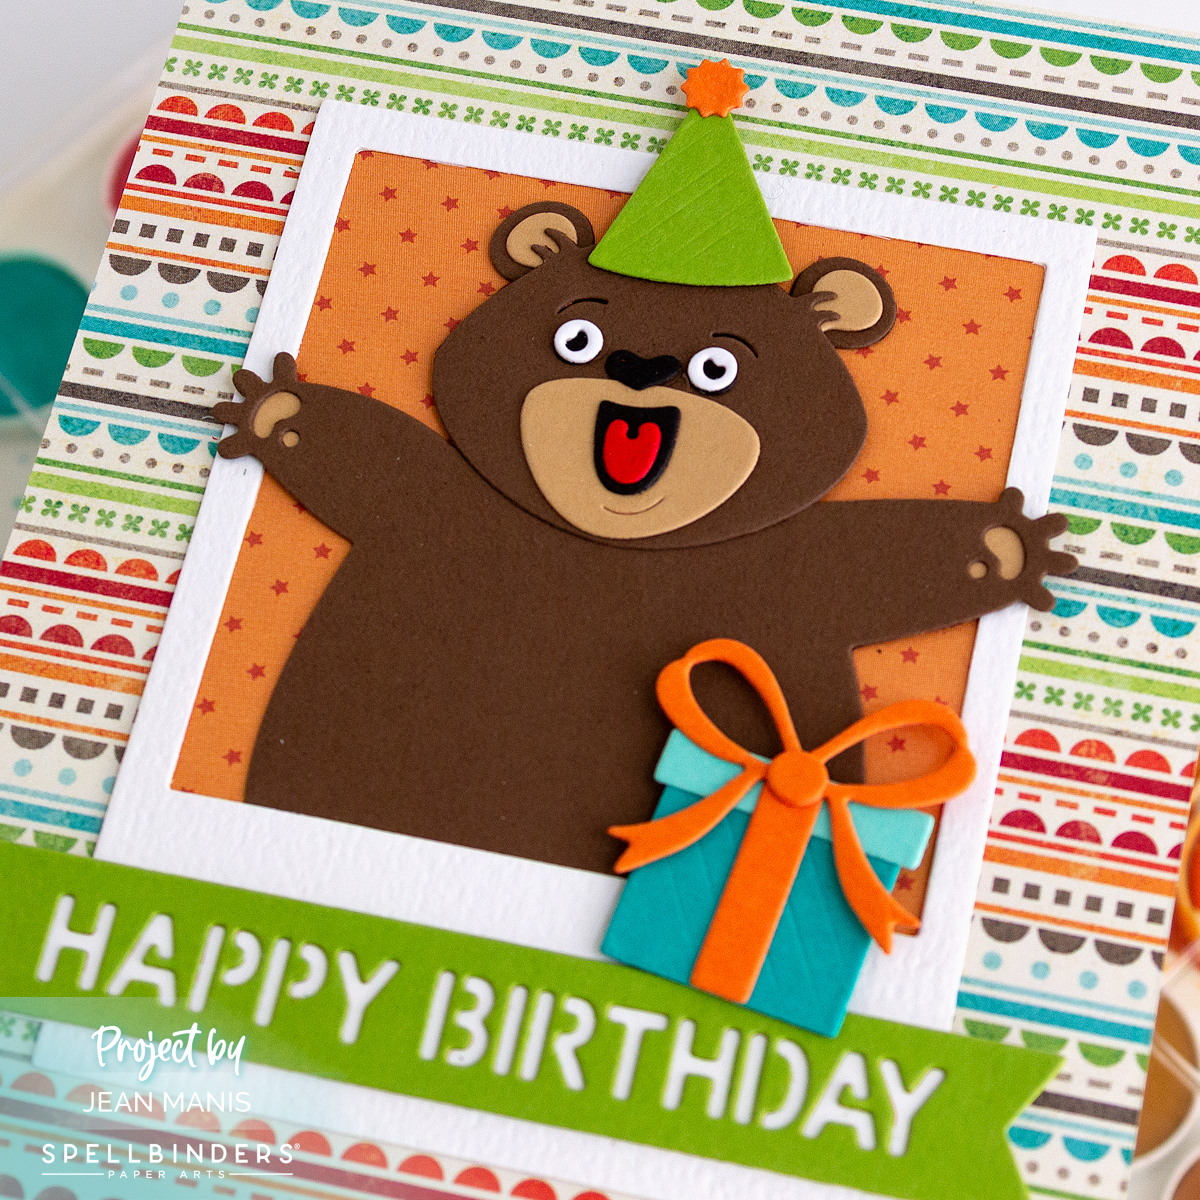
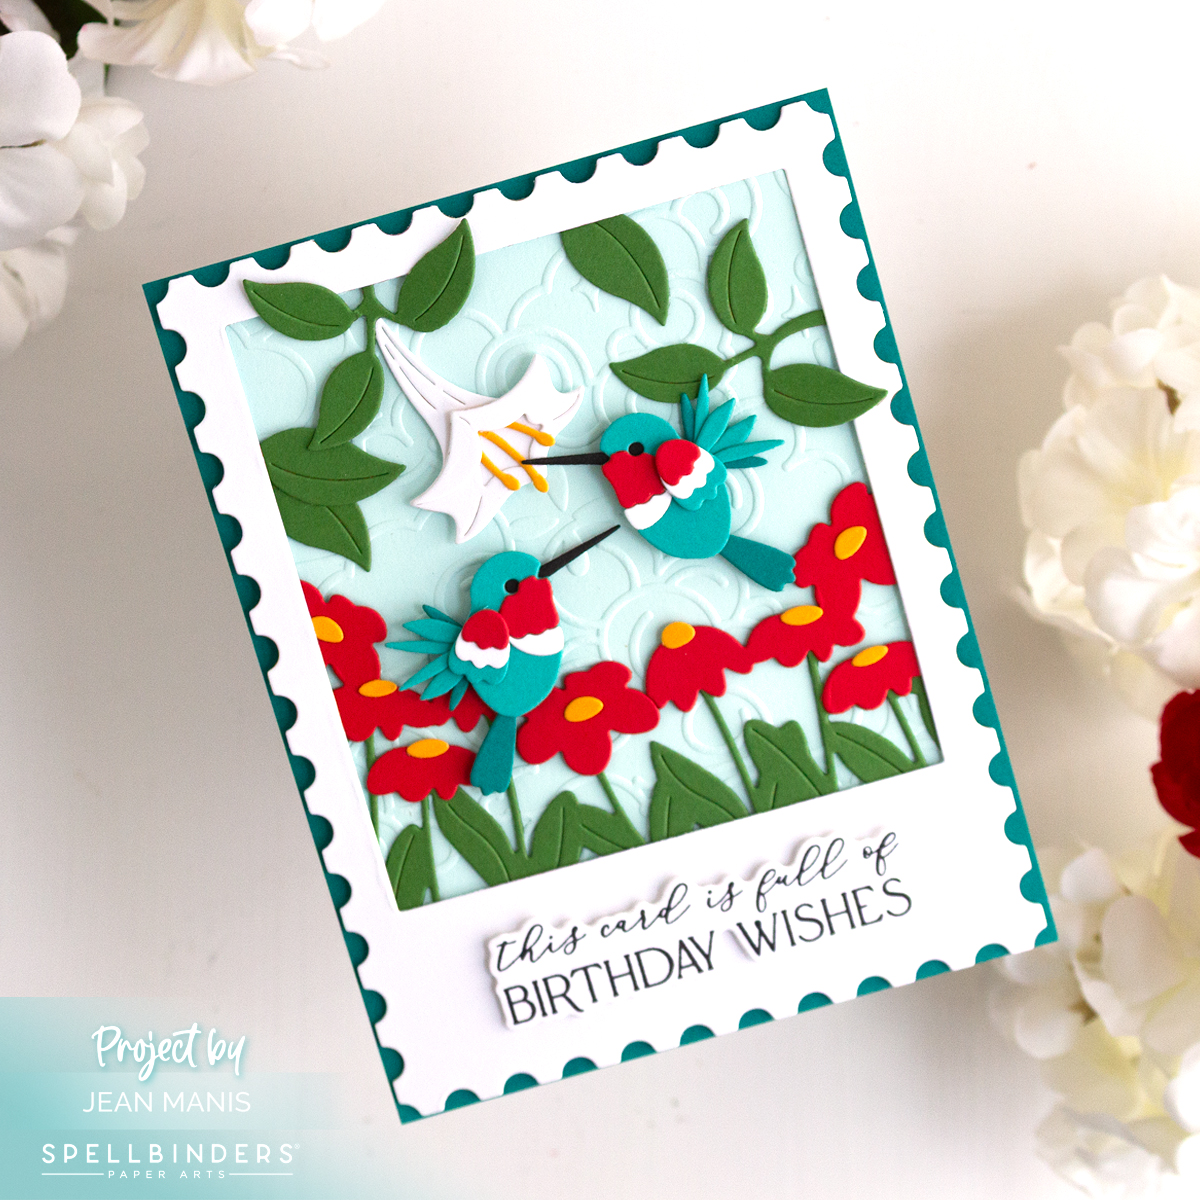
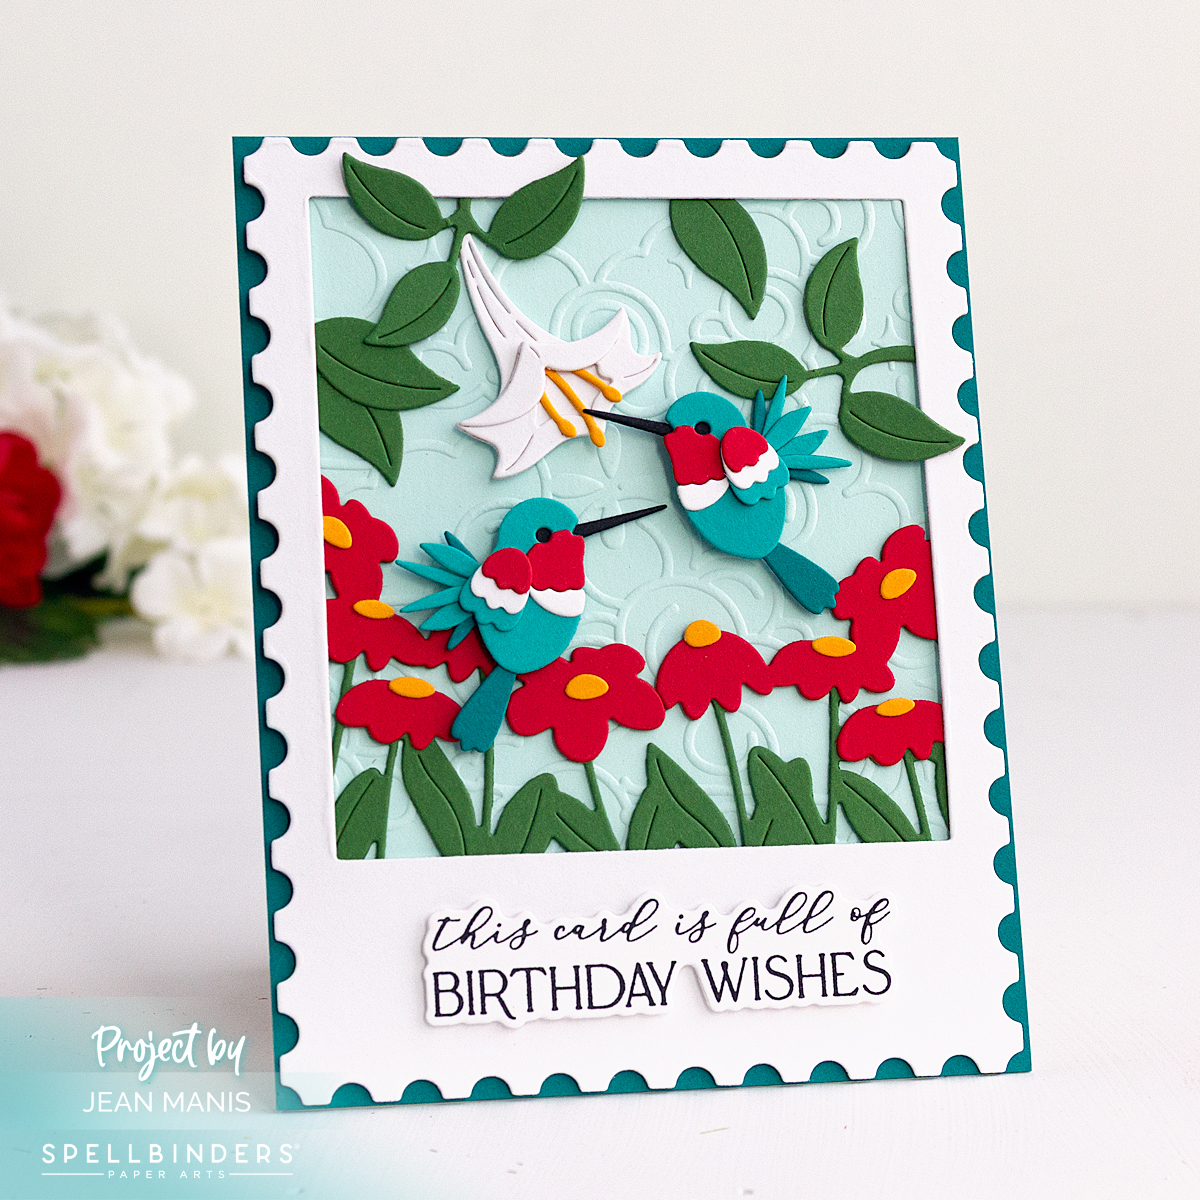
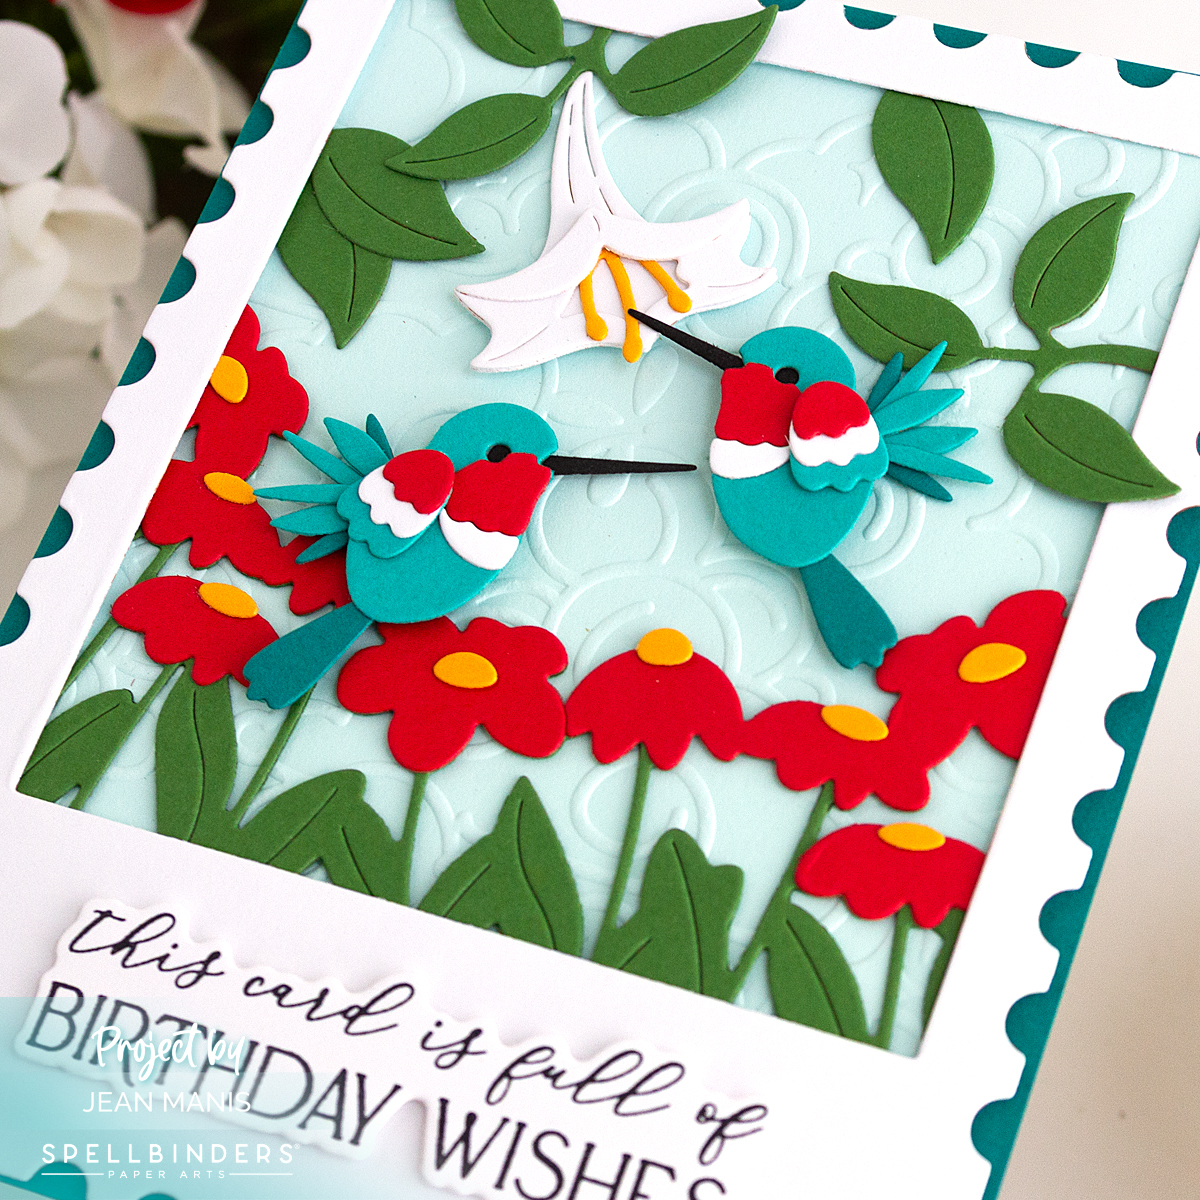
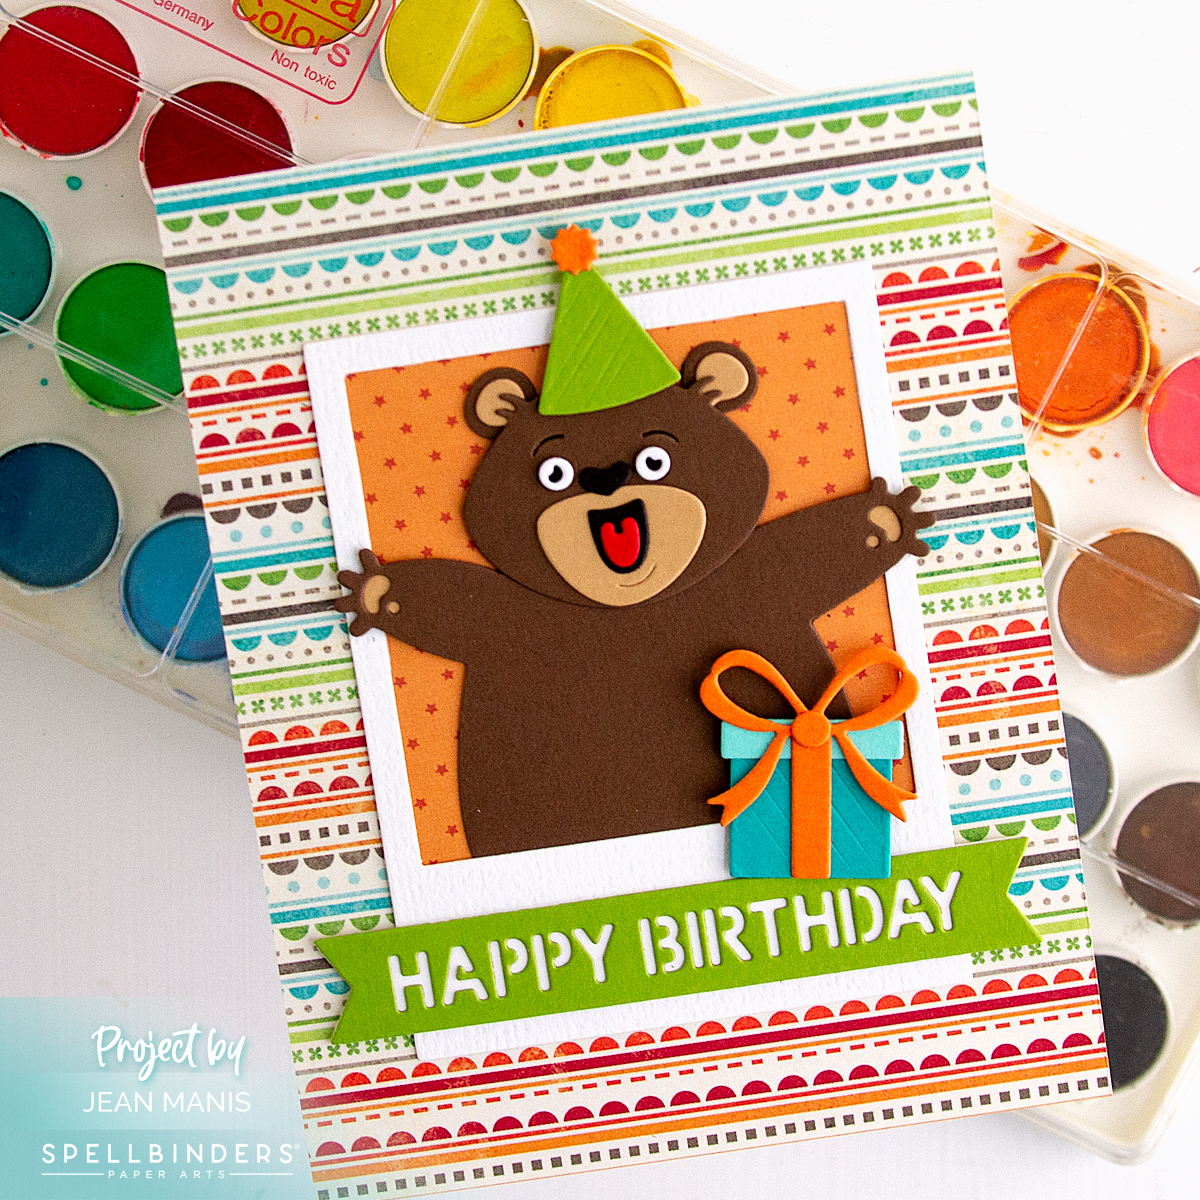
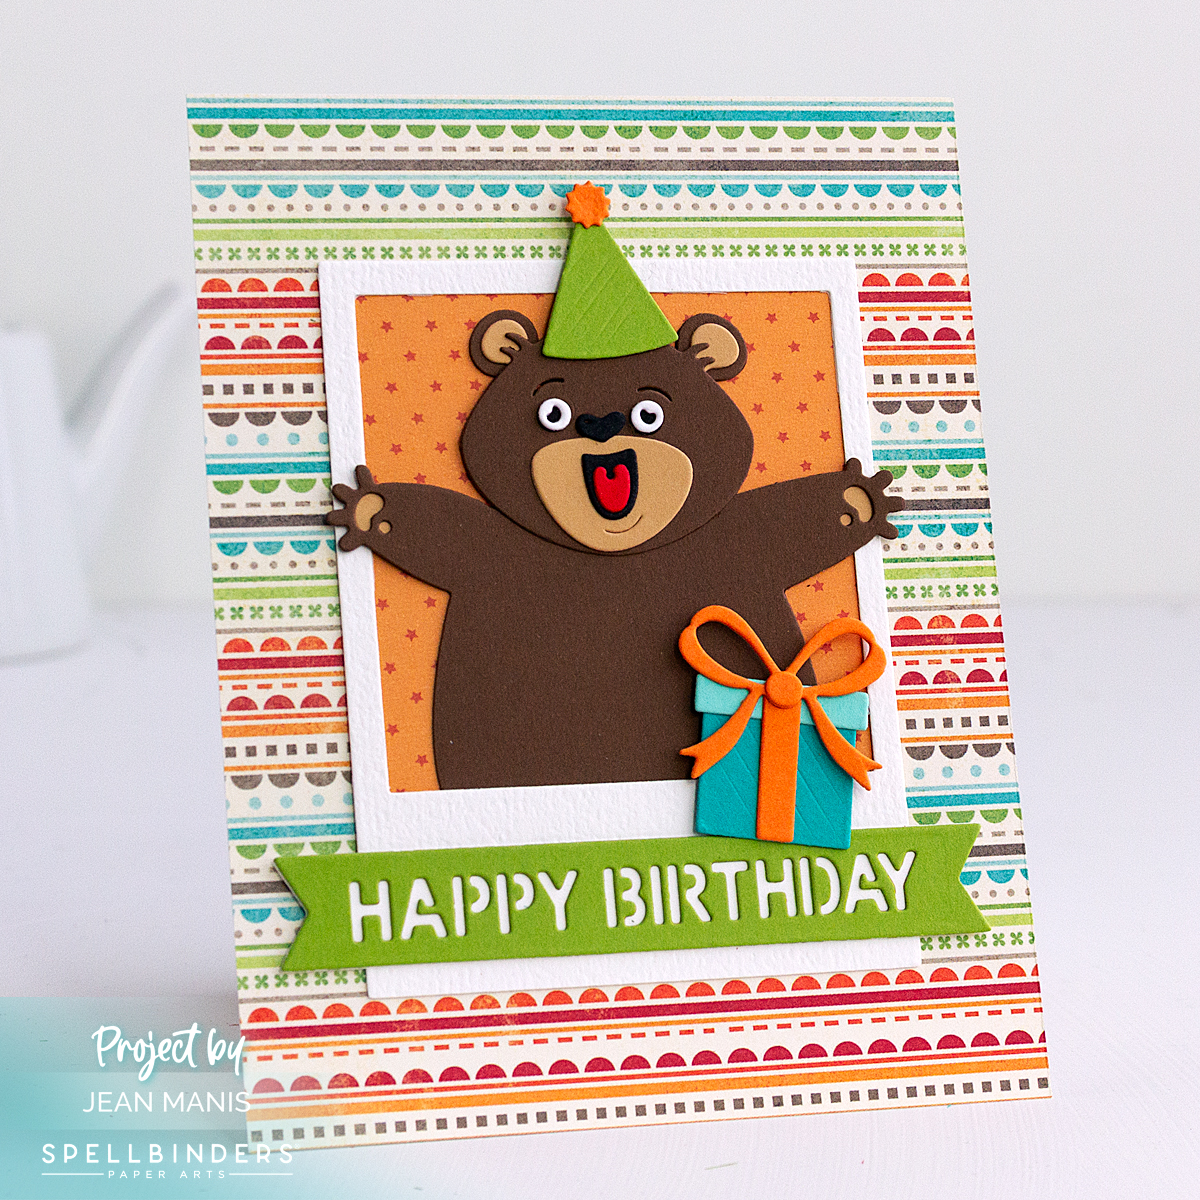
Spellbinders | City Holiday Collection

Hello! Today, I’m sharing a festive Christmas card created with Yana Smakula’s City Holiday Collection for Spellbinders. My inspiration began with one of the Spellbinders Holiday Color Deck cards. You can read more about the cards HERE. I used the same illustration and palette as on the barn card HERE. With those colors as my guide, I created a charming apartment dressed for the holidays and finished the scene with a hot-foiled BetterPress sentiment for an elegant touch.

Spellbinders | City Holiday Collection

    • Dry-emboss a 5″ x 7″ Raven cardstock panel with the Sparkling Snow folder. Add to a card base.
    • Cut the City Holiday building and snowbank from a variety of cardstock colors and assemble.
    • Hot foil in gold the Christmas Cheer sentiment and cut with the coordinating die. I cut foam with the same die and glued to the back for stability and depth.
    • Adhere the building, snowbank, and sentiment to the prepared base using glue and foam squares.

Spellbinders | City Holiday Collection

Spellbinders | City Holiday Collection


Spellbinders | Make a Splash

Hello! I’m back with another underwater-themed card, this time featuring the Splash Tales die set, the August 2025 Large Die of the Month at Spellbinders. This fun and generous set includes everything you need to build a lively ocean scene. I used repetition to create five colorful fish in a variety of hues—almost like an underwater bouquet—surrounded by flowing plant life. The die-cut sentiment “Make a Splash” is perfect for a cheerful hello or celebration.

Spellbinders | Make a Splash

    • Create an A2-size card base from white cardstock.
    • Cut Seaside cardstock with the largest die in the Essential Arches set and adhere to base.
    • Cut scene elements from a variety of cardstock colors using dies in the Large Die and Small Die sets. (You can see my Small Die set card HERE.) Assemble. Die-cut the sentiment from white cardstock and white foam. Assemble with glitter foam side down. This method ensures that the sentiment is well-supported, although the step is not required.
    • Add elements to prepared card base with glue and foam squares.

Spellbinders | Make a Splash


Spellbinders | Dive Into Joy

Hello! Today I’m sharing a card that takes us on an underwater adventure, made with the August 2025 Small Die of the Month set from Spellbinders. I built a lively ocean scene complete with two divers, colorful fish, and flowing underwater plants. The sentiment “You Brighten My Day” adds a cheerful touch, making this card perfect for sending a little sunshine to someone special. The details in this die set make the scene come to life—it was such a joy to put together!

Spellbinders | Dive Into Joy

    • Create an A2-size card base from white cardstock.
    • With the two largest dies in the Essential Stylish Ovals set, cut a vellum oval and a Teal Topaz oval. Adhere to card base.
    • Cut Small Die elements from a variety of cardstock colors. Assemble.
    • Press sentiment and cut with coordinating die.
    • Add elements to card base with glue and foam adhesive.

Spellbinders | Dive Into Joy


Spellbinders | Santa and Mrs. Claus

Hello! I had so much fun creating another holiday card with The Clauses die set at Spellbinders—this time featuring both Santa and Mrs. Claus hard at work at the North Pole! This duo brings charm and teamwork to the season. You can see my first card with the die set HERE.

Spellbinders | Santa and Mrs. Claus

    • To begin, cover card base with dark green cardstock. Cut a panel of patterned paper (Santa’s Village Collection) and add to the base.
    • Cut Mrs. Claus and Santa from a variety of cardstock colors and textures.  Assemble and add to prepared base with foam squares.
    • Press the Merry and Bright sentiment on Classic White cardstock and cut with the coordinating die. Adhere to the base.
    • Mrs. Claus may not get top billing, but the holidays wouldn’t happen without her!

Spellbinders | Santa and Mrs. Claus

The Clauses Etched Dies from the North Pole Friends Collection by Simon…
[ SPL ]
Spellbinders – Simon Hurley – North Pole Friends Collection – Etched Dies -…
[ SBC ]
Spellbinders The Clauses Etched Dies s6-262
[ SSS ]
Merry & Bright Sentiment Strips Press Plate & Die Set from the More Be -…
[ SPL ]
Spellbinders – BetterPress Collection – Press Plates and Die Set – Merry and…
[ SBC ]
Spellbinders Merry and Bright Sentiment Strips Press Plate and Die Set bp-049
[ SSS ]
Simple Stories – Santas Village Collection – 6 x 8 Paper Pad
[ SBC ]
Simple Stories Santa”s Village 6 x 8 Paper Pad 23015
[ SSS ]
Pomegranate ColorWheel Cardstock 8.5″ x 11″ – 10 Sheets | Spellbinders -…
[ SPL ]
Poppy ColorWheel Cardstock 8.5″ x 11″ – 10 Sheets | Spellbinders -…
[ SPL ]
Classic White ColorWheel Cardstock 8.5″” x 11″” – 10 Sheets | Spellbinders…
[ SPL ]
Raven ColorWheel Cardstock 8.5″ x 11″ – 10 Sheets | Spellbinders -…
[ SPL ]
Bellini ColorWheel Cardstock 8.5″ x 11″ – 10 Sheets | Spellbinders -…
[ SPL ]
Blush ColorWheel Cardstock 8.5″ x 11″ – 10 Sheets | Spellbinders -…
[ SPL ]
Gold Assortment Treasured Cardstock 8 1/2″ x 11 -15 Pack | Spellbinders -…
[ SPL ]
Onyx Assorted Treasured Cardstock 8 1/2″ x 11″ – 15 Sheets | Spellbinders -…
[ SPL ]
Doodlebug Design – 12 x 12 Crushed Velvet Cardstock Assortment
[ SBC ]
White Foam Squares Mix 1MM Adhesive | Spellbinders Paper Arts -…
[ SPL ]

Spellbinders | New Take on a Holiday Barn

Hello! It’s amazing how a change in color palette can completely transform a design! I used the same Spellbinders Country Christmas dies and BetterPress sentiment as in my previous project—but this time, I let one of the Spellbinders Color Deck cards guide my creative direction. Each Color Deck card features a festive illustration and five blank swatches, encouraging you to experiment with custom combinations. I shared more information about the card in this post. It’s a reminder that even the most traditional designs can feel brand new with a little color play.

Spellbinders | New Take on a Holiday Barn

    • Dry-emboss an A2-size panel of Windy cardstock with the Sparkling Snow folder. Adhere to a card base.
    • Press the sentiment in gold ink on Classic White cardstock.
    • Use a die in the Landscape Edges set to cut a snowbank from the sentiment panel. Trim and add to the prepared base.
    • Cut the barn pieces from a variety of cardstock colors and assemble. Cut the trees with the same set.
    • Add barn and trees to the card base.

Spellbinders | New Take on a Holiday Barn