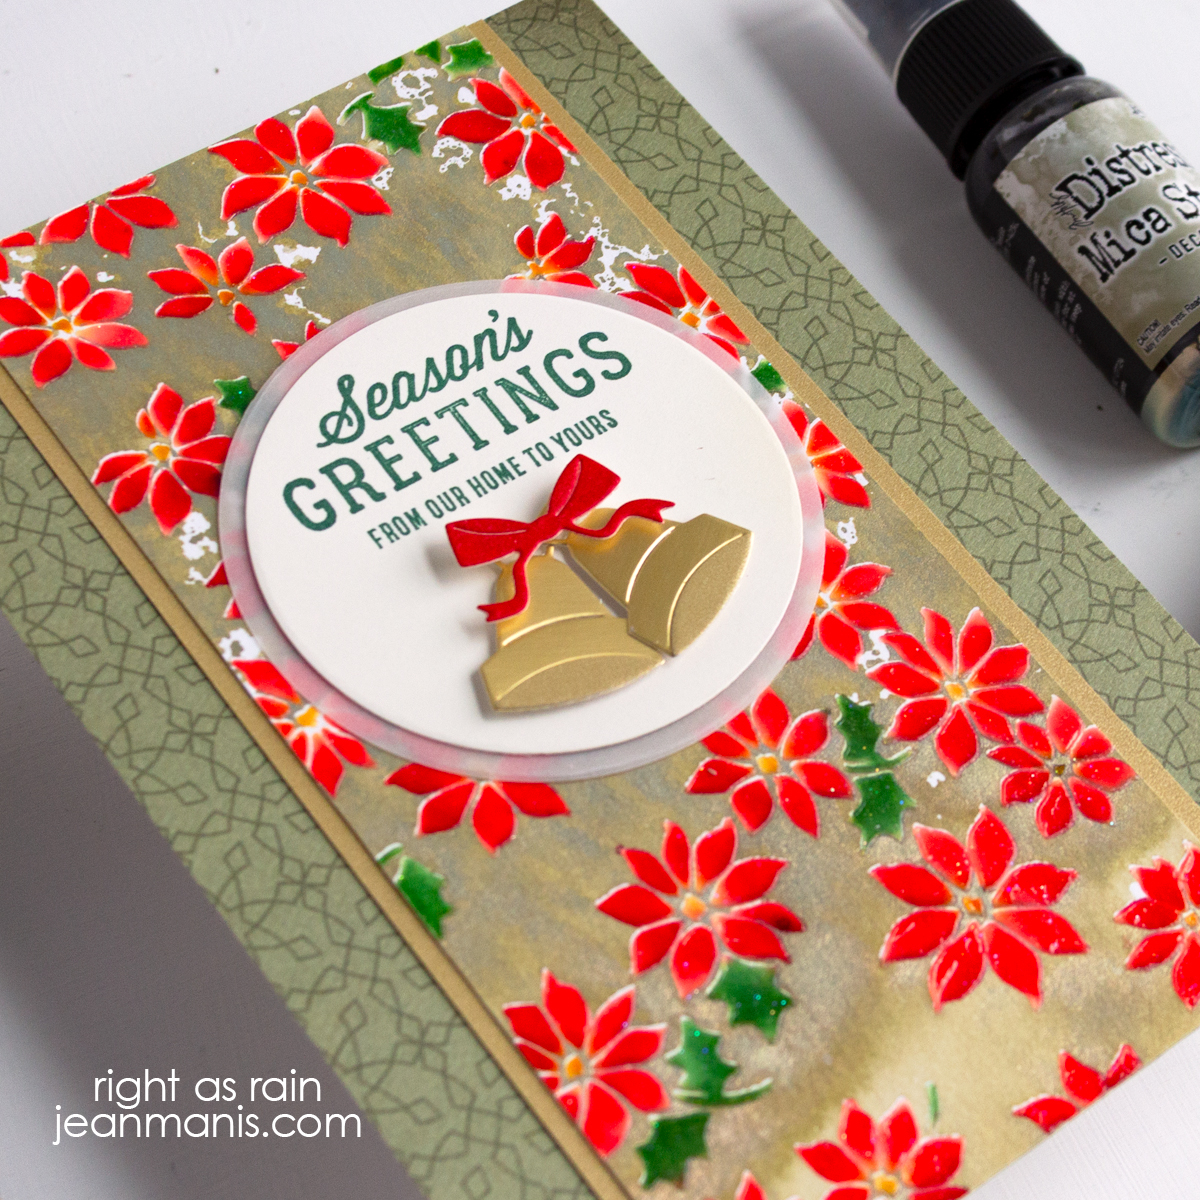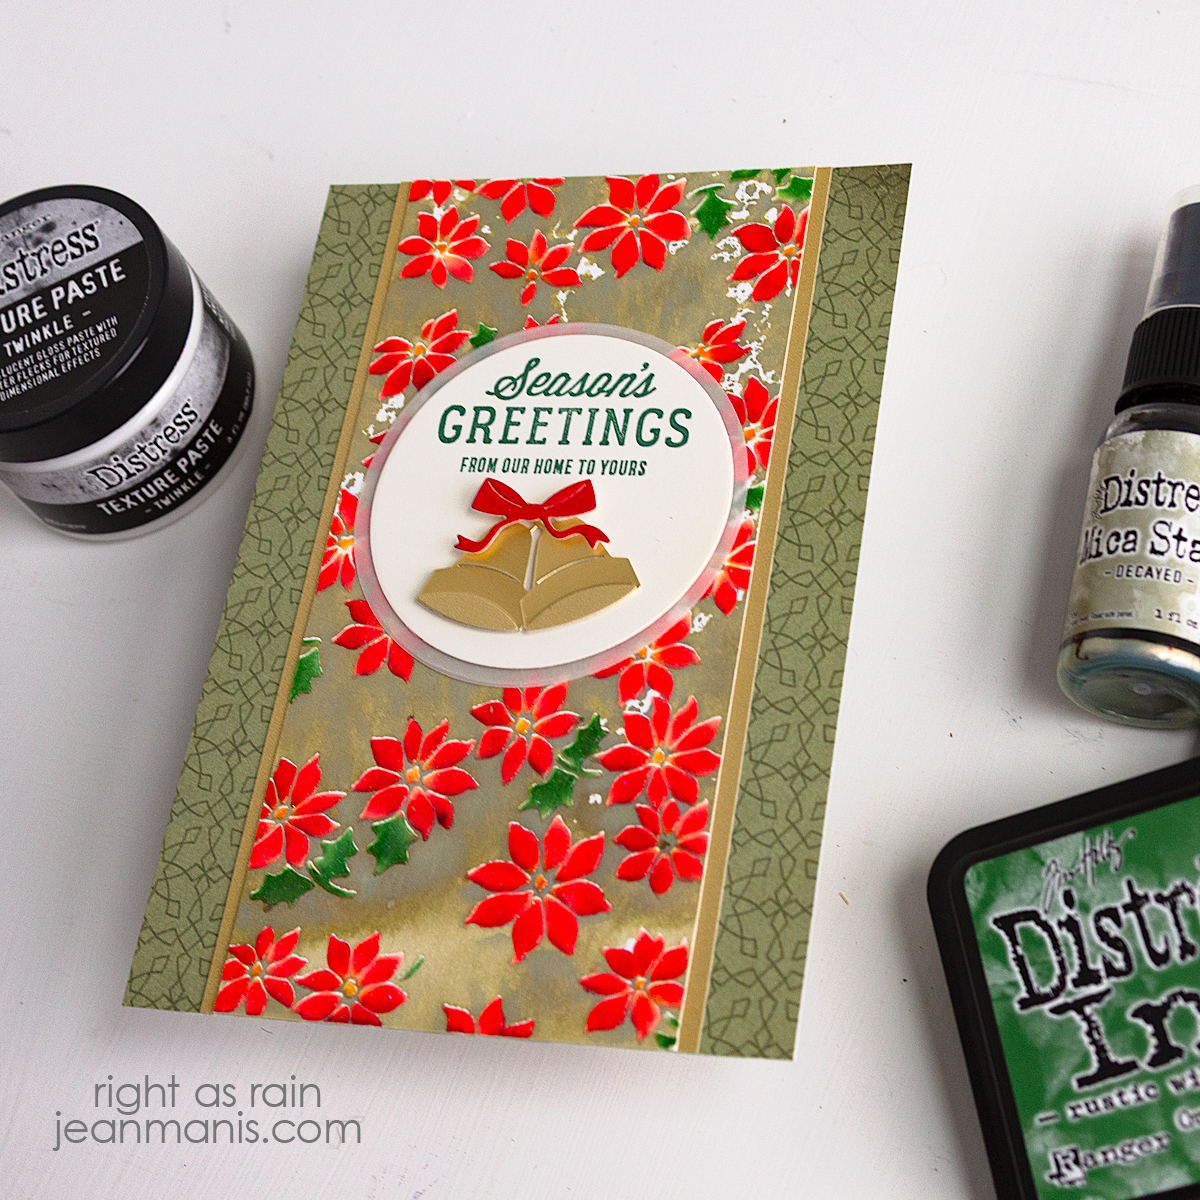
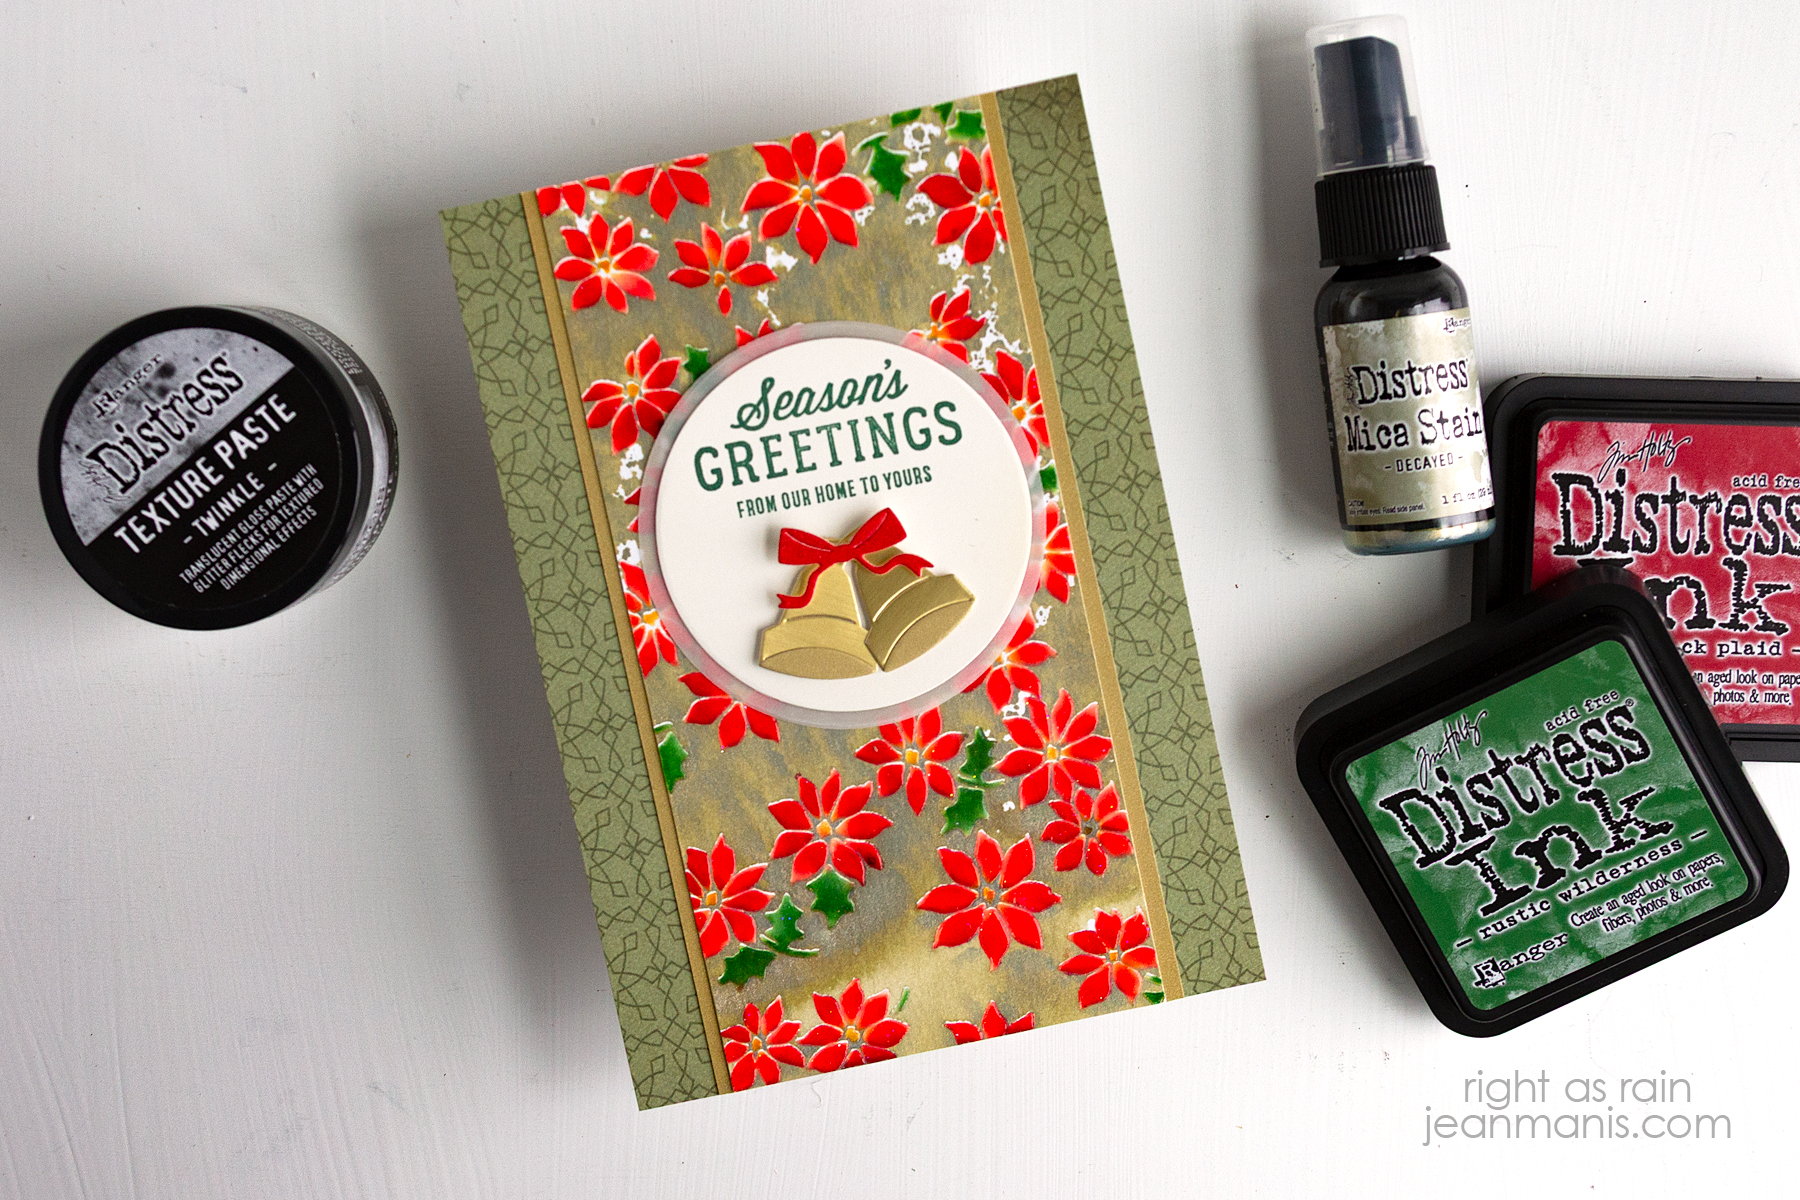
Hello! Today I’m sharing a Christmas card created with Tim Holtz products. The sentiment and focal items are kept understated to spotlight the background, where the texture and dimension really come through. This mixed media approach is a bit different from my usual clean style, but it’s been fun to experiment.
-
- Create a monoprint with the Tiny Poinsettia stencil using Decayed Mica Stain. I shared another stencil monoprint card HERE.
- Once dry, ink the poinsettias with the stencil in place.
- Apply Twinkle paste through the stencil and set aside to dry. I noticed that the colors change considerably with the application of the paste.
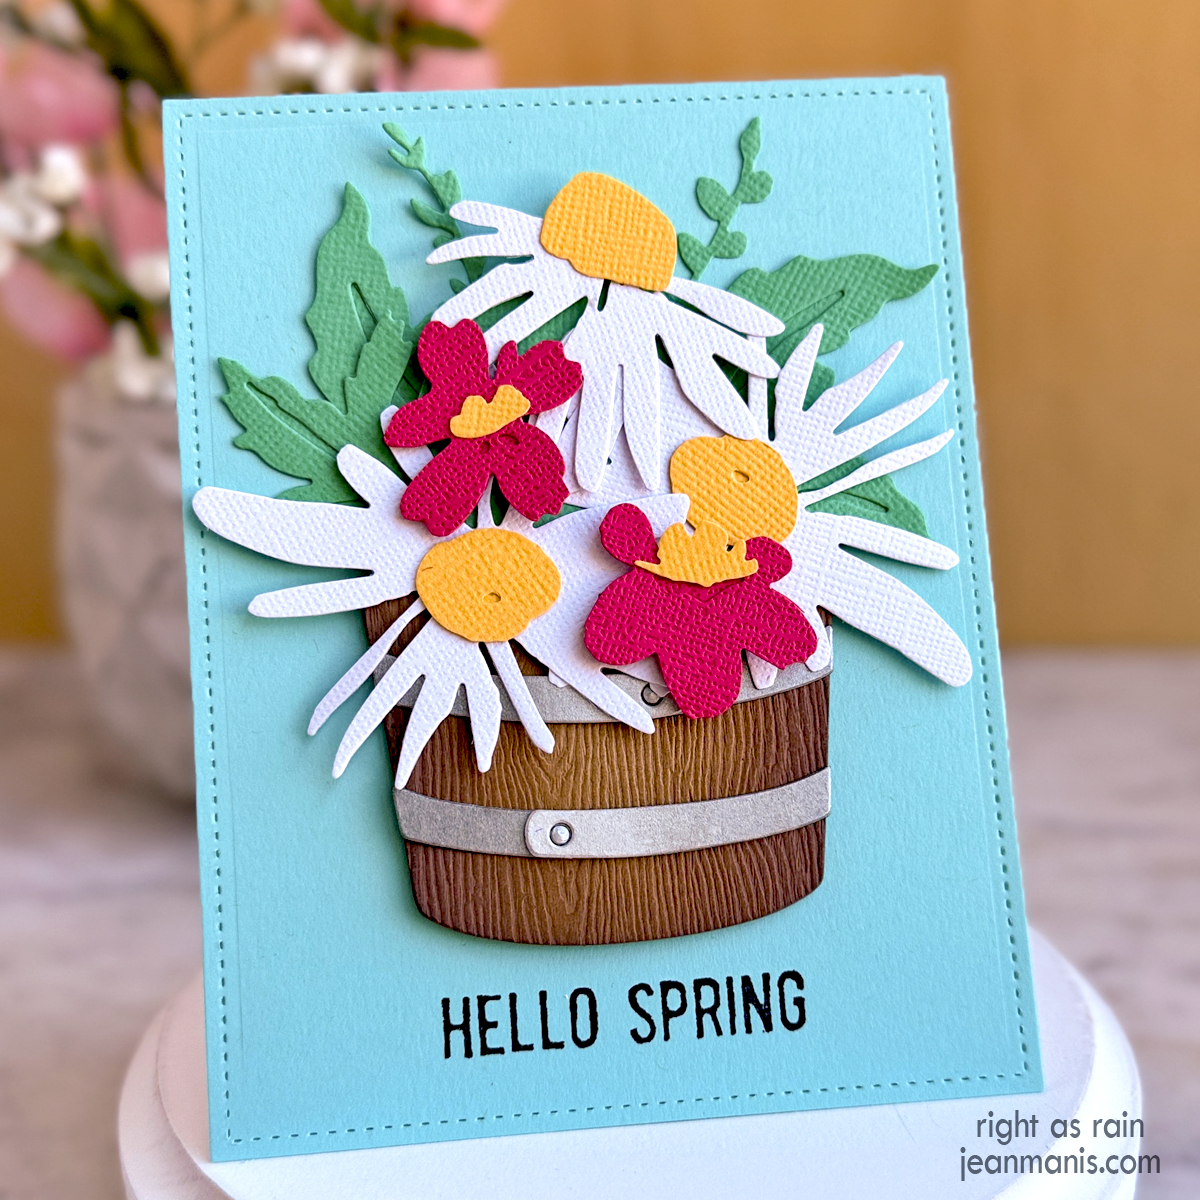
- Trim and mat the panel with gold cardstock. Add the assembly to a card base covered with seasonal patterned paper (I used Carta Bella from several years ago). The overall size is 4 3/4″ x 6 7/8″.
- Stamp the Festive Overlay sentiment in Library Green ink on off-white cardstock. Cut with a circle die. Mat with a slightly larger vellum circle. Add to the base.
- Cut the bells with dies in the Festive Things set. Assemble and add to the prepared base.