Watercolored Penny Black Santa Paws

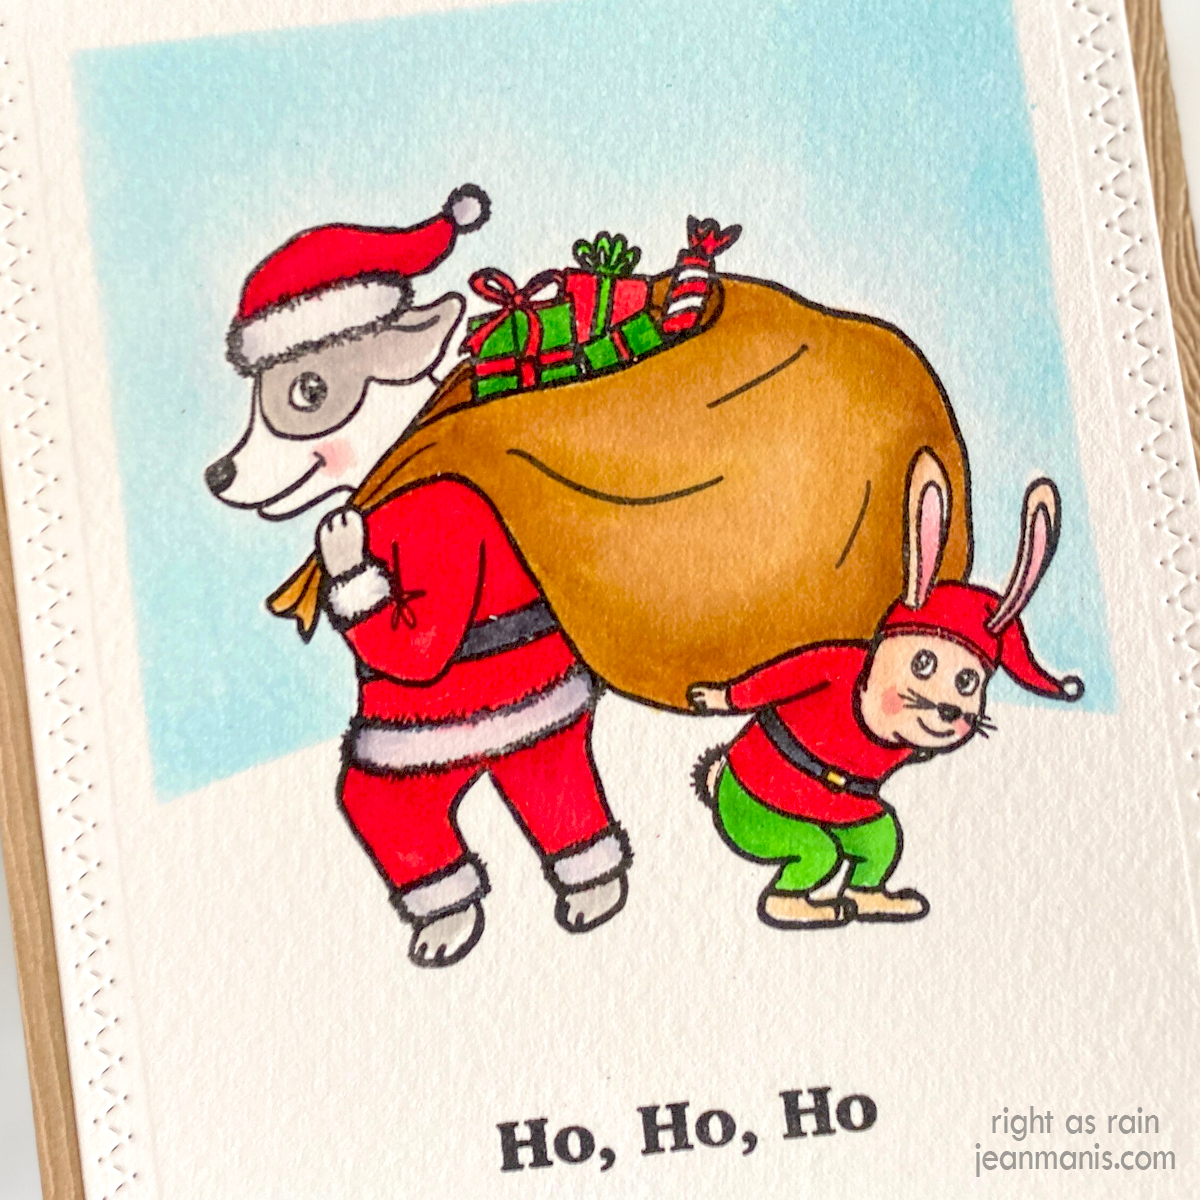
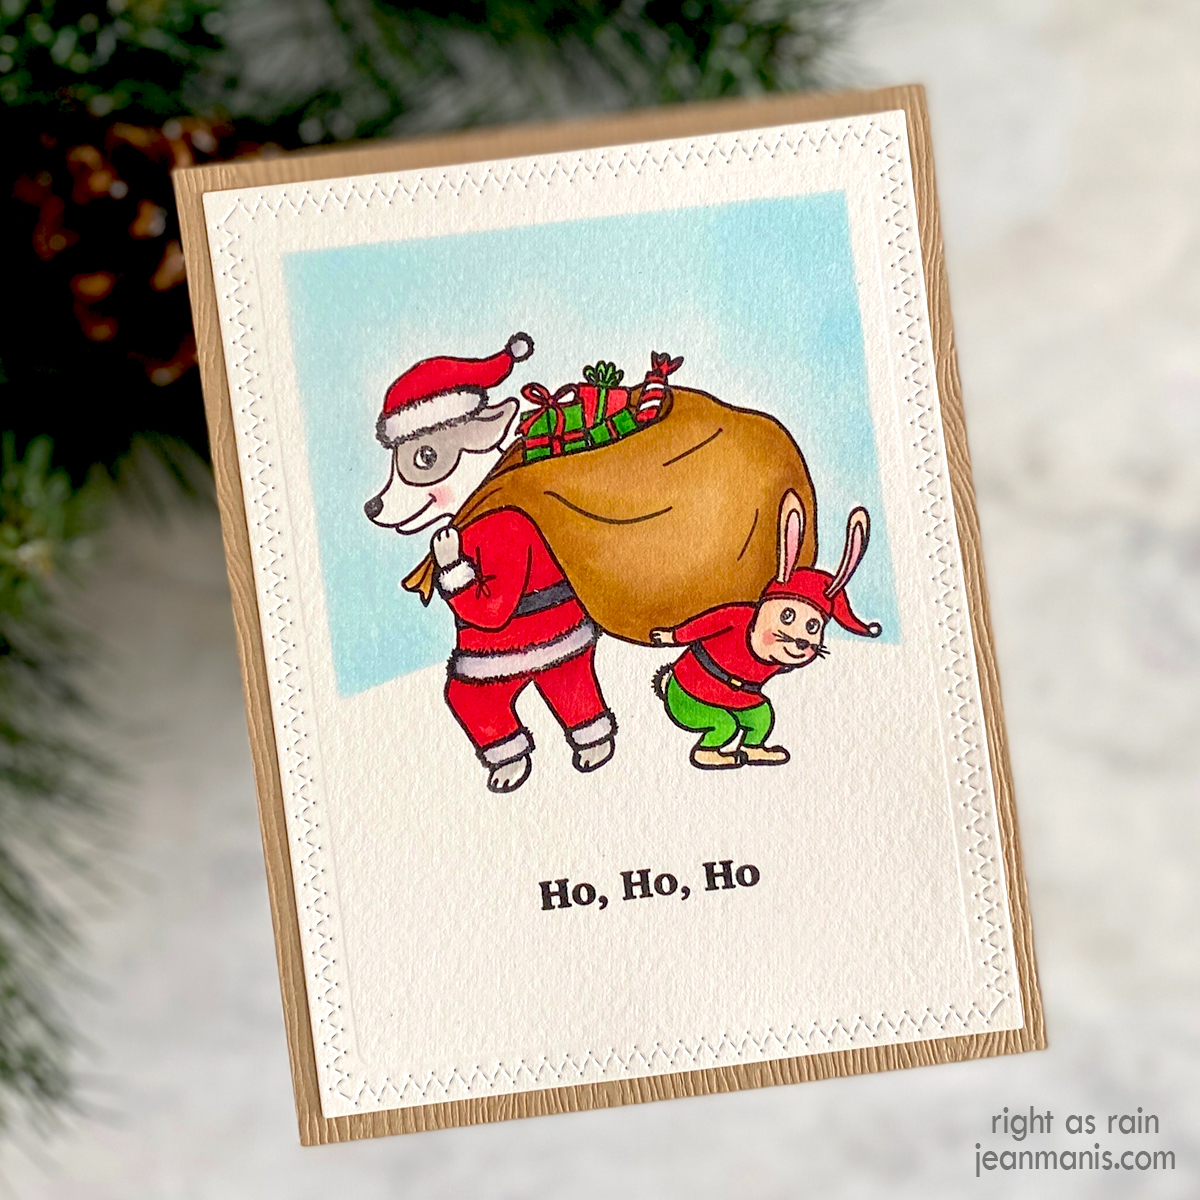
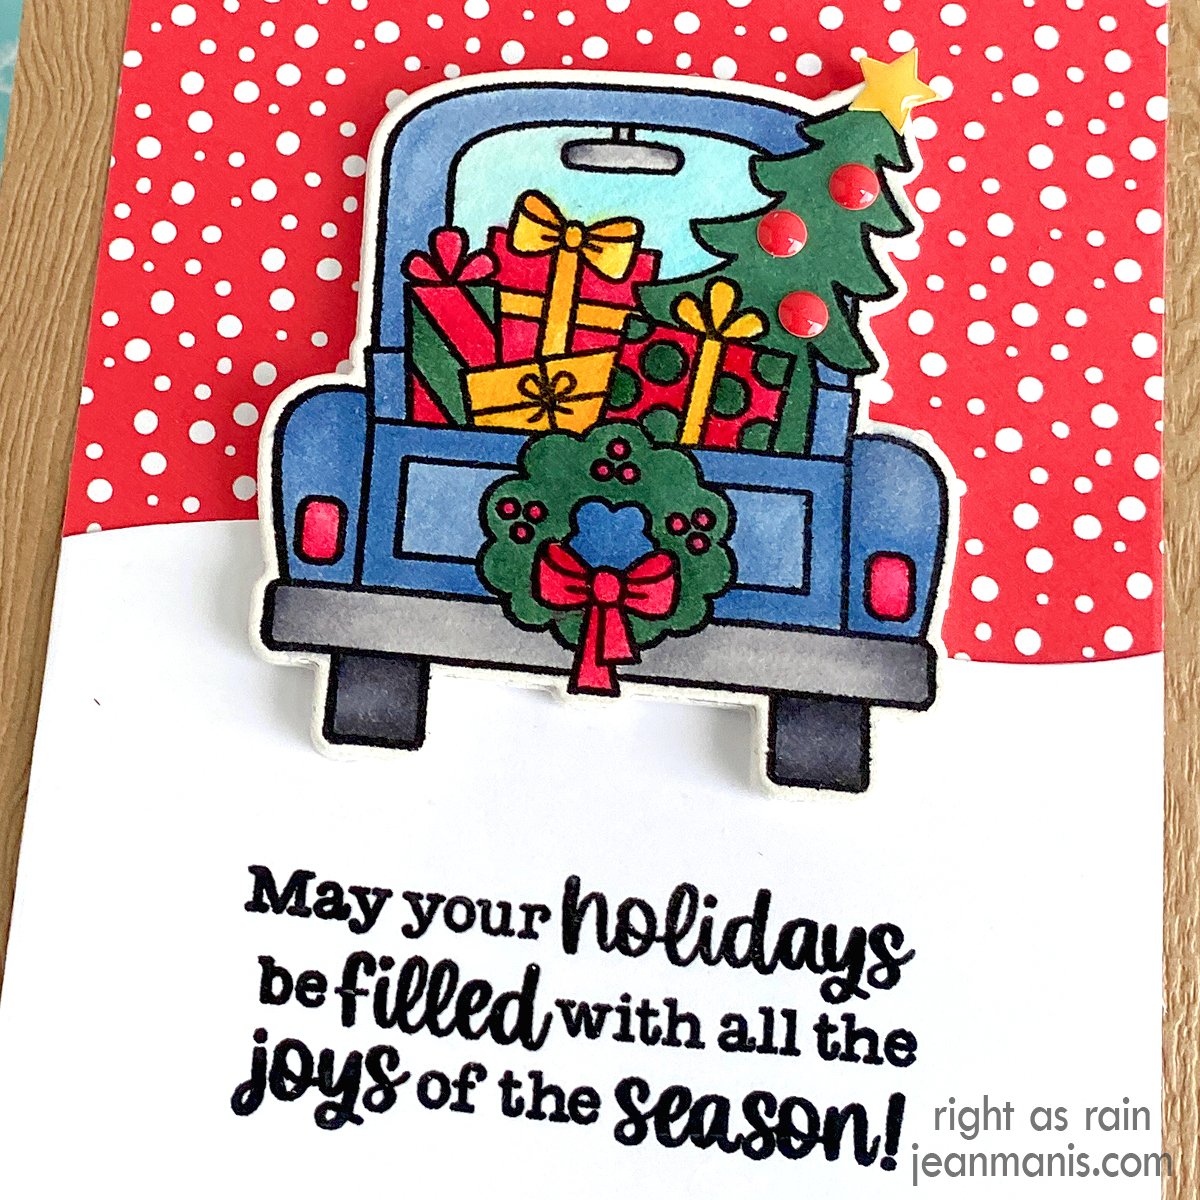
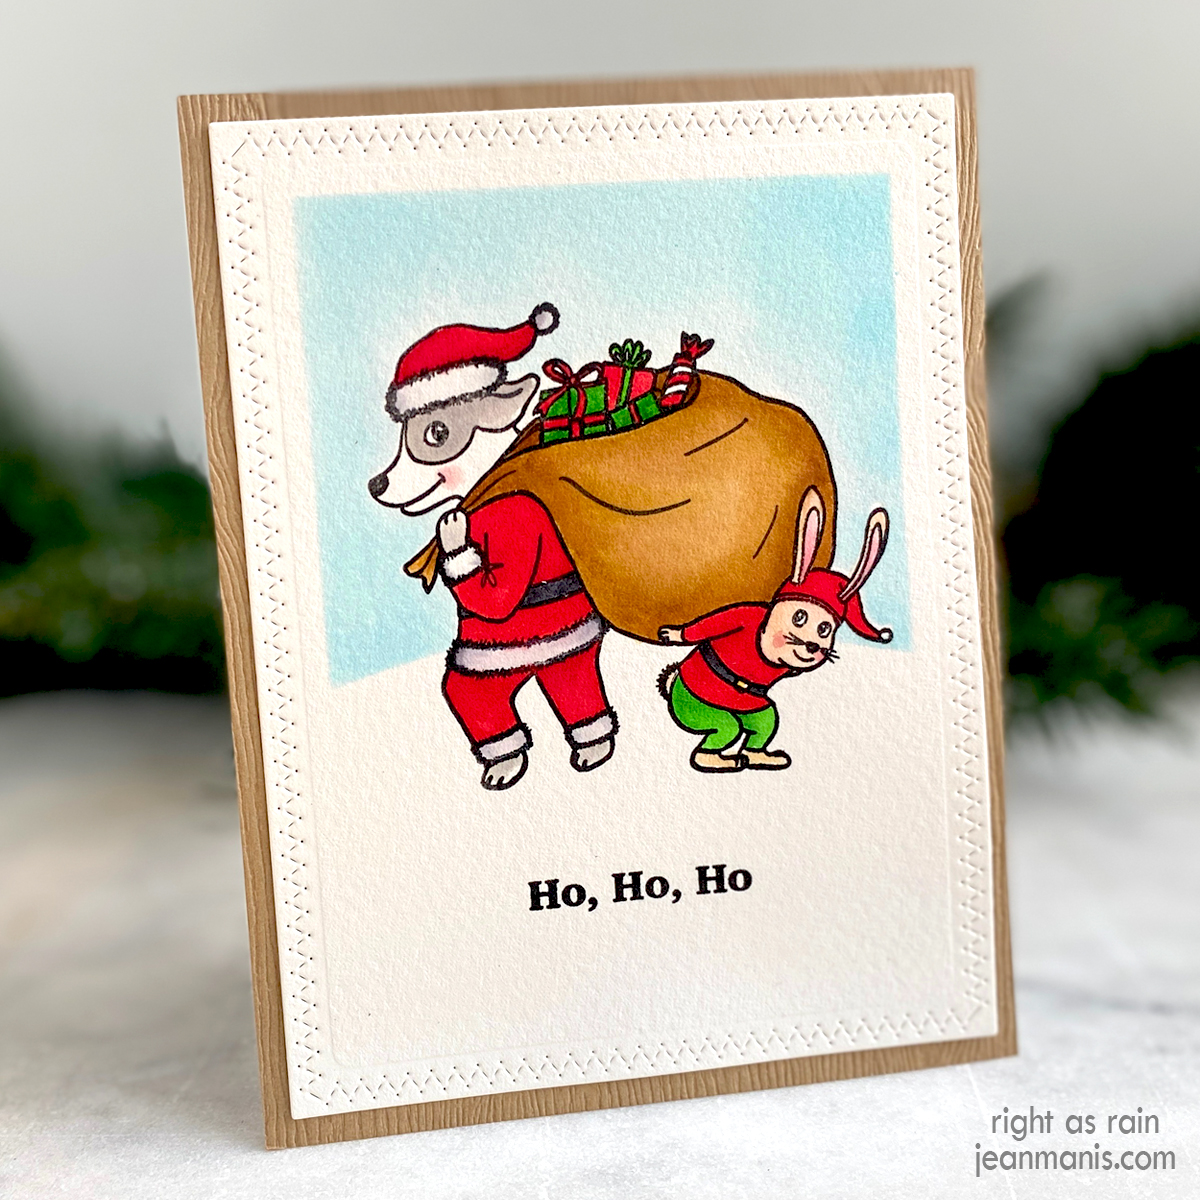
Hello! Today, I am sharing a holiday card featuring the adorable Penny Black Santa Paws stamp watercolored on a one-layer canvas. I was drawn to the image of a dog playing Santa and his rabbit helper spreading the magic of “Ho Ho Ho.”

Watercolored Penny Black Santa Paws

  • Cut an A2-size rectangle of Light Brown Woodgrain cardstock and add to a card base.
  • Stamp the Santa Paws image with Versafine on Arches Cold Press watercolor paper and heat set. Color the image with watercoloring mediums of choice (I used Distress Ink, and Zig and Tombow markers). (Check out my “Resources for Watercoloring Stamped Images” HERE.)
  • Stamp the image on to masking paper and fussy-cut.
  • Once the watercolored image is dry, stamp the sentiment on the panel.
  • Cut a snowbank from vellum. I used a die in the Sunny Studio Nature Borders set. Cover the image with the mask. Place the vellum snowbank over the image. Tape down one of the Background Basics stencils and apply Tumbled Glass ink to the sky area.
  • Cut the watercolored and stenciled panel with the largest die in the Zig Zag Stackers set. Add to the card base. I pressed the watercolored image overnight before adding to the card base.

Watercolored Penny Black Santa Paws

Watercolored Penny Black Santa Paws


Newton’s Nook Christmas Nap

Hello! Today, I am sharing a holiday card featuring the Newton’s Nook Christmas Nap stamp set with coordinating die. Picture a watercolored Christmas scene featuring a lovable dog and a cozy cat nestled in a chair.

Newton's Nook Christmas Nap

    • Cut an A2-size rectangle of Light Brown Woodgrain cardstock and add to card base.
    • Stamp the Christmas Nap image with Versafine on Arches Cold Press watercolor paper and heat set. Color the image with watercoloring mediums of choice (I used Distress Ink, and Zig and Tombow markers). Once dry, cut the image with the die in the coordinating set. Simon Says has the stamp, and both the stamp and die are available directly from Newton’s Nook and Frantic Stamper. (Check out my “Resources for Watercoloring Stamped Images” HERE.)
    • Stamp the Christmas Nap sentiment in VersaFine ink on Fern cardstock and clear heat-emboss it.
    • Use the 3 3/4″ x 5″ Lawn Fawn Small Stitched Rectangle die to cut the sentiment panel on the bottom edge. Trim at top so that the panel is 1 3/4″ tall.
    • Cut a 3 3/4″ x 5″ Snowdrift cardstock panel with the Lawn Fawn Small Stitched Rectangle die. Dry-emboss with the Taylored Expressions Bead Board embossing folder (now retired).
    • Attach the sentiment panel to the dry-embossed panel and add the assembly to the card base.
    • Add the watercolored scene with foam adhesive.

Newton's Nook Christmas Nap

Newton's Nook Christmas Nap


Sunny Studio Stamps | Snowman Kisses

Hello! Today I am sharing a winter-themed card featuring the Sunny Studio Stamps Snowman Kisses stamp set, with coordinating die set, brought to life with watercoloring. I used the Lawn Fawn Say Cheese, Again Polaroid-style frame for my scene. In this post, I discussed the use of frames and mats in cardmaking.

Sunny Studio Stamps | Snowman Kisses

  • Create A2-size card base and cover with patterned paper in the Gingham and Linen pack. I chose my colors for the scarves and hats of the snowmen based on the colors I used from the patterned paper pack. It would be fun to choose colors for the snowmen’s accessories based on a favorite sports team of the recipient.
  • Stamp the Snowman Kisses snowmen images with Versafine on Arches Cold Press watercolor paper and heat set it. Color the images with watercoloring mediums of choice. I used Zig May Green (47), Zig Turquoise Green (42), Zig Orange (70), and Tombow Glacier Blue (491) markers. Once dry, cut the images with the dies in the coordinating set. (Check out my “Resources for Watercoloring Stamped Images” HERE.)
  • From white cardstock, cut the snowbank with a die in the Slimline – Nature Borders set.
  • Add snowbank behind the frame and back with patterned paper from the Gingham and Linen pack.
  • Add sentiment to the bottom of the Polaroid frame cut from white glitter foam using dies in the Journal Letter set.
  • Add frame assembly to card base. Add snowmen with foam adhesive. Embellish with snowflakes cut with the Lawn Fawn Mini Snowflakes set from white glitter foam.

Sunny Studio Stamps | Snowman Kisses

Newton’s Nook Holiday Haul

Hello! Today, I am sharing a holiday card featuring the Newton’s Nook Holiday Haul stamp set with coordinating die.

Newton's Nook Holiday Haul

      • Stamp the Holiday Haul truck image with Versafine on Arches Cold Press watercolor paper and heat set. Color the image with watercoloring mediums of choice (I used Zig and Tombow markers). Once dry, cut the image with the die in the coordinating set. (Check out my “Resources for Watercoloring Stamped Images” HERE.) Add enamel dots (Spellbinders) and star (retired Taylored Expressions) to the tree.
      • Stamp and heat-emboss with clear powder the Holiday Haul sentiment on white cardstock. Cut the sentiment first with a rectangle die and then a snowbank die (now-retired MFT Stamps Snow Drifts set). Add the sentiment panel to a piece of patterned paper. The assembly measures 3 1/2″ x 4 3/4″.
      • Attach assembly to an A2-size light brown woodgrain card base. Add watercolored truck to the card with foam adhesive.

Newton's Nook Holiday Haul

Newton's Nook Holiday Haul


Penny Black | Whimsical Halloween Delight

Hello! A playful hedgehog, a spooky tree, and a “Boo” sentiment create a whimsical scene on this Halloween card showcasing Penny Black stamp and die sets. The scene embodies the spirit of Halloween and emphasizes the creativity found in older crafting sets. Several of these products were introduced in 2020 as part of the Autumn Extraordinaire Collection. I previously used the Windy die set on Halloween cards HERE and HERE. Other products used on the card have been in my collection even longer.

Penny Black | Whimsical Halloween Delight

    • As I mentioned HERE in my post on stamped backgrounds, background stamps can be stamped with colored ink on to inked backgrounds. For this card, the inked background was created with Wilted Violet and Villainous Potion Distress Oxide ink colors (sky section), and the Dots in Space background stamp was stamped with Wilted Violet Distress ink (not Oxide). I lightly stamped the background on to scrap paper, before stamping on to the inked background, so that the amount of ink stamped would be more subtle. The ground was masked when I inked the sky and stamped the dots. I inked the ground and then cut the panel with a stitched A2-size die, and attached it to a card base.
    • Stamp Candy Kisses in Versafine on Arches Cold Press watercolor paper and heat set. Color the images with watercoloring mediums of choice. I used mini Distress Inks in the following colors: Antique Linen, Gathered Twigs, Ground Espresso, Spiced Marmalade, Rusty Hinge, Crackling Campfire, Squeezed Lemonade, Wilted Violet, Picked Raspberry, Saltwater Taffy, Peacock Feathers, and Scattered Straw. Once dry, cut the image with the die in the coordinating set. (Check out my “Resources for Watercoloring Stamped Images” HERE.)
    • With the Windy die set, cut the tree from cardstock on which Distress Oxide inks have been applied. Assemble.
    • Cut the “Boo” sentiment with a die in the eeek! set from cardstock on which Distress Oxide inks have been applied. Cut again from black foam for depth. Adhere the two and attach to the card.
    • Add tree to the card with dot adhesive and the hedgehog with foam adhesive.

Penny Black | Whimsical Halloween Delight