
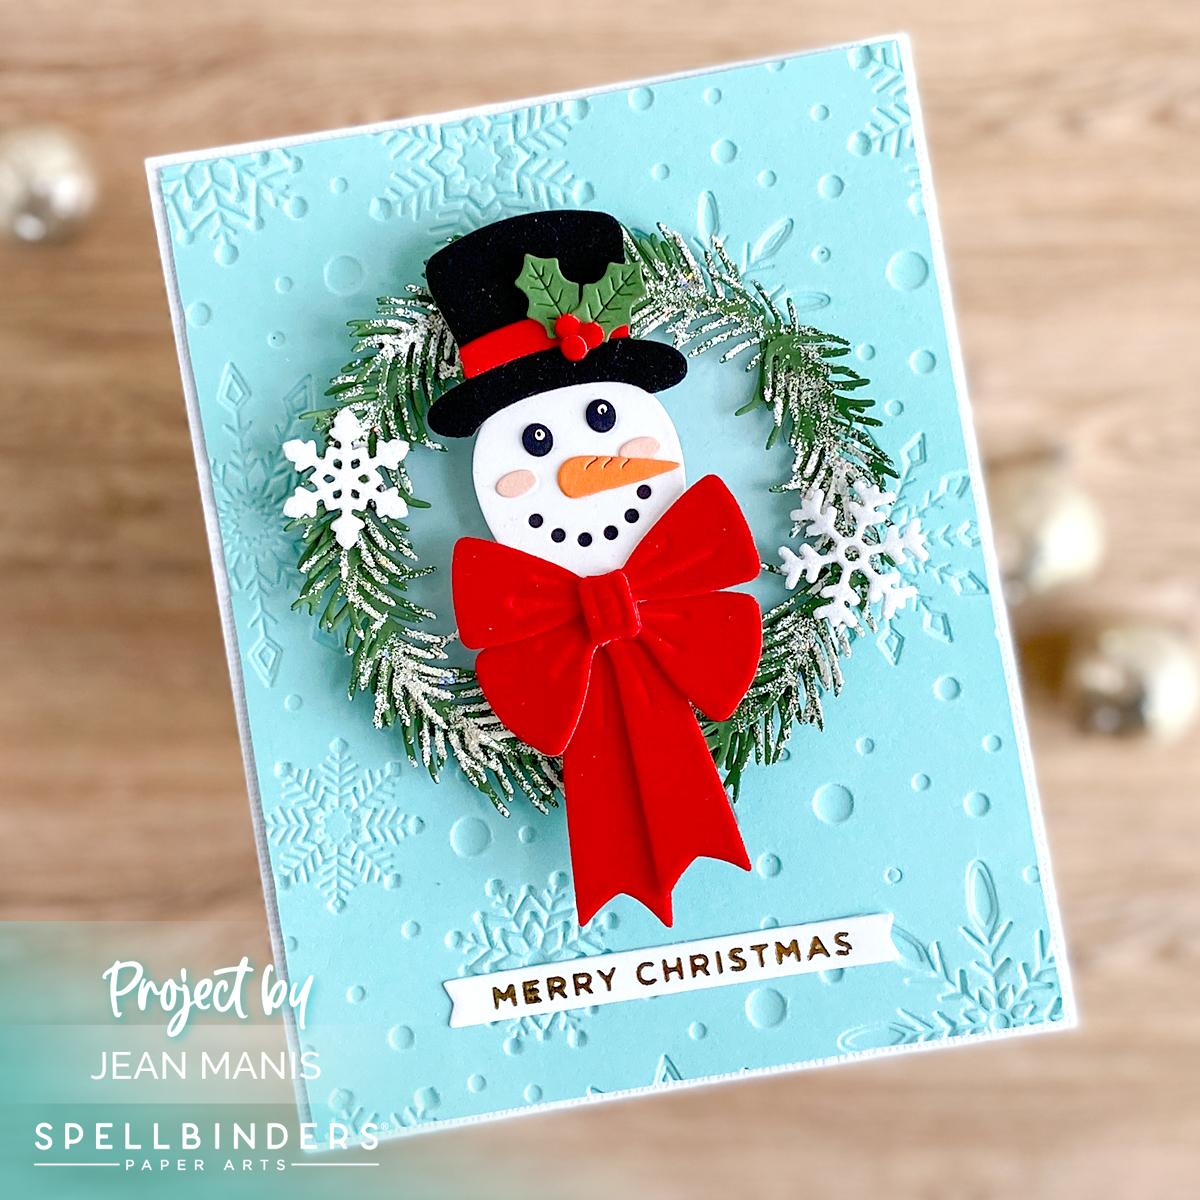
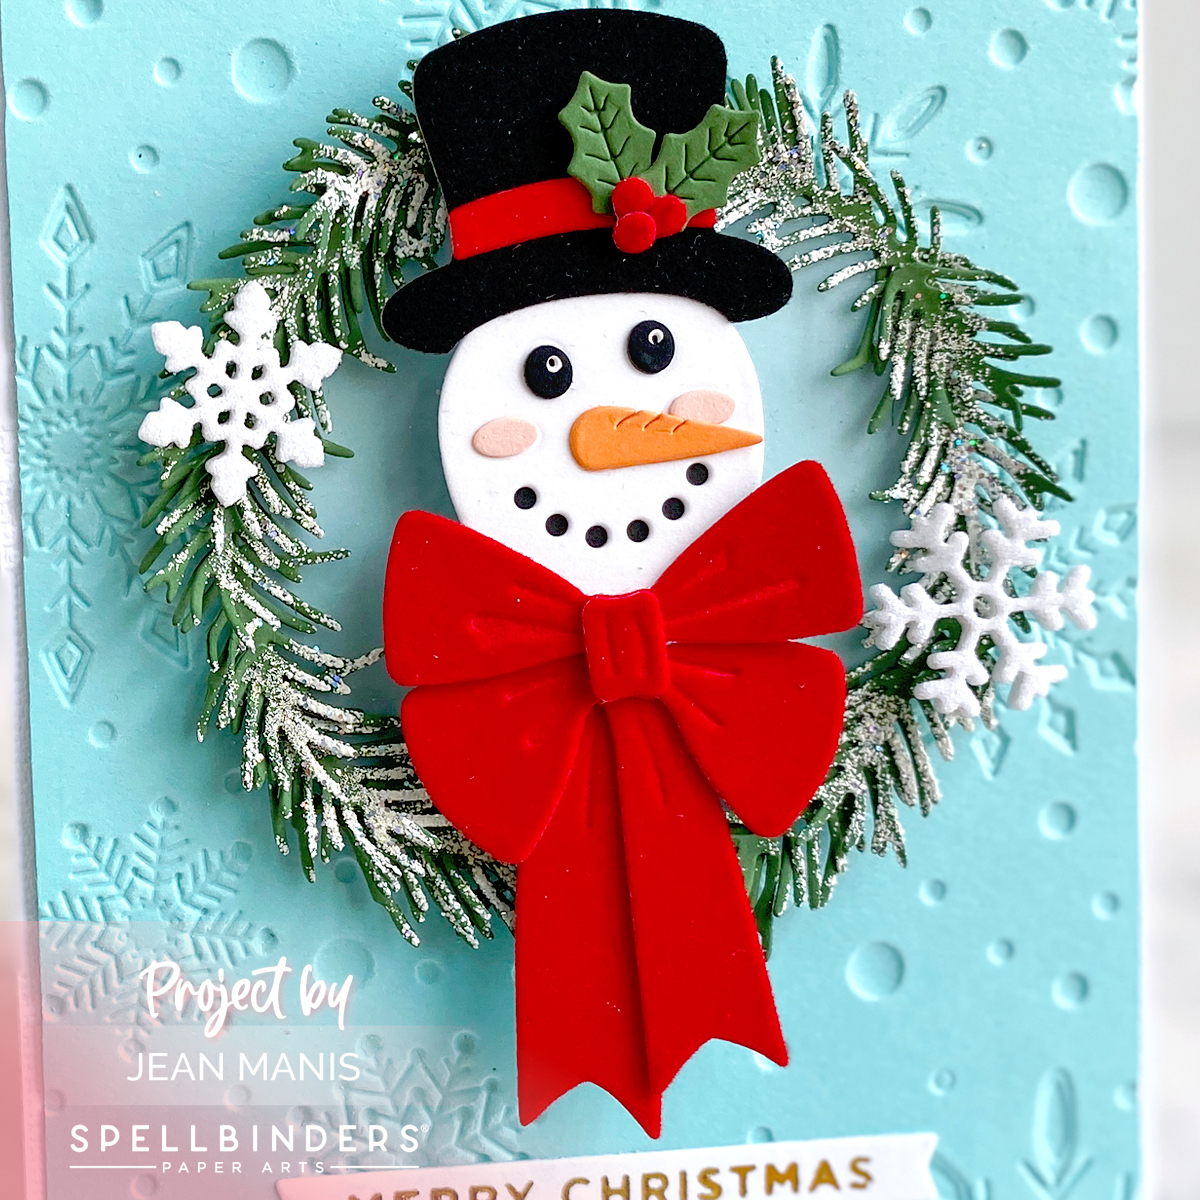
Hello! Today, I am sharing a textural holiday card showcasing the Spellbinders Build-A-Wreath and Christmas Wreath Add-Ons die sets.
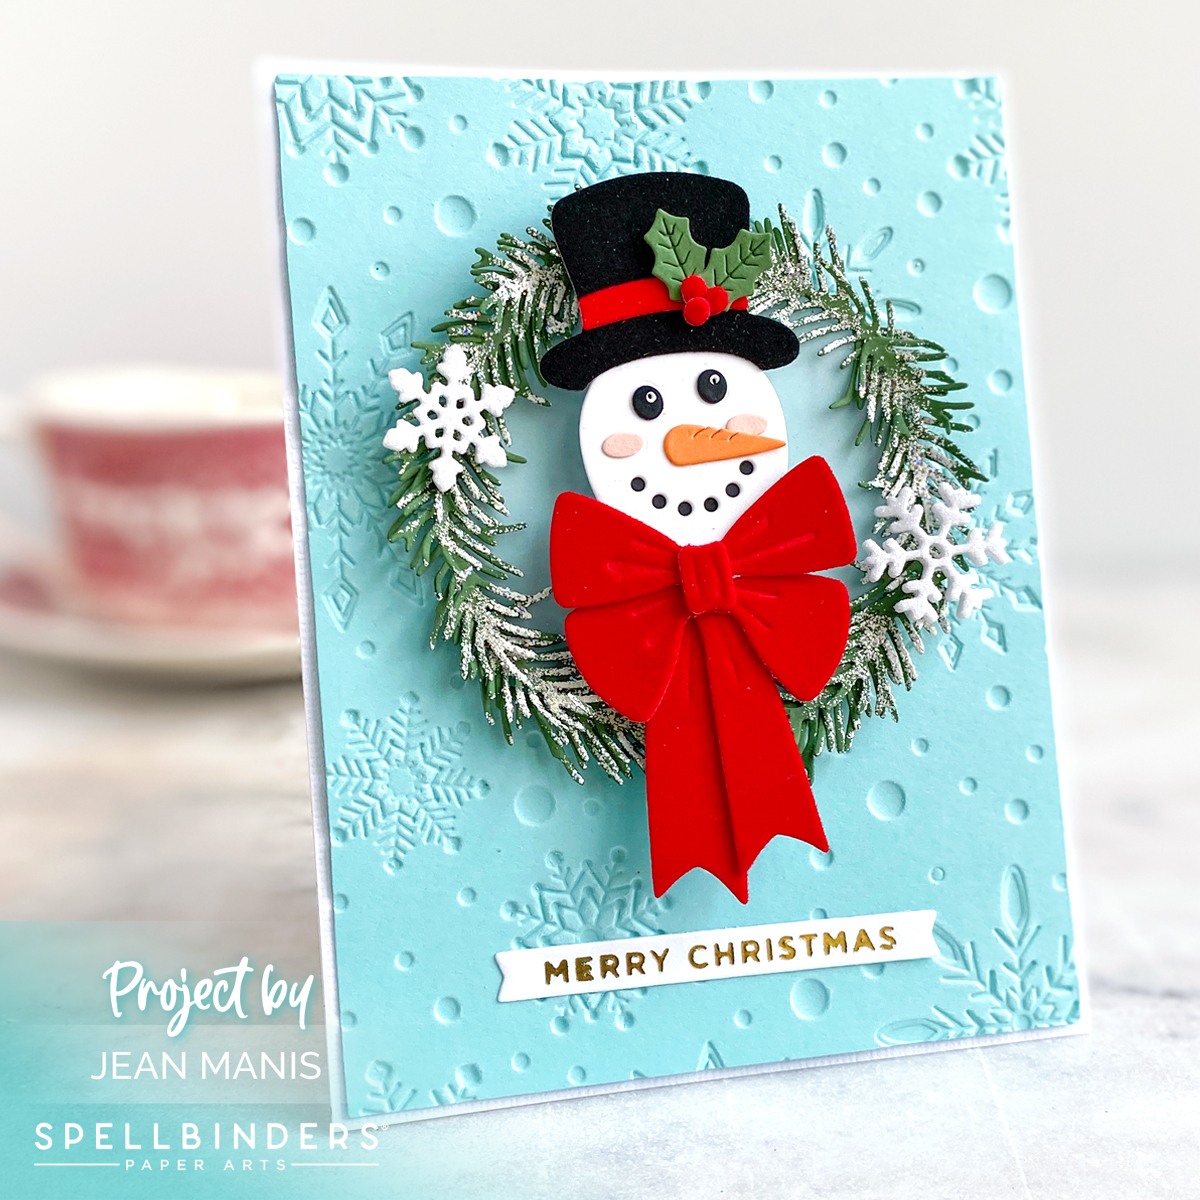
The combination of the wreath and snowman blends the traditions and festive spirit of the Christmas season.
-
- To begin, create an A2-size card base from white Canvas cardstock.
- Cut Waterfall panel with largest die in the Precision Layering A2 B set. Dry-emboss the panel with the Flurry of Snowflakes folder. Adhere to card base with the debossed side up.
- Cut pine boughs from Fern cardstock with the Build-A-Wreath dies. Use a tool in the Susan’s Garden Ultimate Tool Kit set to curl the leaves. Glue several boughs together, dab section with VersaMark ink, shake on Snowflake Tinsel powder, and heat-emboss. Continue until there are enough pieces to form a 3″ wreath. Glue together.
- Cut 3″ circle from vellum and add to card base. Glue wreath around vellum.
- Glimmer foil in Gold on Classic White cardstock the “Merry Christmas” sentiment from the Mini Christmas set. Cut the sentiment with a banner die and add to card front.
- Die-cut snowman elements with the Christmas Wreath Add-Ons set and assemble. Add dimensional foam to back of snowman.
- Add snowman to center of wreath.
- Embellish wreath with snowflakes cut from white glitter foam using dies in the Christmas Wreath Add-Ons set.

This is so cute! Snowman with a wreath does combine traditional and fun holiday images. Love the idea of embossing powder for snow on the wreath. Great card with some great ideas!
Darling wreath with snowman, Jean – love that bow too!!