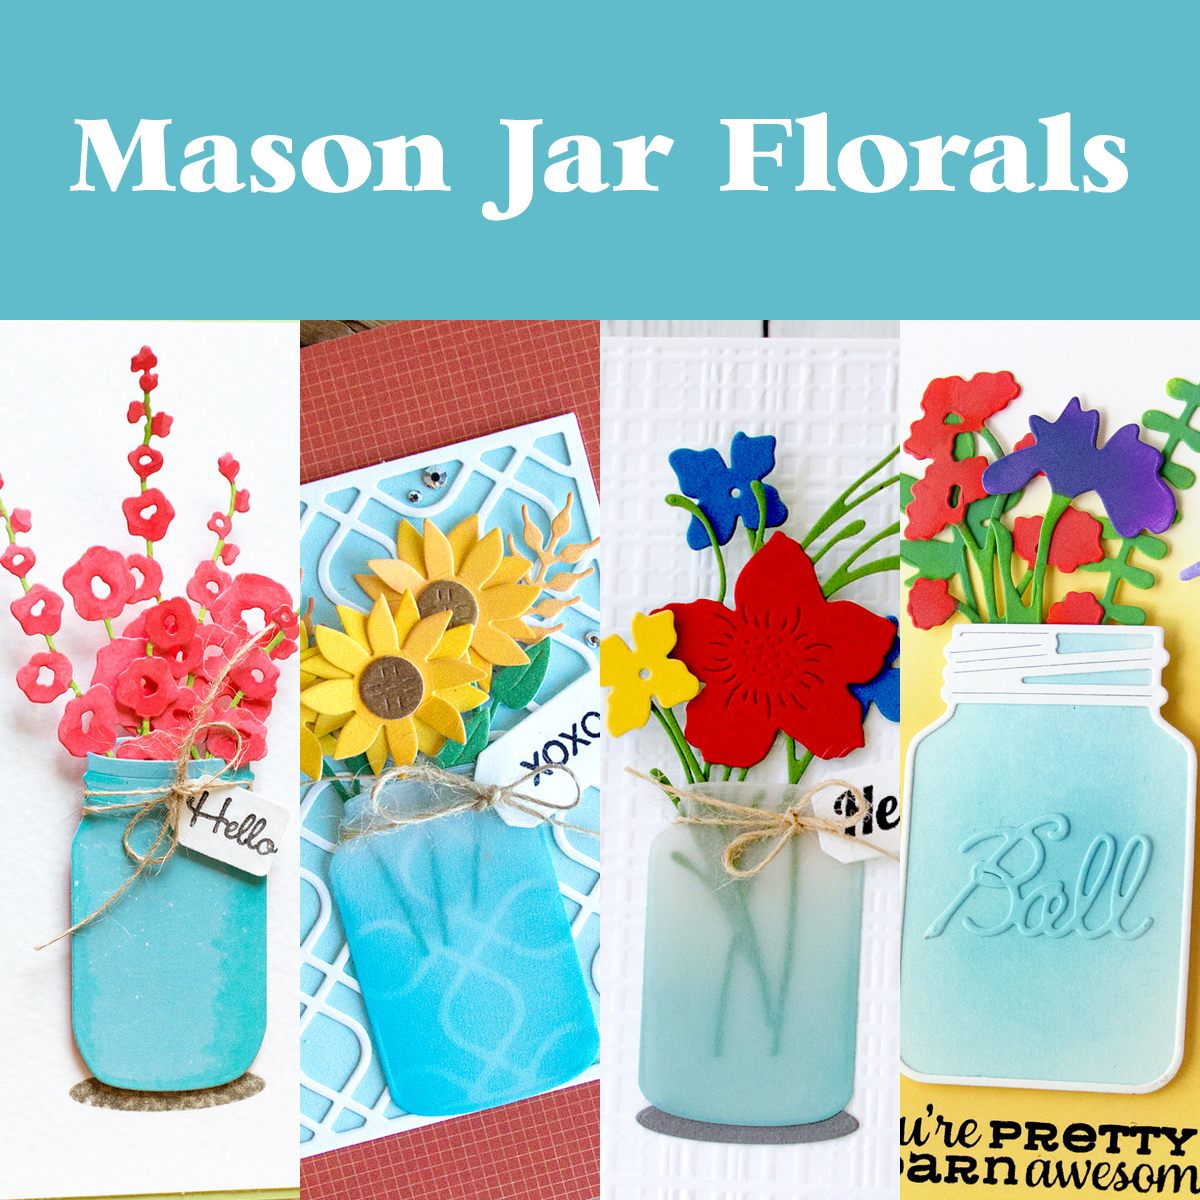
Hello! Recently, I shared a roundup of floral cards exploring alternatives to the traditional vase arrangement in my post Floral Cards Beyond the Vase. While those cards showcased a variety of creative containers, one vessel deserves a closer look of its own: the mason jar.
In this roundup, I’m revisiting five cards that showcase this informal floral container. Click on the photo to visit the original post for additional details. Please note: some of the products used may no longer be available. This roundup is intended to provide inspiration rather than serve as a current shopping guide.
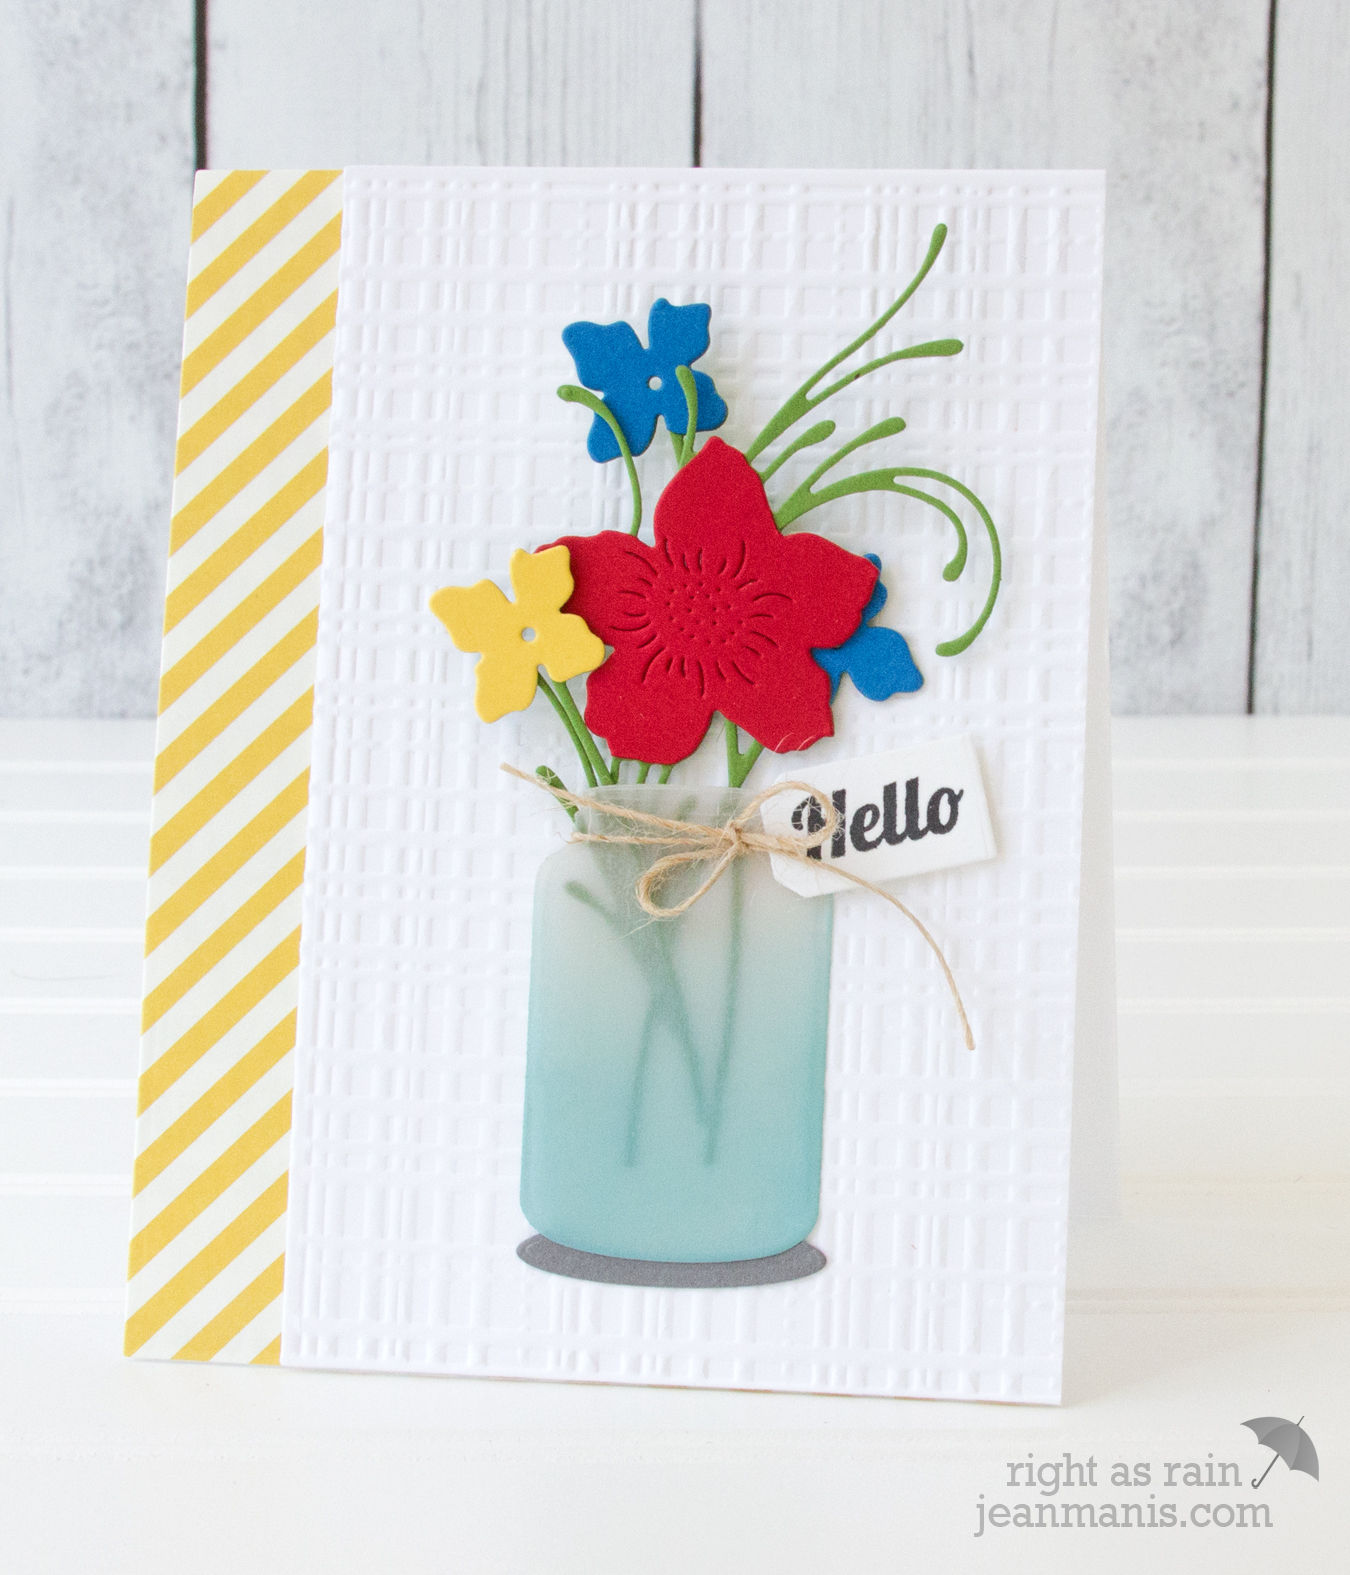
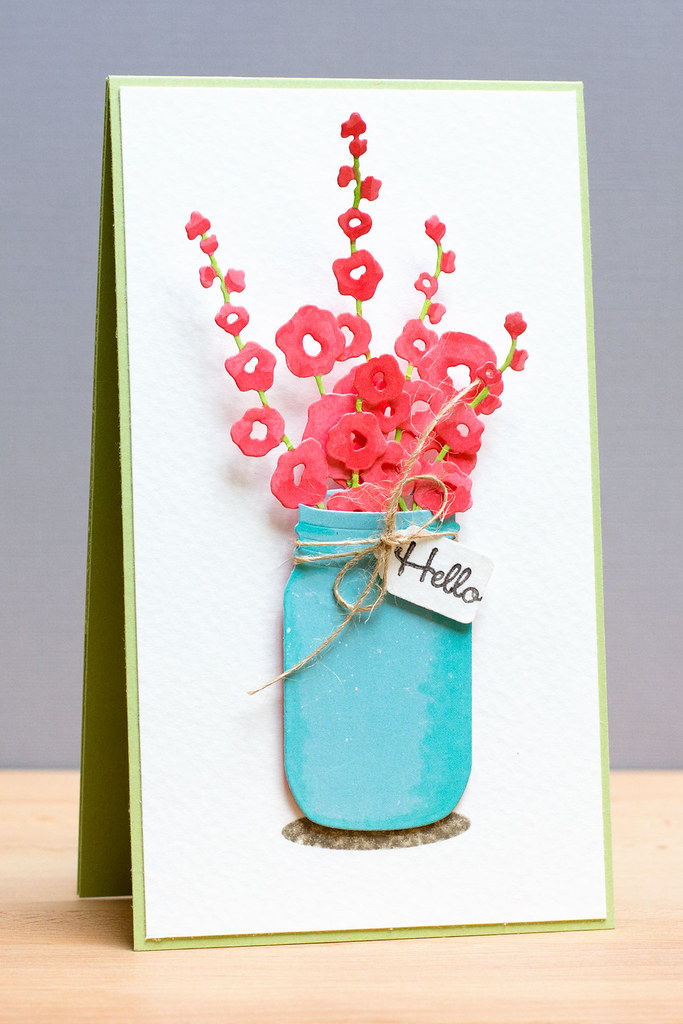
On the first card, the florals were created by cutting the floral element from colored cardstock twice, once for the bloom and again for the stem. The mason jar is cut from vellum and colored to resemble glass holding water.
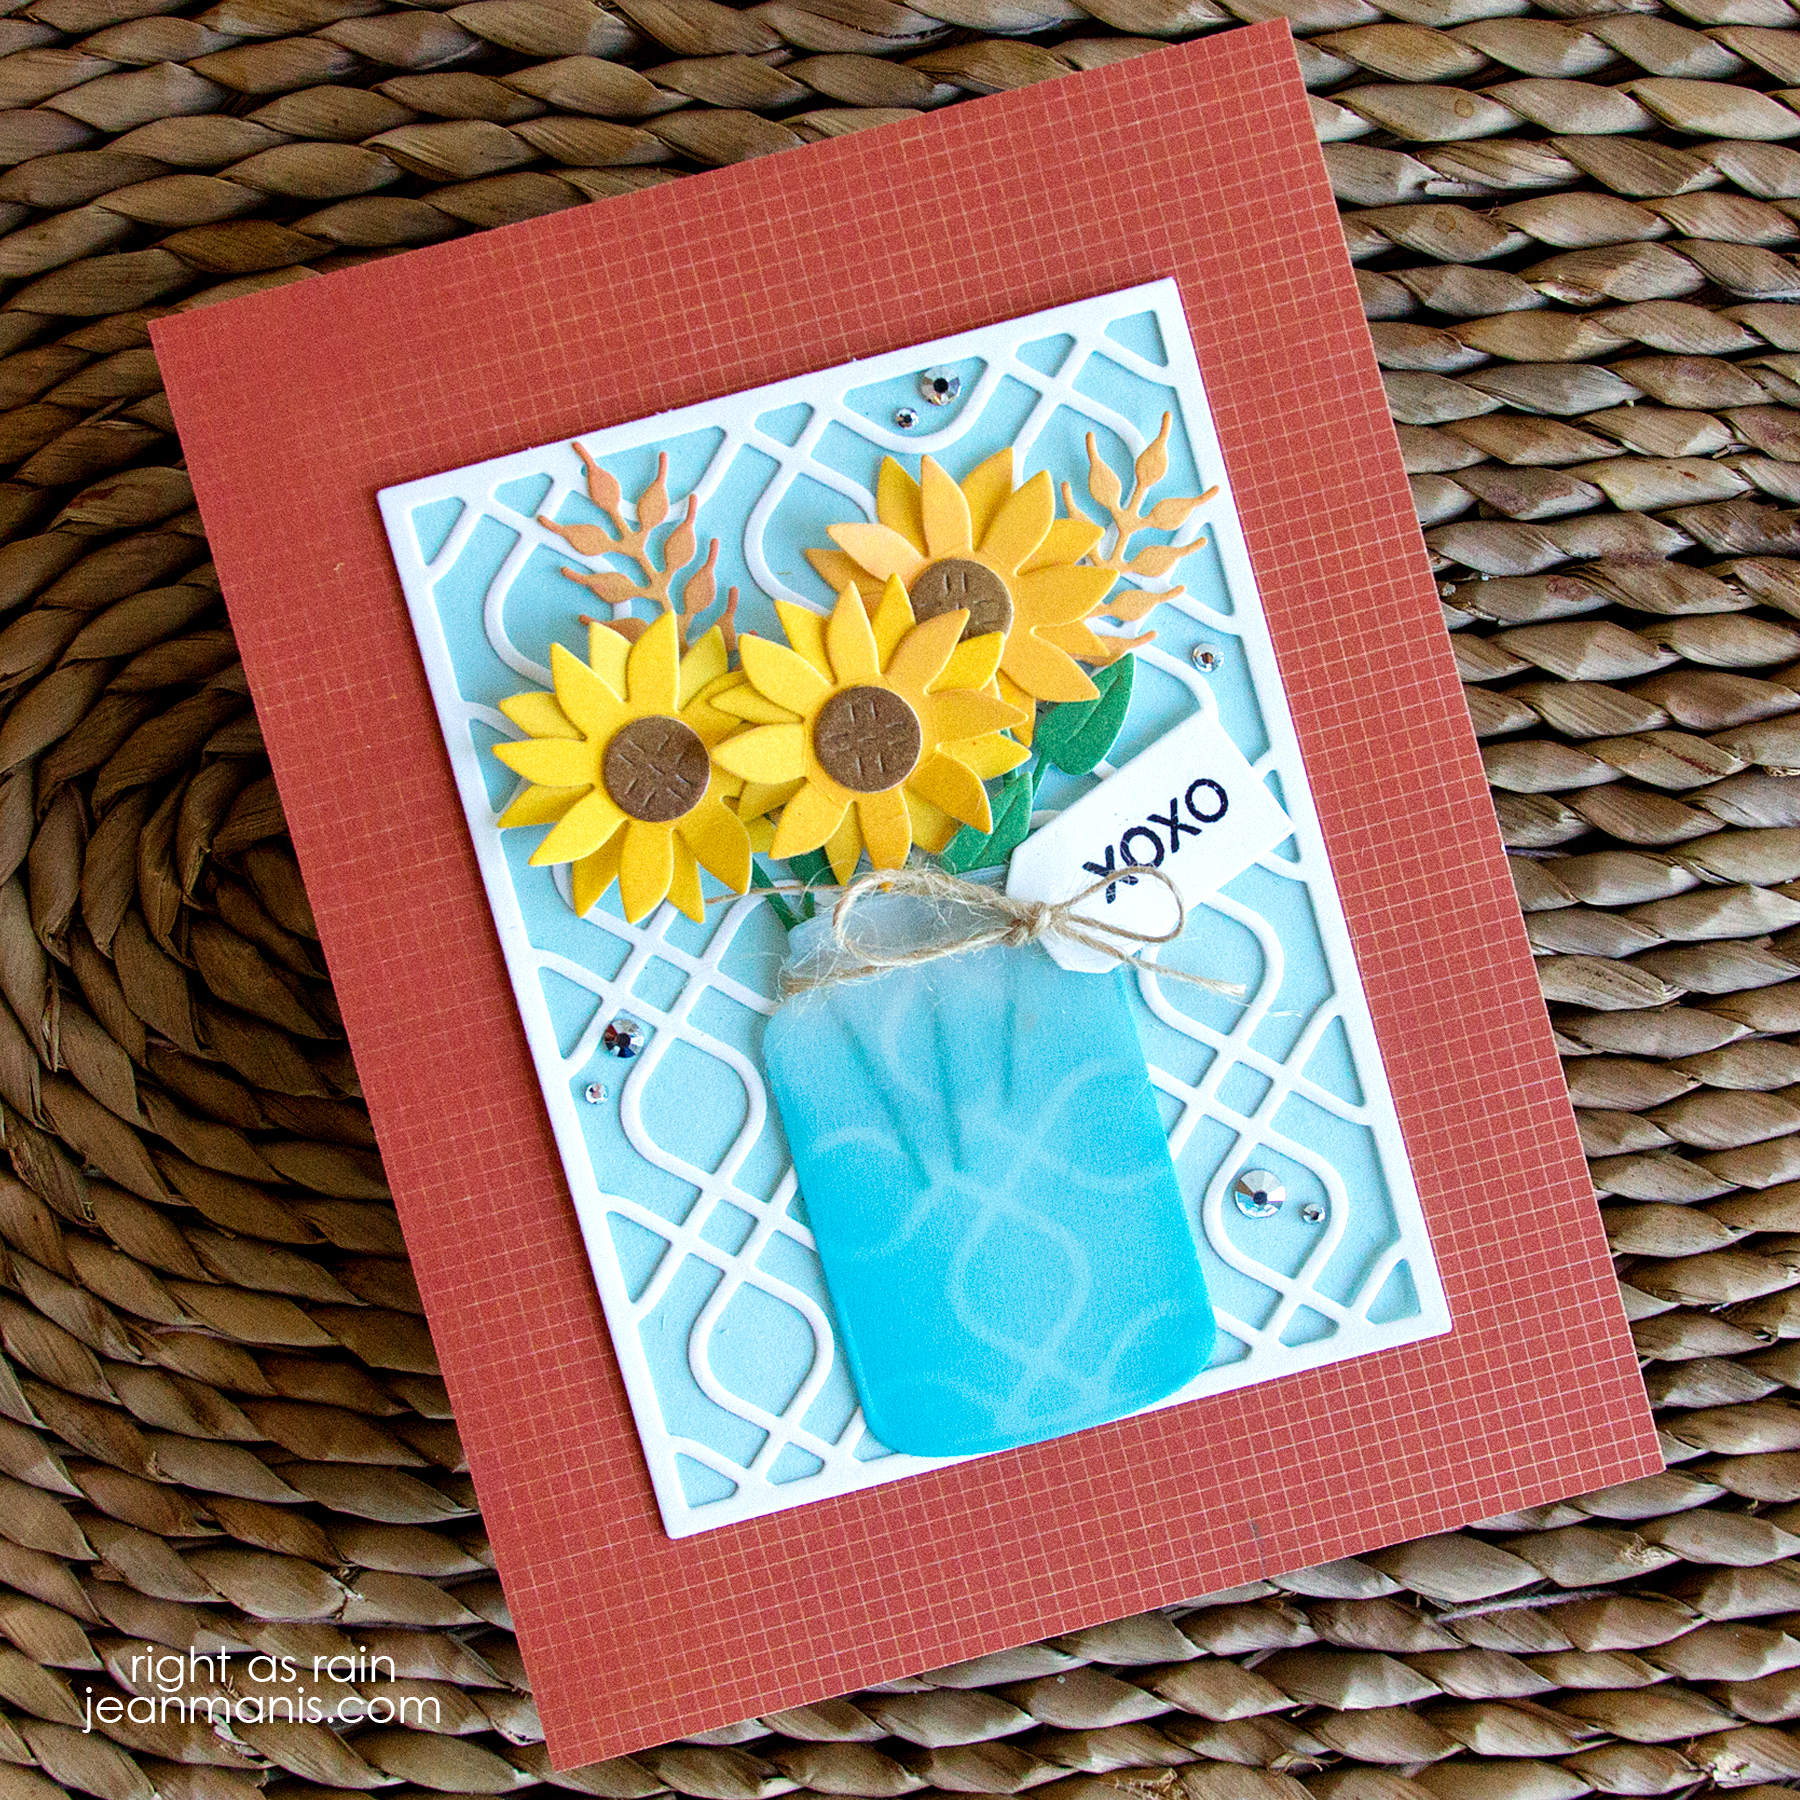
Using the same Penny Black mason jar die as in the card above, this fall-themed card features florals cut from cardstock colored with Distress Oxide inks before cutting.
This bouquet of oversized roses features floral elements cut from cardstock colored with watercolor and Distress Inks before die cutting. A white outline die layered on top gives the design an inlaid appearance.
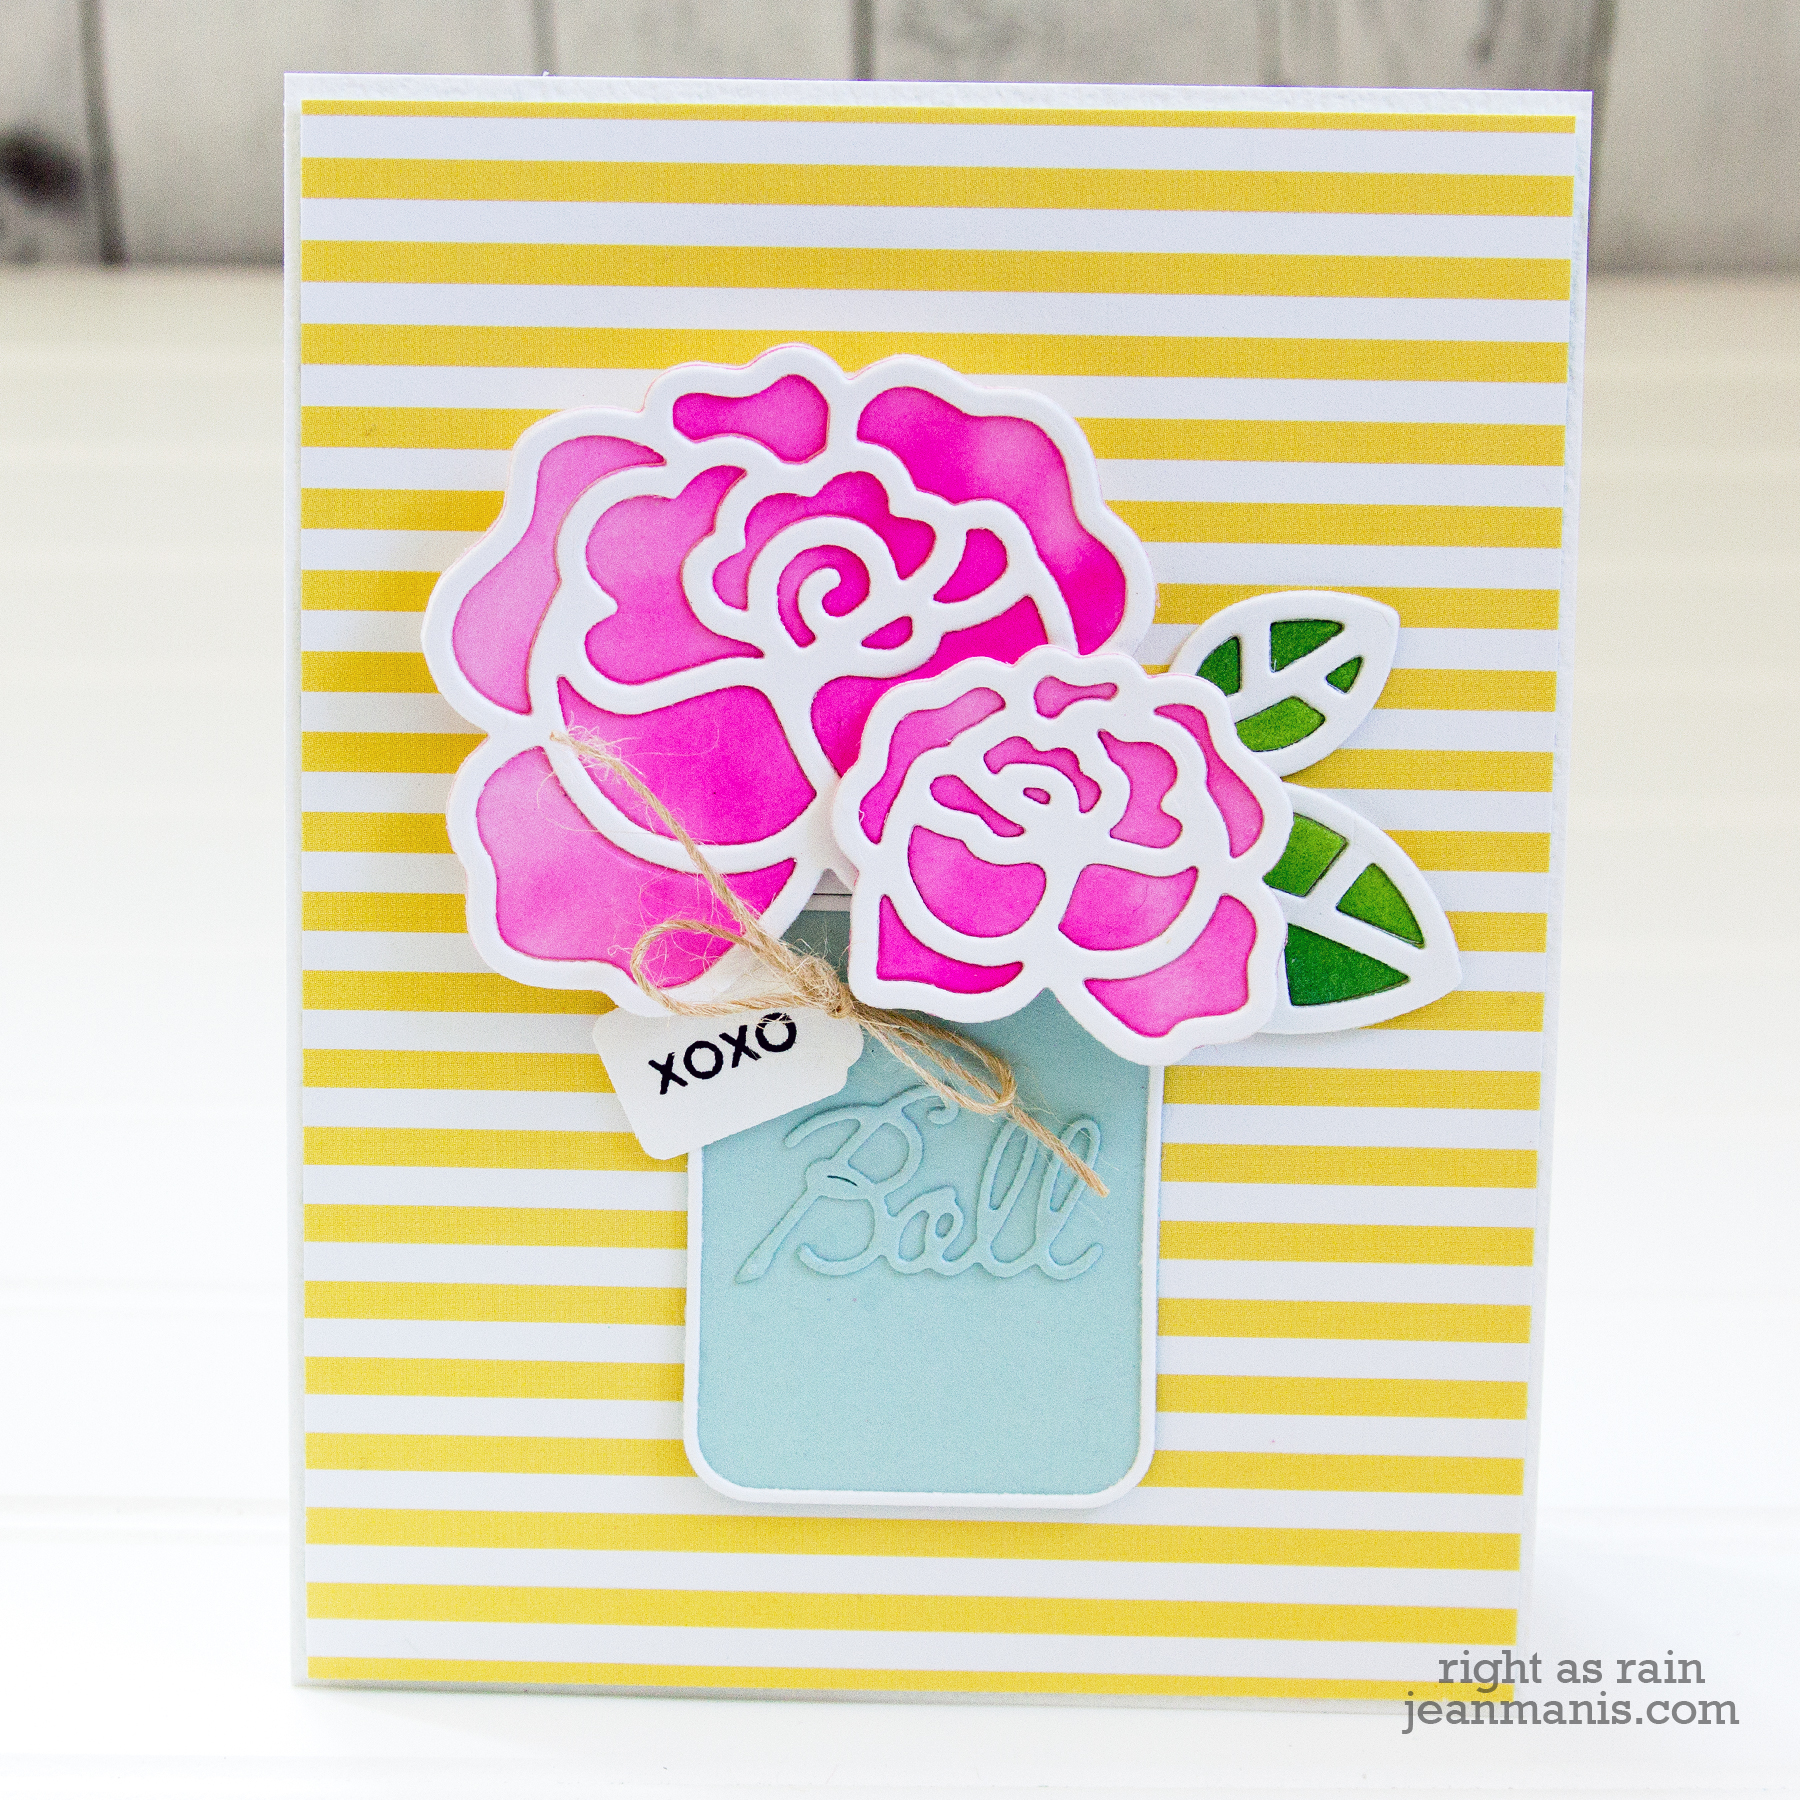
Created with the same mason jar die from Paper Smooches, the floral elements for this card are cut from white cardstock, then colored with Distress Oxide inks. Unlike the other cards in the roundup, this card features a stamped sentiment rather than a tag sentiment tied around the top of the jar.

Finally, for a CAS card created with Impression Obsession dies, the floral elements are cut from white cardstock and then colored with Copics.
While I featured mason jar dies from Penny Black, Paper Smooches, and Impression Obsession in the roundup, as I was gathering these projects, I realized I own a Hero Arts jar stamp set, a Lawn Fawn mason jar stamp set with a coordinating die, and a standalone Lawn Fawn mason jar die that I’ve yet to put to use. It seems I may be due for another mason jar bouquet card!