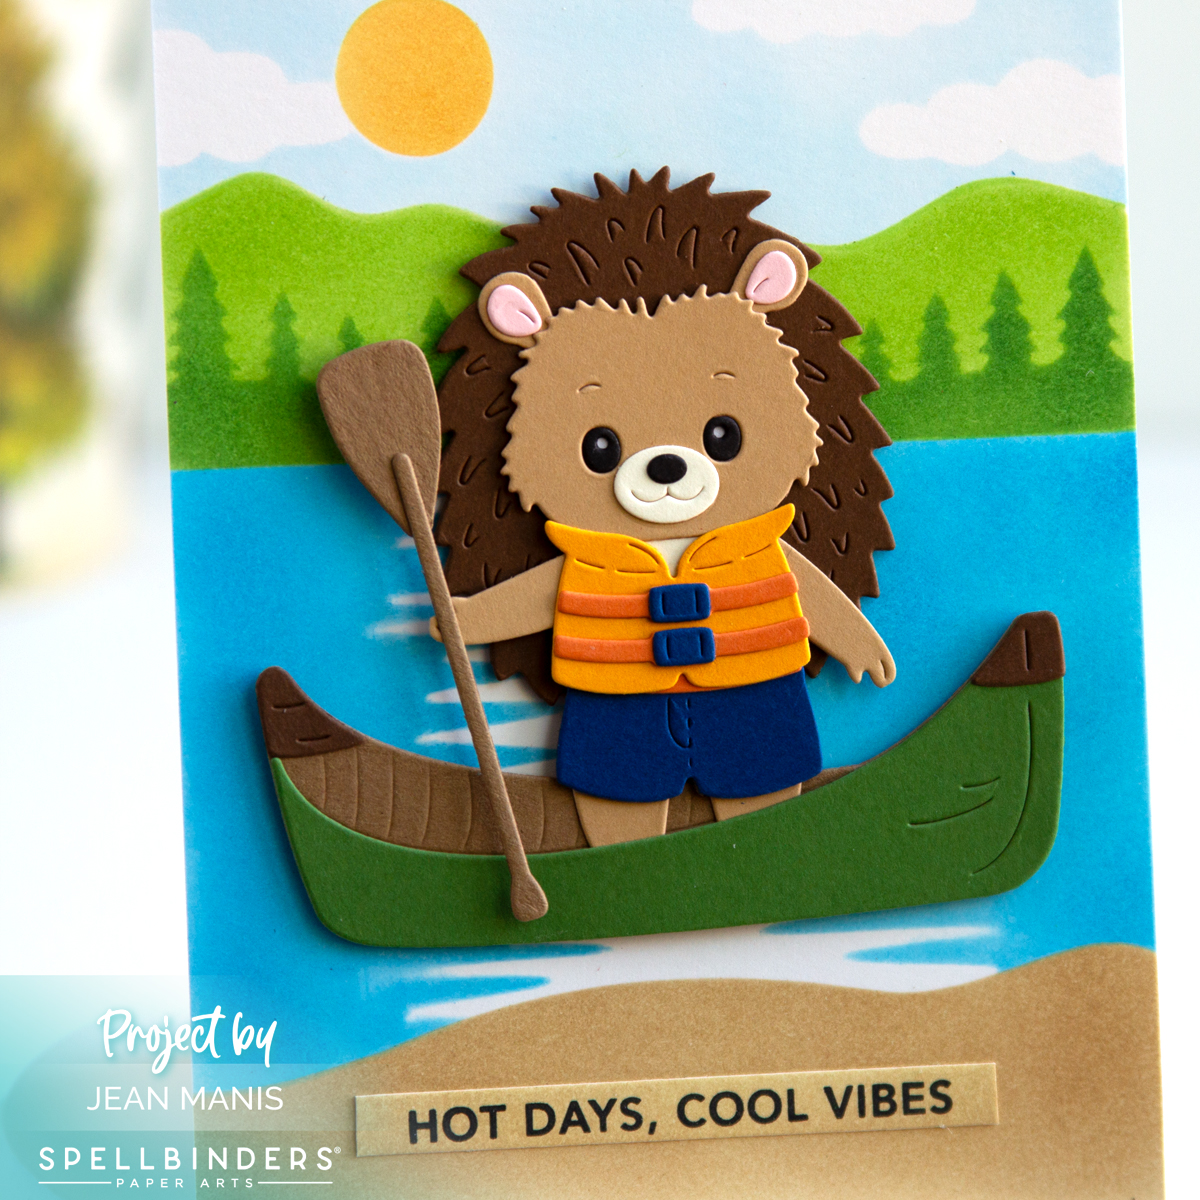
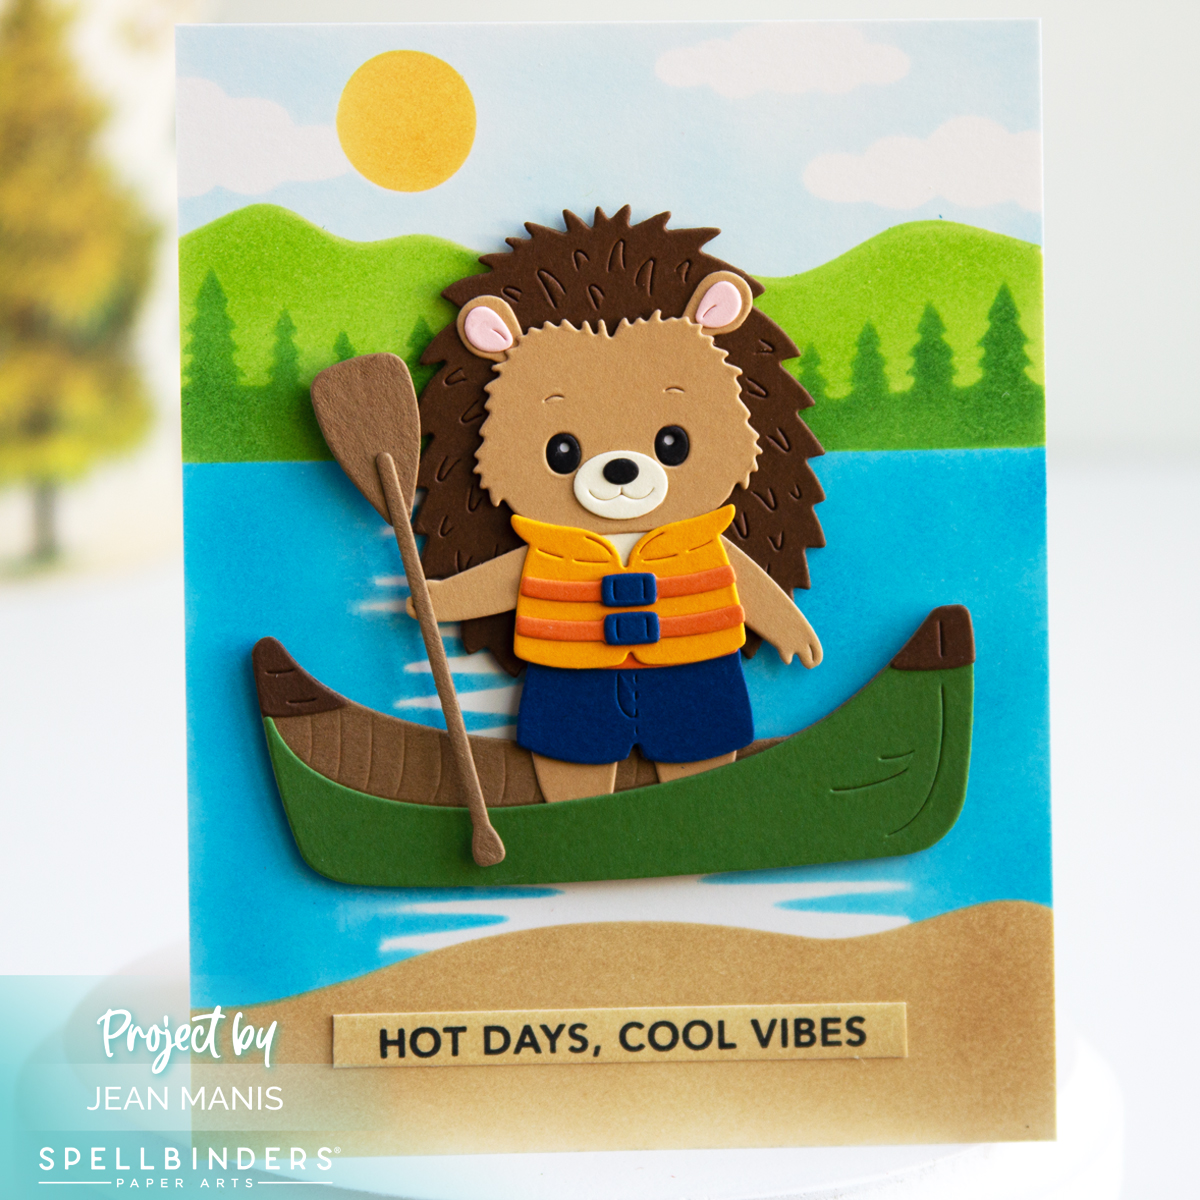
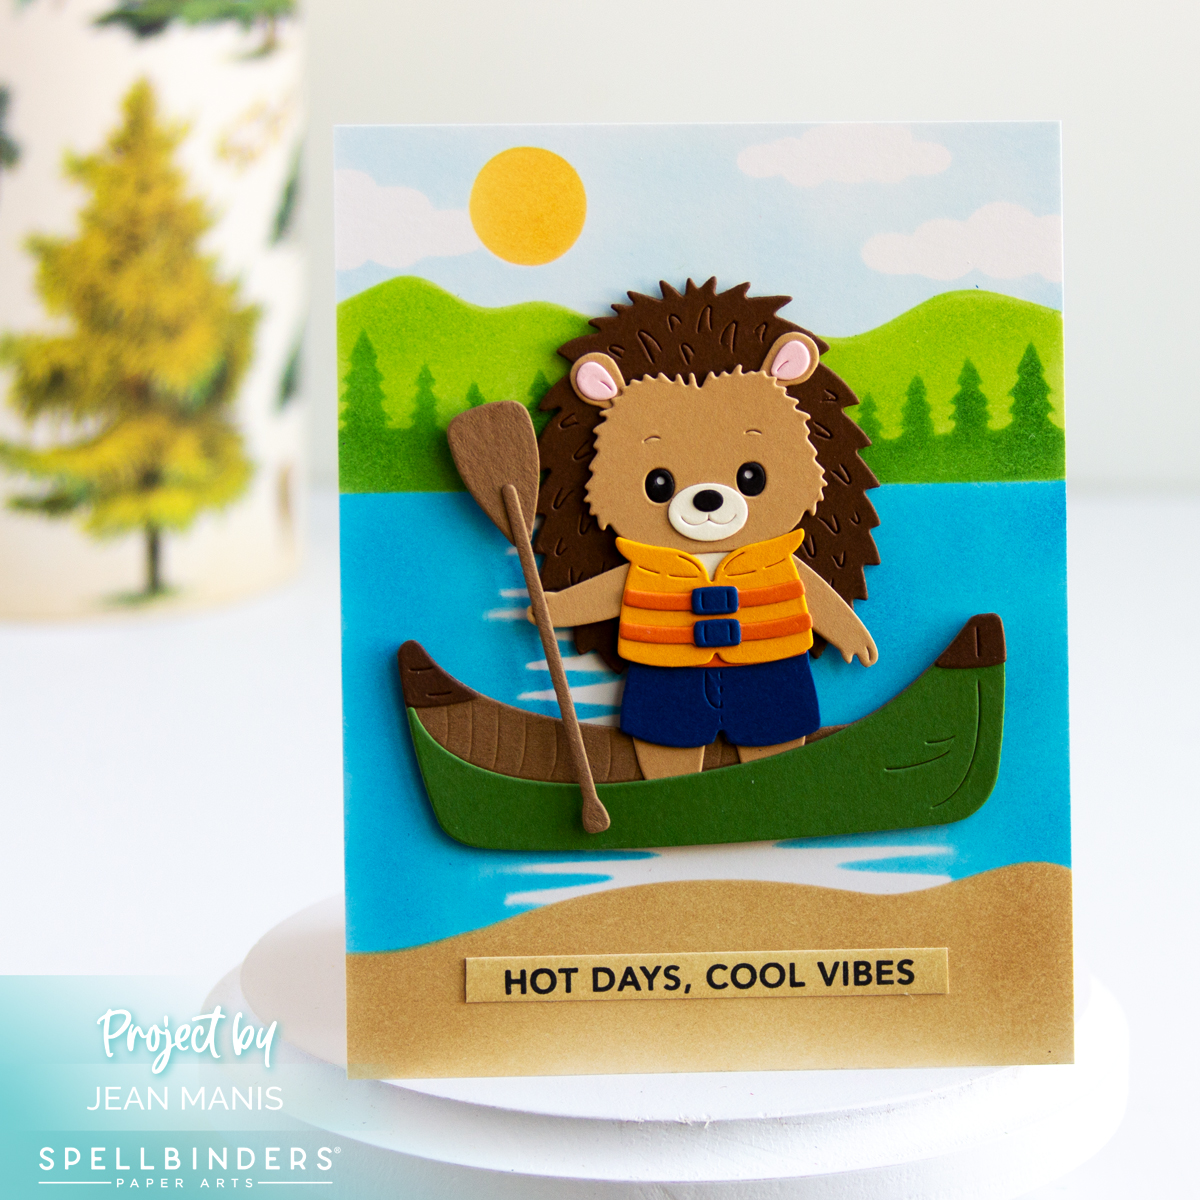
Spellbinders | #1 Foam Finger

Hello! Show someone they’re a true champion with this playful #1 foam finger card! Created with one of the Spellbinders Crate offerings for March 2026, the design features a foam finger, a die-cut banner declaring “You Are Super,” and a dry-embossing for added dimension.

Spellbinders | #1 Foam Finger

Spellbinders | #1 Foam Finger


Spellbinders | Tulip Fields in Bloom

Hello! For this spring card, I used a Spellbinders BetterPress tulip plate with its coordinating stencils, part of the Yana’s Tulips Collection. The BetterPress background makes coloring the scene simple and the Distress Oxide inks through the stencils gives the scene the look of a painted landscape. A BetterPress sentiment ties everything together.

Spellbinders | Tulip Fields in Bloom

    • To begin, press the Windmills and Tulips scene on to white cardstock with black ink.
    • Color the scene with Distress Oxide inks using the coordinating stencils.
    • Trim panel and add to an A2-size card base.
    • Press the You are Everything sentiment, cut with its coordinating die. Add the sentiment to the scene.

pellbinders | Tulip Fields in Bloom


Spellbinders | Superheroine Card

Hello! Today I’m sharing a Mom or friendship card created with the Spellbinders March Small Die kit, featuring a super heroine in the clouds. The dry-embossed sky with a subtle star pattern, adds texture and dimension. The sentiment “You Saved the Day” perfectly complements the theme, making this card ideal for celebrating someone who truly does it all.

Spellbinders | Superheroine Card

    • Create an A2-size card base from Raven cardstock.
    • Cut Breeze cardstock with the largest die in the Mirrored Arch Labels set and dry-emboss with the March Embossing Folder. Add to the card base.
    • Cut the superheroine, clouds, stars, and sentiment with dies in the March Small Die kit from a variety of cardstock colors. Assemble and add to the prepared card base. I added Stickles to the stars and her head crown for sparkle.


Elizabeth Craft | Spring Rain Mice Card

Hello! Today’s card features the charming Big Mouse and Little Mouse die sets from Elizabeth Craft Designs, ready for the spring rain. I intentionally kept the design streamlined by choosing patterned paper for the background rather than building a die-cut scene. I finished the design with a BetterPress sentiment that reads “Hello, Sweet Friend.”

Elizabeth Craft | Spring Rain Mice Card

    • Cover a 6-inch square card base with patterned paper.
    • Press the sentiment and cut with the coordinating die.
    • Cut the Little Mouse, Big Mouse, and Fall Accessories from Soft Finish Cardstock. Color with Distress Oxide inks (Tattered Rose, Black Soot, Spun Sugar, Blueprint Sketch, Candied Apple, Squeezed Lemonade, Hickory Smoke) and assemble.
    • Add the assembled mice and sentiment to the card base.

Elizabeth Craft | Spring Rain Mice Card


Elizabeth Craft | Dog Scene

Hello! Today, I’m sharing a large scene card created with the Dogs and Garden Edges and Fence die sets from Elizabeth Craft Designs. I love building vignettes with these dies, and this one came together as a countryside setting complete with hills, flowers, a classic mailbox, and of course, a sweet dog. All of the pieces were cut from soft finish cardstock and colored with Distress Oxide inks (after cutting), which adds depth and softness to the scene while keeping everything cohesive.

Elizabeth Craft | Dog Scene

    • Cut the Dog, color, and assemble. You can see other cards created with this die set HERE, HERE, and HERE.
    • Cut the Garden Edges and Fence pieces, hand-color, and trim to fit a card base measuring 7 inches wide.
    • Print a computer-generated sentiment or stamp sentiment on to white cardstock and cut with the Garden Edges and Fence cloud die. Trim.
    • Adhere the assembled pieces to a card base measuring 7 inches wide by 5 1/2 inches tall. Add the dog, flowers, and post box with foam adhesive.

Elizabeth Craft | Dog Scene