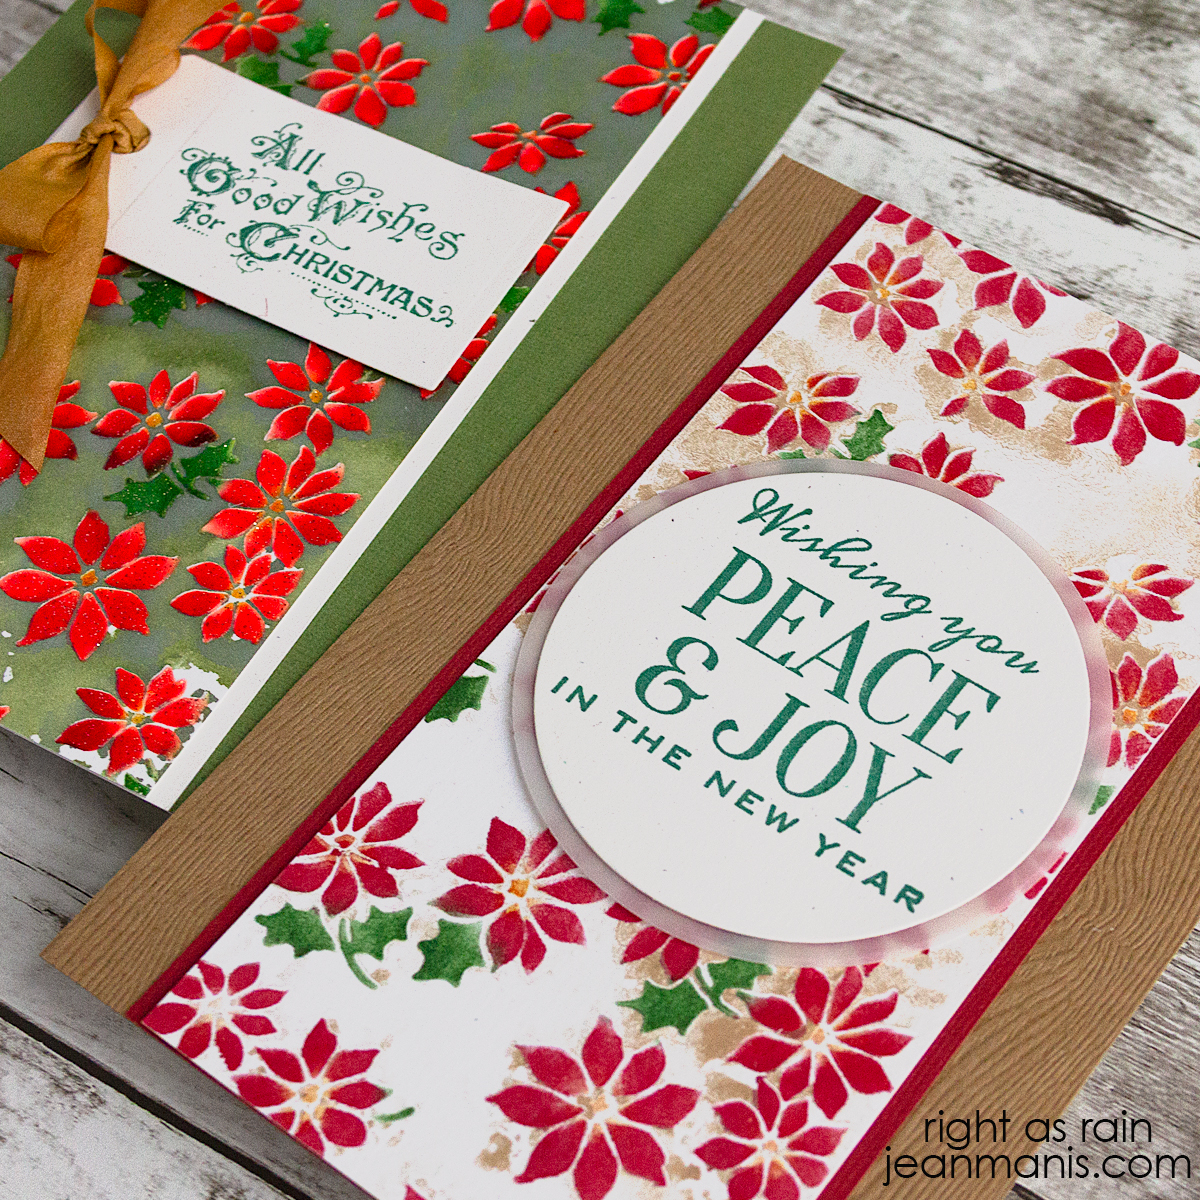
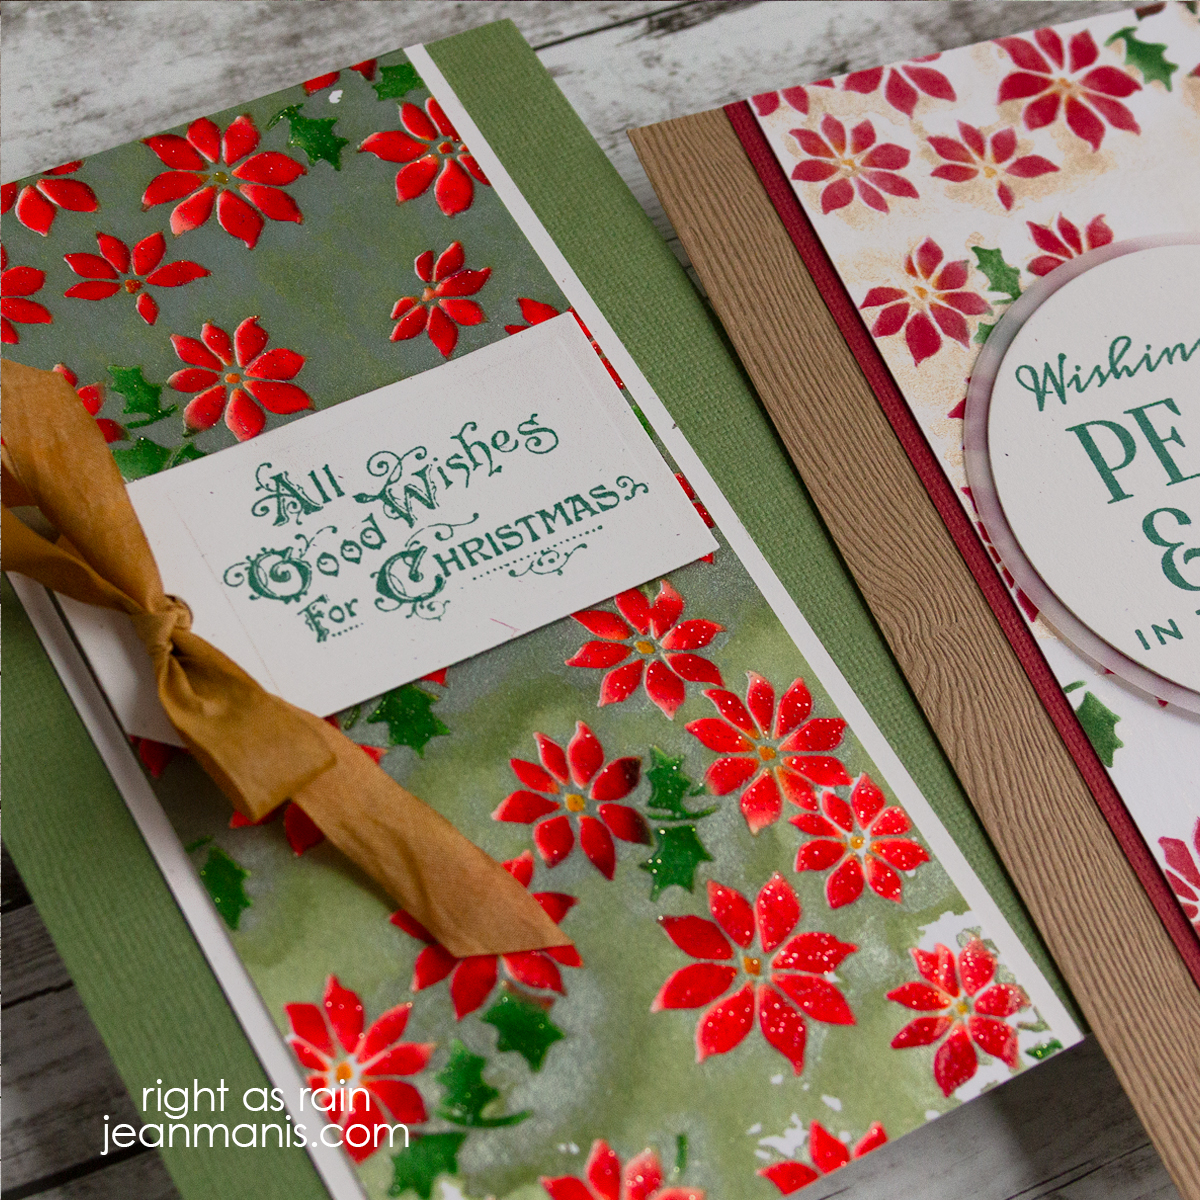
Hello! Today, I’m sharing two Christmas cards created with Tim Holtz products, and yes, I’m back with the same stencil I used on a recent project! I’ve been on a real stencil monoprint kick lately, and these cards are an example of how much variation you can get from a single tool. Both backgrounds began as monoprints, followed by inks added through the stencil. On one card, I added Sparkle Paste for shimmer and texture, while on the other I kept it simple with ink. With so much happening in the backgrounds, I finished each design with a clean sentiment to let the stenciled layers shine.
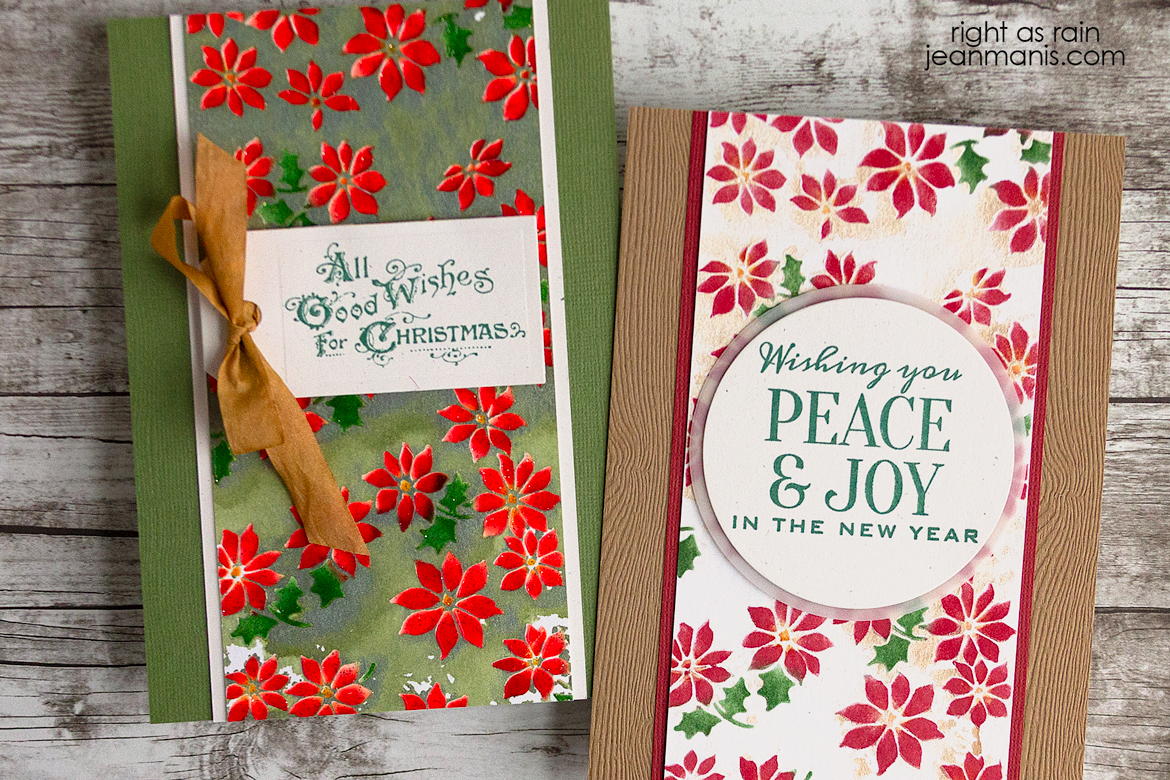
For the first card, I embraced a more dramatic, sparkly finish that instantly makes the background feel rich and joyful.

-
- Create a monoprint with the Tiny Poinsettia stencil using Fresh Balsam Mica Stain. Set aside to dry. Once dry, ink and then add Sparkle Paste through the stencil. Again, set aside to dry.
- Adhere a cardstock panel to a card base measuring 4 3/4″ x 6 3/4″.
- Trim stenciled panel to 3 3/8″ x 6 3/4″. Add to a Speckled Eggshell cardstock panel measuring 3 5/8″ x 6 3/4″. Add assembly to the prepared card base.
- Stamp the Mini Holidays 5 sentiment in Library Green ink on Speckled Eggshell cardstock. Cut the sentiment with a tag die. (I used a now-retired die from the Tag Collection set 658784). Add ribbon to the tag. (I used ribbon in my stash which I colored several years ago with a metallic Distress Spray.) Add the tag to the card front.

For the second card, I went in a different direction letting the clean, inked stencil and woodgrain base create a warm, rustic look.

-
- Create a monoprint with the Tiny Poinsettia stencil using Antique Linen Distress Spritz. Set aside to dry. Once dry, ink.
- Adhere a Light Brown Woodgrain cardstock panel to a card base measuring 4 3/4″ x 6 3/4″.
- Trim stenciled panel to 3 3/8″ x 6 3/4″. Add to a warm red cardstock panel measuring 3 5/8″ x 6 3/4″. Add assembly to the prepared card base.
- Stamp sentiment, included in the Stamptember 2018 set (this set contains several of the Stampers Anonymous Festive Overlay set in a slightly larger size), in Library Green ink on Speckled Eggshell cardstock. Cut with a circle die, back with a slightly larger vellum circle, and add the assembly to the card front.