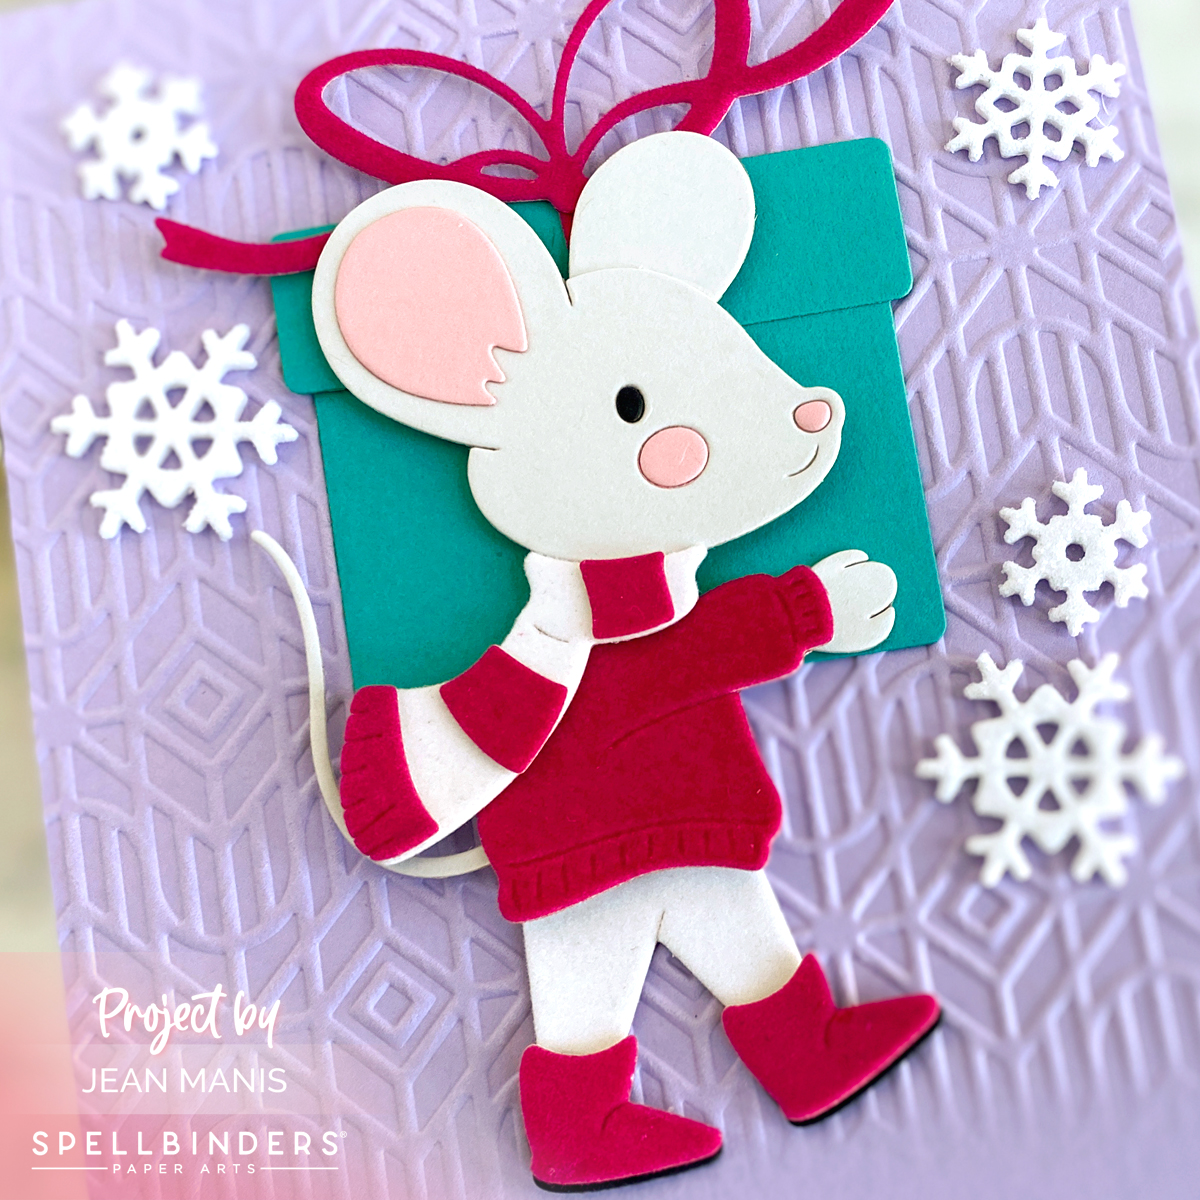
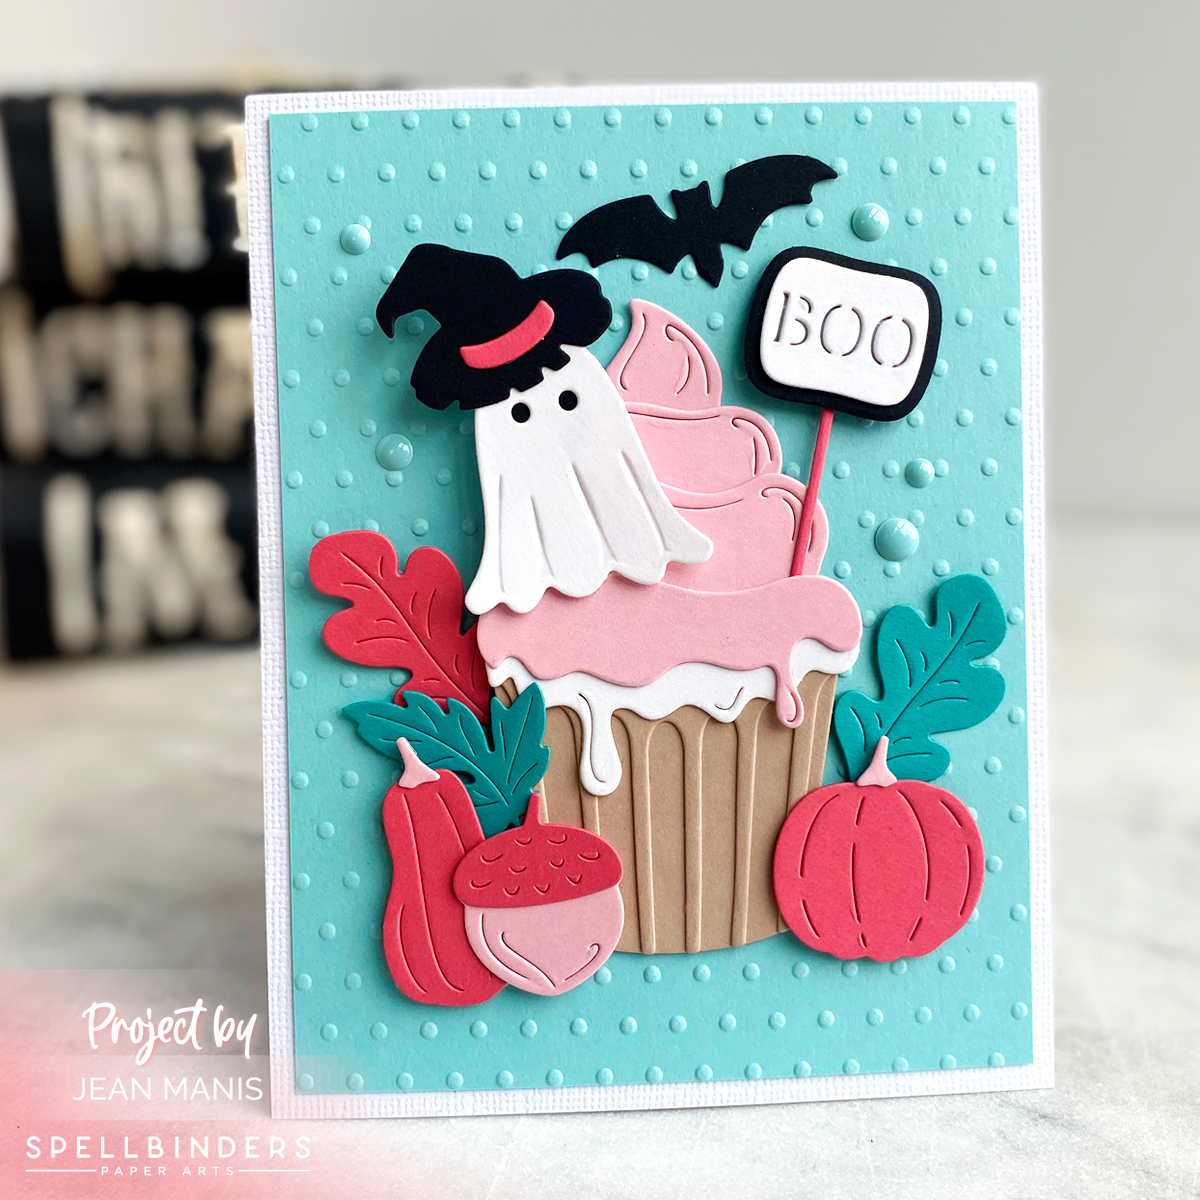
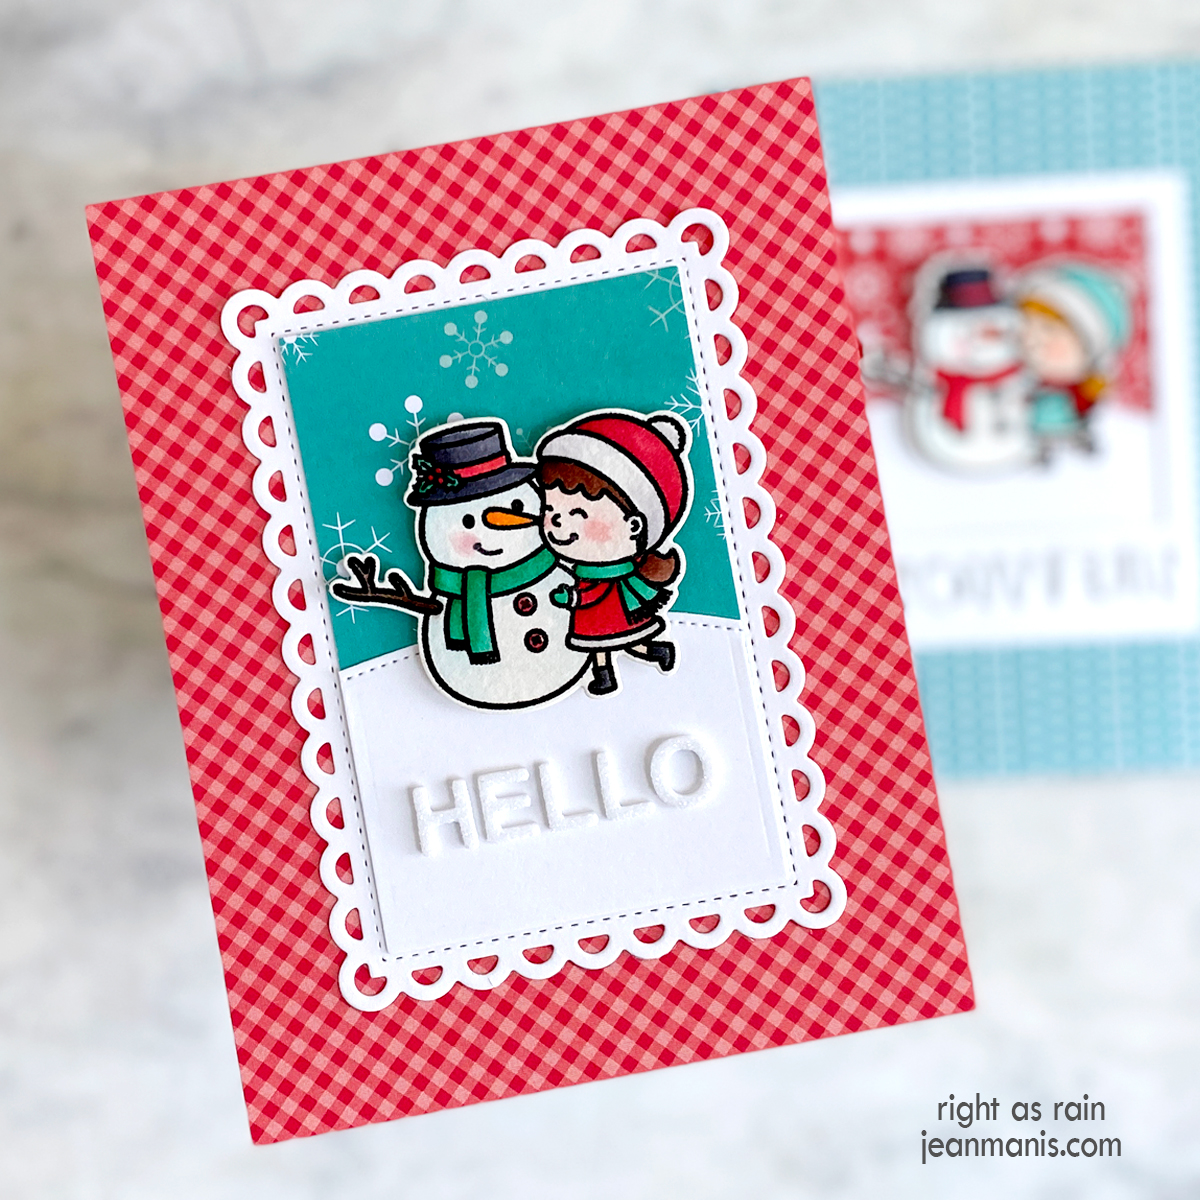
Tim Holtz Cozy Winter Tags

Hello! Today I am sharing two versions of a holiday tag featuring the Tim Holtz Cozy Winter bear. I previously shared a card featuring the bear here.

Tim Holtz Cozy Winter Tags

I used a die in the Tag Collection set to create the tag base, cutting cardstock to which I had applied Distress Oxide ink.

On both tags, I used the Flurries stencil, varying the method by which I created the snowflakes. For the tag on the left, I applied Transfer Gel through the stencil. Once dry, I ran the tag through my Minc with Flock Transfer. For the tag on the right, I applied white embossing paste through the stencil and sprinkled it with Clear Rock Candy glitter.

In addition to changing up the color of cardstocks I used to create the bears, I changed up the sentiment as well. For the first bear, I stamped the Bold Tidings Mini sentiment on to white cardstock and cut it with a Spellbinders Color Block Scenic Scape die.

Tim Holtz Cozy Winter Tags

On the other, I added Clear Rock Candy glitter to white cardstock (with double-sided adhesive), cut the cardstock with the Spellbinders Color Block Scenic Scape die, and added a sentiment cut with the Alphanumeric Bold set, from cardstock to which I had applied Broken China Glaze.

Tim Holtz Cozy Winter Tags

The Cozy Winter set includes a mug for the bear to hold. I swapped out the mug for a present, cut with the Christmas Minis set. I cut the present from cardstock to which I had applied Broken China Glaze and cardstock which I had heat-embossed with Red Tinsel embossing powder. I cut the scarf from these same two pieces.

Tim Holtz Cozy Winter Tags Tim Holtz Cozy Winter Tags

I really enjoy using the same design while varying the ways in which I create the elements.

Spellbinders November 2021 Clear Stamp + Die of the Month Club

Hello crafty friends! Today, I’m sharing a holiday card created with the Spellbinders November 2021 Clear Stamp & Die of the Month Club – “Around The Holidays.” Read more about this club here.

Spellbinders November 2021 Clear Stamp + Die of the Month Club

Spellbinders November 2021 Clear Stamp + Die of the Month Club

Spellbinders November 2021 Clear Stamp + Die of the Month Club


Spellbinders November 2021 Large Die Kit Club

Hello crafty friends! Happy November! I’m delighted to share a slimline holiday card created with the Spellbinders November 2021 Large Die of the Month “Christmas Foliage Strip & Borders.” This jam-packed set includes 13 dies with which to create elegant and distinctive slimline cards. (Find out more about this set here.) The border dies in the set mix-and-match; I have paired three on my card, which I crafted from traditional Christmas colors.

Spellbinders November 2021 Large Die Kit Club

Spellbinders November 2021 Large Die Kit Club

  • With one of the Large Die of the Month border dies, I cut the top piece from red cardstock, trimmed to 8 1/2 inches long, and heat-embossed the Christmas Time Sentiments sentiment.
  • I die-cut the center section from Brushed Gold cardstock and adhered it to the red cardstock.
  • I die-cut the floral border (Noble Fir cardstock) and additional elements.
  • I adhered the elements to the floral border before adding the assembly to the red and gold piece.
  • I added the entire assembly to an off-white, slimline-sized cardstock base.

Spellbinders November 2021 Large Die Kit Club

There are a number of possible variations with these dies! While I chose  traditional Christmas colors, I am envisioning another version in a palette of white and silver, for example. Additionally, the borders can be run vertically for an entirely different look.


Tim Holtz Bold Tidings Mini

Hello! Today, I am sharing a CAS Christmas card created with Tim Holtz supplies that combines my favorite techniques: stenciling, die-cutting, and heat-embossing.

Tim Holtz Bold Tidings Mini

  • I applied white embossing paste through the Flurries stencil on an A2 teal card base.
  • I heat-embossed the Bold Tidings Mini sentiment with Wow silver glitter powder on white cardstock. I trimmed the sentiment and backed it with a silver cardstock mat.
  • I die-cut the Tree Line from white cardstock to which I had applied double-sided sheet adhesive. I added Clear Rock Candy glitter to the exposed trees. I like using Clear Rock Candy glitter as it does not have an undertone (some premade glitter sheets are blueish, yellowish, or pinkish).
  • Once the background was dry, I added the trees and the sentiment panel with foam adhesive.

Tim Holtz Bold Tidings Mini