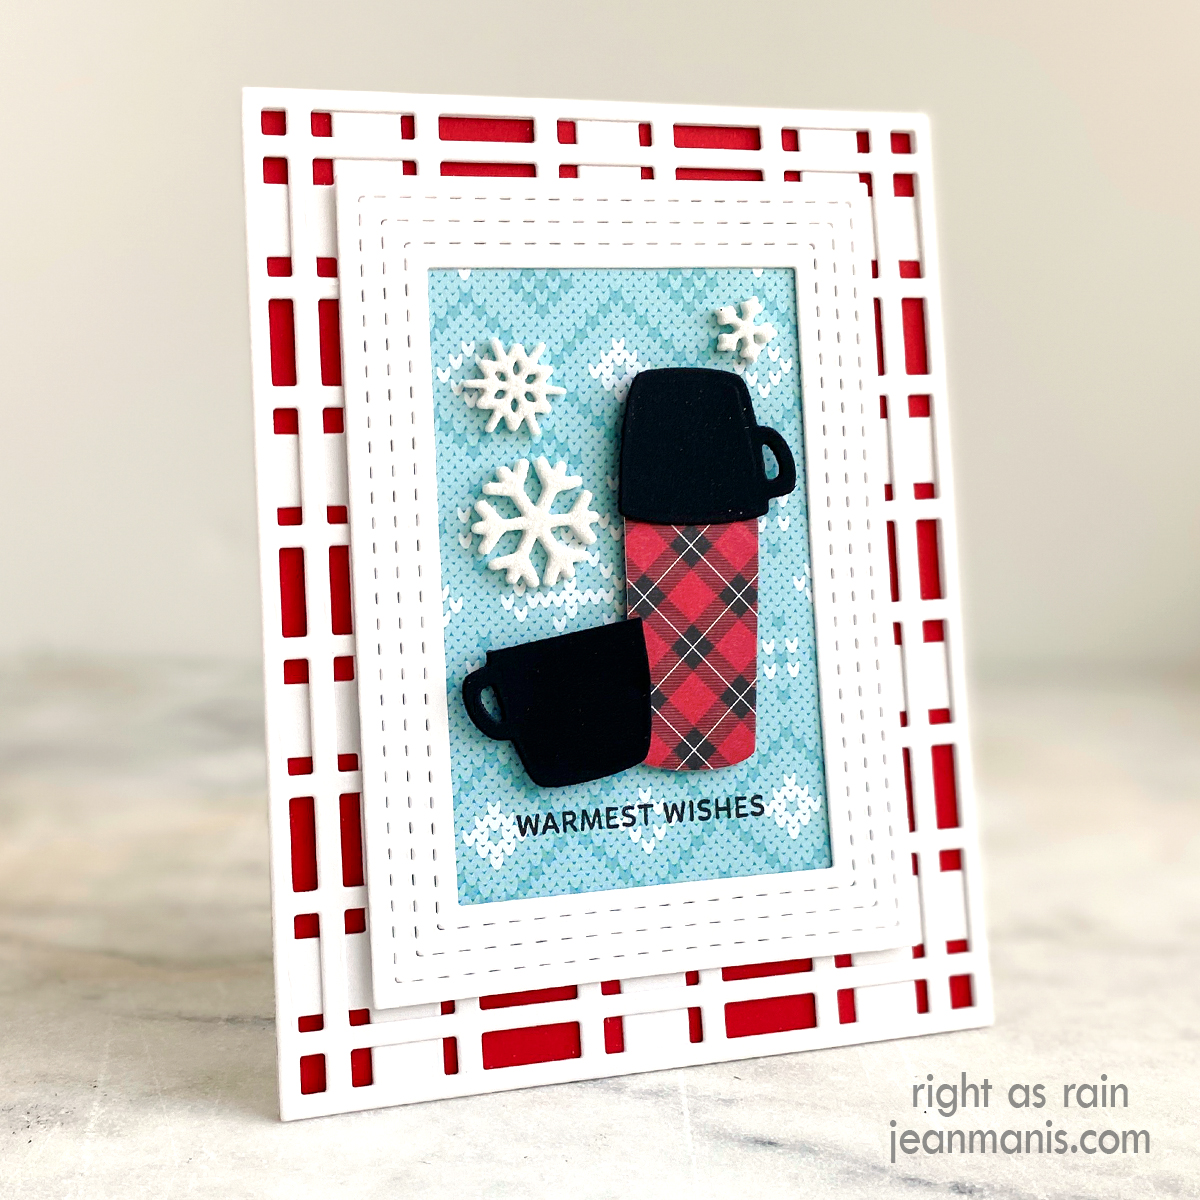
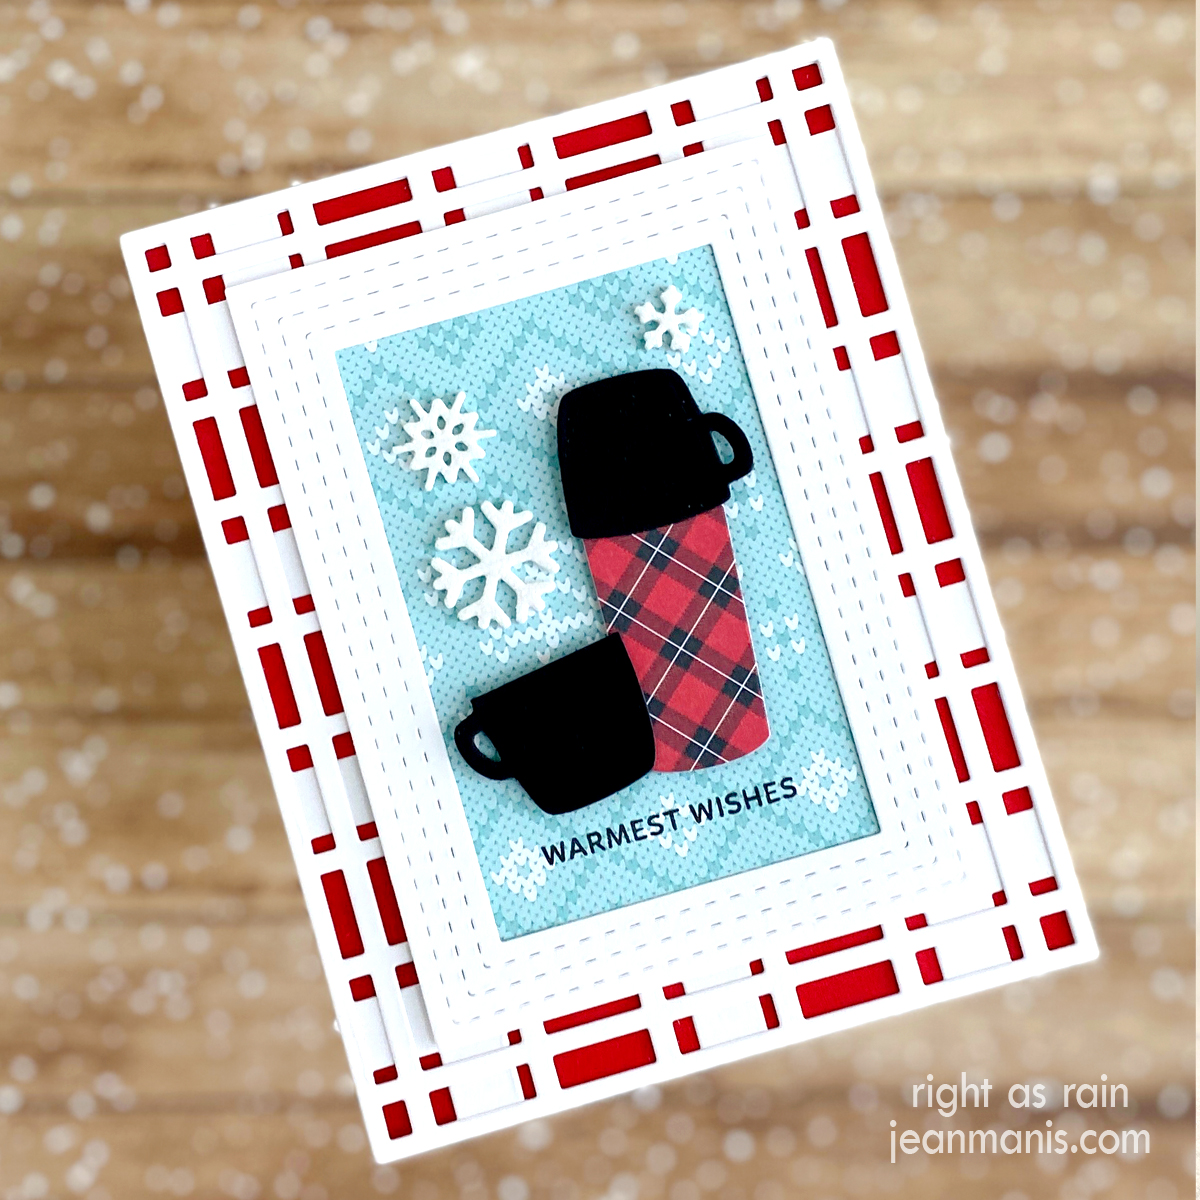
Hello! As I mentioned HERE, I am looking to extend the use of my winter-themed supplies beyond the holidays. Today, I am sharing a card that features a charming plaid vintage thermos and cup, cut with the Impression Obsession Thermos die set. Send your “Warmest Wishes” with this versatile winter-themed card that transcends holiday cheer, celebrating the timeless beauty of coziness and connection.
We owned a plaid thermos that looked very similar to the one I crafted. You can read about the Thermos company HERE. I talk about my enthusiasm for creating cards with a hot beverage theme HERE.
- To create the background, I cut white cardstock with the Reverse Confetti Plaid Lines – Small and Plaid Lines – Big cover plate dies. I rediscovered these two dies after writing a post on cover plate dies, which you can read HERE. I added the two die-cut pieces to a card base covered with Fun Stampers Journey Cranberry Bliss cardstock.
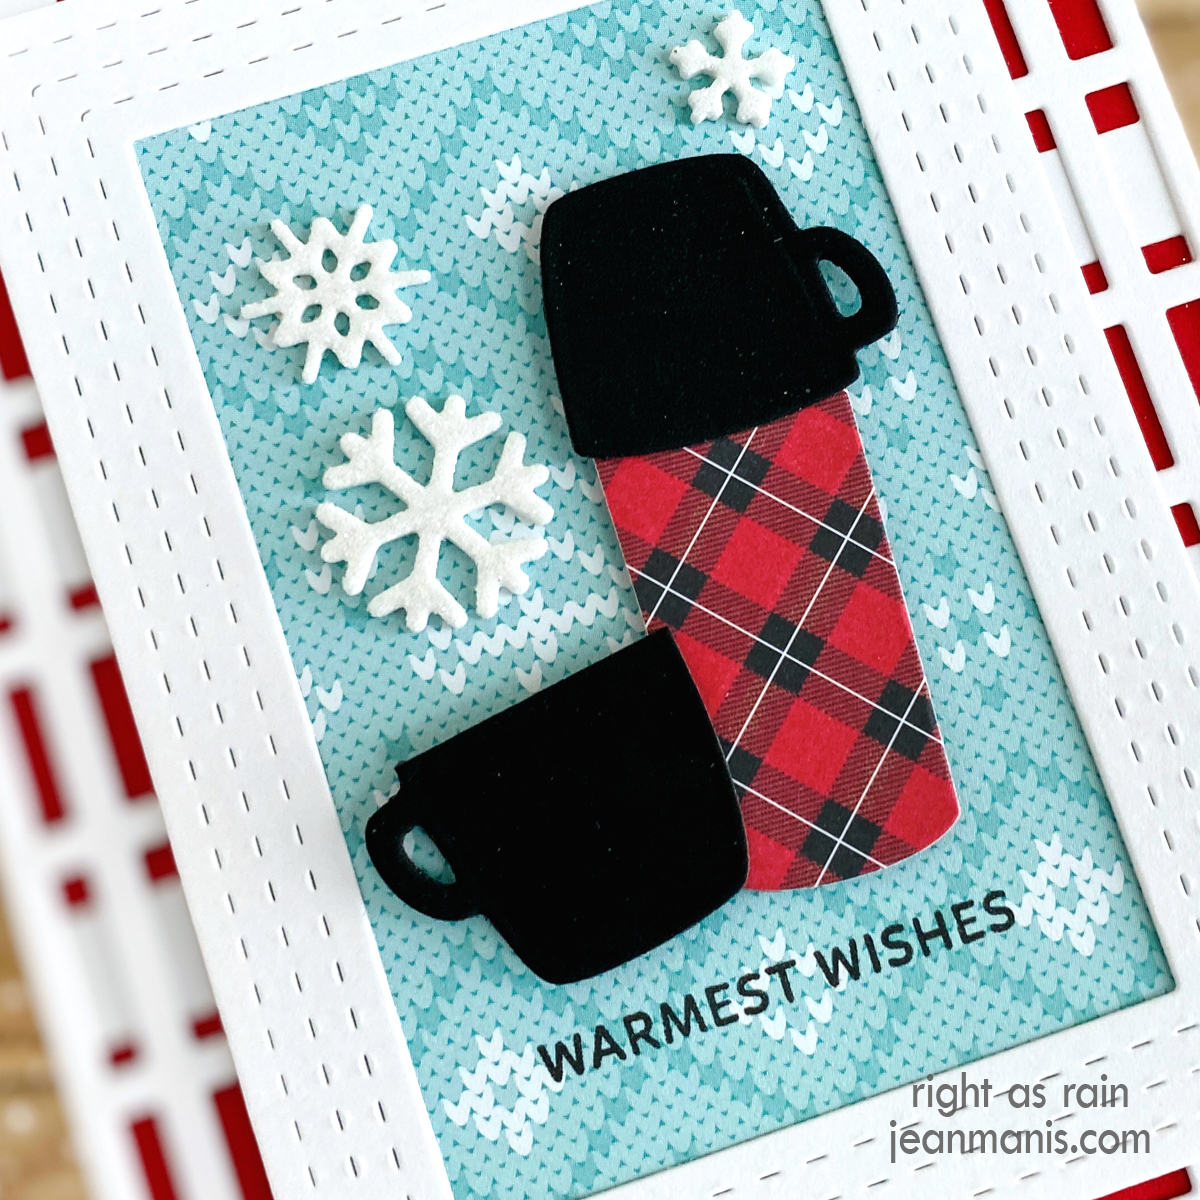
- I cut the Thermos from plaid patterned paper and black chalkboard cardstock. I trimmed the Thermos body off a bit and adhered a black mug to its top. For the other mug, I trimmed off the round top.
- I stamped the Pretty Pink Posh Sentiment Strips Christmas sentiment on to patterned paper (I do not know whose). I trimmed the panel and added a frame cut with the Revere Confetti Stitched Notes & Frames die set. I added the assembly to the card base.
- I added the Thermos and mug to the card with foam adhesive and embellished with snowflakes cut from white glitter foam with the Lawn Fawn Mini Snowflakes die set.
Memory Box Christmas Plaid patterned paper, Fun Stampers Journey Cranberry Bliss cardstock, SU chalkboard cardstock, Reverse Confetti Plaid Lines – Small and Plaid Lines – Big cover plate dies, Revere Confetti Stitched Notes & Frames die set (frame)