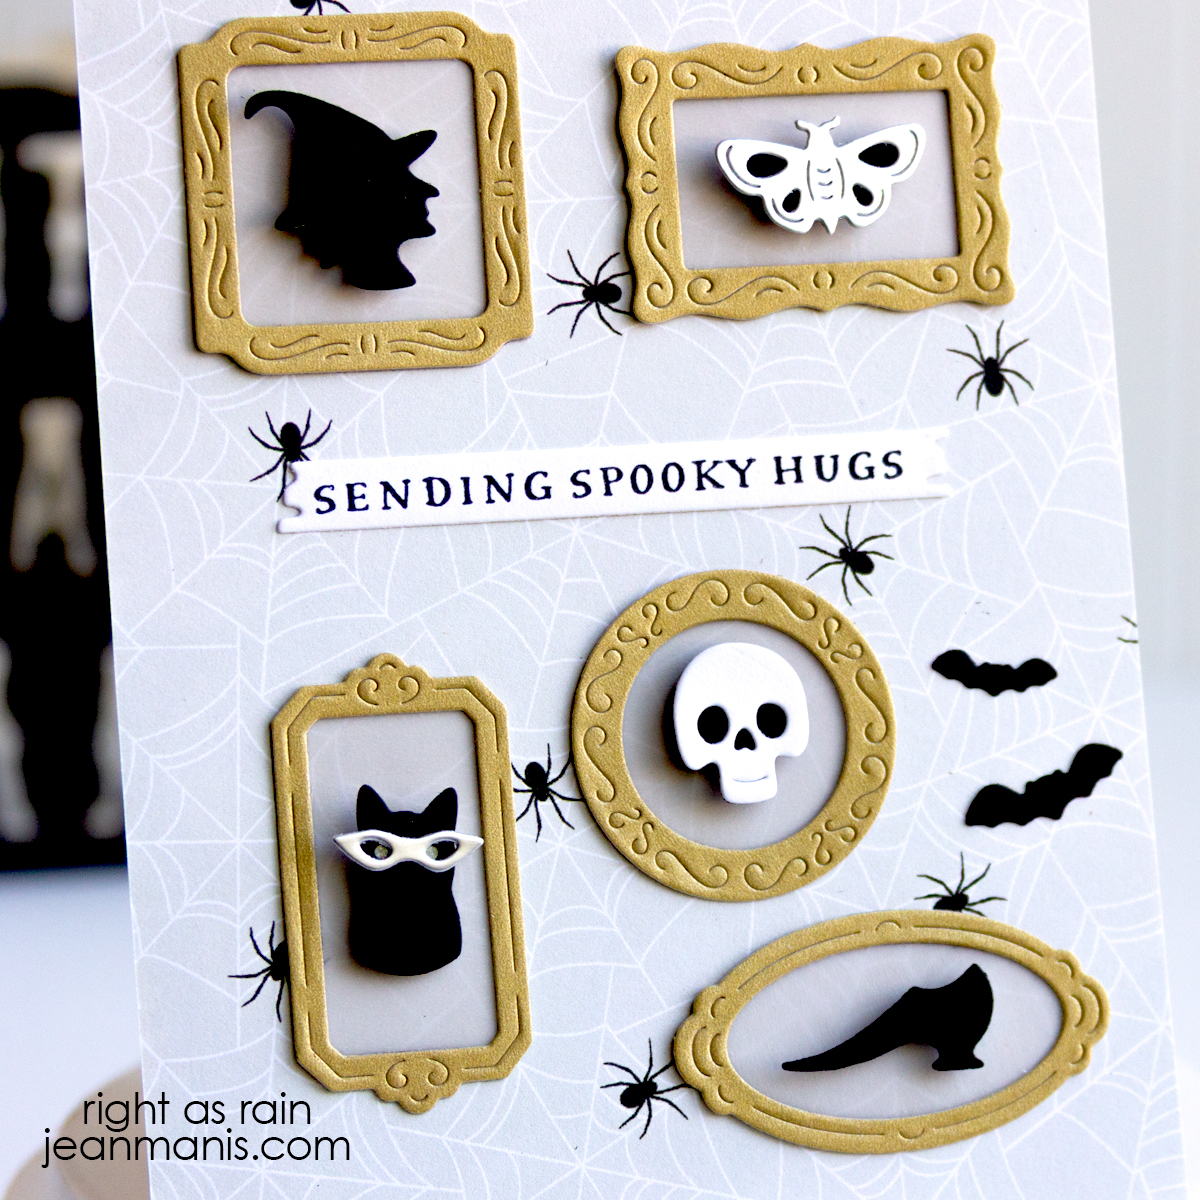
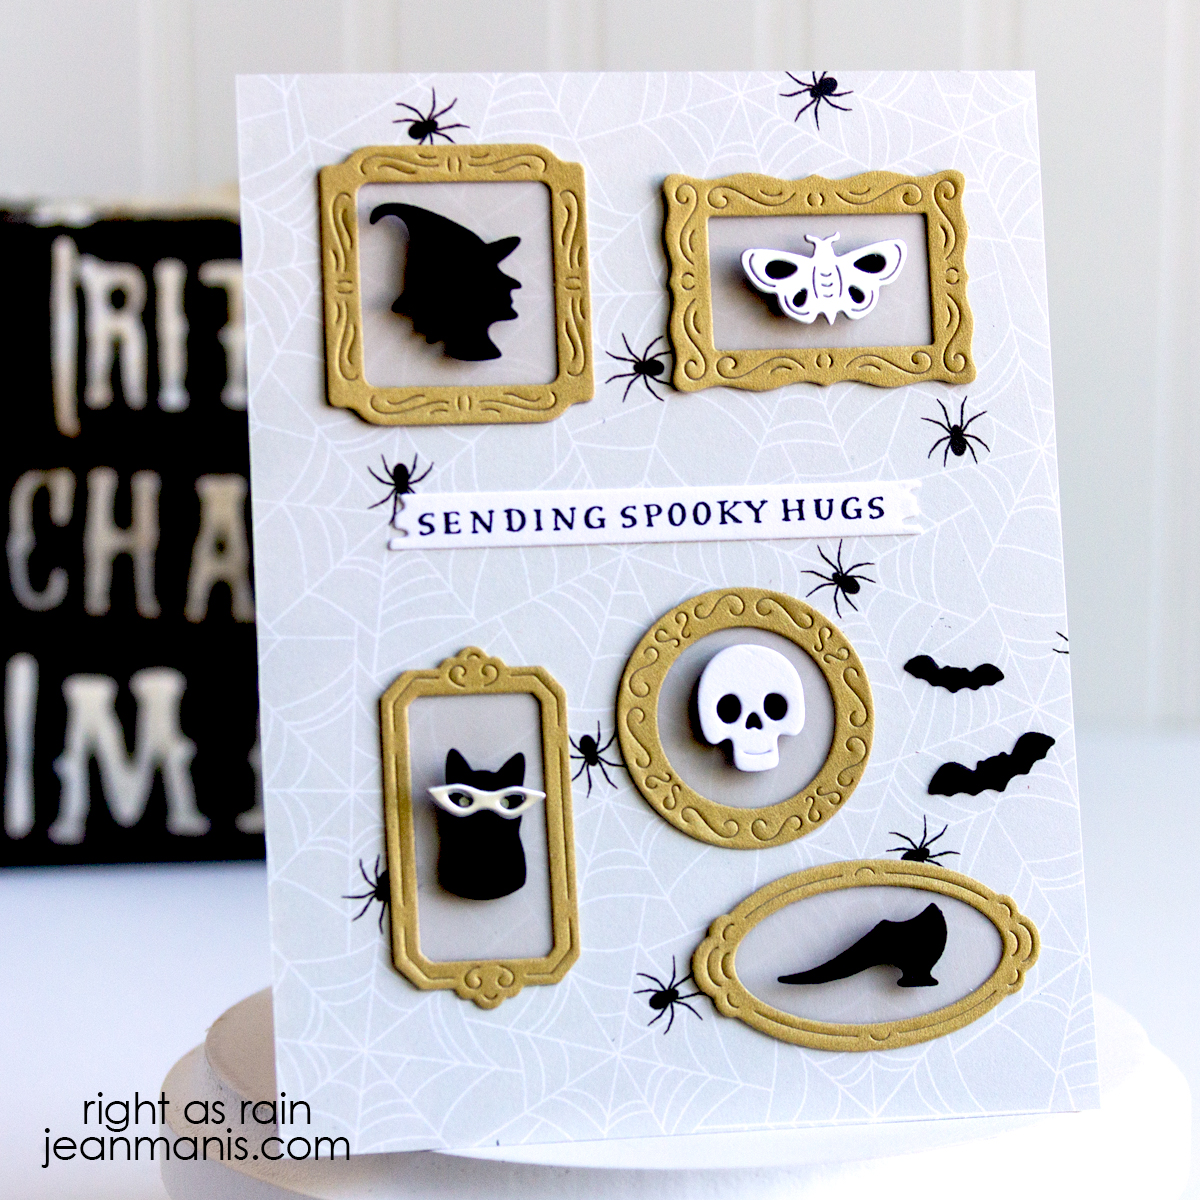
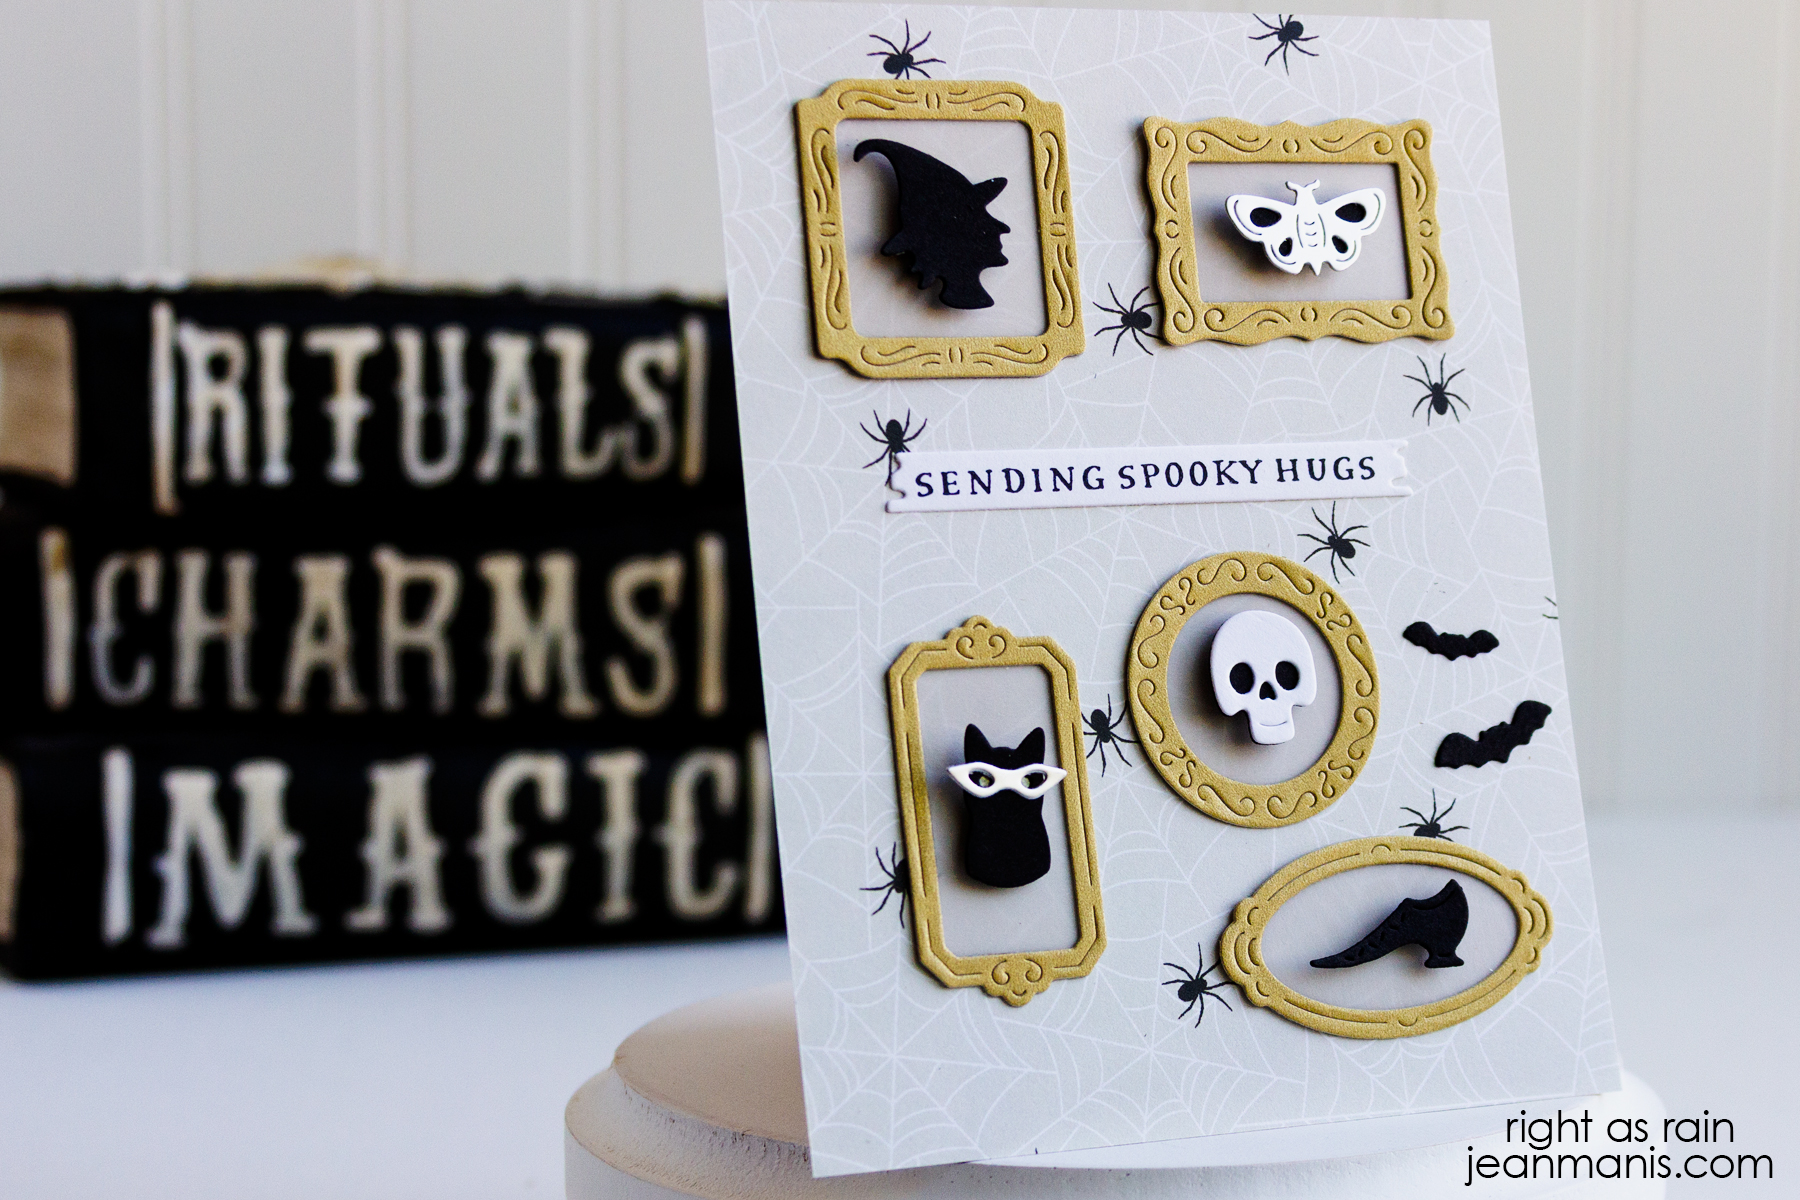
Hero Arts | Boho Birthday Balloons

Hello! I’m sharing a handmade birthday card that’s all about color and celebration—without being overly sweet. This design features die-cut balloons in a warm, boho-inspired color palette paired with a stamped background and a bold birthday sentiment. It’s the kind of card that feels festive yet grown-up, perfect for an adult birthday. I used a mix of Hero Arts products to bring this look together.

Hero Arts | Boho Birthday Balloons

    • Stamp the Ocean Waves background on to Classic White cardstock with gold ink. Trim and add to an A2-size card base.
    • With the Balloon Bunch dies, cut the balloon base and bow from gold cardstock. Cut balloons from desired cardstock colors. Adhere the balloons to the balloon base.
    • Heat-emboss the sentiment and cut with the coordinating die.
    • Add the balloon assembly to the prepared base with foam squares. Attach the bow and sentiment.

Hero Arts | Boho Birthday Balloons

This card comes together quickly with just a few basic die cuts and a stamped background—simple, but impactful. Swap out the boho tones for bright primaries or soft pastels, and you’ll have an entirely different look to suit any recipient or season.


Newton’s Nook | Celebrate the Fourth

Hello! I’m celebrating the 4th of July with a playful handmade card featuring a cat and dog riding in a wagon decked out in red, white, and blue! The adorable image, from Newton’s Nook, is perfect for patriotic crafting. I typically reach for watercolor markers, but this time I opted for my Kuretake Gansai Tambi pans for a fresh take. I decided I wanted to torture myself explore a different watercolor medium that I haven’t used in several years.

Newton's Nook | Celebrate the Fourth

    • Cover an A2-size card base with patterned paper.
    • Stamp the 4th of July stamp image on to watercolor cardstock. Color with medium of choice. Cut with coordinating die set.
    • Stamp the sentiment onto cardstock and cut with a rectangular die. Add the watercolored image with foam adhesive.
    • Add embellishments to the panel (I used Taylored Expressions white epoxy stars from my stash) and add to card base.


Retro Kitchen Collection: Second Helping

Hello! I’m back with another handmade card featuring those irresistible vintage Pyrex dishes—this time in a landscape format! I used the same Hero Arts products from my previous project to craft two charming kitchen shelves, each stamped with part of the sentiment: “You’re not old, you’re retro” and “No one measure up to you.” The dishes are stacked in a mix of blue, red, and sunny yellow, but you can easily customize the palette for any season or holiday.

Hero Arts | Retro Kitchen Collection

    • Create an A2-size Alabaster card base. Adhere a 4″ x 5 1/4″ panel of patterned paper to the base.
    • Stamp the On the Shelf sentiments in blue ink on to Alabaster cardstock and cut with the shelf die in the coordinating die set.
    • Cut the dishes with the Classic Casserole set from desired cardstock colors. I chose to back the dishes with Alabaster cardstock, rather than white, for a more vintage. Assemble. Cut two spoons with the same die set.
    • Add the stacks of dishes to the shelves and attach to the prepared card base. Add the die-cut spoons.

Hero Arts | Retro Kitchen Collection


Hero Arts | Retro Kitchen Collection

Hello! Today, I’m sharing a playful card created with Hero Arts products from the Retro Kitchen Collection, a nostalgic nod to vintage cookware and cozy kitchens. I focused on the coordinating stamp and die sets featuring stacked Pyrex-style dishes, crafting them in a charming palette of dusty blue, red, and yellow. The sentiment “You’re not old, you’re retro” adds just the right touch of humor. This card would delight anyone with a vintage collection—or simply a love for organizing colorful dishes in tidy stacks. With a quick change in color scheme, it’s easy to imagine holiday-inspired versions too!

Hero Arts | Retro Kitchen Collection

To get a balanced set—both in shape and color—I created nearly every dish variation included in the die set in the three colors. It felt a bit like building my own curated collection, not unlike a true vintage enthusiast who hunts down every last piece for their shelf!

    • Stamp the On the Shelf sentiment in black ink on to an A2-size patterned paper. Add to card base. (This stamp set is also sold with a coordinating die set.)
    • Cut the dishes with the Classic Casserole set from desired cardstock colors. I chose to back the dishes with Alabaster cardstock, rather than white, for a more vintage. Assemble.
    • Add stacks of dishes to prepared card base with foam adhesive.

Hero Arts | Retro Kitchen Collection

Do you collect vintage dishes or know someone who does? I’d love to hear about it!


Newton’s Nook | Cat with Bubble Tea

Hello! Today, I’m sharing a playful handmade card featuring a fun-loving cat sipping bubble tea—because it’s always a good time to par-tea! I used stamps from Newton’s Nook to create the adorable focal image, which I watercolored. To set the scene, I stenciled a pair of tropical palm trees on to patterned paper, adding a relaxed, summery vibe that perfectly complements the kitty’s party spirit.

Newton's Nook | Cat with Bubble Tea

    • Stamp the Bubble Tea image on Cold Press watercolor paper, heat-set the image, and color with Zig markers.
    • Once dry, cut the image with its coordinating die.
    • Stencil the palms in black in with the Retro Sun and Palms stencil on to patterned paper (Simple Stories Just Beachy).  Trim and add to a white A2-size card base.
    • Using a different patterned paper in the same Simple Stories Just Beachy pad, cut a hill, and add to the prepared base.
    • Stamp the Bubble Tea sentiment on to yellow cardstock and cut with a circle die.

Newton's Nook | Cat with Bubble Tea