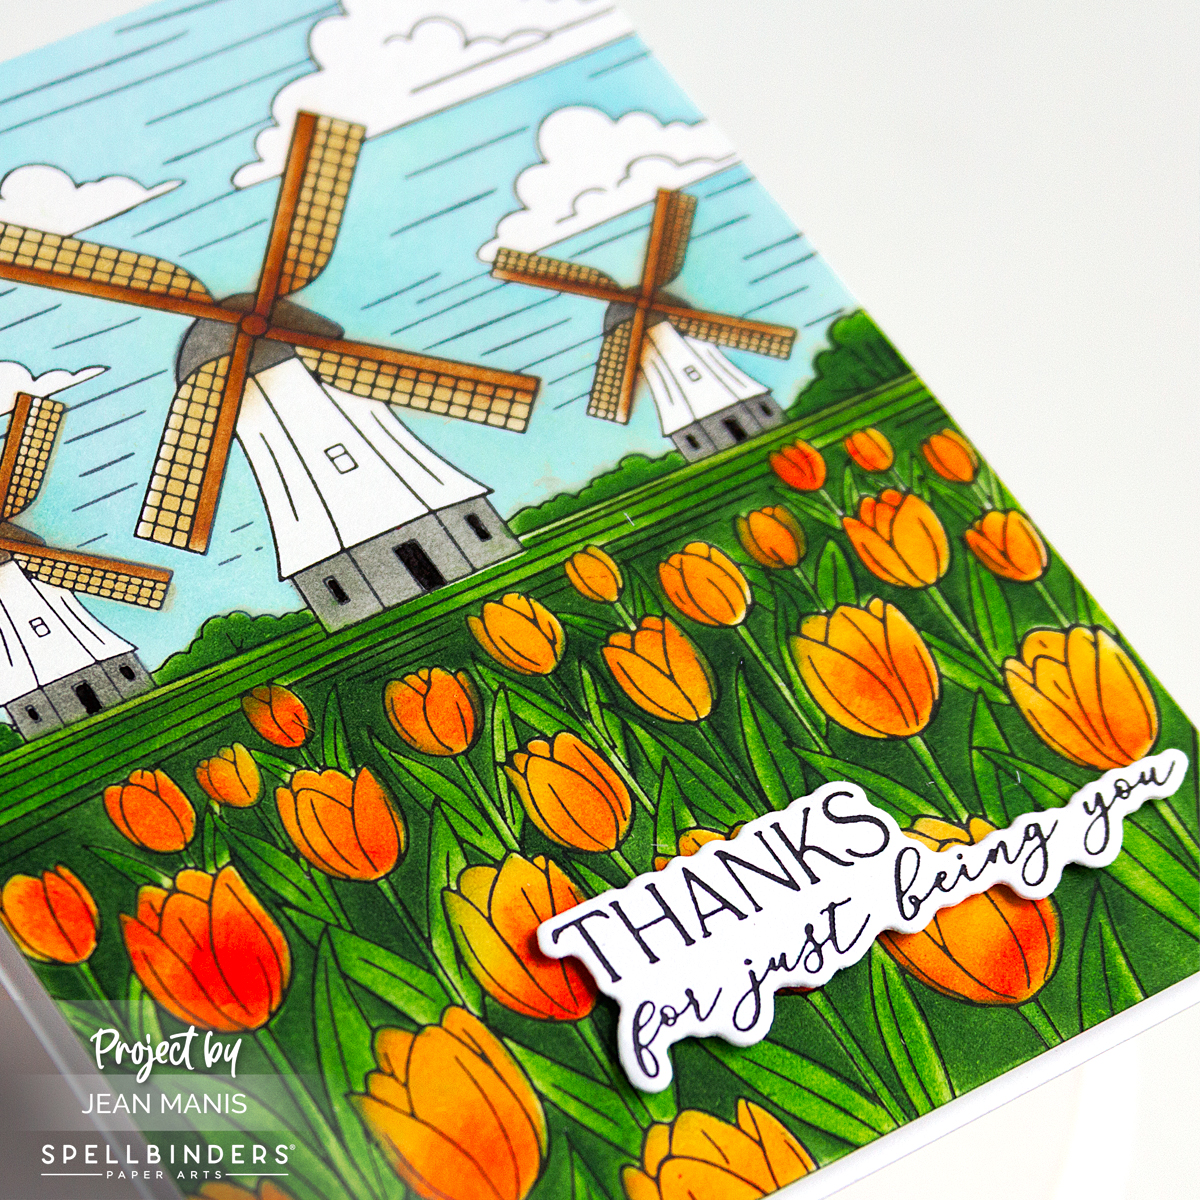
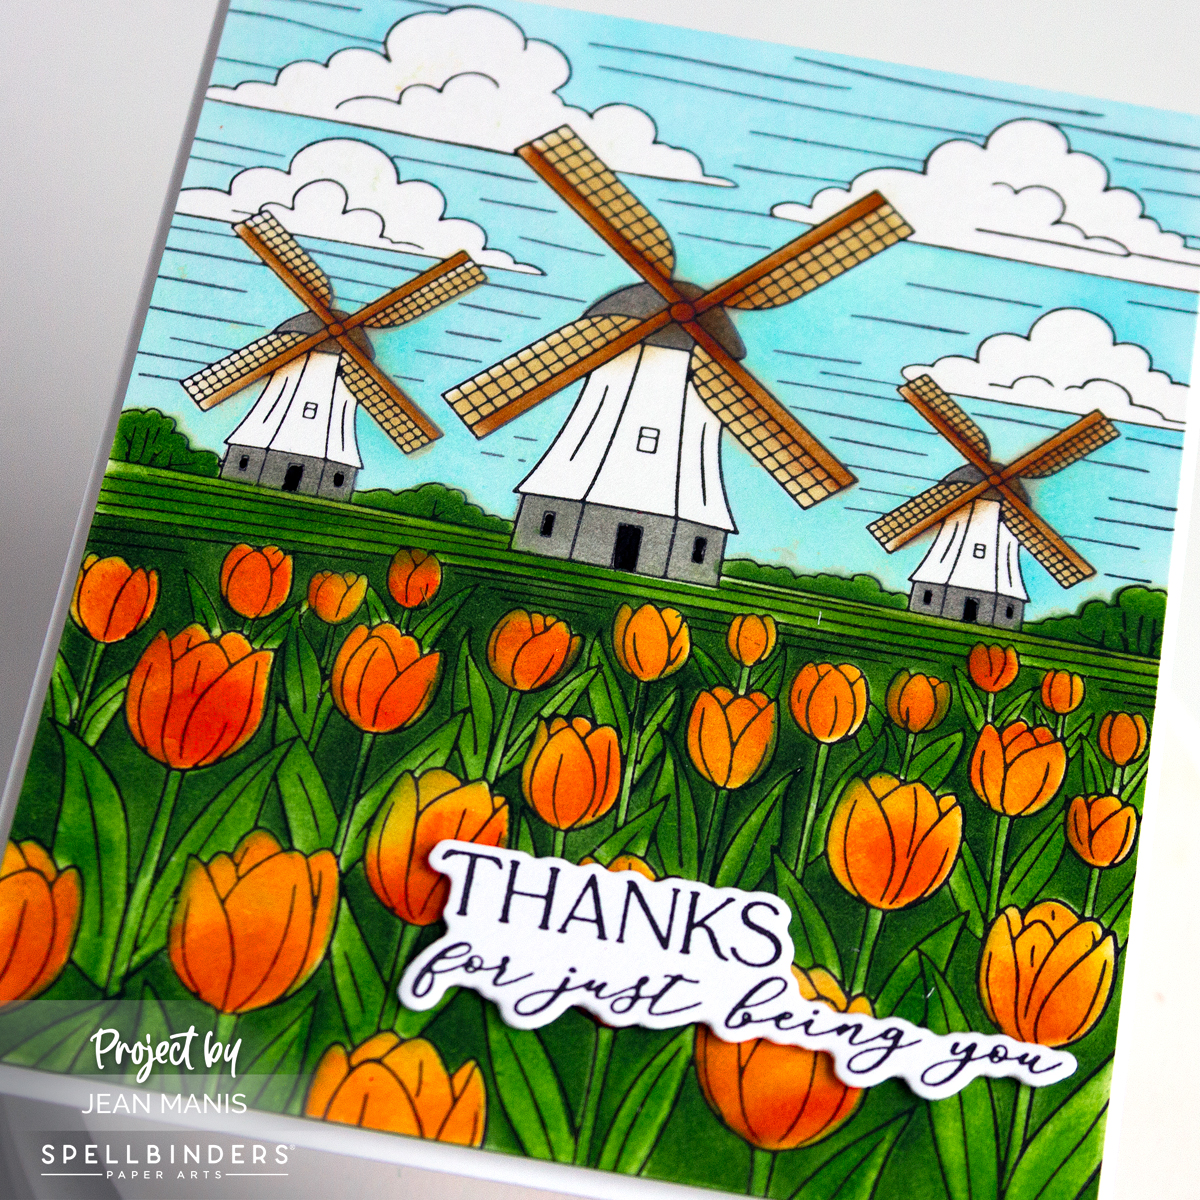
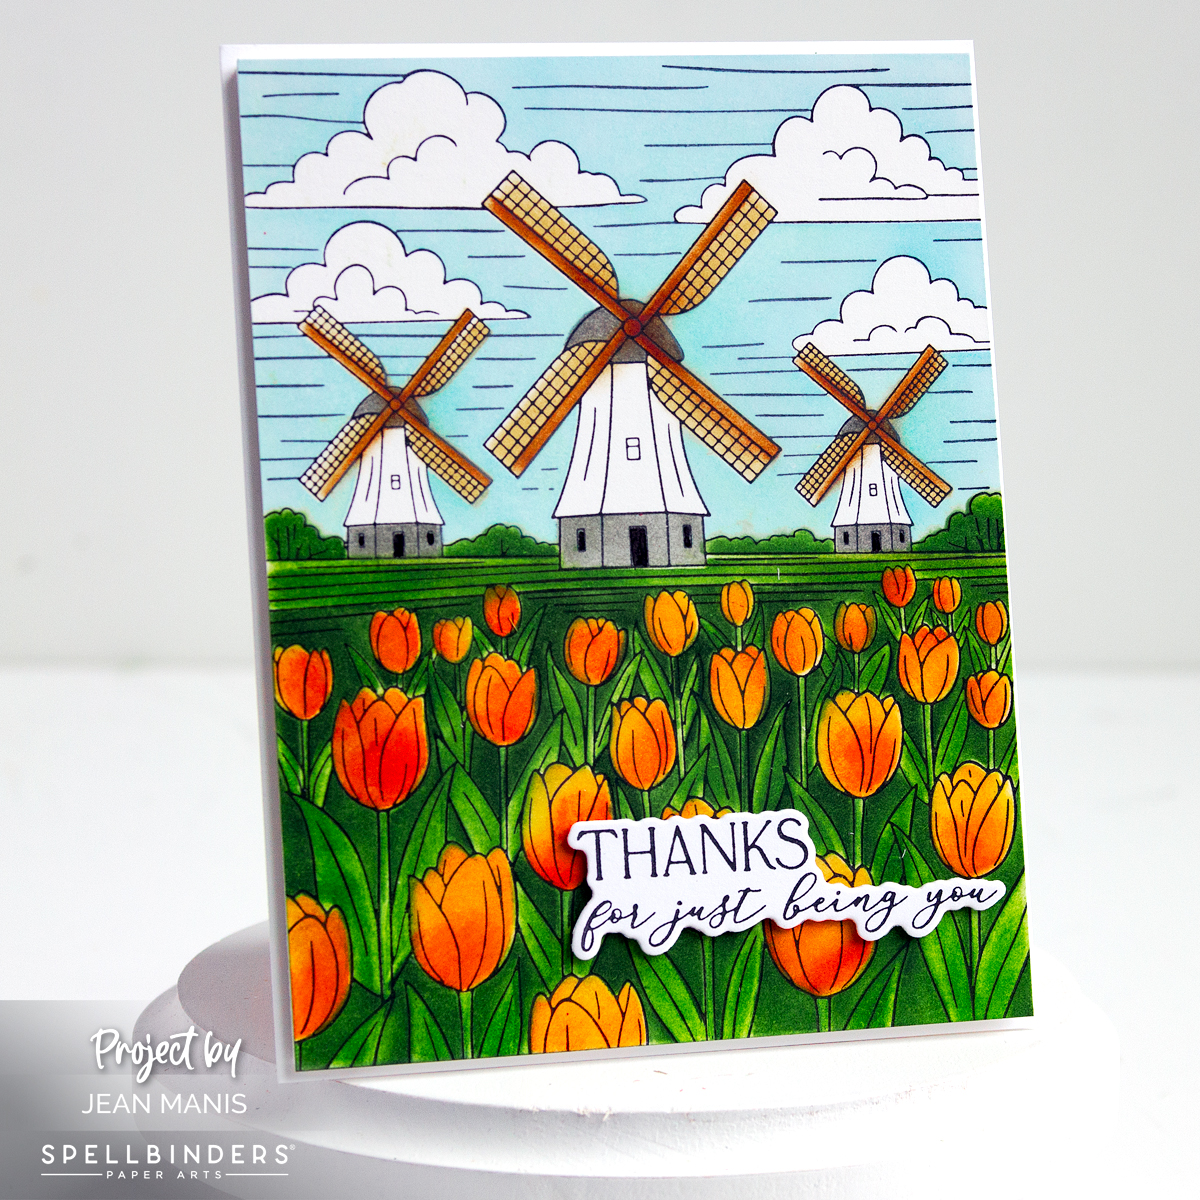
Triple the Cuteness Easter Card

Hello! Easter is a great time to embrace all things cute and colorful, and my latest card does just that! This playful creation features three Polaroid-style snapshots of adventurous bunnies behind the wheel, with each car in a different color combo — green, purple, and pink. The overlapping snapshots add a fun, dynamic feel, while the cheerful “hippity hoppity” sentiment makes it unmistakably Easter. I used a combination of Spellbinders products to bring this scene to life.

Triple the Cuteness Easter Card

    • Create a 5″ x 7″ card base and cover with patterned paper.
    • Cut the photo frames with the Memory Frames die. Back with Waterfall cardstock.
    • BetterPress the All Seasons Spring sentiment in black ink and cut with the coordinating die.
    • Cut bunnies, cars, and balloon with dies in the Go Kart Go set. Assemble as required. I shared a card featuring the Go Kart Go set HERE.
    • Adhere the bunnies inside the frames. Arrange frames on card base and adhere.
    • Embellish scene with the assembled Go Kart Go balloon and clouds cut with the On Cloud Nine set.
    • Add sentiment with foam squares.

Triple the Cuteness Easter Card

Now through March 19, save up to 30% on select Spellbinders die sets!

March 2025 Sale


Out-of-This-World Alien Birthday Card

Hello! Today, I am sharing a birthday card that’s truly out of this world! Using Spellbinders products, I created a playful scene featuring a UFO and an alien with balloons.

Out-of-This-World Alien Birthday Card

    • Dry-emboss an A2-size Blue Jay cardstock panel with the Stargazer folder. Attach to a card base.
    • Cut UFO and aliens with the UFO Friend die set, which is one of several sets in Simon’s Space Adventure Collection. Assemble.
    • Cut the balloons with dies in the Birthday Bliss set. Assemble.
    • Press the Let’s Celebrate sentiment on to a yellow cardstock panel. With the UFO beam die in the UFO Friend set, cut the beam from scratch paper. Using the negative of the beam piece, draw the longer beam on to the sentiment panel. Use scissors or a paper cutter to cut the longer beam.
    • Attach the sentiment beam under the assembled UFO. Add elements to the card base with glue and foam squares.

Out-of-This-World Alien Birthday Card


Customizable Playing Card Faces

Hello! The timeless appeal of playing card symbols—Kings, Queens, and Jacks—lies in their rich history and versatile elegance. With the Reversible Royal Court die set from the Jack of All Trades Collection by Jaycee Gaspar for Spellbinders, you can bring these iconic symbols to life. This die set allows you to create detailed and customizable King, Queen, and Jack designs. I created a striking card featuring the King paired with the sentiment “Lucky You.” You could just as easily feature a Queen and King on the same card or step away from playing card theme entirely to craft a card inspired by heraldry.

Spellbinders Reversible Royal Court

    • Dry-emboss light gray cardstock with the Tiny Dots folder and attach to an A2-size card base.
    • Cut the pieces for the king with the Reversible Royal Court set from a variety of cardstock colors and textures. Assemble the sleeve, shield, torso and face.
    • Press the sentiment with a plate in the Shuffling Sentiments set on Snowdrift cardstock in black. Cut with a banner die (I used one that was included with a Spellbinders Glimmer Foil sentiment set.)
    • Attach the top and bottom torso pieces together (with the sashes already adhered.) Place the sentiment across the assembly. Add additional pieces starting with the head. Once assembled fully, adhere to the card base.

Spellbinders Reversible Royal Court


Spellbinders Botanical Atrium Card

Hello! This month’s Large Die of the Month kit at Spellbinders kit features a botanical atrium design. The open feel of an atrium brings a sense of tranquility and sophistication, making it perfect for cards that convey thoughtful sentiments or celebrate special occasions.

Spellbinders Botanical Atrium Card

    • Dry-emboss Royal Amethyst cardstock with the Tiny Dots folder and cut with the atrium outline die in the Large Die of the Month set.
    • Cut the atrium overlay from texture cardstock.
    • Press the sentiment in black on white cardstock with the plate in the Bestie Sentiments set. Cut with the coordinating die.
    • Cut the floral elements and butterflies with the dies in the Large Die of the Month set. Assemble as required.
    • Glue the floral elements to the dry-embossed purple panel. Glue the sentiment to the atrium overlay. Glue the overlay to the bottom piece and add assembly to an A2-size card base.
    • Embellish with butterflies attached with foam squares.

Spellbinders Botanical Atrium Card

Whether adorned with rich colors or soft pastels, an atrium-inspired card evokes a connection between nature and design, making it a timeless choice for any recipient.


Winter Wonderland: A-Frame House Card

Hello! Are you embracing the magic of the winter season? This winter-themed card showcases an A-frame house set in a serene, snowy forest. The festive sentiment “Fa La La La” adds holiday cheer.

Winter Wonderland: A-Frame House Card

I revisited a previous design but gave it a fresh twist by using different colors and changing how I added snow to the scene. I explored a variety of techniques for adding snowy details to cards HERE.

    • Dry-emboss light-teal cardstock with a snow folder. I used an embossing folder made by Sizzix, now retired. Add panel to A2-size card base.
    • Cut a snowbank from Snowdrift cardstock and add to the background. I used a die in the now-retired Spellbinder Camper Life set.
    • Cut the Layered Narrow Pines from Snowdrift cardstock. Each tree has two parts. To create a snow effect, apply Cosmic Shimmer – Fluffy Stuff – White to the overlay pieces and heat set. Assemble.
    • Cut the A Frame House from a variety of cardstock colors. I used a Taylored Expression brick embossing folder to add texture to the chimney. Add Cosmic Shimmer – Fluffy Stuff – White to the top of the chimney and the roof and heat set.
    • With dies in the Lawn Fawn Build-A-House Beach Add-On and Build-A-Cabin sets, cut windows and a light. Assemble and add to the house.
    • Press the sentiment in Thunder ink (Jet Set ink set) with the Mistletoe Greetings plate and cut with the coordinating plate.

Winter Wonderland: A-Frame House Card

I am entering this card into the Simon Says Stamp Challenge with a theme of Cold & Frosty.