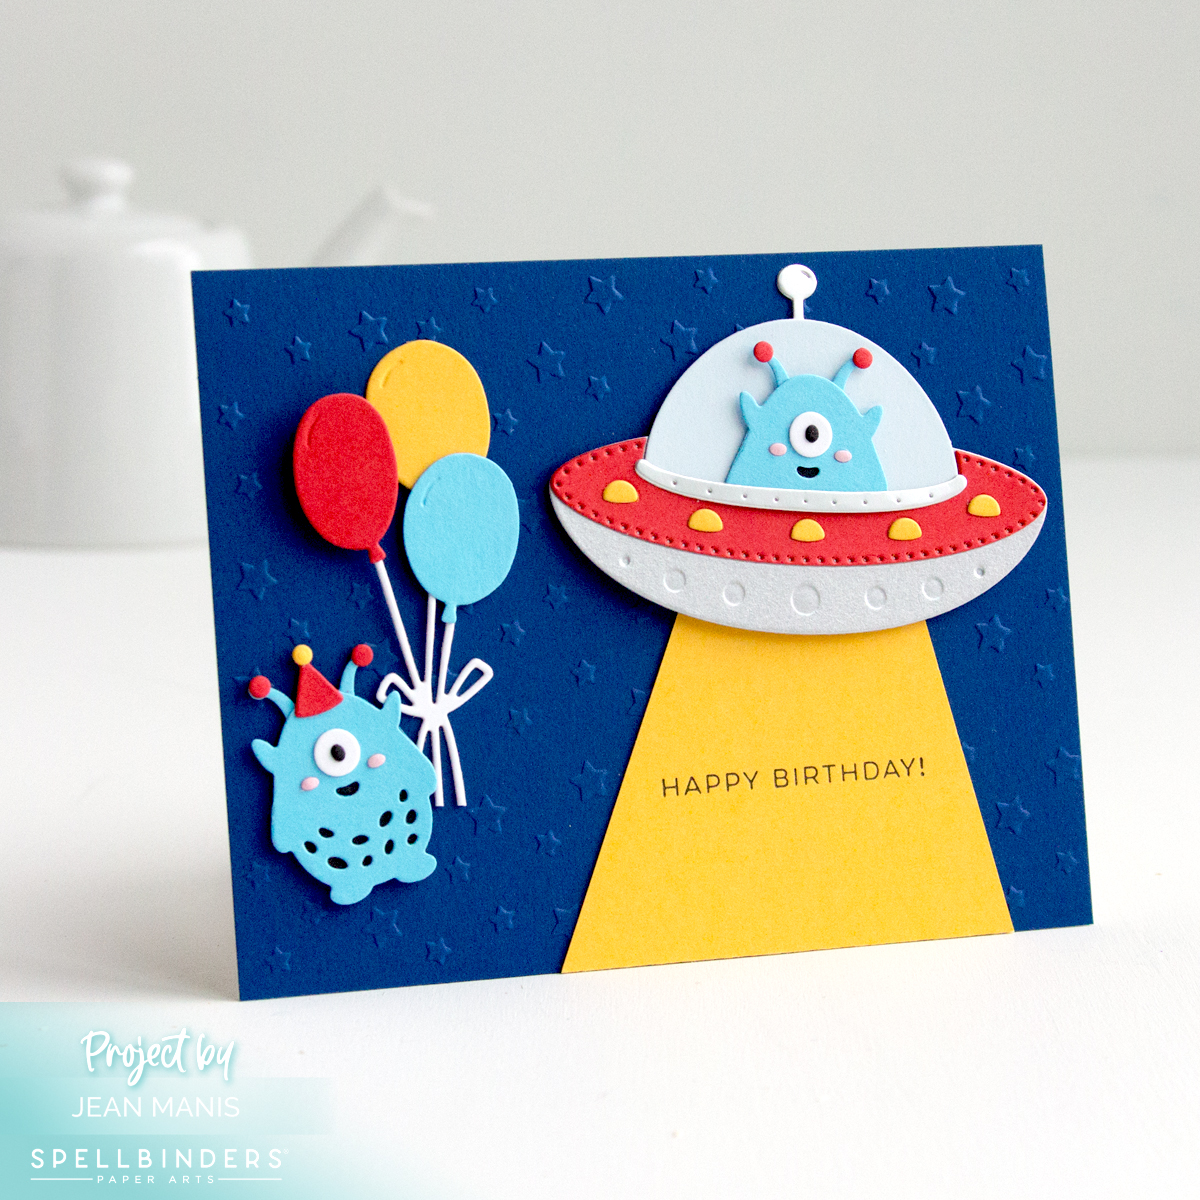
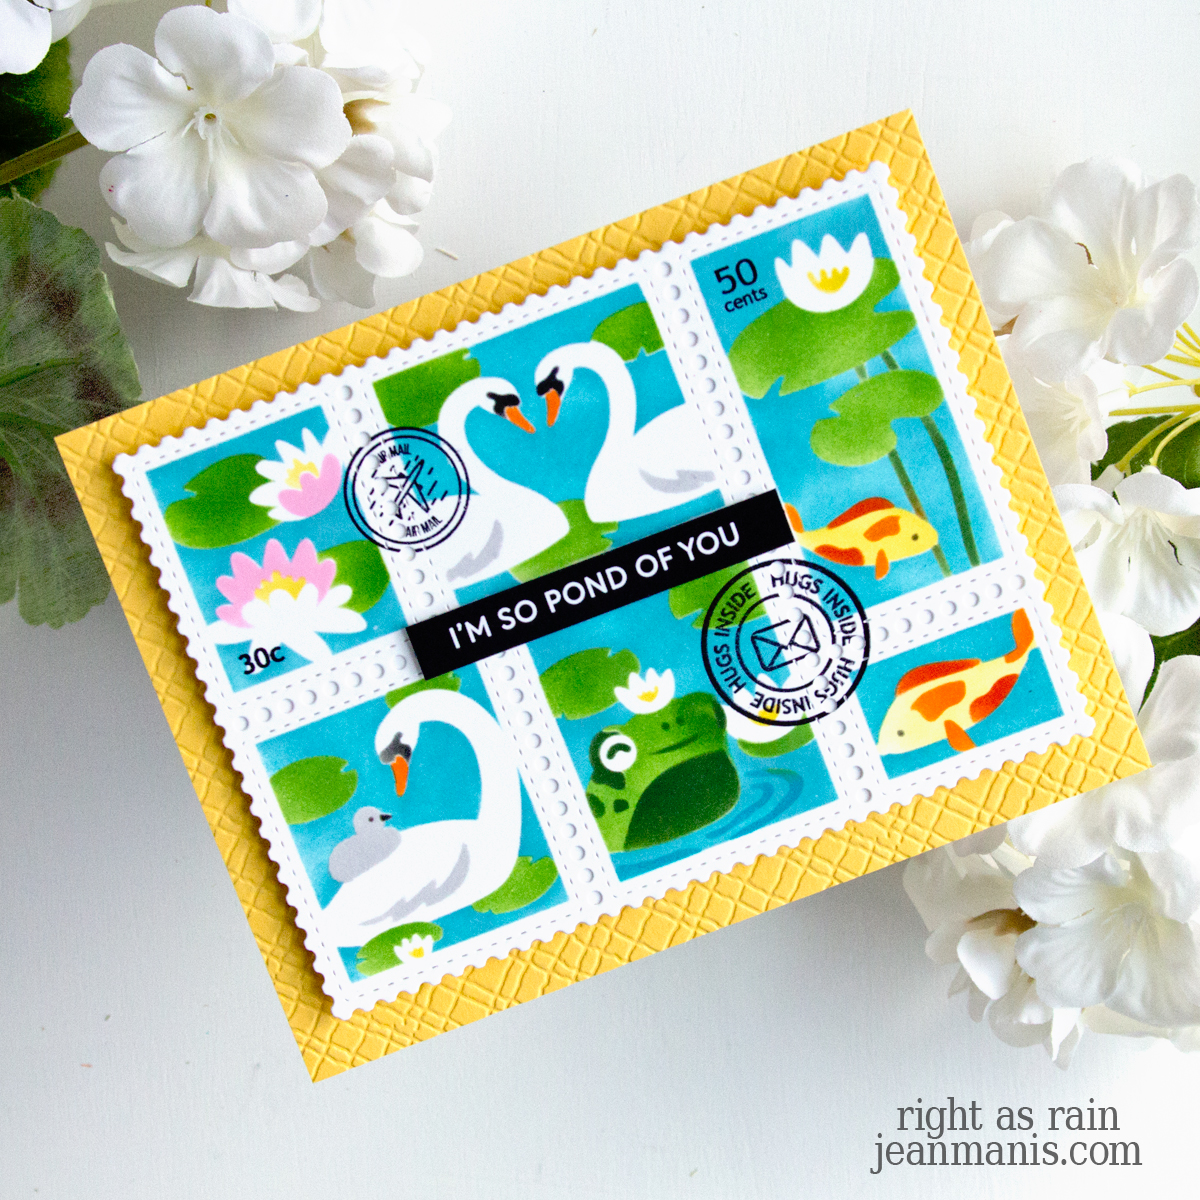
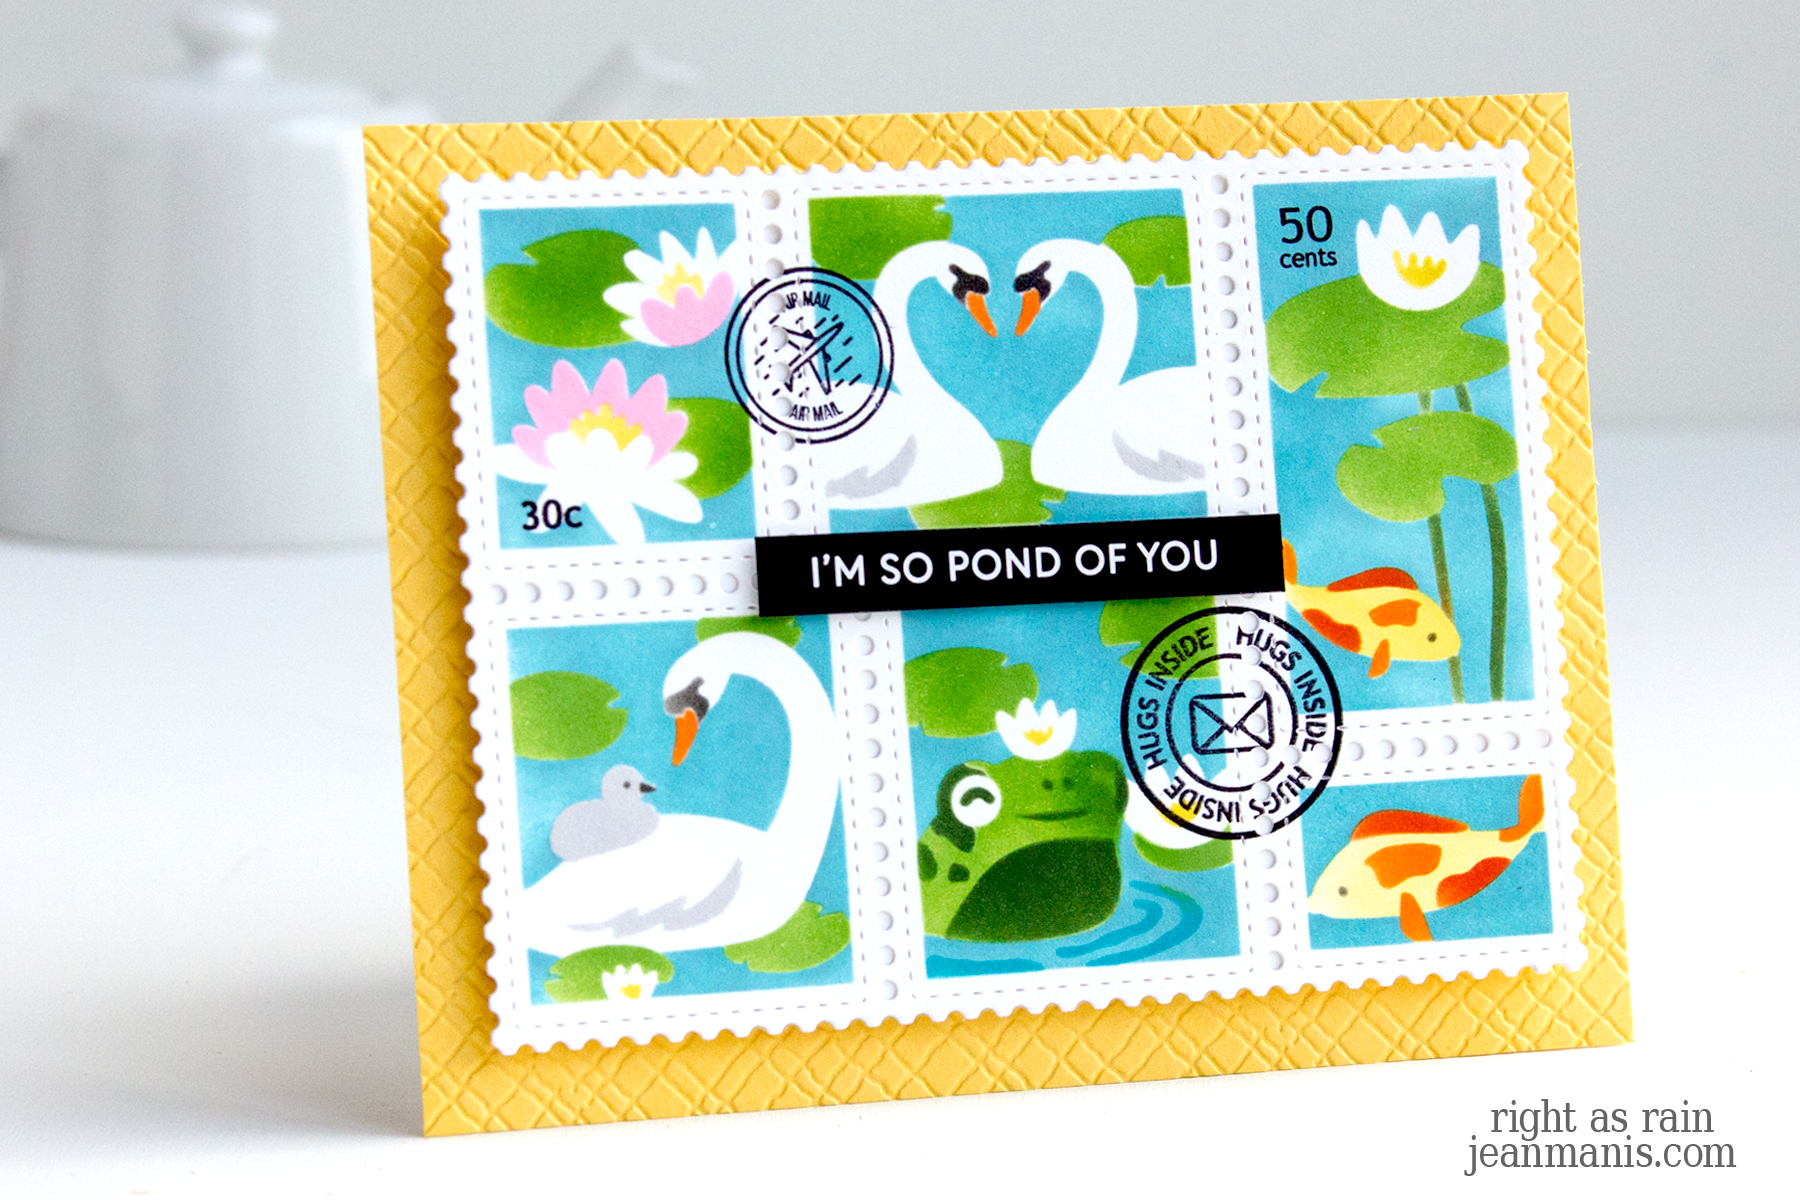
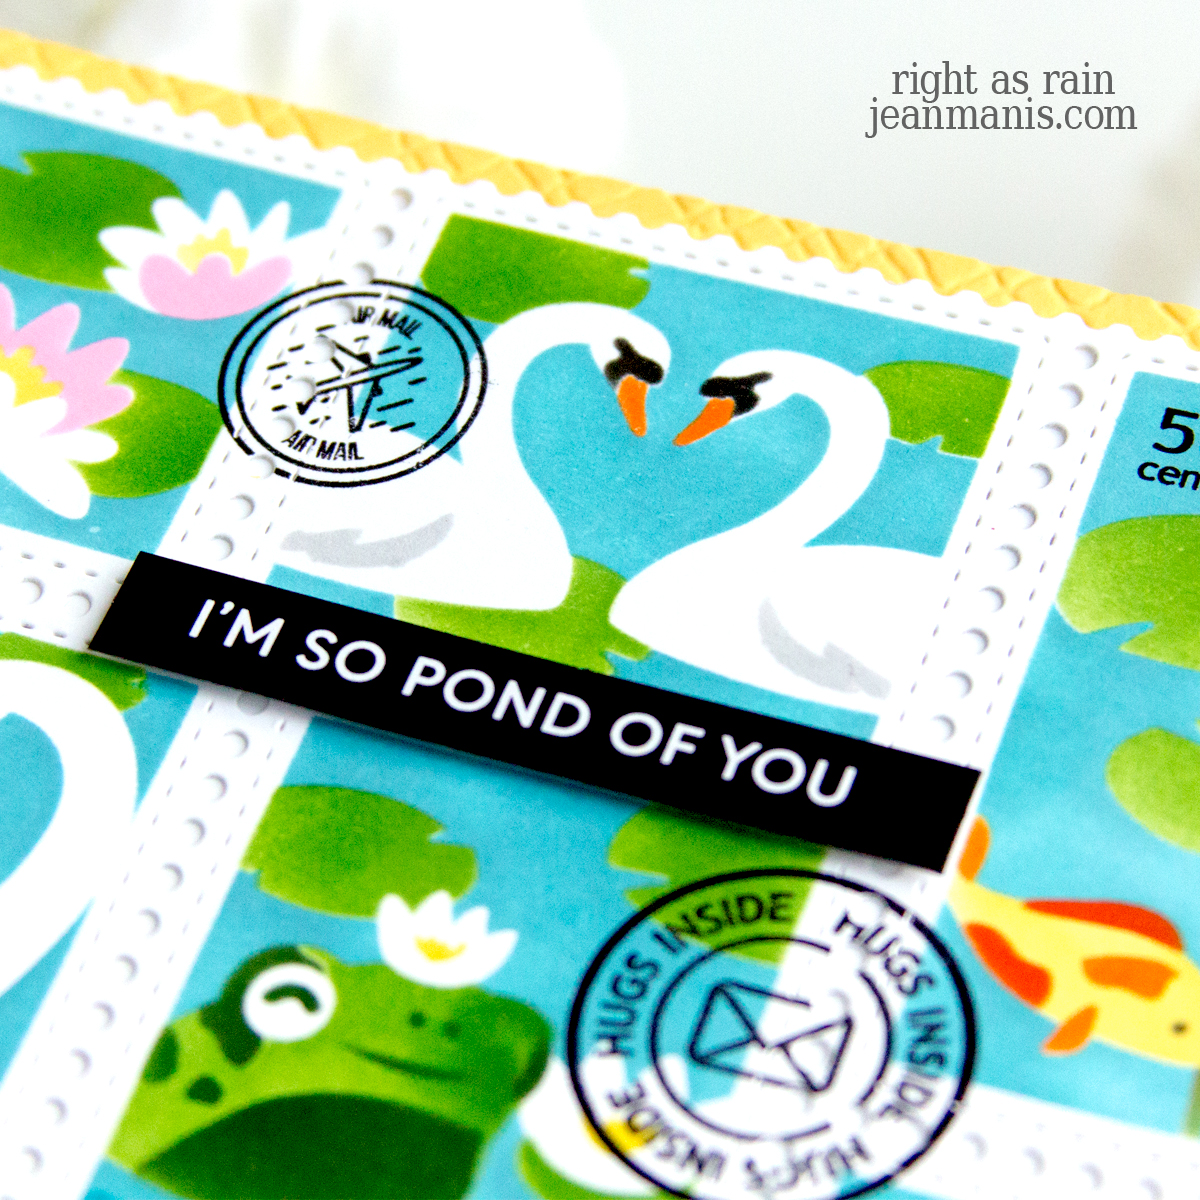
Spellbinders | Classic Tales Large Die

Hello! Today, I am sharing a friendship card featuring a storybook house set upon a stack of books, created with the Spellbinders March 2024Large Die of the Month Club Kit – “Classic Tales.” Create cards for a variety of occasions and seasons simply by changing the sentiment and the colors. I can’t wait to make a holiday card with the set, for which I will add smoke coming from the chimney. The card reminds us that stories – whether shared through books, memories, or heartfelt crafts – hold the power to bring us closer.

Spellbinders | Classic Tales Large Die

    • Cut an A2-size panel from Sea Glass cardstock. Dry-emboss with the Tiny Dots folder and add to card base with debossed side up.
    • Cut house, trees, and books with the Large Die of the Month Club Kit from a variety of cardstock colors. Assemble.
    • Create sentiment with the Always and Forever Sentiment Strips set. Cut with coordinating die.
    • Add sentiment and house/trees/books to card front.

Spellbinders | Classic Tales Large Die


Spellbinders | Wise Owl Small Die

Hello! Today, I am sharing a congratulations card featuring a bespeckled owl and ornate book, created with the Spellbinders March 2024 Small Die of the Month Club Kit – “Wise Owl.” This card, with strong Harry Potter vibes, would be perfect to send for a graduation.

Spellbinders | Wise Owl Small Die

Spellbinders | Wise Owl Small Die


Stenciled Backgrounds | Paste and Glitter

Hello! I am delighted to be a guest on the Spellbinders blog discussing how to create stenciled backgrounds with modeling paste and white glitter. I hope you will head on over to take a look at the three projects I created with Light & Fluffy Modeling Paste and Art Glitter Baby Baubs White Glitter.

Spellbinders Modeling Paste and White Glitter


Spellbinders | Hello Spring

Hello! Today, I am sharing a CAS, spring-themed card crafted with Spellbinders products. Rain or shine, there is a timeless charm to the image of a duck carrying an umbrella. I previously shared cards with these products HERE and HERE. Scroll for info on a die-cutting sale.

Spellbinders | Hello Spring

    • Create A2-size card base from Teal Topaz cardstock.
    • Add sky and ground to a slightly smaller panel of Snowdrift cardstock using Tumbled Glass and Hickory Smoke Oxide inks.
    • Stamp I’ve Got You Covered sentiment on Snowdrift cardstock. Cut with cloud die in the On Cloud Nine set. Cut additional clouds with dies in the set.
    • Cut Duck with Umbrella from various cardstock colors. Assemble and add to card front with foam adhesive.

Spellbinders | Hello Spring

Now through February 28th save up to 40% off select products at Spellbinders.


Tim Holtz Spring Die-Cut Flowers

Hello! As winter’s chill begins to thaw and the first signs of spring emerge (I am seeing quite a few daffodils blooming), I am drawn to crafting spring cards. Today, I am sharing a floral, spring-themed card created with Tim Holtz supplies.

Tim Holtz Spring Die-Cut Flowers

    • To create the background, stamp the Spring Shadows sentiment in black ink on white cardstock. Cut stamped panel with the A2-size die in the Lawn Fawn Stitched Rectangle set. Apply Tumbled Glass Oxide ink to the center of the stamped panel and add to card base.
    • Color Soft-Finish Cardstock with a variety of Distress Oxide inks. Cut pieces with dies in the Brushstroke Flowers 1, Bloom Colorize, and Modern Floristry die sets. Cut flower centers from Tim Holtz Black Alcohol Cardstock. Assemble flowers. I chose to back the open portions of the flowers with inked cardstock.
    • Add assembled flowers and greenery to card with glue and foam adhesive.

Tim Holtz Spring Die-Cut Flowers