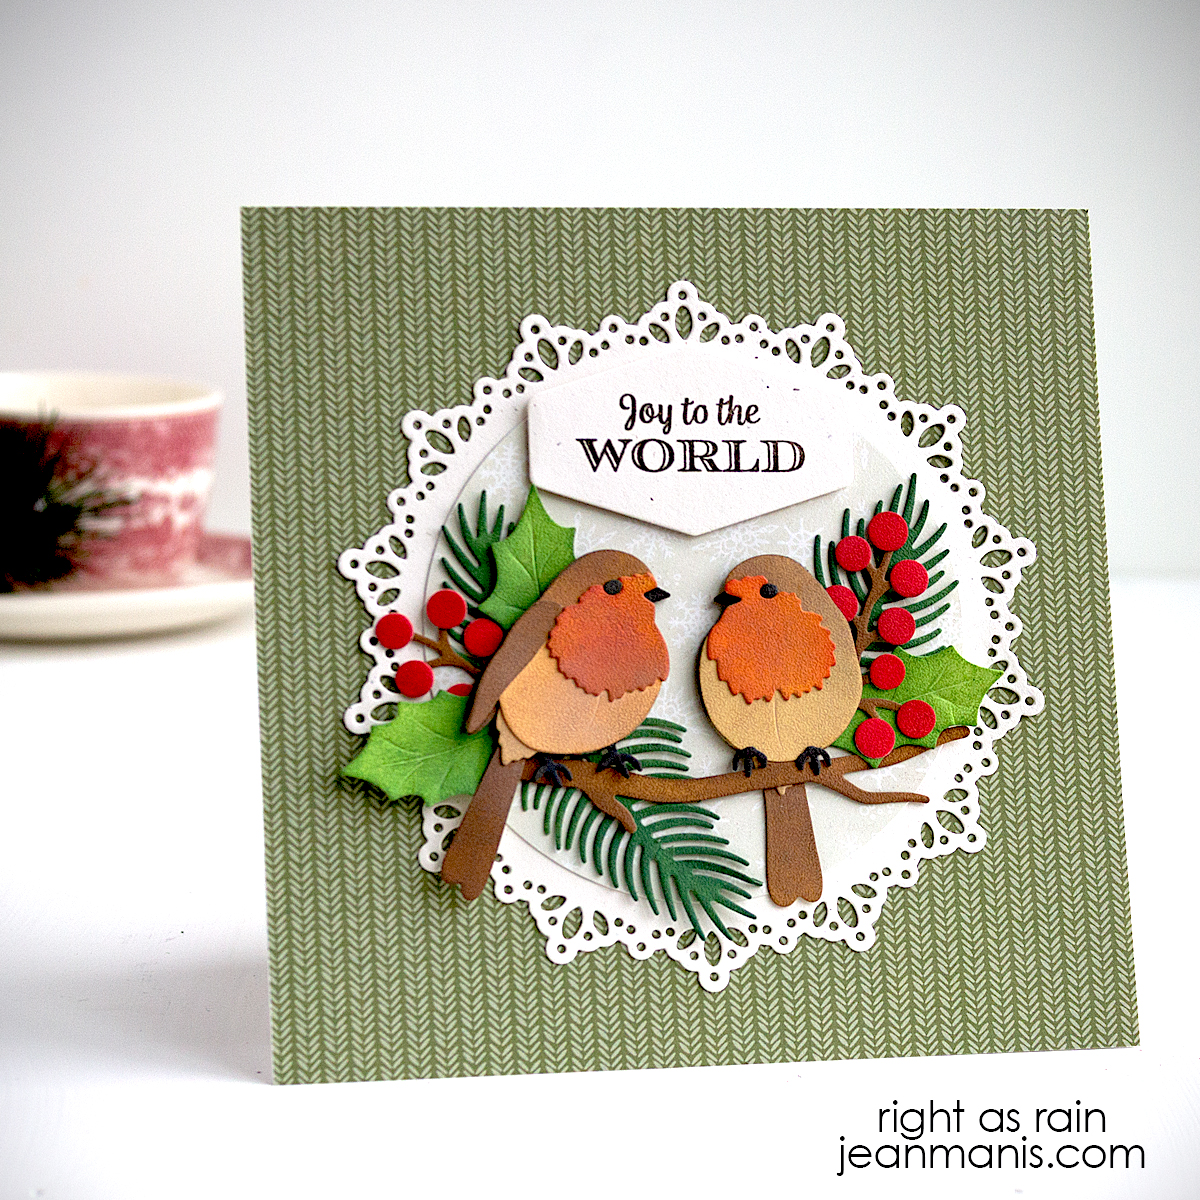
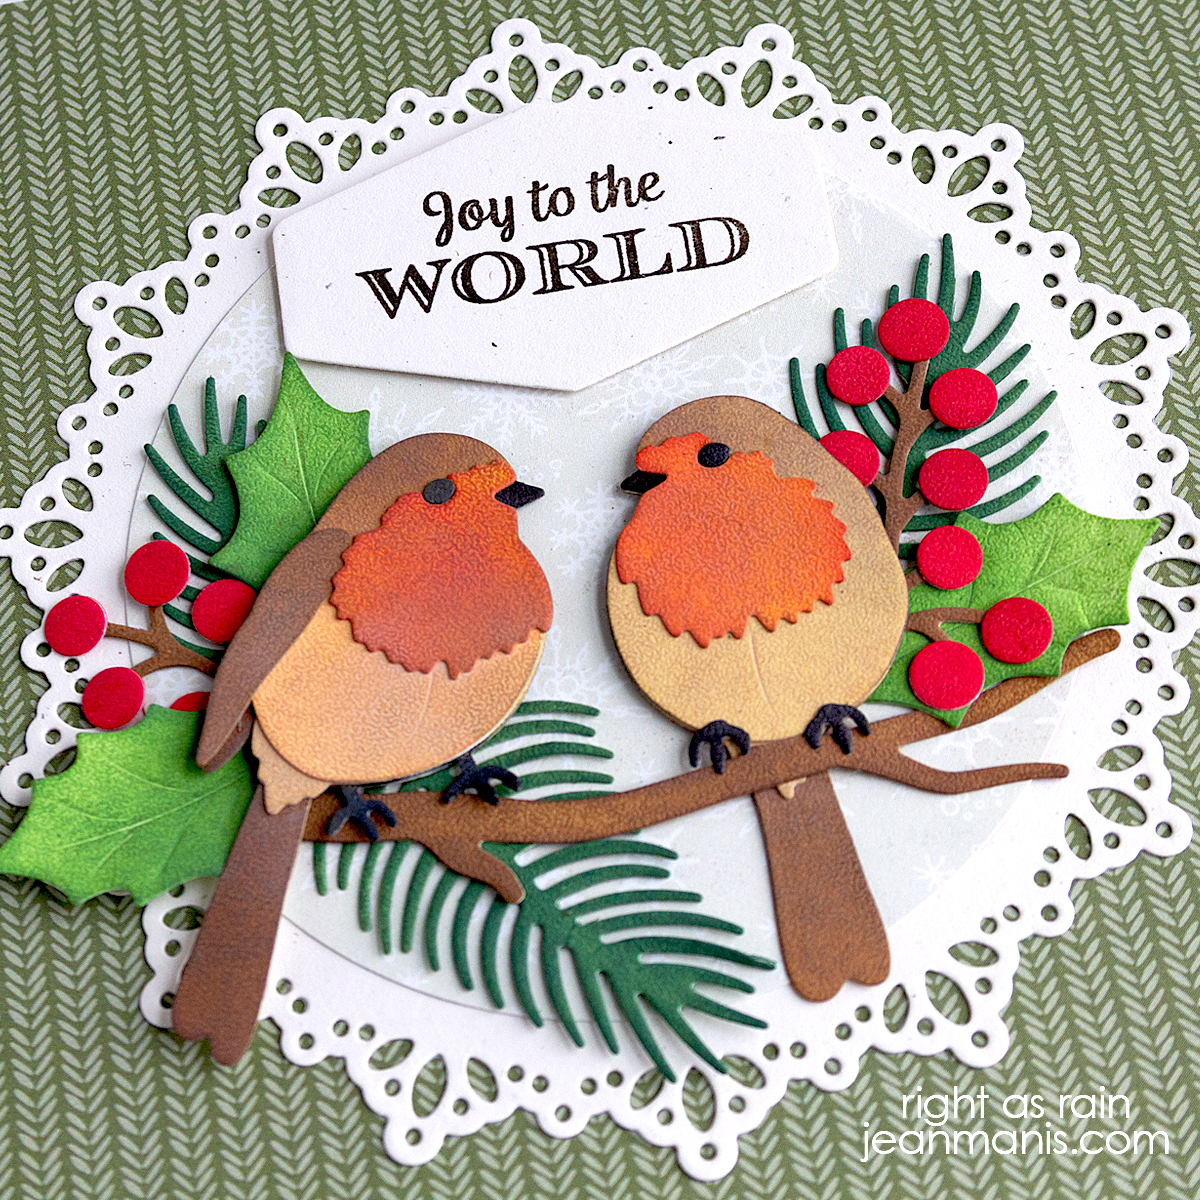
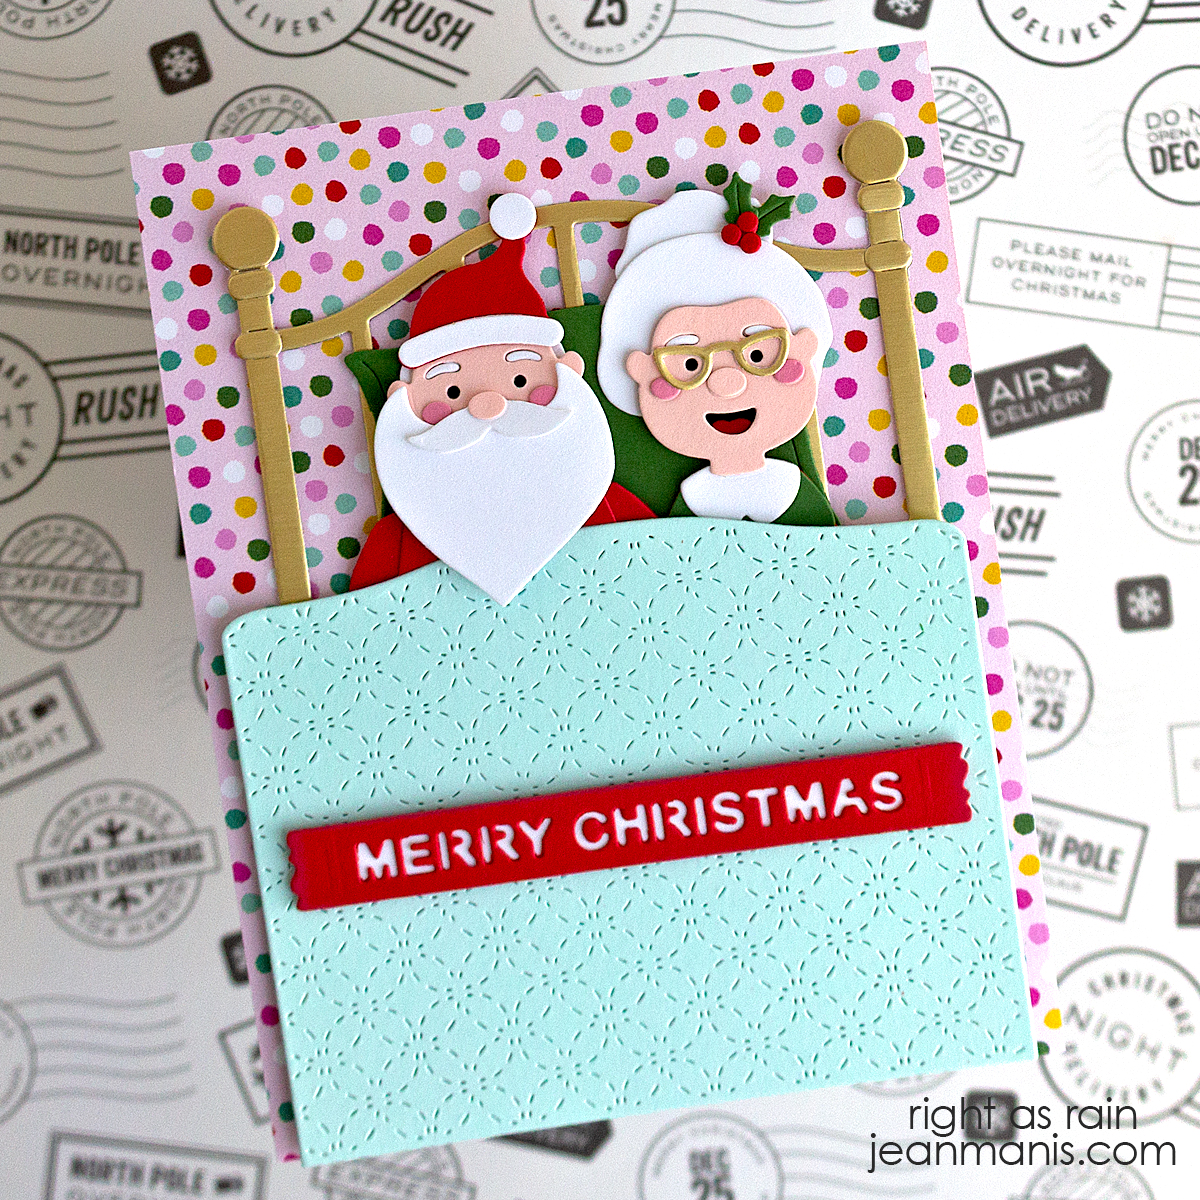
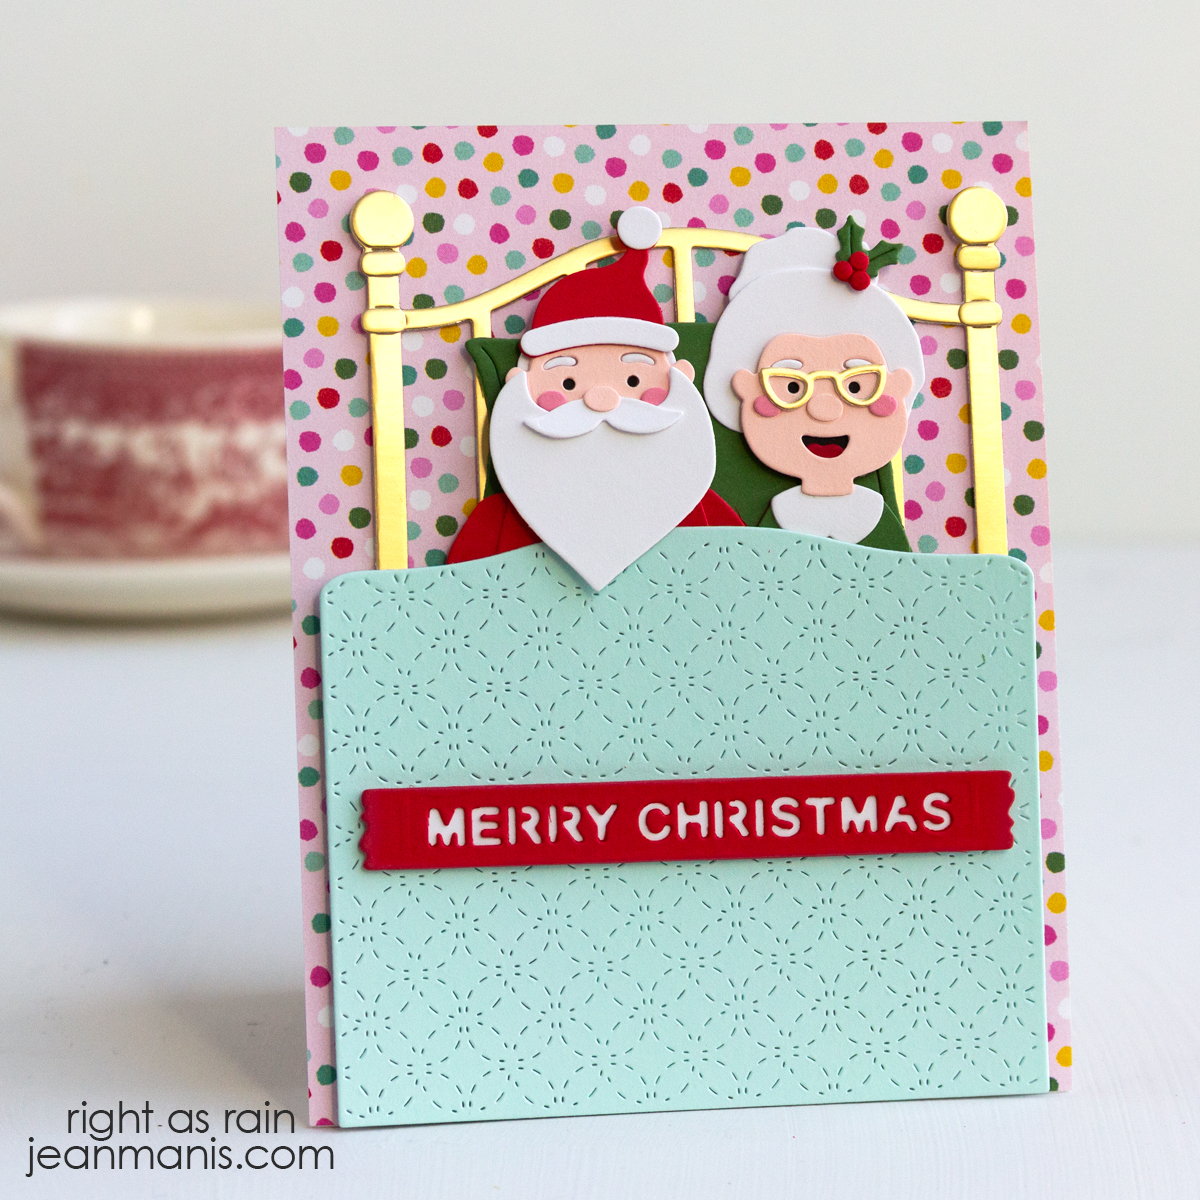
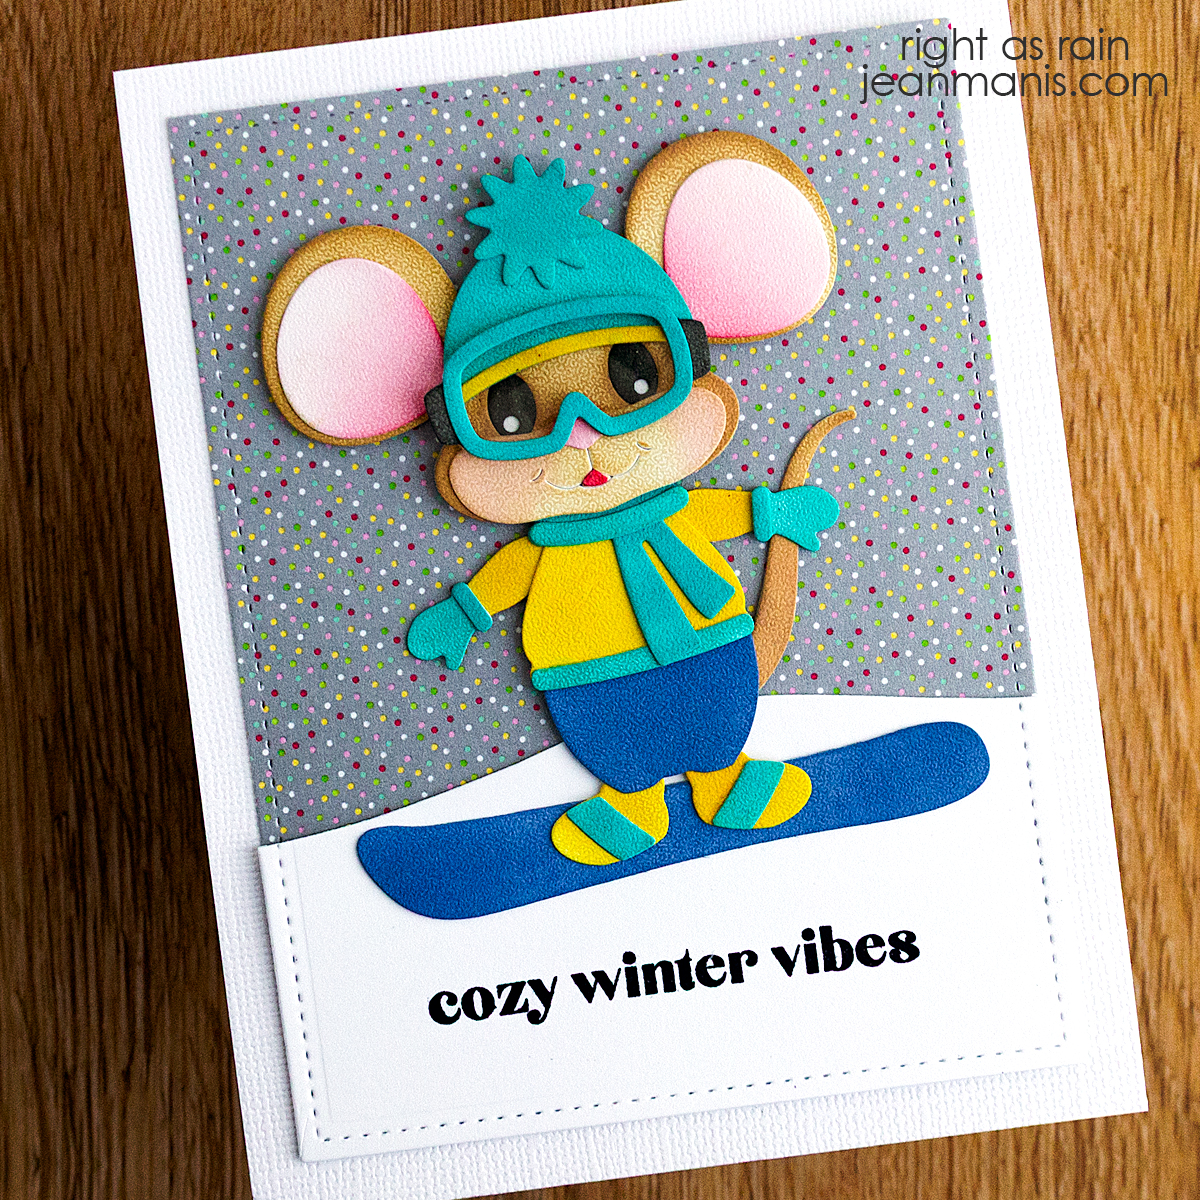
Elizabeth Craft Designs | Handcolored Mums

Hello! Today I’m sharing a handmade card, created with Elizabeth Craft Designs die sets, that features mums arranged in a rustic oak barrel.

Elizabeth Craft Designs | Handcolored Mums

I handcolored the blooms to match the mums currently in our garden, and I encourage you to take inspiration from nature when choosing your own colors.

Mums in the Garden

    • Cover a 5″ x 7″ card base with a patterned paper panel. I used paper from 49 and Market.
    • Cut the Florals 32 (flower petals and leaves) and barrel pieces from Soft Finish cardstock. Color with Distress Inks. Shape petals and leaves with tools if desired. I use tools from Dress My Craft, Heartfelt Creations, Spellbinders, and McGill. Assemble.
    • The Florals 32 die set doesn’t specifically make a mum; rather, it’s a versatile floral design that can be colored and shaped to resemble many fall favorites like zinnias, asters, or dahlias. I chose to make mums because of the ones blooming in our garden, but the set easily adapts to other seasonal flowers depending on your inspiration.
    • Glue prills to the centers of the flowers.
    • To keep the flowers in the spotlight, I added a small “hello” tag tucked into the bouquet. Stamp sentiment (I used a retired stamp from Stampin’ Up) in Potting Soil ink and cut with a tag die.
    • Add the assembled items to the prepared card base.

Fall is the perfect season to look closely at nature’s colors and let them guide your crafting.

Elizabeth Craft Designs | Handcolored Mums


Spellbinders | A Ghostly Twist

Hello! Sometimes the best card ideas come from looking at supplies in a new way. I thought it would be fun to pair supplies from Spellbinders, a ghost with a house die set originally designed for Christmas. I’m sure I’m not the first to turn this townhome into a haunted house, but it was such a delight to see how easily it shifted seasons. A BetterPress sentiment finished the scene.

You can see the Christmas card created with the City Holiday set HERE and the card with the Boo Crew set HERE.

Spellbinders | A Ghostly Twist

    • Cover a 5″ x 7″ card base with patterned paper. (I used a piece from the Simple Stories Spooky Things pad.)
    • Cut the City Holiday building and cat from a variety of cardstock colors and assemble.
    • Cut the ghost from a variety of cardstock colors and assemble.
    • Press the sentiment in black on white cardstock and cut with the coordinating die set.
    • Add assembled house, ghost, and sentiment to the prepared card base.

Spellbinders | A Ghostly Twist


Cozy Fall Card with Big Mouse

Hello! Fall is one of my favorite seasons to craft for, and today I’m sharing a cozy handmade card that captures the warmth of autumn. I used the Big Mouse die along with the coordinating Fall Accessories set, both from Elizabeth Craft Designs, to dress the mouse for the season. To finish it off, I created a playful custom sentiment that reads “Fall Y’all,” cut with a letter die set. This card is full of charm and a fun way to celebrate the beauty of fall.

Cozy Fall Card with Big Mouse

    • Dry-emboss cardstock with the Honey Bee Burlap folder. Add to card base. Cut a strip of the Scary Stories patterned paper and add to base.
    • Cut Big Mouse and Fall Accessories from a variety of cardstock colors and assemble. The large pumpkin is from the ECD Hay Ride die set (now discontinued).
    • Add sentiment with die-cut letters (I used a set from Taylored Expressions).


Hero Arts | Hocus Pocus Collection

Hello! Halloween crafting doesn’t always have to be spooky—it can be sweet and playful, too! Today I’m sharing a card I created with the Hero Arts Hocus Pocus Collection. Using the Boo to You die set along with the Scattered Stars stencil set, I put together a cheerful Halloween design. The smiling ghosts and the BetterPress sentiment “You’re Wicked Cute” bring a lighthearted twist to the season’s festivities, perfect for sending smiles instead of scares.

Hero Arts | Hocus Pocus Collection

    • Stencil a purple cardstock panel with the Scattered Stars stencil set using white ink, VersaMark ink, and gold paste for the three layers. Allow each layer to dry before applying the next one. Once the stenciling is complete, add to an A2-size card base.
    • Press the sentiment on white cardstock with the set. Cut with the coordinating die.
    • With the Boo to You die set, cut the ghosts, hat, and broom from cardstock. Assemble.
    • Add ghosts and sentiment to the prepared card base.

Hero Arts | Hocus Pocus Collection