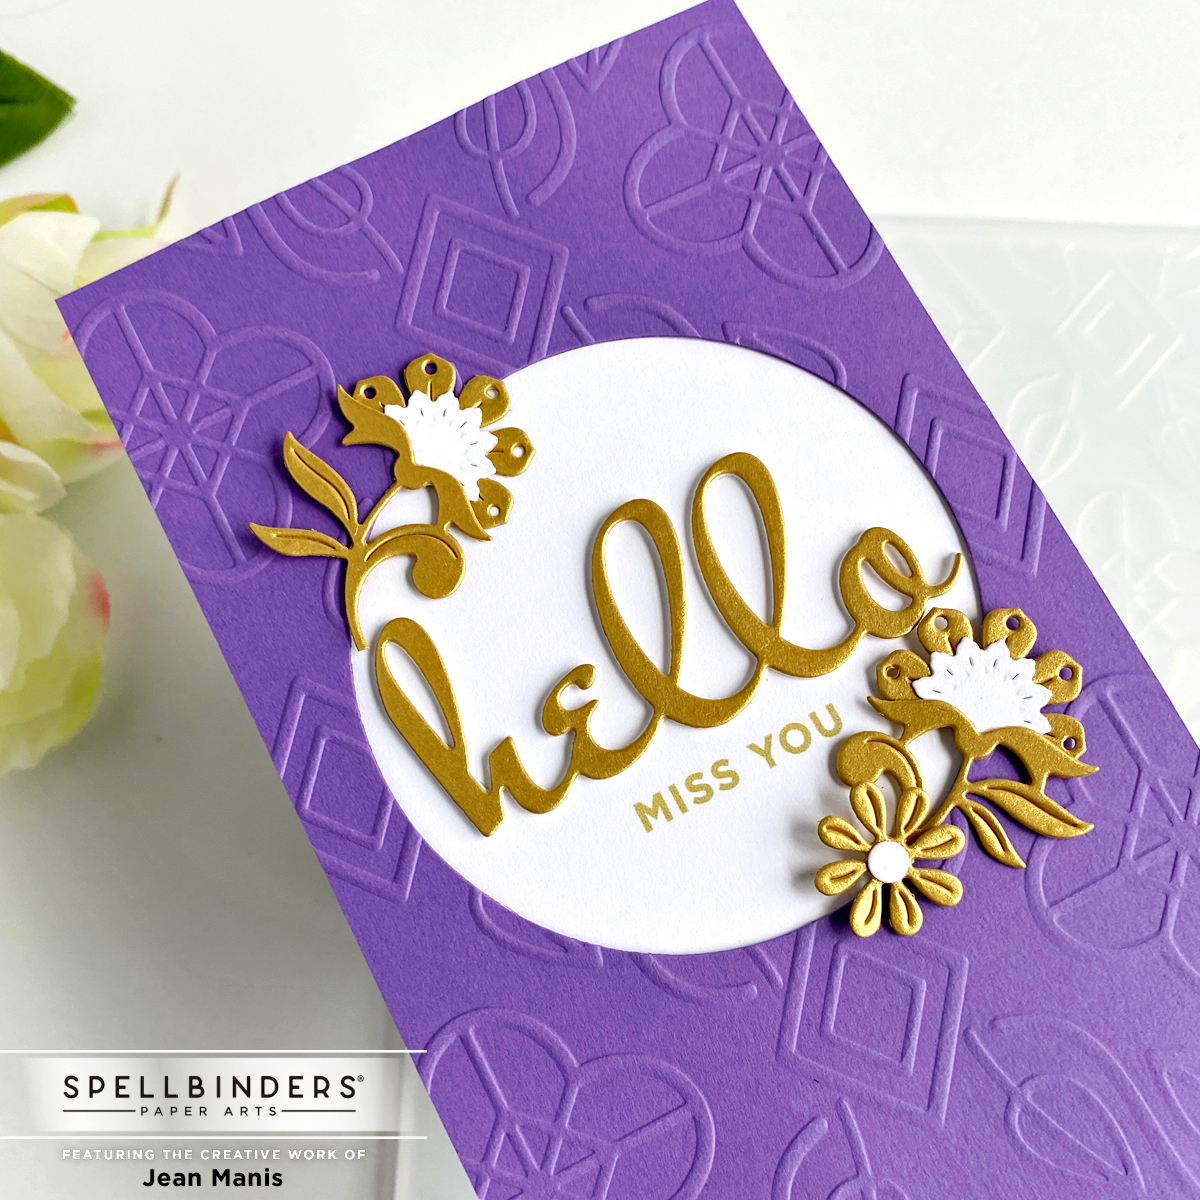
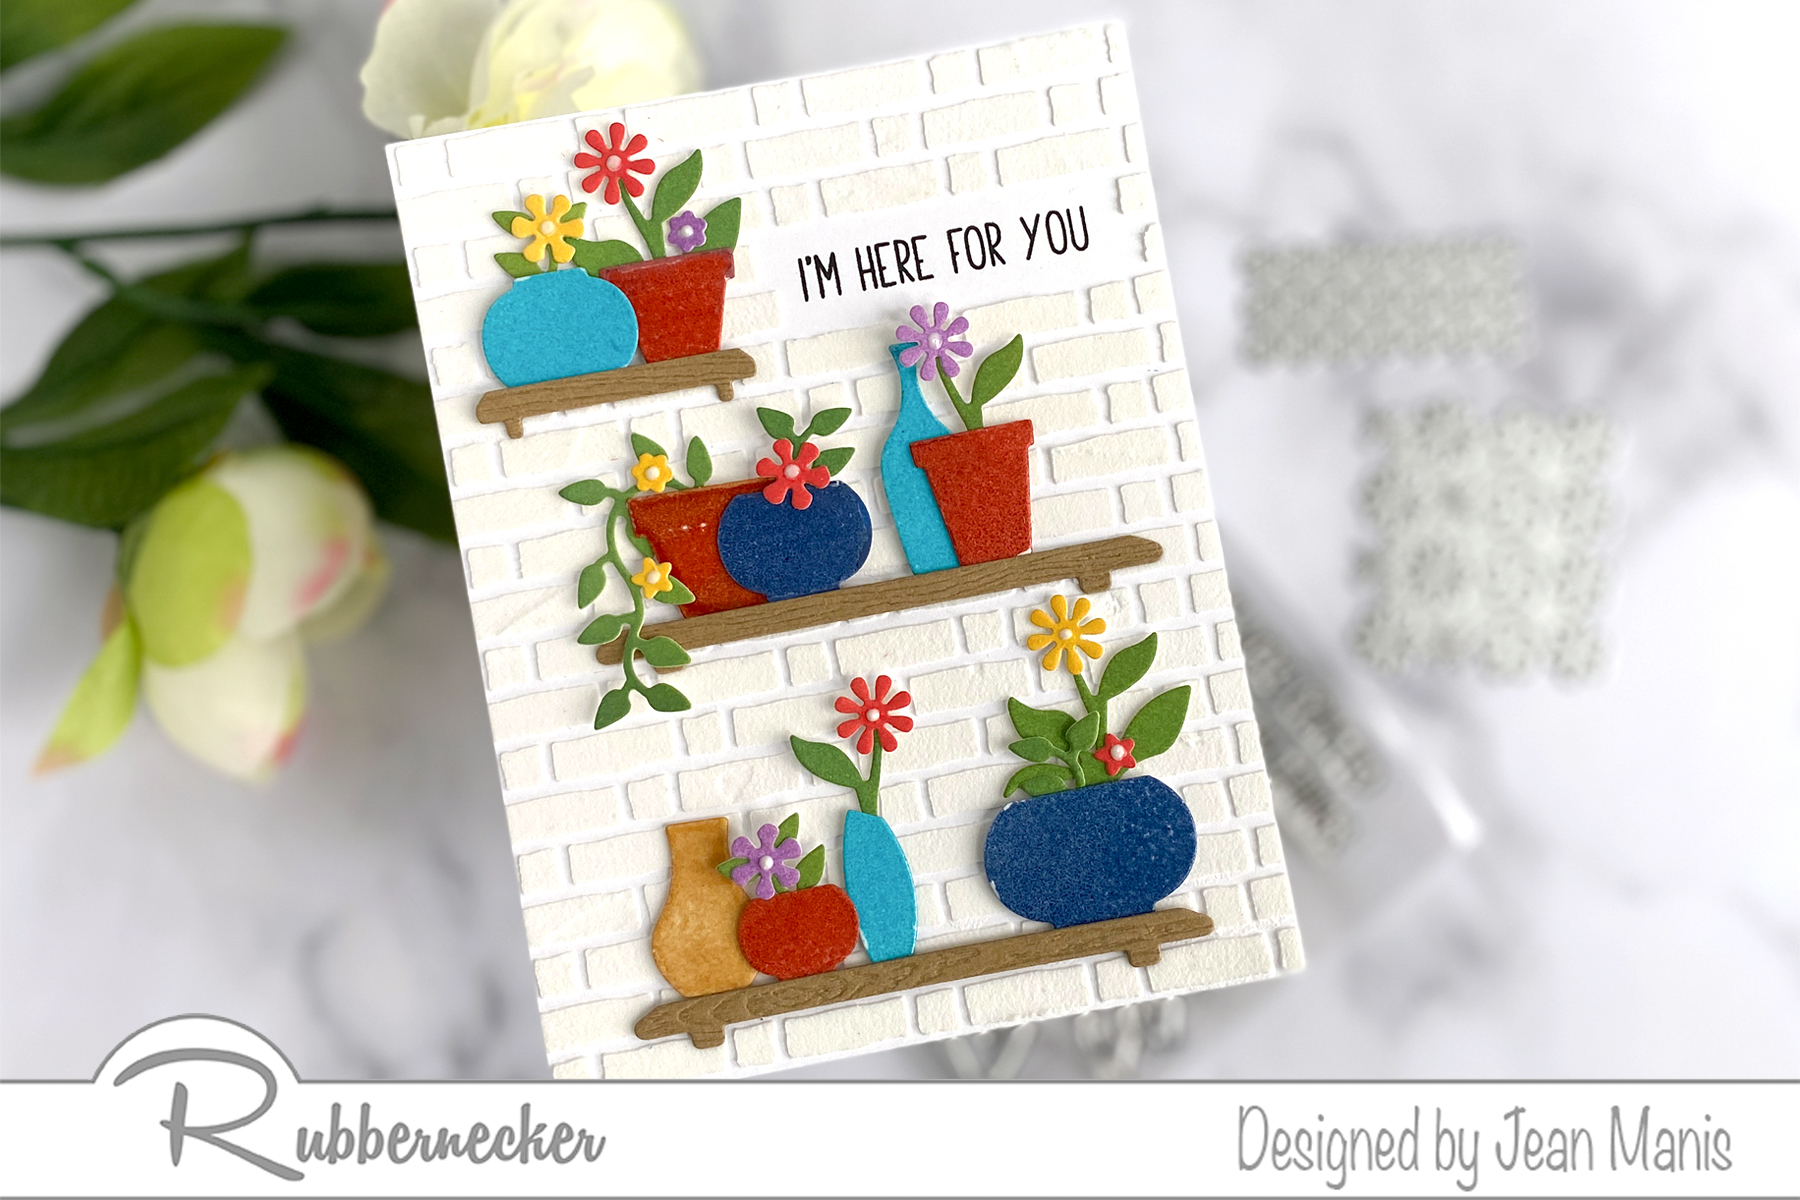
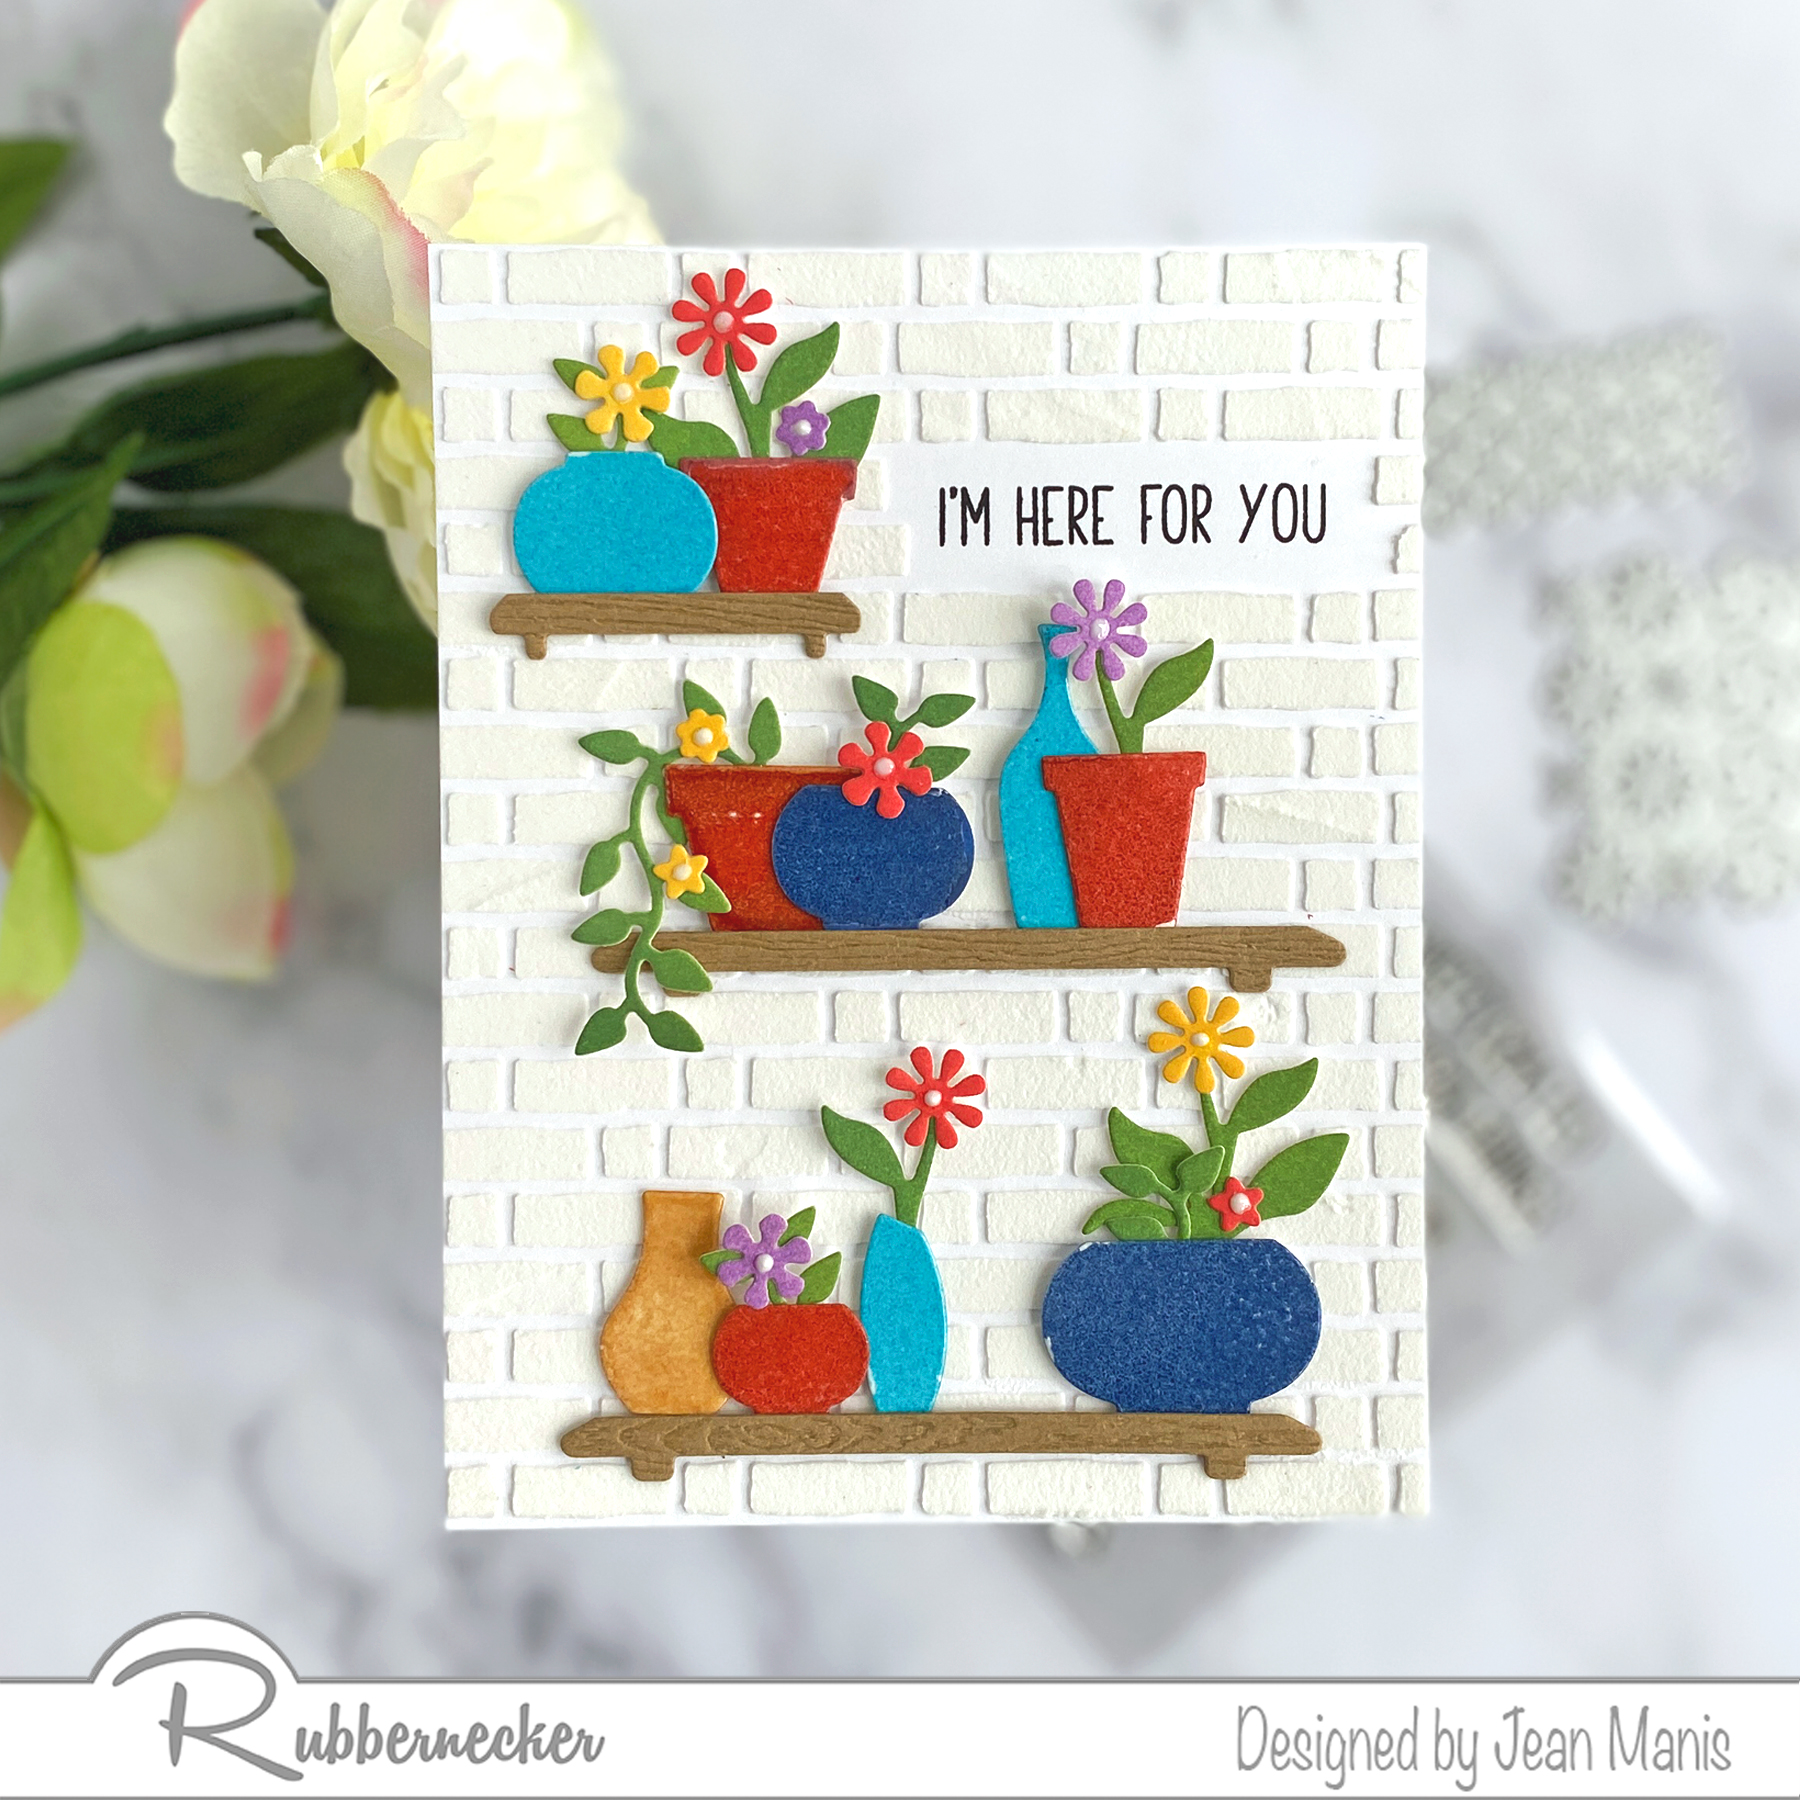
Hello! I’m sharing a CAS, mini-slimline card showcasing the Spellbinders June 2022 Embossing Folder Membership “Botanical Diamond.” I shared another card with this folder here. And the Spellbinders Summer Super Sale has begun offering up to 50% off dies, machines, stamps, card kits, glimmer hot foil products and more!
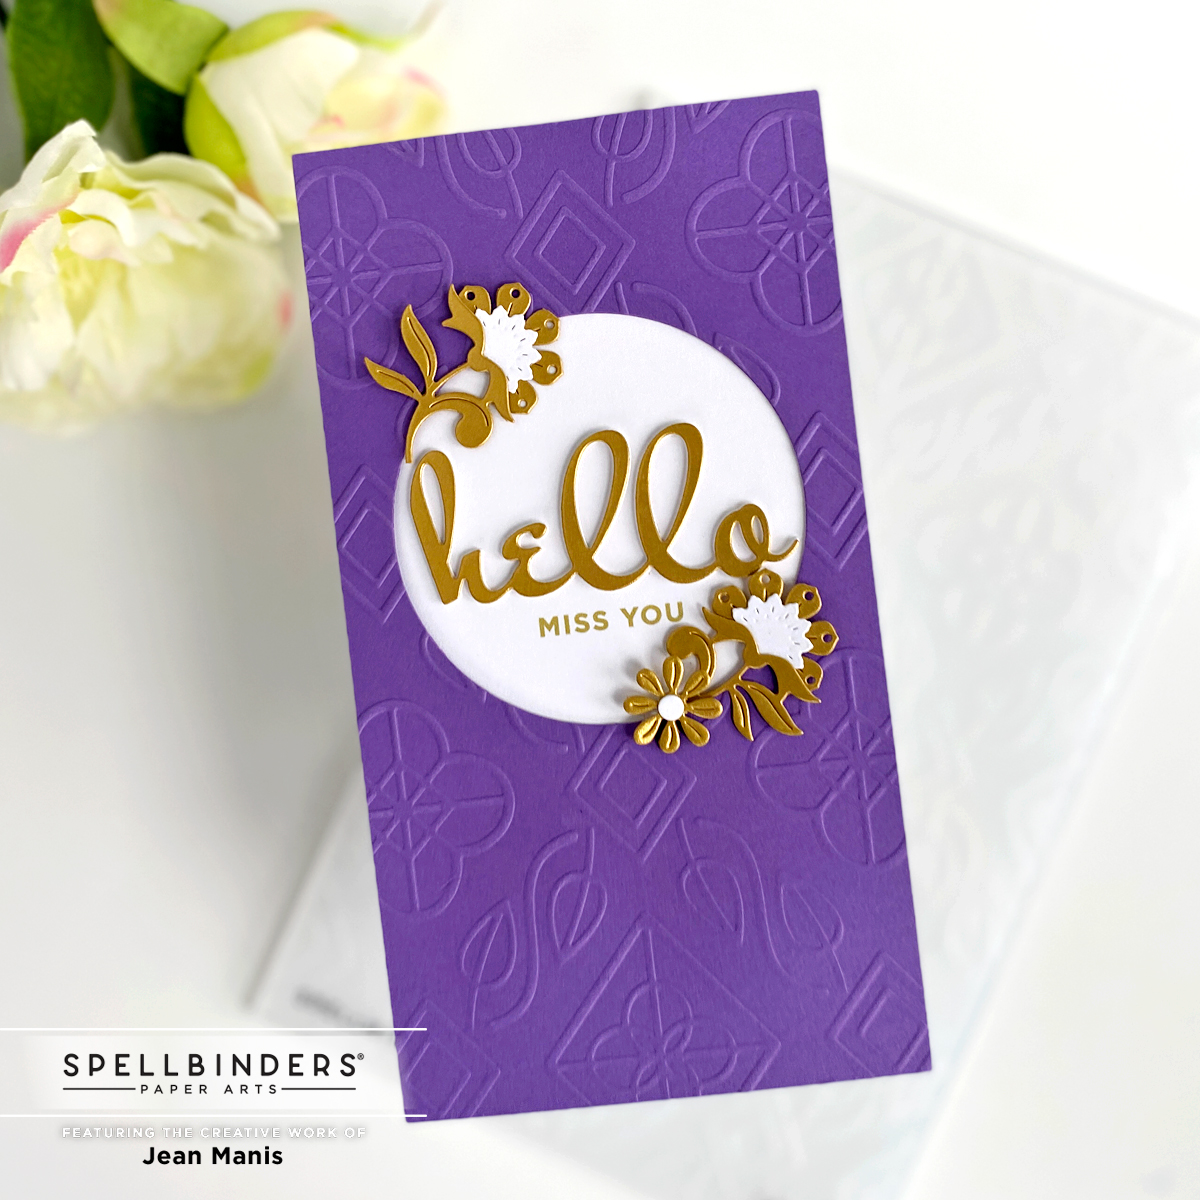
- Dry-emboss mini-slimline sized Lilac Blossom cardstock panel with the Embossing Folder Membership. Cut a circle in the panel slightly above the center.
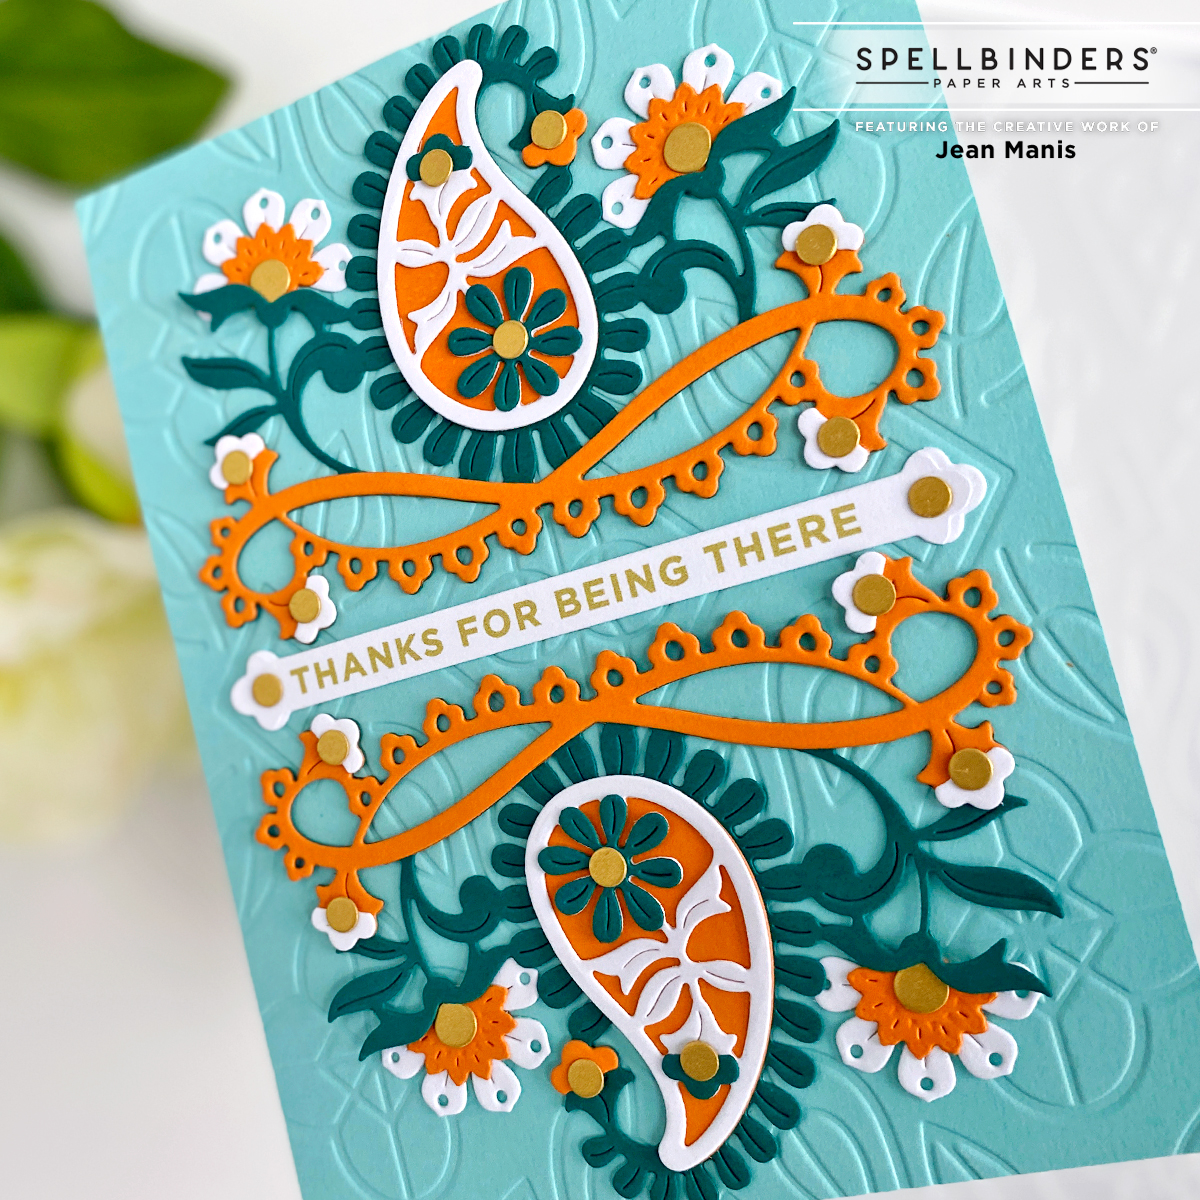
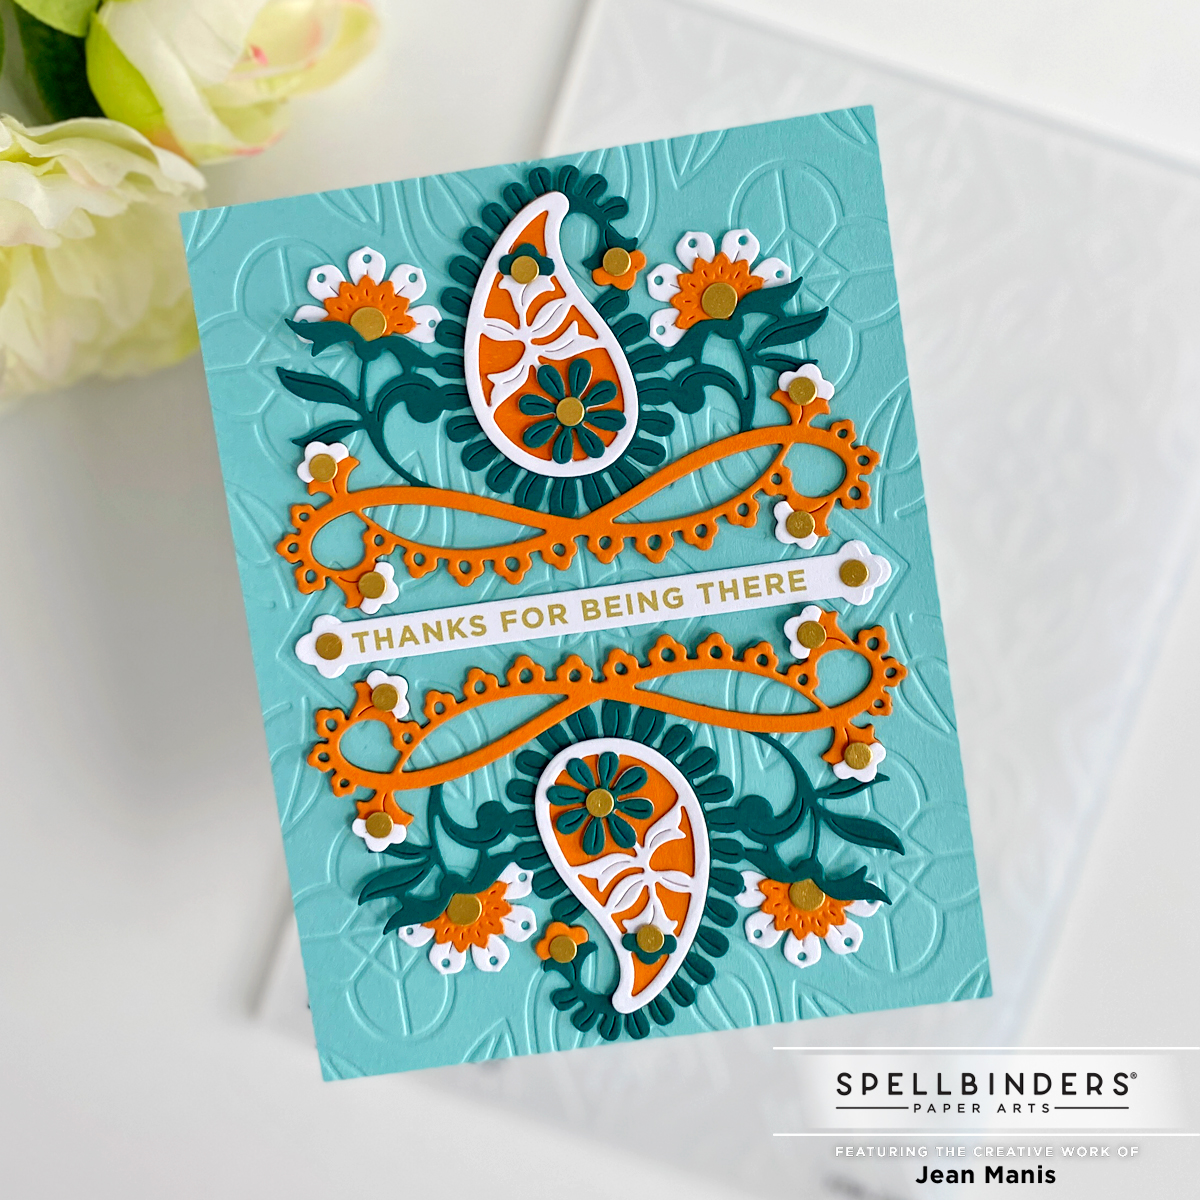
- Cut sentiment and flowers with the Large Die of the Month “Paisley Dreams” set from Brushed Gold and Snowdrift cardstock. Assemble flowers.
- Glimmer-foil the sentiment from the Mini Sincere Sentiments set in Matte Gold on Snowdrift cardstock. Attach to back of dry-embossed panel. Add assembly to a mini-slimline card base.
- Adhere die-cut elements to card.