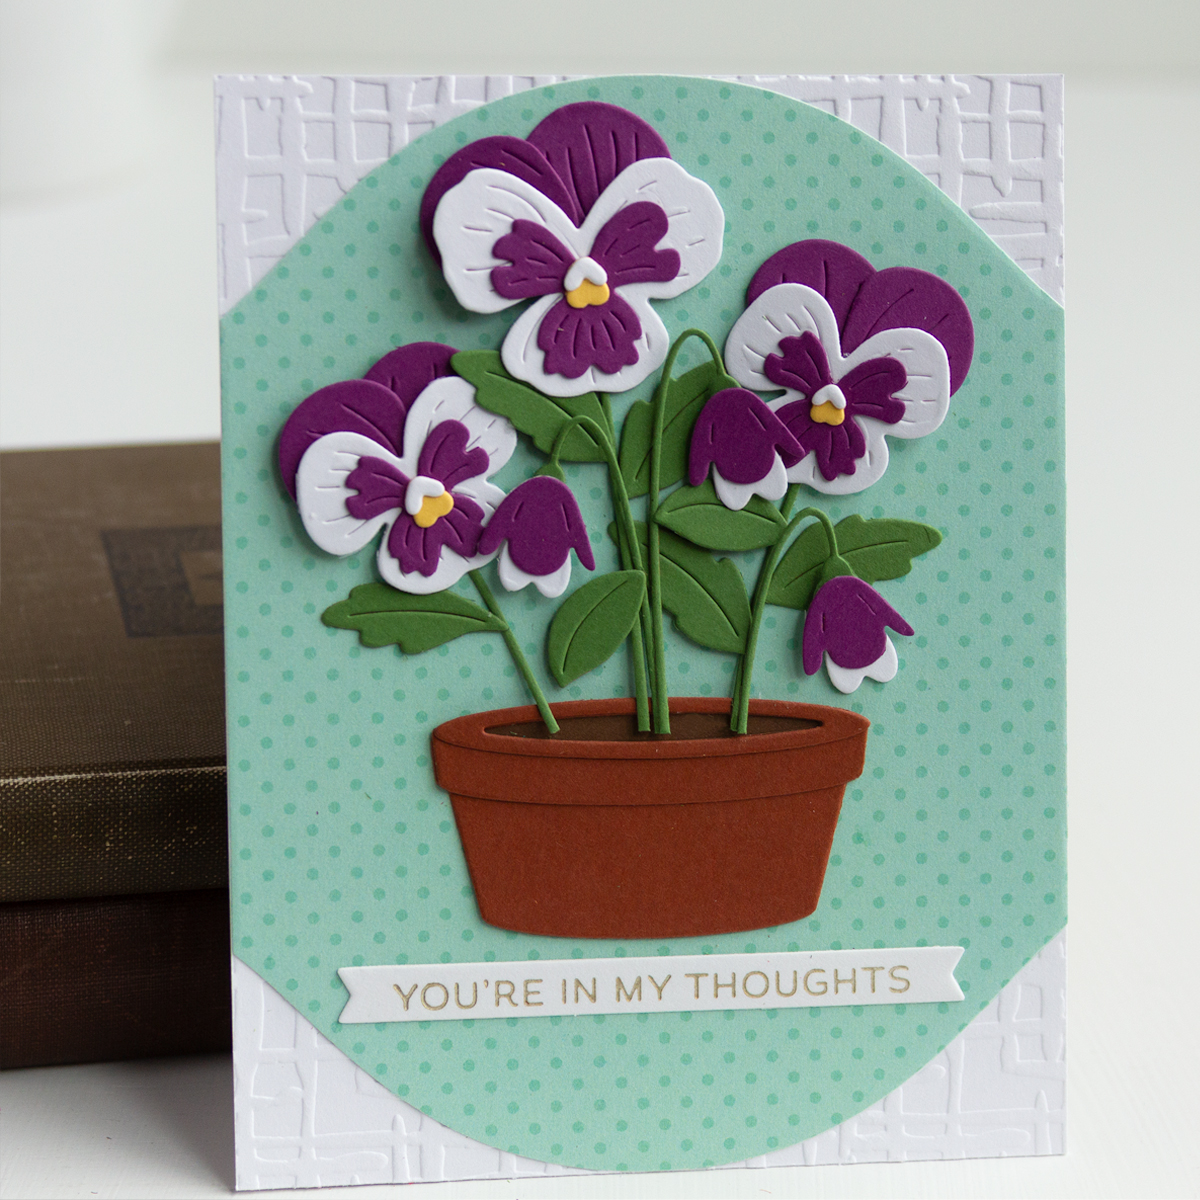
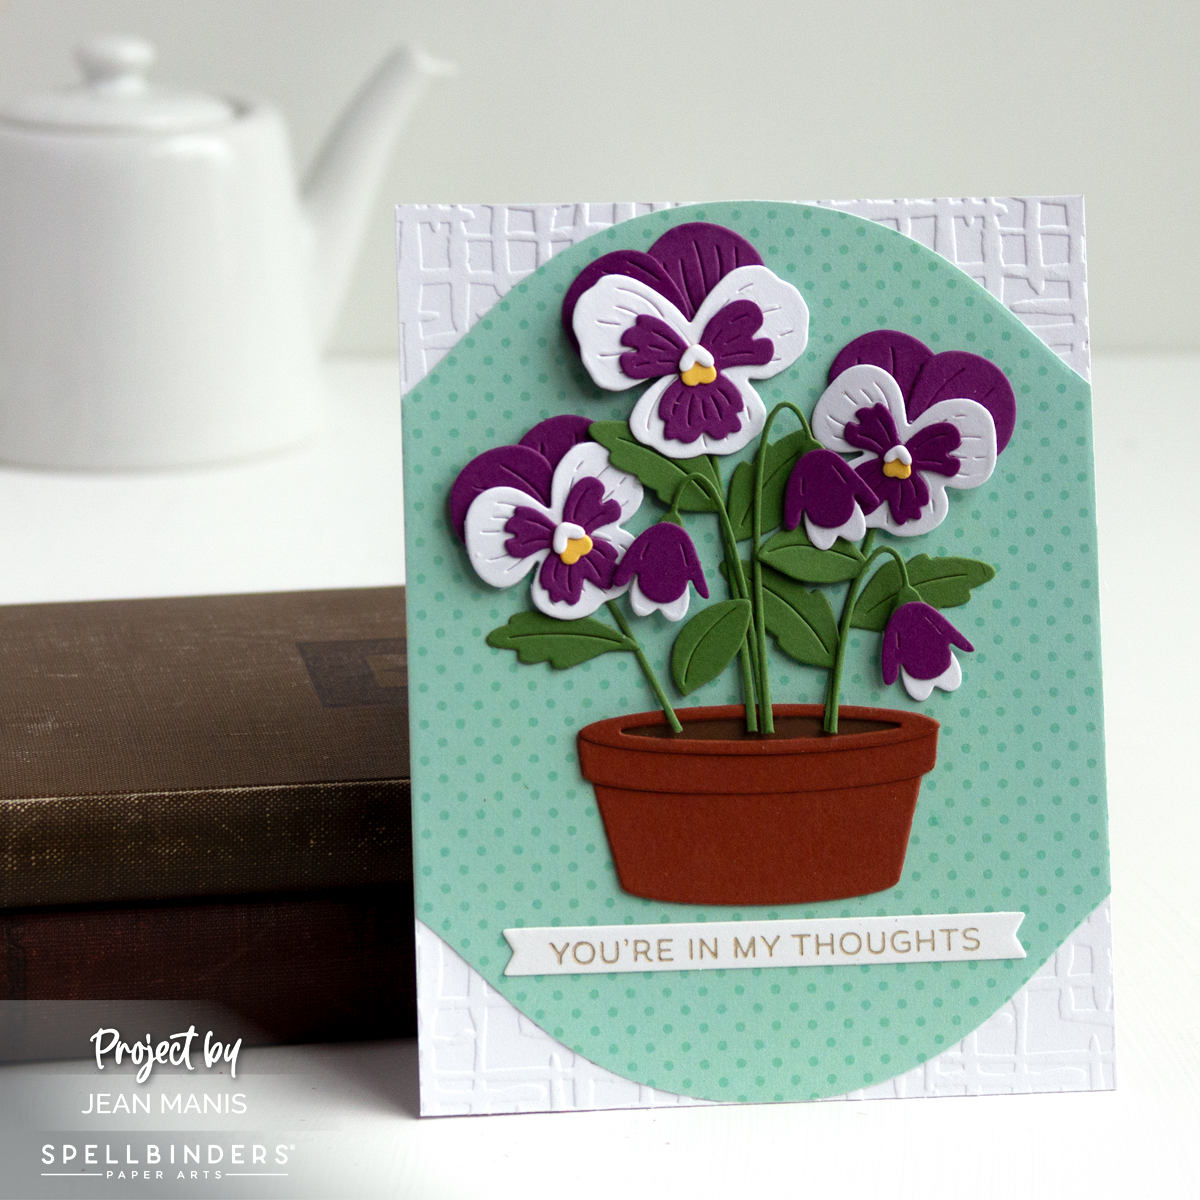
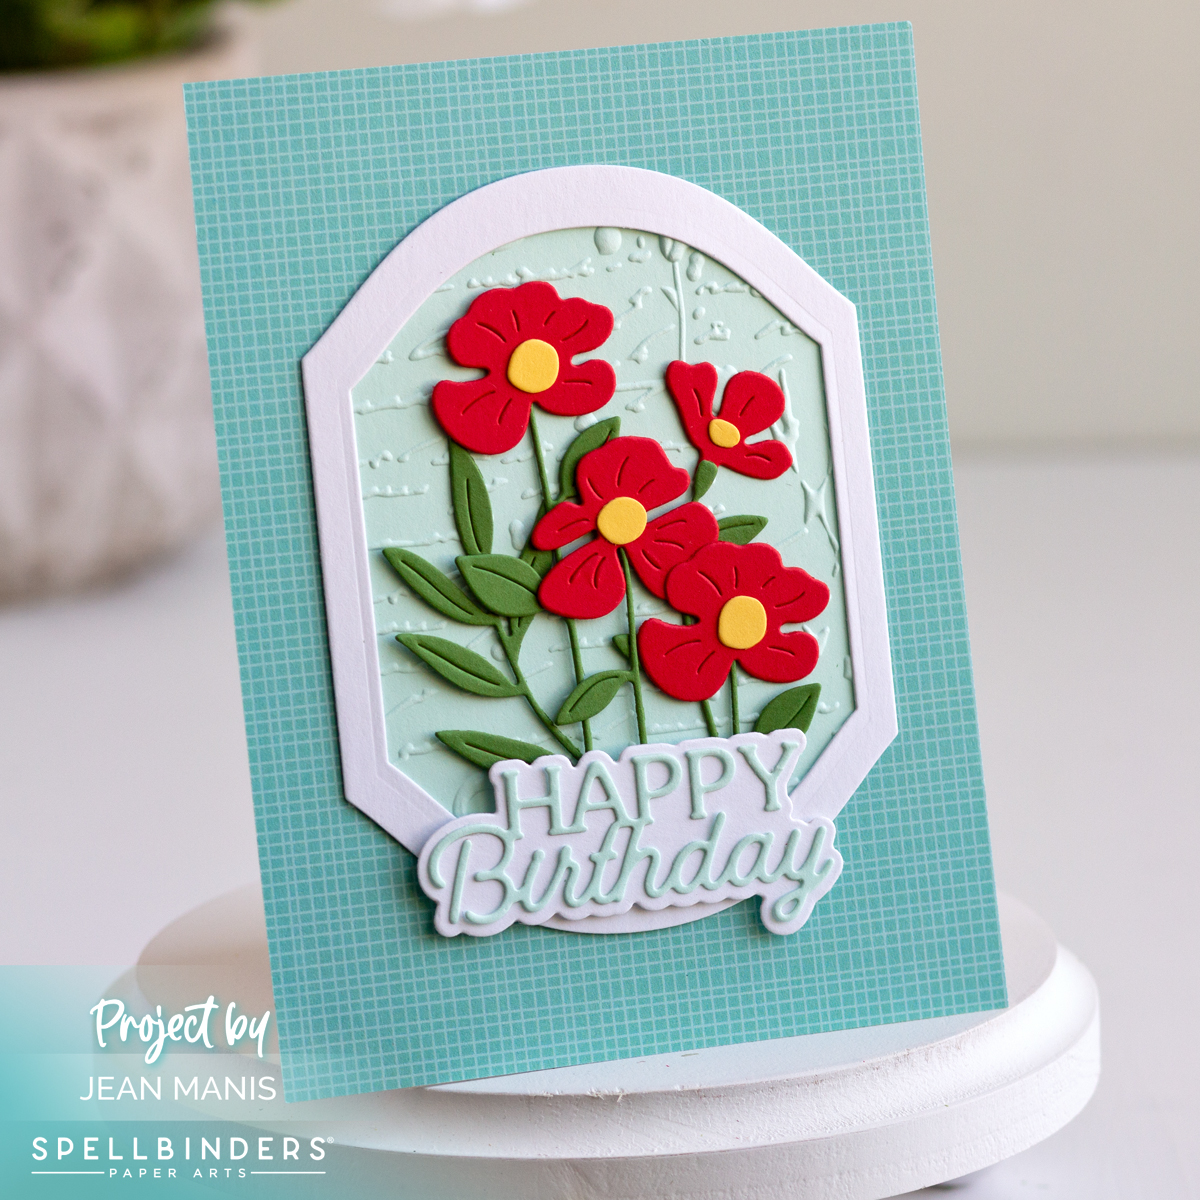
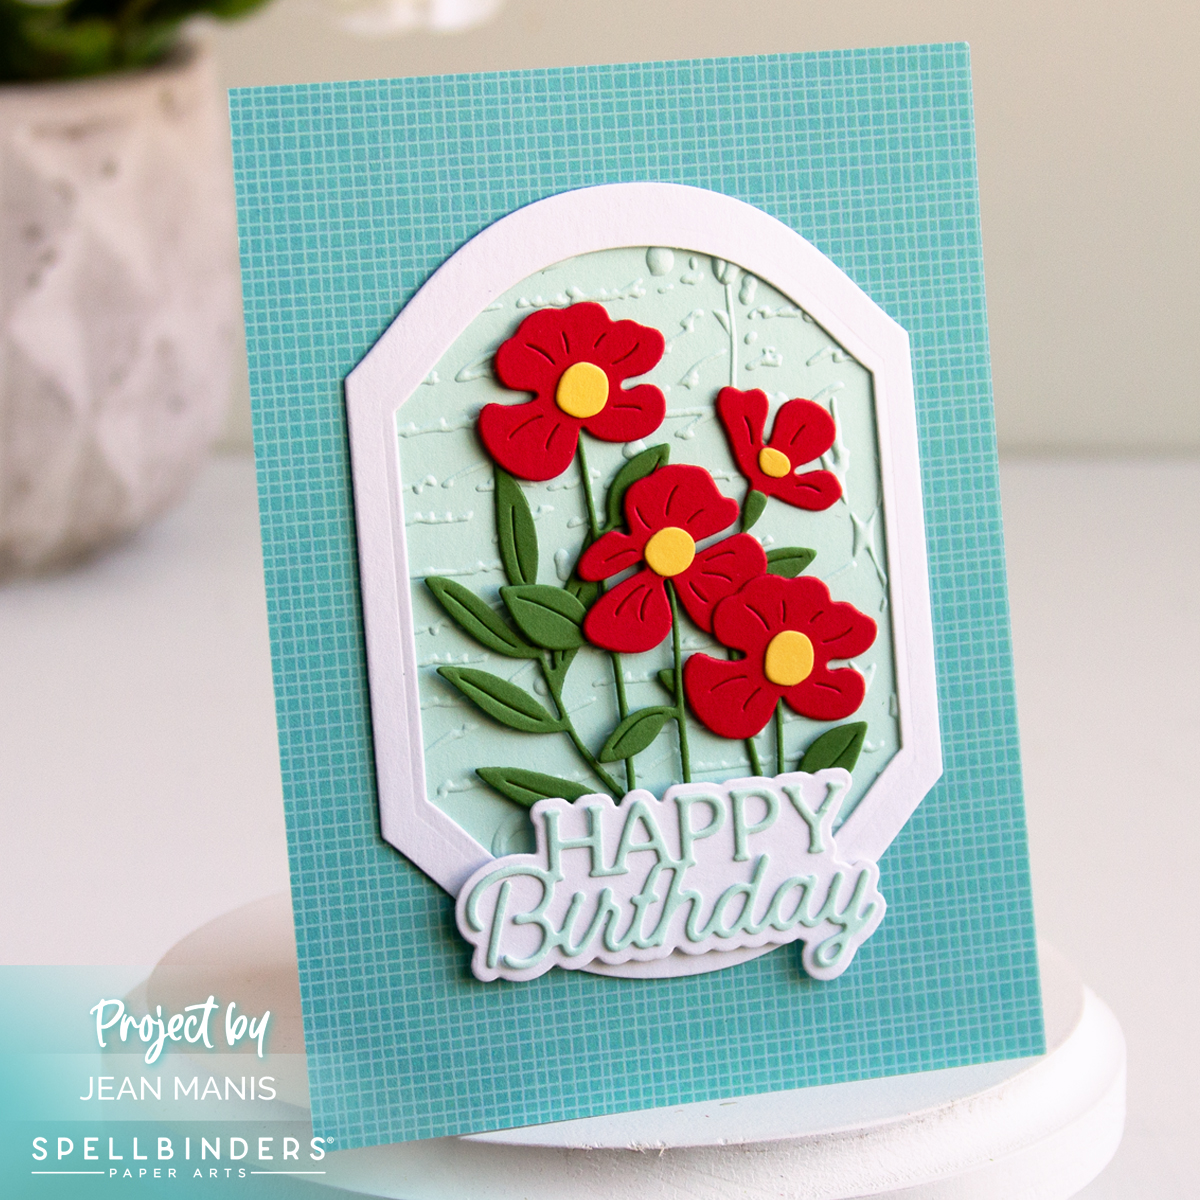
Stuck on You: Watercolored Hedgehog Card

Hello! I usually reach for dies when making cards, but sometimes it’s fun to switch things up with a bit of watercoloring. This adorable hedgehog from Art Impressions was the perfect chance to do just that! Since the stamp set does not have a coordinating die for the images, after watercoloring the stamped image, I masked the hedgehog and cactus to add the sky and ground.

Stuck on You: Watercolored Hedgehog Card

    • Create an A2-size card base from off-white cardstock. With the Burlap folder, dry-emboss a Chocolate Bar cardstock panel measuring 4″ x 5 1/4″. Add panel to card base.
    • Stamp the hedgehog in VersaFine ink on Arches Cold Press watercolor paper; heat set.
    • Watercolor the image with watercolor markers. I used Tombow markers and Derwent Inktense Watercolor Pencils. You can read more about watercoloring stamped images here. Tombow markers: Brown 879, Burnt Sienna 947, Rhodamine Red 725, Dusty Rose 772, Navy Blue 528, Dark Jade 177.
    • Once dry, mask image and add Distress Inks for sky and ground. Cut image with one of the Hexagon Double Stitched Dies. With the next larger die in the set, cut a larger hexagon from Blue Jay cardstock. Add stamped hexagon to mat.
    • Stamp sentiment in Potting Soil ink on off-white cardstock and cut with a 1 1/4″ circle die.
    • Add elements to prepared base.

Stuck on You: Watercolored Hedgehog Card

Masking might sound intimidating, but it’s actually a simple technique that makes a big impact. All you need is a bit of masking paper or a sticky note to cover your stamped image while adding the sky and ground. As for the watercoloring, don’t worry about being perfect — the beauty of watercolor is in its softness and unpredictability. A little practice goes a long way, and the results are so rewarding!


Spellbinders | Monkey on the Move

Hello! Today, I am sharing a card that features an adorable monkey cruising along in a car, with colorful balloons trailing behind. Created with a mix of Spellbinders products, including a die set and embossing folder from the Little Smiles Collection, this cheerful design is perfect for kids—or anyone young at heart.

Spellbinders | Go Kart Go

    • Cover an A2-size card base with patterned paper.
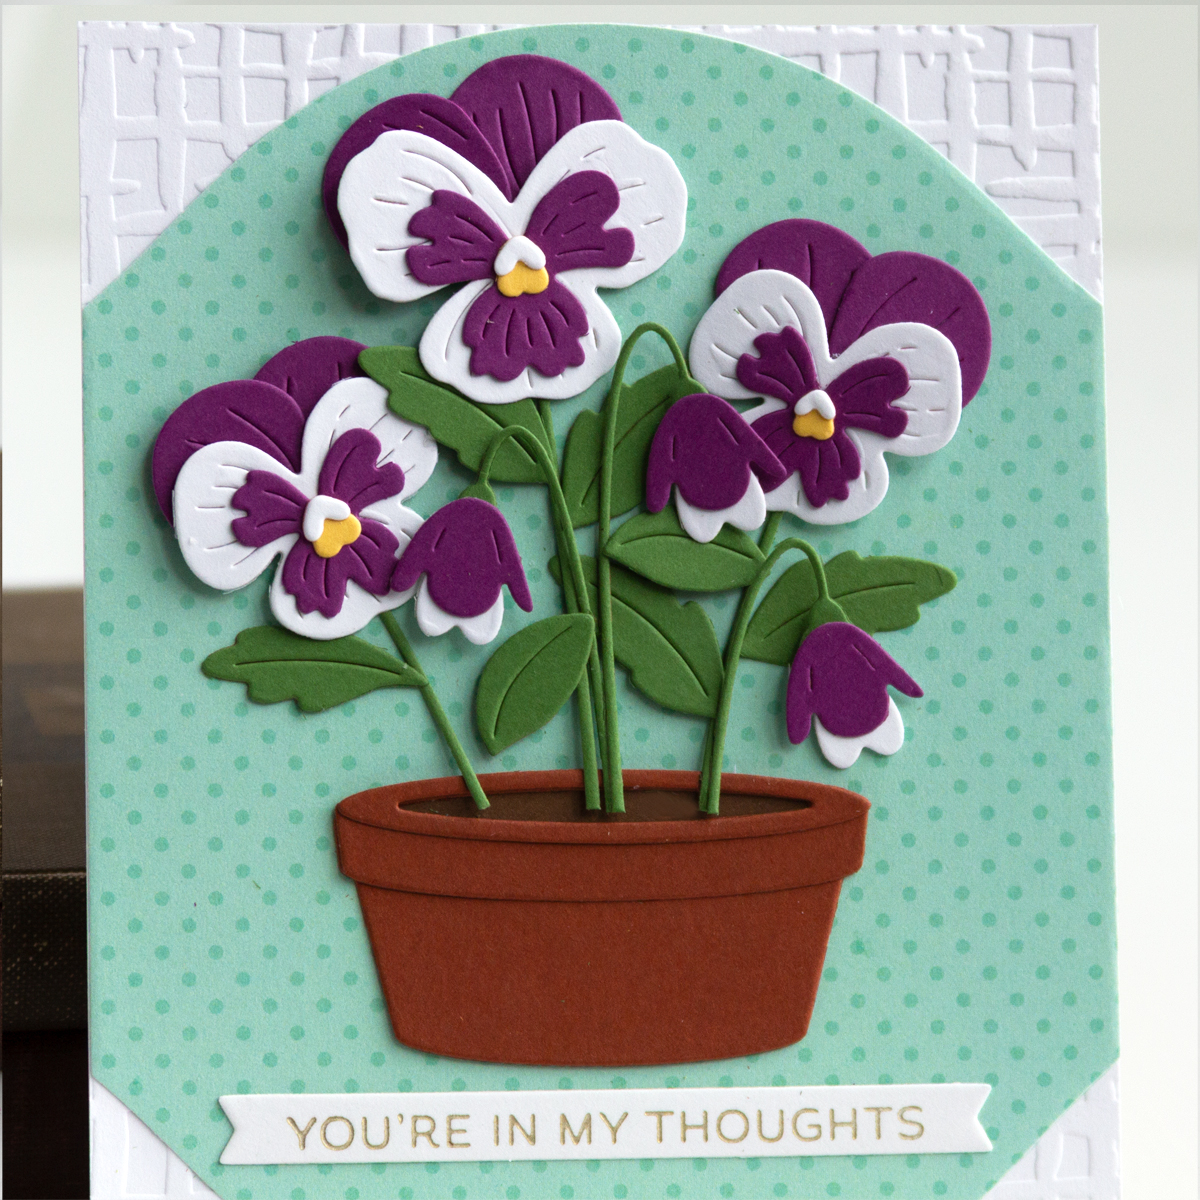
    • Use dies in the Essential Stylish Ovals set to cut textured white cardstock and Beeswax cardstock. Dry-emboss the Beeswax cardstock oval with the Wishing Stars folder. Cut a dark gray cardstock rectangle with a Essential Stylish Ovals die to create the road. Add pieces to card base.
    • Cut monkey, car, and balloons with the Go Kart Go set from a variety of cardstock colors. Assemble and add to card base.
    • Stamp the sentiment with a stamp in the Message Strips set on Classic White cardstock. Cut with a cloud die in the On Cloud Nine set. Cut an additional cloud. Add to card.

Spellbinders | Go Kart Go


Hello Card with Floral Die-Cuts

Hello! If you’re a subscriber of the Large Die of the Month kit club at Spellbinders, or considering joining, you’re in for a treat! This month’s set–“Family & Friends Vignettes”– is packed with creative possibilities, including a versatile arch design, a playful dog, and even a fun dinosaur. For today’s project, I focused on the floral elements in the set, creating a “hello” card with a die-cut cluster. Whether you’re drawn to florals, critters, or something a bit more whimsical, this kit offers many ways to bring your creative vision to life!

Spellbinders | March 2025 Large Die of the Month

    • Create an A2-size card base from textured cardstock and add a 4 1/8″ x 5 3/8″ patterned paper panel (49 and Market – Vintage Artistry Countryside).
    • Use the set to cut the arch and floral elements from a variety of cardstock colors. Assemble floral elements.
    • Dry-emboss the inner arch with the Tiny Dots folder. Adhere to the outer arch.
    • Assemble floral elements on the arches and add to the card base.
    • Cut Hello Smile sentiment from vellum and Fern cardstock. Assemble and add to card base.
    • Embellish with Clear Enamel Dots.

Spellbinders | March 2025 Large Die of the Month


Fishing-Themed See You Soon Card

Hello! The Fairways & Fish Tales die kit at Spellbinders is packed with both fishing and golf-themed elements, making it a fantastic choice for creating masculine and outdoor-inspired cards. My card showcases the fishing side of this set. With die-cut figures of two men fishing on a dock and a dry-embossed background for texture, this card captures the peacefulness of a day by the water. Whether you are already receiving the Small Die of the Month kit or are considering subscribing this month, I hope this project inspires you to explore all the creative possibilities it offers!

Spellbinders Small Die of the Month kit

Spellbinders Small Die of the Month kit


Spellbinders Timeless Painted Daisies

Hello! Today, I am sharing a flower-themed card created with Spellbinders products in the Through the Meadow Collection by Susan Tierney-Cockburn. I paired the realistic painted daisies with a floral-themed, dry-embossed background. The result is a refined, vintage-inspired design that feels both classic and enduring.

Spellbinders Through the Meadow Collection

    • Cut a 5″ square panel of soft blue cardstock and dry-emboss with the Wildly Beautiful folder. Add to card base.
    • Cut the Painted Daisy petals and leaves from Susan’s Garden Specialty Cardstock and color. I followed the video on the product page for coloring and shaping instructions, using Pan Pastels to color. Painted daisies come in a variety of colors —I recommend finding a visual reference to explore the many beautiful possibilities! I cut the flower centers from dark gray cardstock to match Power Outage Prills. Once assembled, glue the flowers and leaves to the card front.
    • Stamp the Message Strips sentiment on off-white cardstock with dark gray ink and cut with the coordinating die. Add to card front with foam adhesive.

Spellbinders Through the Meadow Collection

The Sweetheart Sale is available now at Spellbinders through February 16, 2025 at 11:59 MST.