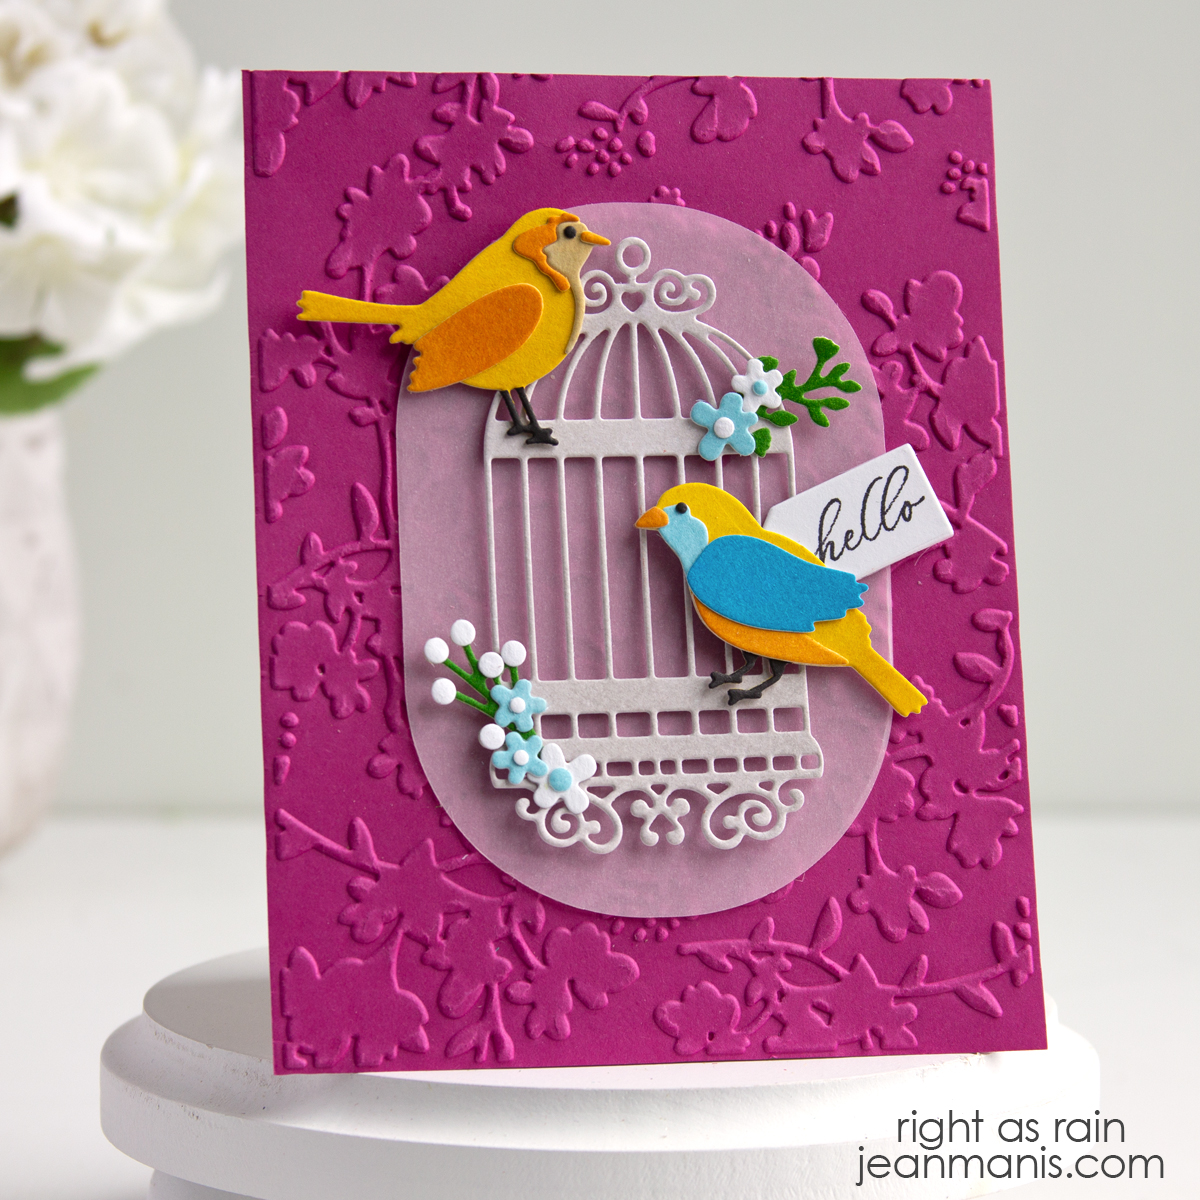
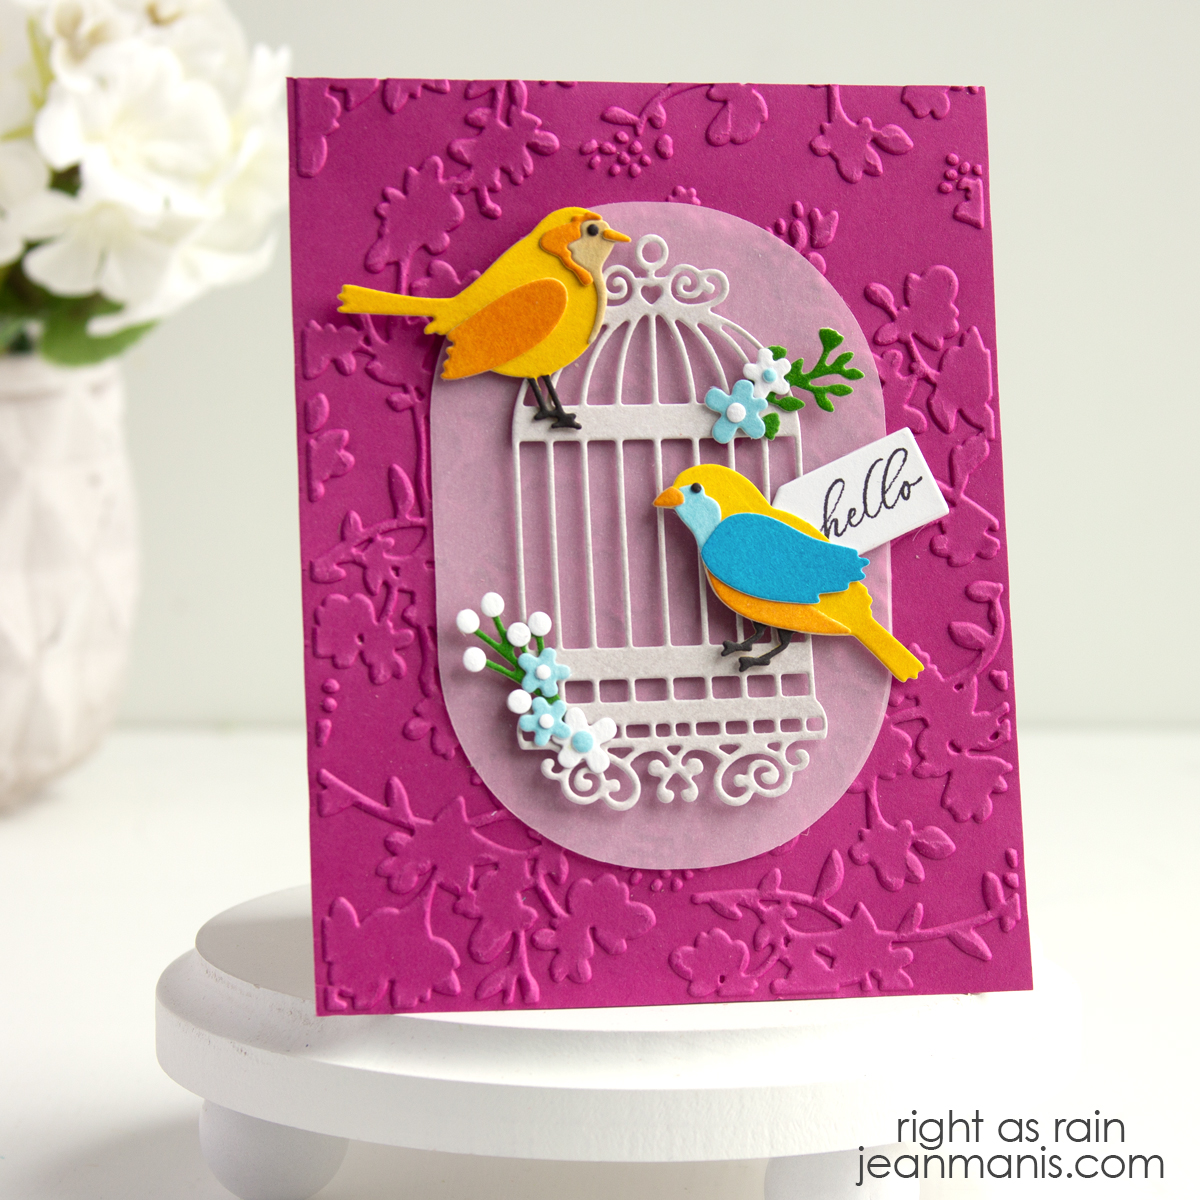
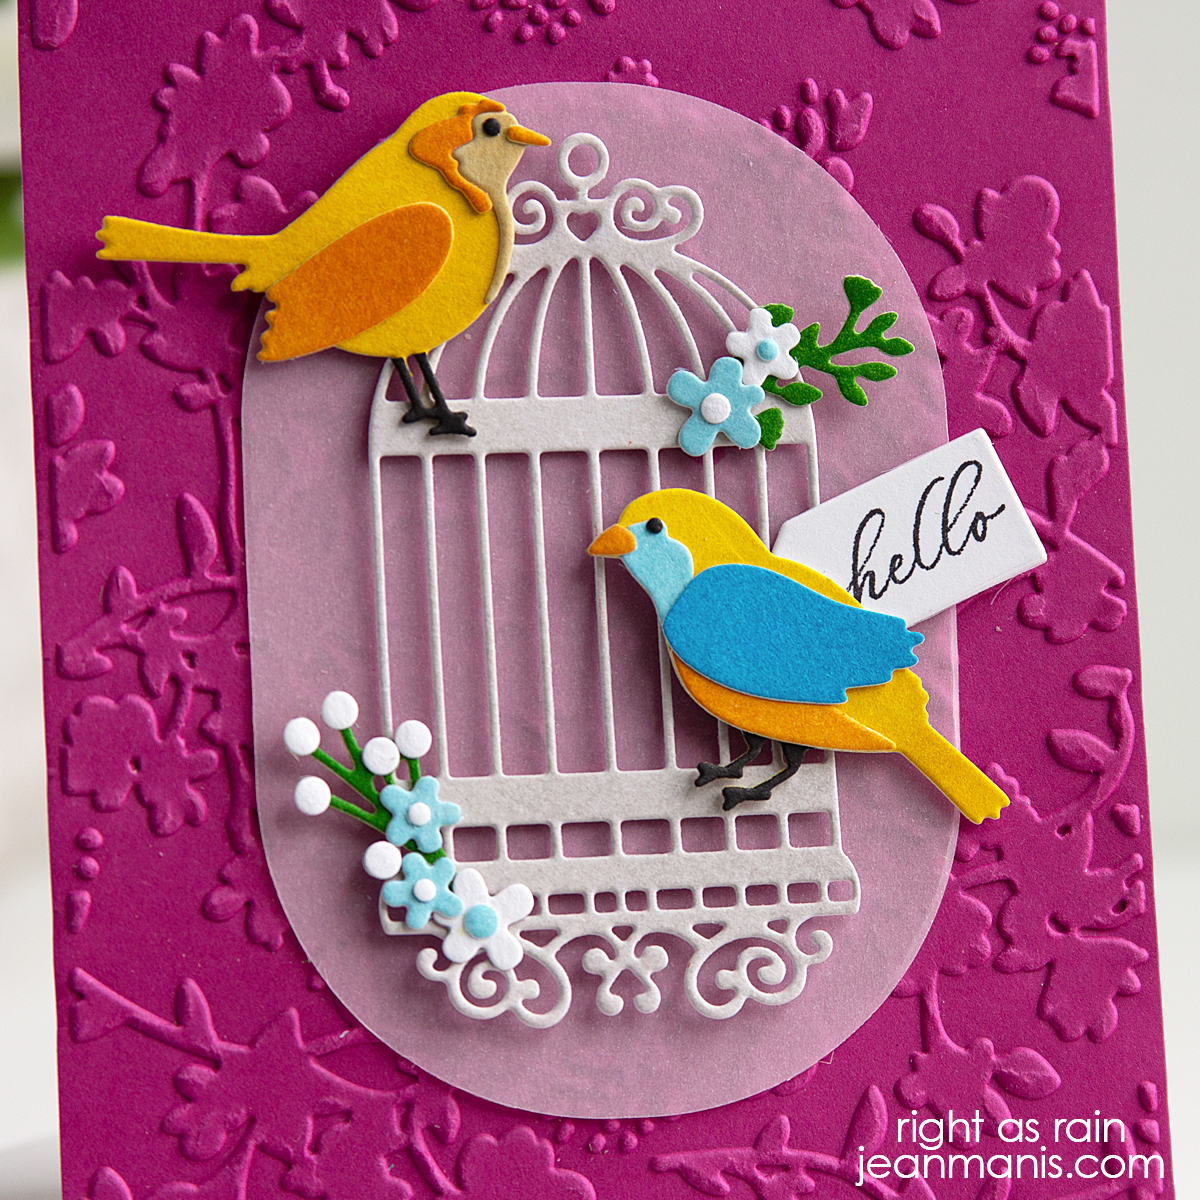
Hello! I’m back playing with the Elizabeth Craft Designs Birds & Dwellings die set. This time, I took a different approach from my previous card featuring the birdhouse and two cardinals. For today’s design, I chose the bird cage and paired it with two sweet birds, all die cut from watercolor paper that I colored with Distress Sprays. A dry-embossed background adds texture without competing with the focal elements. I finished the design with a tucked-away “hello” tag sentiment for a subtle finishing touch.
-
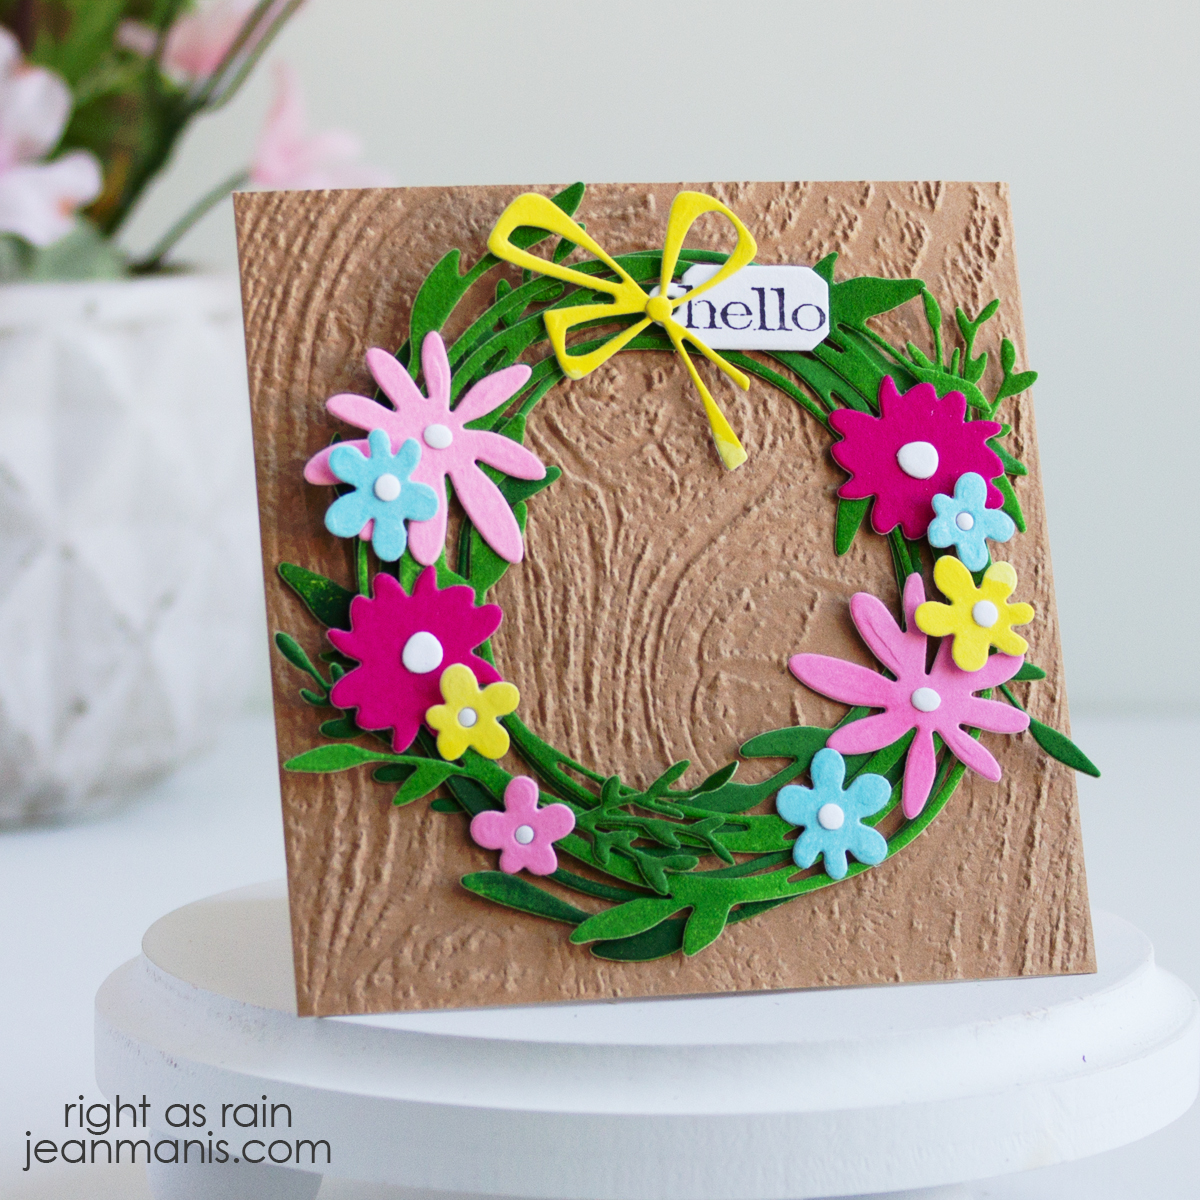
- Dry-emboss solid cardstock with an embossing folder. I used the now-retired Sizzix Tim Holtz Floral folder. Add panel to an A2-size card base.
- Using a die in the Essential Stylish Ovals set from Spellbinders, cut an oval from vellum.
- Cut watercolor cardstock, colored with Distress Sprays, with the Birds & Dwellings dies for the birds, birdcage, and florals. Assemble and add to the oval. Add the assembly to the card base.
- Stamp the sentiment (now-retired SU Timeless Tropical set) and cut it with a small tag die (now-retired MFT tag set).
A quick note: I’ve discontinued my Linkdeli lists. From now on, I’ll share product links directly within my posts where needed. Previous posts will still include Linkdeli lists, and I’ll be working through updating older content over time. Affiliate links are used when available at no extra cost to you.