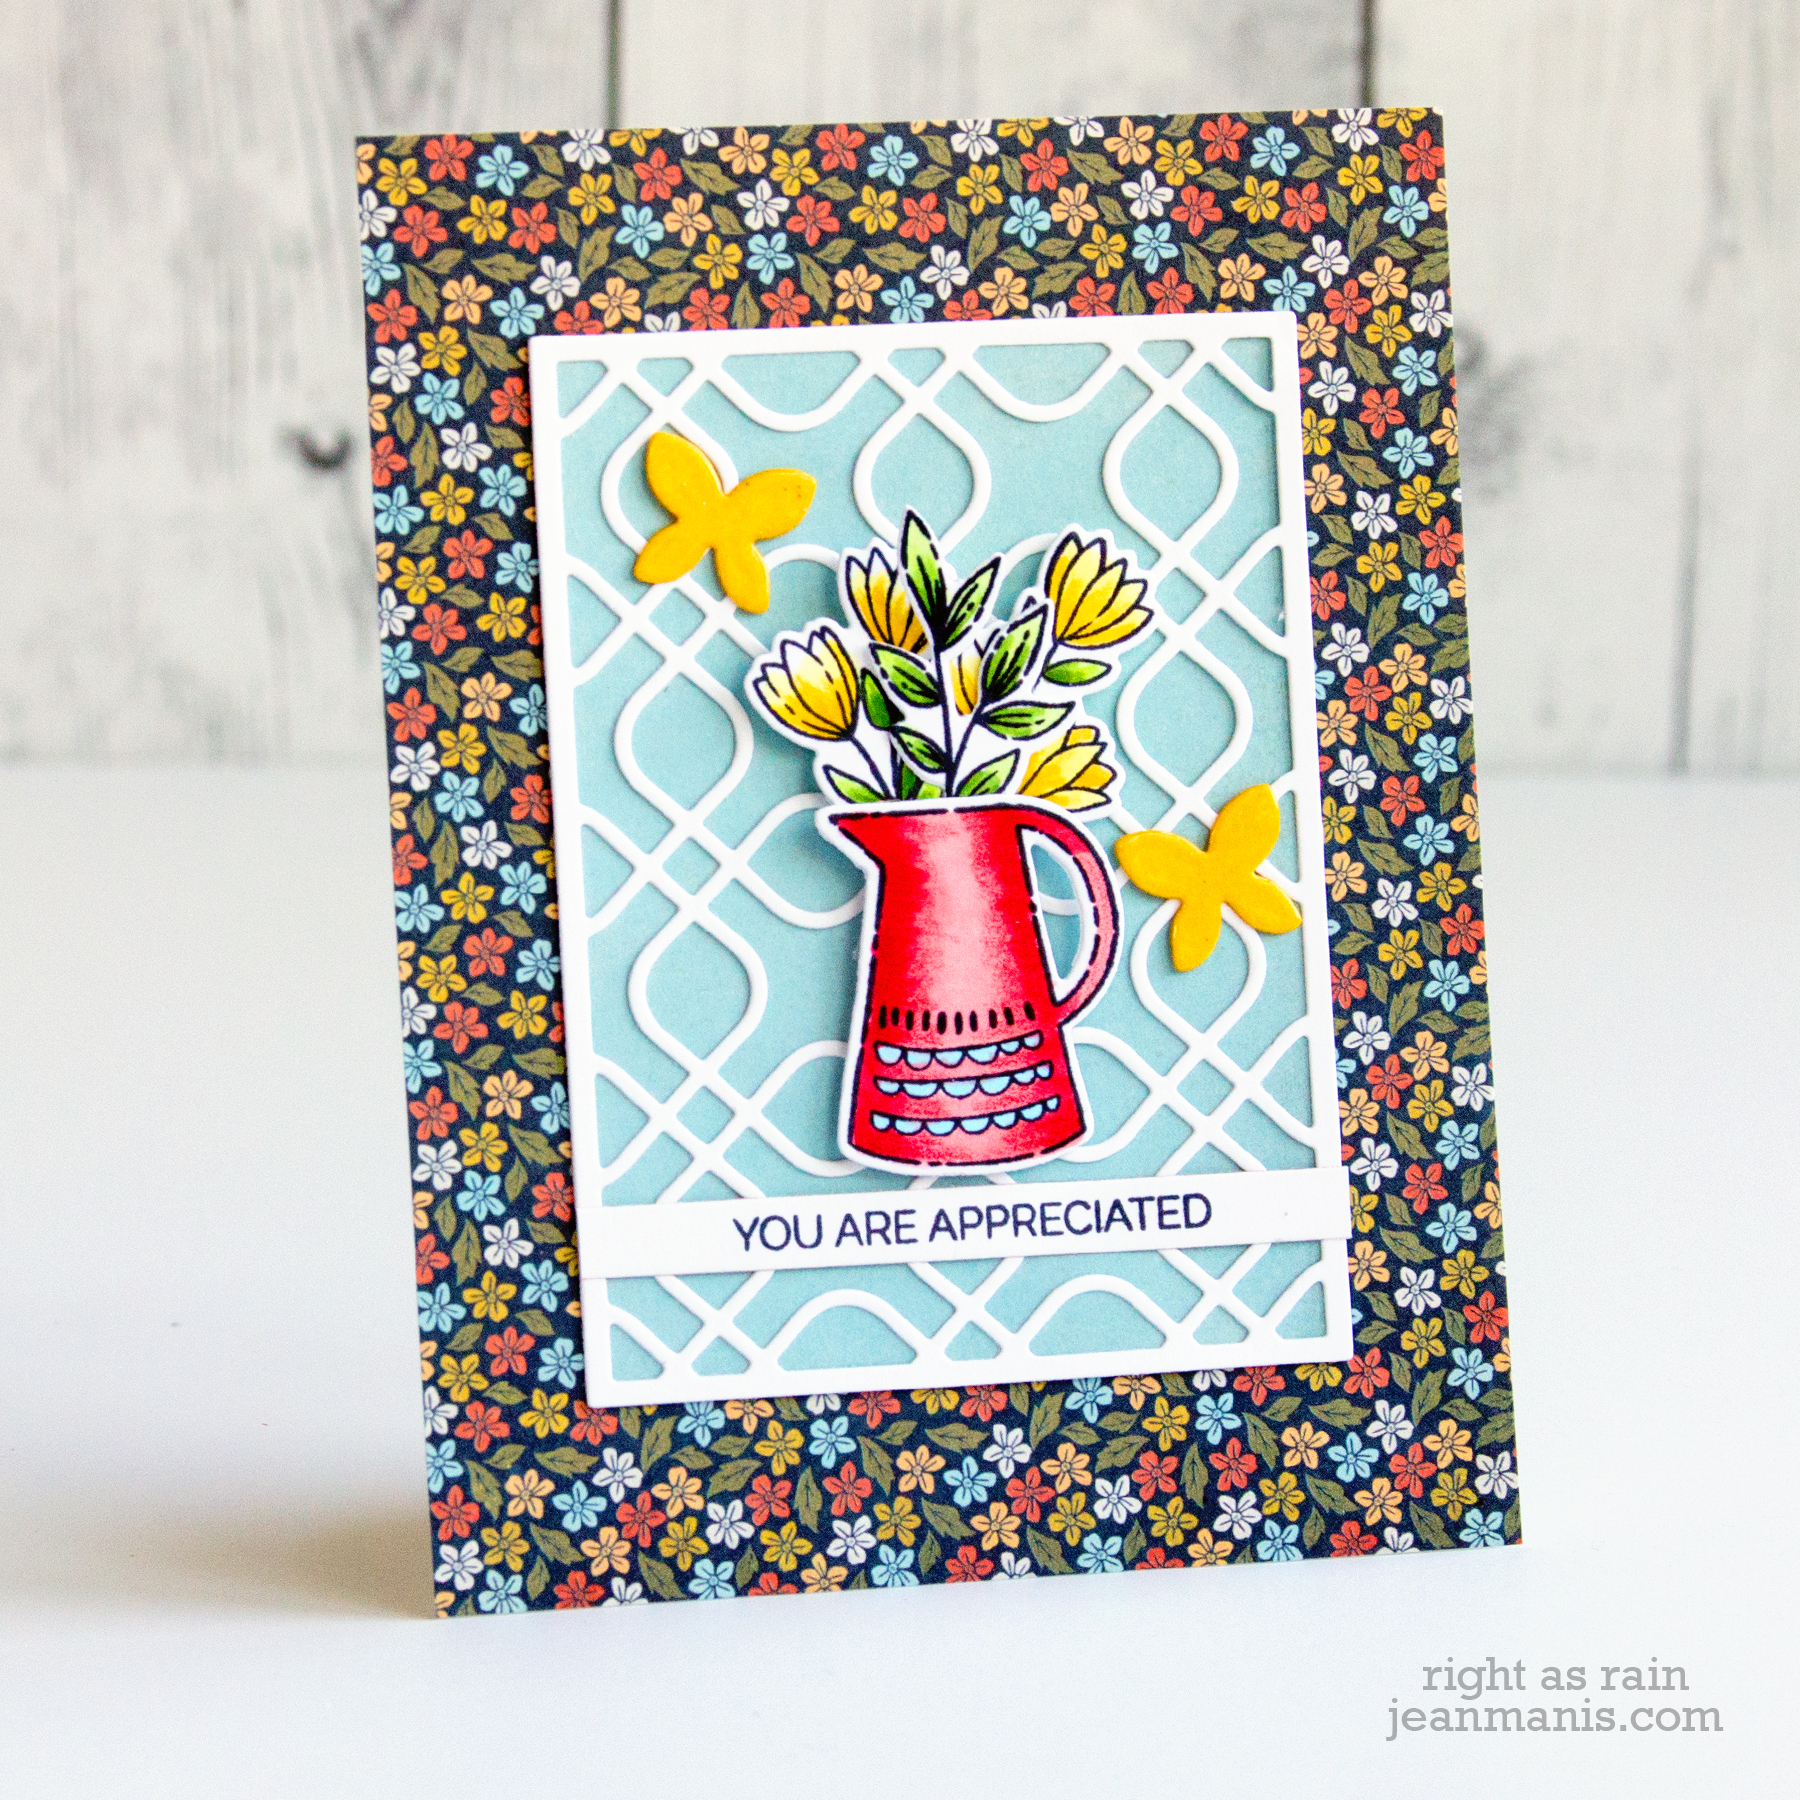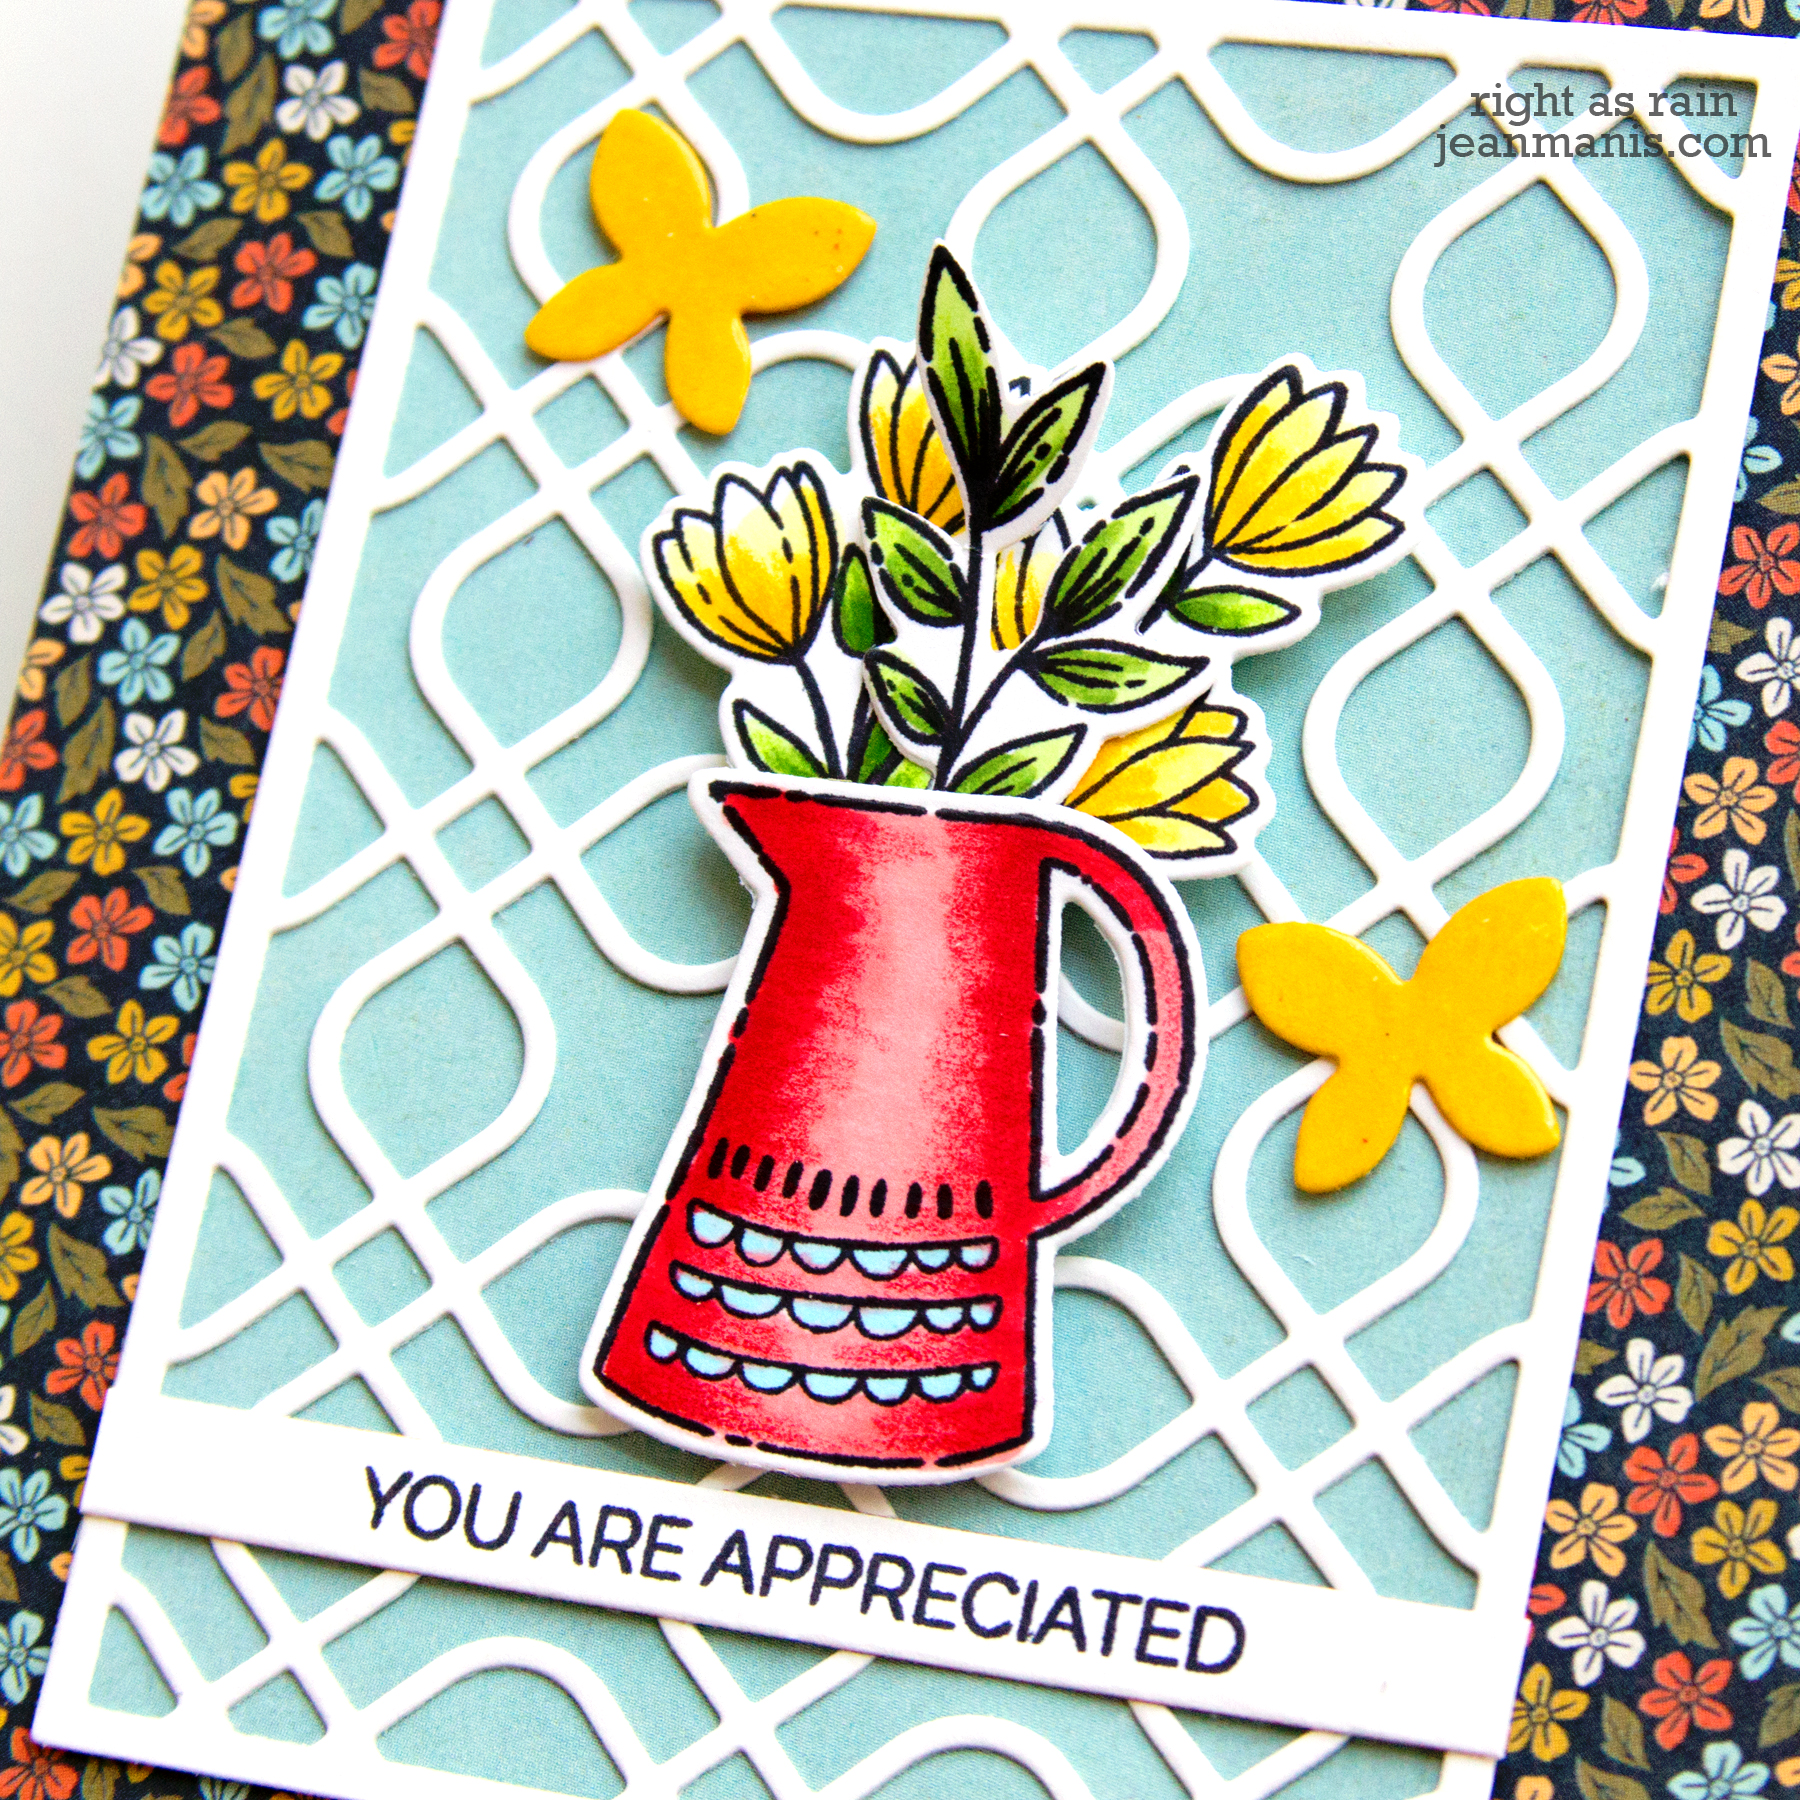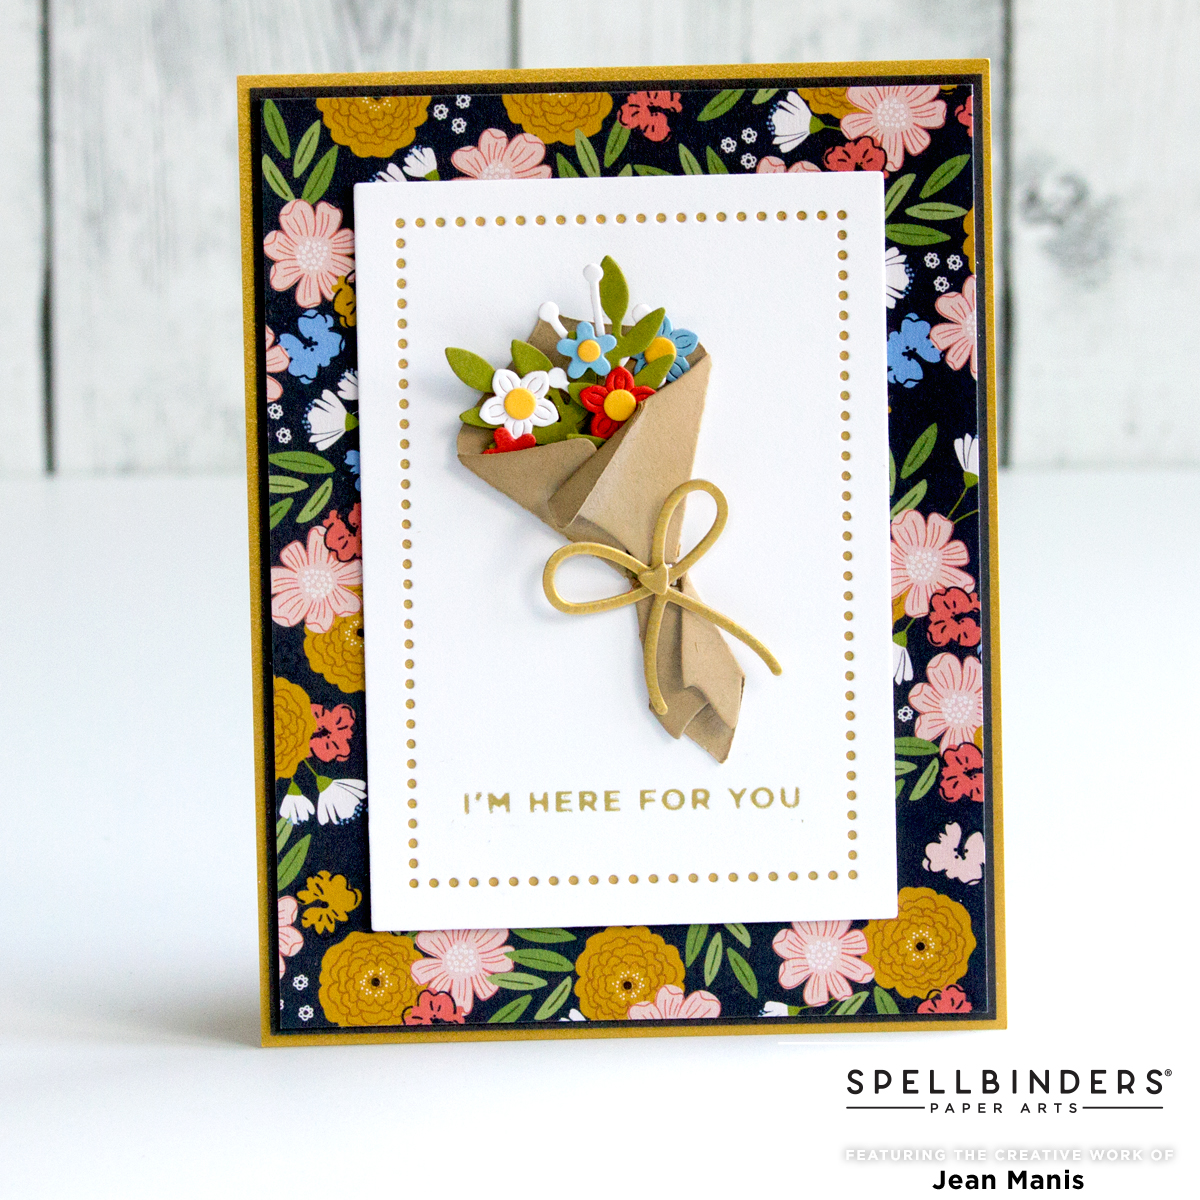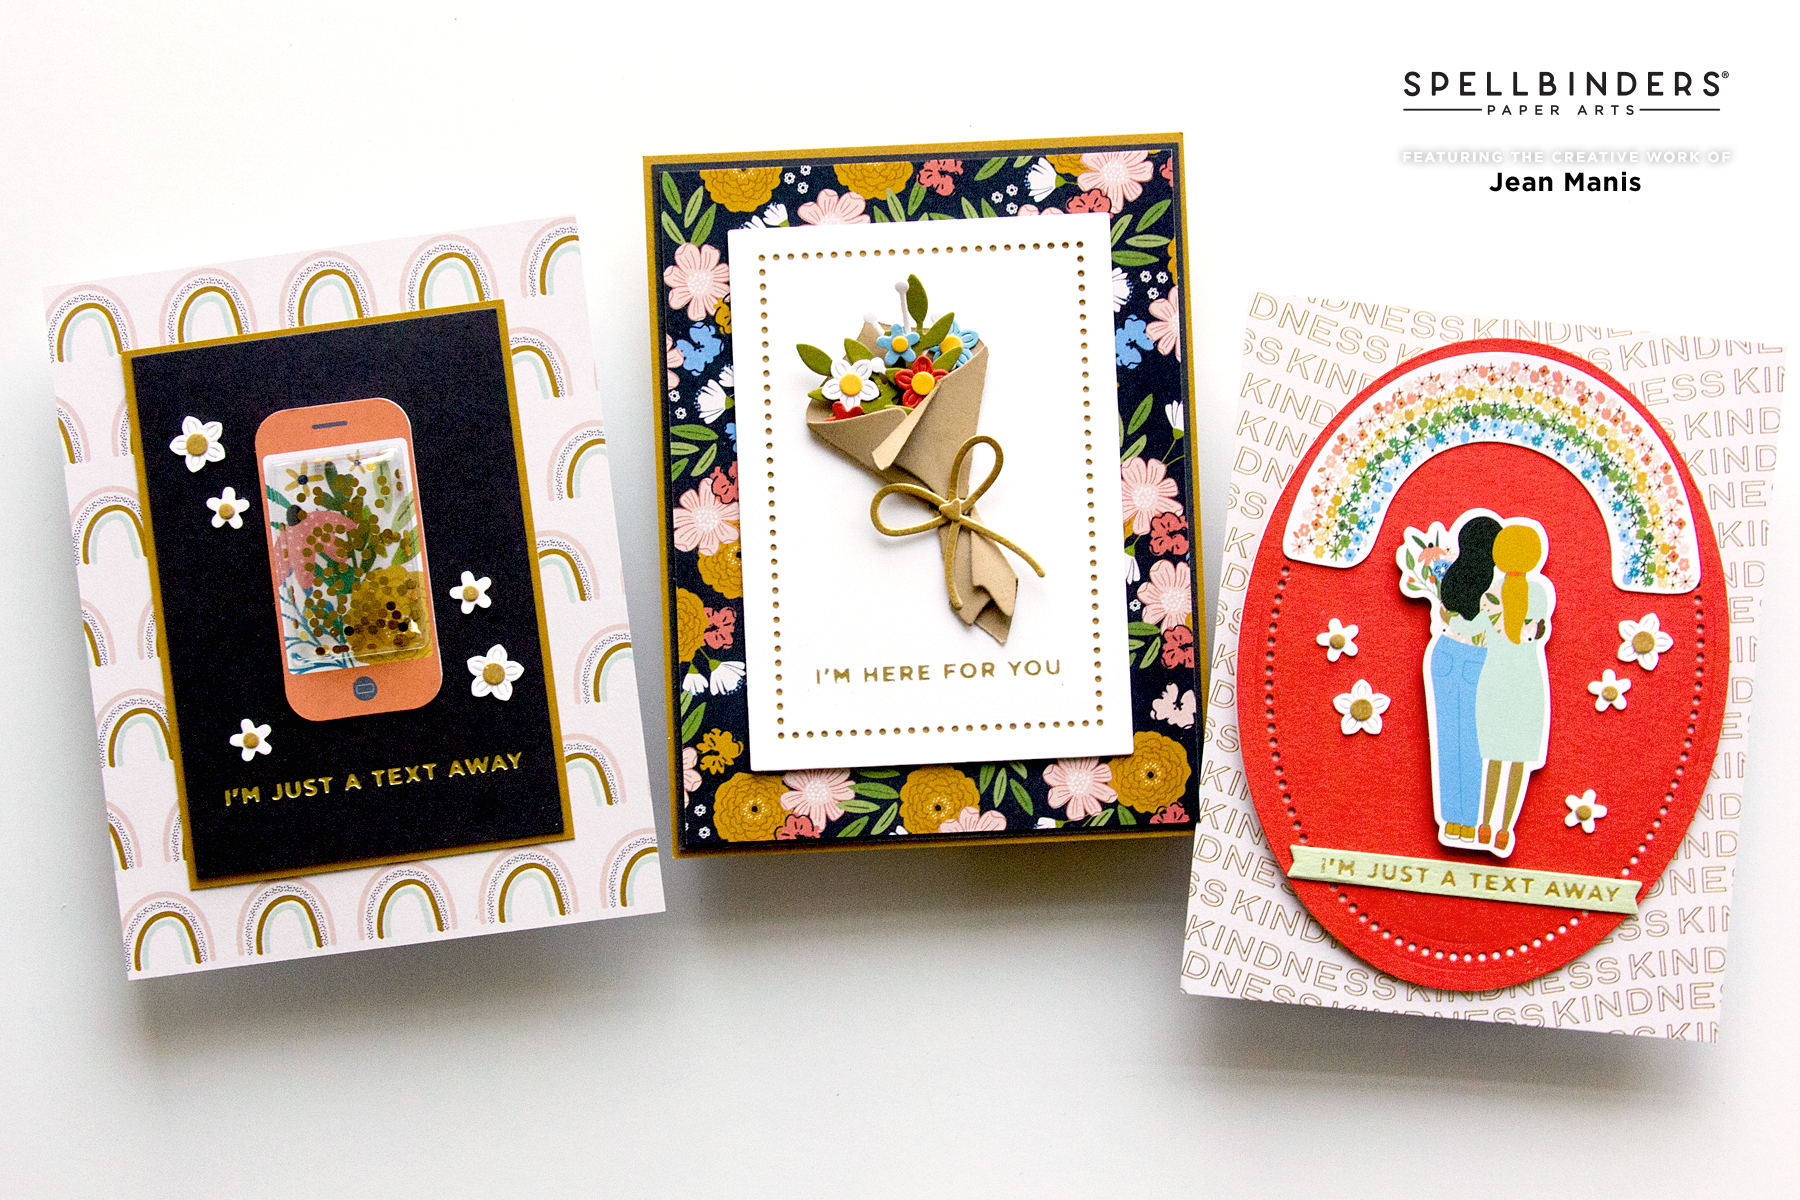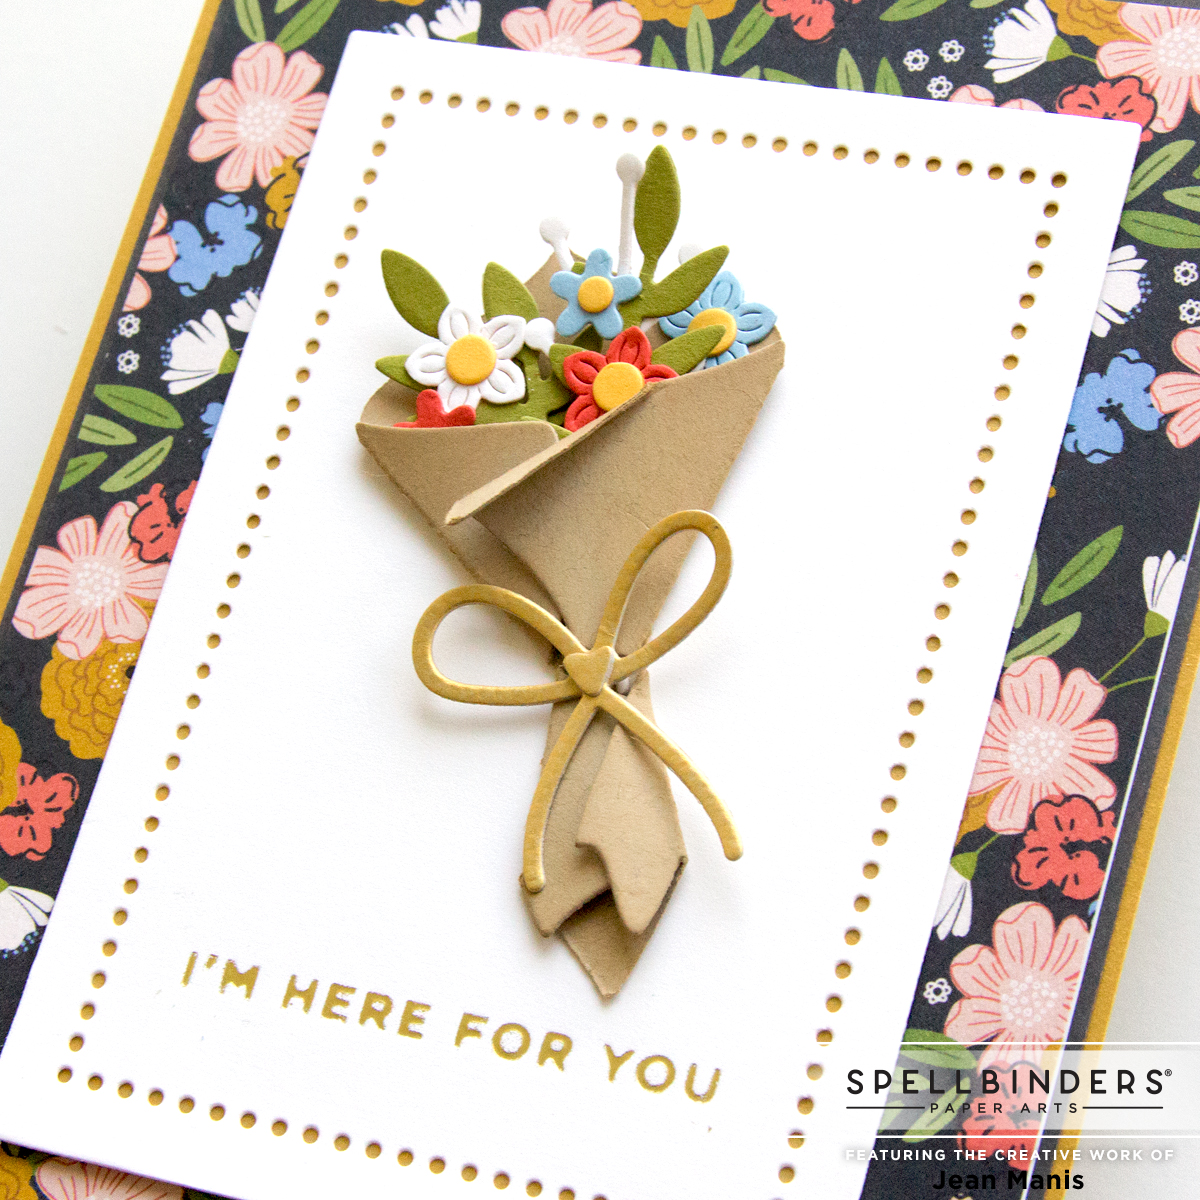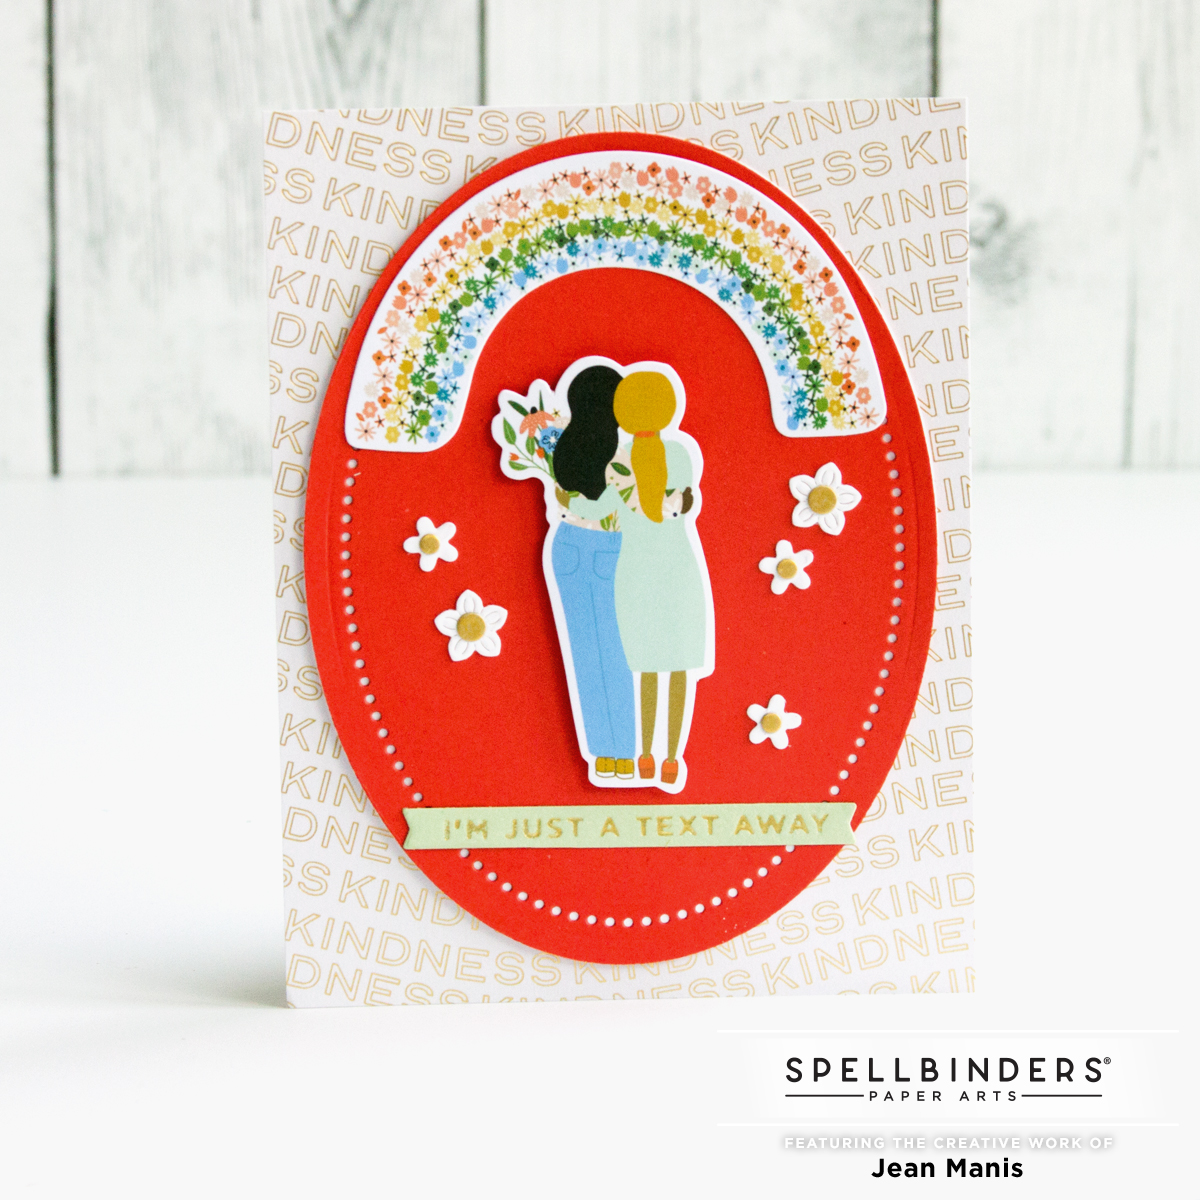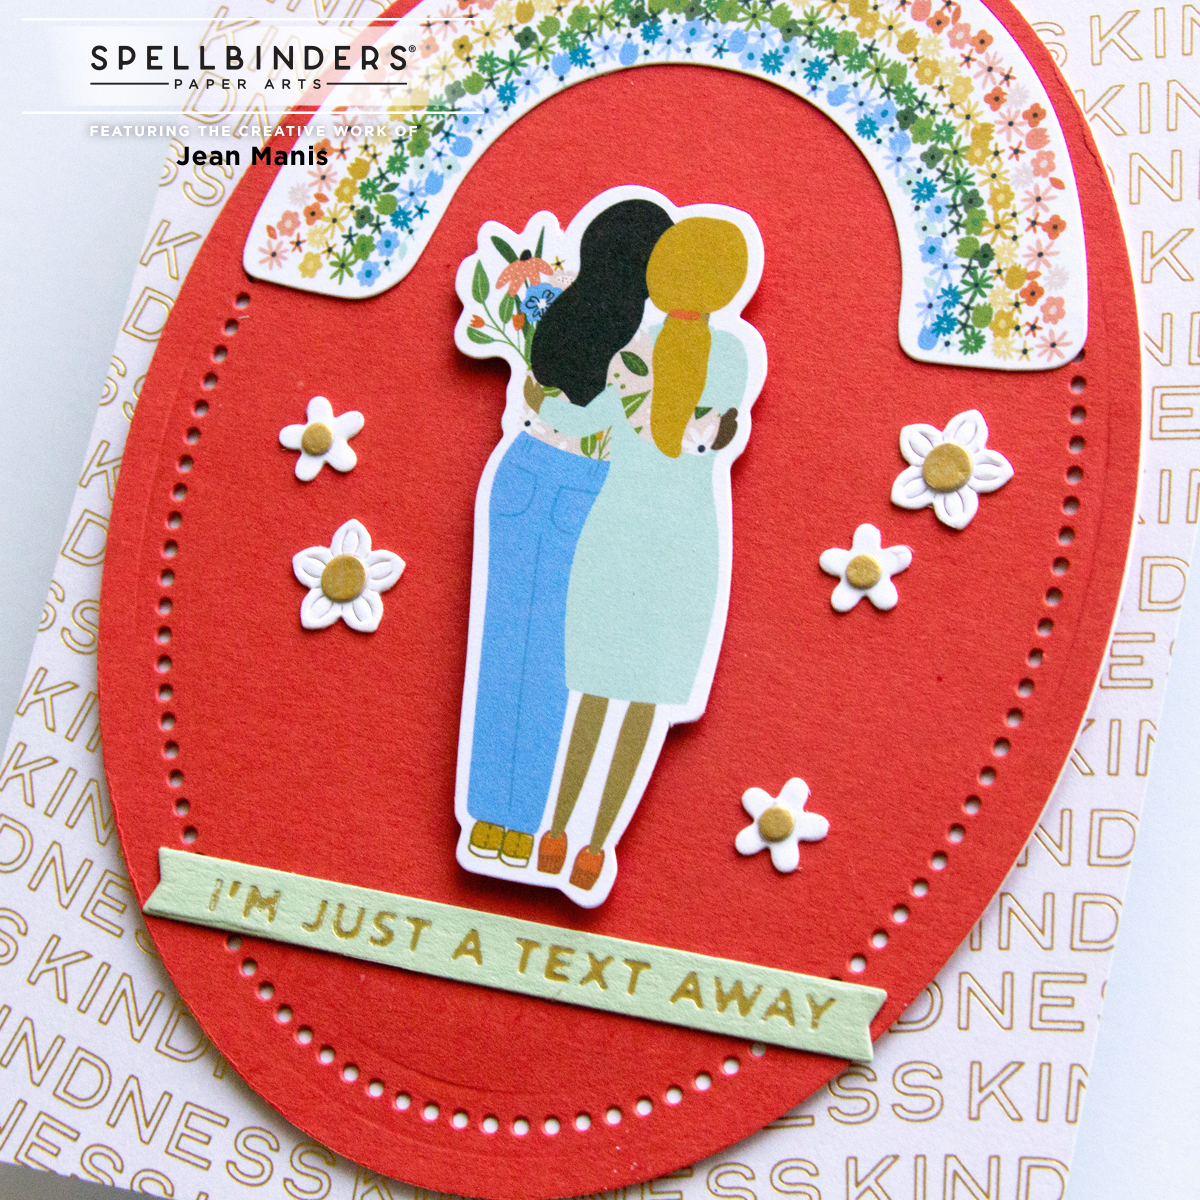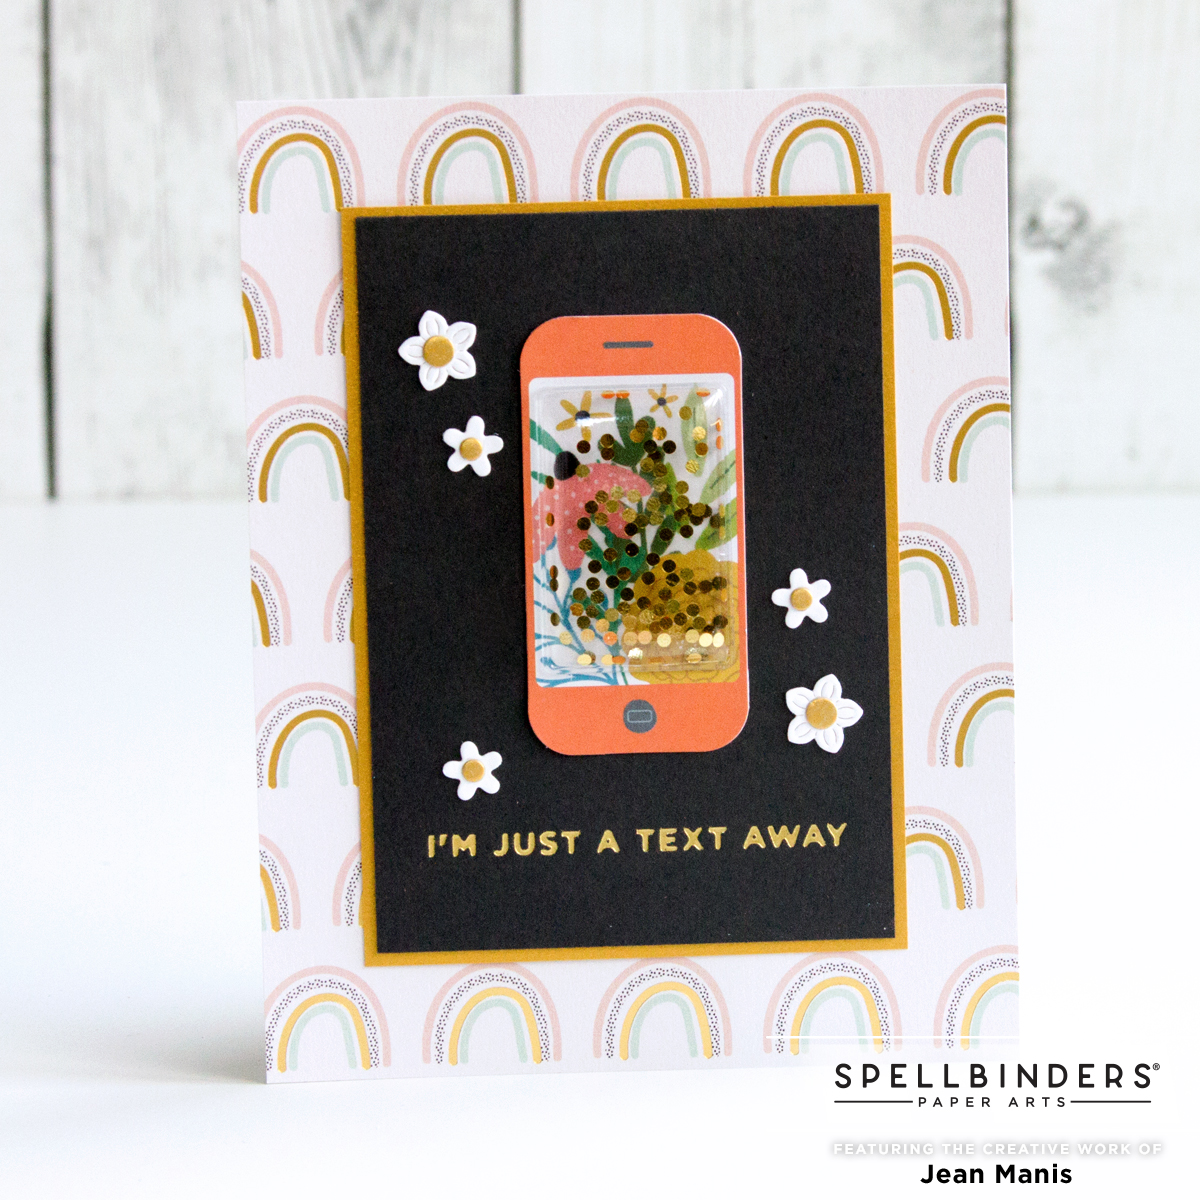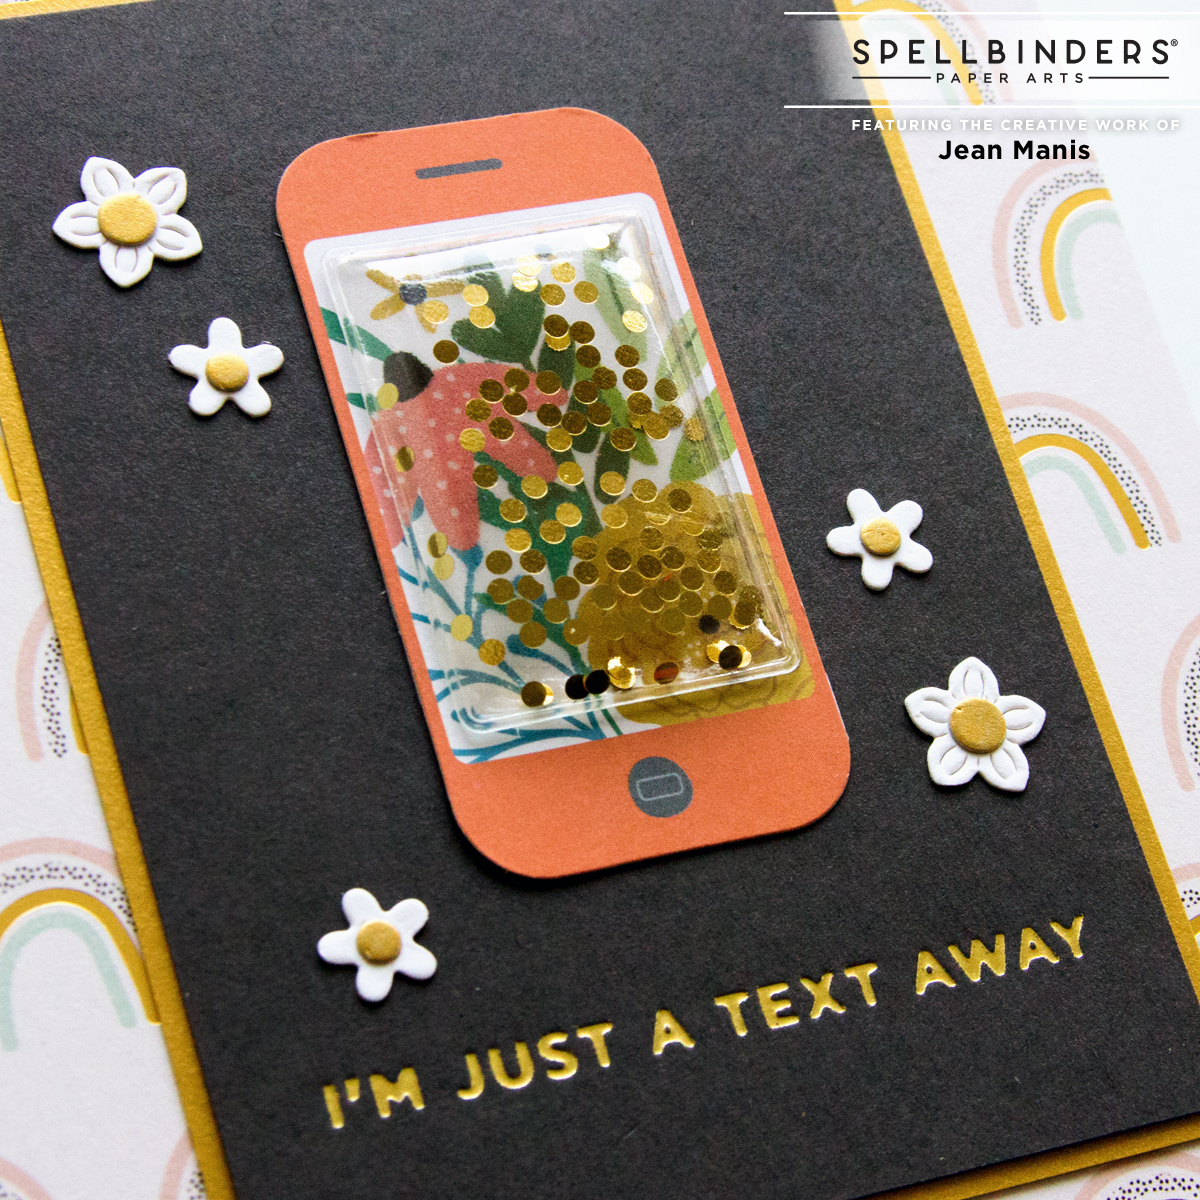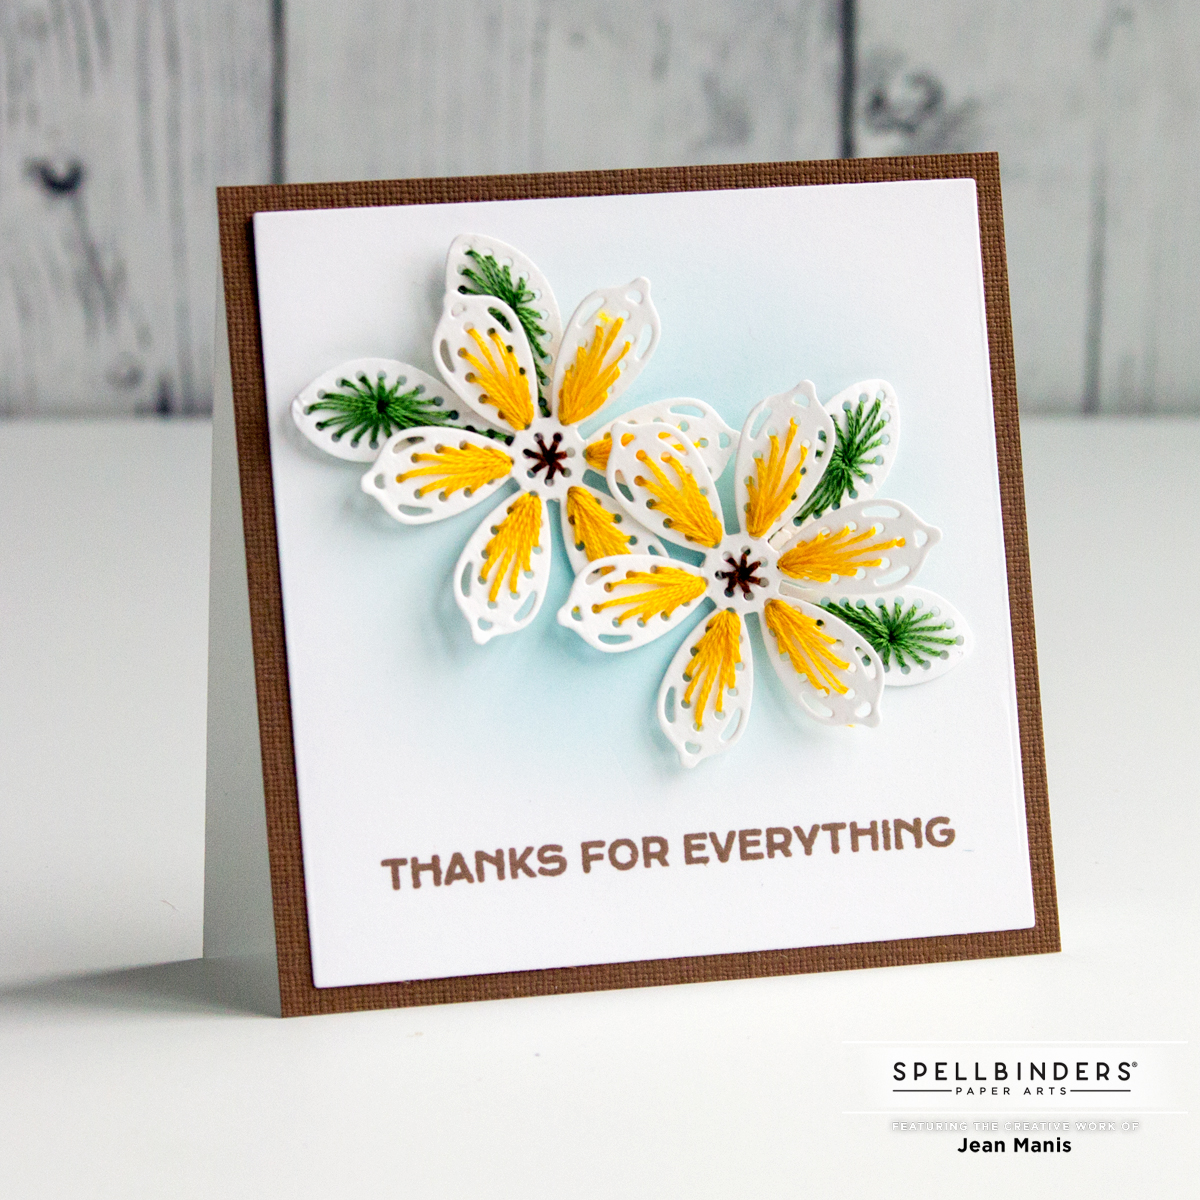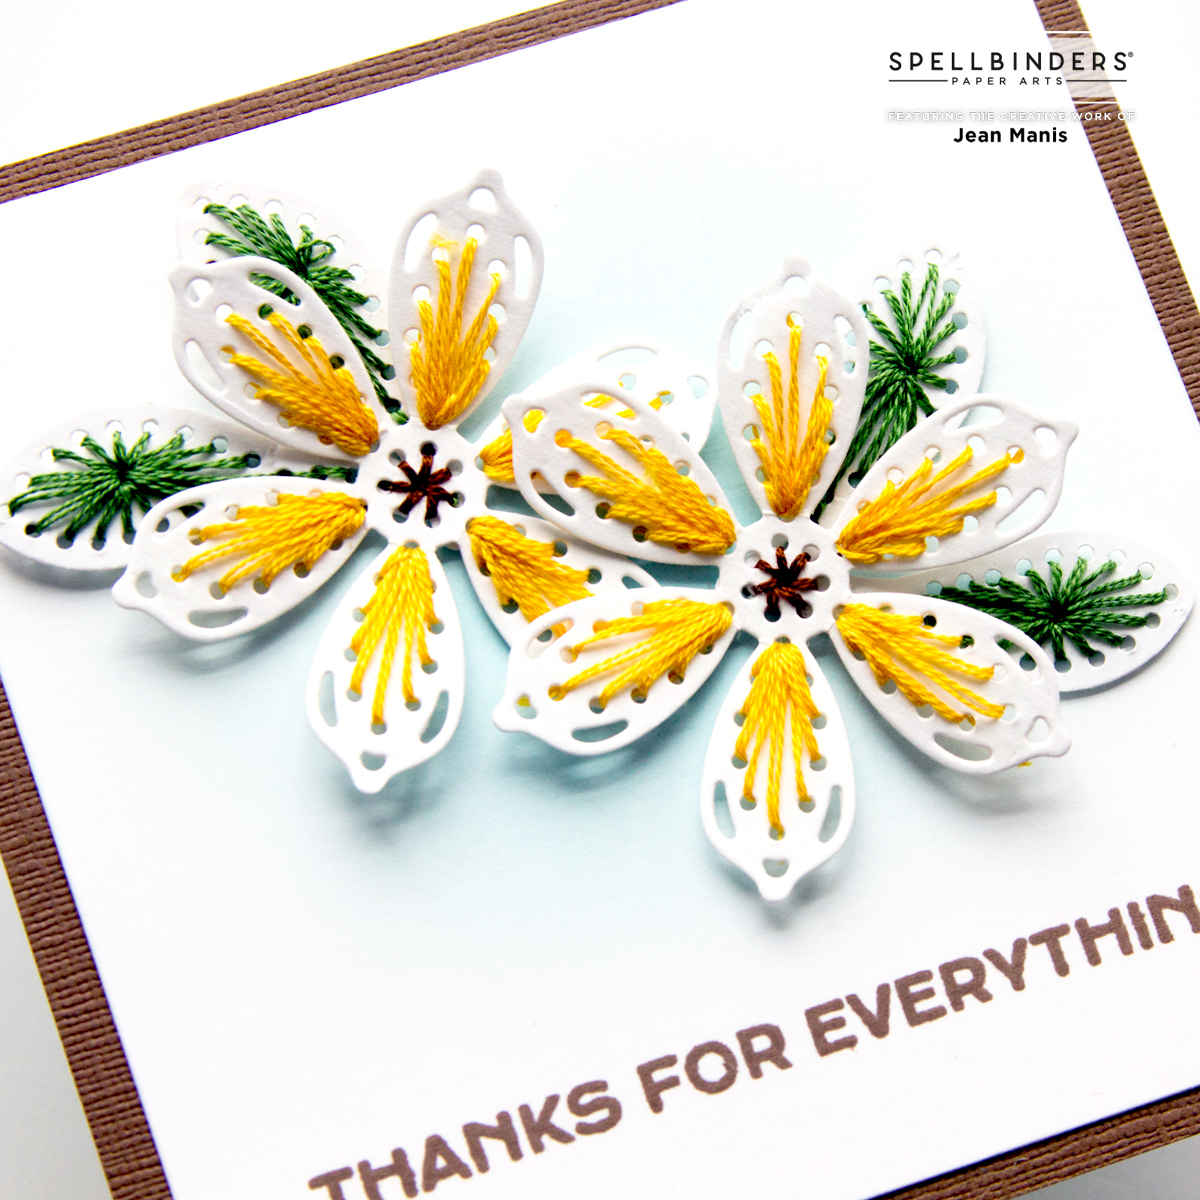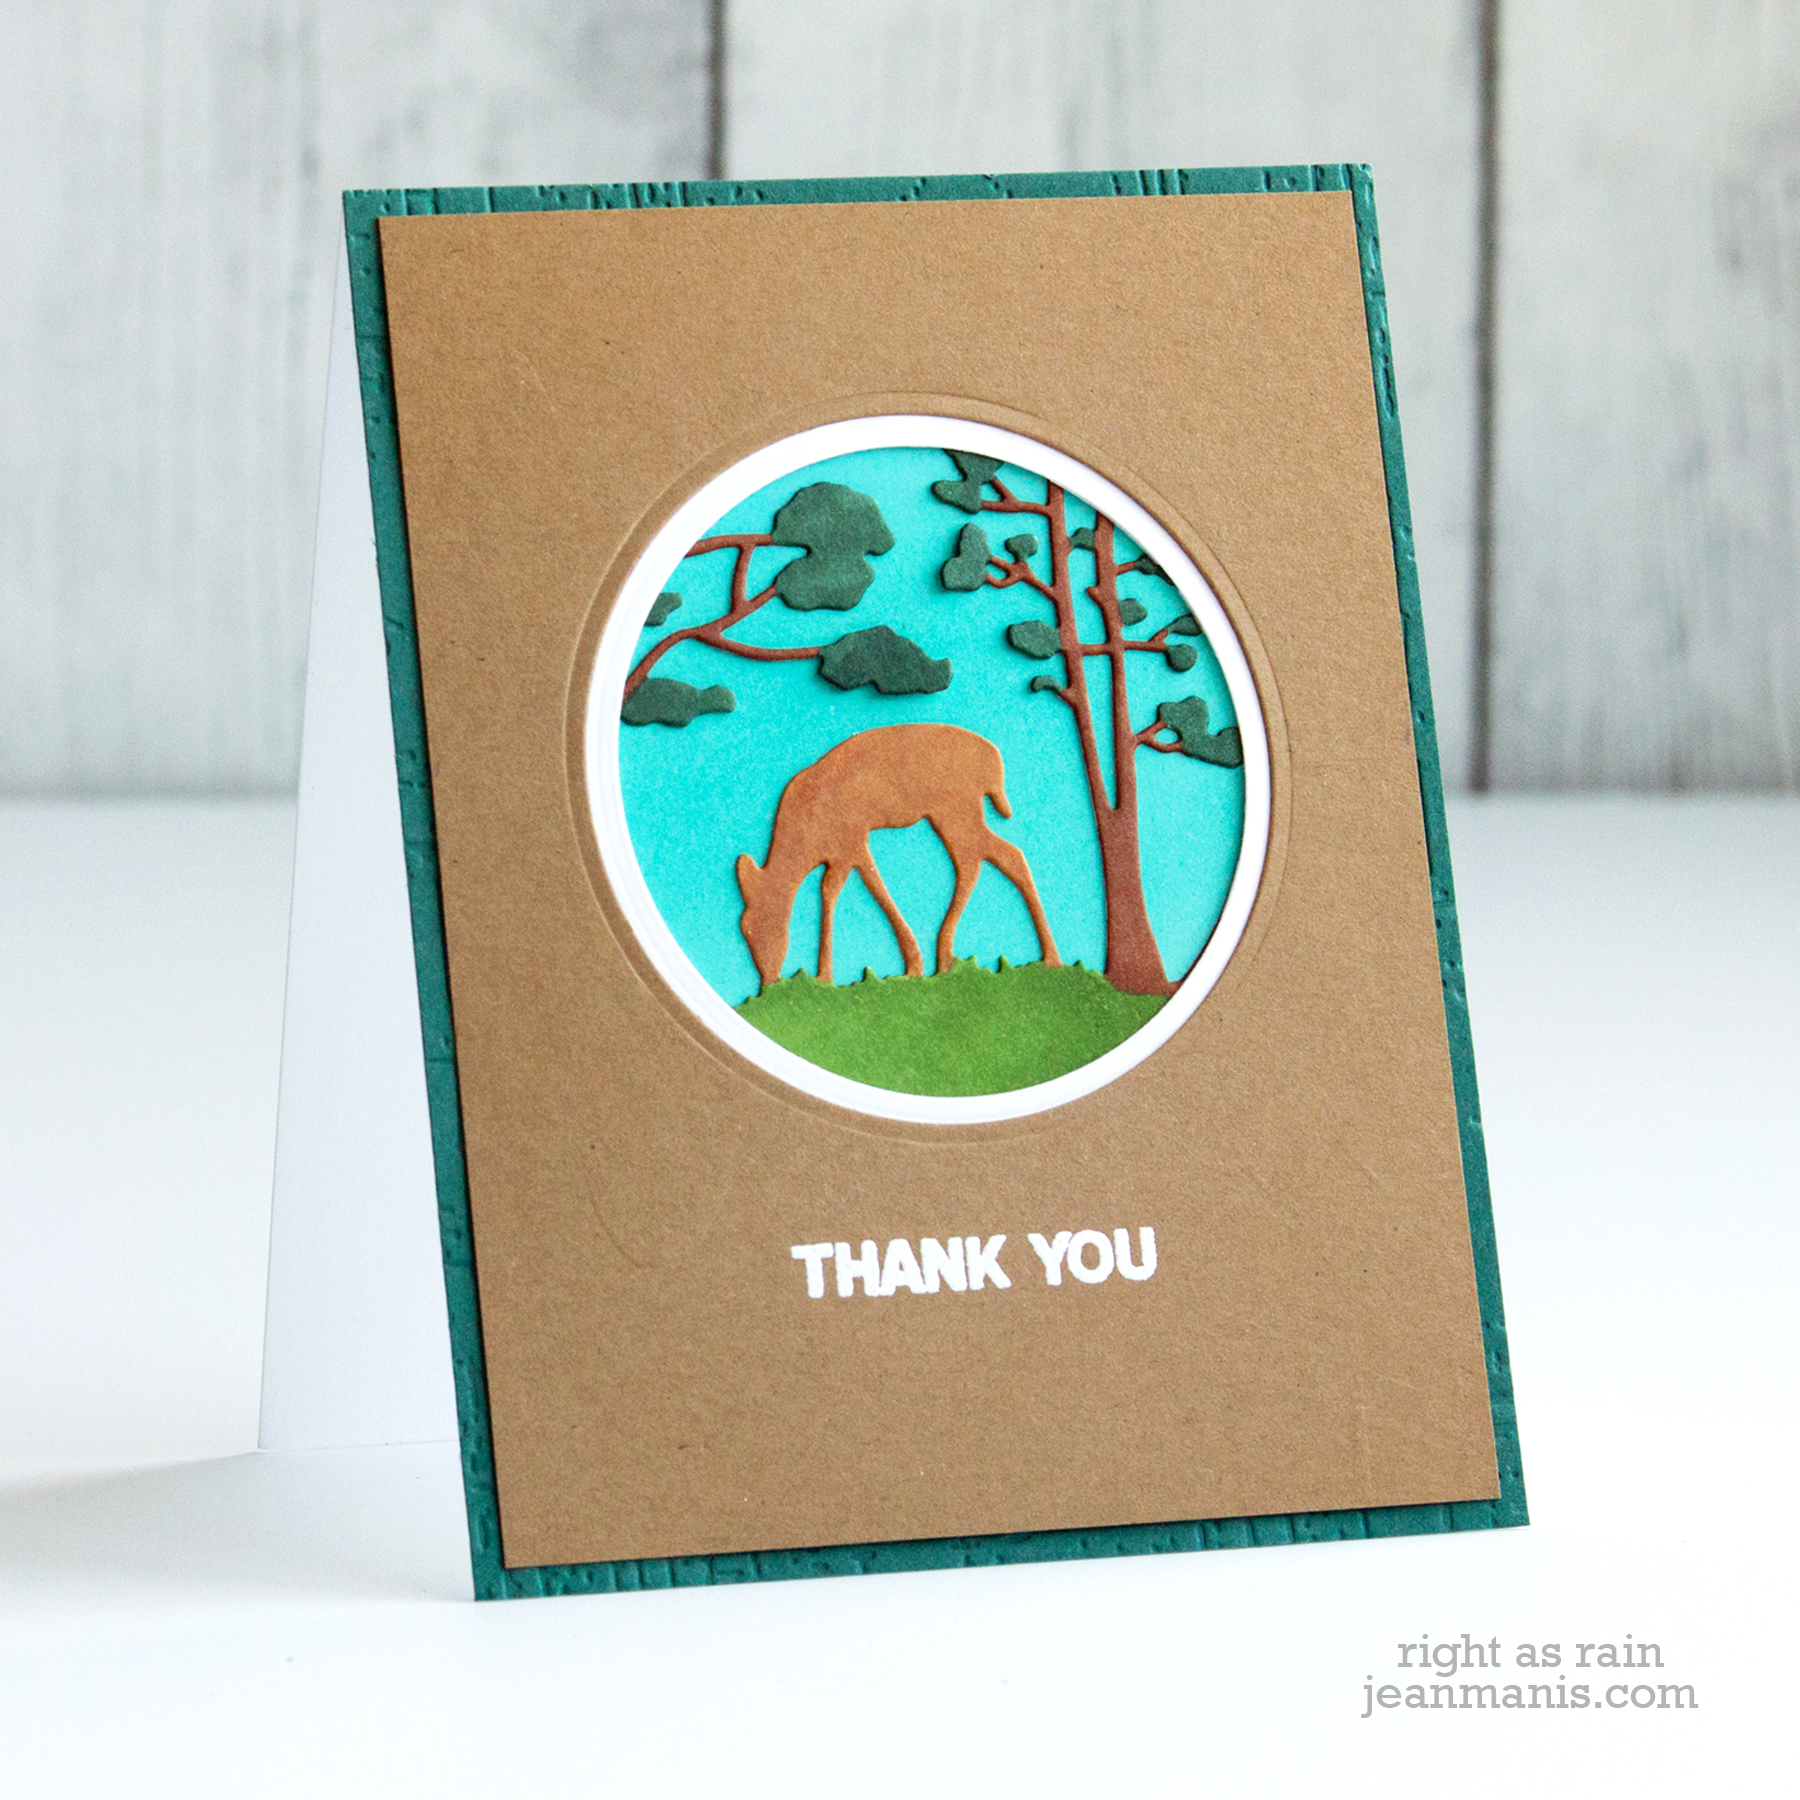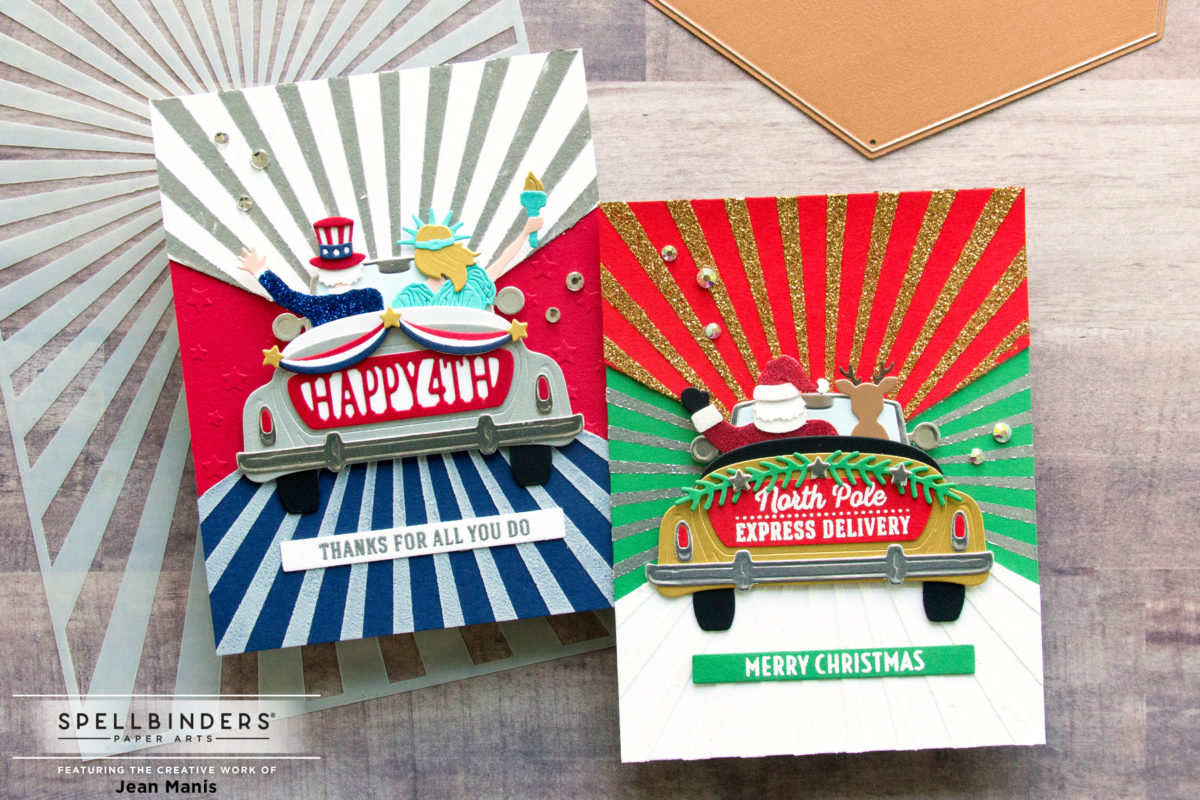
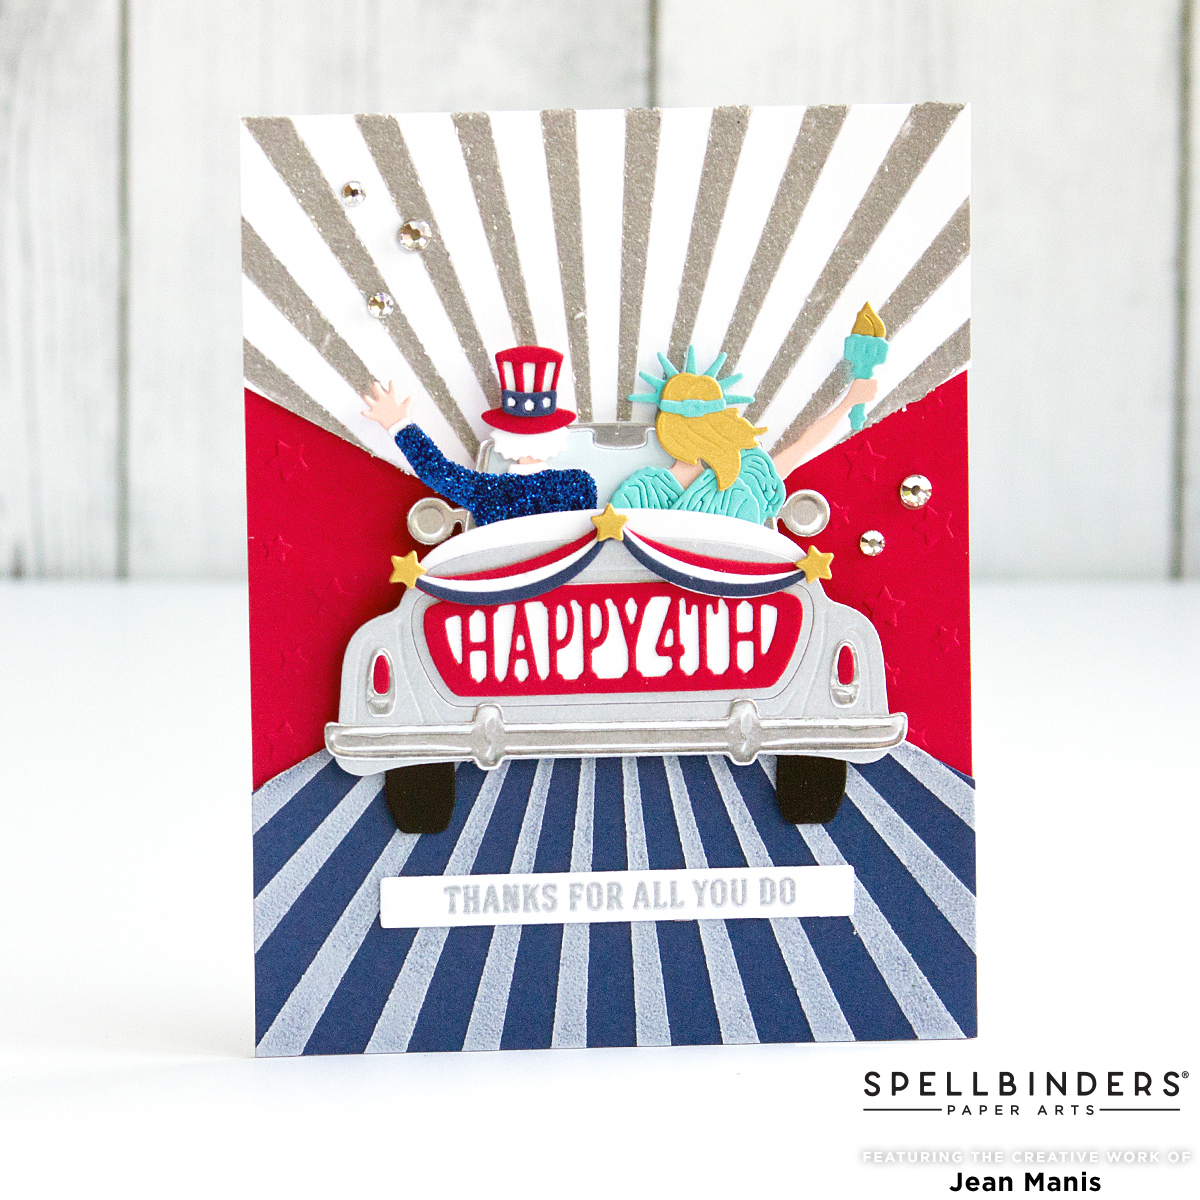
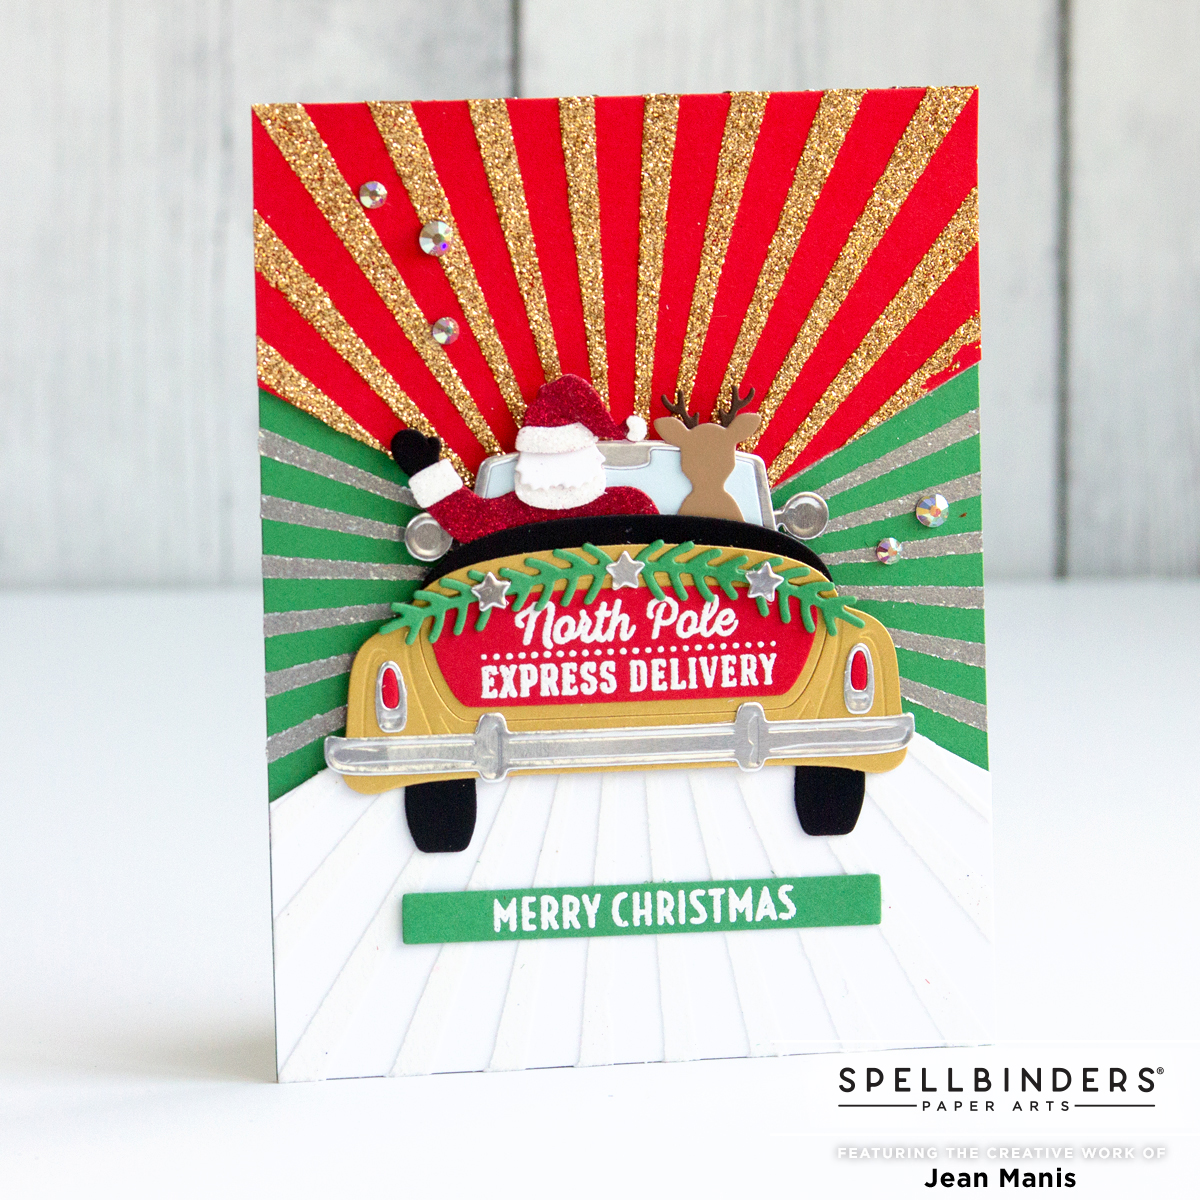
Hello! I was recently a guest blogger for Spellbinders on their blog sharing two cards showcasing the Liberty Collection. With the collection, I created a 4th of July card and a Christmas card. I hope you will head over to see my creations, read about the designs, and leave a comment!


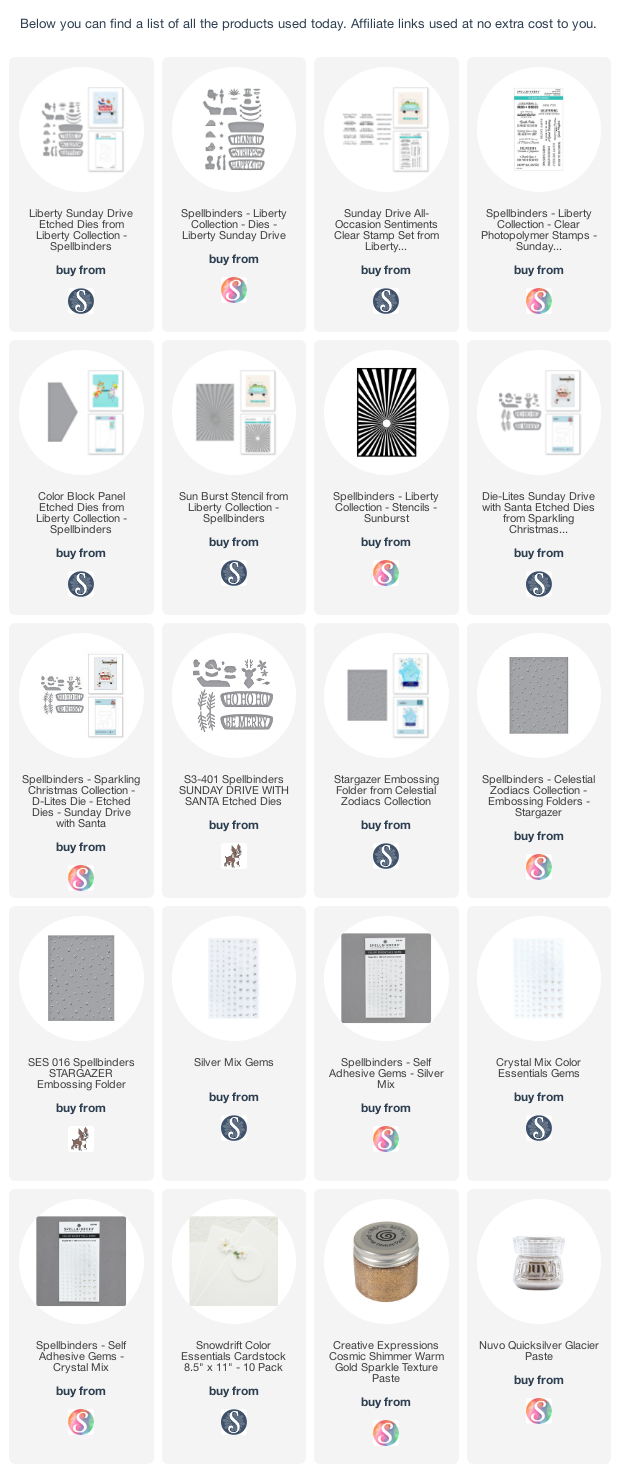
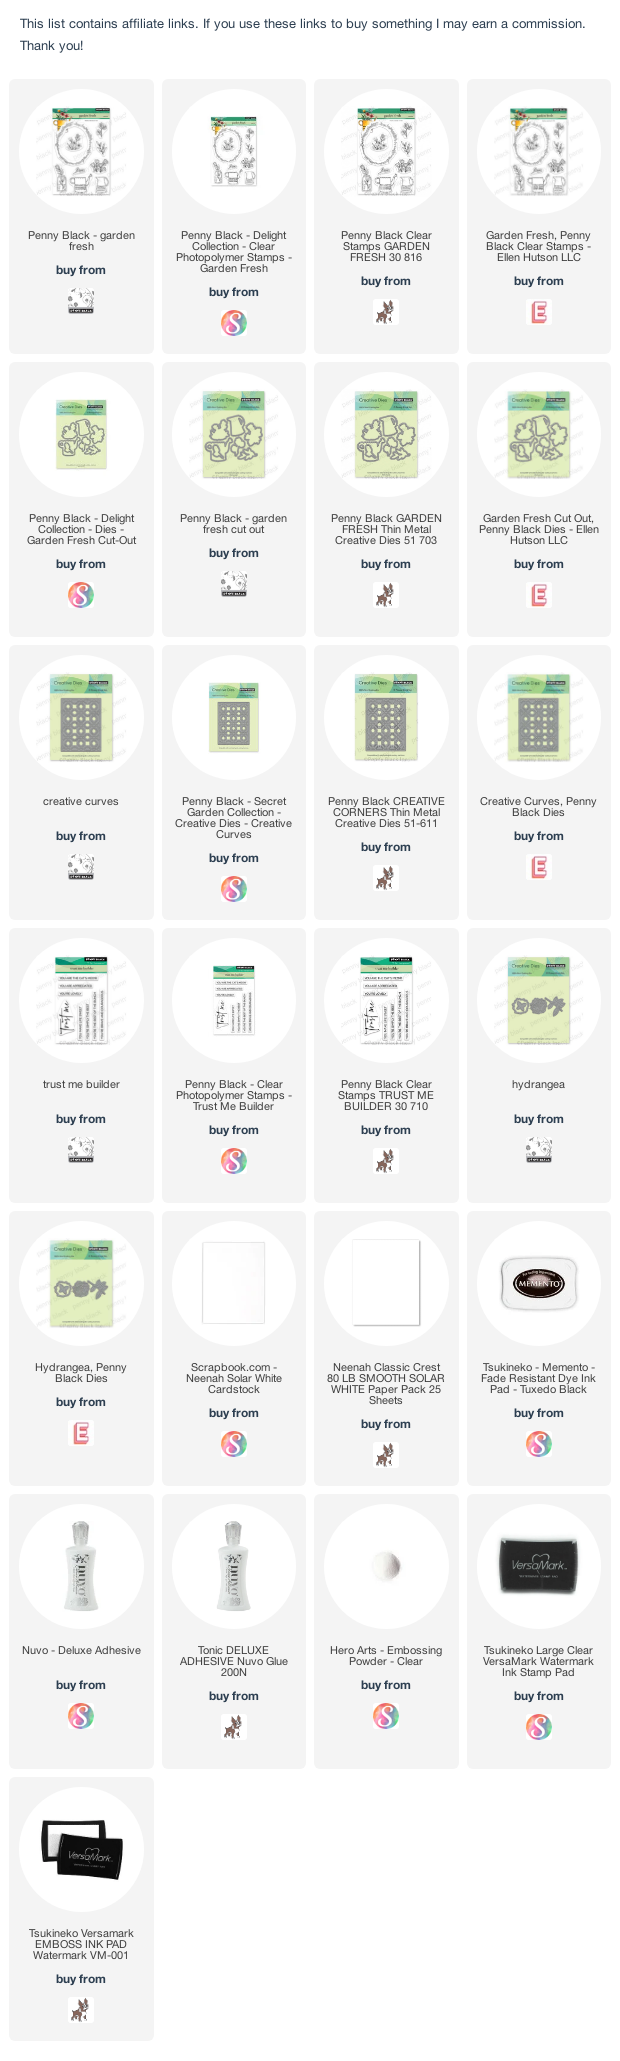
Supplies: