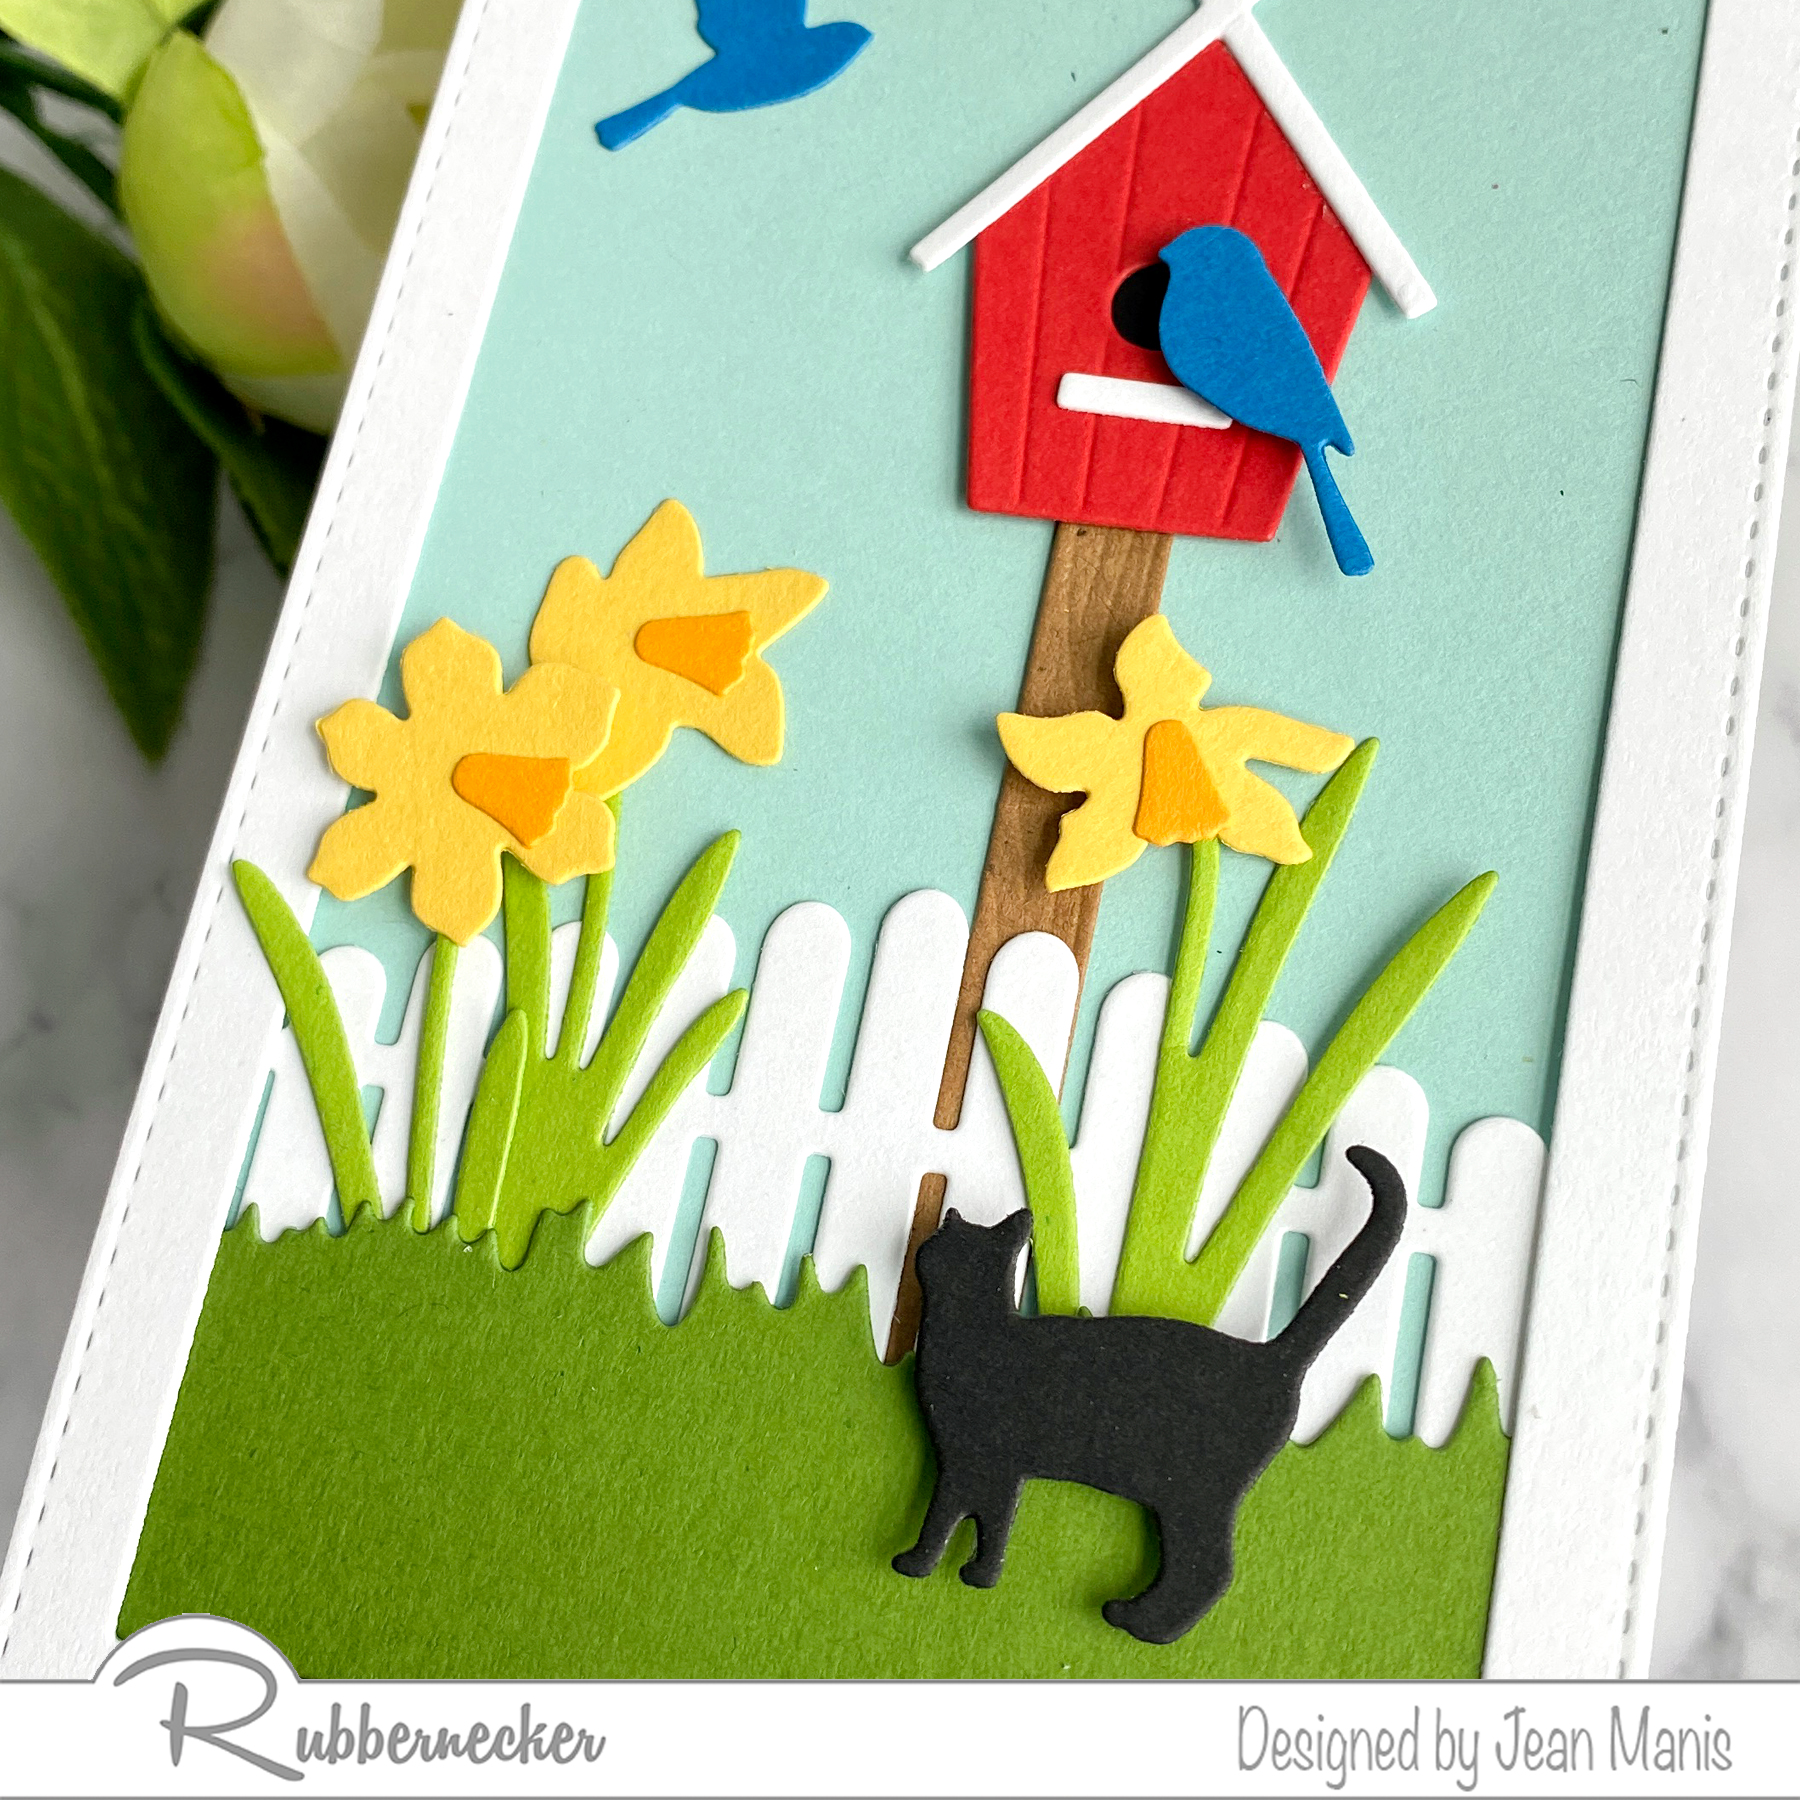
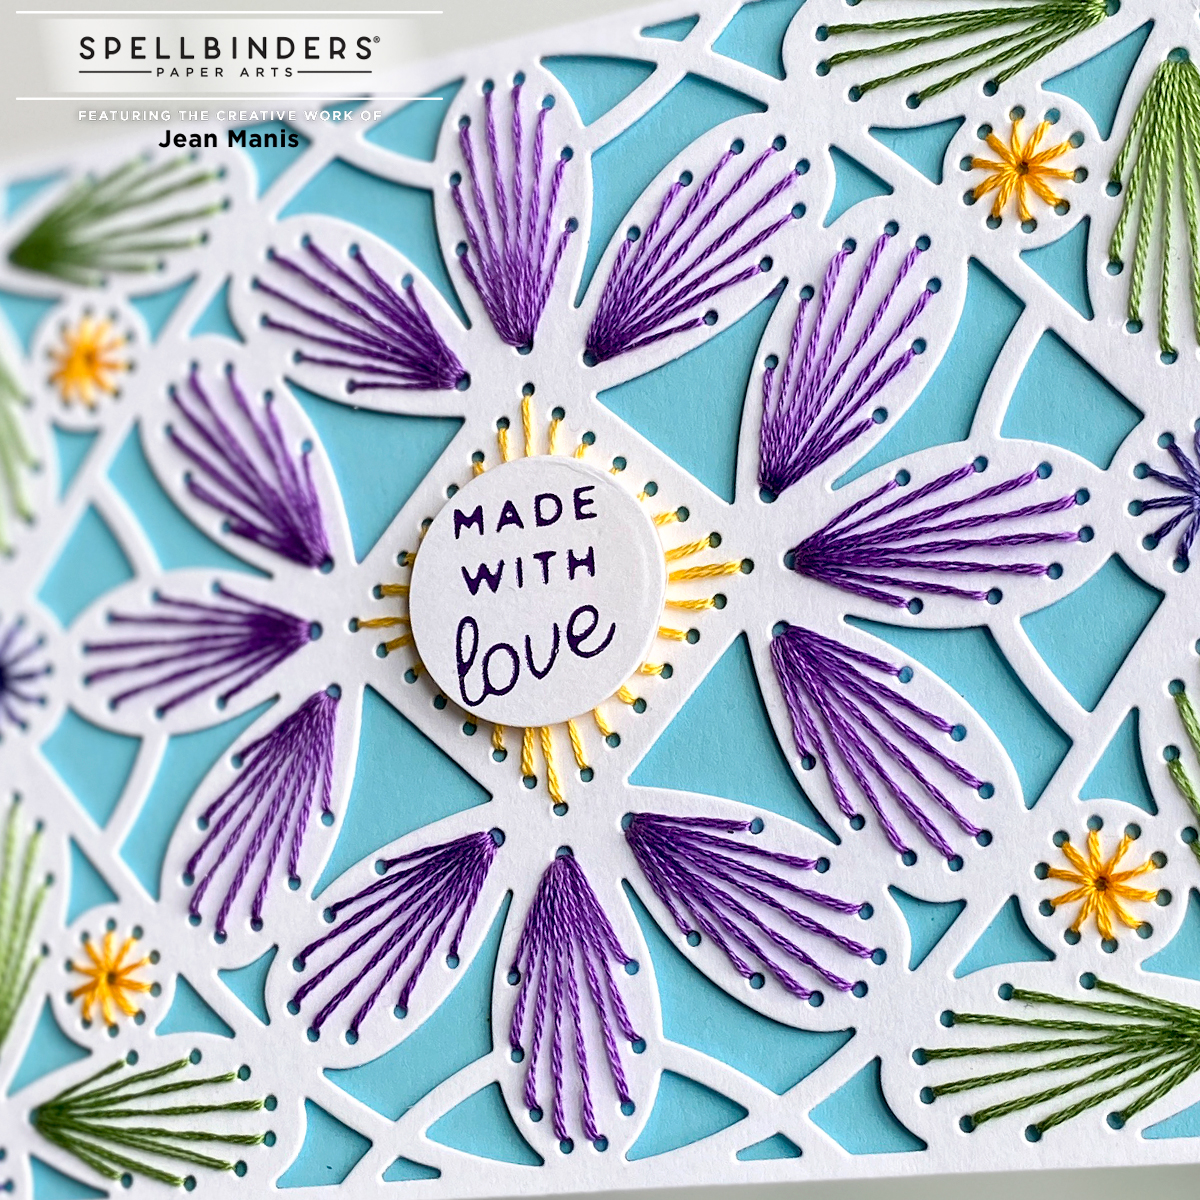
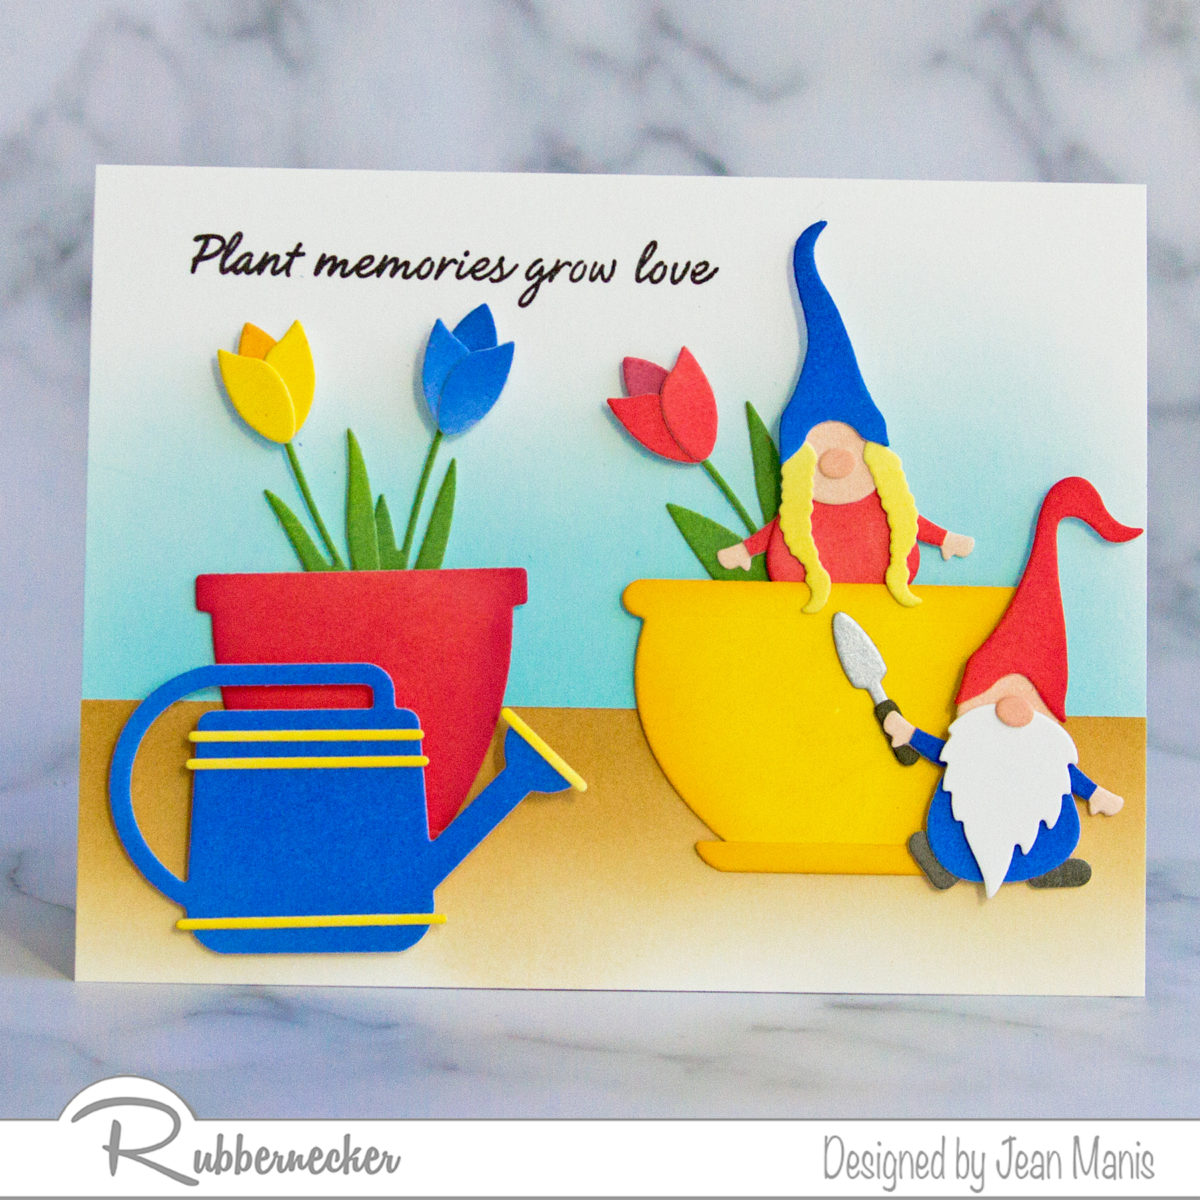
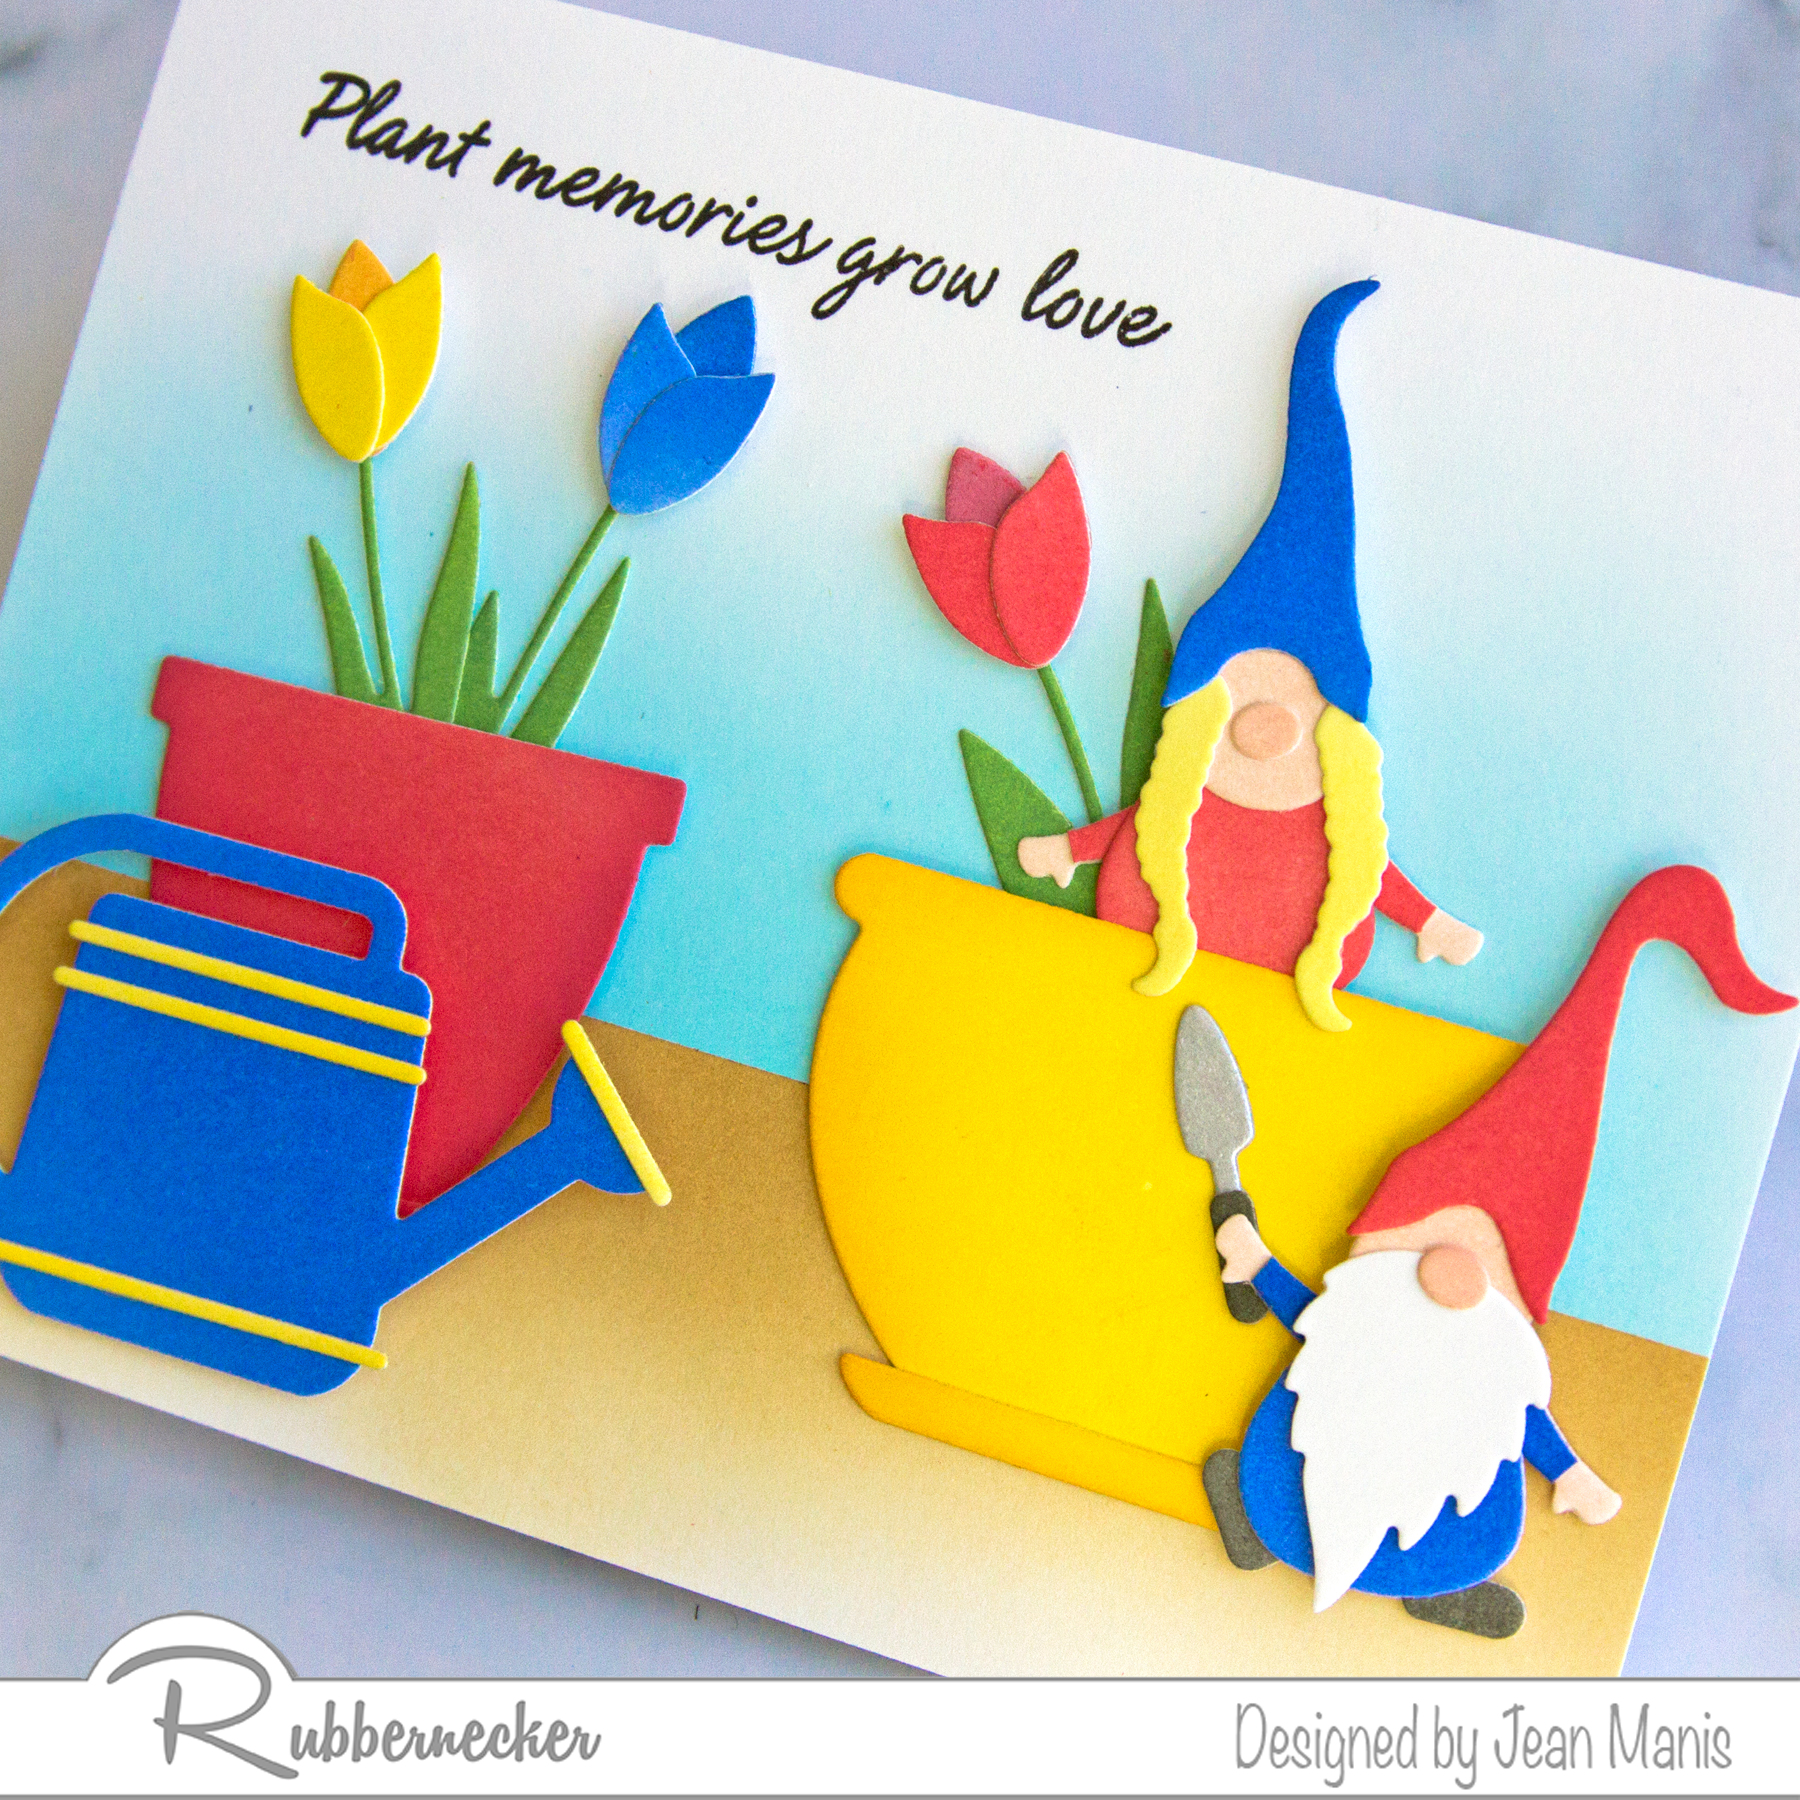
Hello! Today, I am sharing a spring-themed, mini-slimline card created with Rubbernecker supplies. I have combined die sets from their recent release with other Rubbernecker die sets. See my other cards featuring the Large Bird House die set in this post.
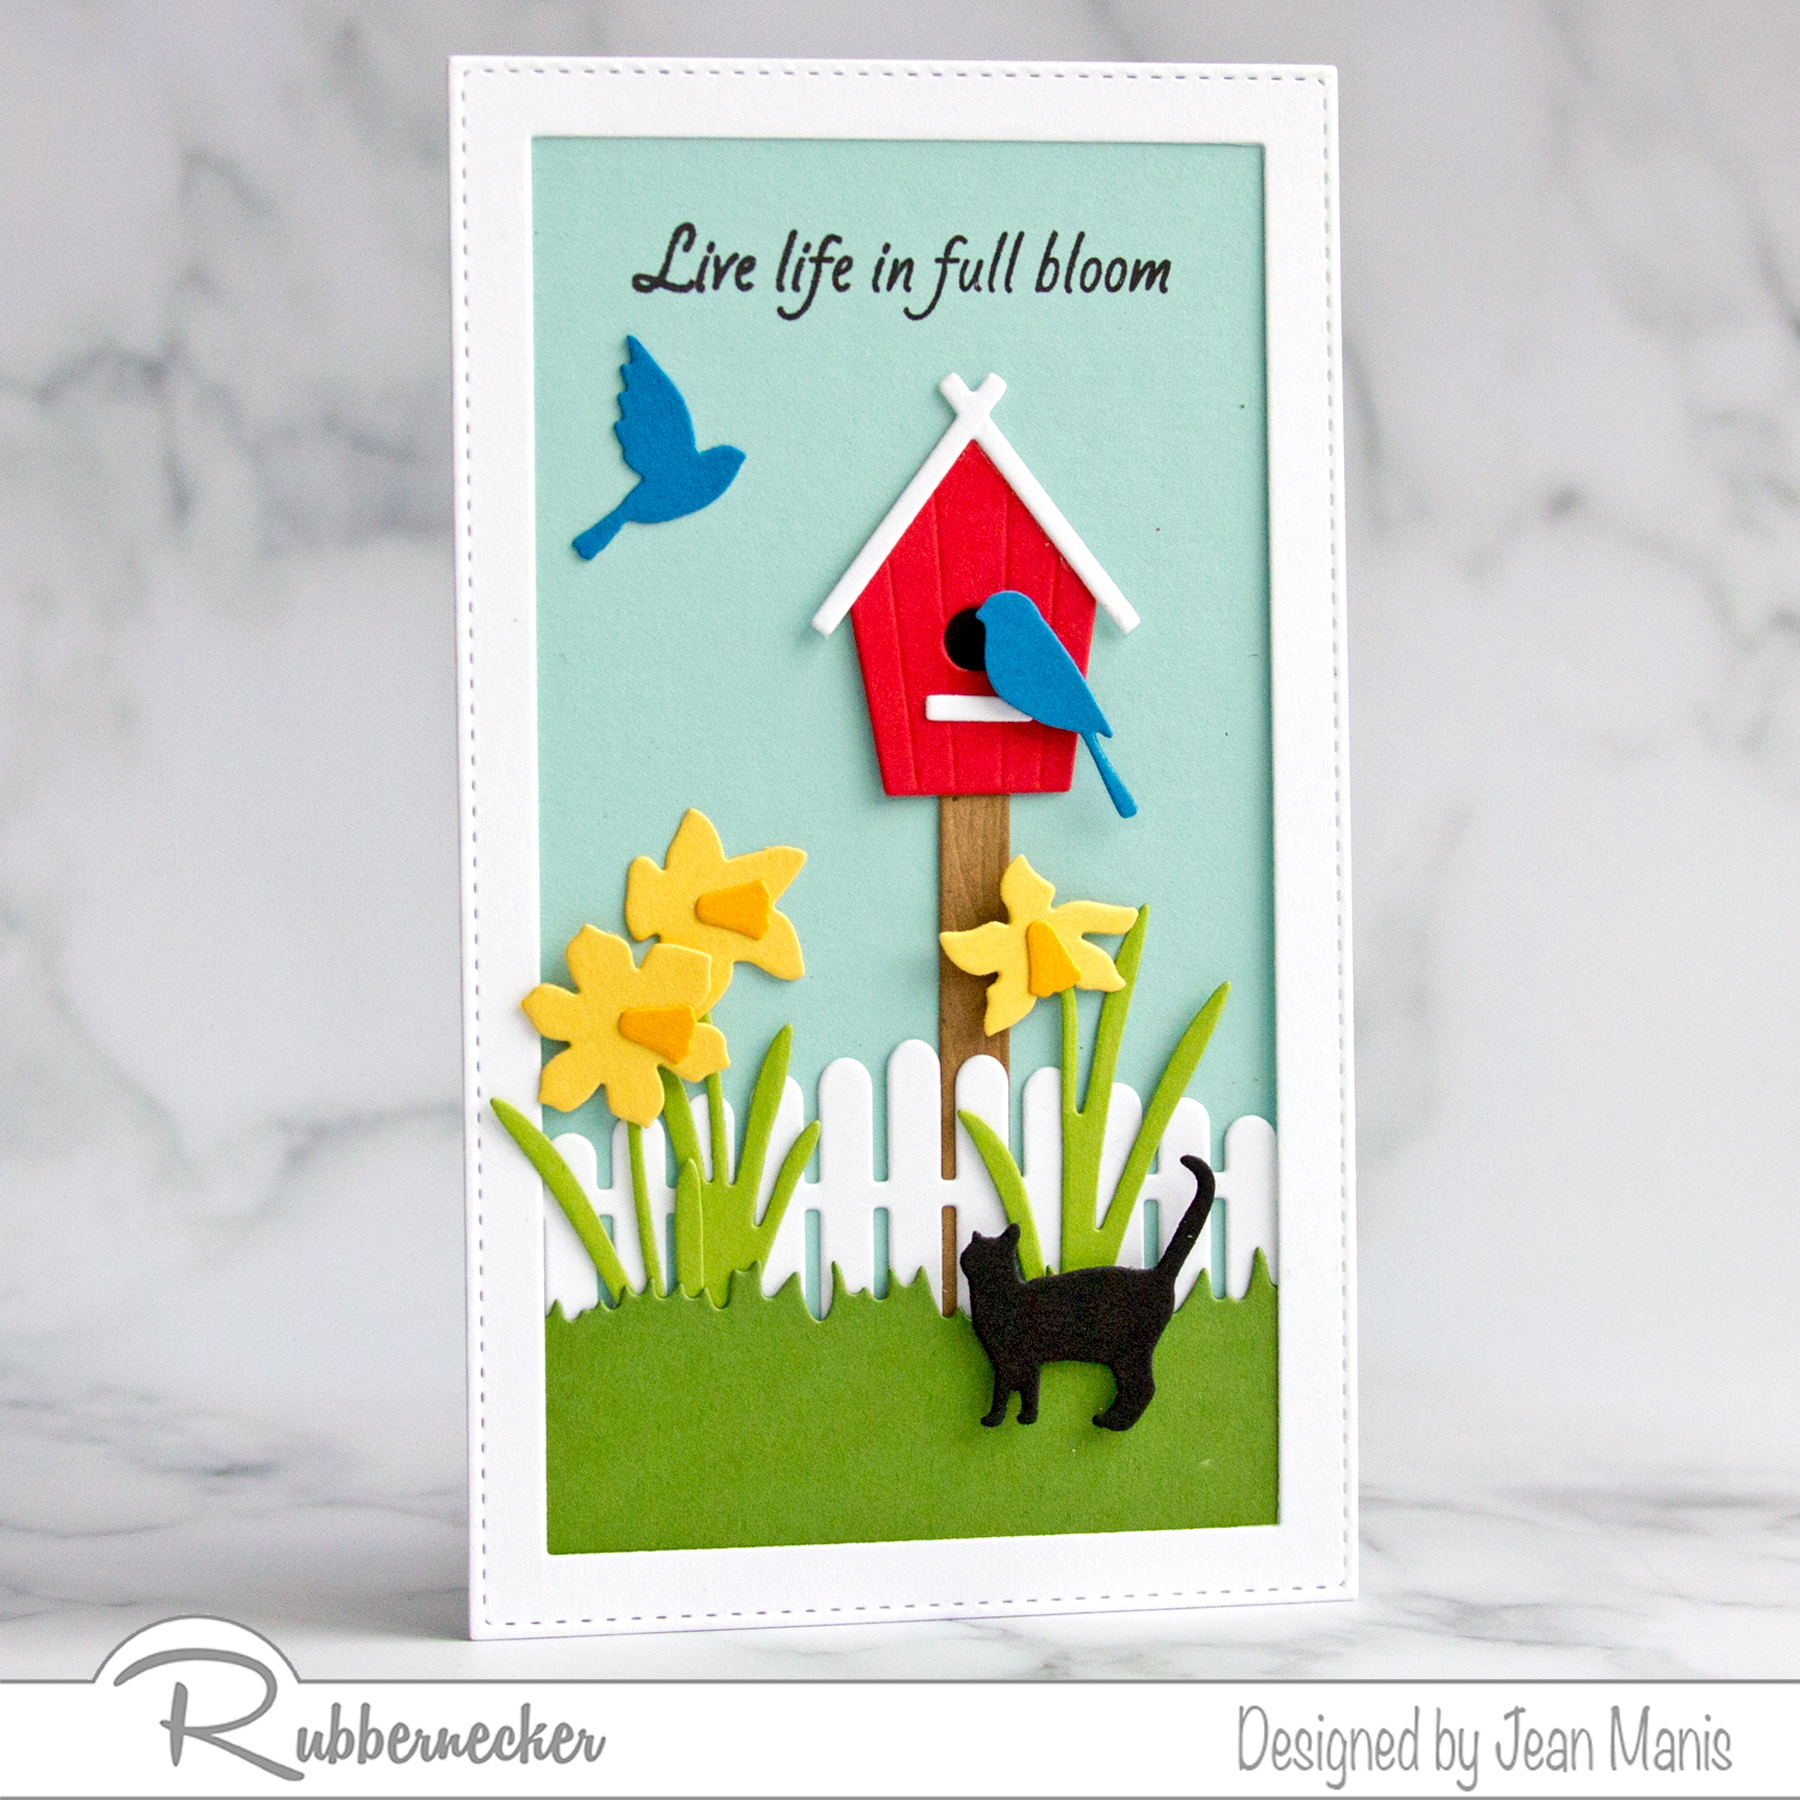
- Cut frame from white cardstock with the two largest dies in the Mini Slimline Nested with Stitch set.
- Cut grass with the Slimline Grass die. Trim and adhere to the bottom of the frame on the back.
- Cut fence from white cardstock with Peak Fence #4 die. Attach to the back of the frame above the grass, leaving room between the two for the daffodils.
- Stamp Kittie Says Spring Time sentiment with VersaFine Onyx Black ink on light blue cardstock. Trim panel.
- Attach frame, with grass and fence, to the stamped panel. Add assembly to a mini slimline card base.
- Cut Large Bird House from cardstock and assemble.
- Cut Daffodils from colored cardstock and assemble.
- Tuck bird house behind fence and attach to card background. Slide daffodils between the grass and fence, trimming as necessary, and attach.
- Cut cat with the Cats die set from black cardstock. Add to card with foam adhesive.
- Cut two birds from blue cardstock with the Birds set. Add one with glue to the background and the other to the birdhouse with foam adhesive.