Tim Holtz | Cozy Winter Bear Card

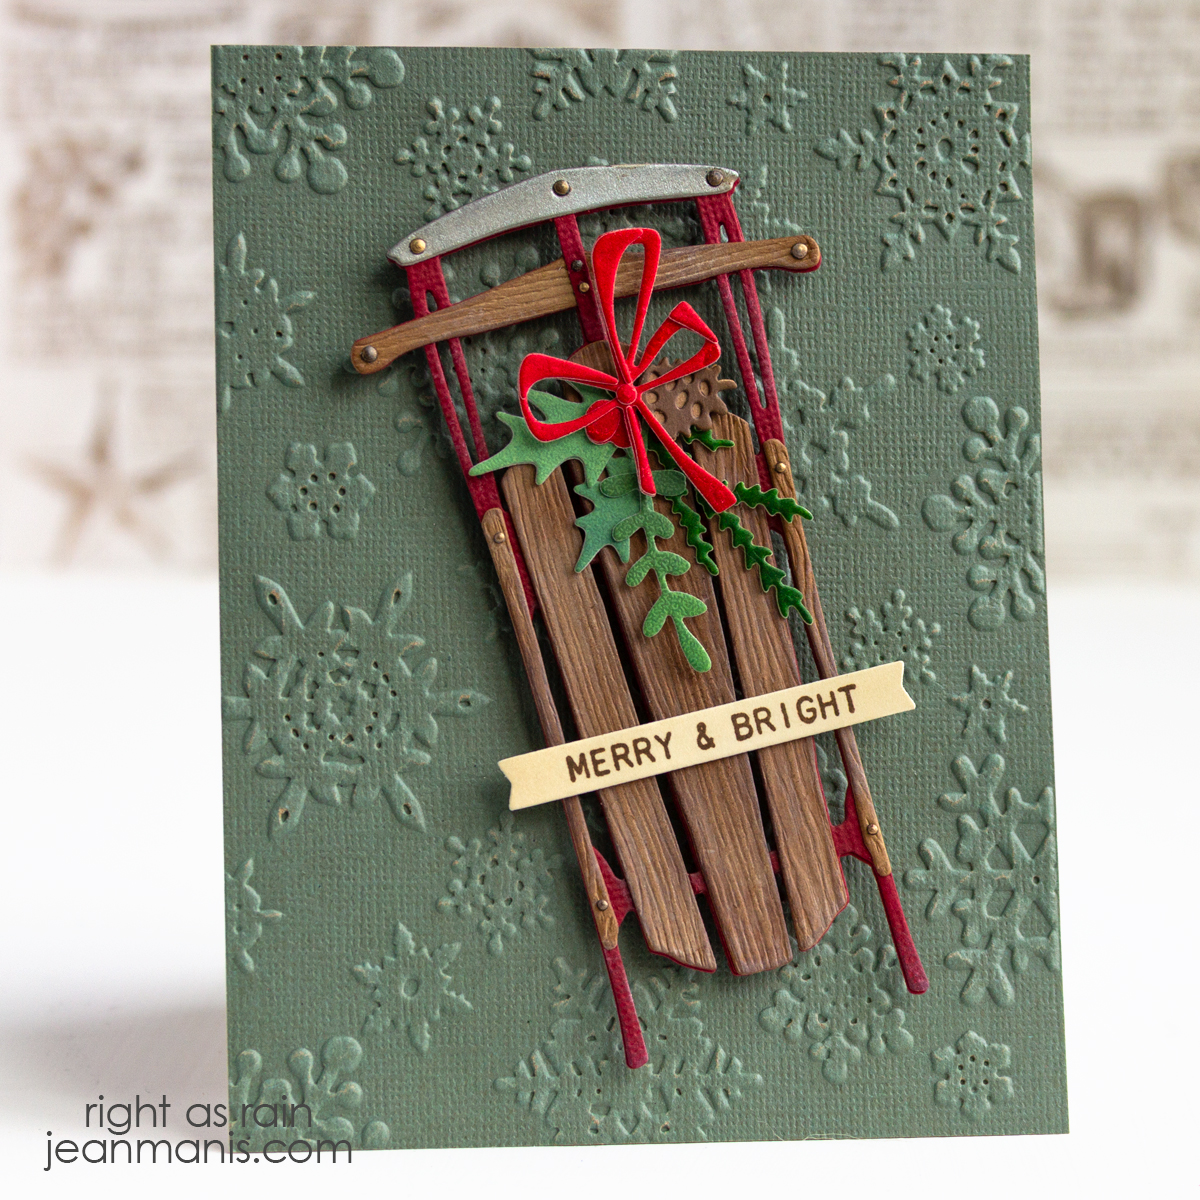
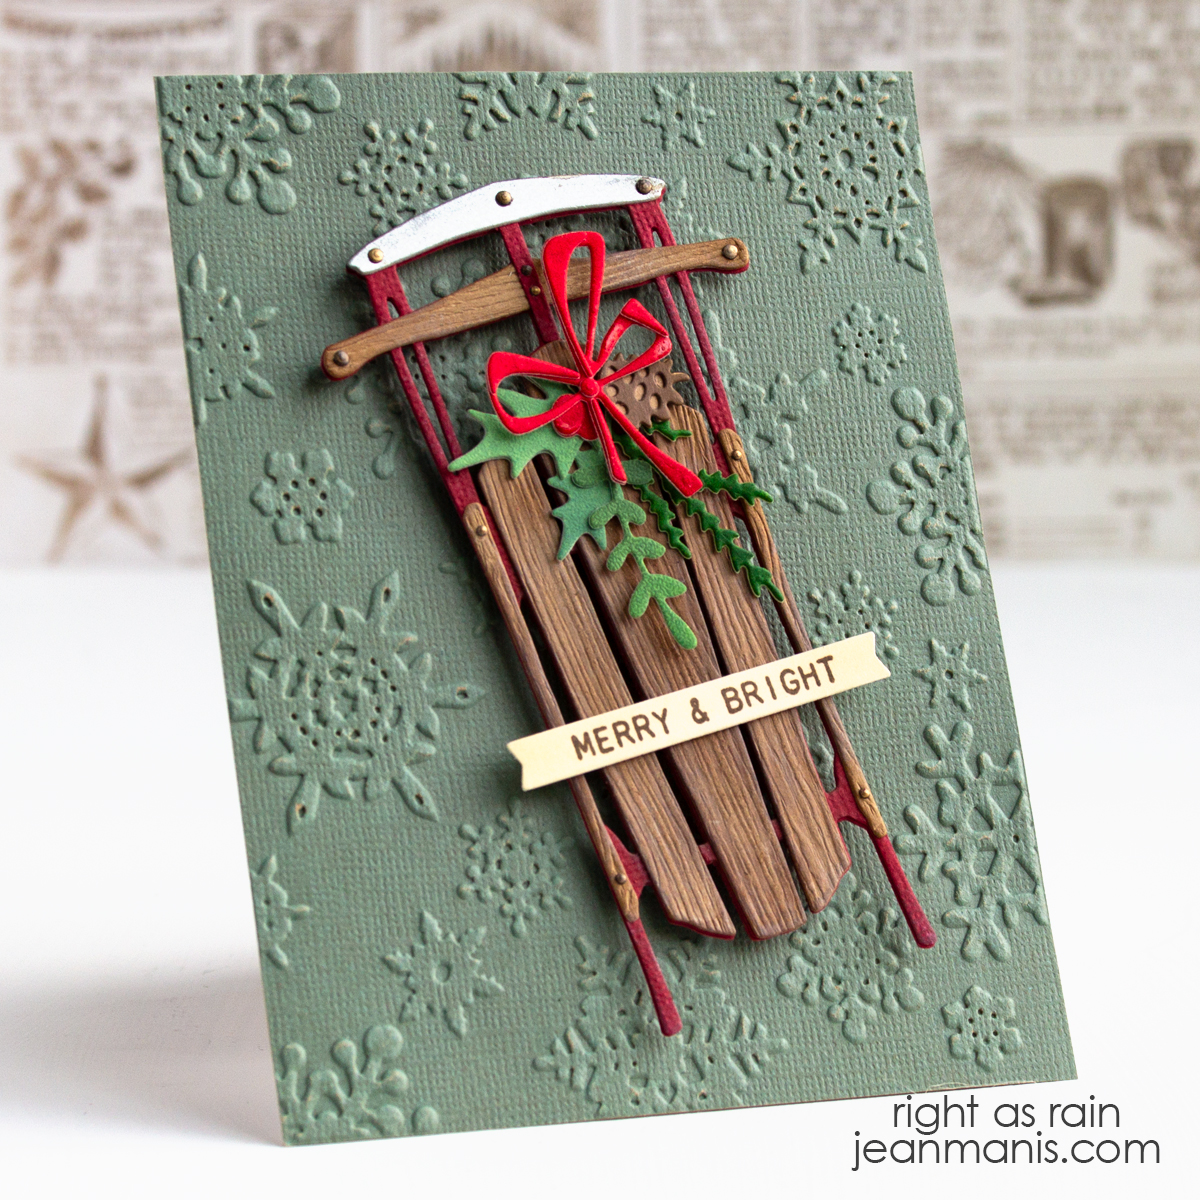
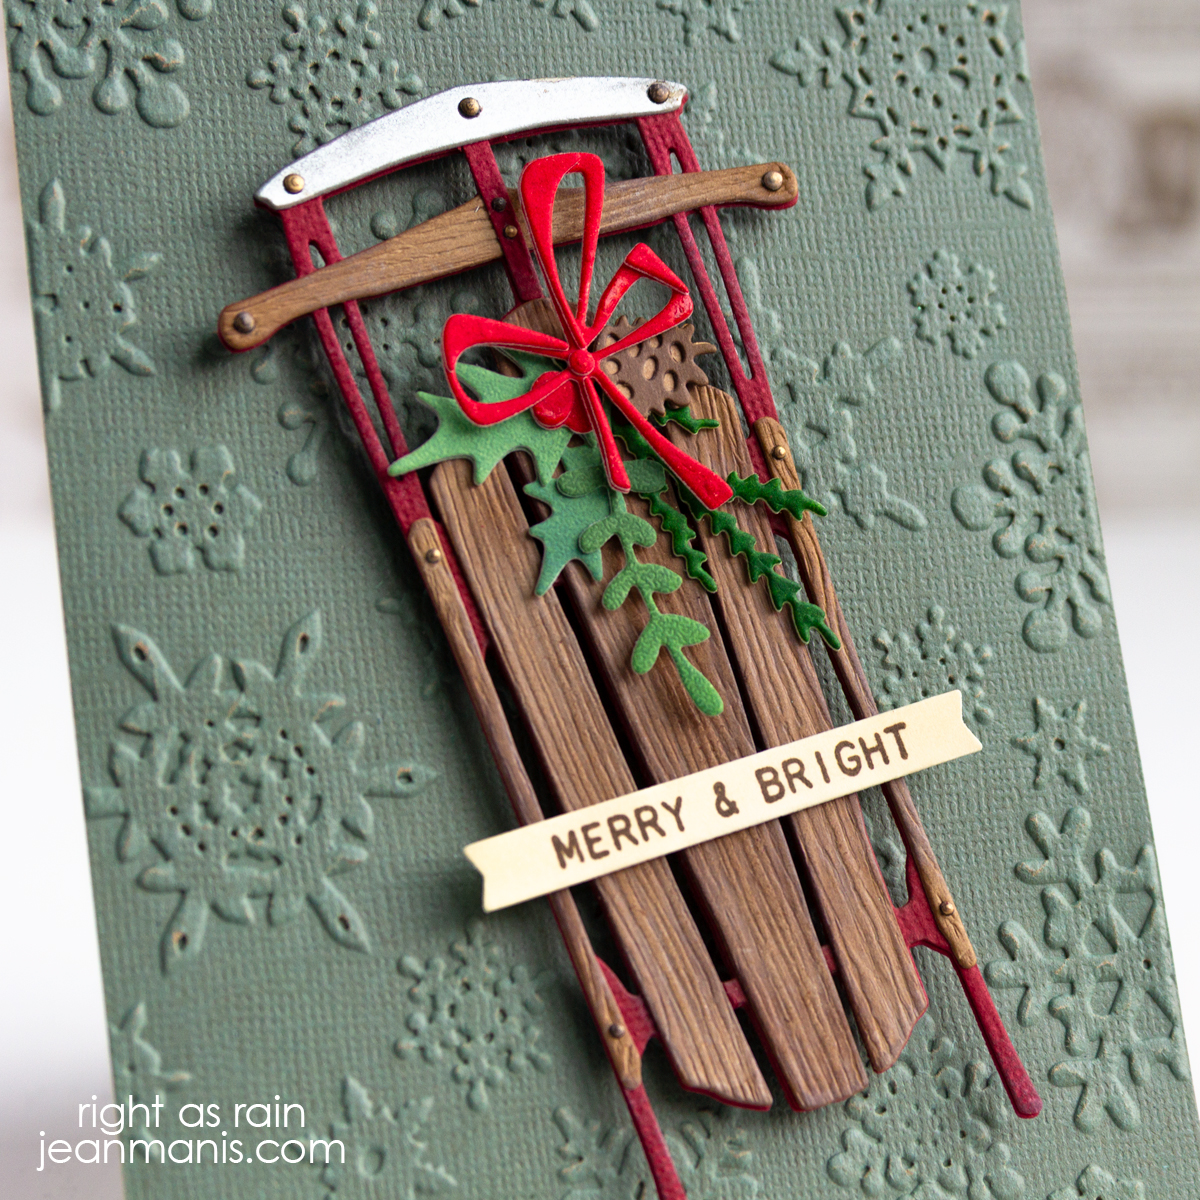
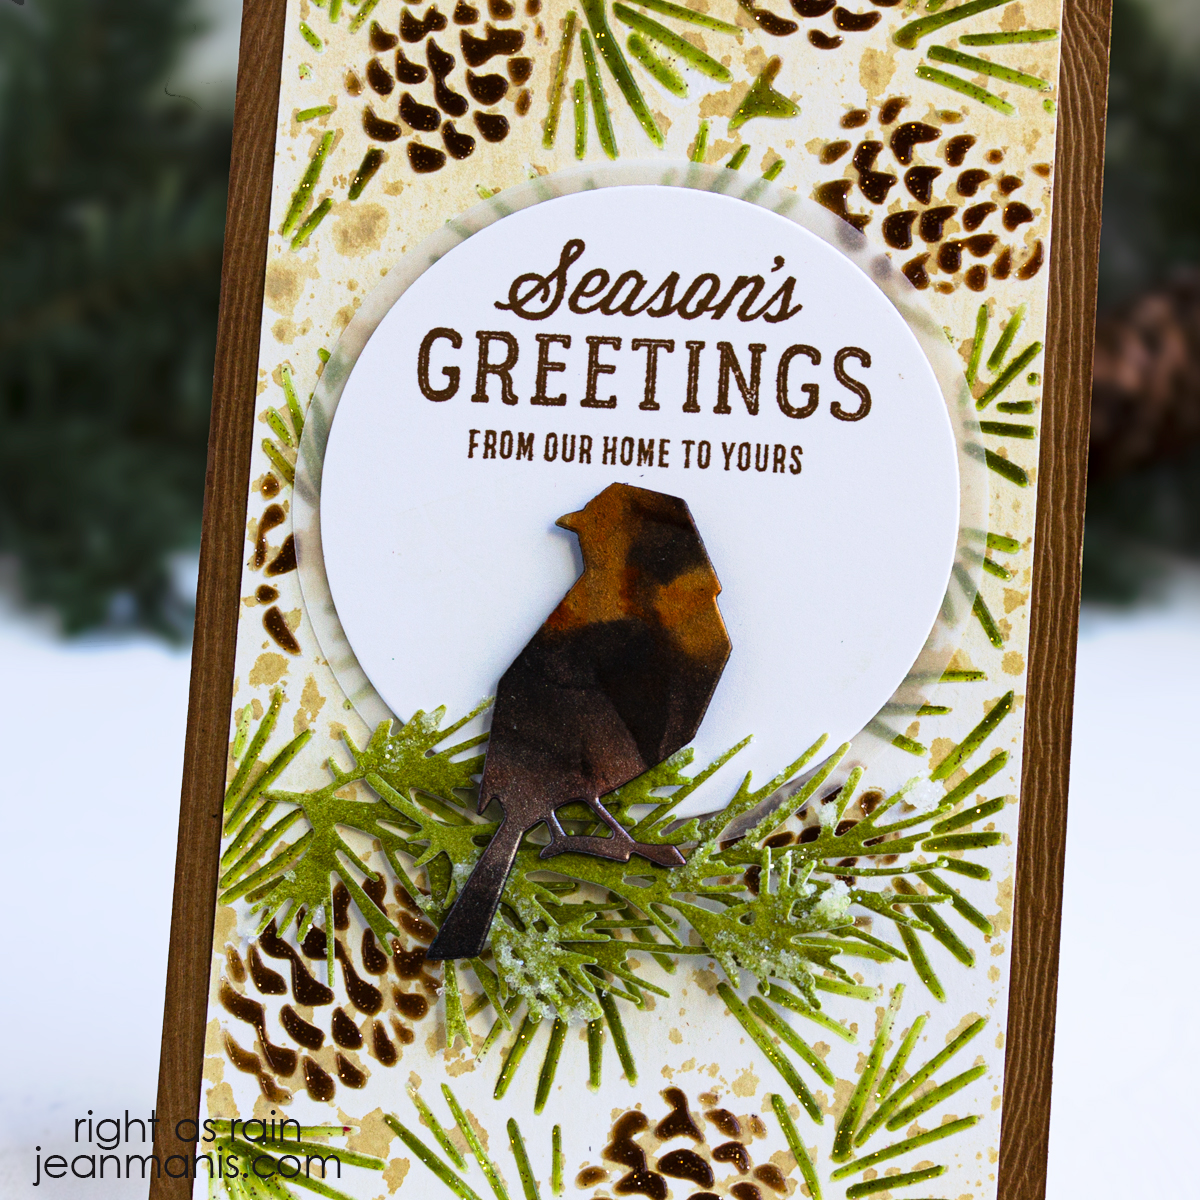
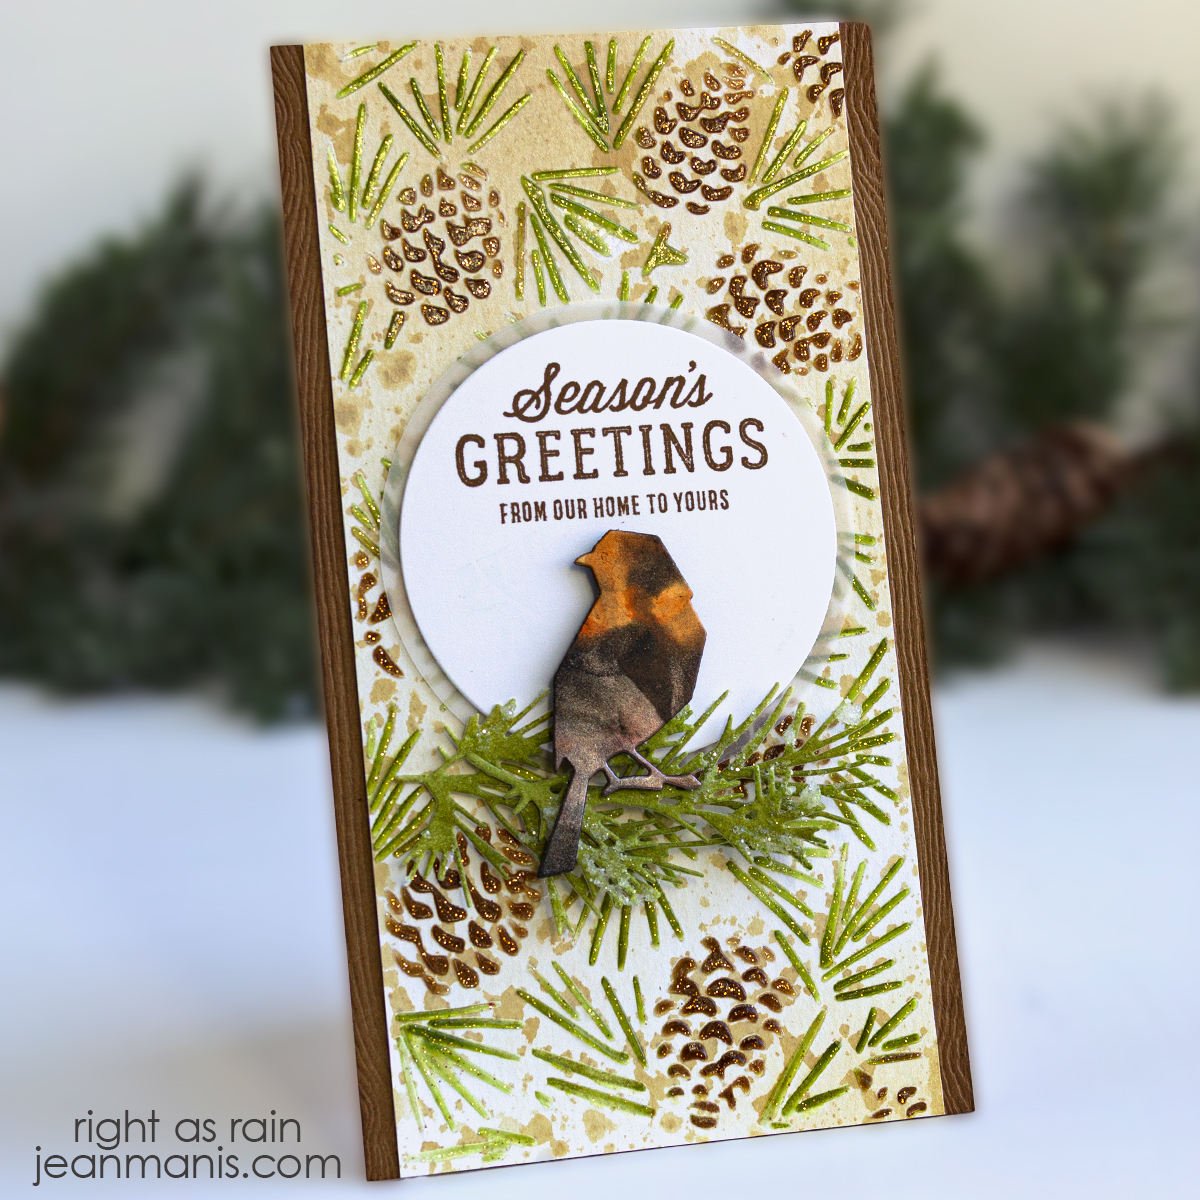
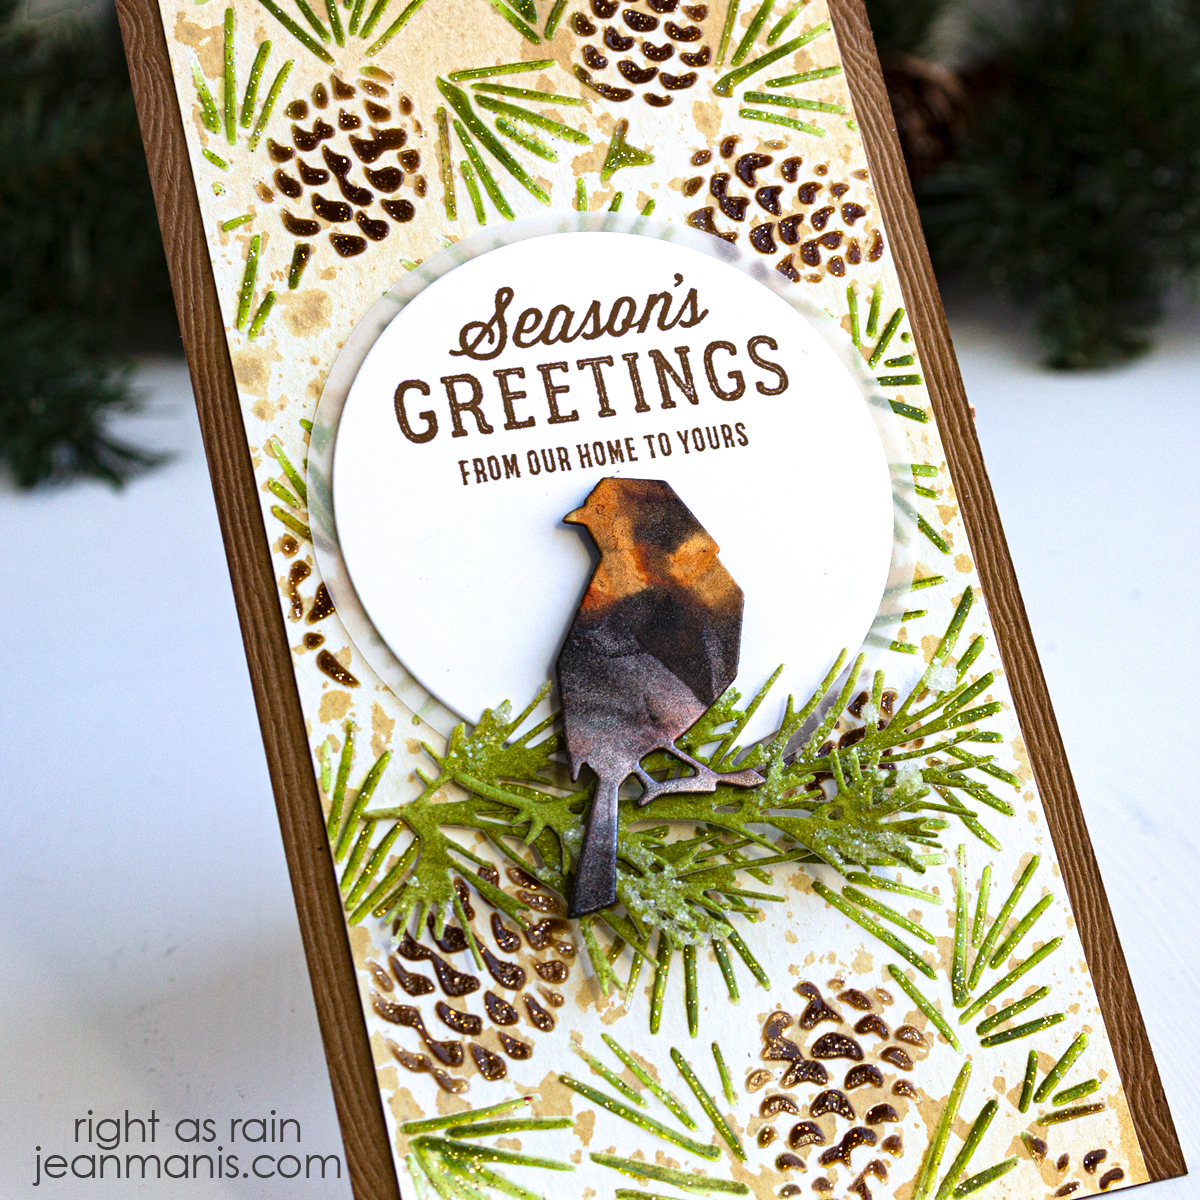
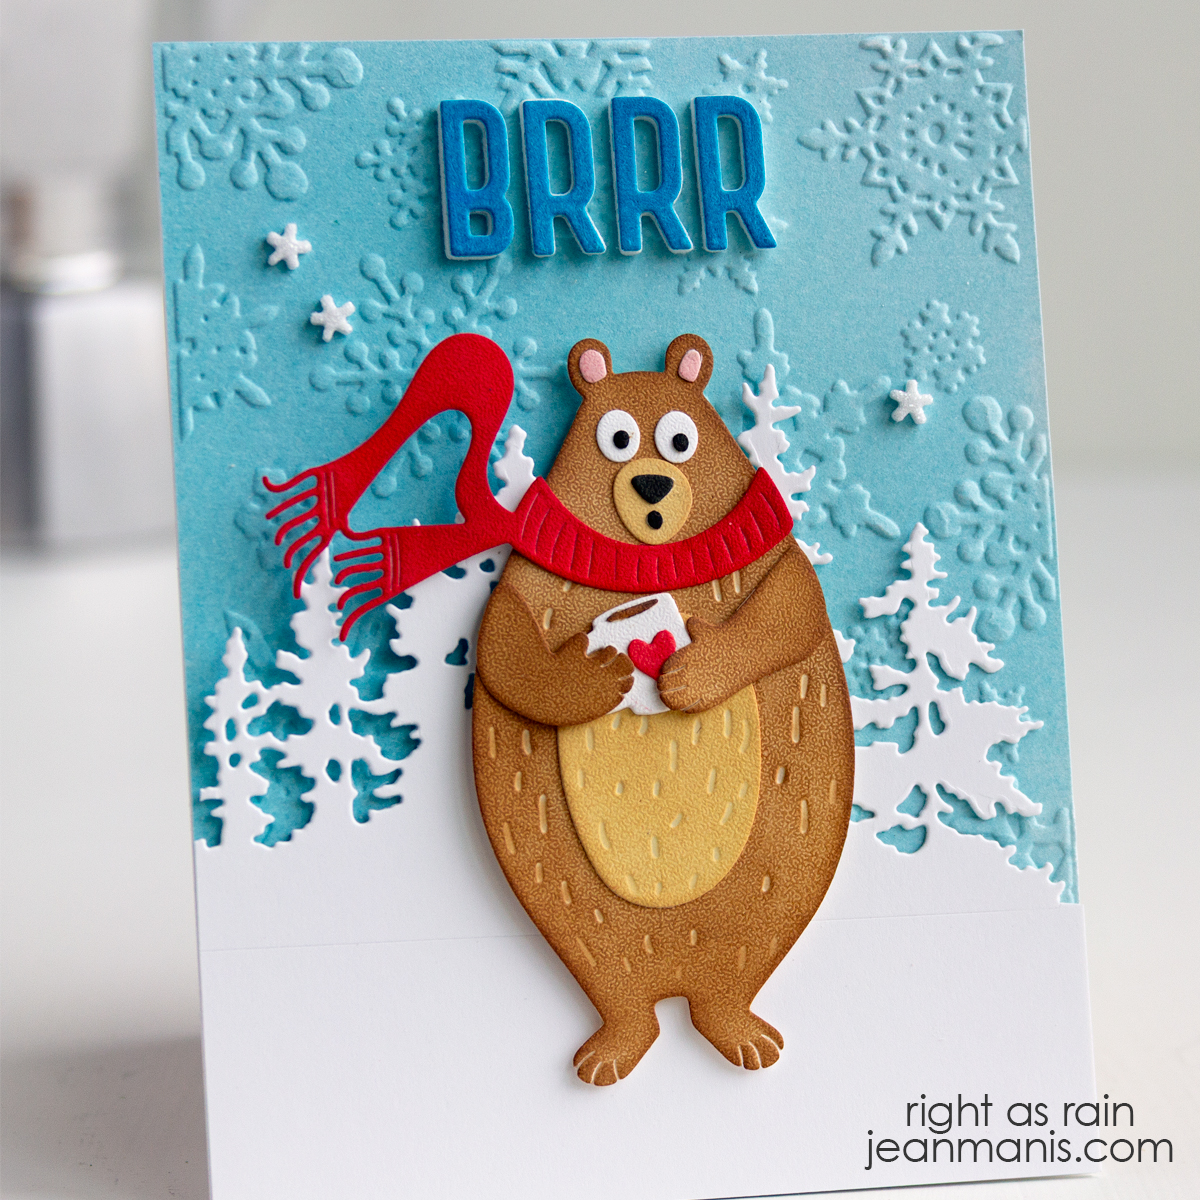
Hello! Sometimes the simplest projects are the most enjoyable. For this card, I revisited some of my favorite Tim Holtz dies and embossing folder to create a winter scene. The focal point is a die-cut bear bundled in a scarf, holding a steaming beverage, paired with the playful “BRRR” sentiment. By using products I already love, the process was relaxing and creativity flowed without overthinking. This card is a quiet acceptance that winter is sticking around a bit longer.

Tim Holtz | Cozy Winter Bear Card

    • To begin, spray a watercolor cardstock panel with Tumbled Glass spray. Once dry, dry-emboss with the Simple Snowflakes folder and attach to an A2-size card base.
    • Use the Tree Line die to cut white cardstock. The die cuts along the bottom. In order to lengthen, align the plates so that the bottom edge does not cut. Trim and add to the prepared base.
    • Spray watercolor cardstock with Mermaid Lagoon spray. Once dry, cut the sentiment with letters in the Seasonal Sketch set. Add to letters cut from foam. Add the sentiment to the base.
    • Cut the bear with dies in the Cozy Winter set from soft-finish cardstock. Color with Distress Oxide inks and assemble.
    • Add the bear to the card with foam adhesive.
    • Embellish with snowflakes cut with a die in the Festive Things set.

Tim Holtz | Cozy Winter Bear Card

Retired Tim Holtz products: Cozy Winter, Tree Line, Simple Snowflakes embossing folder


Tim Holtz | Vintage Holiday Card

Hello! Today’s card leans into the vintage style of Tim Holtz, which is a departure from my usual look. I used the Tim Holtz sled die as the focal point, cutting it from cardstock that I inked and distressed for a worn, mixed media feel. The snowflake-embossed background adds texture, and the “Merry and Bright” sentiment brings in holiday cheer. I loved playing with layers, texture, and inky color to create that signature Tim Holtz weathered charm.

Tim Holtz | Vintage Holiday Card

    • Dry-emboss and A2-size panel of textured cardstock with a snowflake embossing folder. I used the now-retired Sizzix Tim Holtz Simple Snowflakes 662432 folder. Add to card base.
    • Cut the Vintage Sled from a variety of cardstock colors and textures. Assemble.
    • Stamp the Tiny Text Christmas sentiment in Potting Soil ink on off-white cardstock that has been colored with Antique Linen ink. Cut with a banner die.
    • Add assembled sled to the card base with foam adhesive. Add sentiment to sled with foam adhesive.

Tim Holtz | Vintage Holiday Card


A Tim Holtz-Inspired Holiday Card

Hello! Mixed media isn’t my usual cardmaking style, but it’s always fun to step outside my comfort zone and experiment. For this Christmas card, I used a variety of Tim Holtz products including stenciling and alcohol inking. The variety of mediums adds character and depth to the design—each layer contributing its own texture and visual interest. It’s a festive project full of wintery sparkle and creative play.

A Tim Holtz-Inspired Holiday Card

    • To begin, create a card base 3 3/4″ x 6 7/8″ from woodgrain cardstock. Ink the sides of the cardstock with Gathered Twigs.
    • Next, create a monoprint on watercolor paper with the Pinecones stencil using Antique Linen Distress Spray and water. There are several of the Tim Holtz makers who regularly use this technique. Once dry, stencil in the pinecones and greenery. Apply the Sparkle paste through the panel and set aside to dry. Tim Holtz recently created a video discussing the many pastes available.; it proved to be an invaluable resource.
    • Once dry, you can add Antique Linen ink to the cardstock since the areas covered by the paste resist the ink. This can help fill in bare spots from the monoprint method.
    • Cut the bird from alcohol-inked black cardstock. I used the same formula as on this card.
    • Cut the greenery, from cardstock to which Distress ink has been applied, with dies in the Holiday Greens set. Add a snow effect by applying Snowfall Grit paste and Rock Candy glitter.
    • Stamp the Festive Overlay sentiment on to cardstock and cut with a circle die. Cut a vellum circle slightly larger. Adhere the two.
    • Trim the stenciled panel and add to the card base. Add sentiment circle, greenery, and bird.

A Tim Holtz-Inspired Holiday Card

It’s a bit more involved than my usual clean and simple cards, but worth every step for the texture and sparkle it brings to the finished design.

Christmas Trend – Snowmen

Hello! Today I am sharing a wrap-up of cards created in the past several months featuring snowmen (snow people) die sets, which were introduced this past fall. I used snowmen more than any other holiday motif (focal item) this year.

Did you identify any strong Christmas cardmaking themes or trends? The farmhouse Christmas trend – Buffalo check and the red pickup truck – is still holding on, along with gnomes and poinsettias; however, I did not see anything new arrive on the scene this year. I spoke to the seasonal buyer at our grocery store about Christmas trends, (they carry an amazing number of seasonal items, as it is an independent store), and we speculated that the pandemic, and its uncertainty for retail, impacted the creation of a new trend (which would have had to have been created a year ago for this season).

My snowmen cards for Christmas 2022 – click on the photo for the original post.

Sizzix | Snow Family

Spellbinders | Let It Snowman

Lawn Fawn | Build-A-Snowman

Spellbinders | Let It Snowman

Lawn Fawn | Build-A-Snowman

Tim Holtz | Mixed Media Poinsettias

Hello! Today, I am sharing a mixed media Christmas card created with several Tim Holtz products including the Festive Bouquet die set. The items for which I have listed product links below are in bold.

Tim Holtz | Mixed Media Poinsettias

  • To begin, I sprayed Watercolor paper with Distress Ink Sprays in Barn Door, Mowed Lawn, and Mustard Seed. I like the vibrancy of the Distress Ink Sprays. I have never used Distress Ink Oxide Sprays, although I have some in one of my online shopping carts!
  • Once the watercolor paper was dry, I cut the poinsettia pieces with the Festive Bouquet die set and assembled the elements.
  • I stamped the Simple Sayings sentiment in Potting Soil on off-white cardstock that has flecks in it. (I am not sure where I got this cardstock from; it might have been My Favorite Things in a sample pack.)
  • I trimmed the sentiment panel and added it to a Paper Bag card base.
  • I adhered the poinsettias and greenery to the card front.

Tim Holtz | Mixed Media Poinsettias