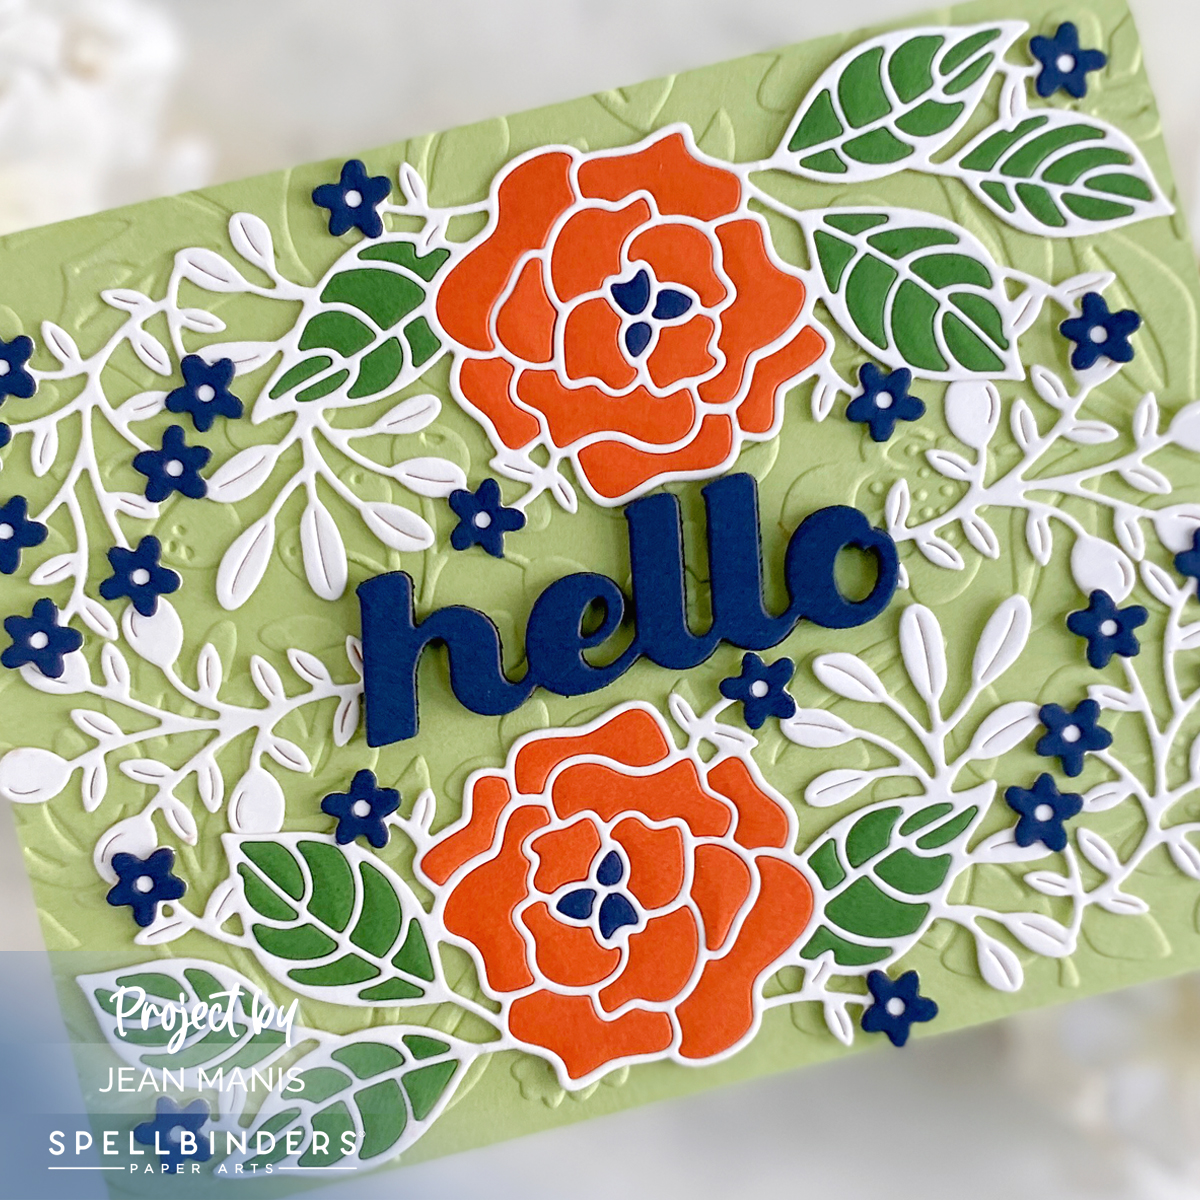
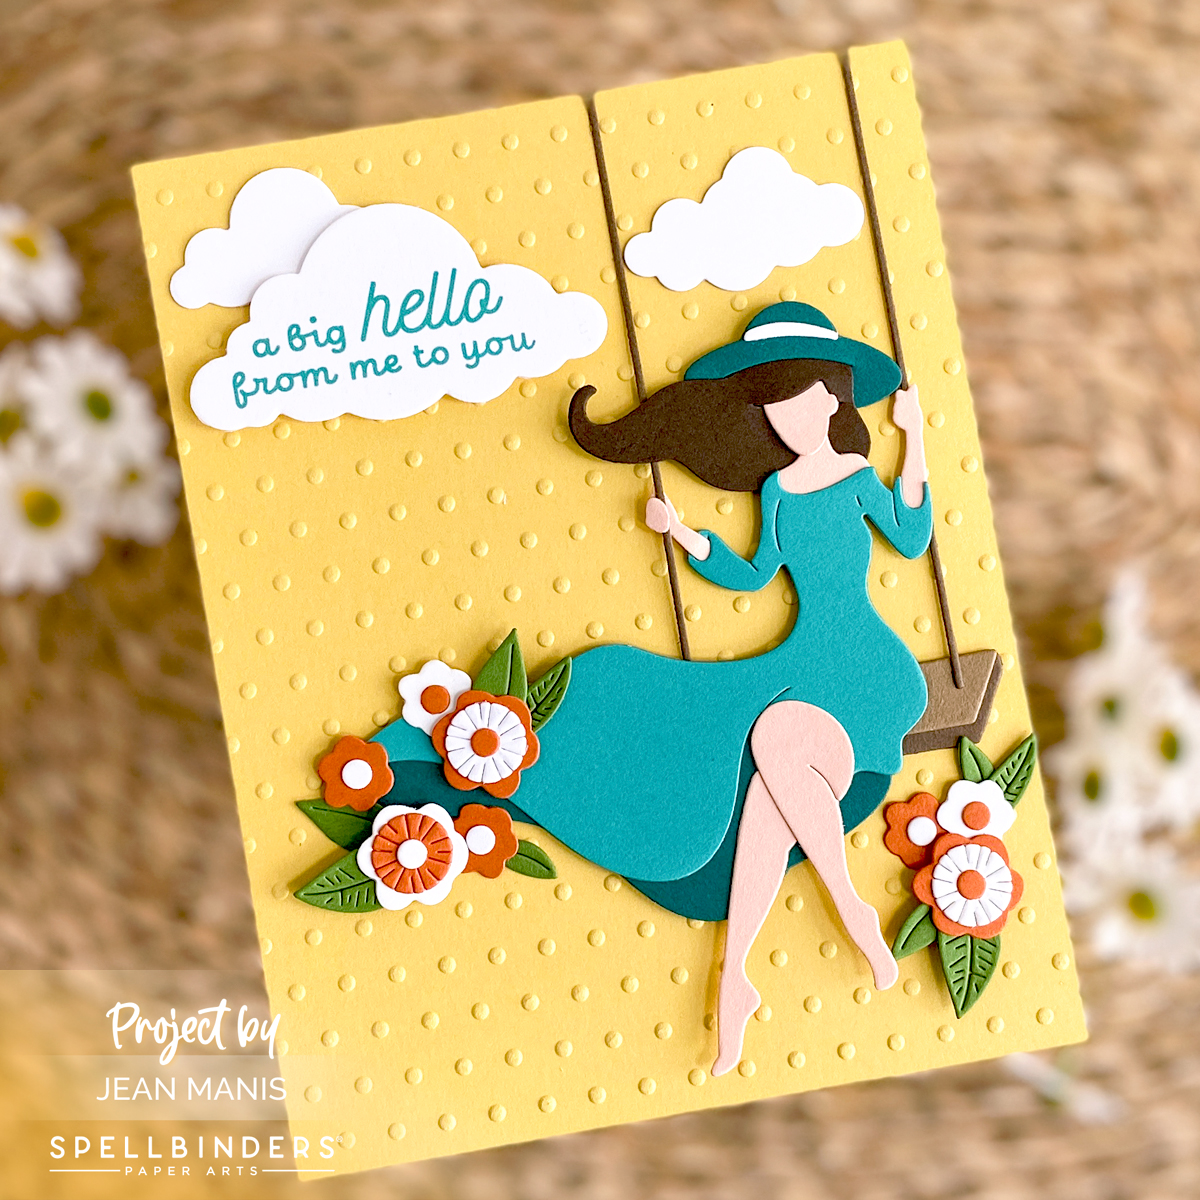
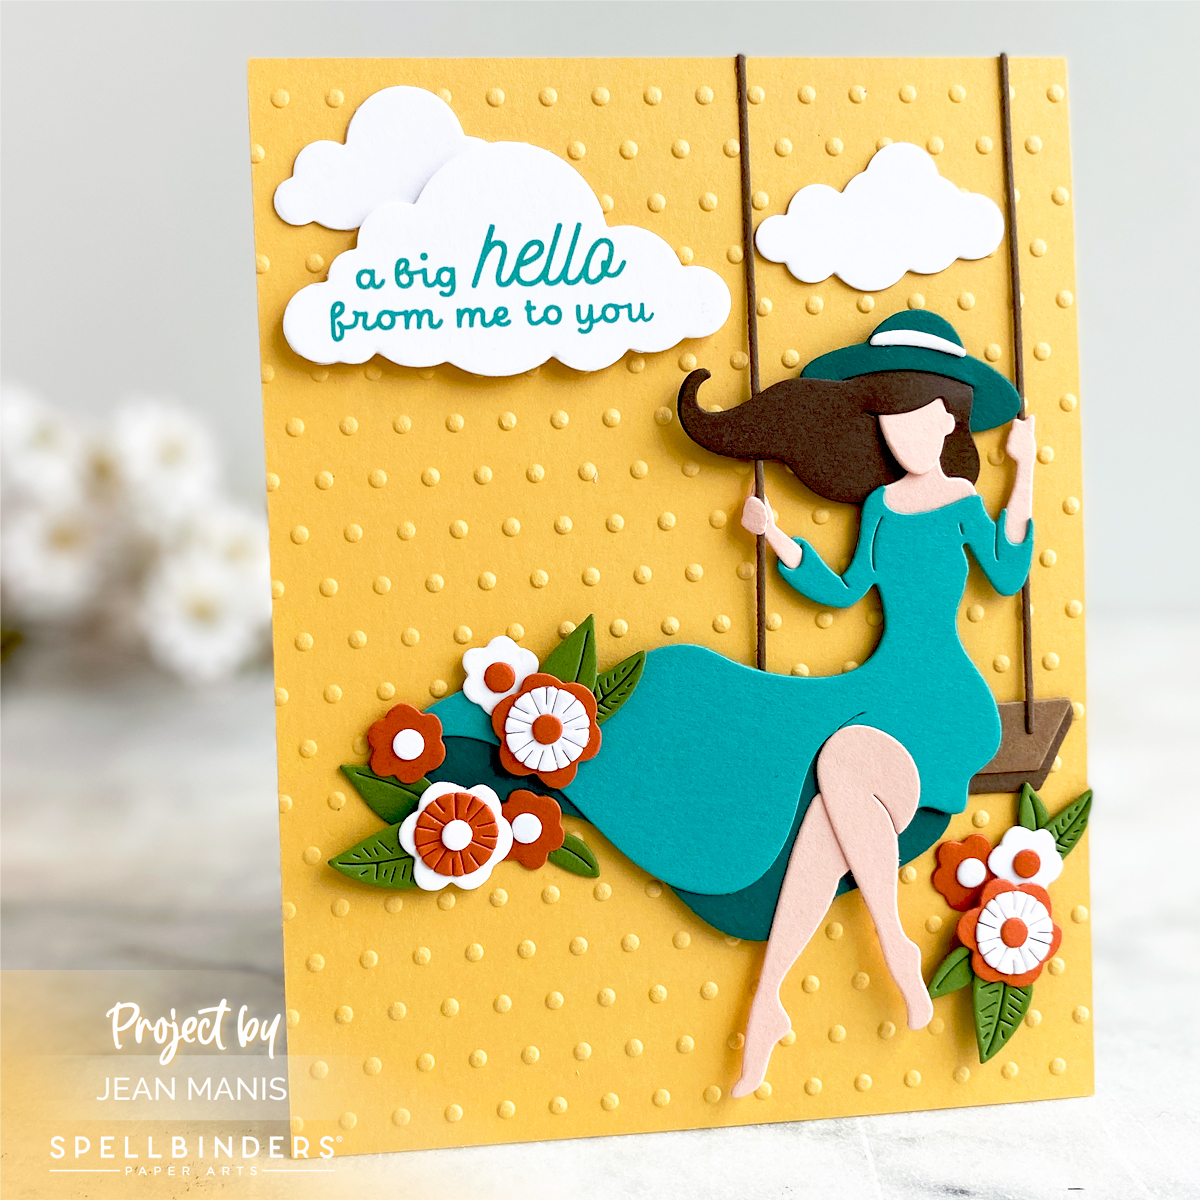
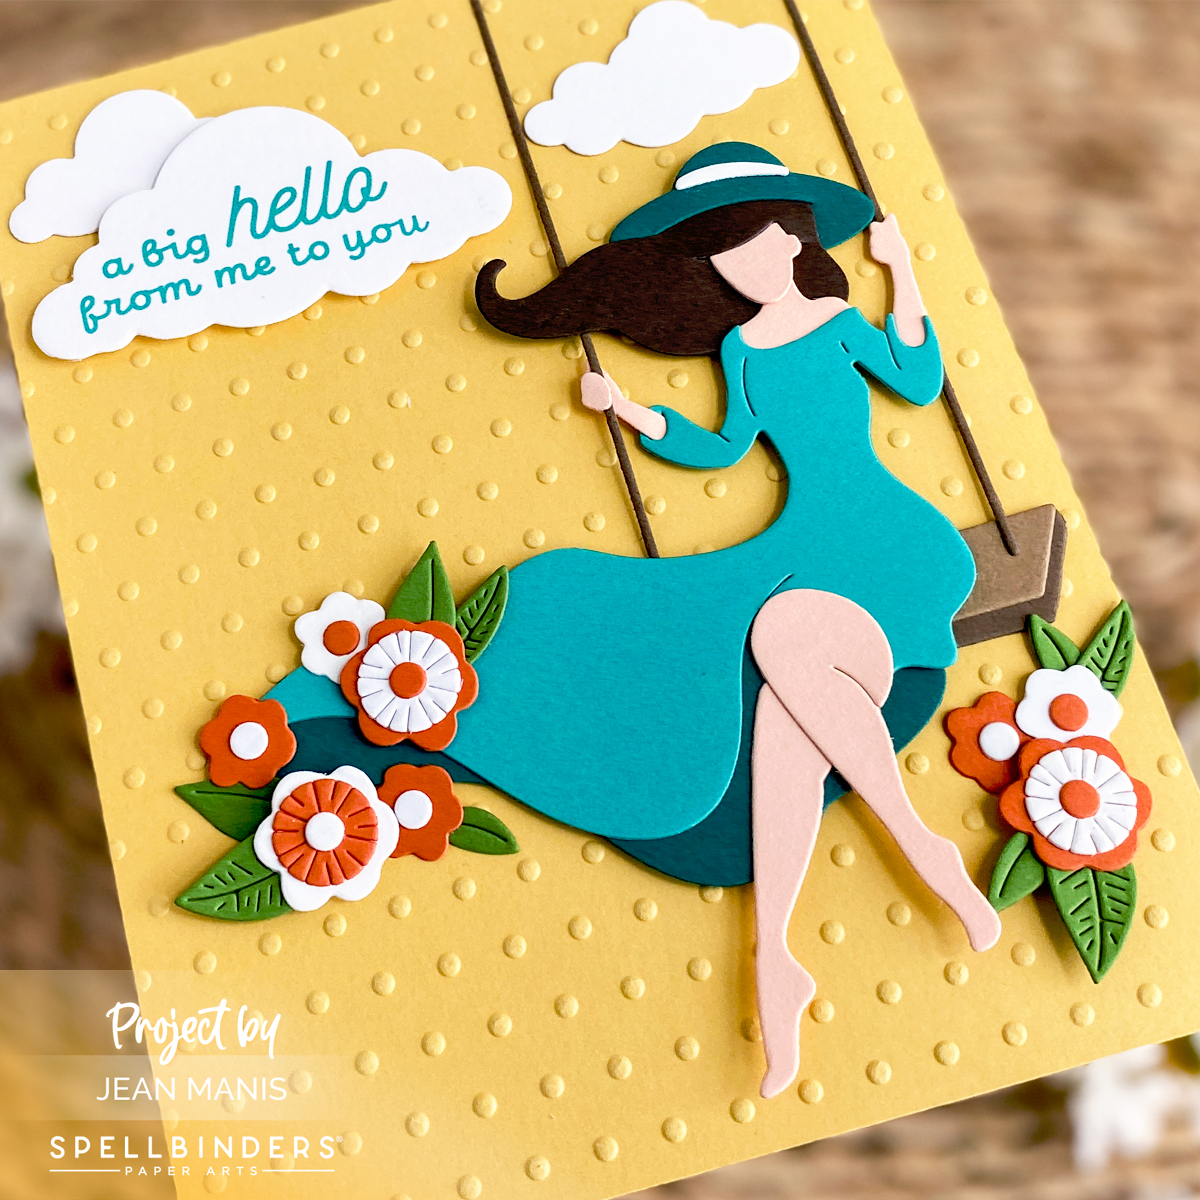
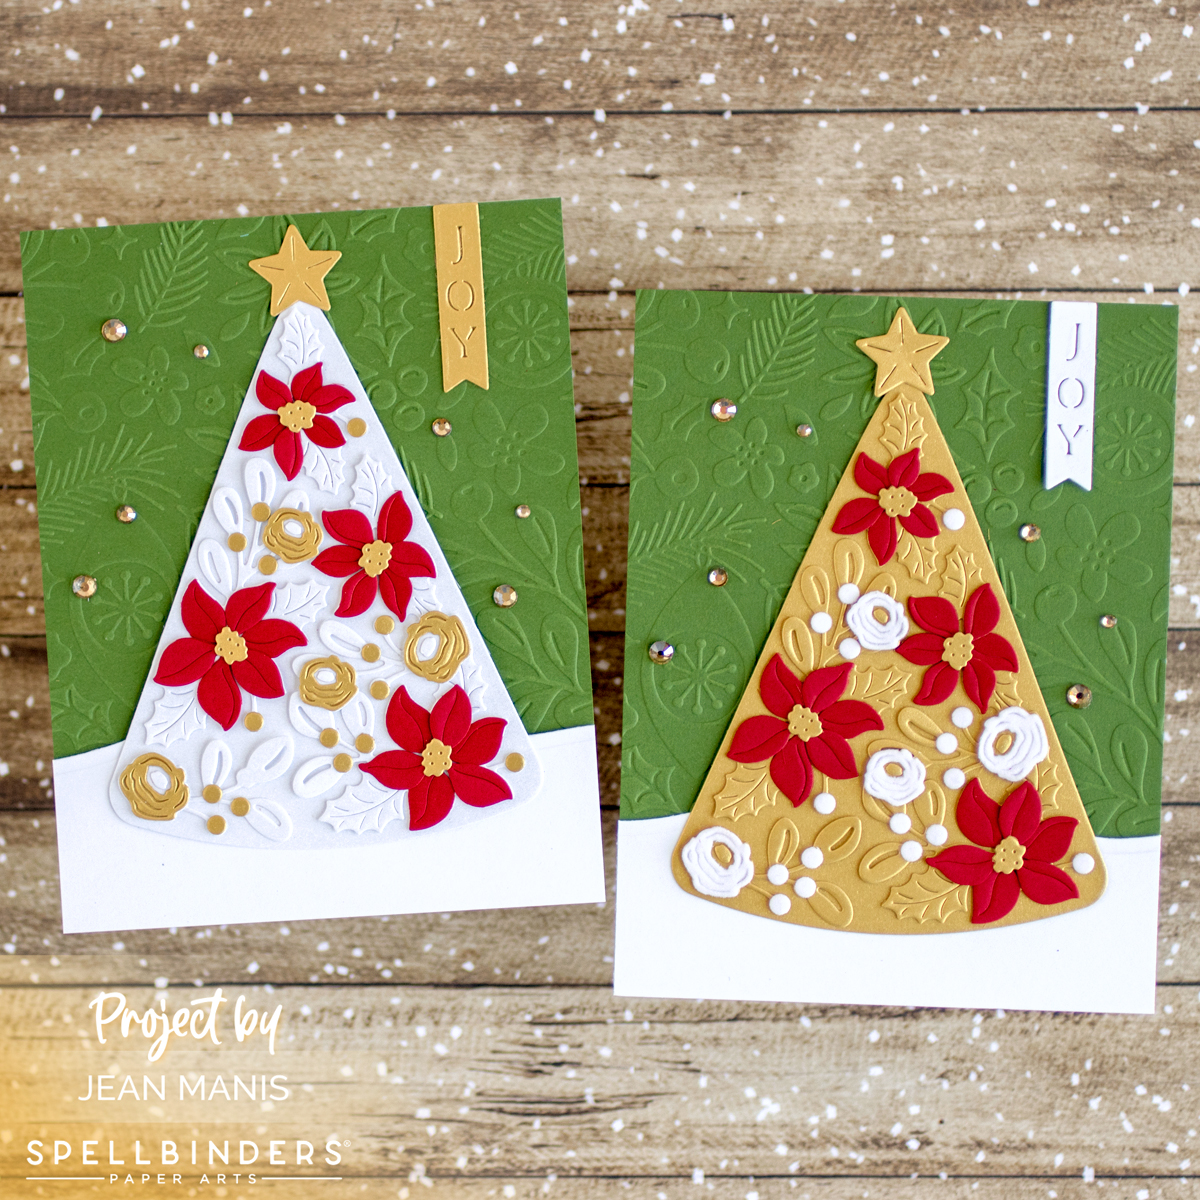
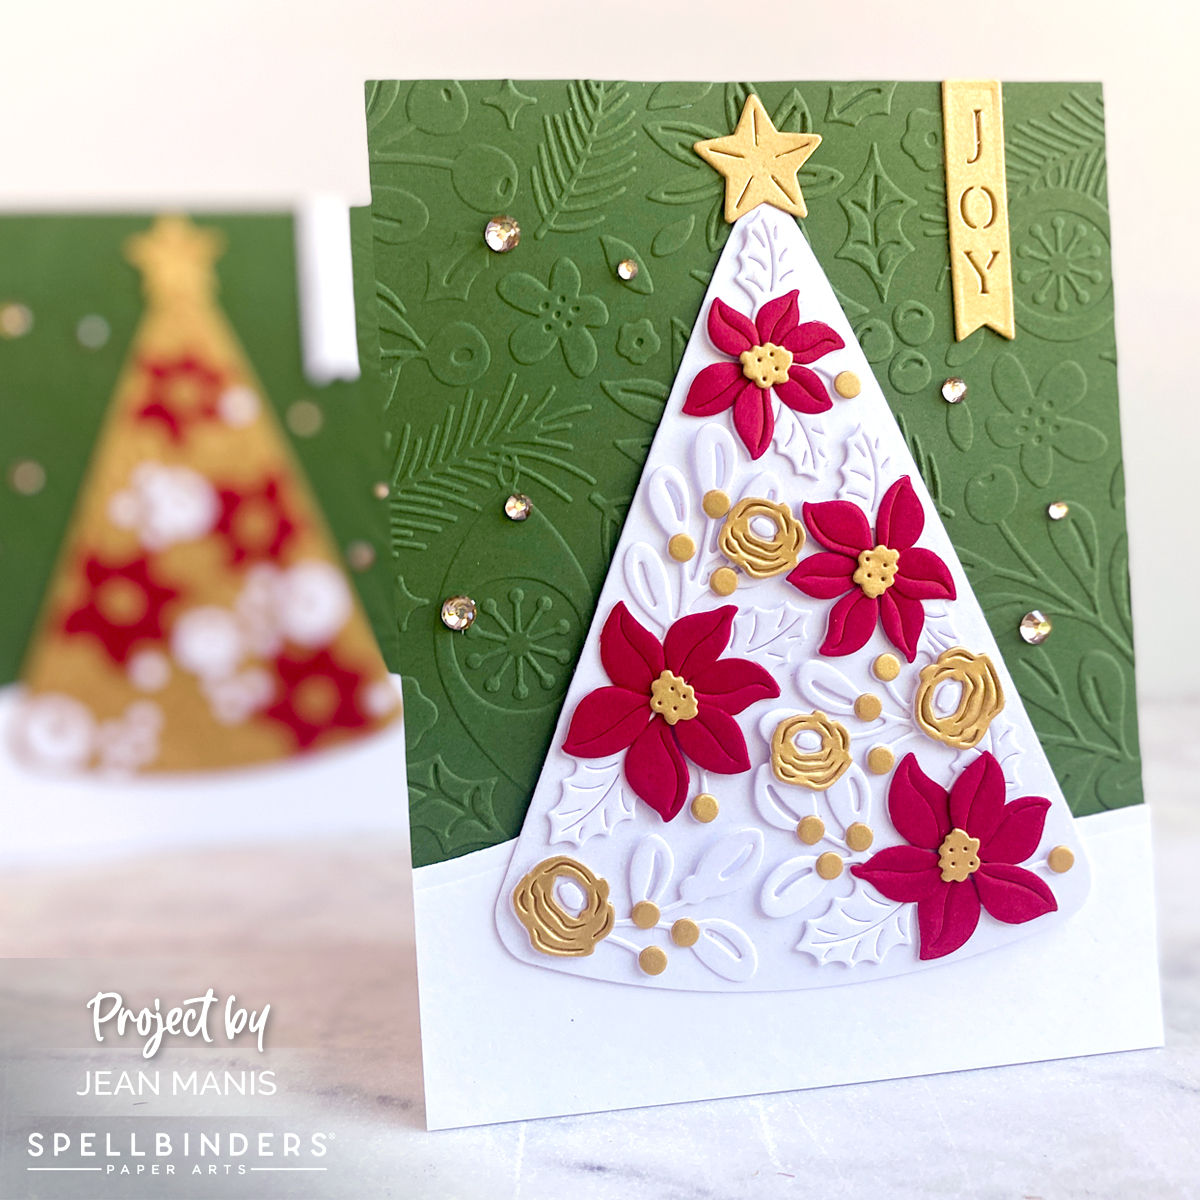
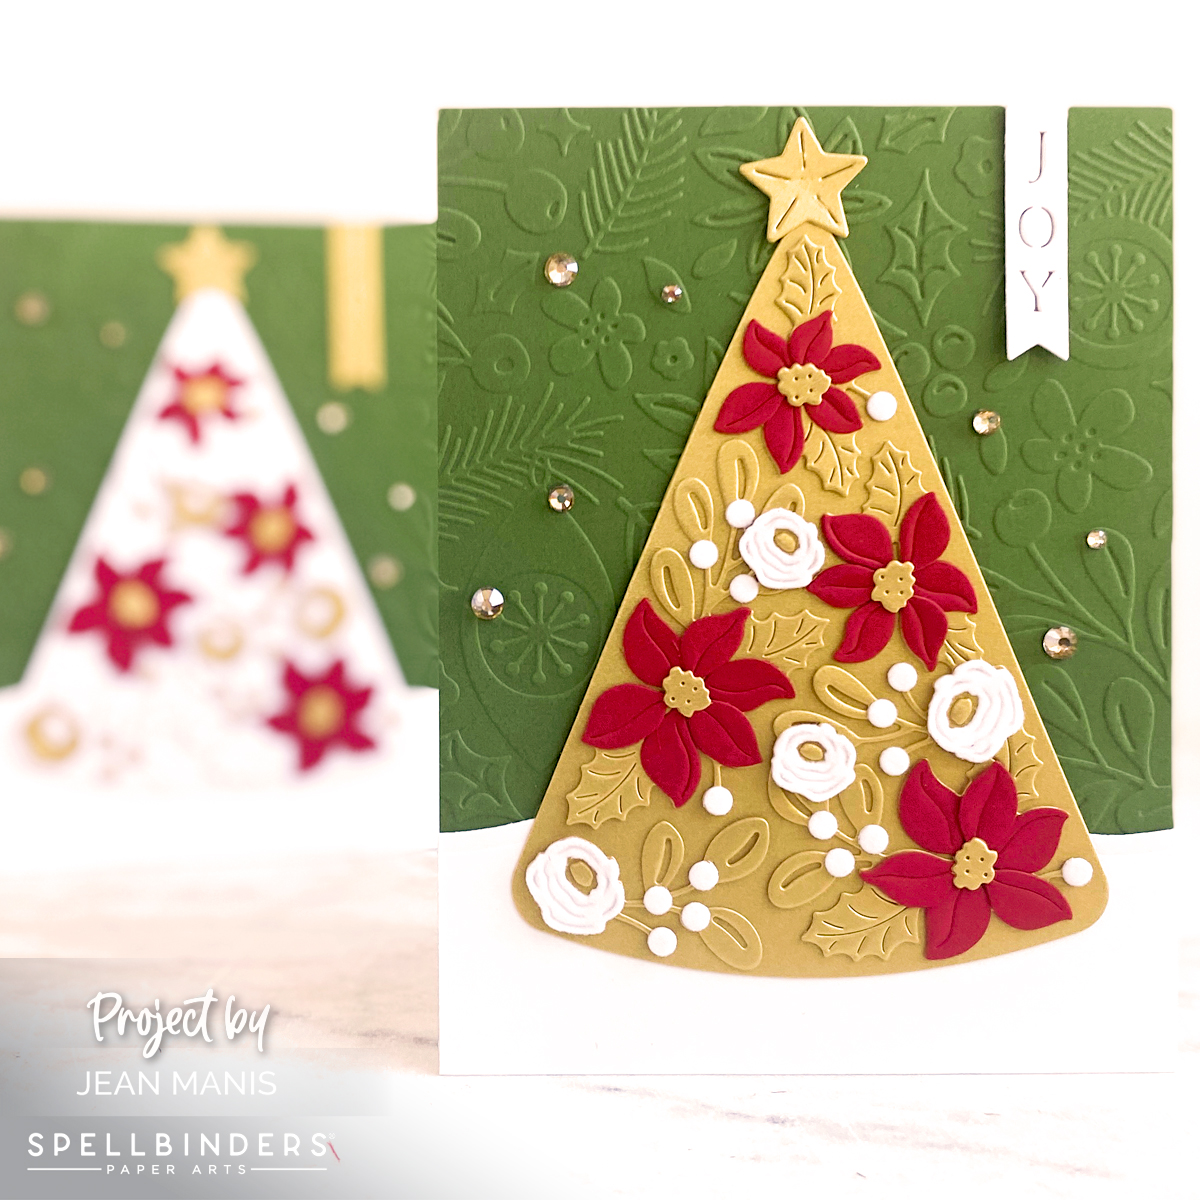
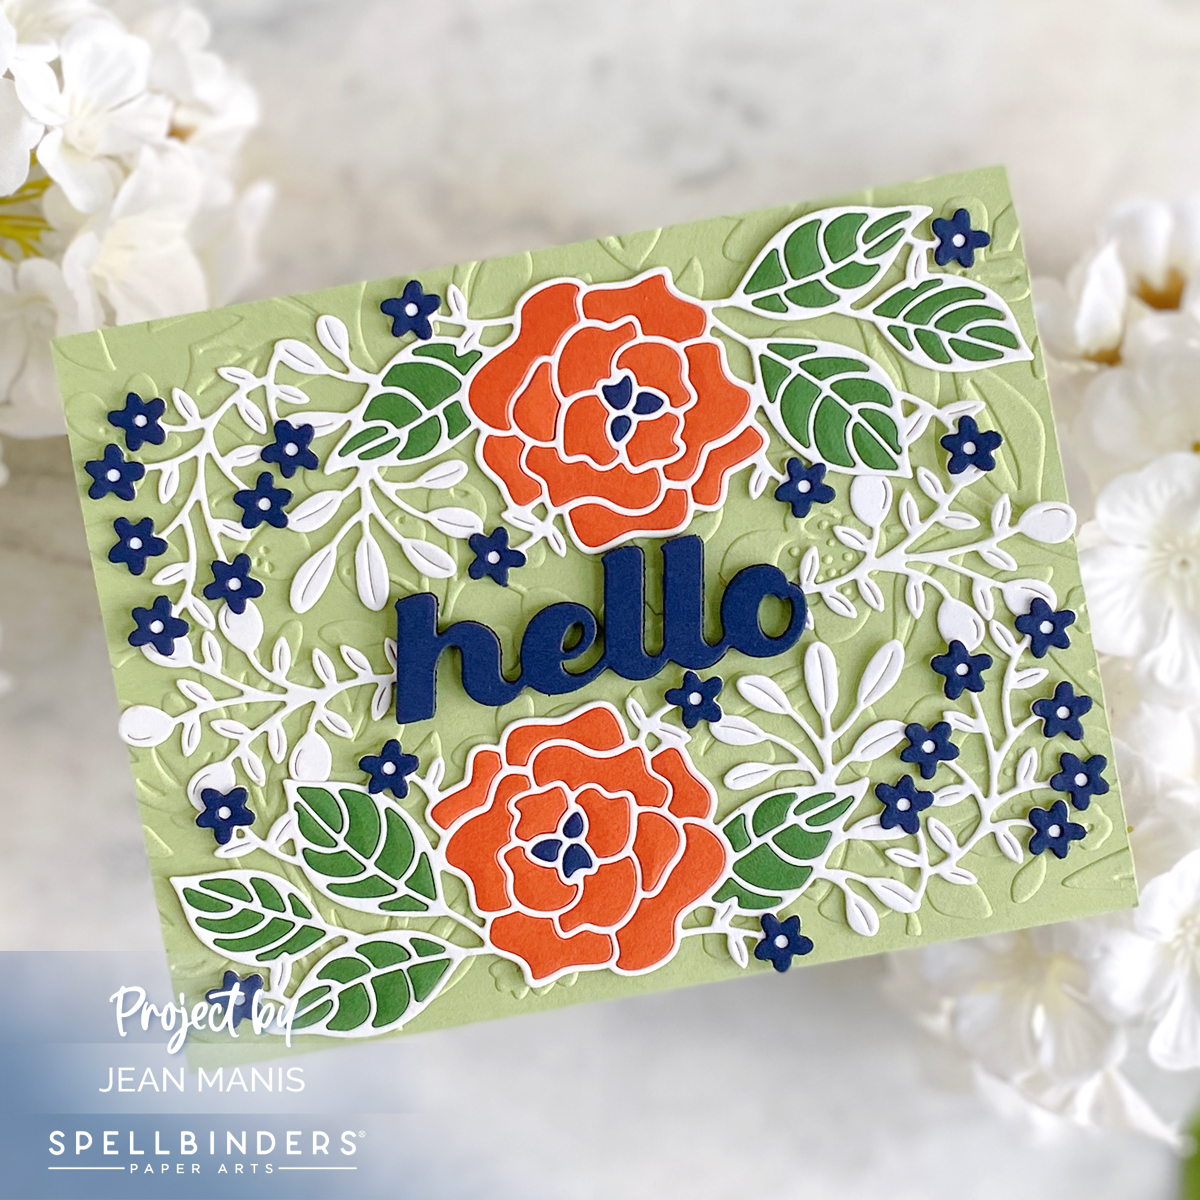
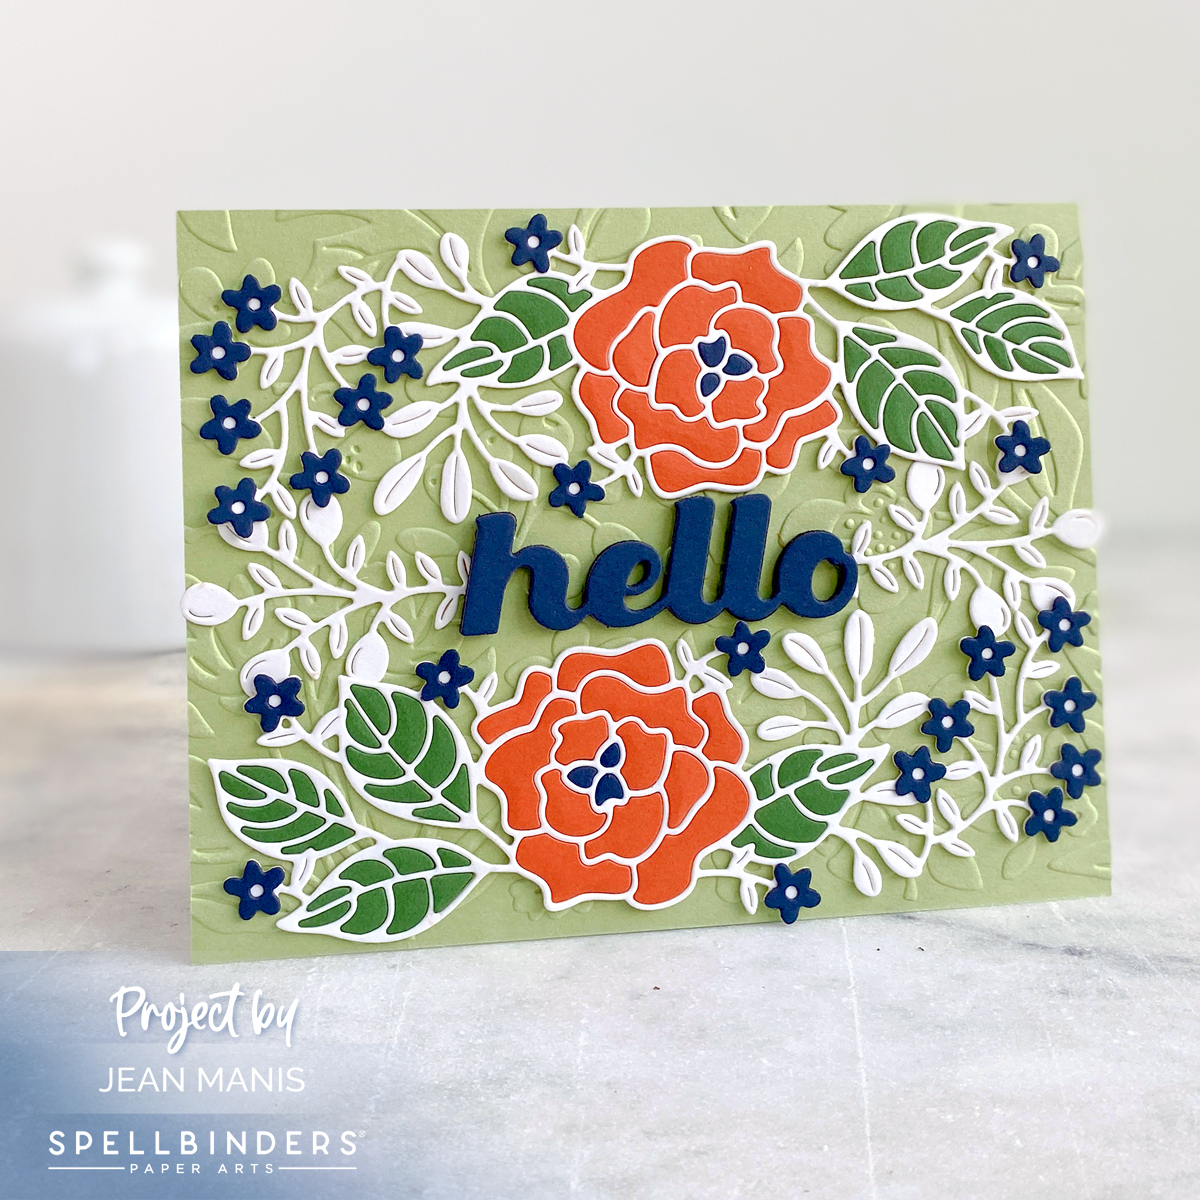
Spellbinders Trick-or-Treat Die-cut Scene

Hello! I am sharing a die-cut Halloween scene on which I combined several Spellbinders/FSJ die sets – “Eek-A-Boo” (this month’s Small Die of the Month), Haunted Manor, and Sweet Home Accents.

Spellbinders Trick-or-Treat Die-cut Scene

For this card, I wanted to capture a trick-or-treat scene. While there are a number of different trick-or-treaters that can be made with the “Eek-A-Boo” set, I crafted a devil. I liked the punch of red the devil provides. (See my first set of cards with the “Eek-A-Boo” set here.)

Spellbinders Trick-or-Treat Die-cut Scene

I also tucked the ghost, cut with a die in the “Eek-A-Boo” set, behind the door – the “Eek” being that it was a ghost who answered the door!

Spellbinders Trick-or-Treat Die-cut Scene

What I like about this card: the Halloween theme; the bold colors; the whimsy of it – a black cat in the window, a ghost at the door; it includes a home scene, which is one of my favorite types of scenes to make; and it’s made entirely from die-cuts.

Supplies:


Spellbinders Small Die of the Month Kit – Pack It Up – Travel Version

Looking for the Spellbinders Holiday Inspiration Blog Hop post? Head here.

Hello! Today, I am sharing two more projects created with the August Small Die of the Month kit from Spellbinders – “Pack It Up.” You can see my previous post with projects using the die set here. As I mentioned in that post, this die set lends itself to a couple of themes including school and travel. In this post I share two travel-themed cards.

My first card is for someone headed to Disneyland! I used a vintage Disneyland map for the background and added ears to the backpack!

Spellbinders Small Die of the Month Kit – Pack It Up - Travel Version

I cut the backpack body, straps, and the ears from a shiny black cardstock. I cut the zipper and buckles from silver foil cardstock.

Spellbinders Small Die of the Month Kit – Pack It Up - Travel Version

Spellbinders Small Die of the Month Kit – Pack It Up - Travel Version

My second card is for someone NYC-bound. Same design with a few tweaks to the colors of the backpack and sunglasses, and of course a different map. For this card’s background, I used a NYC subway map.

Spellbinders Small Die of the Month Kit – Pack It Up - Travel Version

Spellbinders Small Die of the Month Kit – Pack It Up - Travel Version

Supplies:

Spellbinders Small Die of the Month Kit – Besties Forever

Hello and happy July! Today, I am sharing two CAS projects created with the July Small Die of the Month kit from Spellbinders – “Besties Forever” ($12.50 with US shipping included in the cost!). The dies to create the cat and dog are included in the kit, as well as the grass border die, the sentiment dies, and the two bone dies.

Spellbinders Small Die of the Month Kit - Besties Forever

On my first card, I used both the cat and dog dies included in the set, along with the “Besties Forever” die-cut sentiment, to create a friendship card.

Spellbinders Small Die of the Month Kit - Besties Forever

  • I cut the pieces for the dog and cat and assembled the pieces with glue. I used my rotary trimmer to cut the cat’s whiskers. It took some experimentation to get the right size for these.
  • I cut the bones and glued them to the light-blue background.
  • I cut the grass and attached it to the background.
  • I added the die-cut sentiments with glue and the assembled cat and dog with foam adhesive.

Spellbinders Small Die of the Month Kit - Besties Forever

On my second card, I used color and repetition to create a friendship card with the cat dies. It would be easy to do something similar with the dog faces and a dog-themed sentiment.

Spellbinders Small Die of the Month Kit - Besties Forever

  • I cut the cat faces and collars from a variety of cardstock colors.
  • I assembled the pieces with glue.
  • I heat-embossed the sentiment and cut it with a circle die.
  • I attached the cats to the circle and attached the circle to the card base, which measures 5″ x 5″ with a 4 3/4″ x 4 3/4″ blue square background.

Spellbinders Small Die of the Month Kit - Besties Forever

Thanks so much for visiting today!

Supplies:

Spellbinders June Small Die Kit Club – Christmas Card

Hello! Today I am sharing a CAS Christmas card created with the Spellbinders Small Die of the Month die set “Kaleidoscope Trio” (June 2019). This card was just a happy accident; I didn’t set out to make a Christmas card! My first round of cards created with this die set can be found in this post.

Spellbinders June Small Die Kit Club - Christmas Card

  • For the back layer, I cut white cardstock with the die set’s hexagon bottom die.
  • I used one of the detailed hexagon dies to cut the top layer from Lawn Fawn Peacock, Stampin’ Up Melon Mambo, and Gina K Tranquil Teal cardstock.
  • I used spray adhesive to adhere the top layers to the back layers. I then taped the hexagons together on the back.
  • I stamped the All Year Long sentiment on to a Simon Says Stamp Sea Glass panel with FSJ Fusion ink.
  • I attached the “snowflake” assembly to the card base with spray adhesive.
  • I added sequins for sparkle and to help fill in the white space.

Spellbinders June Small Die Kit Club - Christmas Card

Supplies:

Spellbinders Kaleidoscope Trio – June Small Die of the Month Kit

Hello and happy June! Today, I am sharing three CAS projects created with this month’s Spellbinders Small Die of the Month die set “Kaleidoscope Trio” ($12.50 with US shipping included in the cost!). The set includes eleven dies with which to create layered shapes. Let’s take a look!

Spellbinders Kaleidoscope Trio - June Small Die of the Month Kit

For my first project, I used the fan-shaped layering dies to create an A2-sized “Good Luck” card.

Spellbinders Kaleidoscope Trio - June Small Die of the Month Kit

  • I die-cut the fan-shaped layers from cardstock in black (back layer), dark teal, brushed gold, and teal (top layer).
  • I assembled the layers with spray adhesive.
  • I heat-embossed the sentiment in gold and cut the cardstock with a circle die.
  • I attached the fan pieces to the card background, adhering the sentiment on top.

Spellbinders Kaleidoscope Trio - June Small Die of the Month Kit

On my second card, measuring 4 1/2″ x 4 1/2″ square, I used the circle dies.

Spellbinders Kaleidoscope Trio - June Small Die of the Month Kit

  • I cut the circles from cardstock in green (back layer), blue, and turquoise (top layer). I also used a circle die to cut a white cardstock circle for the base. (Otherwise the row of assembled circles in the background would be visible through the circles in the front).
  • I assembled the layers with spray adhesive.
  • I attached the rings together.
  • I added a white heat-embossed sentiment which I “framed” with a white circle and attached the two to the center of the “kaleidoscope.”
  • I added the assembly to the card background.

Spellbinders Kaleidoscope Trio - June Small Die of the Month Kit

On my last card, I used the hexagon dies.

Spellbinders Kaleidoscope Trio - June Small Die of the Month Kit

  • I cut the hexagon shapes from cardstock in white (back layer), turquoise, and orange (top layer).
  • I assembled the layers with spray adhesive.
  • I attached the hexagons together with tape on the back.
  • I added the assembly to the kraft card base.
  • I added a heat-embossed sentiment to the top of the hexagons.

Spellbinders Kaleidoscope Trio - June Small Die of the Month Kit

There are lots of options with these dies! Thanks for dropping by!

Spellbinders Kaleidoscope Trio - June Small Die of the Month Kit

Supplies: