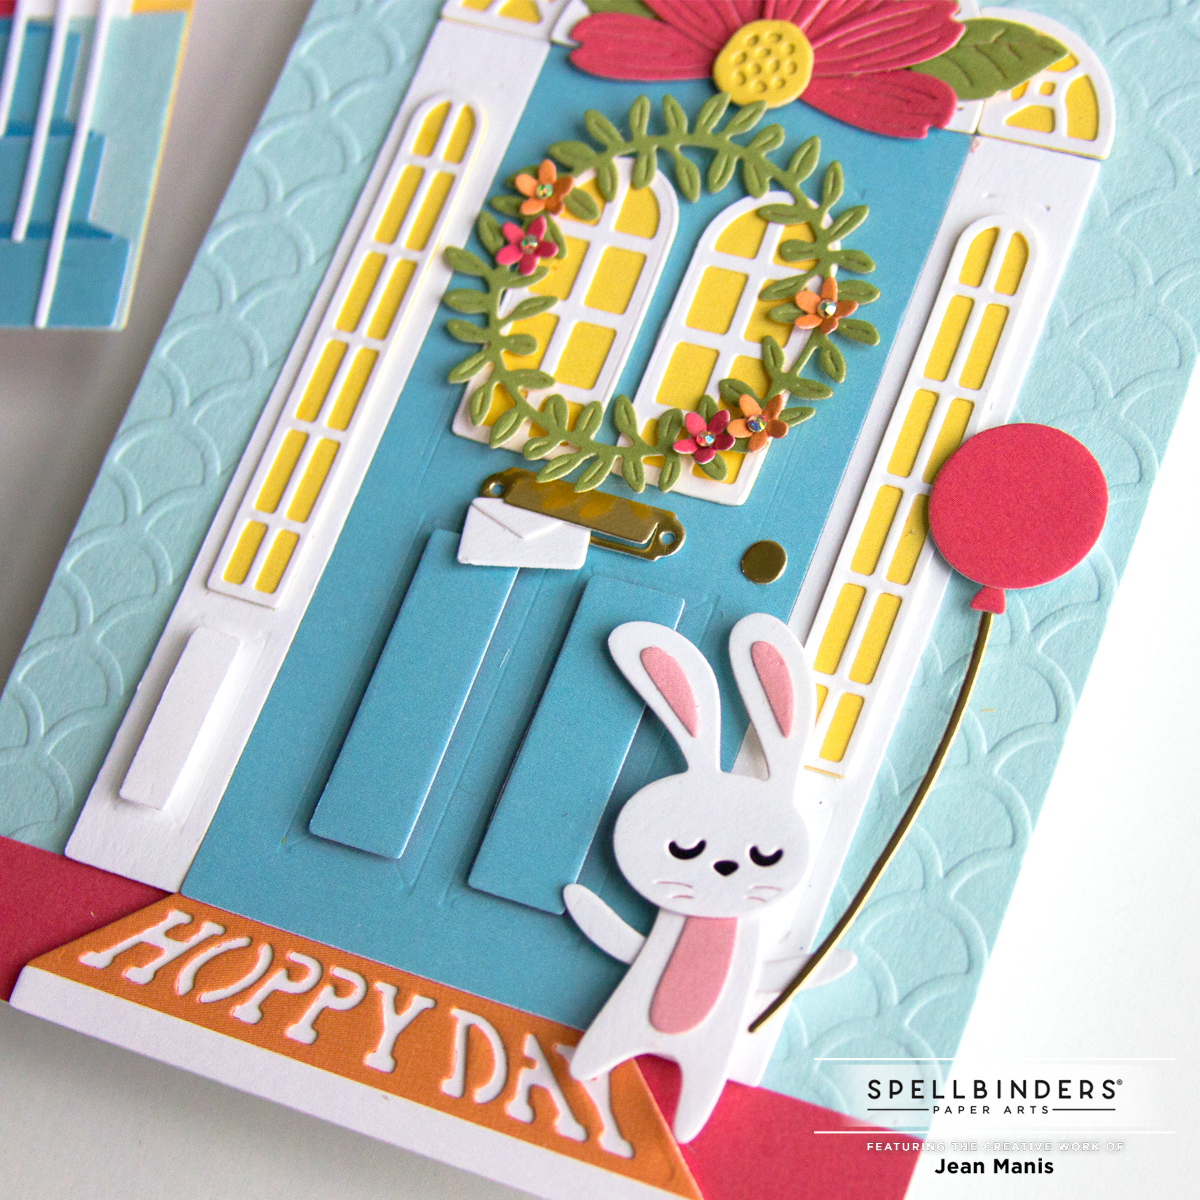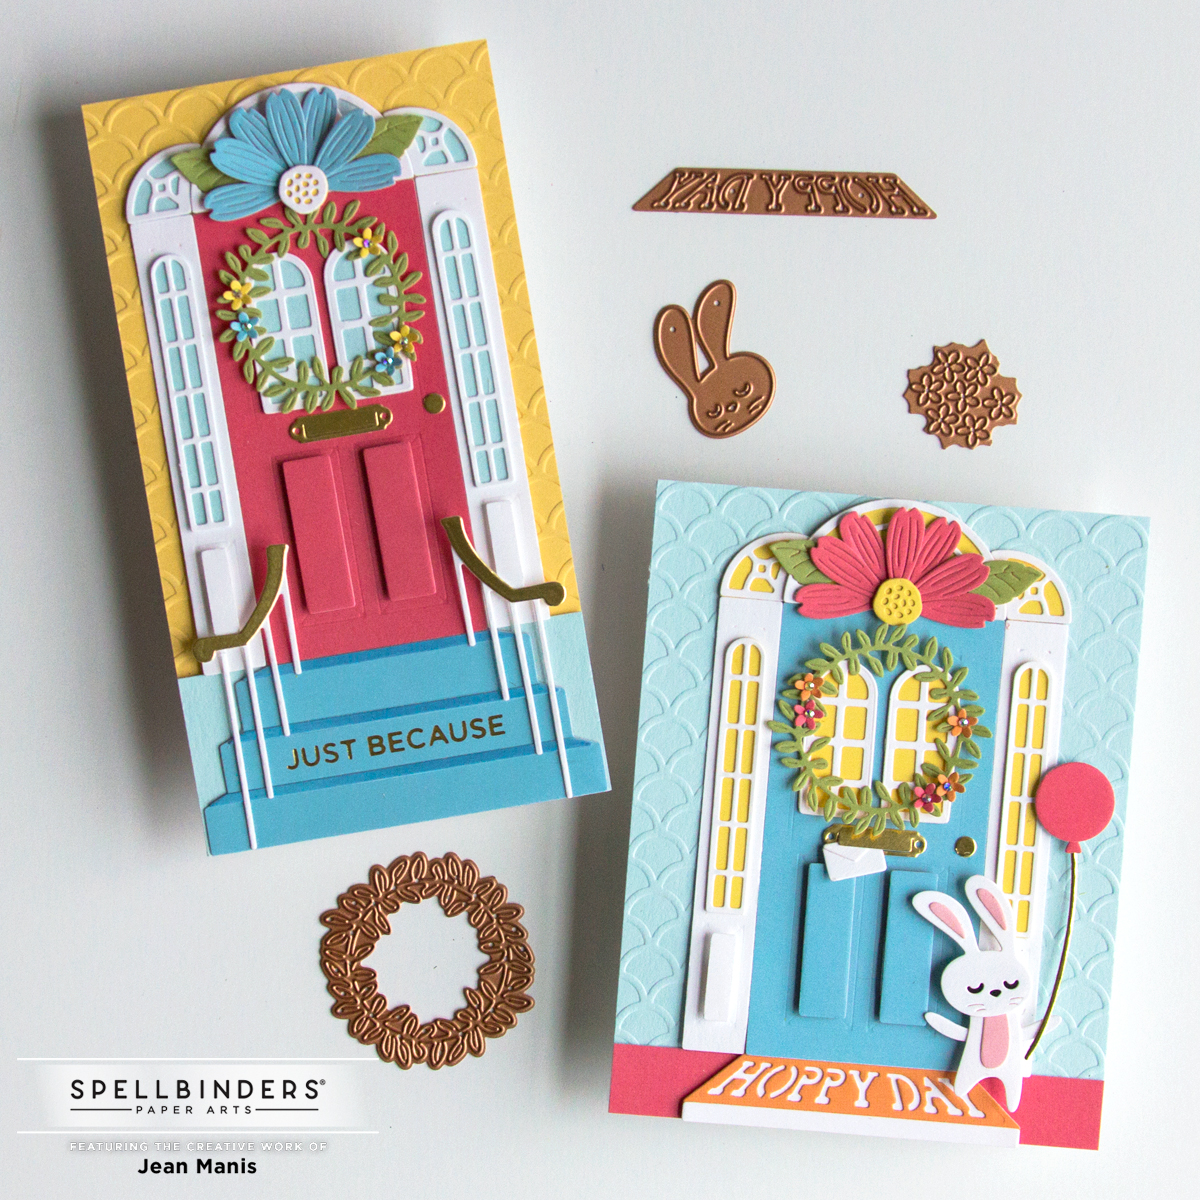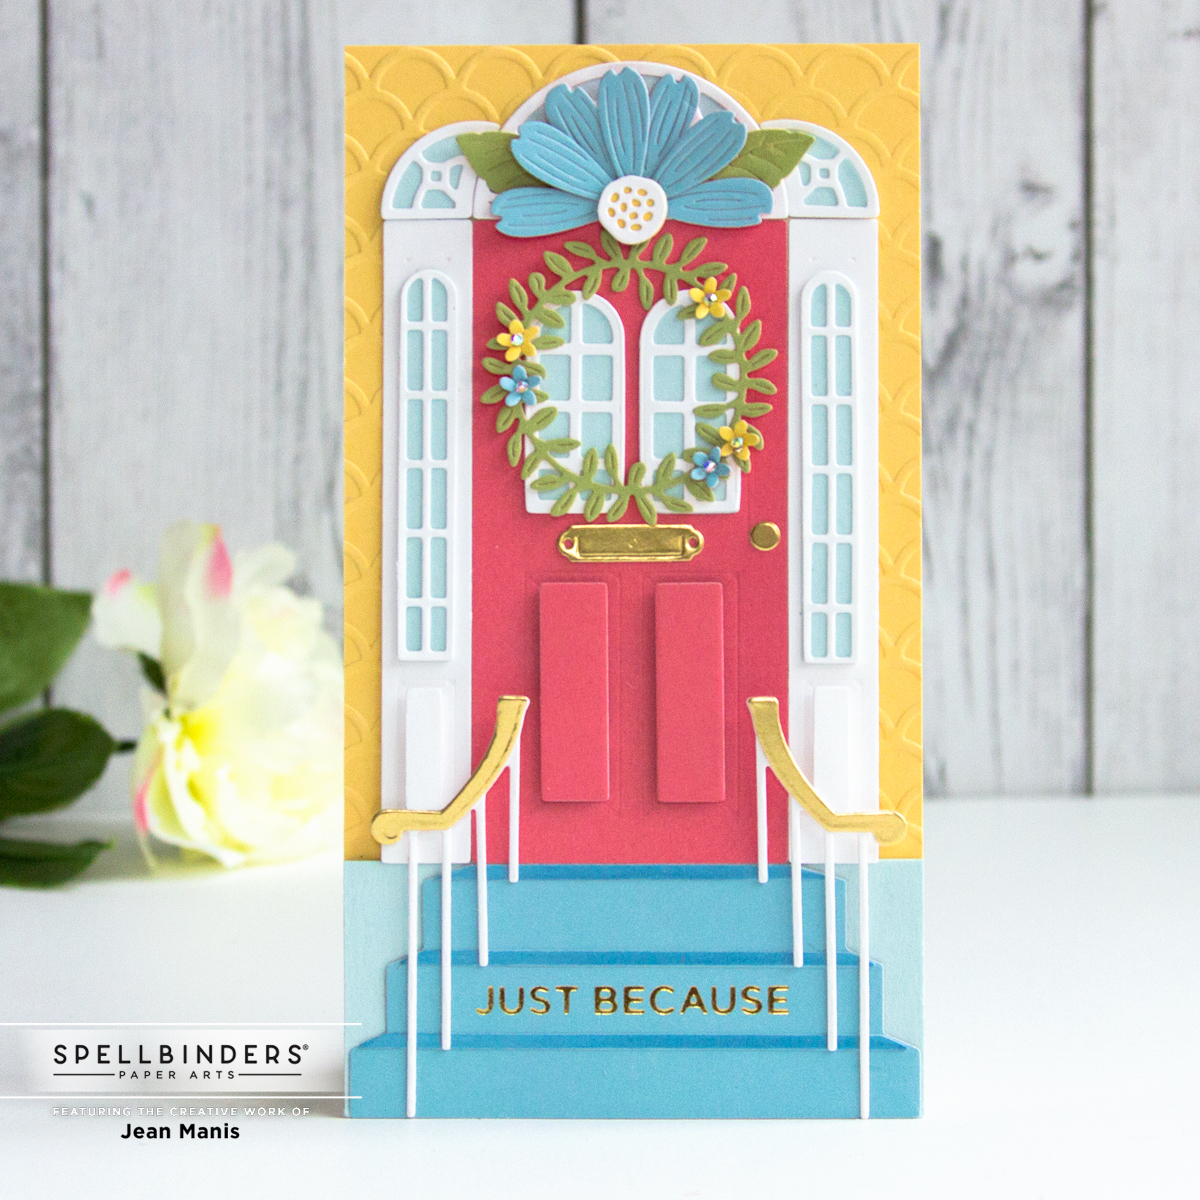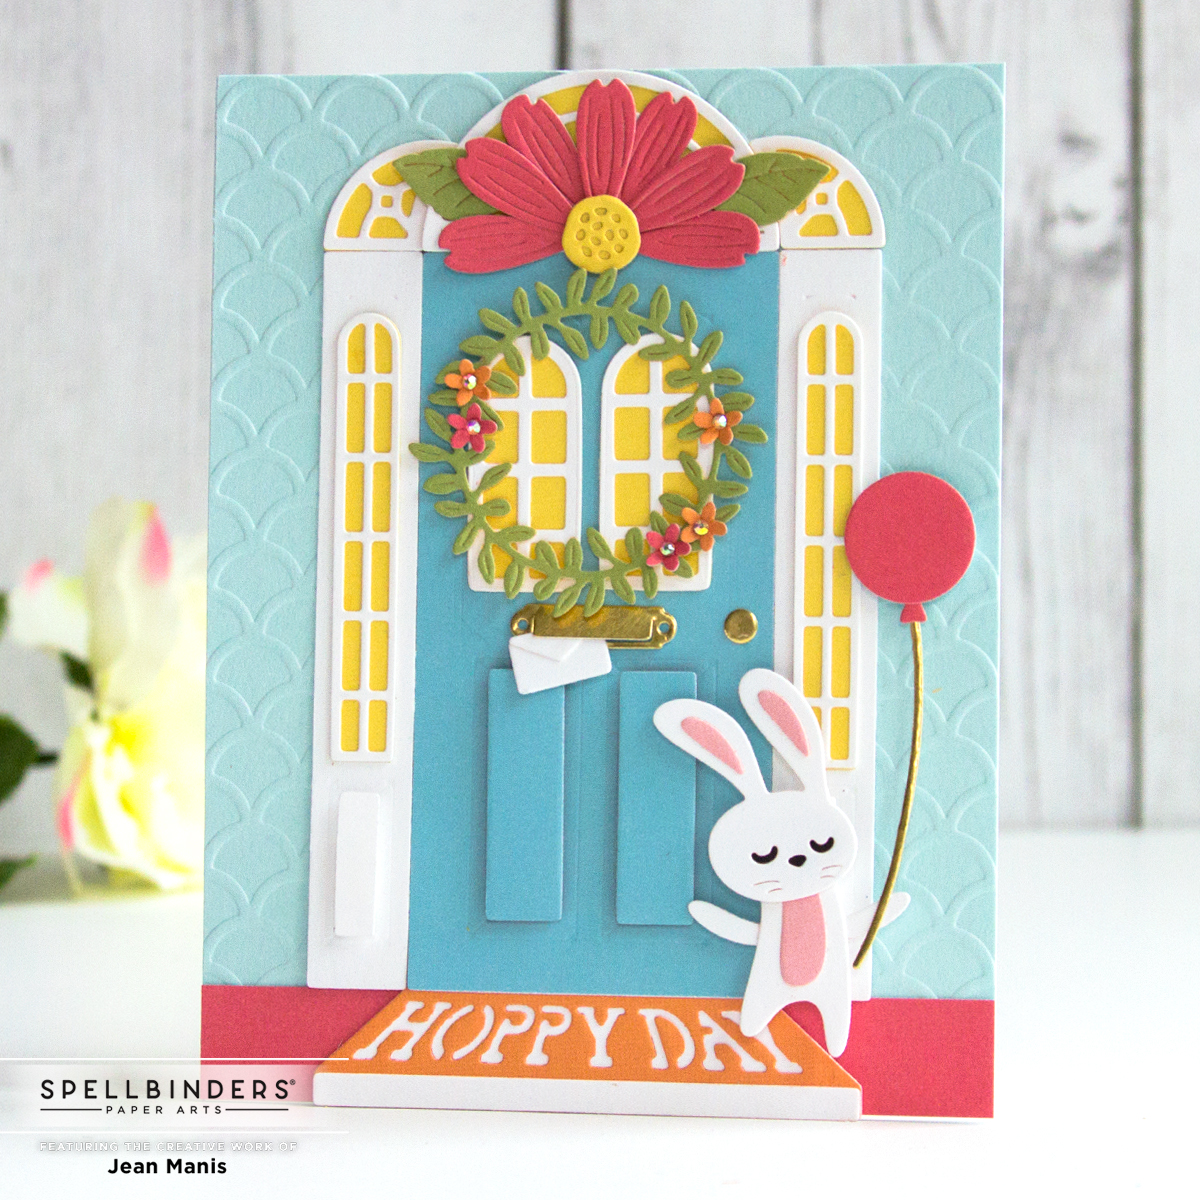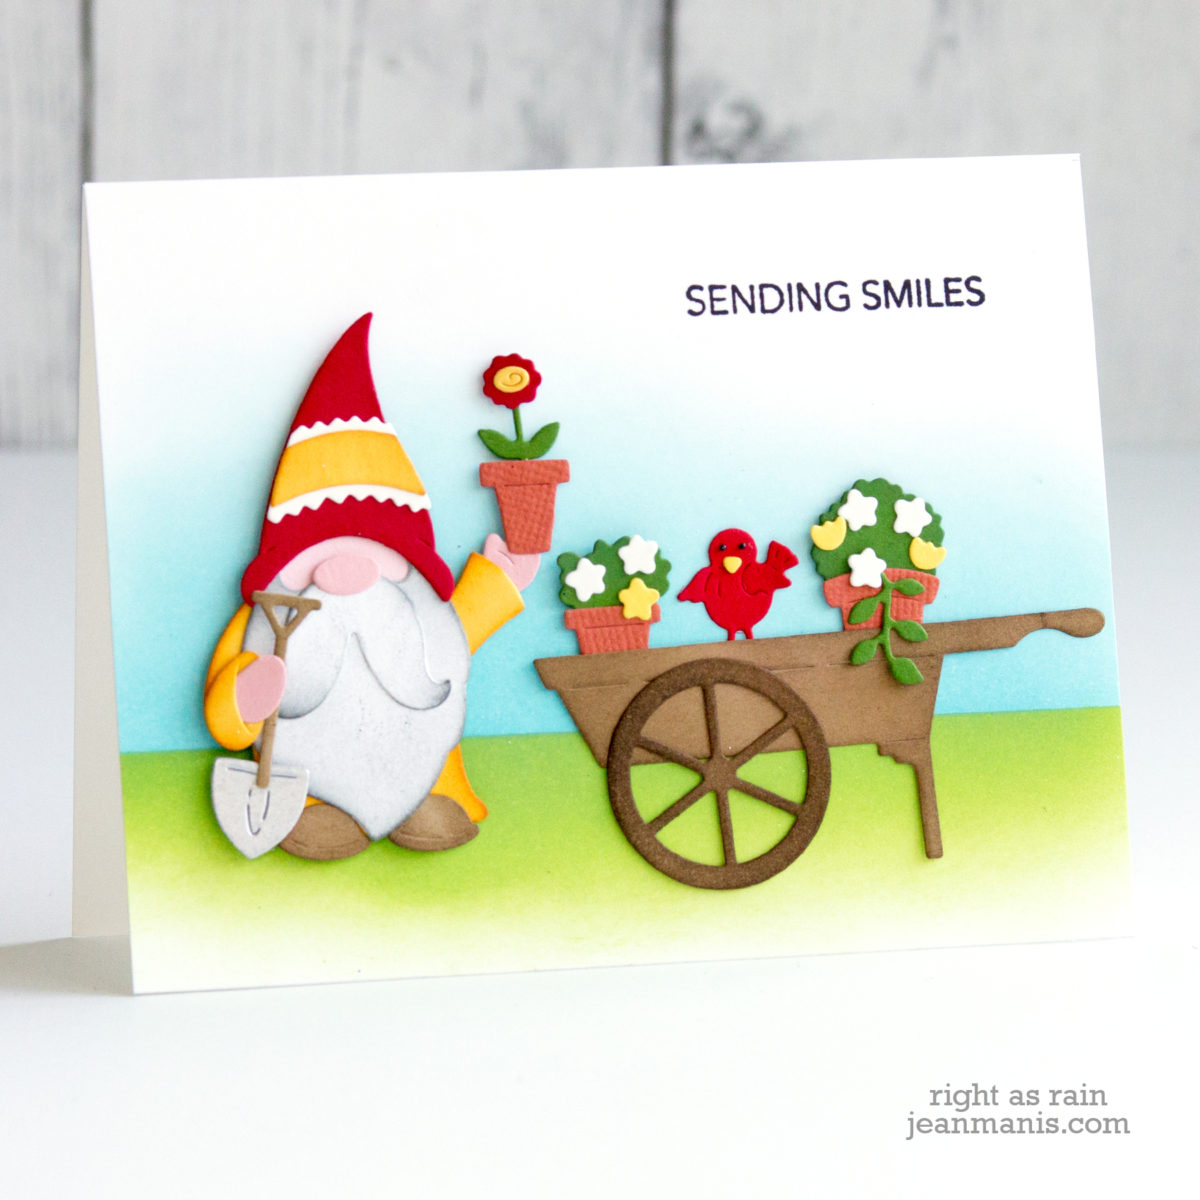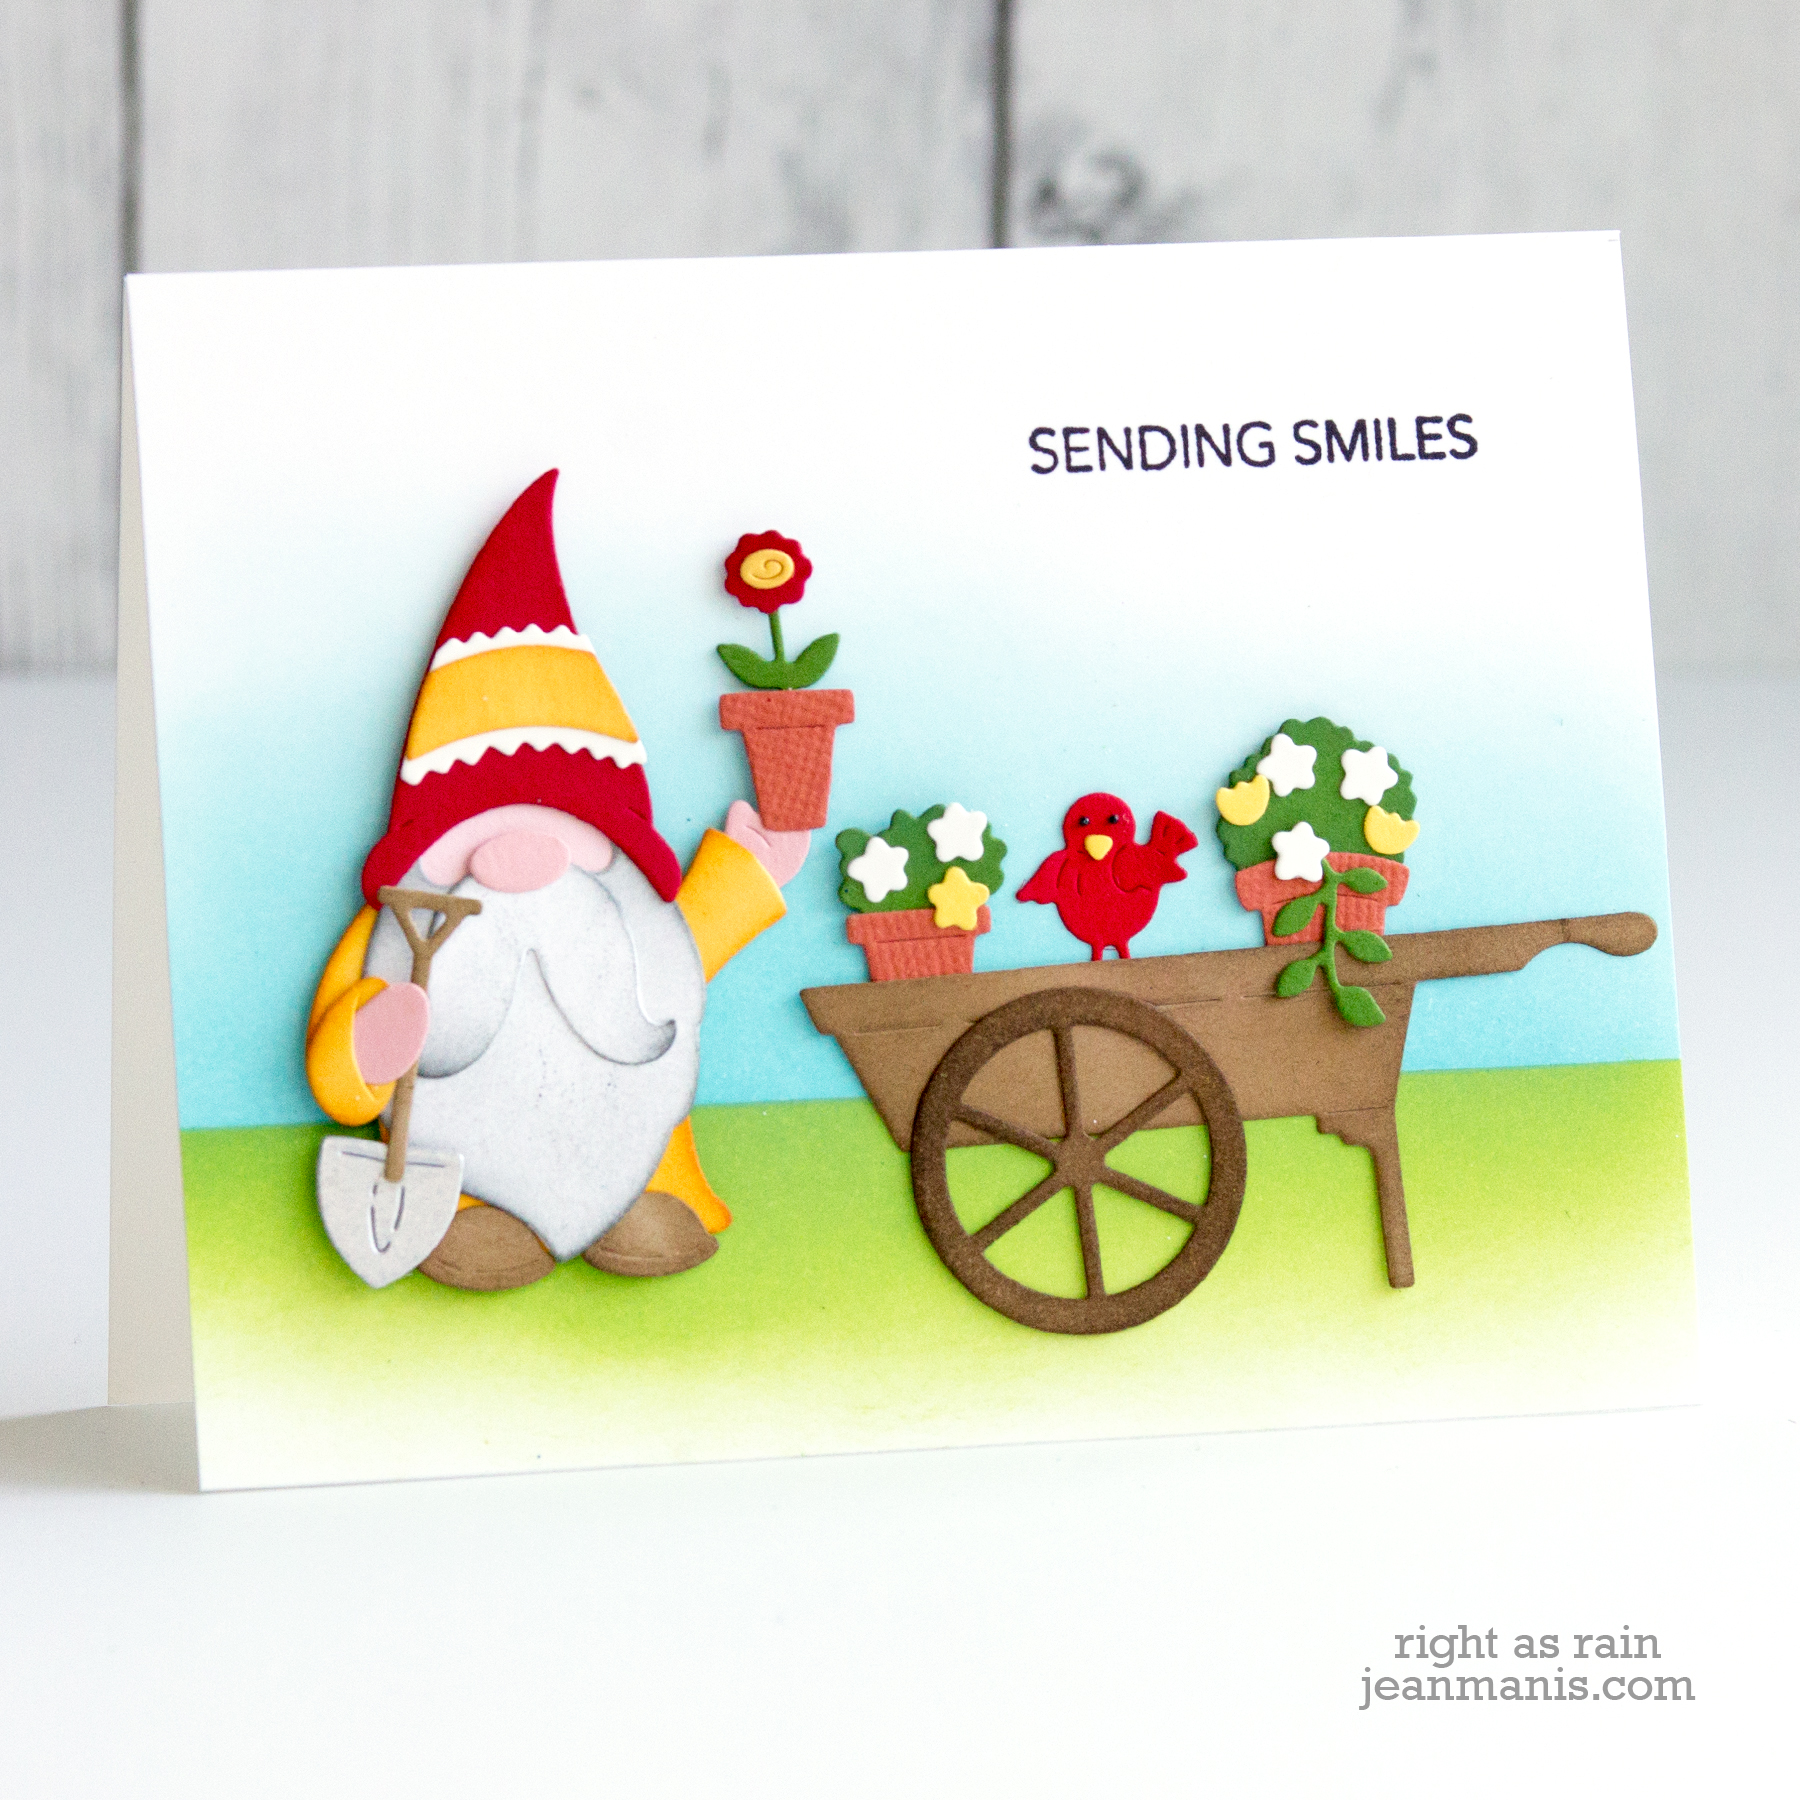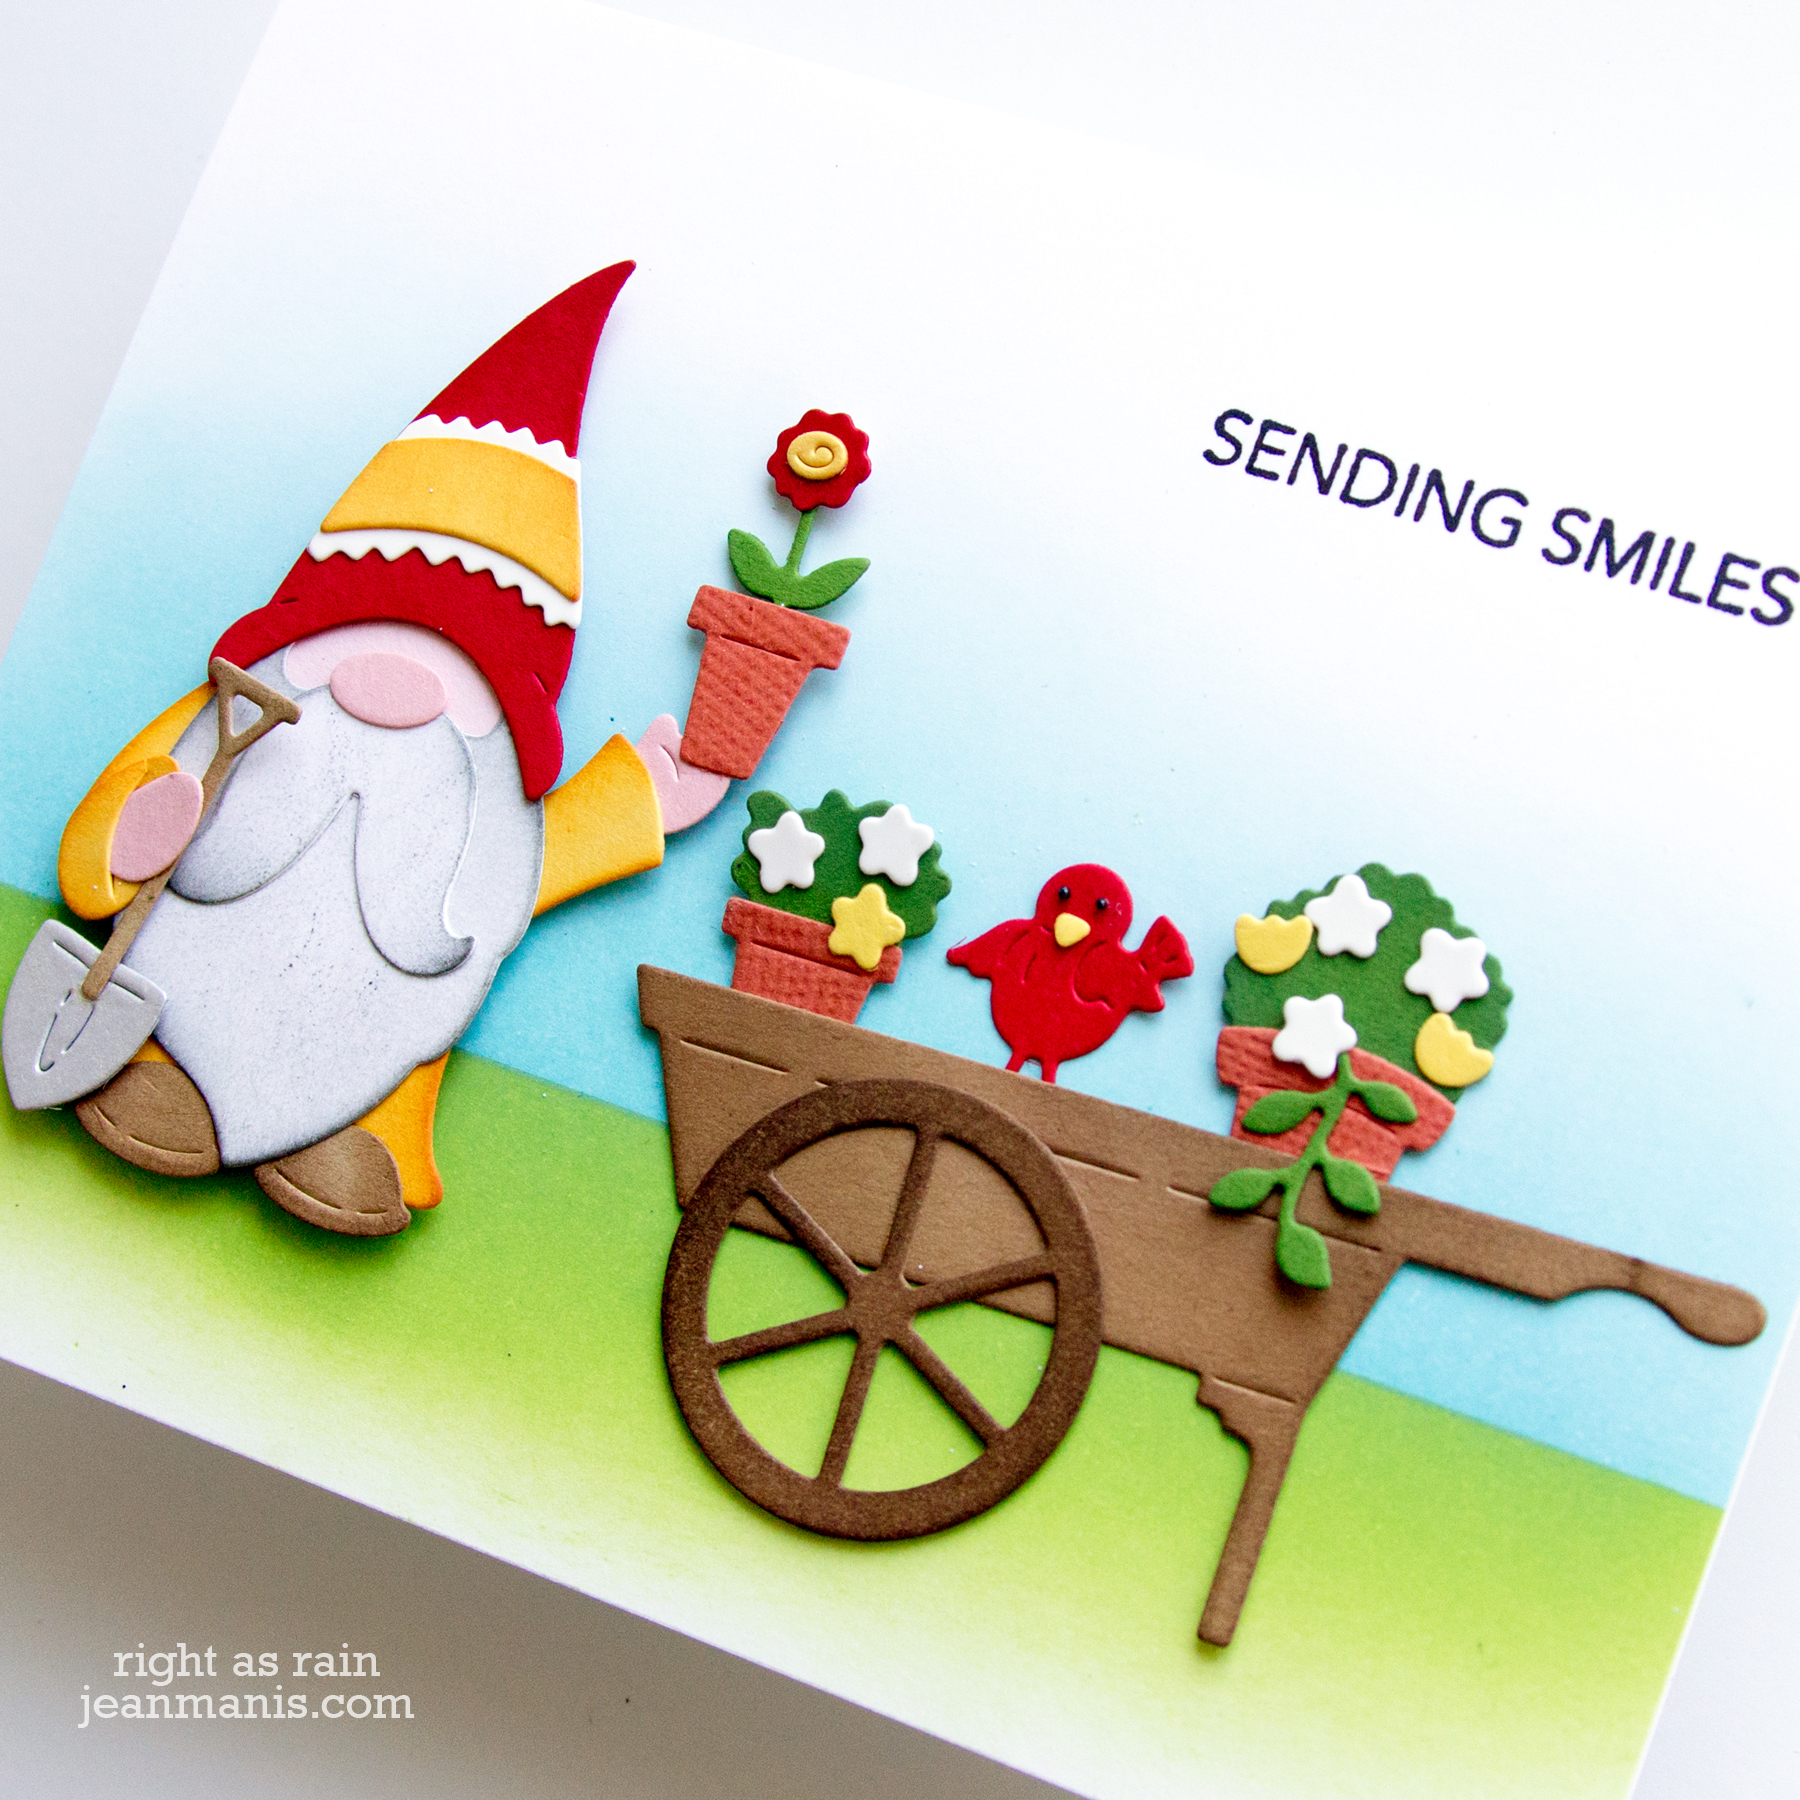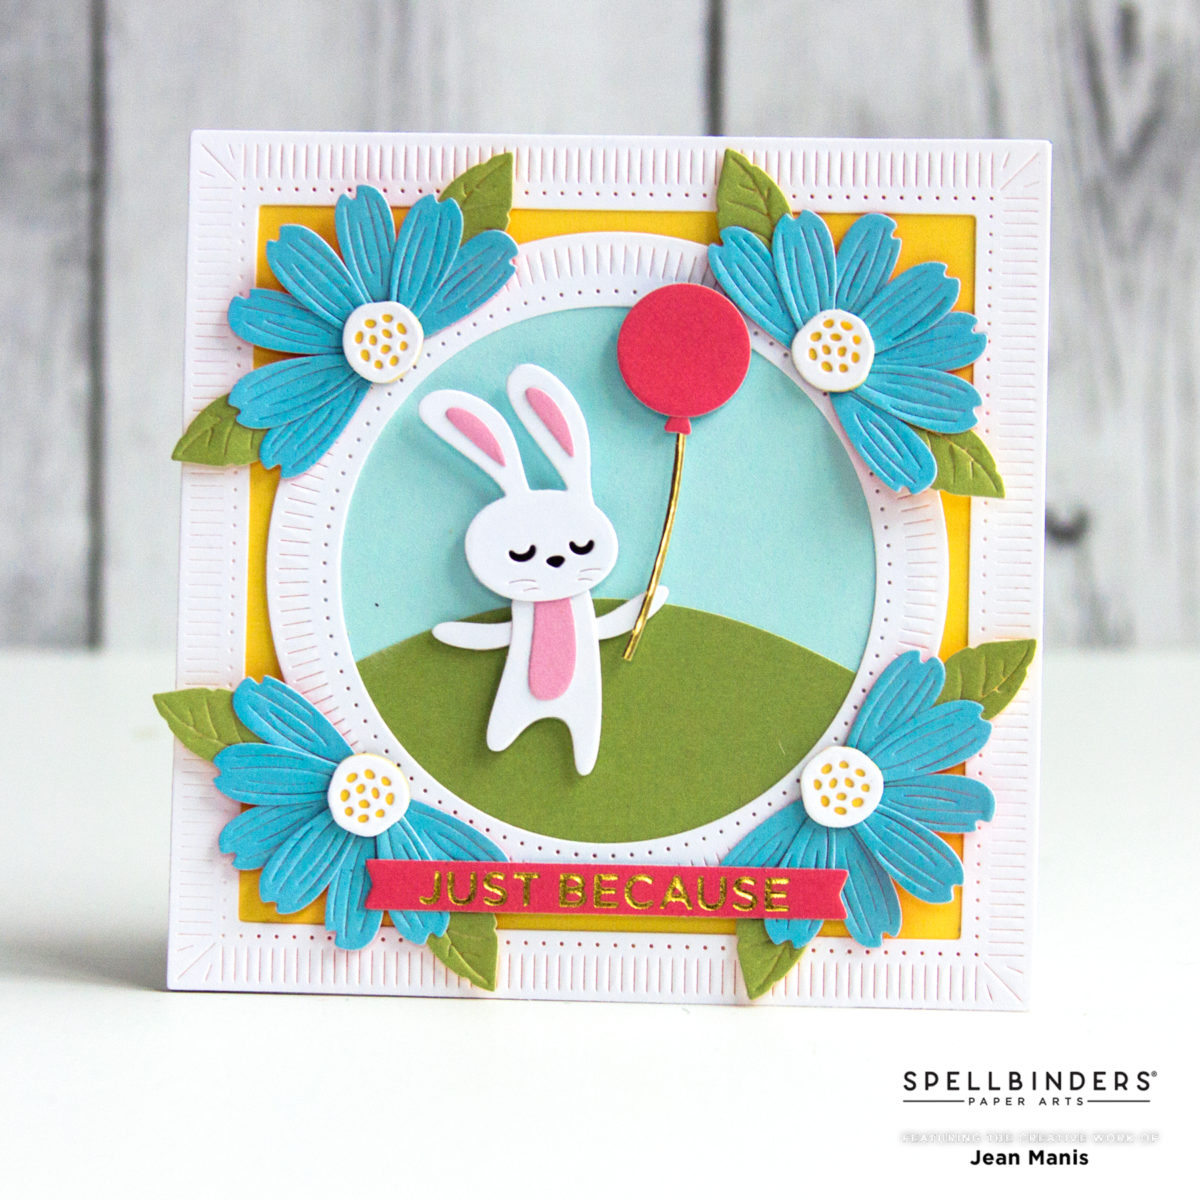
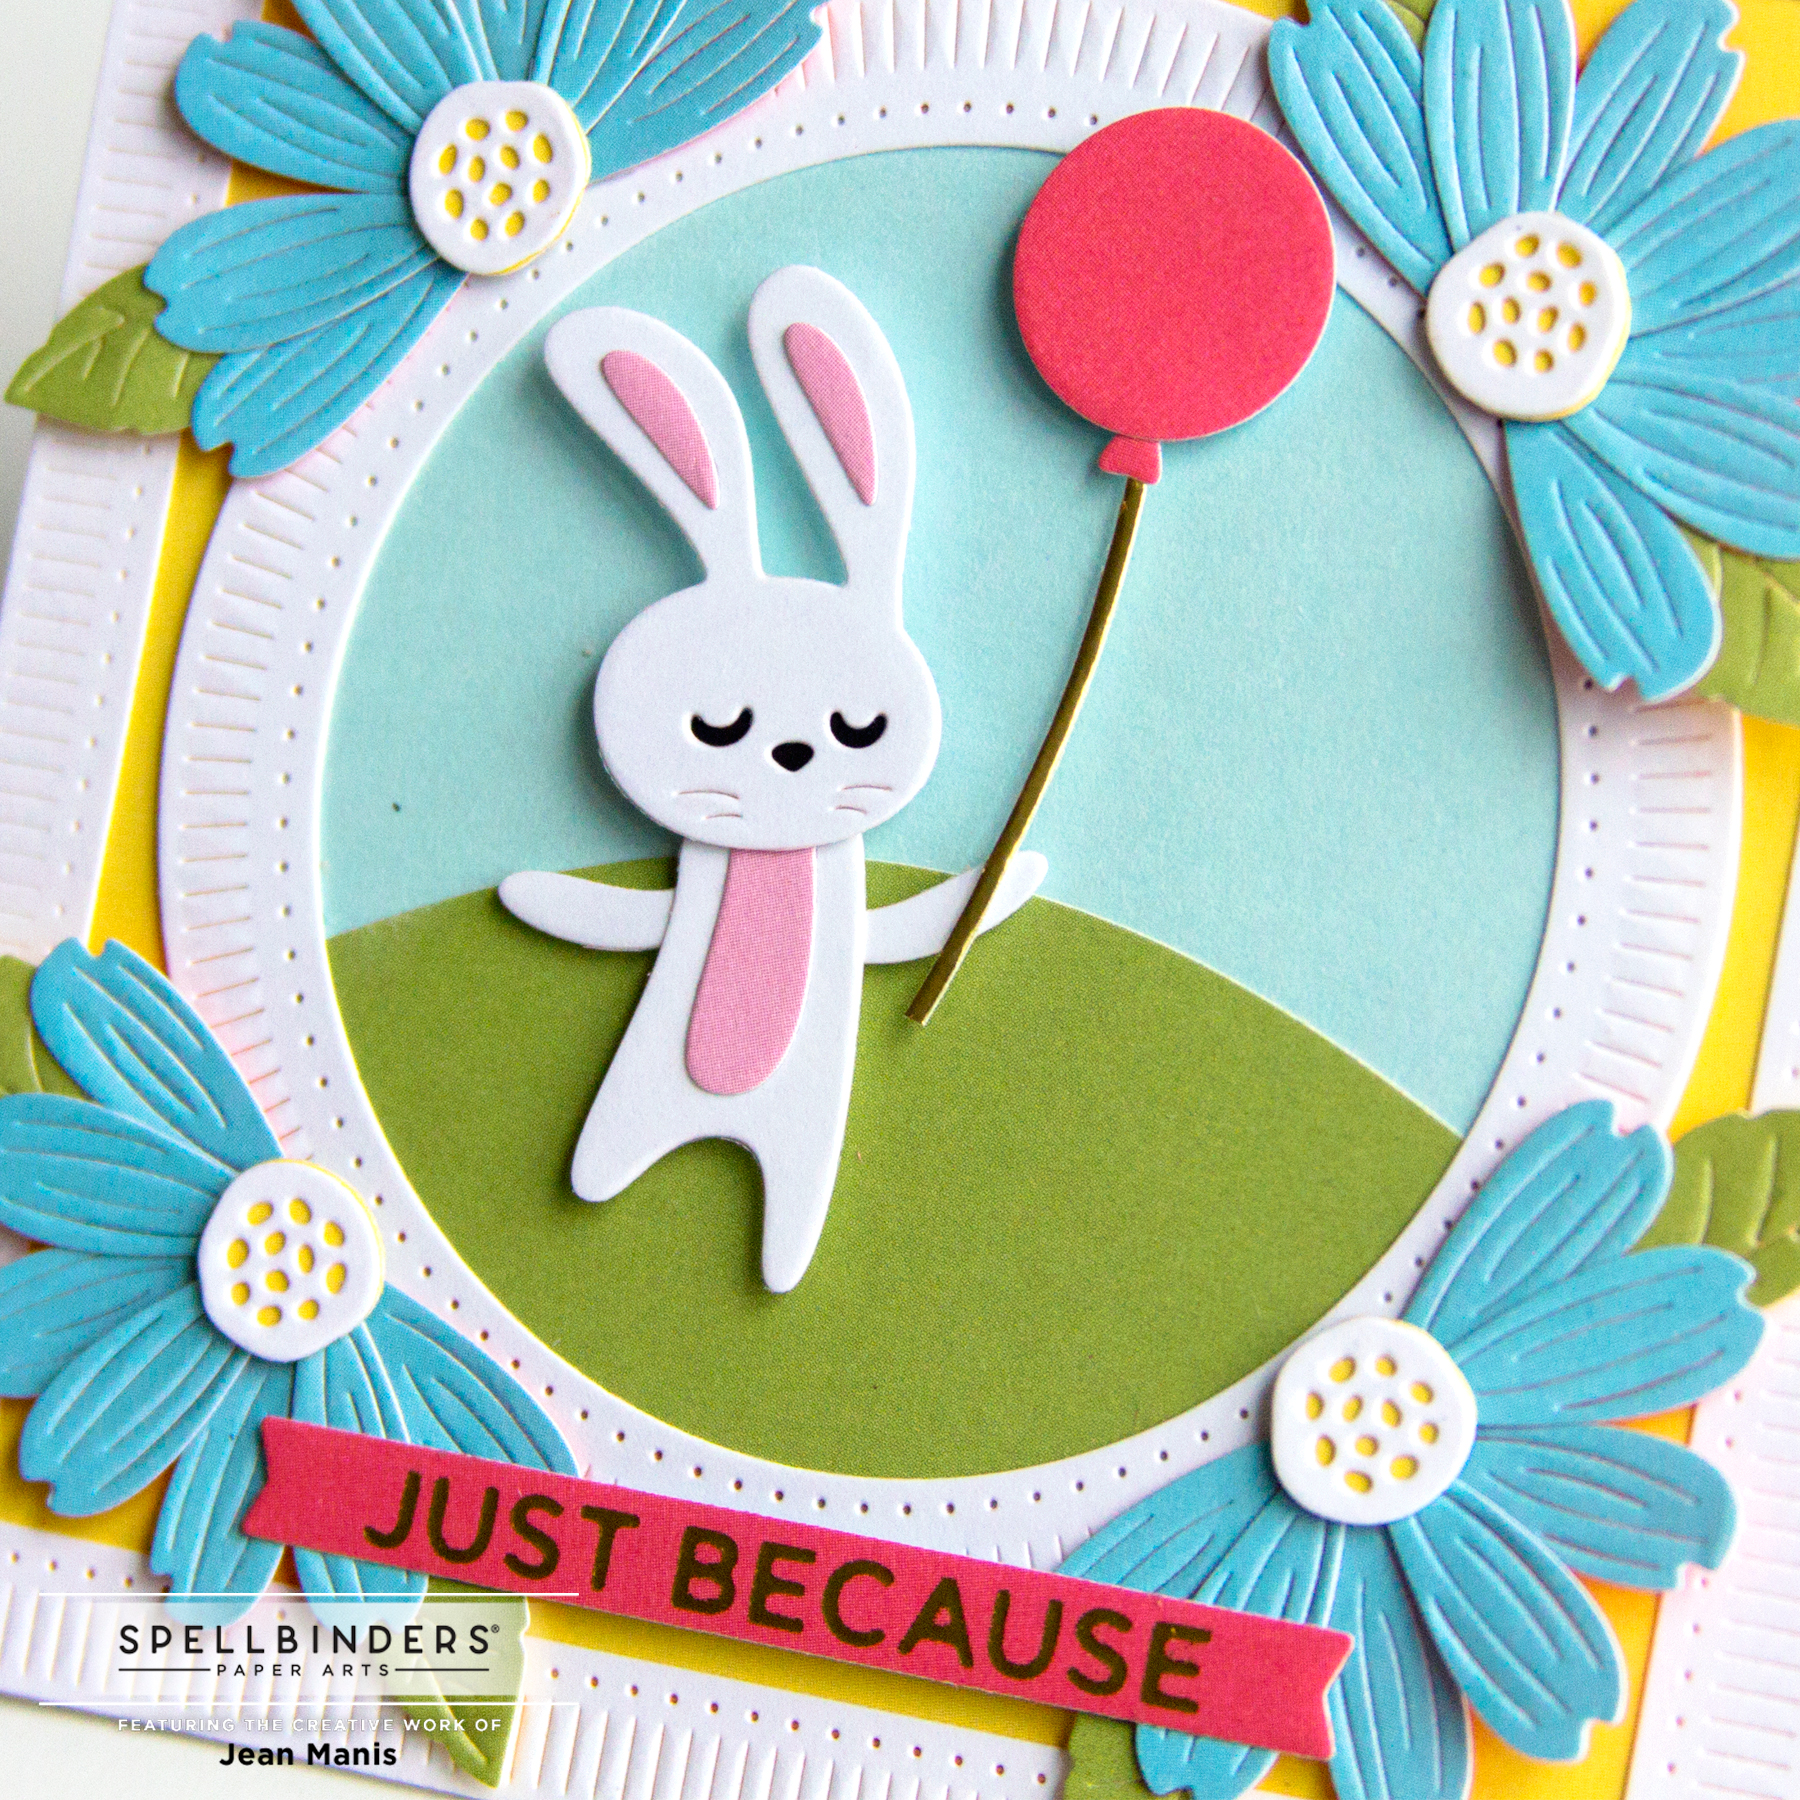
Hello! Today, I am sharing a whimsical, spring-themed, friendship card created with Spellbinders products. Even though Punxsutawney Phil saw his shadow (and declared six more weeks of winter), I am crafting with spring colors.
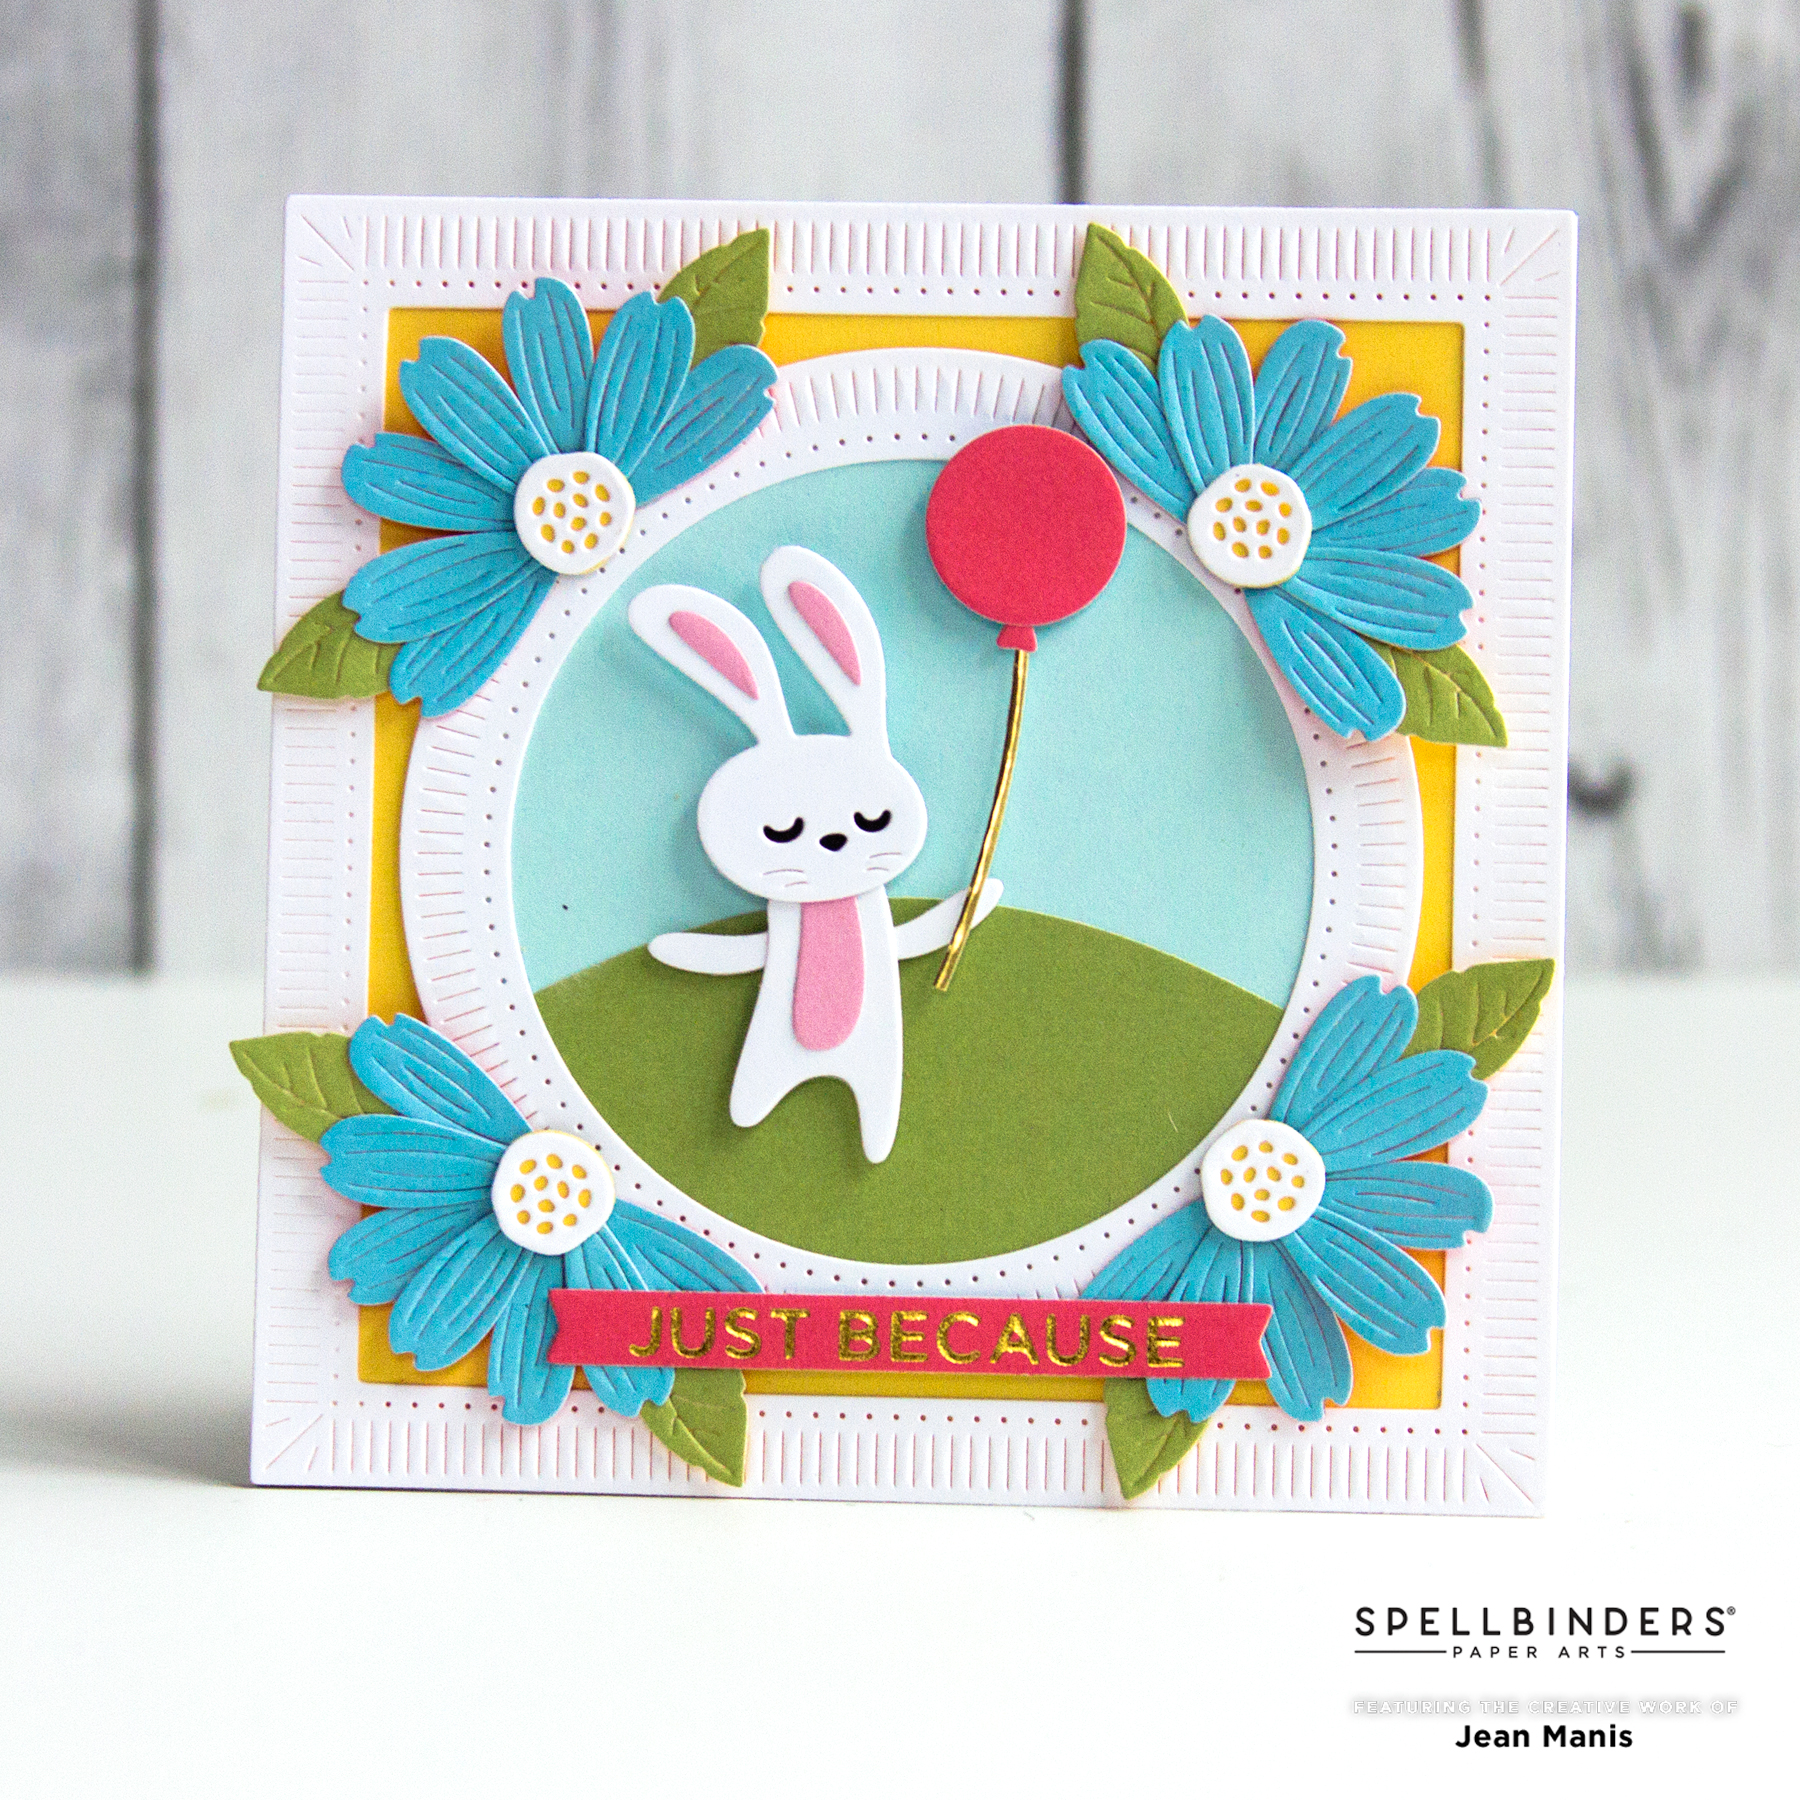
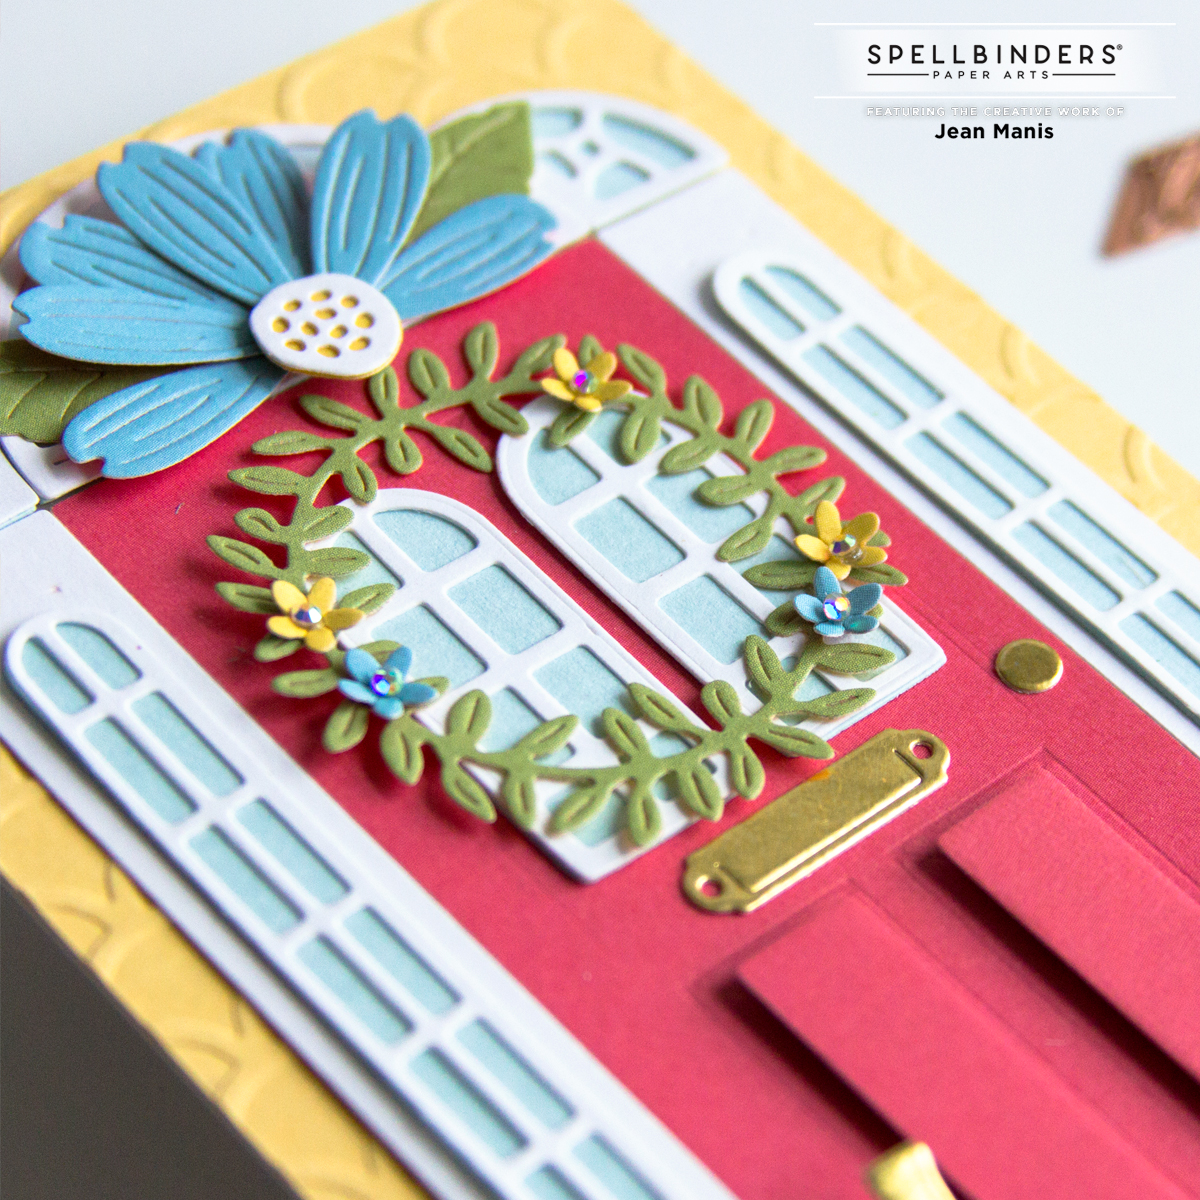
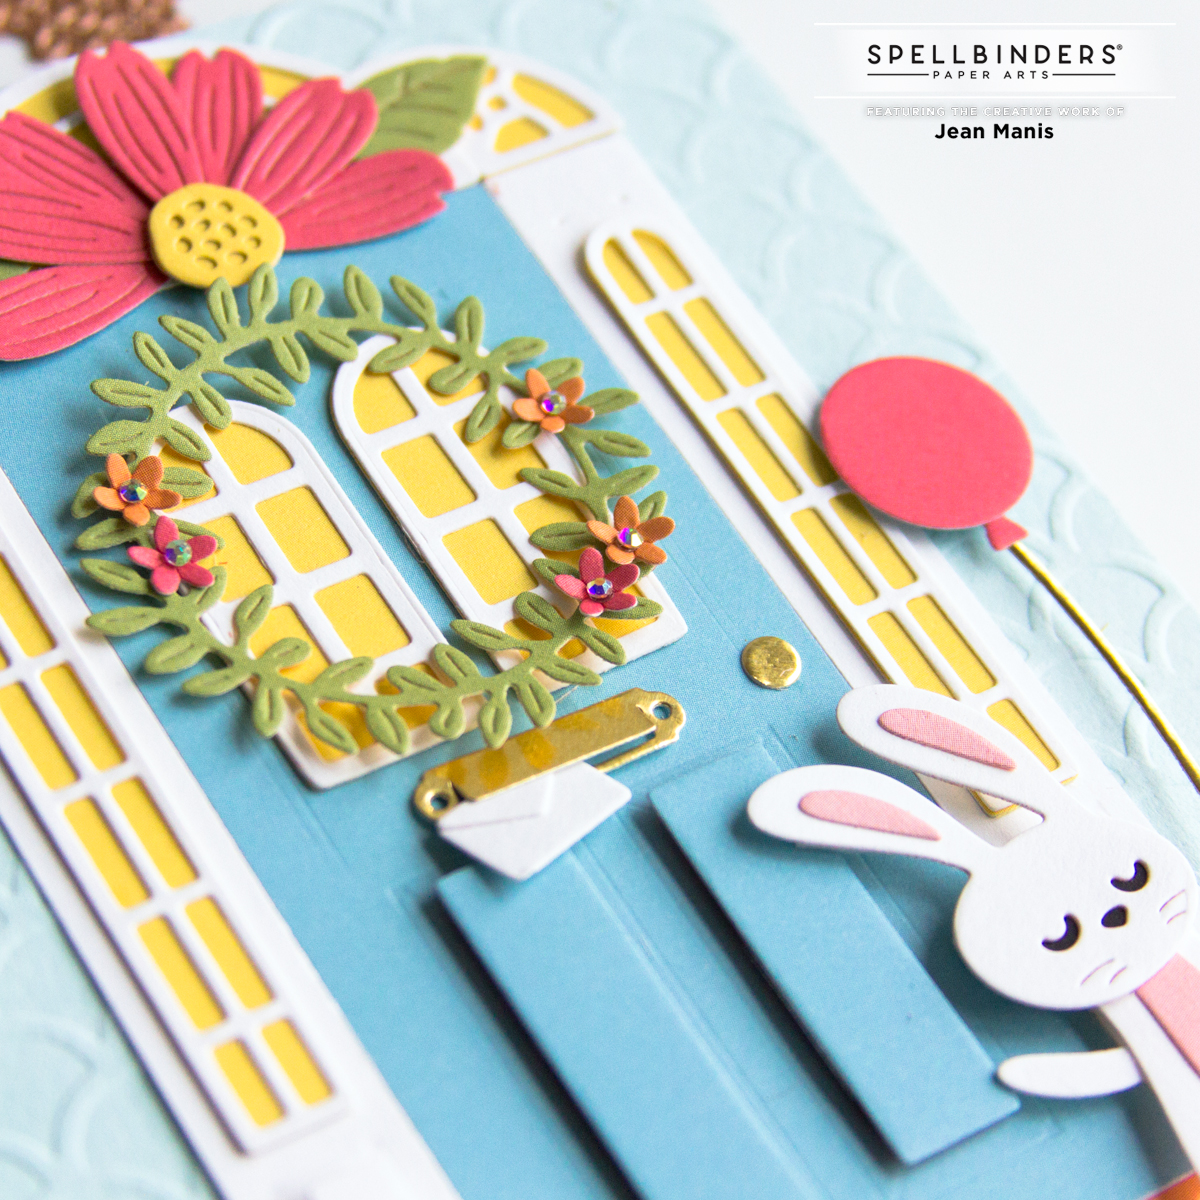
- Die-cut bunny, balloon, and flowers with dies in the Open House Spring set.
- Die-cut the square card frame (measuring almost 4 1/2 inches) with dies in the Fluted Classics Squares set. Adhere to a yellow card base.
- Die-cut the circular frame with dies in the Fluted Classics Circles set.
- Die-cut hill with a die in the Color Block Scenic Scape set. Adhere to sky cardstock and cut both with a die larger than the interior of the circle frame. Adhere frame and add assembly to card base.
- Adhere flowers to the circular frame. Add the bunny and balloon with foam adhesive.
- Glimmer-foil in Gold the sentiment with a plate in the More Sentiments set and die-cut with a die in the Mini Sincere Sentiments set. Attach to card.
 Looking for more inspiration? Check out this post. I previously shared projects with the versatile Fluted Classics Squares and Fluted Classics Circles sets here.