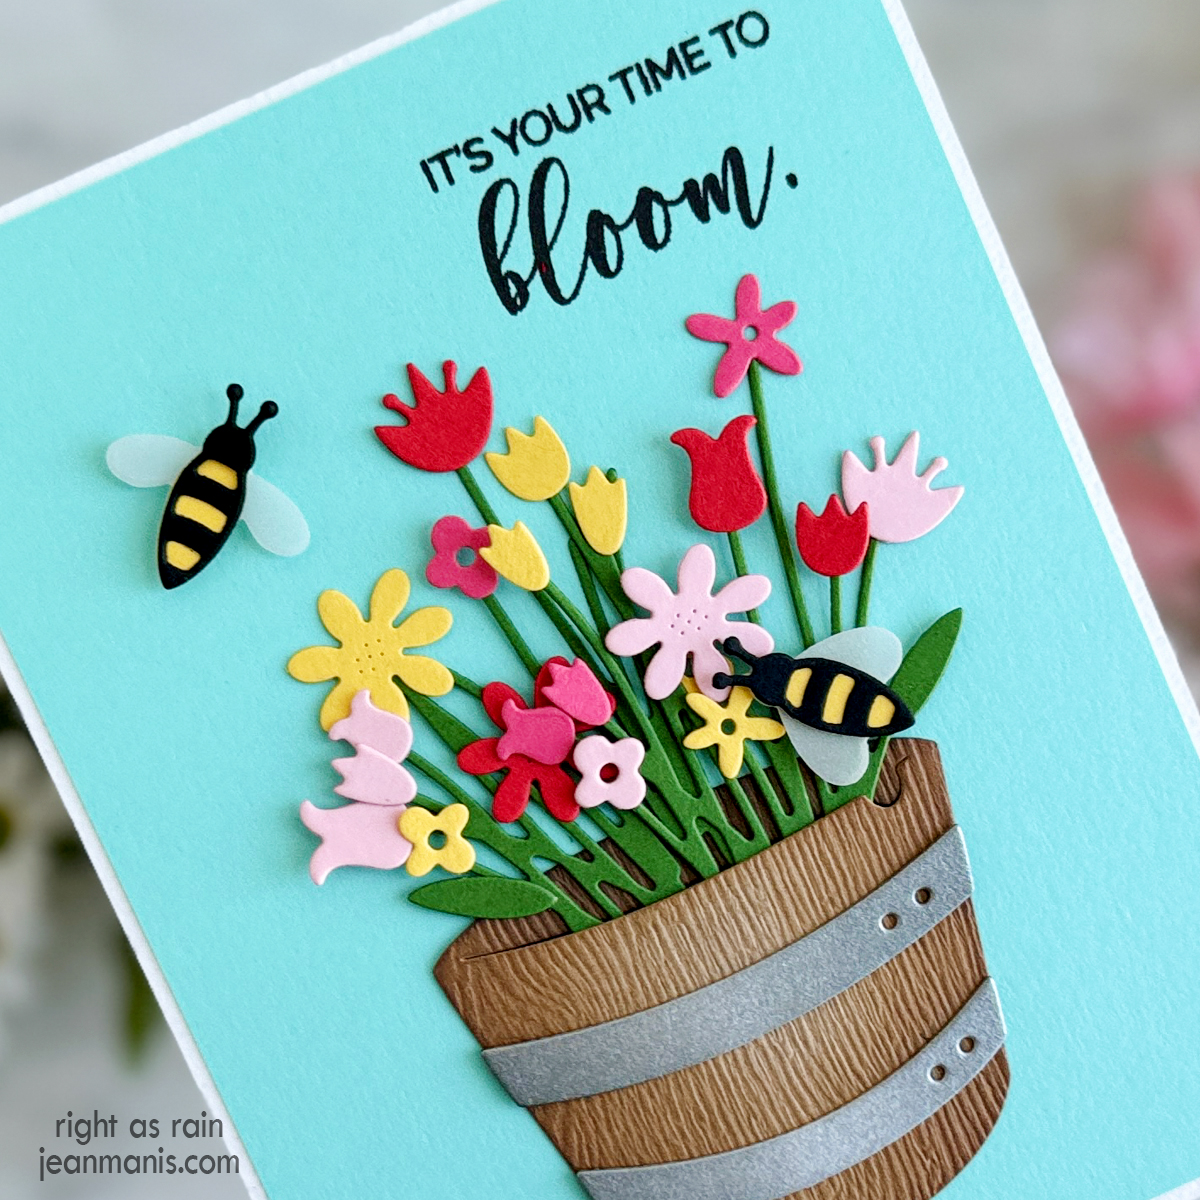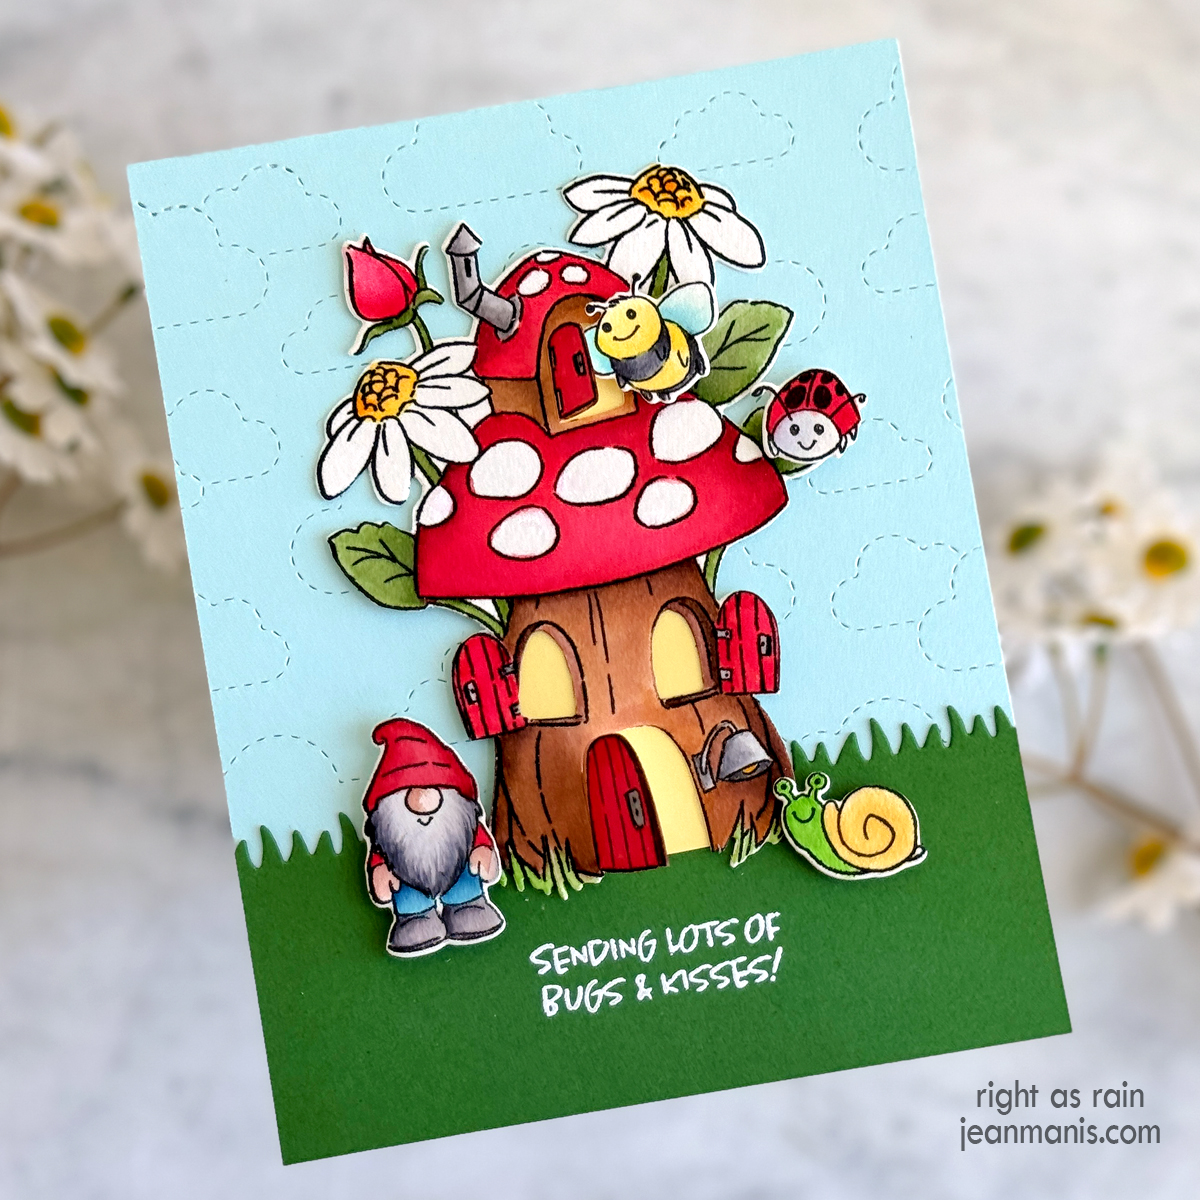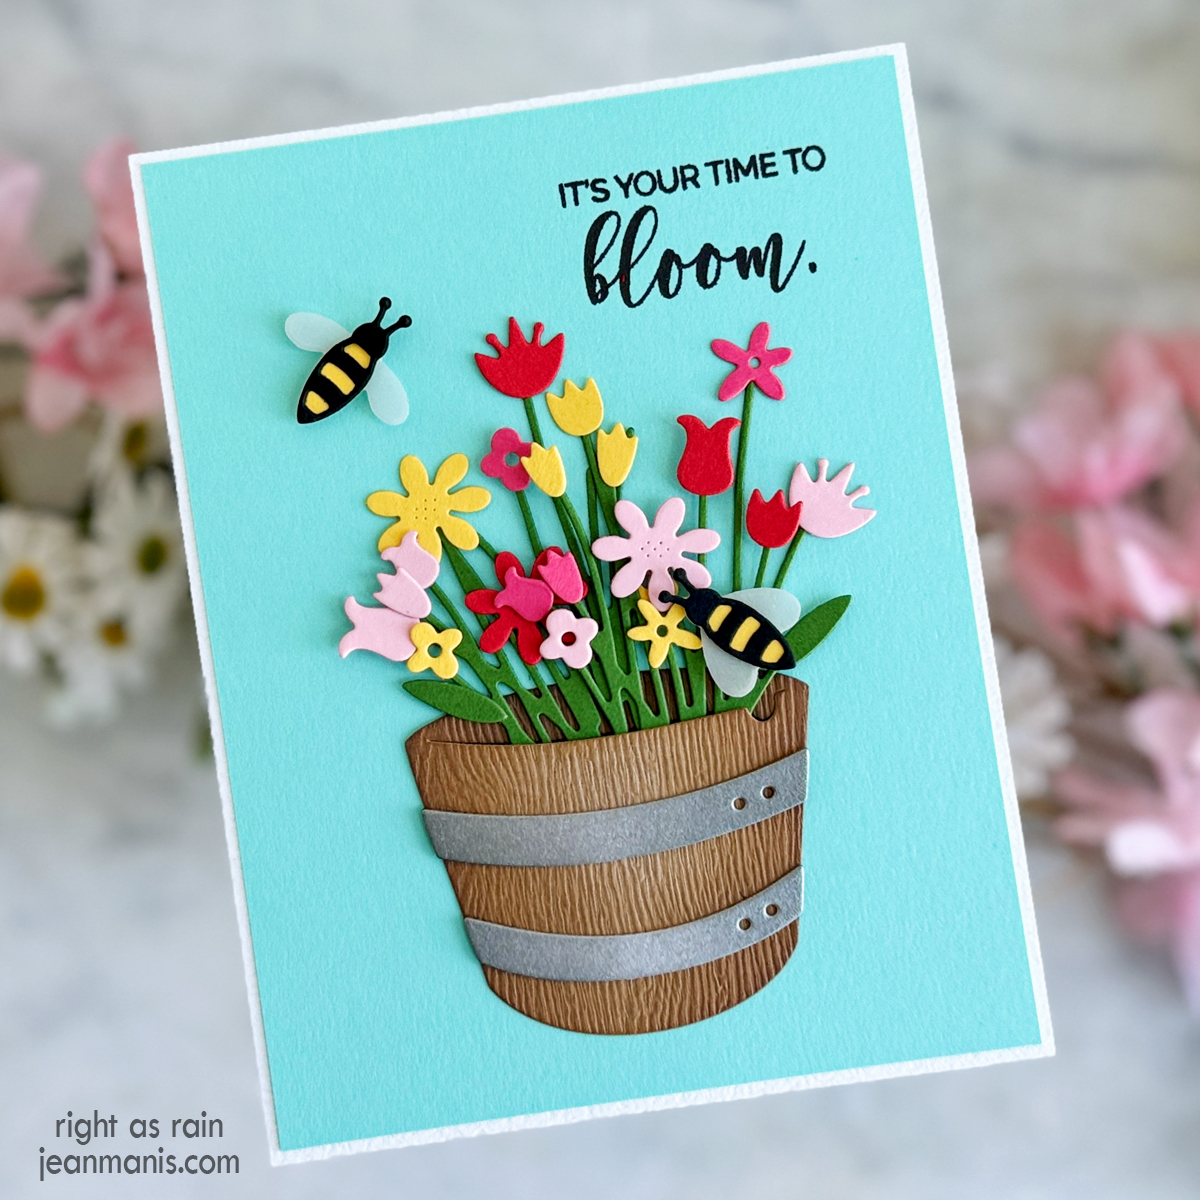
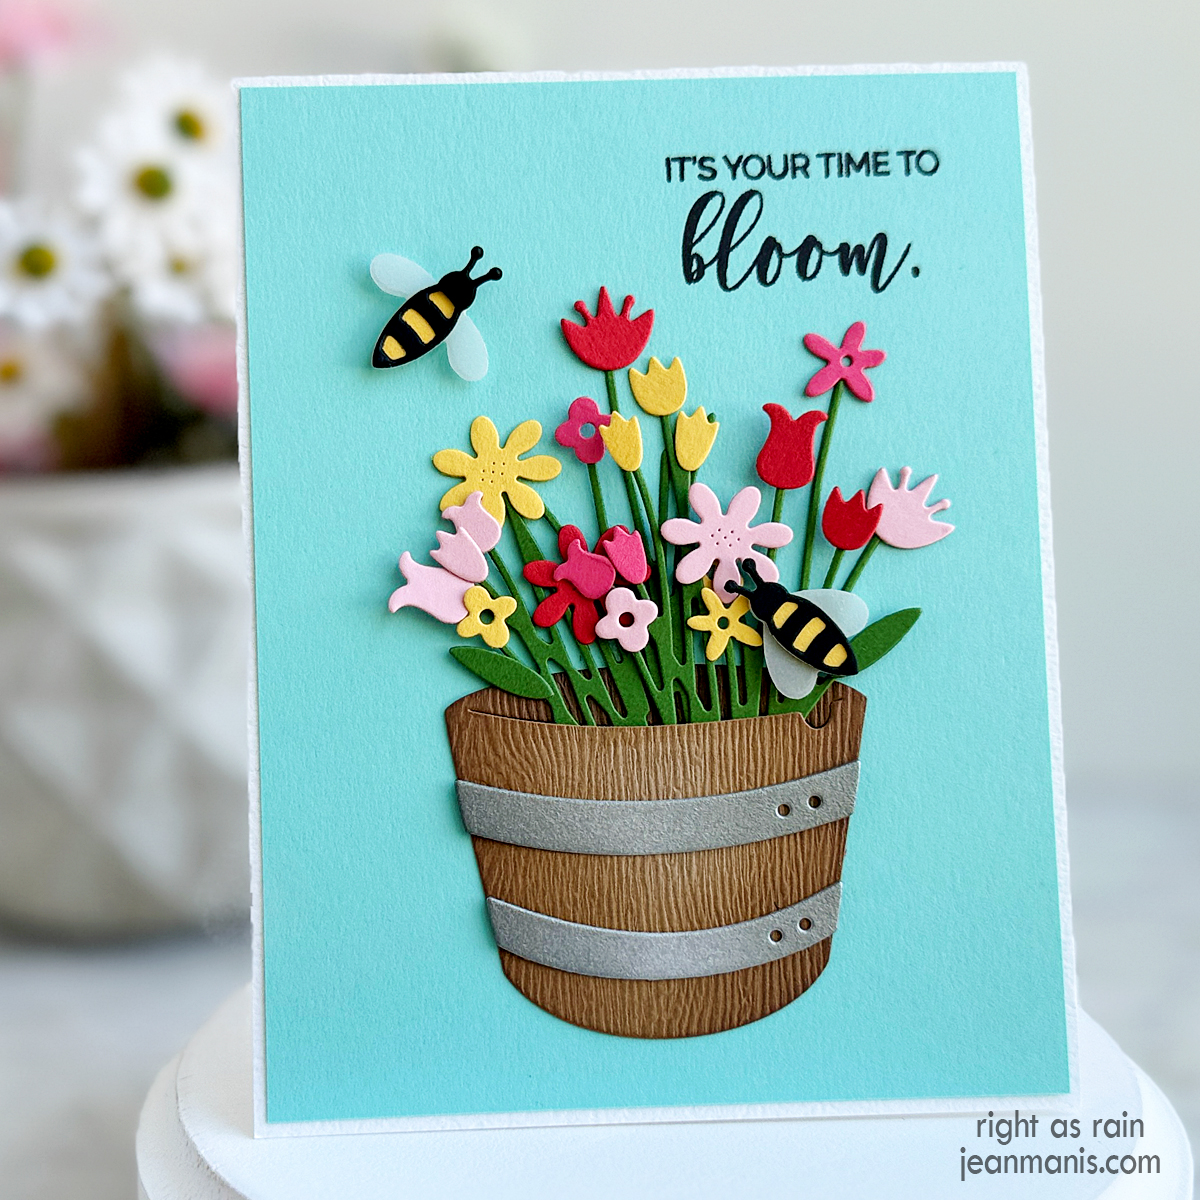
Hello! Today, I am sharing a friendship/encouragement card that features a barrel of blooming flowers and a heartfelt sentiment, “It’s your time to bloom.” The phrase can remind a friend to seize an opportunity, embrace growth, and achieve their potential. To see more cards with the encouragement theme head HERE.
-
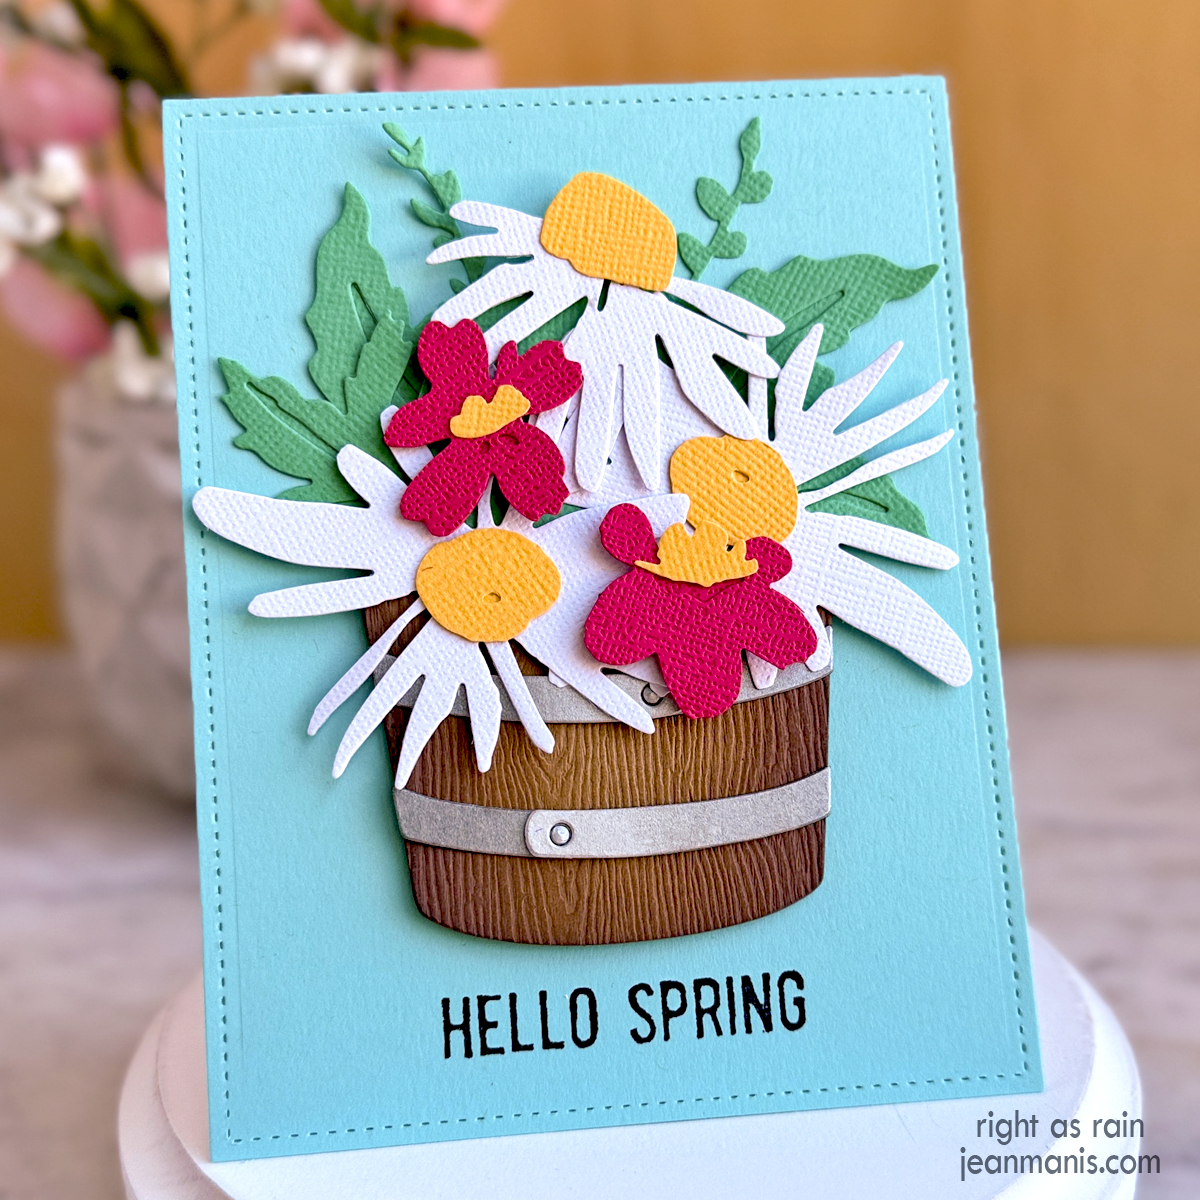
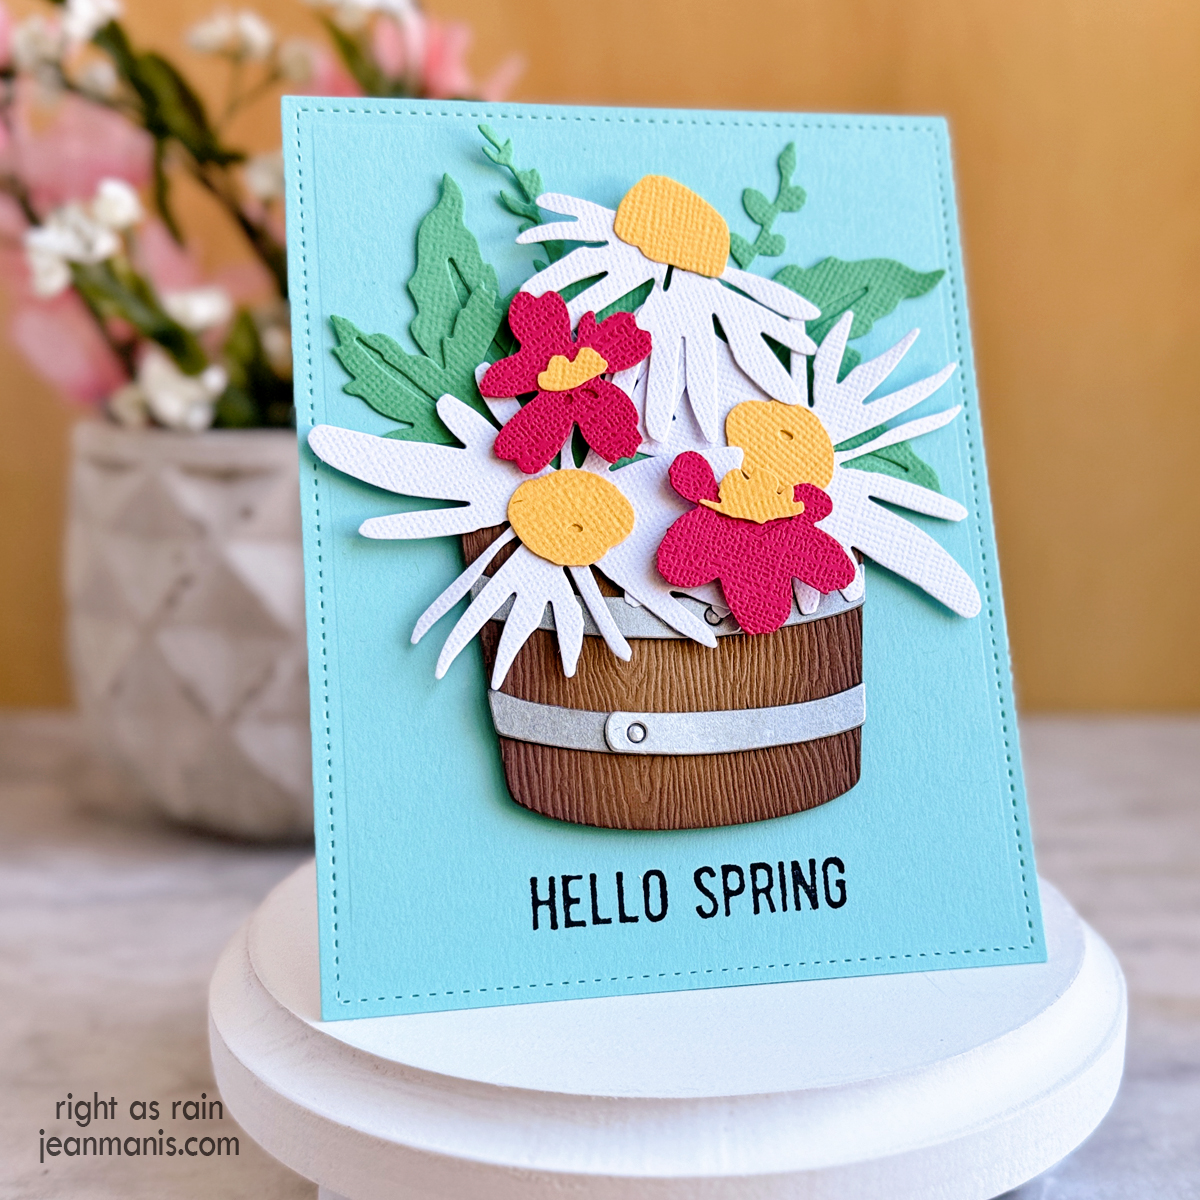
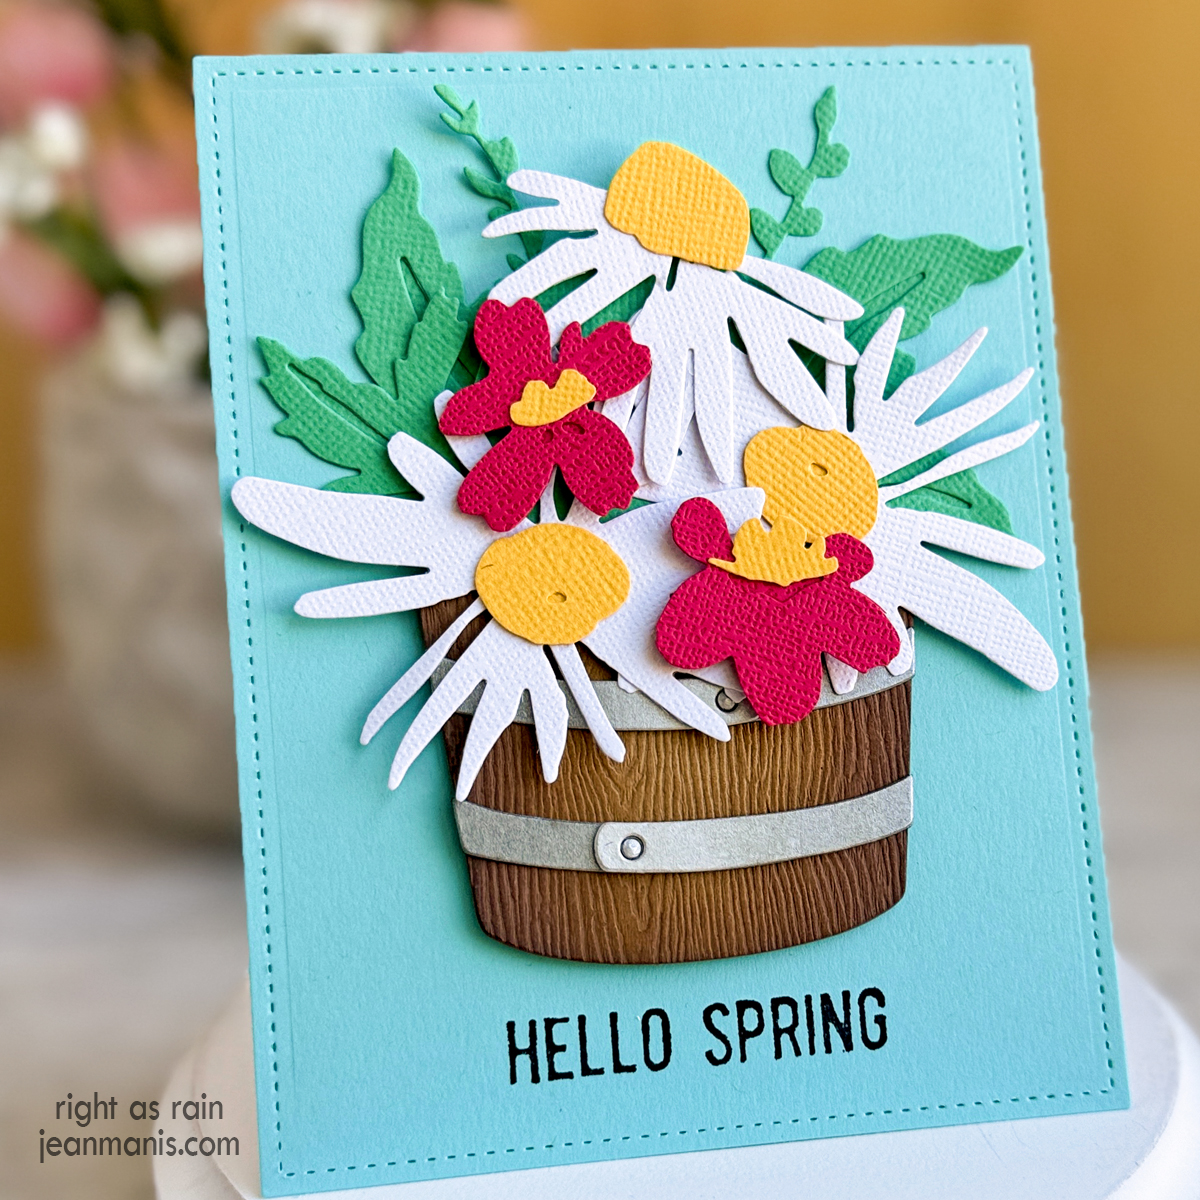
- Stamp the Penny Black sentiment on Waterfall cardstock. Trim panel to slightly smaller to A2 size and add to an A2-size card base.
- Cut the Impression Obsession Bouquet and Whiskey Barrel pieces from a variety of cardstock colors. Assemble and add to card base.
- Embellish with die-cut bees. (I used a now retired Elizabeth Crafts set.)